
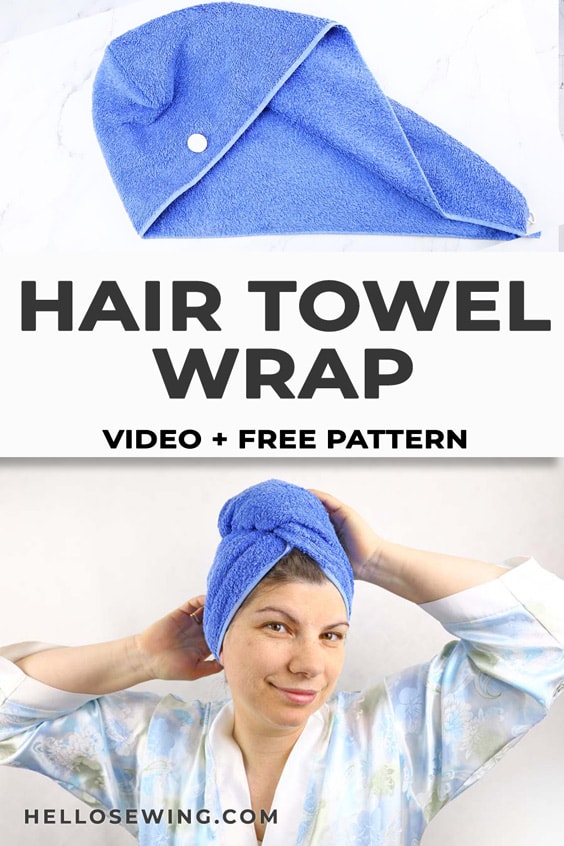
DIY Hair Towel Wrap Pattern and VIDEO Tutorial
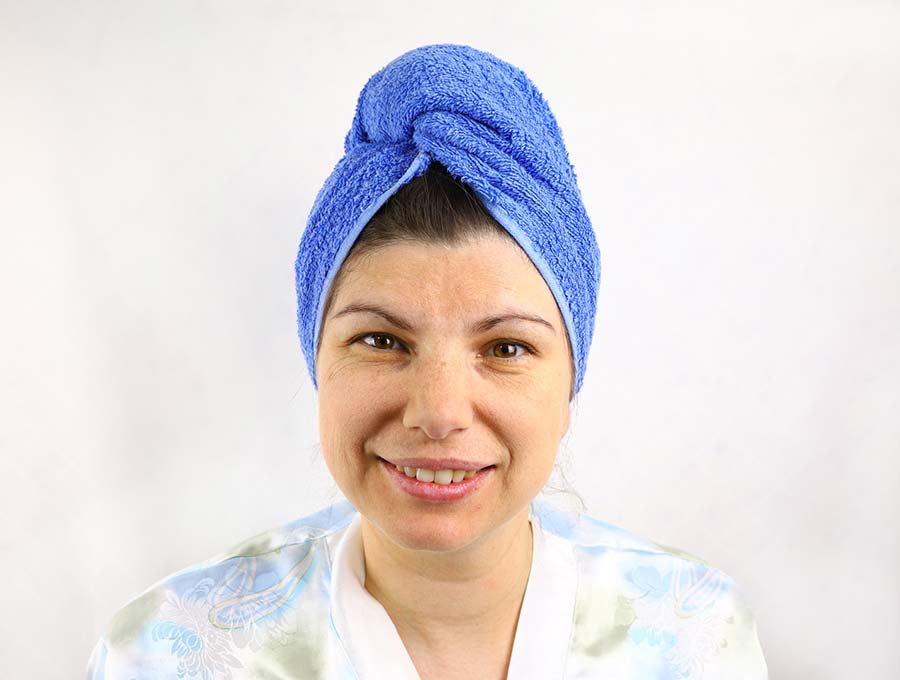
I’m not sure about you but my go-to wrap after washing my waist length hair used to be a towel, wrapped around and flipped over. Note the “used to” because the towel had its disadvantages – if you tucked in the end at the back of the neck it made an uncomfortable bump pressing on the base of the skull; if you left it loose, the towel twist would swing round and unwrap as you bent forward to apply scented body lotion, or paint your toenails. Then I discovered how to make a towel turban. I used the hair towel wrap pattern in this article and am so happy with the result I just had to share it. Hair experts are against vigorous towel drying, warning it further damages split ends and can lead to dry hair and frizziness. This DIY towel turban does a great job of soaking up the moisture without damaging your hair, and takes only around 15 minutes to make.
What I love about this DIY towel turban is that I didn’t even have to go out to buy a towel. For the first one I used a towel I already had. Bath towels come in various sizes with the standard 28 x 55-inch (70 x 140cm) towels being the most popular. They also come in slightly smaller and larger sizes like 20 x 40 inches (51 x 102 cm) or 30 x 58 (76 x 147 cm). You can use the slightly smaller than standard towel but the larger one will probably be too big. After all, with the hair turban we are aiming to cut down on the extra volume of fabric on your head, without losing the efficient absorbency of the cotton towelling, which has made it the go-to solution to wrapping hair after a shower for years.
With the super absorbency of cotton there is nothing better for making your hair towel wrap, and why we use cotton towels to dry off as they absorb so much water. In case of any emergency involving water spillage we run for the old towels kept for this purpose, precisely because they are so efficient – not an old blanket or T-shirt. We all know how heavy a wet towel can be and that is because cotton can absorb as much as 27 times its own weight in water, according to the not-for- profit organization, Cotton Inc, that conducts research for the global cotton industry.
So, now it’s time to get to creating your fabulous DIY towel turban. It is really so easy you’ll wonder why you haven’t done it before. Below you will find my step by step written tutorial with VIDEO instructions for all the visual learners.
We occasionally link to goods offered by vendors to help the reader find relevant products. Some of the links may be affiliate meaning we earn a small commission if an item is purchased.
How to make a hair towel wrap
Towel Turban Supplies and tools
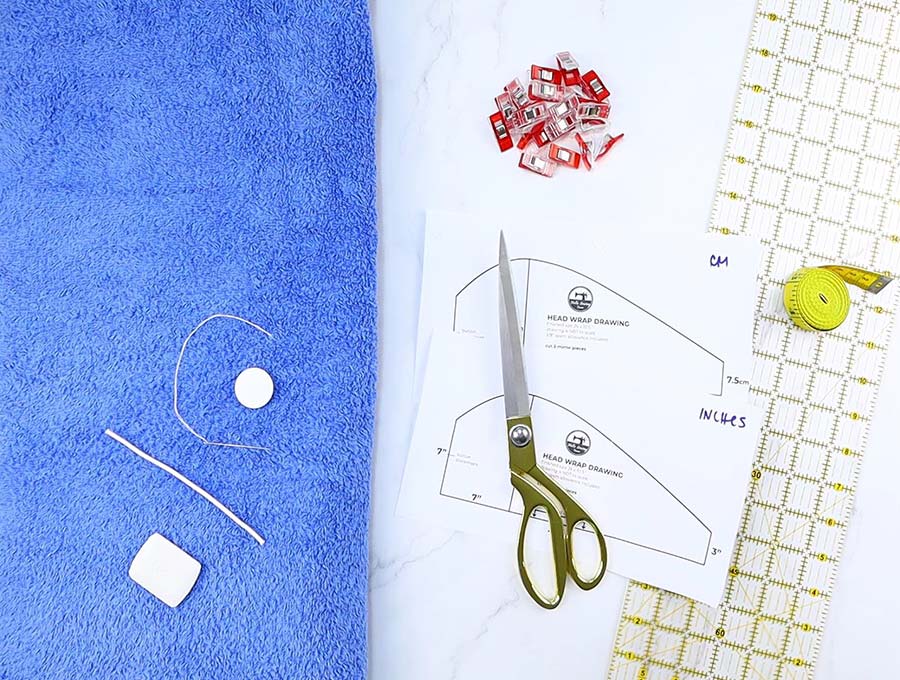
- 1 bath towel
- 1/16″ round elastic (preferable) or 1/8″ flat elastic – 3″ long
- matching thread
- scissors (or rotary cutter and a cutting mat)
- ruler or measuring tape
- iron and ironing board
- sewing clips or pins
- sewing machine
DOWNLOAD: hair towel wrap pattern(Free PDF file)
*** Print only page 1 (inches) or only page 2 (cm) ***
Follow us for free patterns & tutorials!
How to Sew a Towel Turban
Watch the diy hair towel wrap video first and then follow the written step by step instructions below.
Please enjoy and don’t forget to Like and SUBSCRIBE over on YouTube to be kept up to date with new videos as they come out.
TOWEL TURBAN VIDEO TUTORIAL
HAIR TOWEL WRAP INSTRUCTIONS:
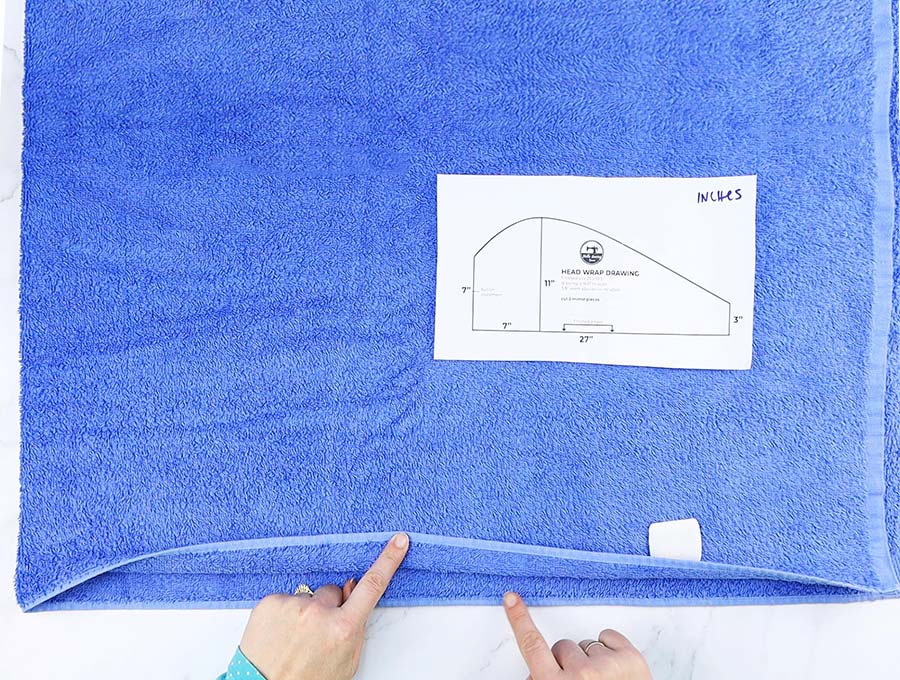
STEP 1: Prepare the head towel wrap pattern
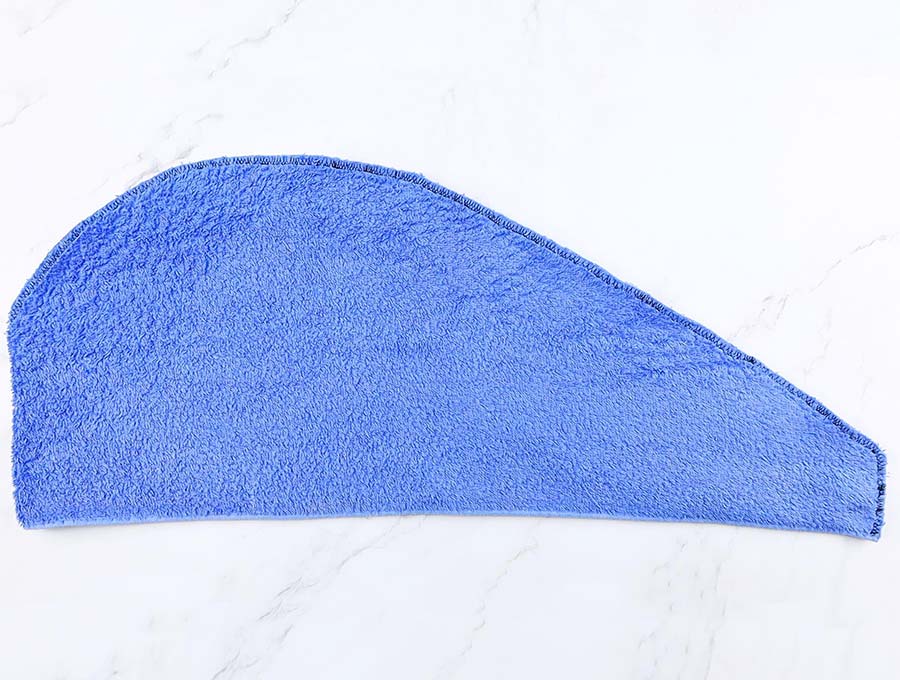
The head towel wrap pattern included here is not to scale – it’s a drawing that gives you the instructions of how to cut the bath towel.
It is suggested you draw your pattern on paper first, then place on the towel, checking you missed those woven bits, however, the thin end of the teardrop shape can go onto the woven bit by about an inch because you are going to do a seam on the thin 3-inch side and it will just make for less bulk than trying to sew through the thicker part of the towel.
If you are confident in drawing out your shape and want to skip the paper pattern part then you can work straight onto the towel, drawing the shape with a sharpie marker. Of course, if you are planning on making a few of these as gifts for family and friends, by all means make a paper pattern you can keep and re-use. These hair turbans are a little bit of spa luxury that will be very welcome as gifts, paired with a special hair treatment cream, a scented candle and maybe a rejuvenating peel-off face mask.
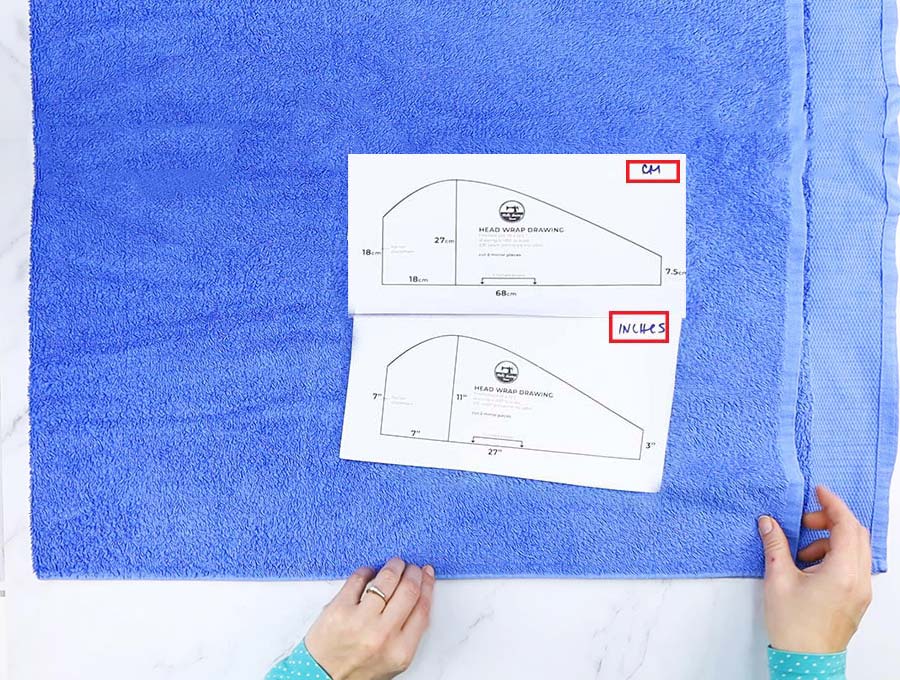
TIP: Most towels have woven borders running across the ends – sometimes they are close to the end and sometimes a bit higher up the towel. You will probably be using a standard 55 inch towel, but if you are using a 40 inch long one just make sure that when you cut you can miss those borders on the ends. You are going to need a length of 33 inches, plus another 6/8 of an inch to account for the two seam allowances for the DIY towel turban.
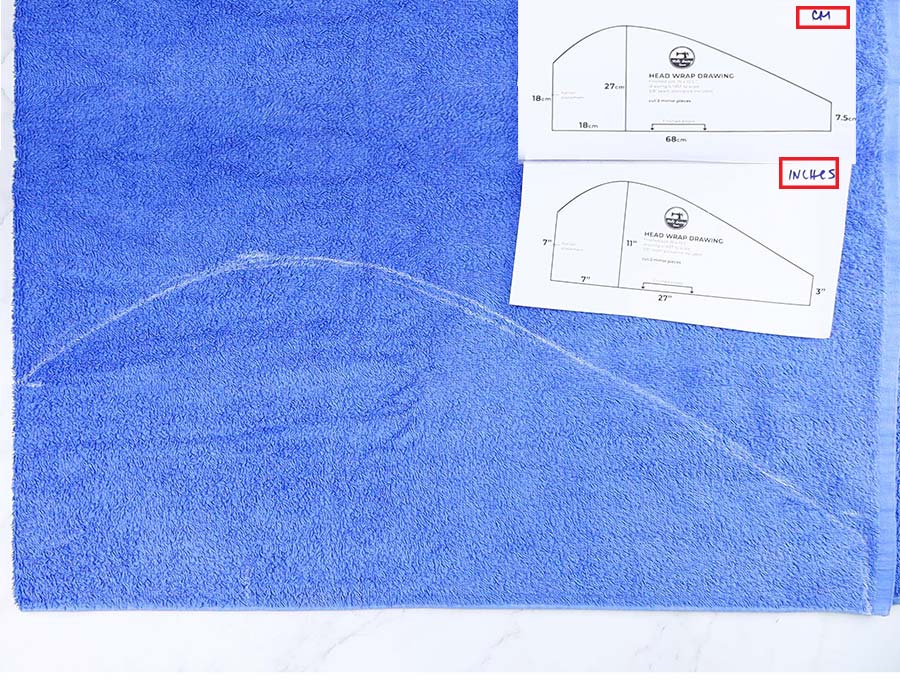
STEP 2: Fold the bath towel
Take a bath towel and fold it so the two short sides meet, right side to right side, forming a fat rectangle. Match up the finished edges of the bath towel at the bottom as well. This is to enable you to cut both sides of the hair turban at the same time.
STEP 3: Mark the towel
With the sketch supplied as a guide, use a sharpie marker to sketch out the shape onto paper, which will resemble a teardrop cut in half lengthways. The seam allowance is already included in the pattern. The seamed edges of the towel will not be cut off – this just saves you a whole lot of sewing to make use of what is already there, as the seamed edge will be the part you place around the back of your head, bringing it forward to twist and gather up your hair.
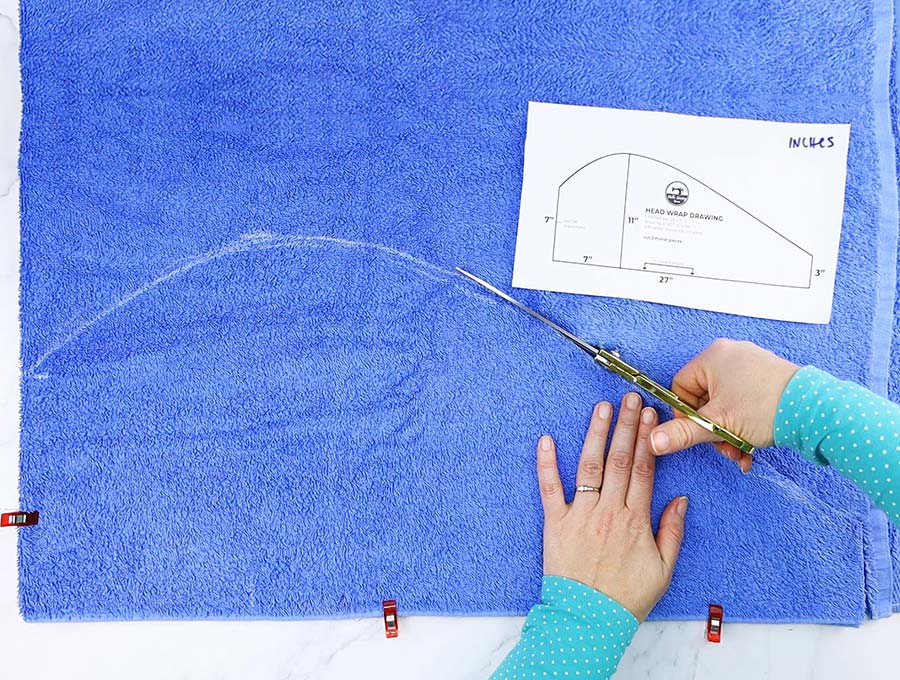
STEP 4: Cut
Secure the bottom and left side with clips and cut out the shape you have marked.
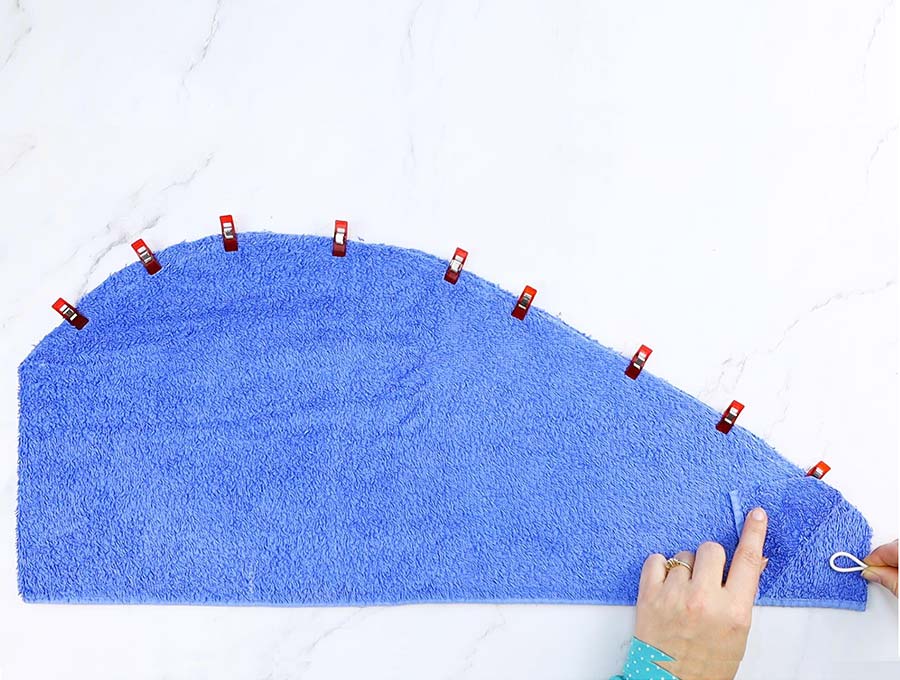
STEP 5: Pin
The wrong sides of the towel will be facing outwards so pin together so ensure the two halves don’t move as you stitch around the curve you have cut.
Fold the elastic in half and place it inside the 3-inch end of the hair turban, pinning it in the centre where the center seam of the towel turban is.
STEP 6: Stitch
Stitch around the raw edges. I you have an overlocker you can overlock the edges, or use a serger, but if you don’t have these then just one zig zag seam will be fine.
STEP 7: Trim and turn around
Trim around the seam allowance to get a smooth edge, making sure you don’t cut too close to the stitching. Turn the towel turban inside out.
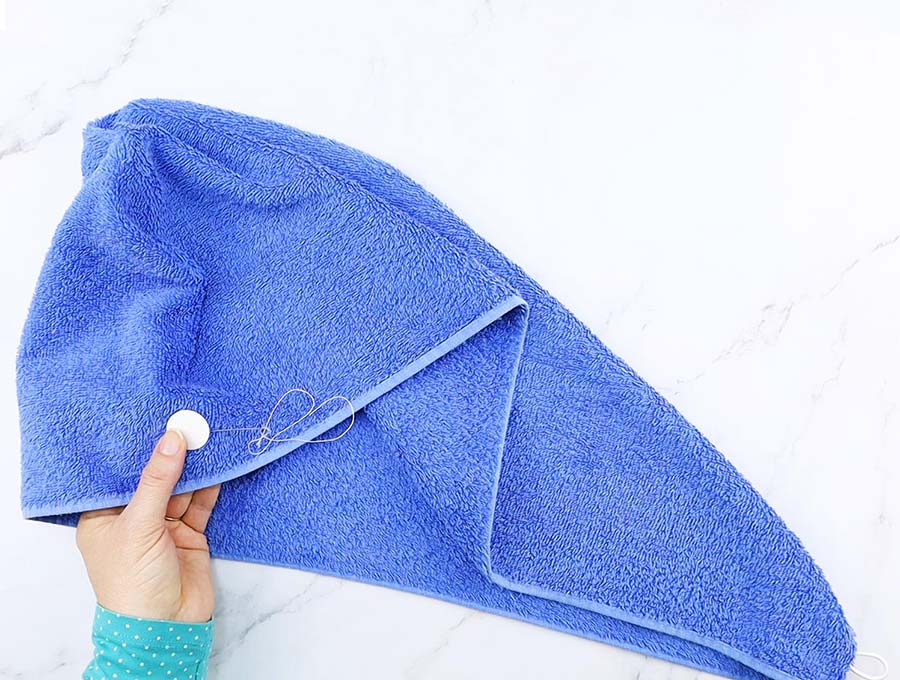
STEP 8: Handsew a button
Hand stitch a suitable button at the base of the 7-inch seam side to provide a ‘hook’ for the elastic loop. Check that the loop fits snugly over the button when you are selecting the size of the button. Stretch the elastic over the button and you’ll have a DIY towel turban that fits on your head snugly. It will absorb the excess water from your hair and won’t flop down when you move your head or bend forward, like when you use a ordinary towel.
That’s it your hair towel wrap is ready!
TOWEL TURBAN FAQs, Tips and Troubleshooting:
Q Should I wash the towel turban before using it for the first time?
Definitely yes! Towels are made from little loops and as you cut the towel many of those loops will be cut through leaving fluffy cotton bits all over and you certainly don’t want a snowstorm in your freshly washed hair. Give the new hair turban a good shake, and then put it through a quick wash and tumble dry to ensure you have no loose fluffy bits.
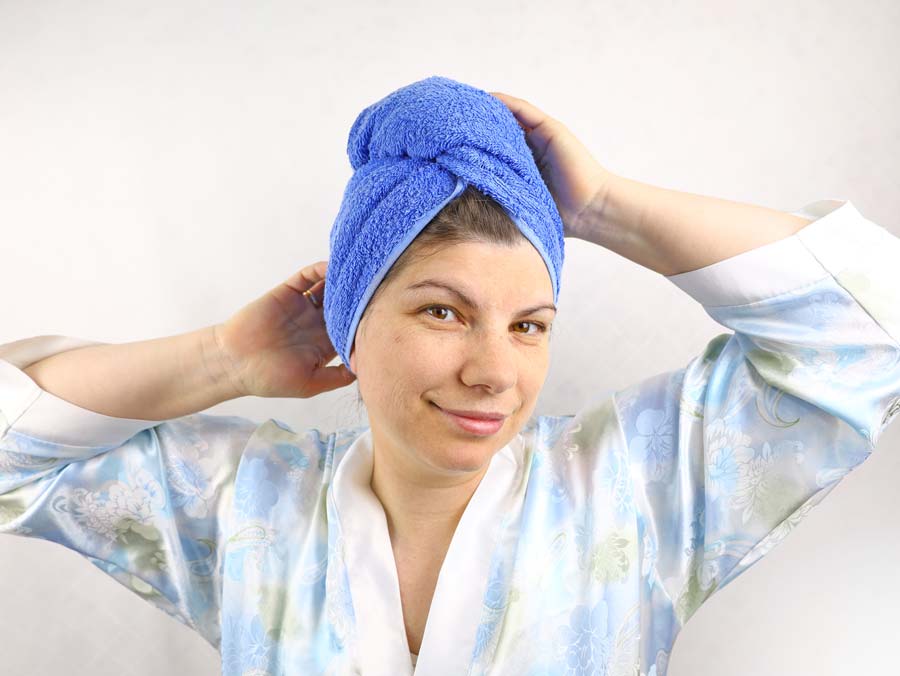
Q How do I wrap the hair turban?
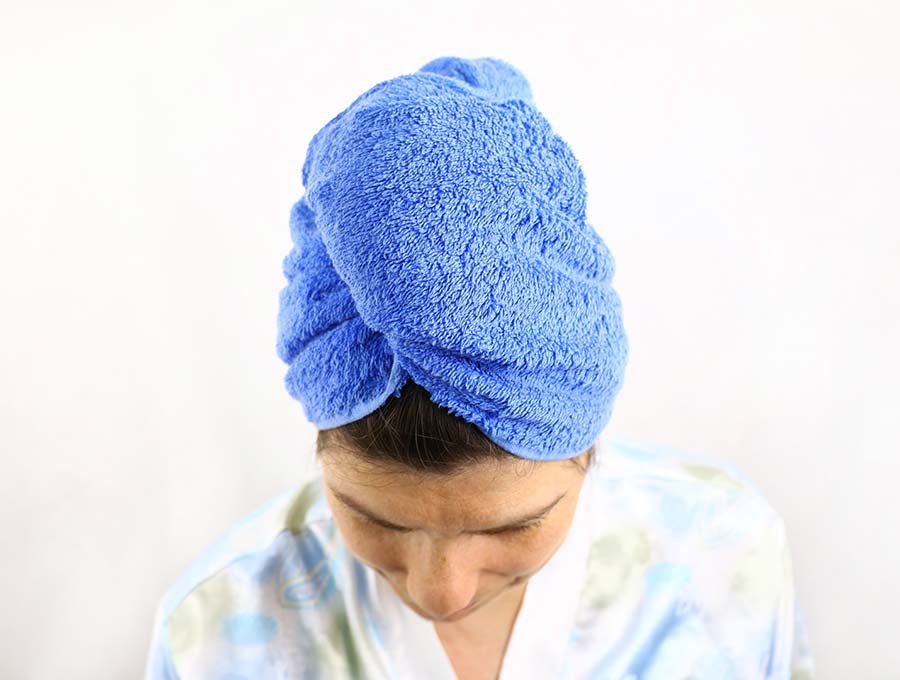
A Bend forward and place the hair turban part with the button to line up with the centre of the nape of your neck and drape the ends on either side of your head. Taking both ends and your hair twist a couple of times and flip up over your head, then pull the little elastic piece over the button at the back. It should be secure and the twists of towel will absorb the extra moisture from your hair, leaving it ready for styling.
Q Can I use fabric softener when I wash my DIY hair turban?
A It is not advisable as the oils in fabric softener and commercial dryer sheets coat the cotton fibers, reducing the absorbency of the towel. Instead make up a few 3-inch balls of crunched up aluminum foil and throw them in the dryer with the towels to reduce static electricity. Just make sure the aluminum balls are pressed down firmly and there are no loose corners to catch on the towels and towel turbans.
Now that you know how to make a turban out of a towel, you should be so convinced your fingers are itching to get busy making practical towel turbans. Have fun making the first one, then you can begin thinking about making some as gifts, ready to haul out when an occasion pops up like a bride-to-be’s pamper party, a friend or colleague’s birthday, or when you really don’t know what to get Aunt Agatha for Christmas.
Do you like this tutorial how to make a turban out of a towel? Pin for later:
Wanna be friends? Click HERE and follow me on Pinterest
RELATED:
- Soap saver pouch out of washcloth
- Hooded towels for kids– great gift for the little ones
- Hanging dish towel patterns with just 1 straight seam. So easy!
- DIY kitchen towels you can use instead of paper towels
- Swiffer wet pads out of old towel
- DIY shower cap
- DIY towel bath mat – experience a toe-wiggling luxury in this soft handmade bathmat