
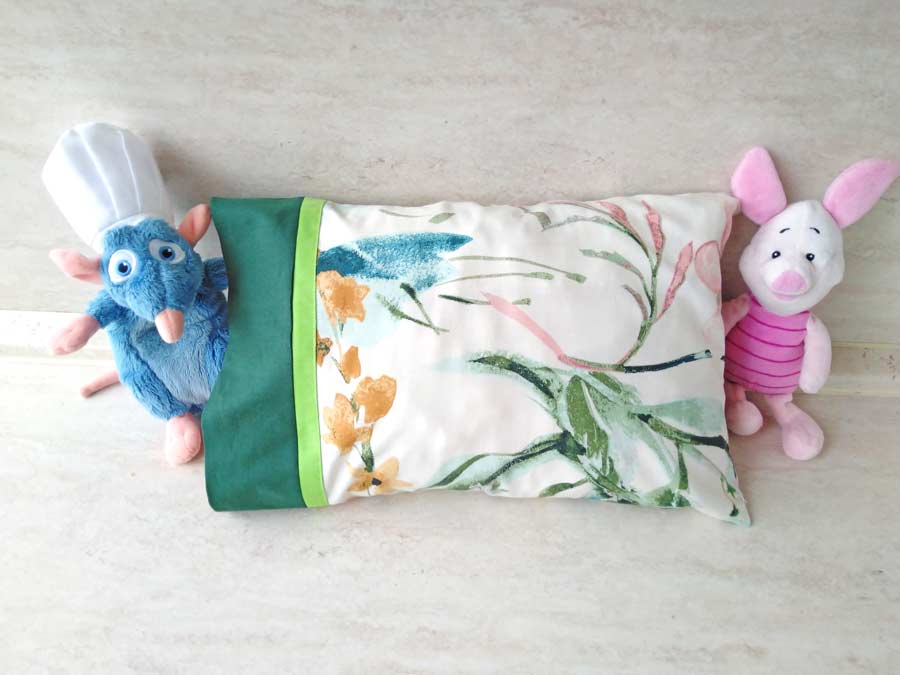
How to Make a Pillowcase | FREE Pillowcase Pattern Burrito Style
Making a pillowcase isn’t hard at all, but making it so that it has that nice professional look can be a bit tricky. I’ll show you the easiest way to make the
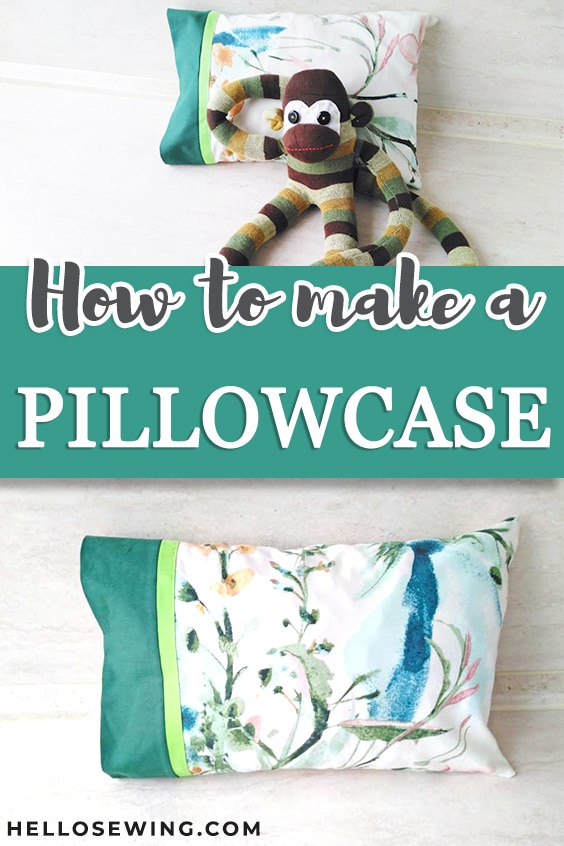
With the help of this pillowcase tutorial and free pillowcase pattern we have prepared for you, you’ll make a DIY pillowcase in less than 15 minutes. It will have that neat professional look after you’ve finished, as I will show you the burrito (roll up) method with french seams – the easiest way to avoid frayed raw edges and exposed seams.
Here you’ll learn how to make a pillowcase in three different sizes, standard, king, and queen. And even though pillow forms tend to vary in size in different countries, you don’t need to worry. These pillowcases will fit your pillow no matter where you’re from.
Below you will find my step by step written tutorial with VIDEO instructions for all the visual learners.
We occasionally link to goods offered by vendors to help the reader find relevant products. Some of the links may be affiliate meaning we earn a small commission if an item is purchased.
How to Make a Pillowcase
Supplies and tools
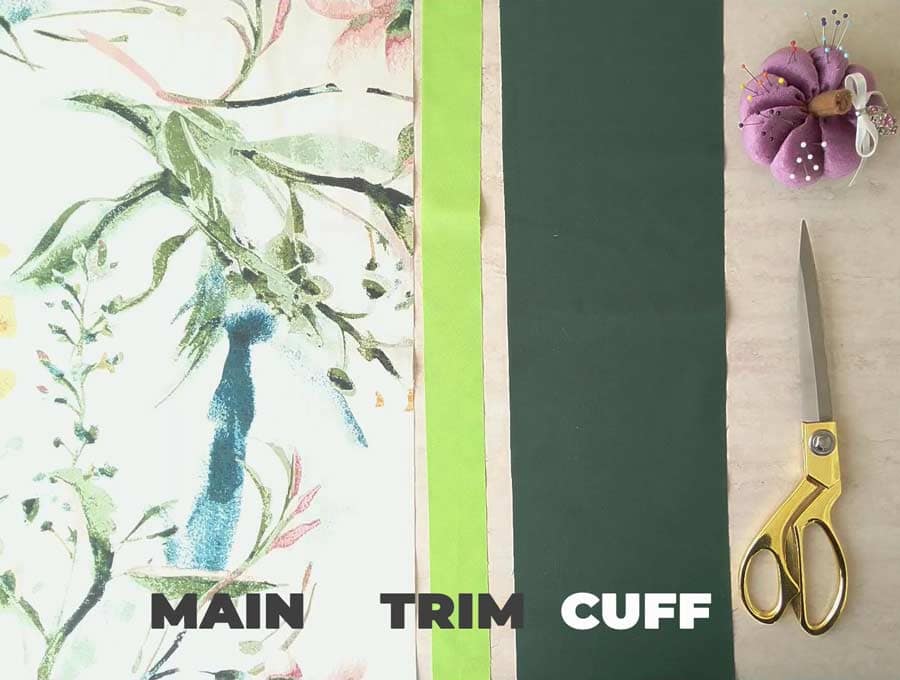
- fabric (main) – 1 yd quilting cotton (you can also use silk or 100% cotton)
- fabric (trim) – 1/4 yd
- fabric (cuff) – 1/3 yd
- matching thread
- scissors (or rotary cutter and a cutting mat)
- ruler or measuring tape
- iron and ironing board
- sewing clips or pins
- sewing machine \
DOWNLOAD: FREE Pillowcase pattern (Free PDF file)
Follow us for free patterns & tutorials!
How To Sew a Pillowcase
Watch the diy pillowcase video first and then follow the written step by step instructions below.
Please enjoy and don’t forget to Like and SUBSCRIBE over on YouTube to be kept up to date with new videos as they come out.
Burrito Pillowcase VIDEO TUTORIAL
INSTRUCTIONS:
STEP 1: Cut out fabric according to these pillowcase measurements
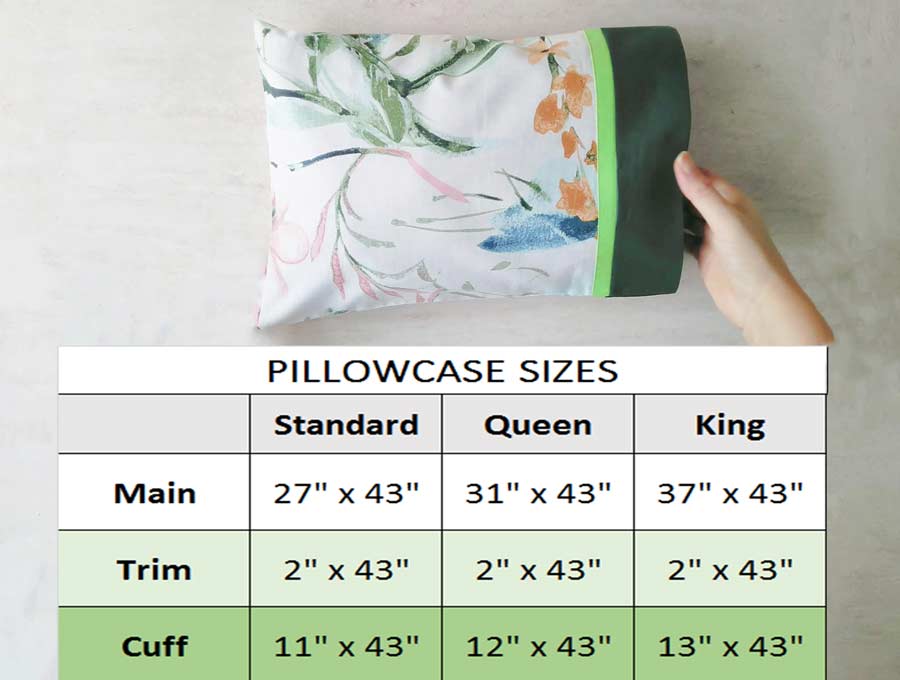
For the standard size pillowcase, start by cutting out a rectangular piece 27″ x 43″ big, from the main fabric. Cut out the cuff fabric into a piece that’s measuring 11 x 43 inches.
For the queen size pillowcase, cut out the main fabric into a piece measuring 31″ x 43″ in dimensions. Cut the cuff fabric into a 12 x 43 inches piece.
The king size pillowcase requires you to cut the main fabric into a 37″ x 43″ piece. Cuff fabric size is 13 x 43 inches
Trim is the same size for all pillowcase sizes – 2″ x 43″
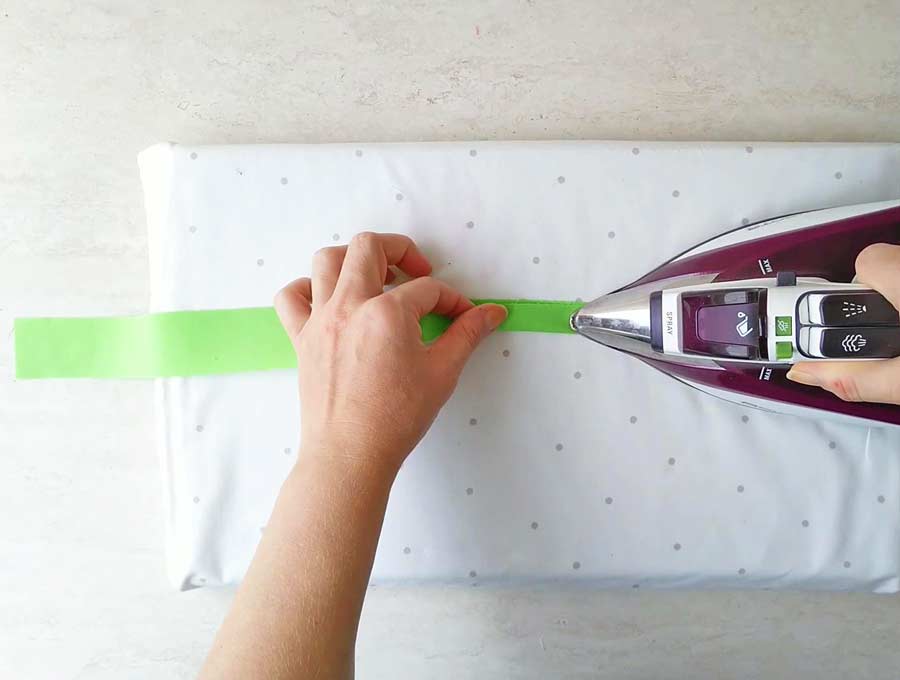
STEP 2: Prepare the cuff and trim
Fold the trim fabric piece lengthwise and press it flat with your iron.
Place the cuff fabric piece on your workspace with its right side facing up. Turn it so that the two long edges are on the top and the bottom. Then place the folded trim piece on the top edge of the cuff piece, aligning their raw edges. Pin (optional, but recommended)
STEP 3: Layer all fabrics
Place your main fabric over the two pieces so that its right side is facing inward. Make sure that the long edges are on the top and the bottom. Align all edges. Pin (optional, but recommended)

STEP 4: Roll it up (burrito method)
Start rolling up the main fabric from the bottom towards the top. Stop about an inch away from the top edge.
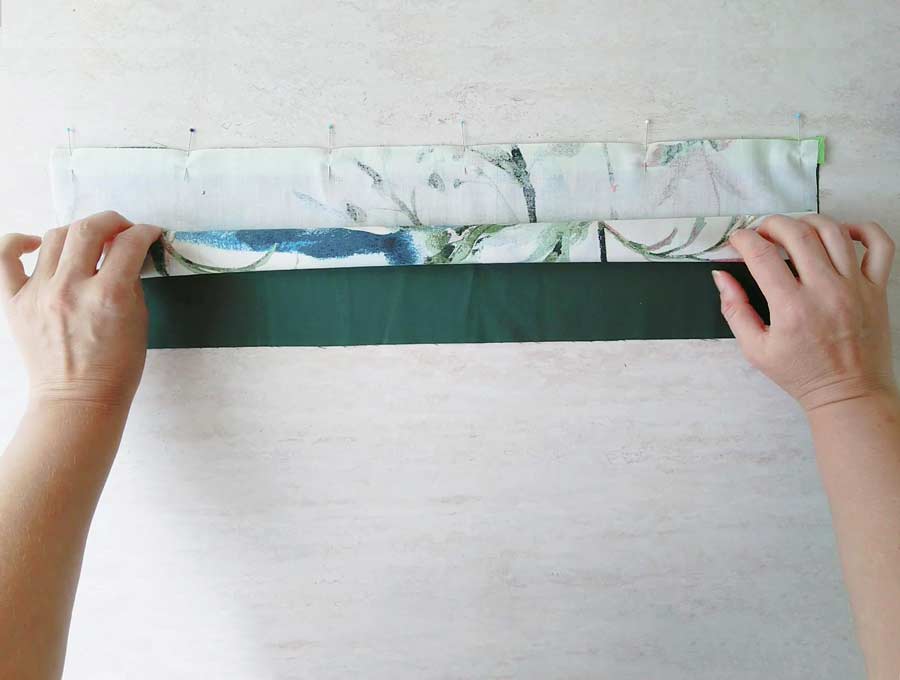
Grab the bottom edge of the cuff fabric that’s below the rolled-up main fabric. Pull it over the rolled-up fabric so that you cover it and align its edge with the top edge of the fabrics. Pin everything in place.
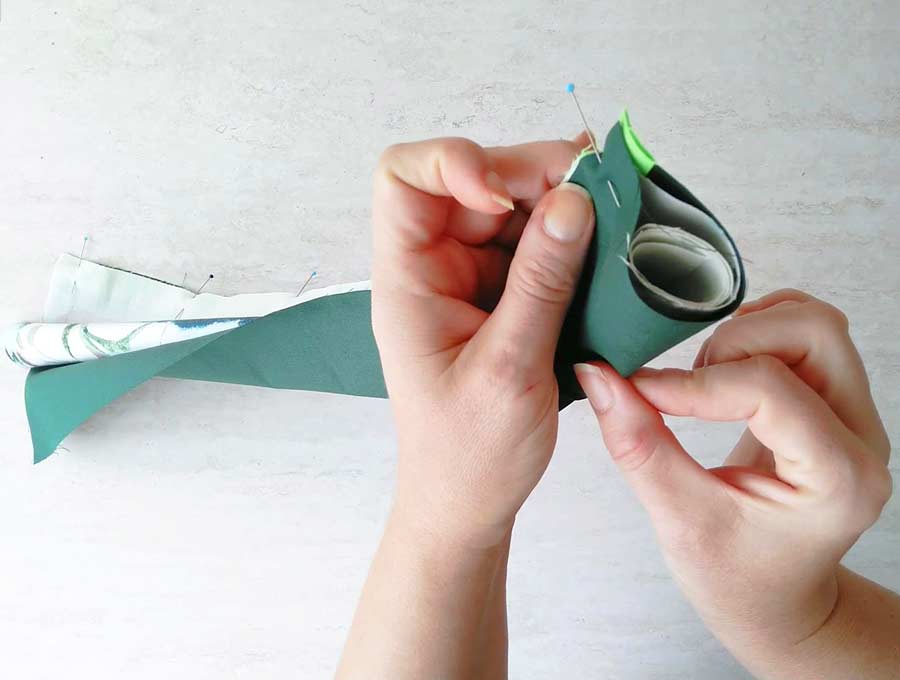
STEP 5: Start sewing the burrito style pillow case
Sew along the top long edge with a quarter-inch seam allowance. Backstitch at the beginning and the end of the seam to reinforce it.
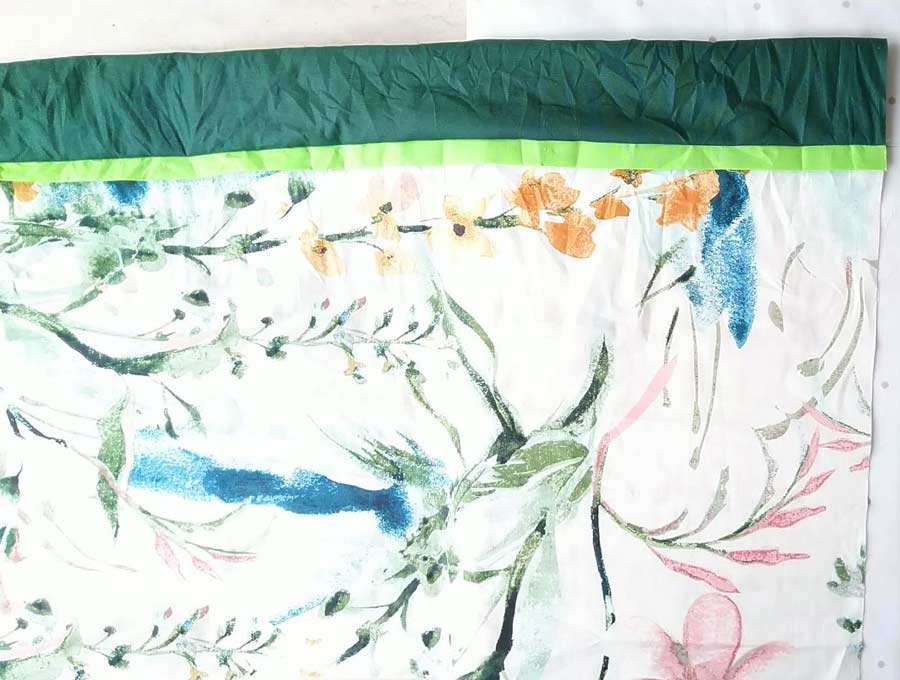
STEP 6: Turn right side out and press
Turn the whole thing inside-out, unfold it, and press everything flat with your iron.
STEP 7: (OPTIONAL) Top-stitching or embroidery
If you want, you can topstitch the edge to give it a finer finish.
Also, if you like to add some embroidery to your pillowcases, feel free to do so in this step.
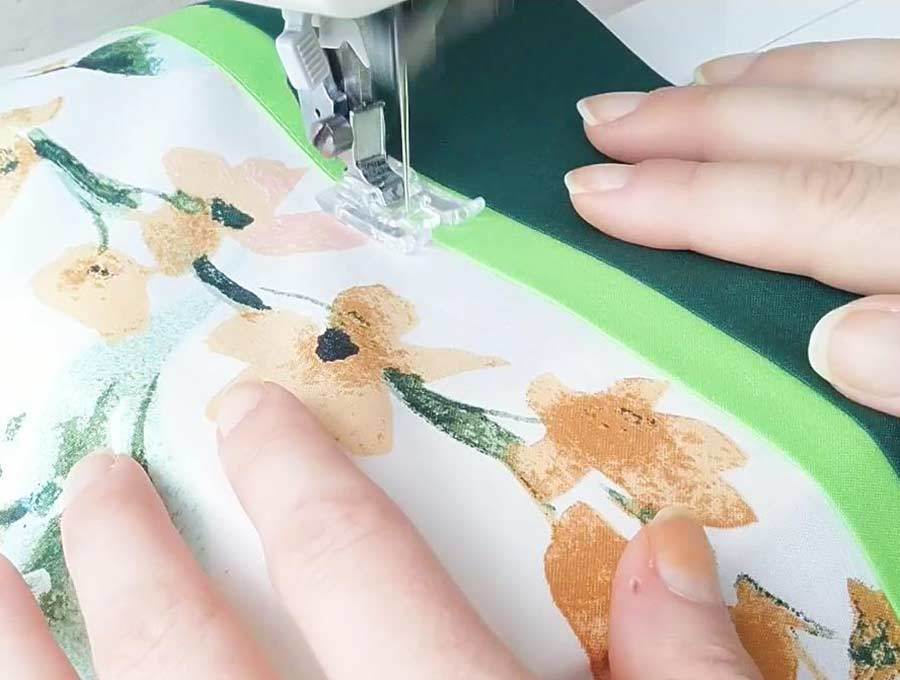
STEP 8: Start sewing French seams
Fold the pillowcase so that its short sides align with the WRONG sides together (that’s right, wrong sides together)! Turn the pillowcase so that the short edges are on the top and the bottom, while the fold is on the left. Pin.
If you want to go a step further and make sure the seams align properly, pin the intersection where the cuff meets the trim and the body.
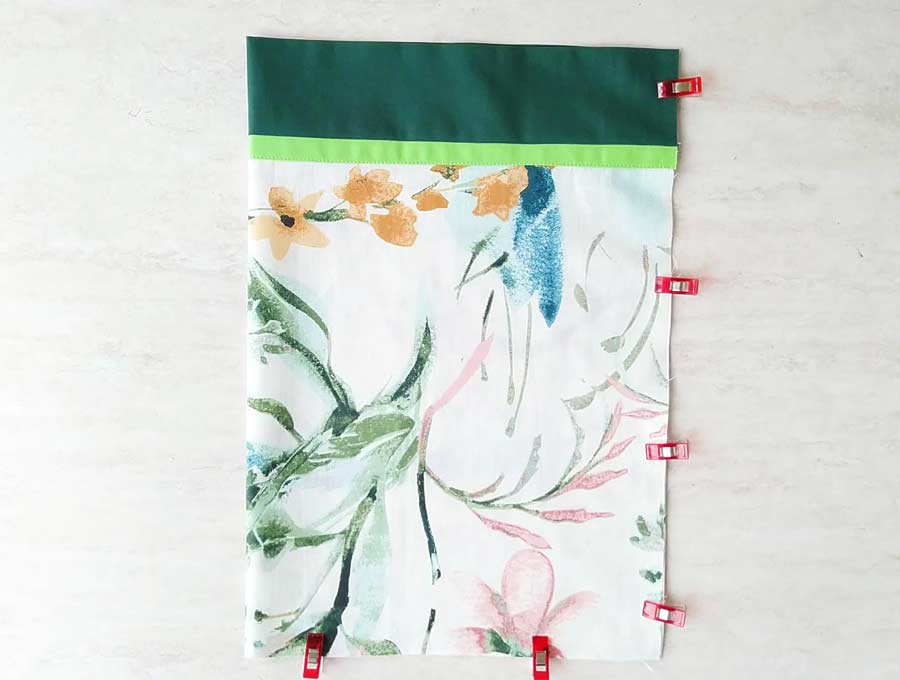
Sew the right edge and the bottom edge using a scant quarter-inch seam allowance, backstitch at the beginning and the end of the seam. Trim the seam down to an eighth-inch and clip the bottom corners for a crisp, professional look. Just be careful not to clip through your stitching.
Push out the corners using something pointy.
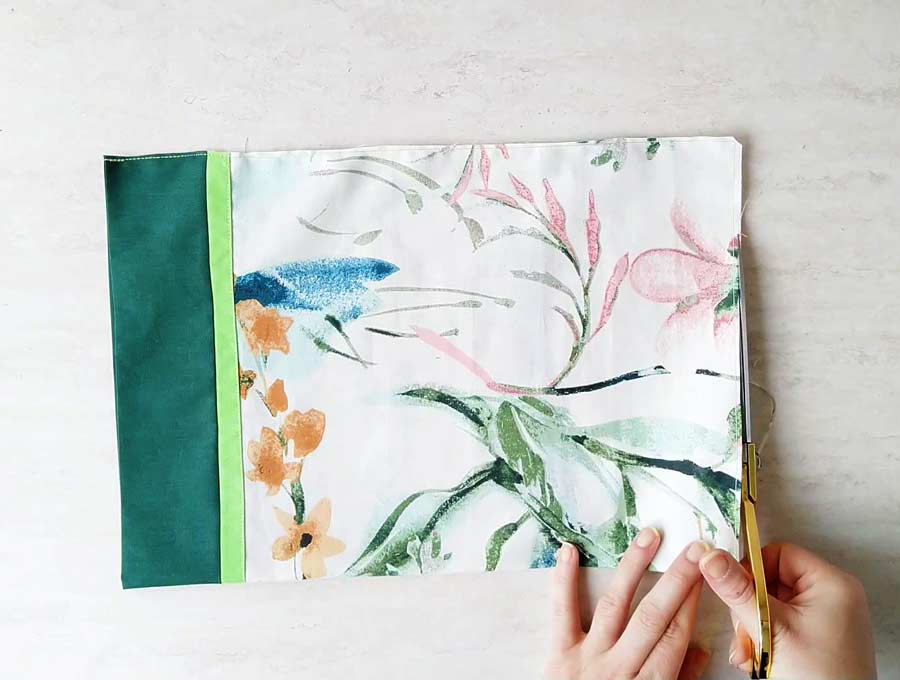
STEP 9: Turn and press
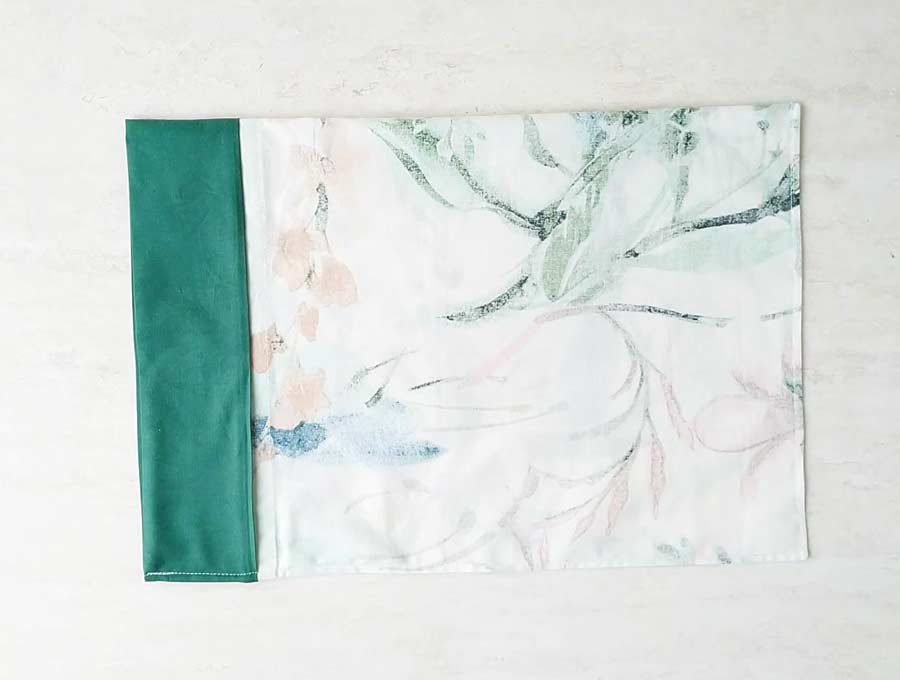
Turn the entire pillowcase wrong side out. Press everything flat with an iron.
For best results, roll the seam with your fingers to push it to the edge before you press it flat.
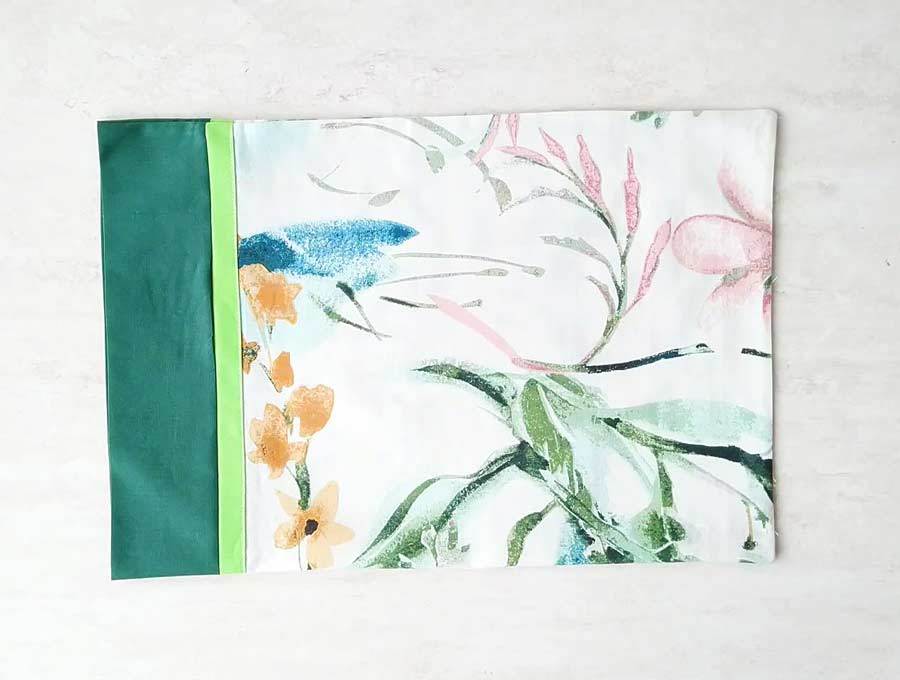
STEP 10: Finish the french seam
Sew along the seamed edge with a quarter-inch seam allowance, backstitching at the beginning and the end. This will completely enclose the seam you’ve just sewn. It will also prevent any fraying later on even after multiple washings.
Turn the pillowcase right side out again, and press it flat one last time.
That’s it your diy pillowcase with french seams is ready! It’s gorgeous and sturdy, and you can bet those durable seams will handle multiple washings for years to come!
Now that you know how to sew a pillowcase you can whip out a ton to give family and friends as presents, or join one of the charity causes and sew up pillowcases for children or adults in need! Here are a few worthy causes that I was able to find:
What did you think about this burrito pillowcase tutorial? I hope you liked it! Go ahead and make your own DIY pillowcase and tell us how it turned out. We’re looking forward to your feedback in the comment section below! Sweet dreams!
Do you like this? Pin for later:
Wanna be friends? Click HERE and follow me on Pinterest
RELATED: