
How to Sew a 3 Roll Toilet Paper Holder the Easy Way
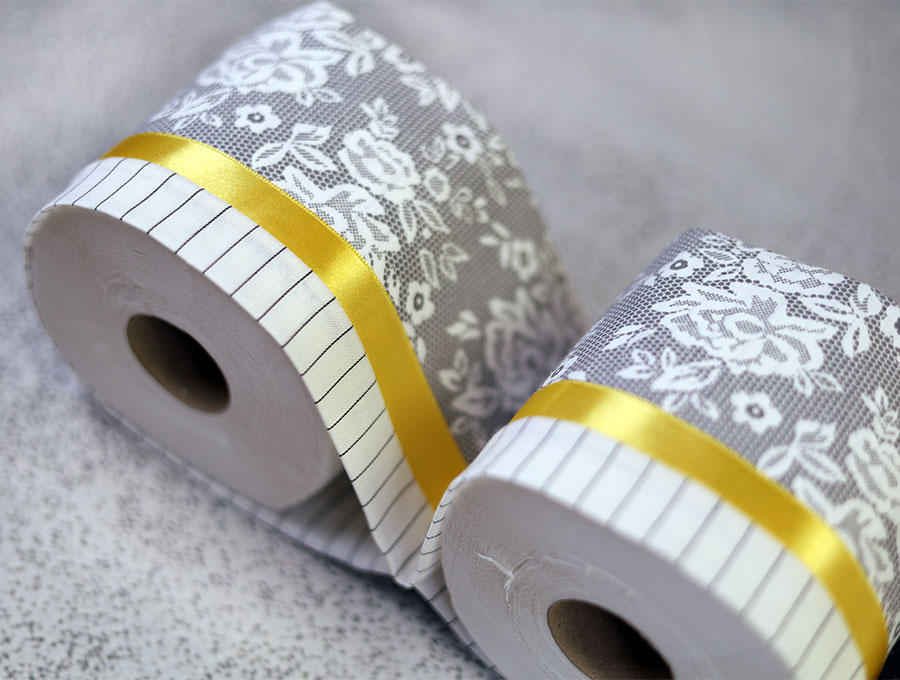
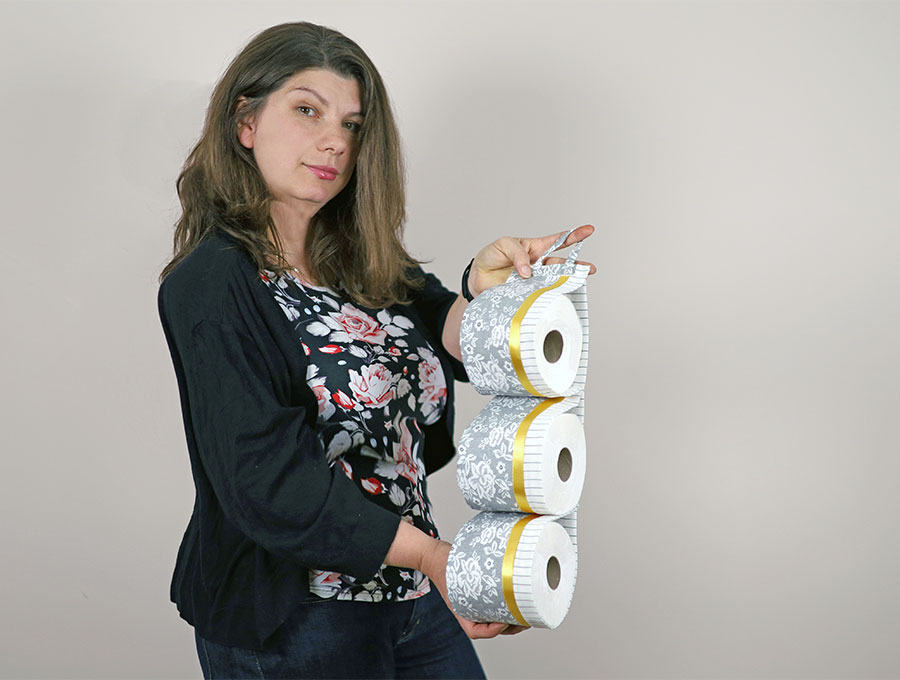
Create a classy look for your bathroom with the three-roll toilet paper holder with its classic French toile print and subtle band of ribbon stitched into the design. It’s also super easy to make.
Master the basic construction of this 3 roll toilet paper holder, which is a quick and easy 15 minute make, then adapt it to other uses, like in the kitchen to hold a roll of bin bags and paper towel, or the nursery for spare diapers and other things you don’t want baby fiddling with but need handy, hanging on the side of the change table. All you need is two fairly narrow strips of fabric – a great use for those long pieces in the stash.
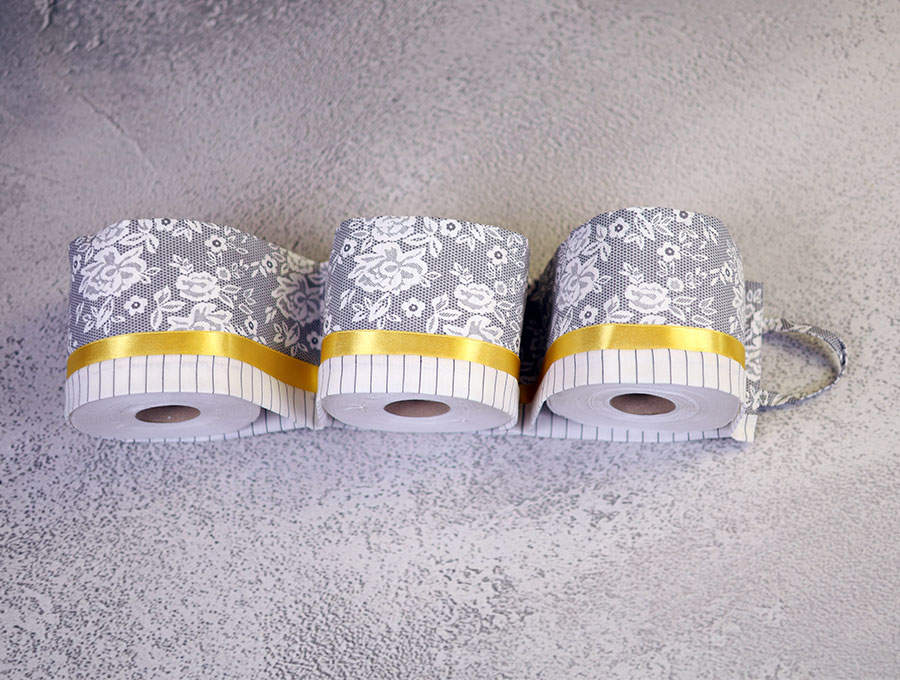
Toile is a classic pattern that originated in France in the 18th Century. It is usually printed in one color on a white or cream linen background with intricate designs that feature foliage, and country scenes. Although dating so far back toile is currently trending with interior designers for its elegance and style. For this toilet roll holder you don’t have to use a toile pattern, you could go for stripes or a bold geometric print in white, grey and black for a suitably stylish look. If your bathroom is neutral then try to get fabric that blends with the décor. Just avoid the old school frilly toilet roll holders with fussy prints – those are too dated.
Below you will find my step by step written tutorial with VIDEO instructions for all the visual learners.
We occasionally link to goods offered by vendors to help the reader find relevant products. Some of the links may be affiliate meaning we earn a small commission if an item is purchased.
Table of Contents
How to make the 3 Roll Toilet Paper Holder
Supplies and tools
- Main fabric 55 x 4 inches (140 x 10.5 cm)
- Lining fabric 55 x 6 inches (140 x 15 cm)
- Ribbon ½ inch wide (1.3 cm) 30 ½ inches long (95 cm) OR
- 2 loops made from the main fabric – 1 ½ x 7 inches (4 x 18 cm)
- matching thread
- scissors (or rotary cutter and a cutting mat)
- ruler or measuring tape
- iron and ironing board
- sewing clips or pins
Follow us for free patterns & tutorials! [easy-profiles]
How to Sew a 3 Roll Toilet Paper Holder
Watch the diy 3 Roll Toilet Paper Holder video first and then follow the written step by step instructions below.
Please enjoy and don’t forget to Like and SUBSCRIBE over on YouTube to be kept up to date with new videos as they come out.
3 Roll Toilet Paper Holder VIDEO TUTORIAL
INSTRUCTIONS:
STEP 1:
Lay out the lining fabric on your worktop right side up, long side parallel to the bottom of your worktop, then at the top edge, place the ribbon right side up, and over the ribbon and lining place the main fabric, right side down. Clip in place all along the top edge.
STEP 2:
Pull the edge of the main fabric down to meet the lining edge at the bottom and clip in place.
STEP 3:
Stitch along each edge with a ¼ inch (6 mm) seam allowance, backtacking at the start and finish of each seam.
STEP 4:
With the tube still inside out press making sure the ribbon is facing the main fabric and the extra bit of lining is on the other side of the ribbon.
STEP 5:
Stitch closed the end that does not have the ribbon ¼ inch (6 mm) from the edge, and trim off the corners to reduce bulk when turned right way out.
STEP 6:
Use a safety pin or turning tool to turn the tube the right way out, then get the corners out by using a pin to hook out the fabric so the corners are perfect.
STEP 7:
Starting from the end that has the ribbon measure 3/8 of an inch (1 cm) from the end and make marks with a fabric pen, then join with a line.
STEP 8:
Starting from the line you drew in Step 7 mark three sections of 12 inches (30.5 cm) at the top and bottom, then join each set with a line.
STEP 9:
Starting from the last line mark 3 sections of 5 ½ inches (14 cm) each.
STEP 10:
With the non-ribbon lining side facingup on the worktop fold over the end of the fabric so the ribbon side is over it and that the last mark made, lines up with the first mark made. Fold the top piece down to align with the mark and pin or clip in place.
STEP 11:
Match and pin the marks on the top piece with the marks on the bottom piece. You are creating three loops to hold the toilet aper. Clip in place.
STEP 12:
Stitch along the three sets of marks, and then at the top where you first folded the fabric over. Backtack at the start and finish of each line of stitching.
STEP 13:
Create the two hanging loops. Place each piece wrong side up on your ironing board then fold in half along the length and press.
STEP 14:
Open out each piece and fold the sides in to meet the pressed in fold in the middle. Press again. Open up and press the short ends in.
STEP 15:
Fold the pressed sides to meet each other, ensure the ends you pressed are neatly folded in and clip in place.
STEP 16:
Stitch around all four sides as close to the edge as possible.
STEP 17:
To attach the loops there are three options:
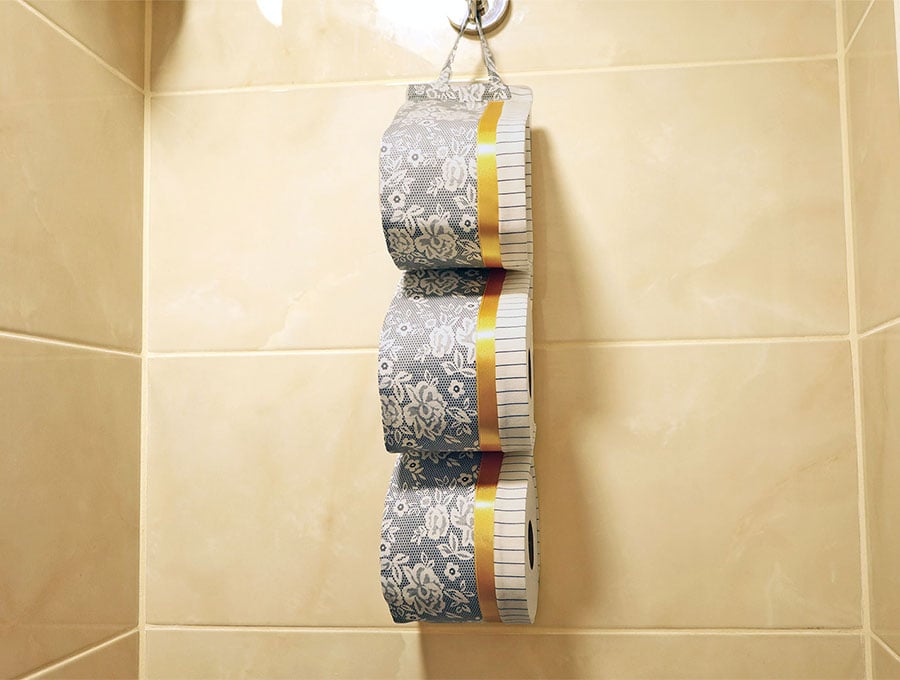
- Pin a loop at the back of the top of the toilet roll holder 1 inch (2.5 cm) from each end. Stitch across the ends, backtacking at the start and finish. This is to you can slide it onto a bar to hold it, or attach to double hooks on the side of the cistern.
- Pin just one loop in the center of the back of the toilet roll holder and stitch in place – this enables you to hang it on a single hook in the bathroom.
- If you do not have something to hang it on but rather need to tie the holder onto a fixed rail then stitch on two pieces of folded ribbon at each end of the top – the loose ends of the ribbon will be facing upwards enabling you to tie bows onto the rail.
Not everyone likes a toilet roll holder in the bathroom, but this is a useful item, especially for guests who may not know where to find the extra paper and don’t want to dig through cabinets in the bathroom. Launder the toilet paper holder often so it does not get dusty, and have a couple in reserve so there is always a fresh one available and filled. No longer will you be met with desperate cries of, “Bring me some toilet paper!” while a hand fumbles blindly around the edge of the toilet door.
Like and subscribe if you enjoyed this tutorial. Remember you can adjust the width for this to hold paper towels in the kitchen. For the nursery it can hold a pack of Wet Wipes and a couple of spare diapers and be hung on the edge of a change table.
Do you like this? Pin for later:
Wanna be friends? Click HERE and follow me on Pinterest
RELATED: