
Transfer Pictures or Drawings on T-shirts
Need a temporary print on a shirt for a special event or occasion? Here’s the answer using clingfilm and baking paper from the kitchen combined with a drawing or photo printed onto copier paper and an iron. The best part? It’s temporary, so, after using the shirt you can peel off the print and use it again and again.
This transfer method uses basics in your kitchen – clingfilm and baking paper – put on drawings or photos on a T-shirt for a one-off occasion. The print will later peel off after use, leaving you free to launder the shirt and reuse. This is not intended to be a permanent transfer. It is suggested it be used with cotton rich fabric that can take the heat of the iron during the transfer process. We show you how and supplement with step-by-step instructions. White was used for the visuals in this tutorial but you can use any color T-shirt.
Below you will find my step by step written tutorial with VIDEO instructions for all the visual learners.
We occasionally link to goods offered by vendors to help the reader find relevant products. Some of the links may be affiliate meaning we earn a small commission if an item is purchased.
Table of Contents
How to transfer a picture or a drawing on a t-shirt

Supplies and tools
![]()
- Drawing or photo printed on copier paper
- Clingfilm
- Baking paper
- Plain T-shirt or vest
- scissors
- iron and ironing board
Follow us for free patterns & tutorials! [easy-profiles]
How to make a DIY photo transfer on a t-shirt
Watch the diy photo transfer on a t-shirt video first and then follow the written step by step instructions below.
Please enjoy and don’t forget to Like and SUBSCRIBE over on YouTube to be kept up to date with new videos as they come out.
transfer a photo or a drawing on a t-shirt VIDEO TUTORIAL
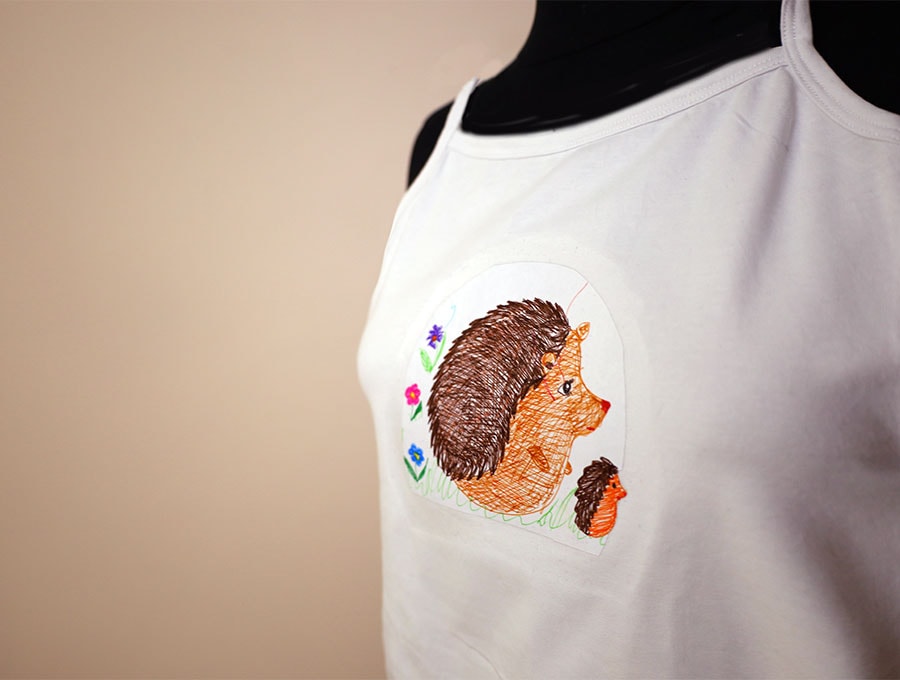
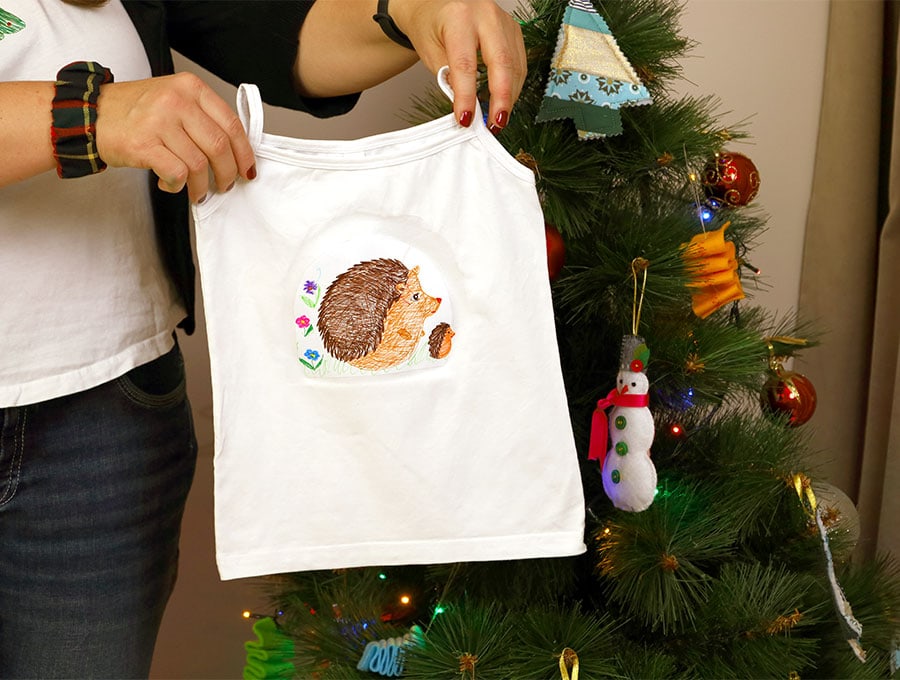
METHOD 1 – Transfer a photo or a kid’s drawing
STEP 1:
Choose a cute photo or a kid’s drawing they have done using marker pens on the type of basic light-weight white paper you would normally use in a photocopier.
STEP 2:
Cut out the picture leaving very little white space around it.
STEP 3:
Cut a piece of cling film that is large enough to cover the front and back of the drawing.
STEP 4:
Place the cling film down on your worktop, then the drawing right side up on top of it, then fold up the clingfilm to cover the drawing.
STEP 5:
Cut away the excess clingfilm 3/8 of an inch (1 cm) from the edge of the drawing.
STEP 6:
Lay the T-shirt or vest you want to print out on your ironing board.
STEP 7:
Place the drawing covered in the clingfilm in the position you want it with the right side facing upwards – make sure it is exactly straight and cover with a sheet of baking paper,.
STEP 8:
Set you iron to ‘no steam’ and iron the baking paper covering the print for about a minute on medium high or high setting until the clingfilm has melted, adhering the print to the shirt.
Yes, the paper will not dissolve, but the clingfilm on the front will protect the colors of the drawing and the melted clingfilm on the back will make it stick to the T-shirt. Take photos of your kids with their very own printed T-shirts so that they can remember this creative exercise. Older kids may want to decorate a T-shirt for Halloween using one of their scary drawings.
METHOD 2 – Create your own Christmas or special occasion T-shirt
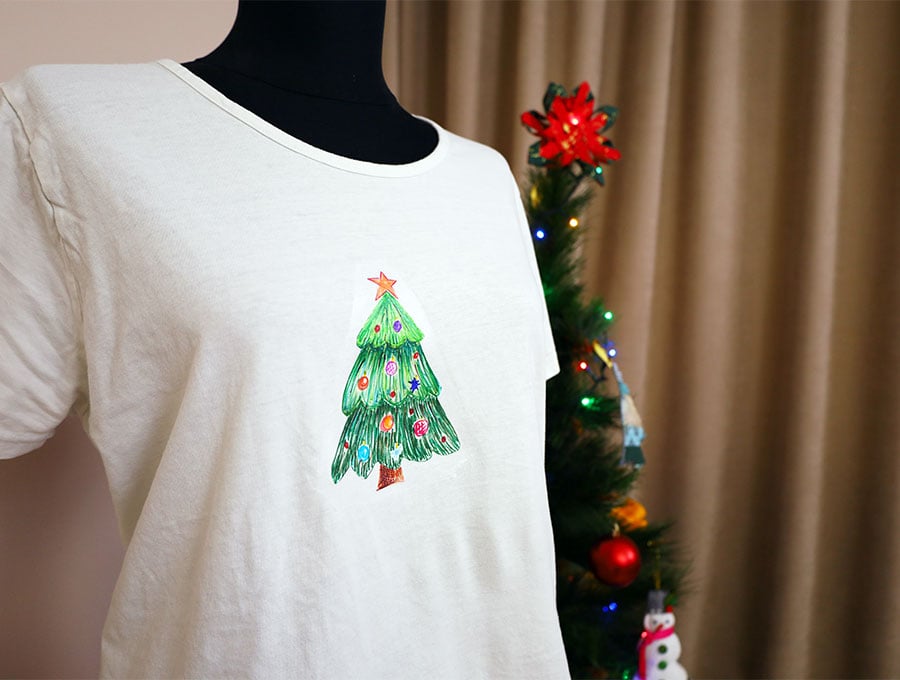
Let’s be honest – we wear the Christmas T-shirts a couple of times then off they go to the bin or to a charity shop for someone to maybe use the next year. So, why not take a plain T-shirt and decorate for Christmas or Halloween or any once-off occasion and have the shirt to reuse? It’s much more sustainable!
STEP 1:
Create a special occasion drawing using marker pens, or print out an appropriate color photograph on the type of basic light-weight white paper you would normally use in a photocopier.
STEP 2:
Cut out the picture leaving very little white space around it.
STEP 3:
Cut a piece of cling film that is large enough to cover the front and back of the drawing.
STEP 4:
Place the clingfilm down on your worktop, then the drawing right-side-up on top of it, then fold up the clingfilm to cover the drawing.
STEP 5:
Cut away the excess clingfilm 3/8 of an inch (1 cm) from the edge of the drawing.
STEP 6:
Lay the T-shirt you want to print on your ironing board.
STEP 7:
Place the drawing covered in the clingfilm in the position you want it with the right side facing upwards – make sure it is exactly straight and cover with a sheet of baking paper,.
Step 8:
Set you iron to ‘no steam’ and iron the baking paper covering the print for about a minute on medium high or high setting until the clingfilm has melted, adhering the print to the shirt.
What is great about this method is that you are not turning the print face down on the shirt, so if you want to do lettering – say a name or a number for a birthday party or a special anniversary you don’t have to worry about the words coming out backwards – what you see or print out is what you get on the shirt. If you enjoyed this please give us a like and subscribe. We have loads of creative projects to share and will send them to our subscribers’ inboxes as they are posted.
Do you like this? Pin for later:
Wanna be friends? Click HERE and follow me on Pinterest
RELATED: