
Six-Point Beanie Sewing Tutorial – How to Sew a 6-point Beanie Hat in a Flash
For this super quick six point beanie project all you need is a rectangle of stretch fabric! The final use of the six-point beanie will be determined by the fabric you choose. If it’s to keep hair off your face while you do your makeup choose a soft terrycloth, for outdoor warmth a stretch fur fabric or cozy velour or knit. It’s easy and fun! So, let’s get sewing.
Below you will find my step by step written tutorial with VIDEO instructions for all the visual learners.
We occasionally link to goods offered by vendors to help the reader find relevant products. Some of the links may be affiliate meaning we earn a small commission if an item is purchased.
Table of Contents
How to make a Six Point Beanie
Supplies and tools
- fabric – Sufficient length of stretch fabric to fit the circumference of your head that is 11 inches (28cm) wide
- matching thread
- scissors (or rotary cutter and a cutting mat)
- measuring tape
- sewing clips or pins
- sewing machine
Follow us for free patterns & tutorials! [easy-profiles]
How to Sew a 6-point beanie
Watch the diy six point beanie video first and then follow the written step by step instructions below.
Please enjoy and don’t forget to Like and SUBSCRIBE over on YouTube to be kept up to date with new videos as they come out.
DIY Six point beanieVIDEO TUTORIAL
INSTRUCTIONS:
STEP 1:
Before you start, measure you head circumference using a tape measure – an average size is 23 inches (58 cm), but head sizes will differ.
STEP 2:
Measure a piece of stretch fabric to your head size in inches (or cm) x 11 inches (28 cm) in height.
Cut the piece to size.
STEP 3:
Lay it on your worktop wrong side up and with the long edge in line with the bottom edge of the worktop, measure 4 inches (10 cm) upwards from the base on each side and join with a line.
STEP 4:
Next place the short ends together and pin on the wrong side (right sides will be facing each other)
STEP 5:
Use a zigzag or overlock stitch on the edge. If your overlocker has a safety stitch that is fine, but if it doesn’t then you’ll still need a zigzag stitch to prevent the seam opening when pulled over the head. Why we use a small zigzag stitch instead of a straight stitch is because the fabric is a stretchy one and a straight stitch is likely to break when stretched.
STEP 6:
Fold up the fabric from the base to meet the line you marked and pin the raw edge in line with the marked line.
STEP 7:
Stitch on the right side of the fabric using a zigzag stitch. You can stick a piece of tape on your machine to ensure you keep an even distance as you stitch around the circumference of the beanie. Line up the folded edge with the edge of the tape, and ensure your needle is stitching through both layers.
STEP 8:
Measure the open end of the beanie and divide into thirds from the fold to the zigzag edge – this will vary depending on the size of the person’s head. For my head circumference of 23 inches (58 cm) I divided 11.5 inches by 3 to get three equal spaces of 3.6 inches.
STEP 9:
Take a pin and insert at the mark you made furthest away from the seam. Next take the seam and move it to the pinned mark, inserting a new pin. You will now have three folds at the top of the beanie that are equal in size.
STEP 10:
Take each fold and divide in half by pushing the fold towards the center, and pin.
STEP 11:
Serge or zig-zag along the edge of each of the 3 folds to create your 6-point beanie.
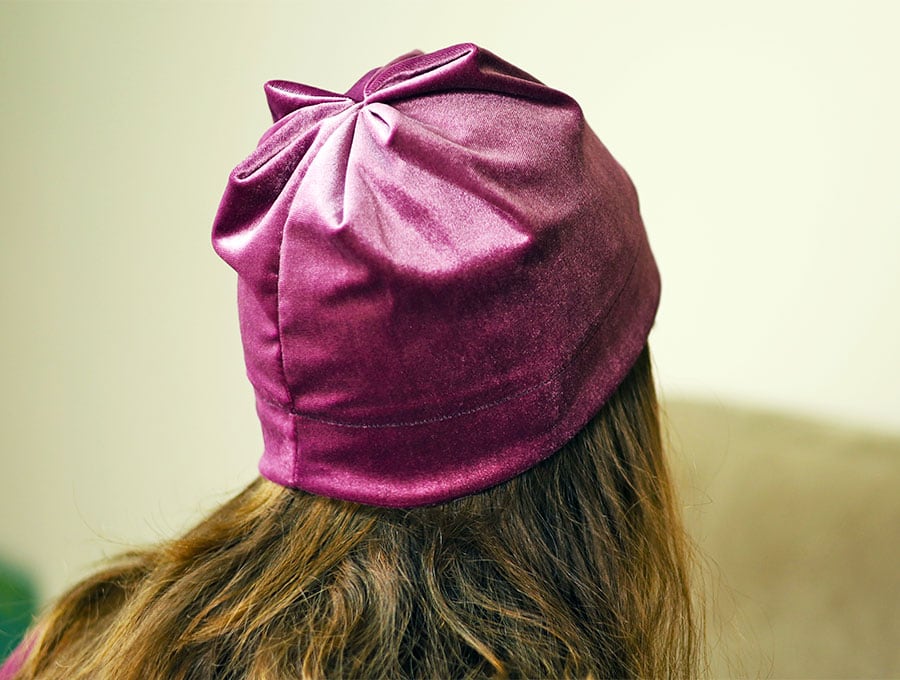
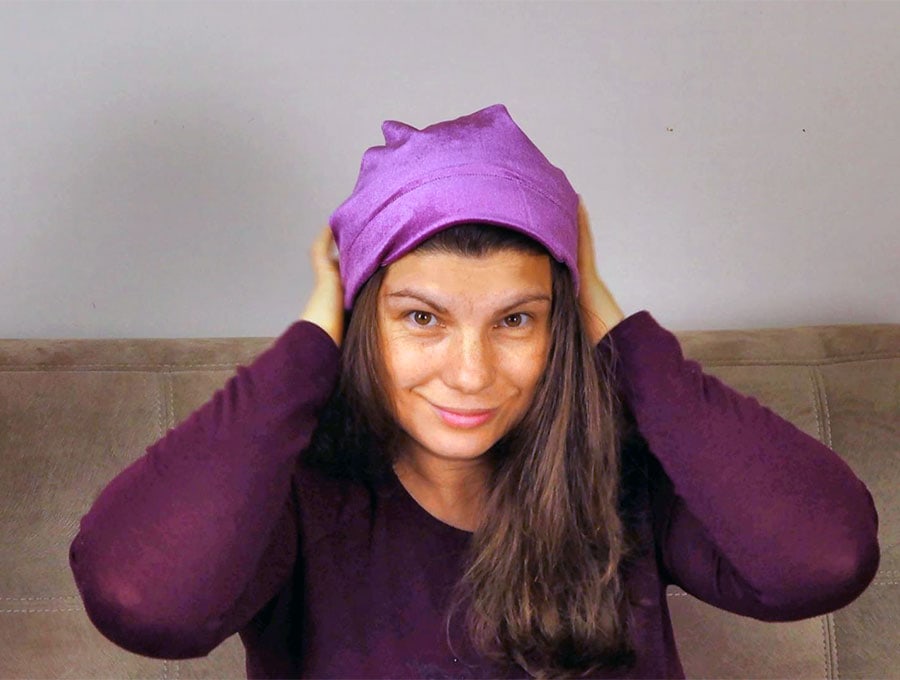
Your beanie is now ready to be put to use whenever or wherever you want to use it. Keep your hair from getting tangled in the wind, keep your head warm, or keep hair off your face and neck while you do housework or gardening. The visuals backed up with step-by-step instructions will guide you through the creative process.
Our fun six-point beanie that can be casual or chic, depending on the fabric you choose. It’s an ideal item to keep your head warm in cold weather, or when the wind is blowing and you don’t want to arrive looking like you’re going into competition with a dreadlocked reggae artist. Choose the fabric to suit the purpose – velvet, knit, fur fabric or whatever takes your fancy as long as it has a bit of stretch in it. We’ll show you how in this quick tutorial.
If you enjoyed this tutorial then like and subscribe, to have our latest projects delivered to you as we post them.
Do you like this? Pin for later:
Wanna be friends? Click HERE and follow me on Pinterest
RELATED: