
DIY Bolster Pillow with a Zipper and Piping [How to Sew a Bolster Pillow]
I love a bolster pillow. They are so useful, depending on the size. They can be tucked behind your back to support you, used to support your head when lying on the couch watching TV, as a prop for feet to elevate them after a hard day’s work when you just need to rest those weary legs for a little before getting back to work, and in hot climates like Indonesia they are used for your legs – one leg flung over the bolster. We show you how to sew the bolster pillow with our step-by-step instructions that you can complete in just 30 minutes.
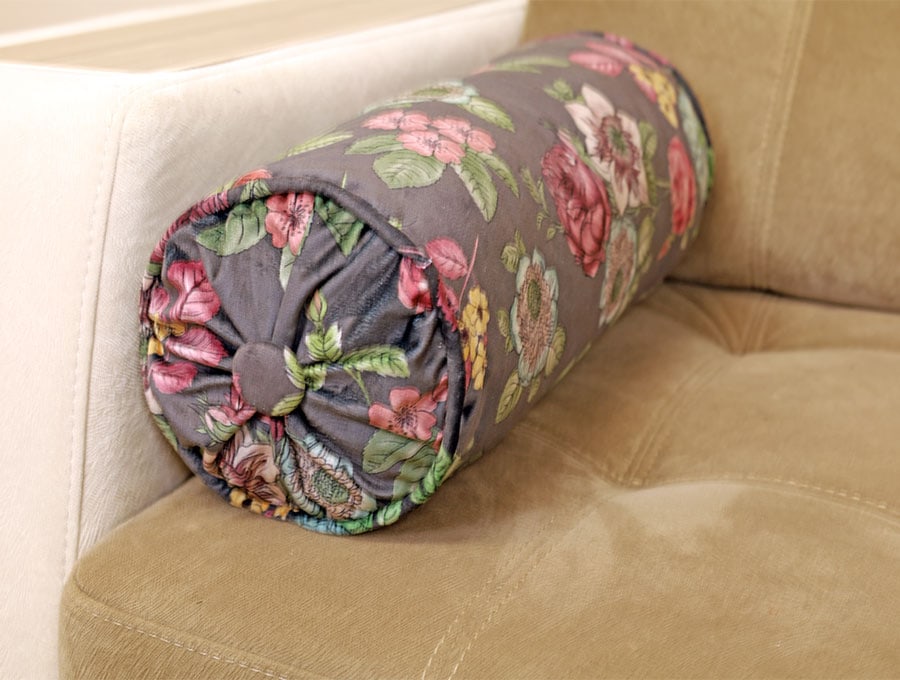
Learn how to make this bolster pillow with my step by step sewing tutorial. The DIY bolster pillow has a zipper closure and piping but worry not! I will show you the easiest way to add a zipper to this pillow and make your own piping. I will also show you how to cover your buttons and it’s easier than you think 🙂 You can of course scale the size up or down to suit your tastes.
Below you will find my step by step written bolster pillow tutorial with VIDEO instructions for all the visual learners.
We occasionally link to goods offered by vendors to help the reader find relevant products. Some of the links may be affiliate meaning we earn a small commission if an item is purchased.
Table of Contents
- 1 How to make a Round Bolster Pillow Cushion
- 2 Supplies and tools
- 3 How to Sew a Bolster Pillow
- 3.1 DIY Bolster Pillow VIDEO TUTORIAL
- 3.2 INSTRUCTIONS:
- 3.3 STEP 1:
- 3.4 STEP 2: Making the piping
- 3.5 STEP 3:
- 3.6 STEP 4:
- 3.7 STEP 5:
- 3.8 STEP 6:
- 3.9 STEP 7:
- 3.10 STEP 8:
- 3.11 STEP 9:
- 3.12 STEP 10:
- 3.13 STEP 11:
- 3.14 STEP 12:
- 3.15 STEP 13:
- 3.16 STEP 14:
- 3.17 STEP 15:
- 3.18 STEP 16:
- 3.19 STEP 17:
- 3.20 STEP 18:
- 3.21 STEP 19:
- 3.22 STEP 20:
How to make a Round Bolster Pillow Cushion
Supplies and tools
- fabric – upholstery fabric 24 x 22″ (61 x 56cm)
- non-woven interfacing – 2 circles with 8″(20cm) diameter
- 2 covered button blanks
- large hand sewing needle
- 10″ (25cm) wide bolster pillow form insert
- 14″ (27cm) zipper
- matching thread
- scissors (or rotary cutter and a cutting mat)
- ruler or measuring tape
- iron and ironing board
- sewing clips or pins
Follow us for free patterns & tutorials! [easy-profiles]
How to Sew a Bolster Pillow
Watch the diy bolster pillow video first and then follow the written step by step instructions below.
Please enjoy and don’t forget to Like and SUBSCRIBE over on YouTube to be kept up to date with new videos as they come out.
DIY Bolster Pillow VIDEO TUTORIAL
INSTRUCTIONS:
Cut your fabric:
- 1 x fabric 23.5 x 18 inches (60 x 45 cm)
- 2 x fabric 24 x 1 3/8 inch (61 x 3.5 cm)
- 2 x piping cord lengths 22 inches (55 cm) each
- 2 circular pieces of fabric 10 ¼ inches (26 cm) in diameter, with a hole of 2 inches (5 cm)
- diameter in the middle of each.
- Two small circles of fabric sufficient to use for the covered buttons – mine were 2 3/8″ (6cm) in diameter
- non-woven interfacing – 2 circles with 8″(20cm) diameter
STEP 1:
After the fabric has been cut to size use your serger (overlocker) to stitch along the short ends to prevent fraying. If you do not have a machine with the overlocking function you could use a zig-zag stitch.
STEP 2: Making the piping
Next take both skinny strips of fabric and your 2 piping cord lengths of 22 inches (55 cm) and lay them on your worktop
Place the 2 strips of fabric wrong side up on your worktop, and in the middle of each, place the 2 lengths of cord. Fold over the fabric and clip to hold in place.
STEP 3:
Attach the zipper foot to your machine and move the needle to the right to sew the piping.
Sew both lengths of piping and set aside.
STEP 4:
Cover the 2 buttons with fabric. To do this cut a circle larger than the front of the button. Covered button blanks come with two pieces – you cover the outer then using a hand sewing needle gather the fabric around the edge of the circle and slip it over the button front, easing into place, pulling the threads tight, then leaving the threads exposed slip the backing piece into place and press to click in position. Trim the threads. Instant covered button.
STEP 5:
Please your 2 circular pieces of fabric that are 10 ¼ inches (26 cm) in diameter, with a hole in the middle of each and your two pieces of non-woven interfacing on your worktop.
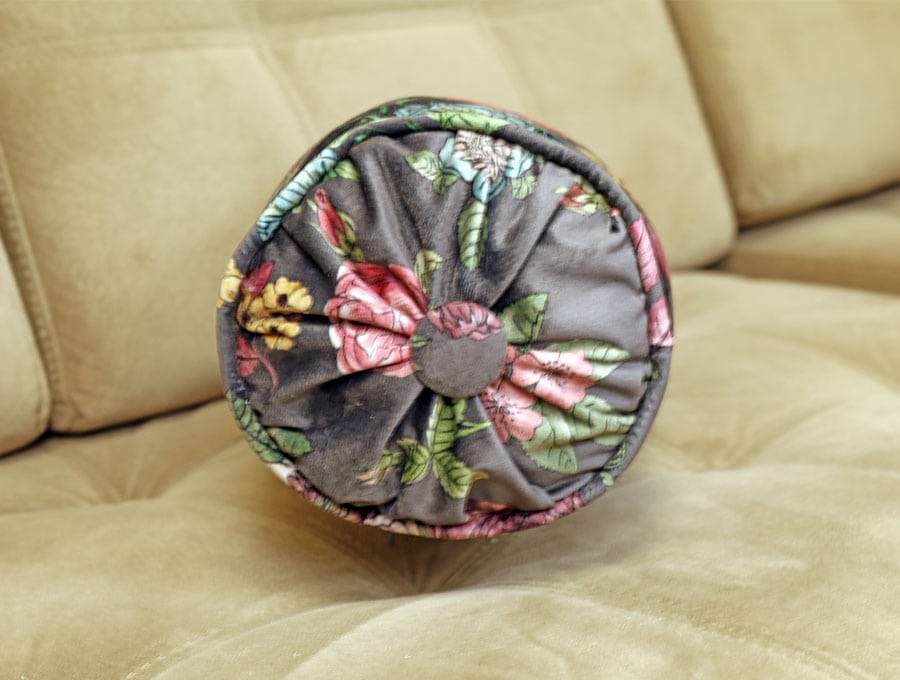
To create the bolster end, take the fabric circle with the middle cut out of it and fold in half, then clip a small notch on either end of the fold line. This is going to help you create perfect quarters – now unfold the circle and fold the opposite way and clip two mall notches on the fold line – you now have 4 equidistance notches in the fabric. This will help you line up with the interfacing.
STEP 6:
Take the circle of non-woven interfacing and fold in half, clip two small notches at either end of the fold, then unfold and fold the opposite way, again clipping out two small notches on the fold line. When you open it out you have 4 equidistant notches.
STEP 7:
Line up the notches for the interfacing with the notches on the outer fabric and clip in place at the notches. You will notice the outer fabric circle is bigger than the interfacing – this is to enable you to make pleats.
STEP 8:
Work your way around the circle making pleats in the fabric and clipping in place – you will have three to four pleats per quarter circle. Make sure all pleats face in the same direction. Repeat with the other circle.
STEP 9:
Stitch around the edge of each circle ¼ inch (6 mm) from the edge to secure the pleats.
STEP 10:
Using a hand sewing needle and matching thread, doubled, make running stitches around the edge of the hole about 1/8 of an inch (3mm) from the edge. When you have completed the circle, pull the thread up to tighten the circle and tie off the threads. Repeat for the other circle.
STEP 11:
Again, use the hand sewing needle and a double thread to start to attach the button shank to the centre of the circle, pulling the thread tight and ending of with a firm knot once you have worked through the shank 4 times. Repeat with the other circle. Be careful not to catch the interlining fabric in the stitching.
STEP 12:
Pin the piping to the circle, starting by pulling the fabric back and exposing the piping cord itself to secure it to the circle, then work your way around pinning or clipping in place. When you get to where you started fold the fabric back onto itself by ¼ of an inch, push the end of the piping cord in to meet the piping cord where you started, then nestle the fabric covering inside the folded over edge. This will make for a neat finish. Clip in place.
STEP 13:
Stitch around the edge of the piping cord ¼ of an inch (6 mm) from the edge to attach it to the circle.
STEP 14:
Stitch the long ends of the bolster main fabric together to create a tube using your machine and a ¼ inch (6 mm) seam allowance.
STEP 15:
With the wrong side of the tube fabric facing upwards pin the zipper carefully to the opened seam, lining up the central part of the zipper with the central stitching of the seam.
STEP 16:
Using the zipper foot, stitch down the sides of the zipper, taking care not to catch the fabric of the tube as you stitch.
STEP 17:
Run a seam riper along the seam to open it out, only where the zipper runs, then pull the zipper about 1/3 to ½ way open to enable you to turn the bolster later.
STEP 18:
Attach one bolster circle to the tube, pinning or clipping in place and easing the fabric around the circle so it sits flat. Right sides to right sides. Repeat with the other circle at the opposite end of the tube.
STEP 19:
Run a line of stitching on the wrong side of the fabric to join the piped edge to the main tube. The seam allowance will be between ½ to ¼ inch (1.2 cm to 6 mm) – just feel with your fingers so you do not stitch over the piping cord itself, but stitch as close alongside as you can. Repeat the stitching at the other end to attach the other bolster circle. Back tack at the start and finish.
STEP 20:
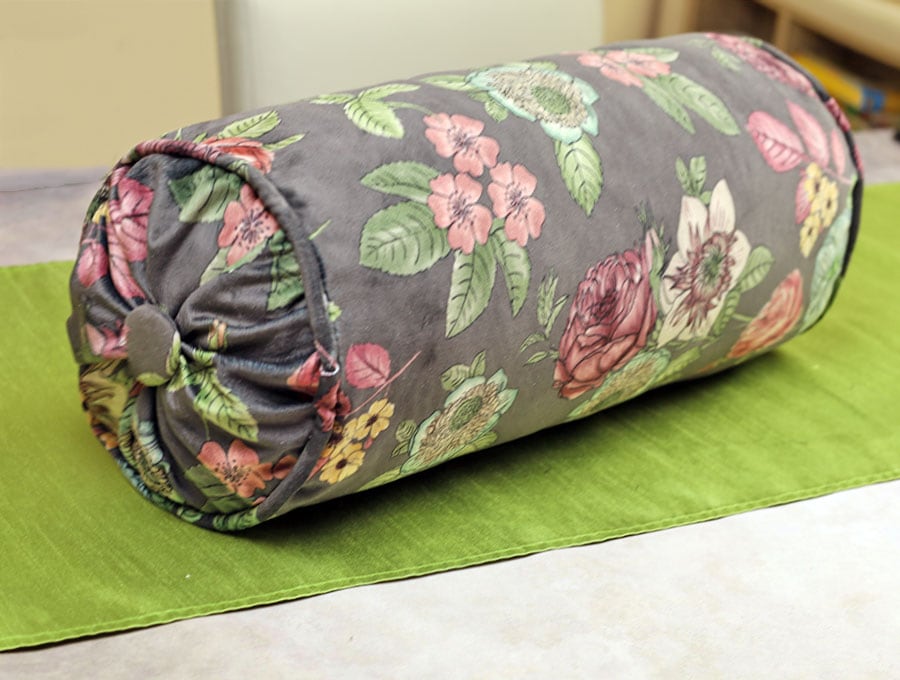
Turn the bolster the right way out and it is all ready to stuff and use. You can use a commercially stuffed bolster inner of the same size or you can make your own inner – simply using the same tube dimensions and plain circle ends, leaving a gap in the middle of the seam in the tube to stuff the inner. Once ready hand-sew closed or use your machine to close the gap and insert into the bolster.
Have fun using the bolster!

This DIY bolster cover may look complicated but in fact it shouldn’t take more than 30 minutes to sew. Watch the visuals and follow the step-by-step instructions for a new classy look for your sofa or for your bed. We show you exactly just how easy it is to make this bolster cover without any fuss. Feel free to let your creativity run wild in choice of fabric and colors. We would love to see how your bolster with zip and covered buttons turned out so please post your photos of the finished project in the comments section once you have subscribed.
Please remember to like and subscribe to have more tutorials delivered straight to your inbox, and never miss out on the fun projects from Hello Sewing.
Do you like this? Pin for later:
Wanna be friends? Click HERE and follow me on Pinterest
RELATED: