
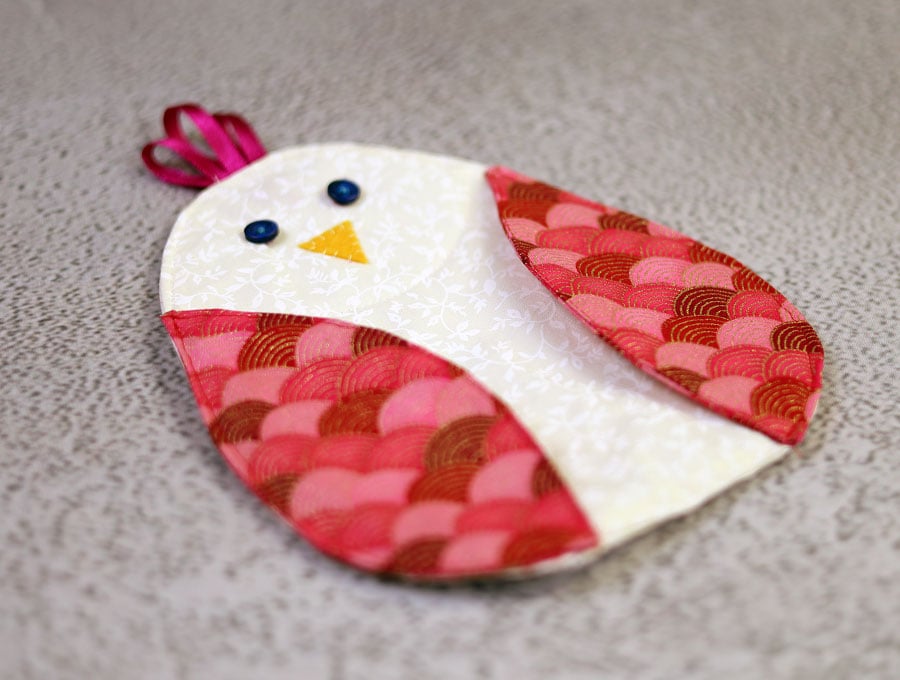
DIY Chicken Potholder with Free Sewing Pattern
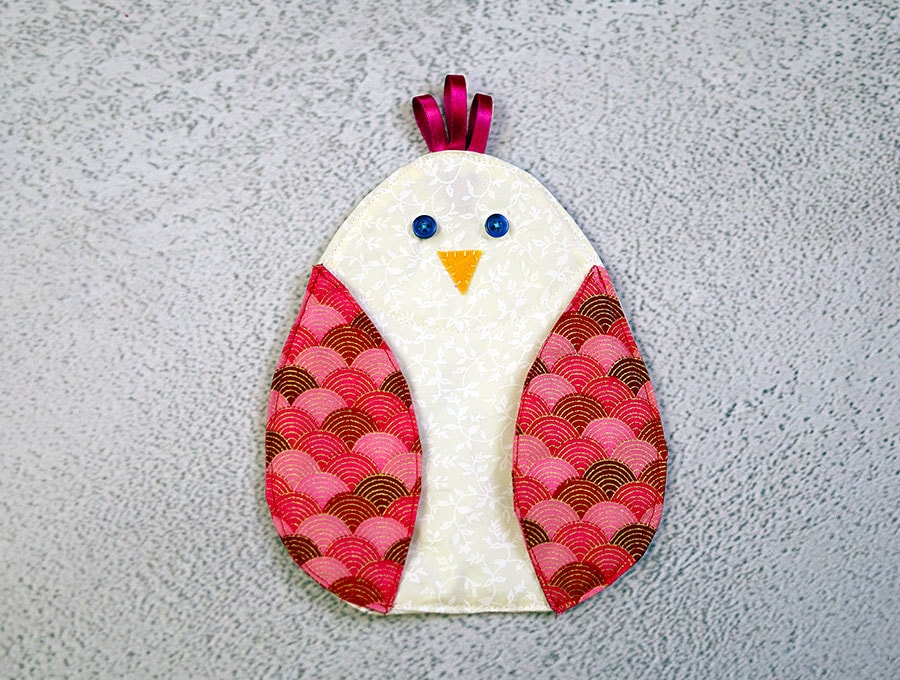
Sew yourself a cute chicken potholder with our free pattern. It has handy wing pockets so you can slip your fingers and thumb inside for a good grip. A perfect addition to your kitchen in the spring. It is so easy to sew that you can make a few to give your friends or family.

Below you will find my step by step written tutorial with VIDEO instructions for all the visual learners.
We occasionally link to goods offered by vendors to help the reader find relevant products. Some of the links may be affiliate meaning we earn a small commission if an item is purchased.
Table of Contents
How to Make a Chicken Potholder

Supplies and tools
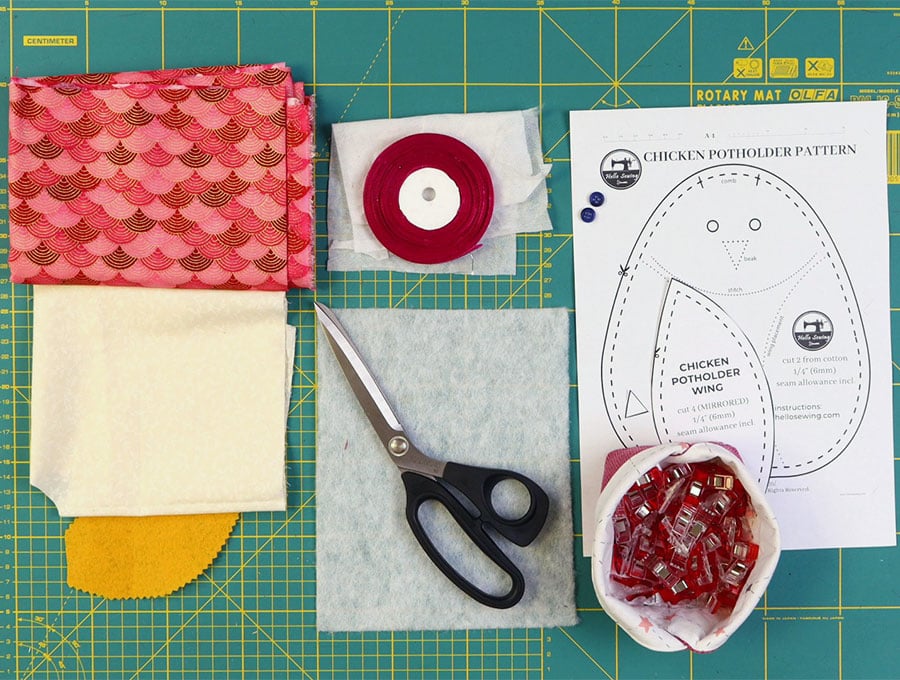
- fabric – 2 pieces of 100% tightly woven cotton (one main, one lining)
- wadding
- matching thread
- 1/4″ or 6mm wide grosgrain ribbon in red or pink for the comb
- scissors (or rotary cutter and a cutting mat)
- ruler or measuring tape
- iron and ironing board
- sewing clips or pins
DOWNLOAD:chicken potholder sewing pattern [Free pdf file]
Follow us for free patterns & tutorials! [easy-profiles]
How to Sew a Chicken Potholder
Watch the diy chicken potholder video first and then follow the written step by step instructions below.
Please enjoy and don’t forget to Like and SUBSCRIBE over on YouTube to be kept up to date with new videos as they come out.
Chicken Potholder VIDEO TUTORIAL
INSTRUCTIONS:
Finished size: 16.5 x 19.5cm or 6.5″ x 7 3/4″ – perfect size for most hands
MATERIALS:
- BODY: cotton fabric 38 x 22 cm (15 x 8.5″)
- WINGS: cotton fabric 18 x 36cm (7 x 14″)
- BEAK: 2cm (3/4”) square of felt
INSTRUCTIONS:
STEP 1:
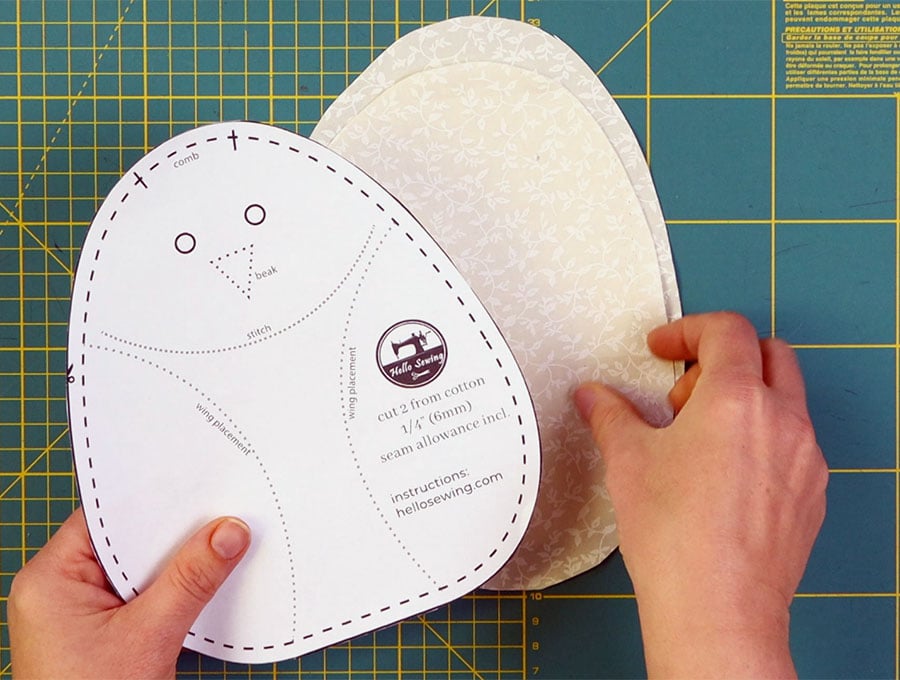
Print the pattern and cut out the excess paper. You will end up with 3 pattern pieces (body, wing and beak)
STEP 2:
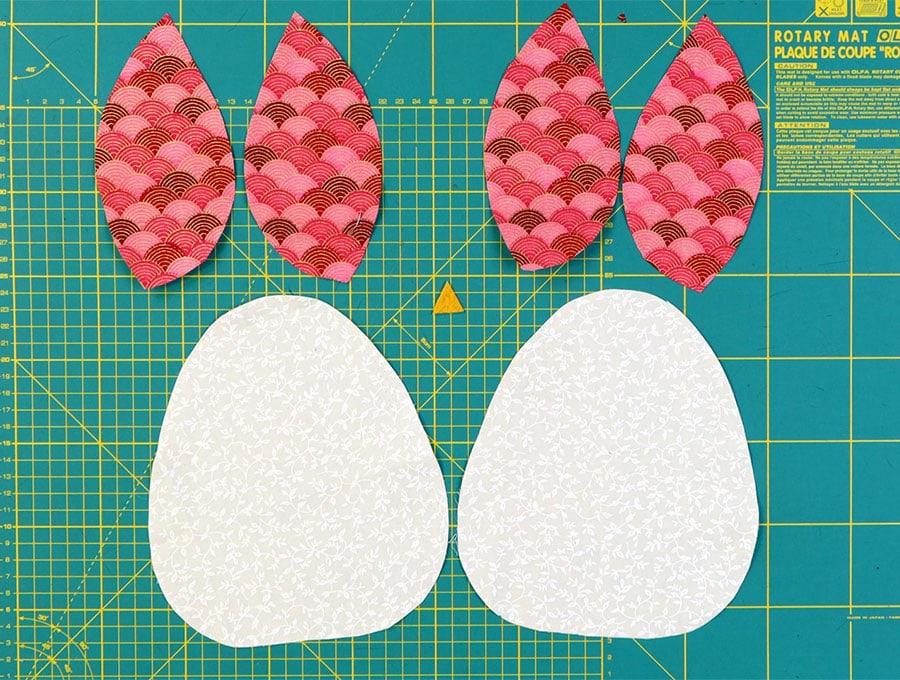
Cut out your fabric according to the pattern. You need to cut 2 pieces from the body pattern out of fabric and one out of batting, 4 mirrored pieces from the wing pattern out of contrasting fabric and one piece out of felt according to the beak pattern

PRO TIP: The fastest way to cut mirror images is to fold the fabric and cut both pieces at one time. Do this twice to cut 4 WINGS
STEP 3:
Take 2 mirrored wings and fuse interfacing to the back side according to manufacturer instructions
STEP 4:
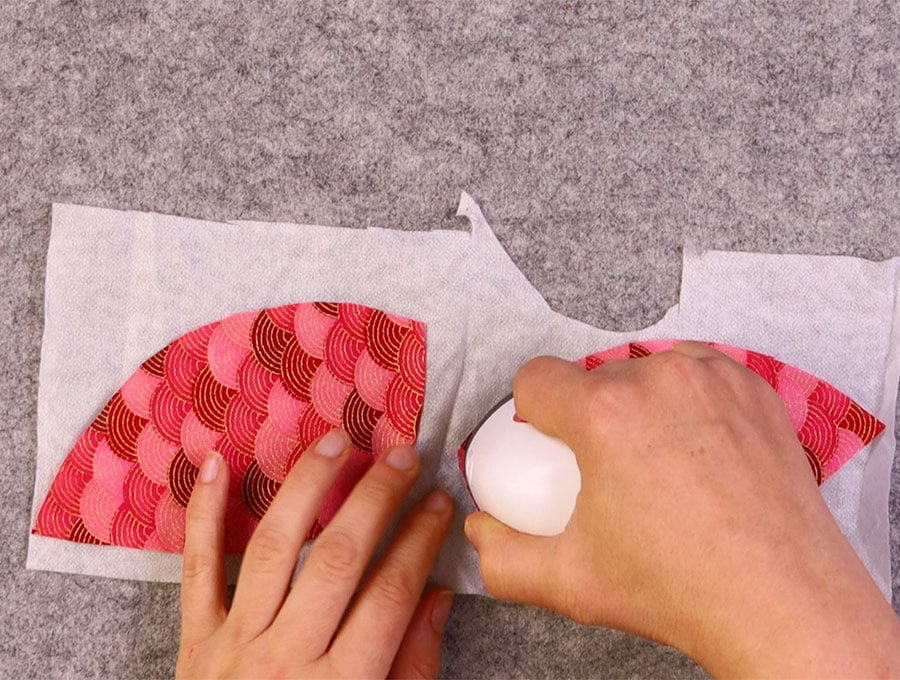
To make a wing, take one wing with interfacing and one without. Place right sides together and pin. Repeat for the other wing
STEP 5:
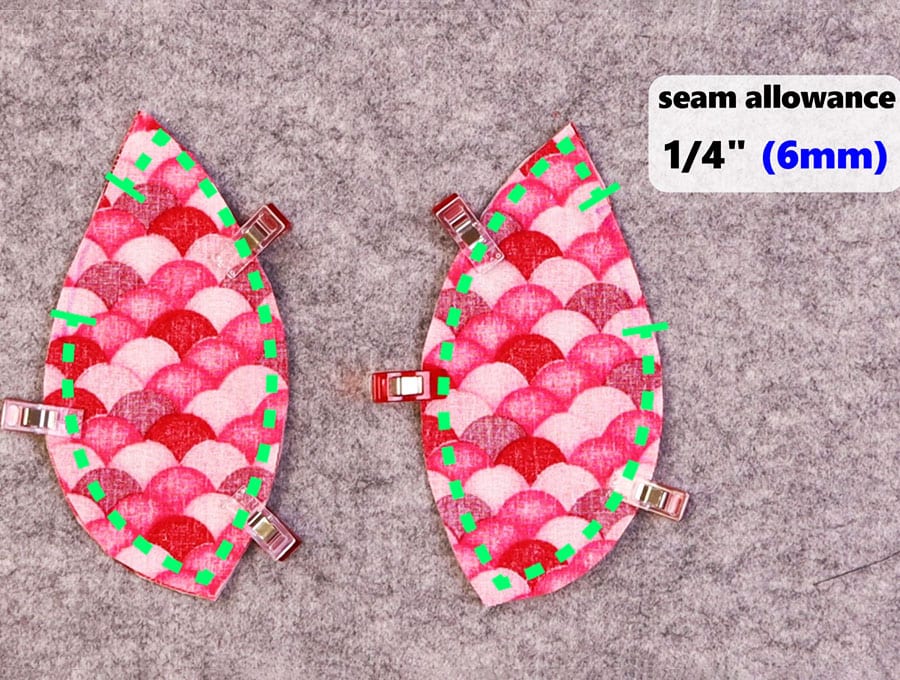
Stitch around the wing using 6mm (1/4”) seam allowance, leaving a 2-3cm (1 inch) gap for turning.
STEP 6:

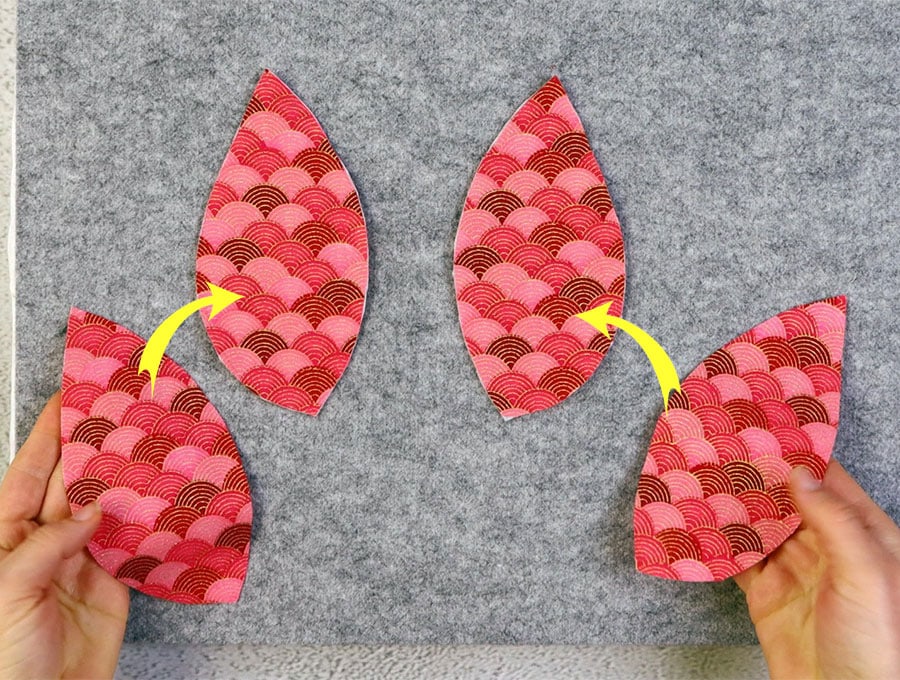
Clip the corners and the curves. Do not clip the gap. Turn right side out and press.
STEP 7:
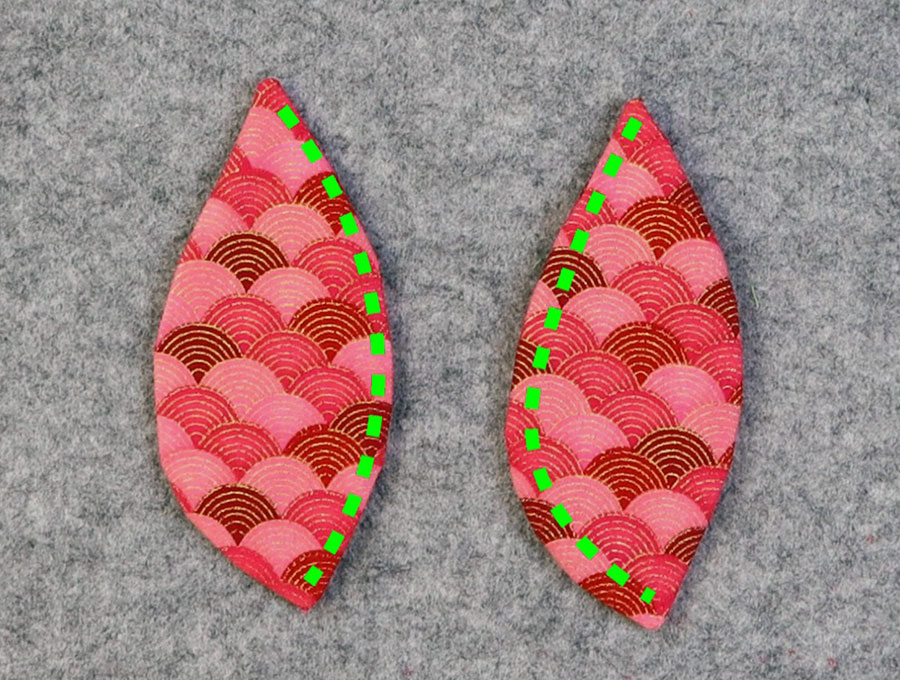
Stitch along the side with the gap using 6mm (1/4”) seam allowance. The wings are ready, put them aside
STEP 8: Assemble the body
To make the body, place the batting on your worktop, then place one of the fabric pieces right side up, and then the other body piece, wrong side up.
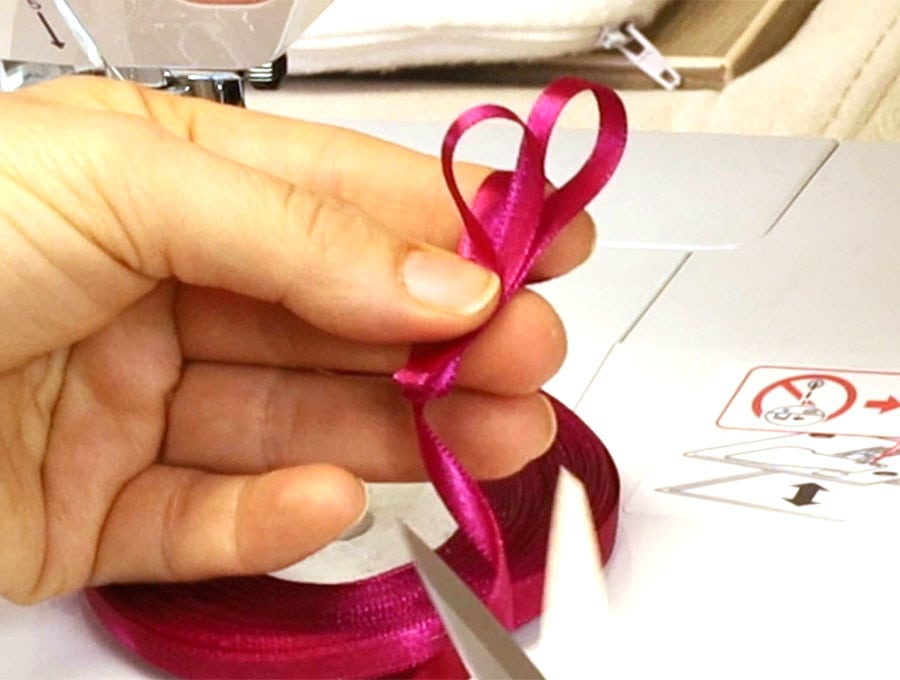
To make the comb make 3 folds from the grosgrain ribbon, making sure the middle fold is slightly longer than the other two.
Insert the comb at the top between the fabric pieces
STEP 9:
Pin or clip all the layers
STEP 10:
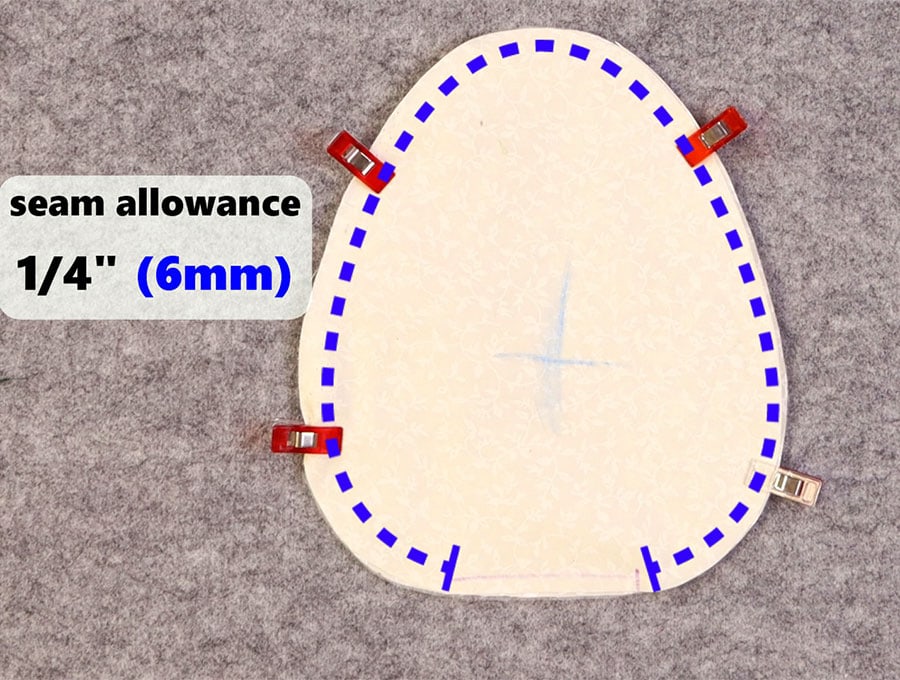
Stitch around the body using 6mm (1/4”) seam allowance, leaving a 4cm (1.5 inch) gap for turning on the bottom.
STEP 11:
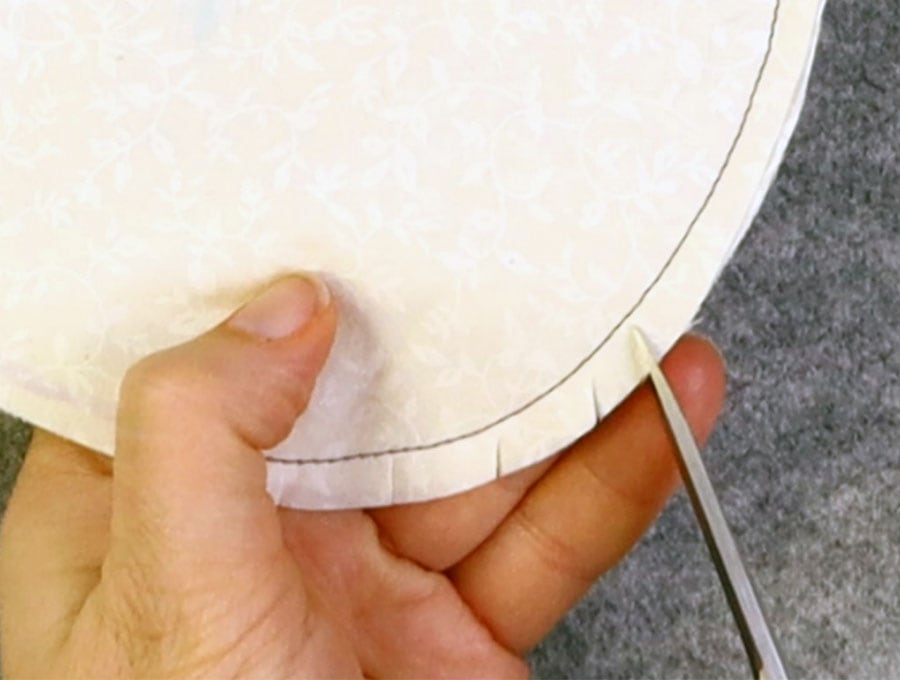
Clip all around the body (do not clip the gap), being careful not to cut through your stitching
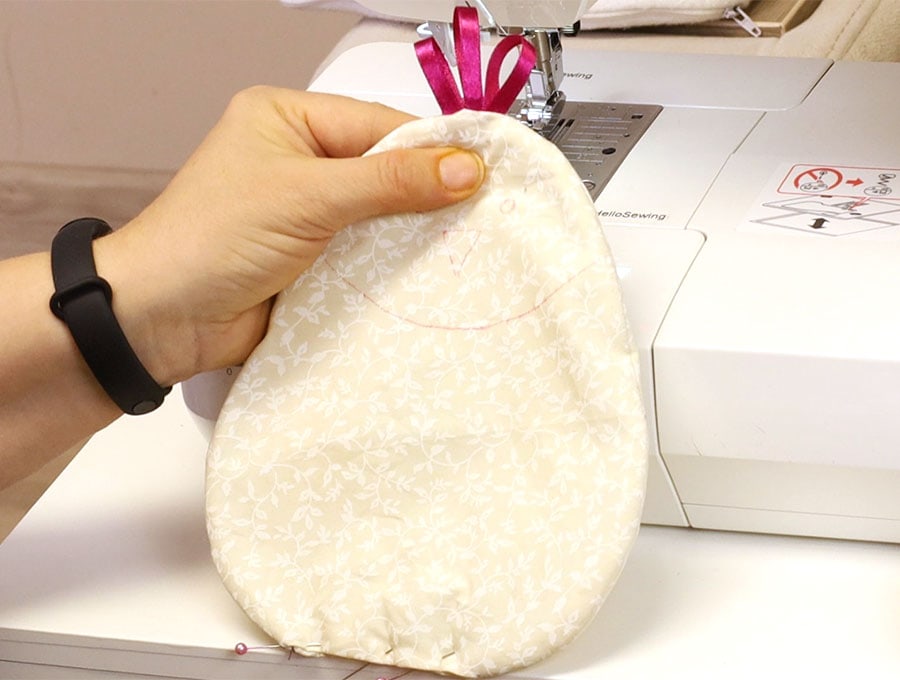
STEP 12:

Turn the chicken body right side out and press. Center the pattern on top of the body and transfer the markings for the eyes, head, beak, comb and wings.
TIP: If you forgot to insert the comb before you stitcked the body, you can do it now. I show how to do it in the video. Simply unpick 1.5cm (1/2”) on the top of the head. Insert the comb through the gap on the head and pin
STEP 13:
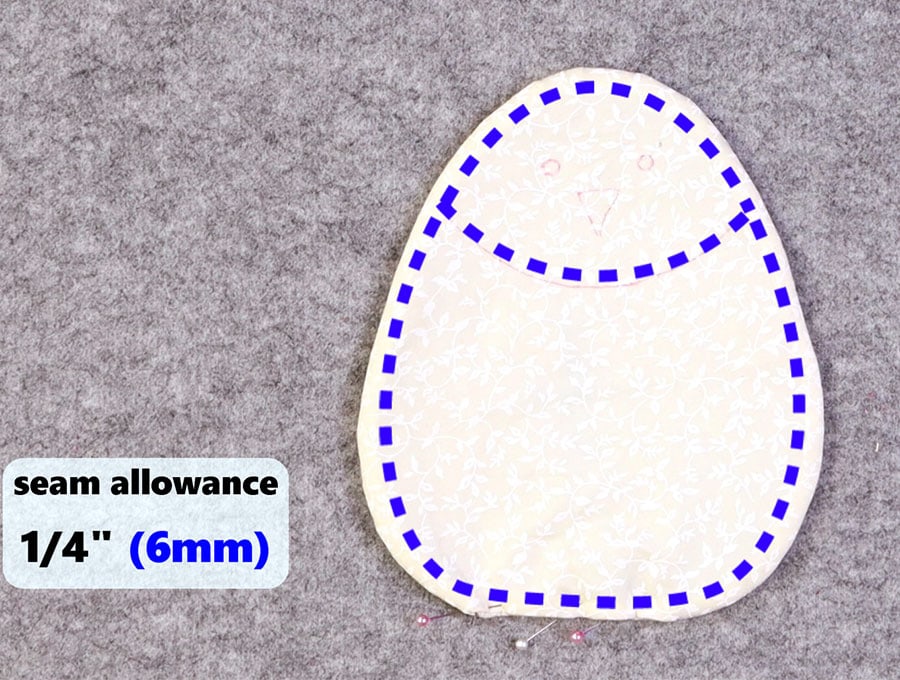
Stitch all around the body using 6mm (1/4”) seam allowance and along the marking for the head.
STEP 16:
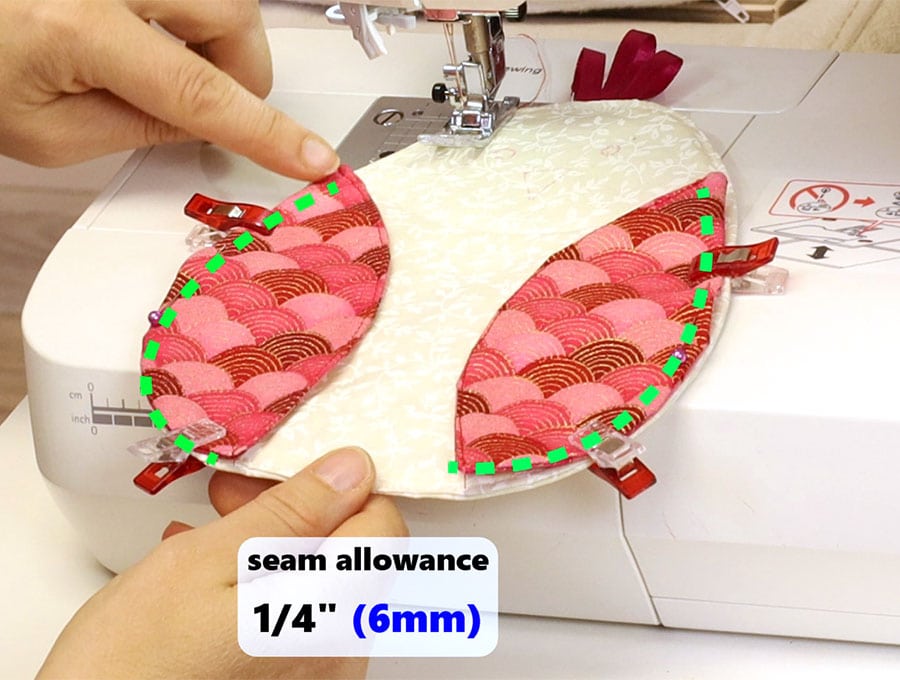
Place the wings on along their marks on the body and pin the outer sides
STEP 17:
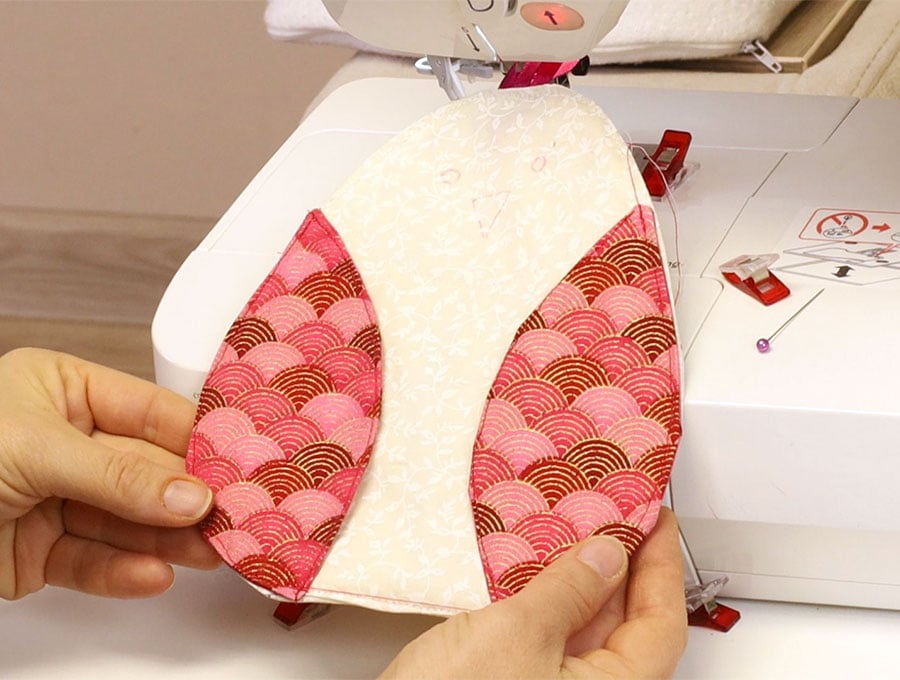
Stitch along the outer sides only! (Do not stitch the inner part of the wings to the body, as they form the pocket for the hand)
STEP 18:
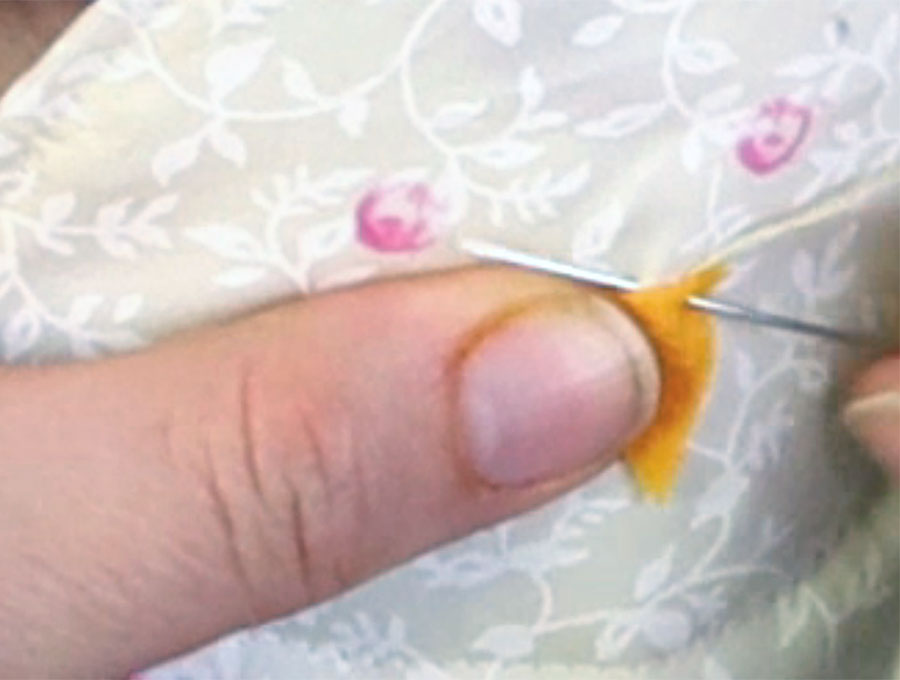
Place the yellow felt on the beak mark and hand stitch it in place.
STEP 19:
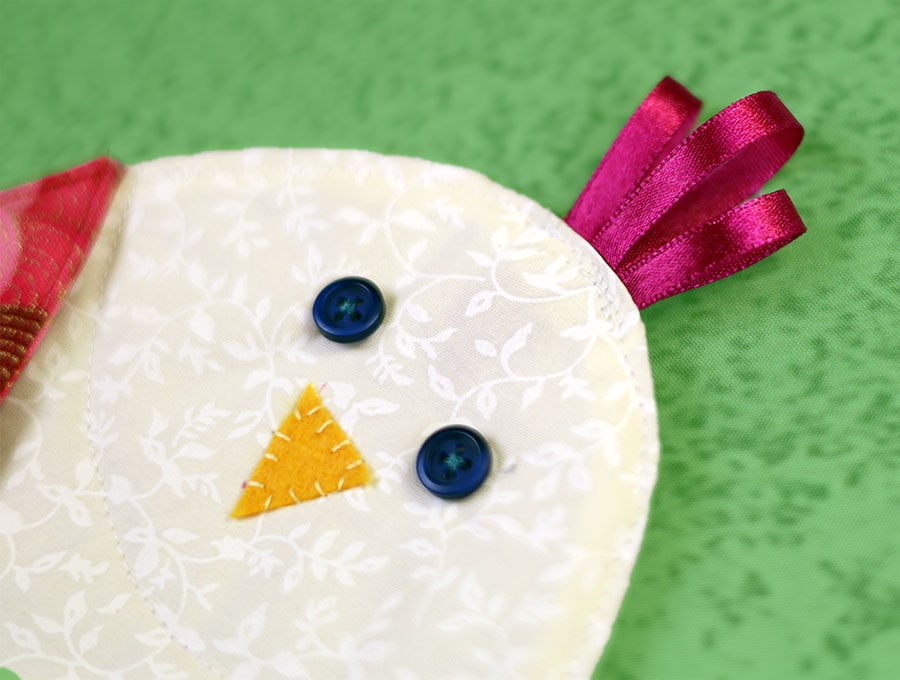
To make the eyes either sew two small buttons or make a few running stiches using embroidery thread to form the shape of an eye.
You DIY Chicken potholder is ready!
Do you like this? Pin for later:
Wanna be friends? Click HERE and follow me on Pinterest
RELATED: