
DIY Collapsible Shoe Bag for Travel // 10-Minute Lay Flat Shoe Storage Bag
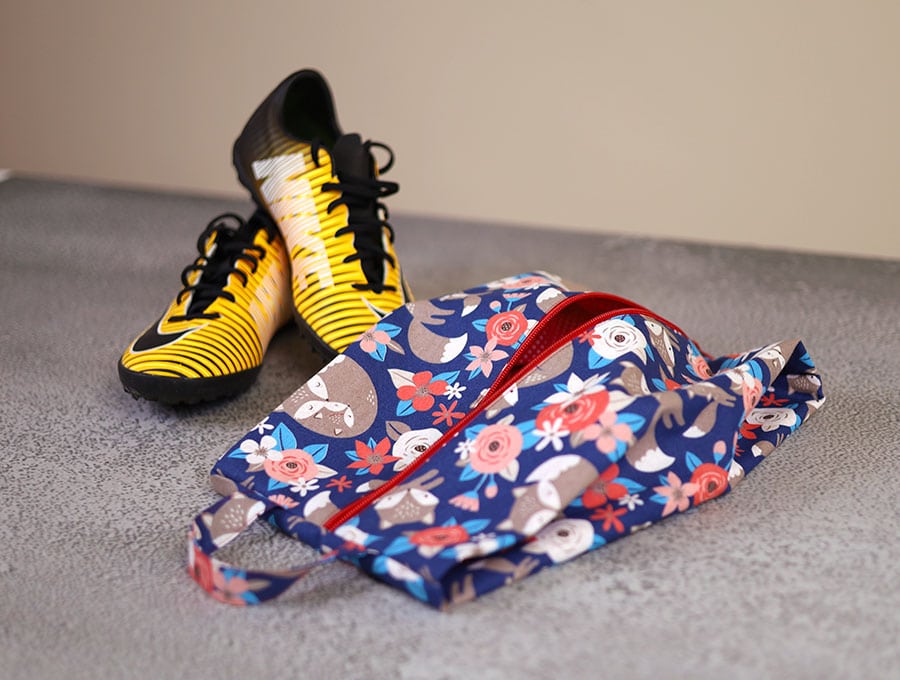
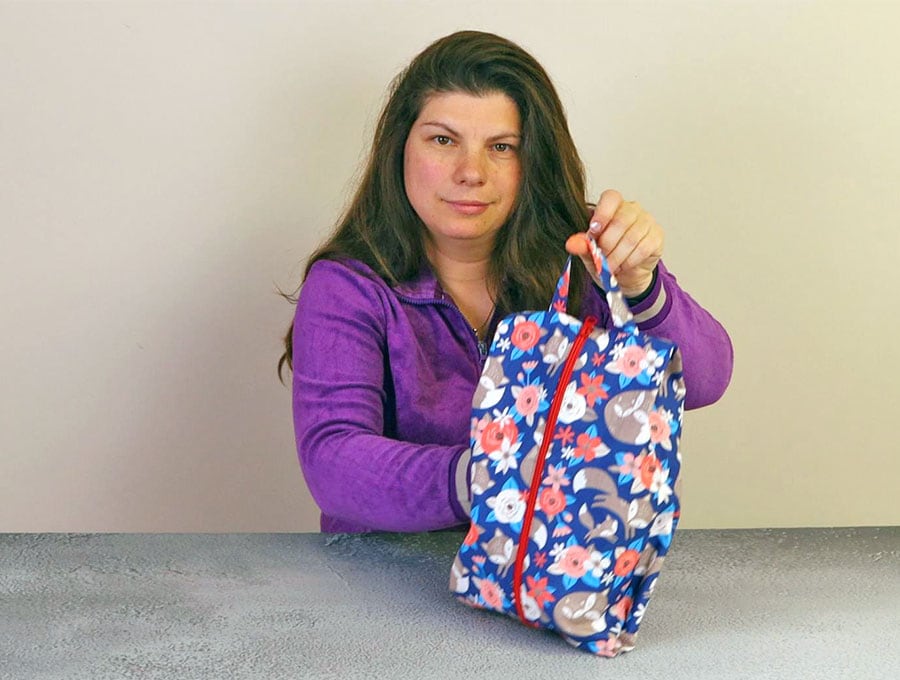
It doesn’t take long to make our DIY shoe bag that will keep your shoes together in your suitcase, and keep them safely away from contact with your clean clothes. With a clever little fold to enable the bag to expand to accommodate your shoes, this one is a winner for travellers. It comes with a handy carry handle so if you backpack is really stuffed full you can always attach it to a loop on the outside with a carabiner.
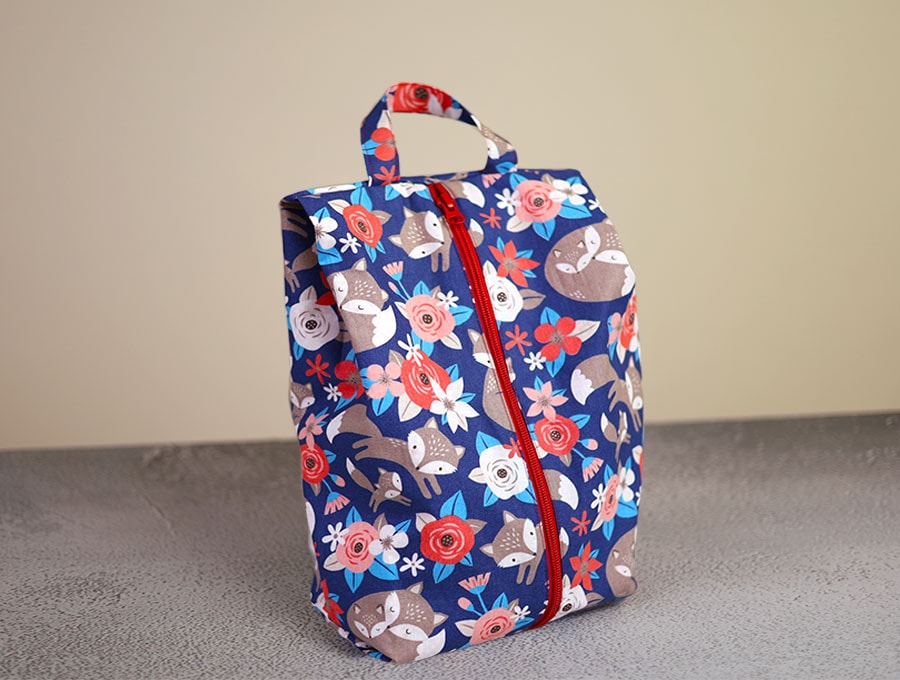
Having a handy collapsible shoe bag is an absolute bonus when travelling, keeping shoes together and separate from clean clothes. It lays flat for easy storage and expands to accomodate your shoes. Make this one using the free shoe bag pattern and our instructions that you can print out and refer to as you sew. The shoe bag comfortably fits most shoes up to EU43 (US 9.5, UK9) and if you need to accommodate a larger size you can just add couple of inches to the fabric to accommodate bigger sizes.
Below you will find my step by step written tutorial with VIDEO instructions for all the visual learners.
We occasionally link to goods offered by vendors to help the reader find relevant products. Some of the links may be affiliate meaning we earn a small commission if an item is purchased.
Table of Contents
- 1 How to make a Shoe Bag
- 2 Supplies and tools
- 3 How to Sew a Shoe Bag
- 3.1 Shoe Bag VIDEO TUTORIAL
- 3.2 INSTRUCTIONS:
- 3.3 STEP 1:
- 3.4 STEP 2:
- 3.5 STEP 3:
- 3.6 STEP 4:
- 3.7 STEP 5:
- 3.8 STEP 6:
- 3.9 STEP 7:
- 3.10 STEP 8:
- 3.11 STEP 9:
- 3.12 STEP 10:
- 3.13 STEP 11:
- 3.14 STEP 12:
- 3.15 STEP 13:
- 3.16 STEP 14:
- 3.17 STEP 15:
- 3.18 STEP 16:
- 3.19 STEP 17:
- 3.20 STEP 18:
- 3.21 STEP 19:
- 3.22 STEP 20:
- 3.23 STEP 21:
How to make a Shoe Bag
Supplies and tools
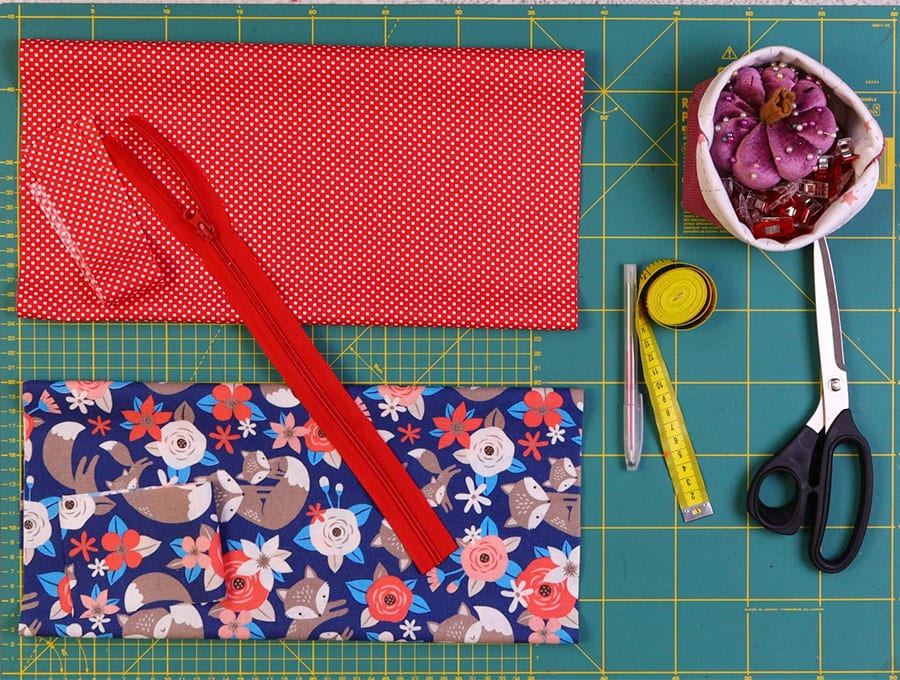
- fabric – 2 pieces of woven cotton (one main, one lining)
- matching thread
- Plastic zipper 15 inches (37 cm) or standard metric size of 40 cm which you can shorten
- scissors (or rotary cutter and a cutting mat)
- ruler or measuring tape
- iron and ironing board
- sewing clips or pins
- fabric marking pen
Follow us for free patterns & tutorials! [easy-profiles]
How to Sew a Shoe Bag
Watch the diy shoe bag video first and then follow the written step by step instructions below.
Please enjoy and don’t forget to Like and SUBSCRIBE over on YouTube to be kept up to date with new videos as they come out.
Shoe Bag VIDEO TUTORIAL
INSTRUCTIONS:
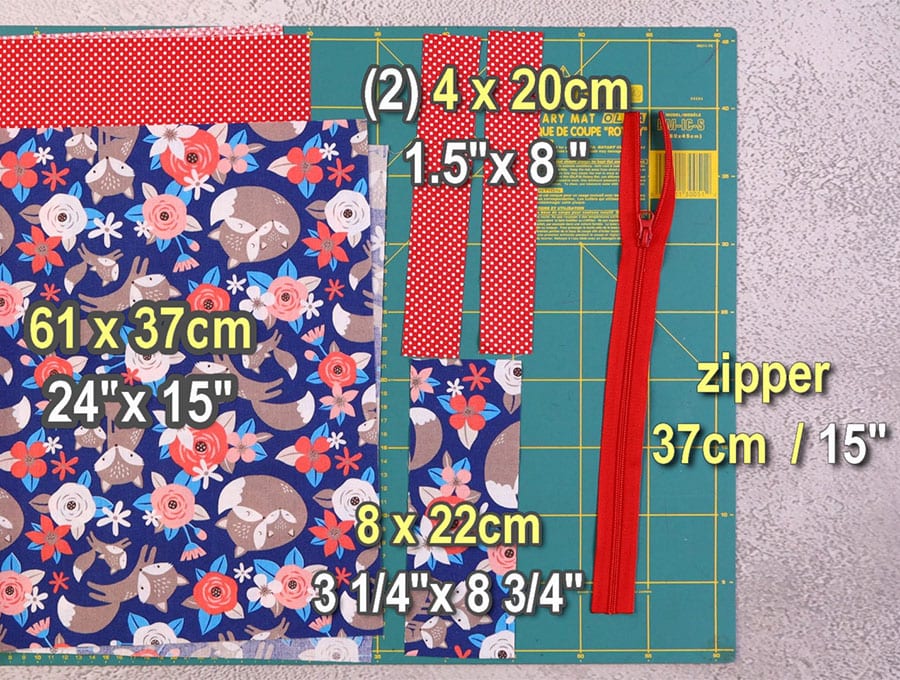
Fabrics:
- 1 x Outer fabric 24 x 15 inches (61 x 37 cm)
- 1 x lining fabric 24 x 15 inches (61 x 37 cm)
- 1 x handle cut from outer fabric 3 ¼ x 8 ¾ inches (8 x 22 cm)
- 2 pieces of lining fabric to bind ends of shoe bag 1 ½ x 8 inches (4 x 20 cm)
- Plastic zipper 15 inches (37 cm) or standard metric size of 40 cm which you can shorten
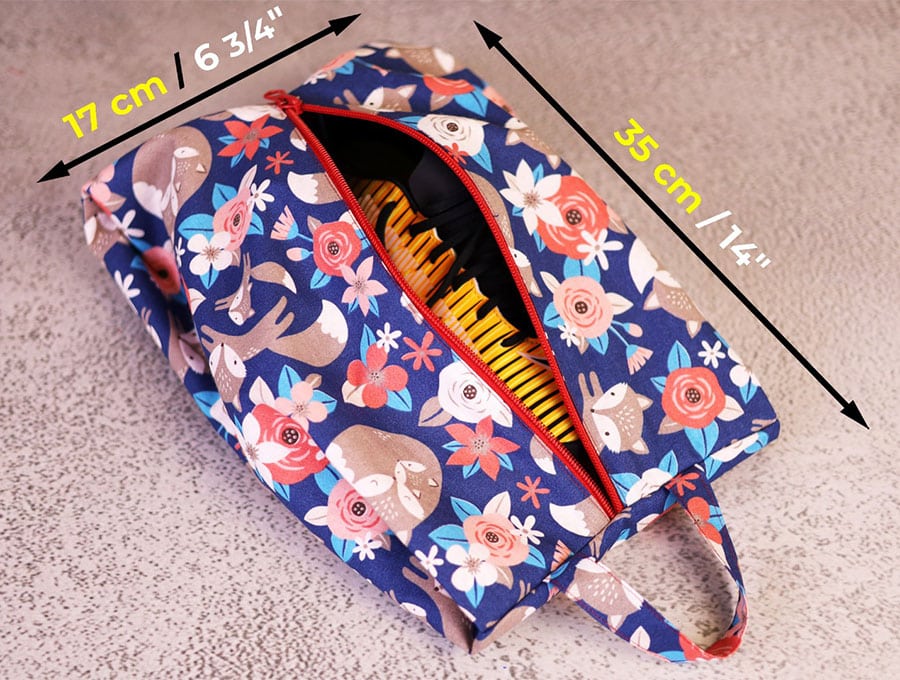
The finished shoe bag size is 17 x 35cm (6 ¾ inches by 14 inches)
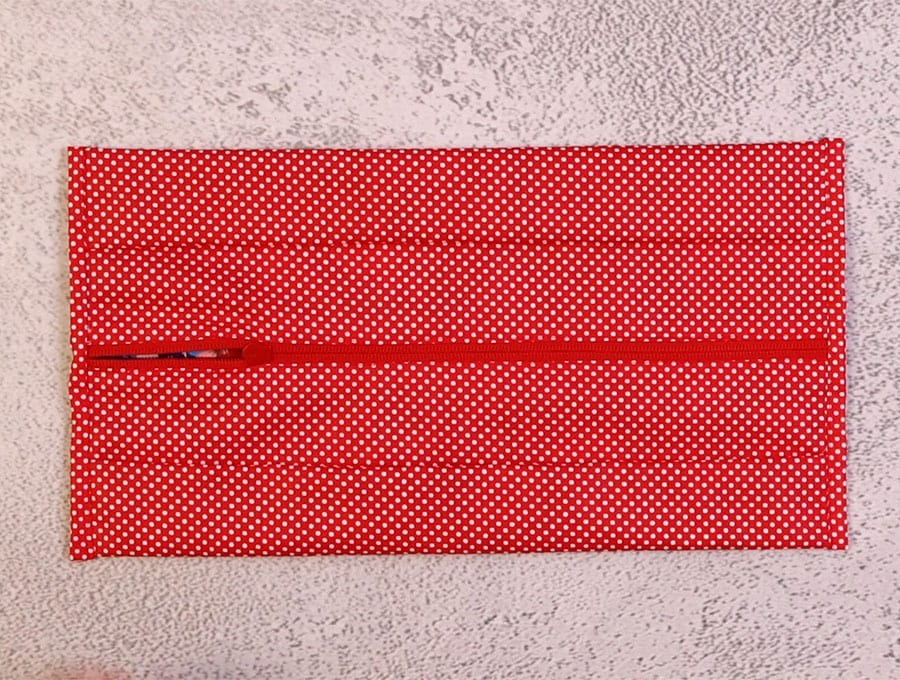
STEP 1:
Cut the fabric to size.

Take the zipper apart by removing the stopper at the end – if there is enough length cut if off, if insufficient, remove the stopper pieces with pliers, remove the zipper pull and set aside somewhere safe. You now have two separate halves of the zipper
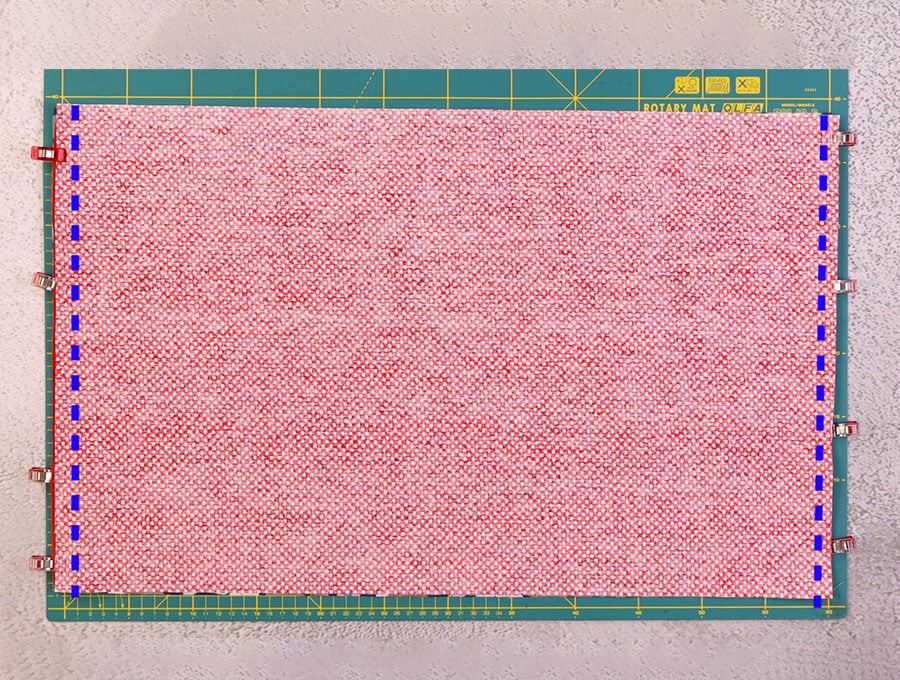
STEP 2:
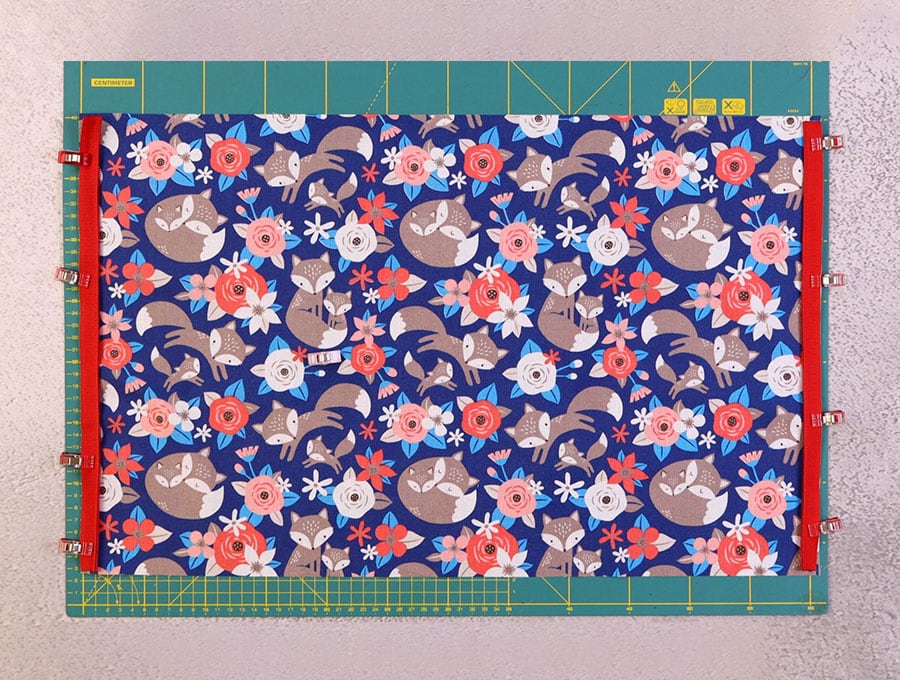
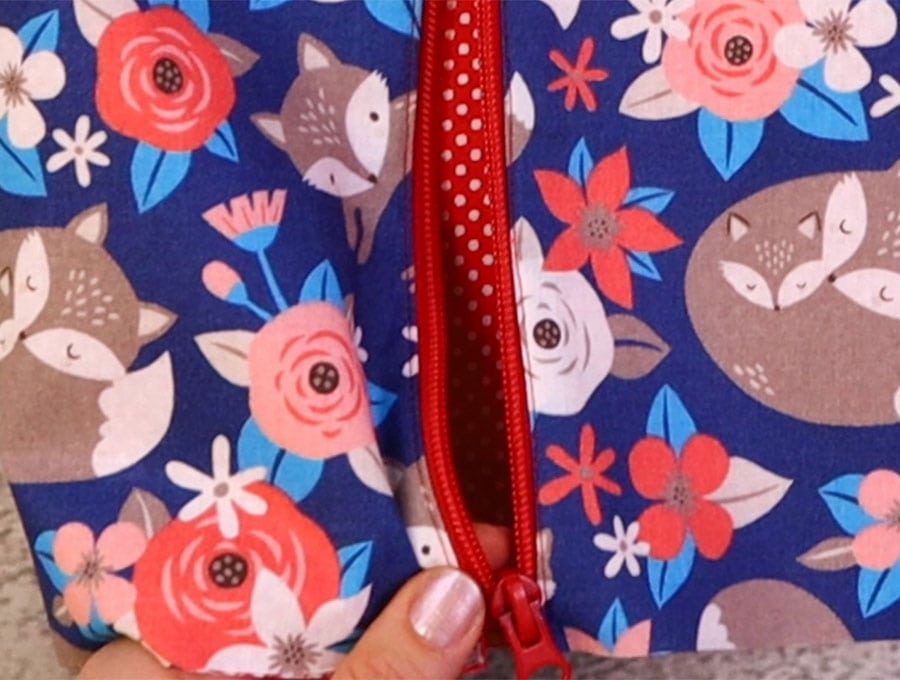
Take the outer fabric and along the short edges clip or pin the zipper pieces, right side of zipper sides to right side of fabric, with the zipper teeth facing the body of the fabric.
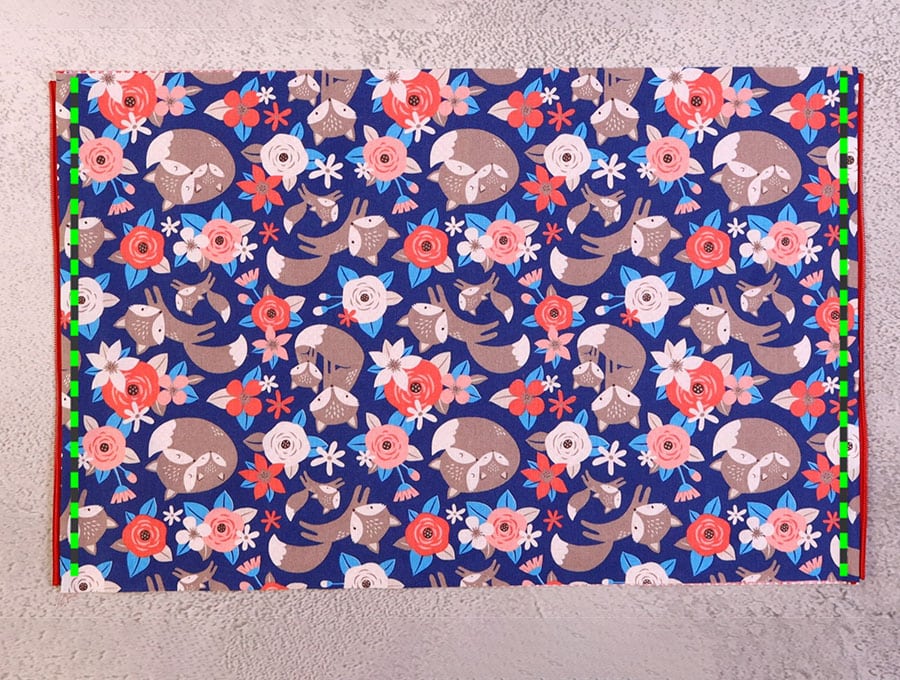
STEP 3:
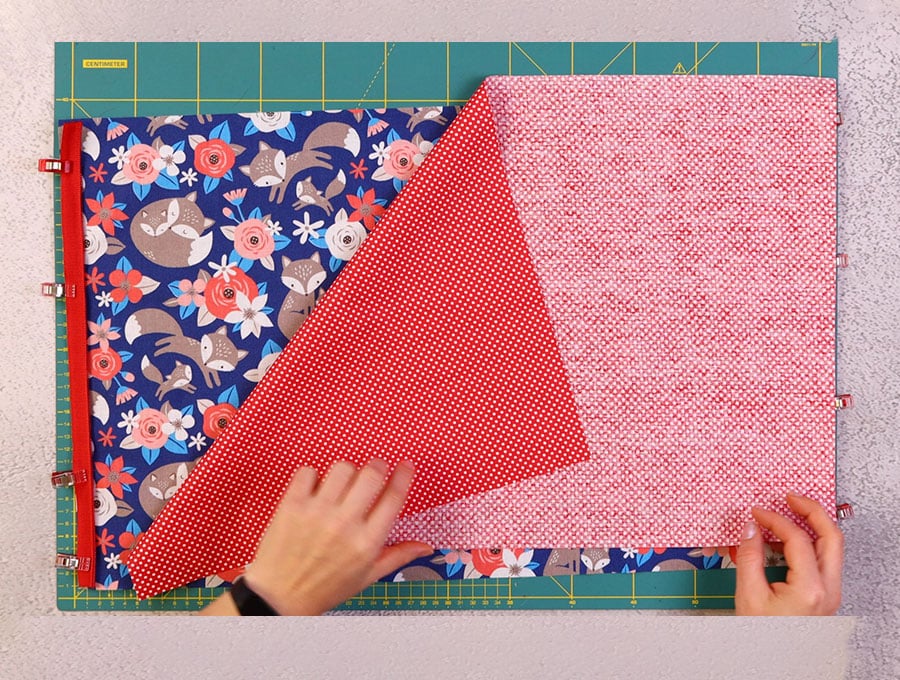
Place the lining fabric, wrong side up over the outer fabric and line it up, then carefully remove each clip and replace them so the two fabrics are sandwiched with the zipper between them.
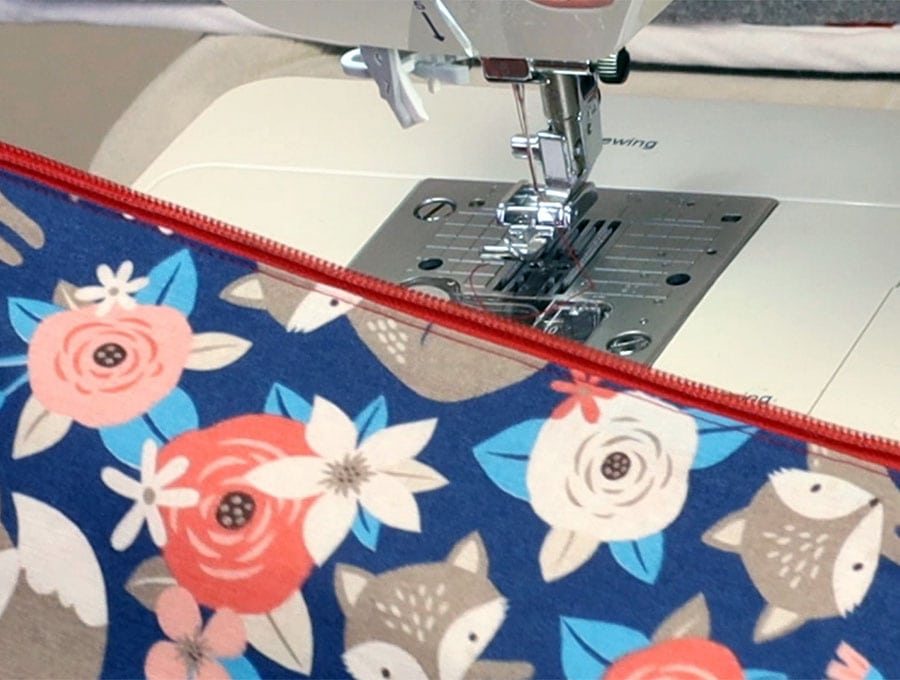
STEP 4:
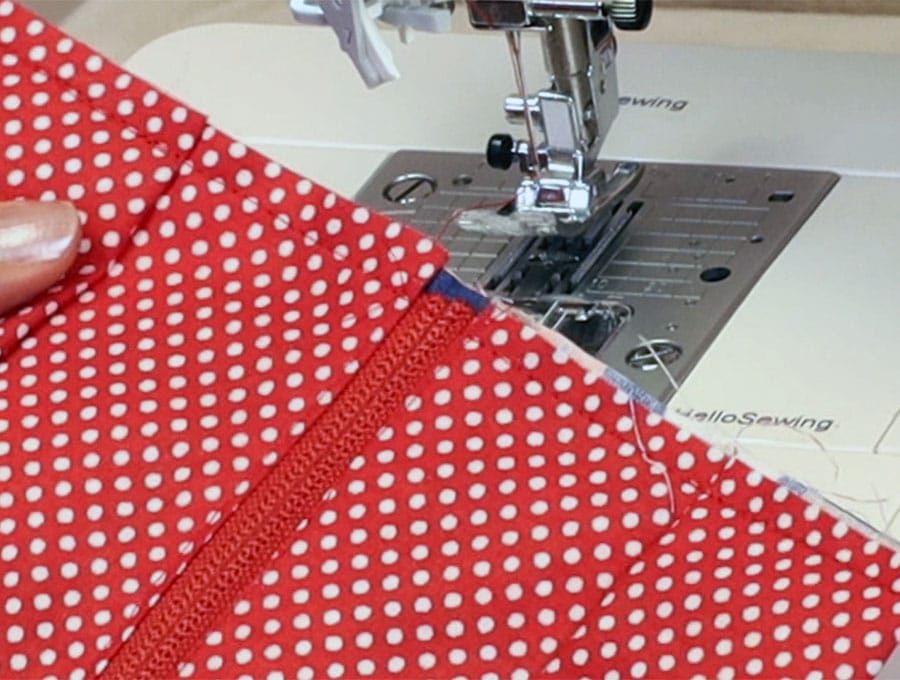
Swap to a zipper foot on your machine and stitch as close to the zipper teeth as possible down each of the two sides.
STEP 5:
Turn the fabric the right way out and press on either side of the zipper teeth so the fabric lies flat.
STEP 6:
Top stitch as close to the edge as possible on the sides of the zipper teeth.
STEP 7:
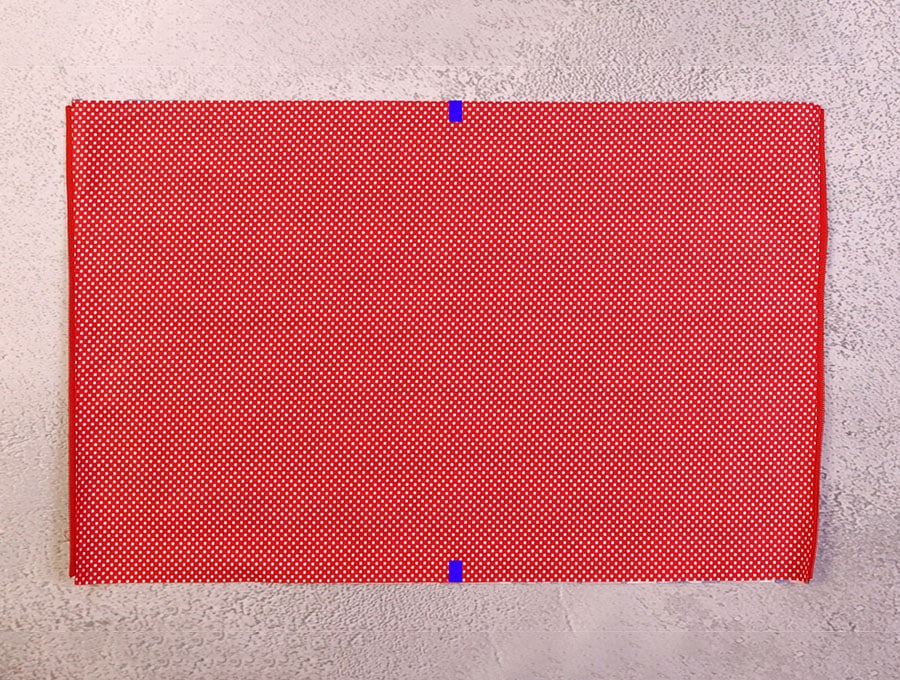
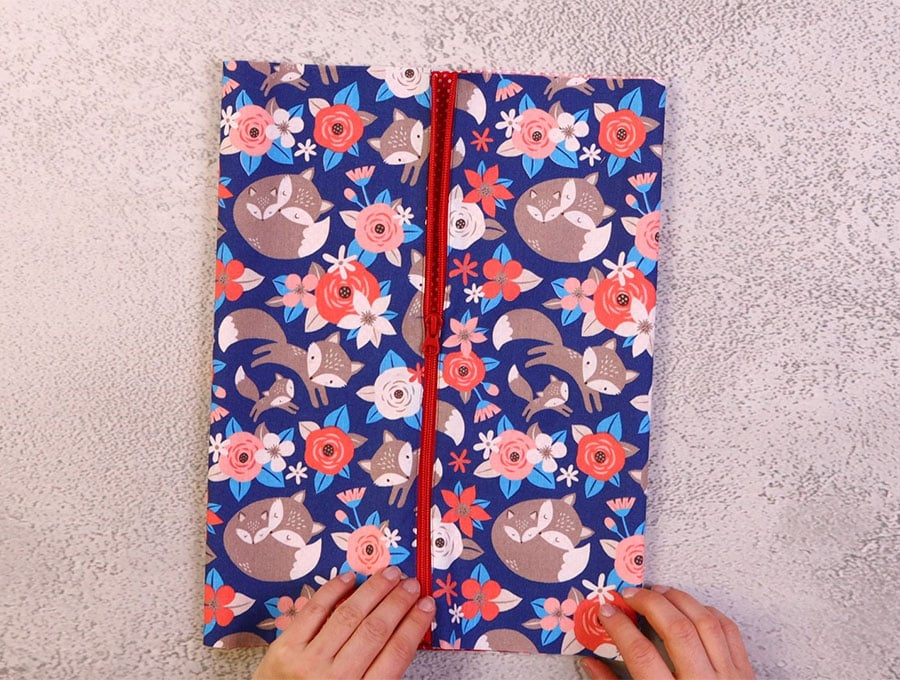
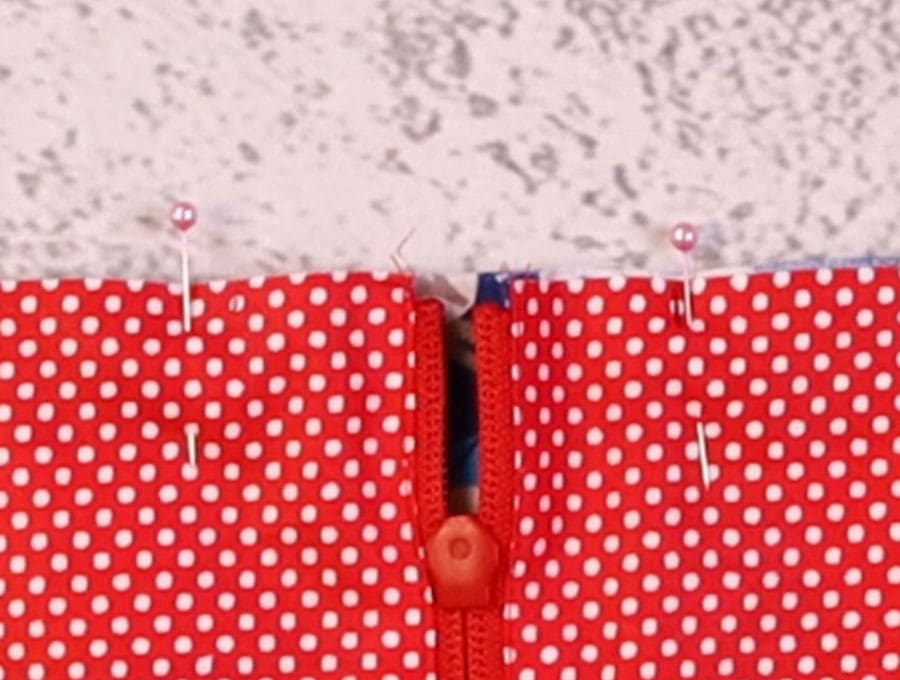
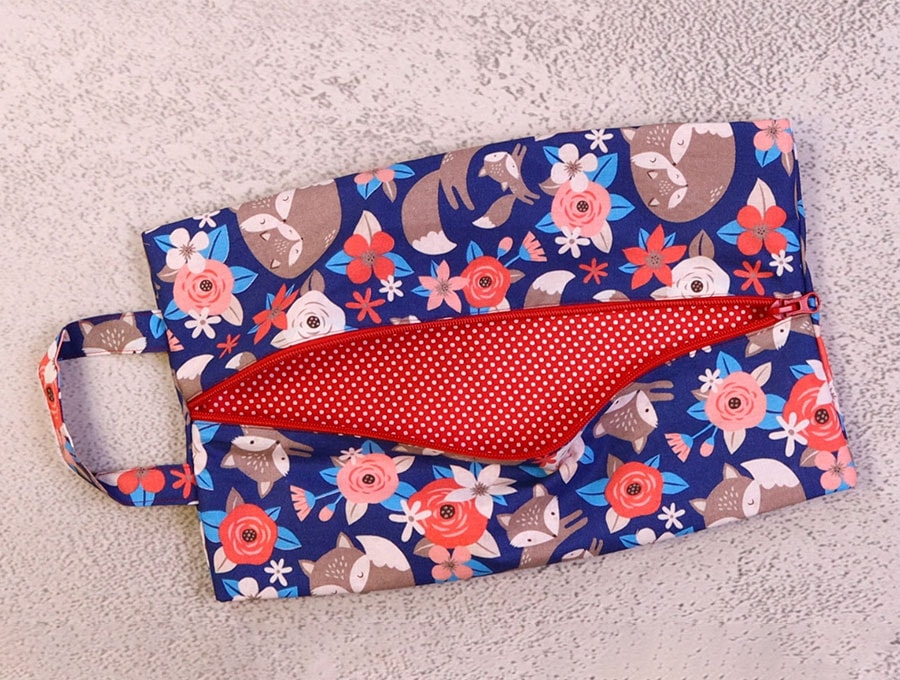
Fold the fabric in half so the zipper sides meet, then mark the center of the fabric at the top and bottom on the right side of the fabric.
STEP 8:
Attach the zipper pull to the zipper, then turn the fabric so the lining is outside, then line up the zipper ends with the marks you made at the top and bottom of the fabric.
STEP 9:
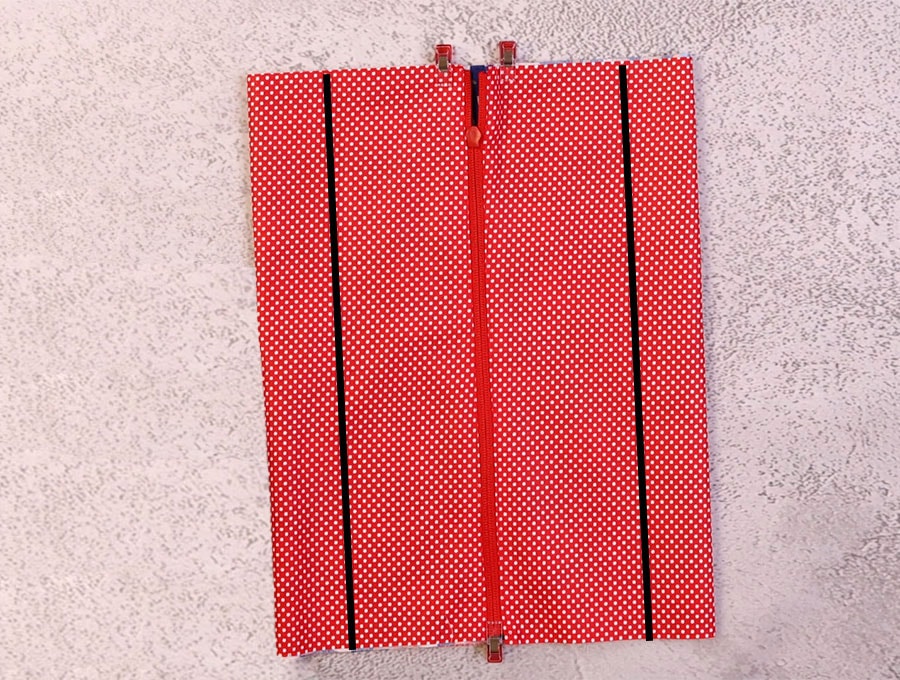
Make a mark 2 inches (5 cm) in from the folded sides on the lining side, at top and bottom of the shoe bag, then join the marks with a ruled line.
STEP 10:
To make the handle for the shoe bag take the piece measuring 3 ¼ x 8 ¾ inches (8 x 22 cm), fold in half along the length wrong sides facing each other and press to create a fold line.
STEP 11:
Open the fabric and fold each edge in to the center fold and press, before folding folded edge to folded edge and pressing once more.
STEP 12:
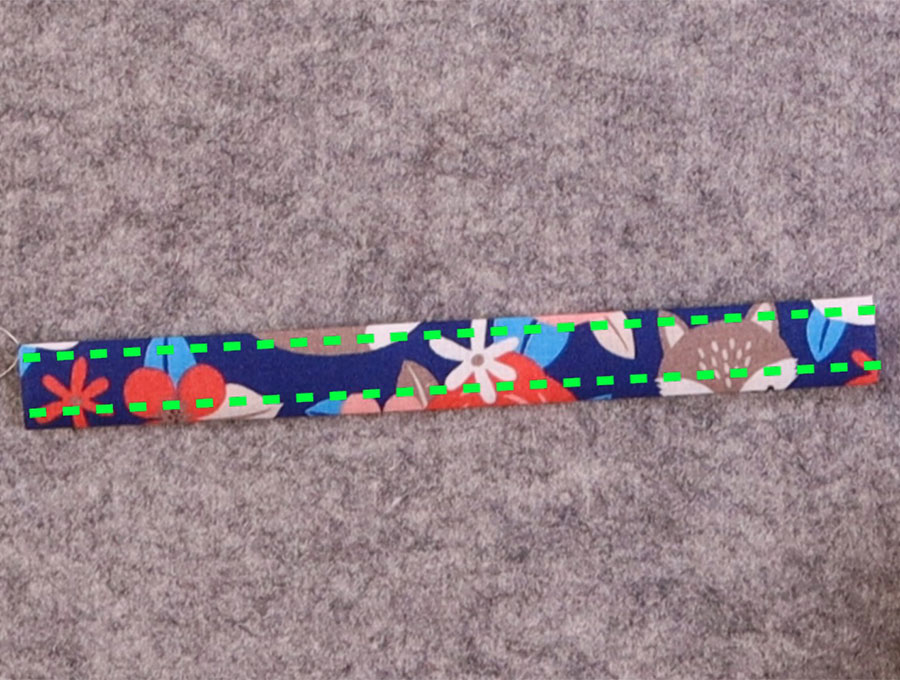
Stitch along each long side 1/8 of an inch (3 mm) from the edge.
STEP 13:
Pull the zipper down about half way to work comfortably on getting the handle in place. Measure 1 inch (2.5 cm) on either side of the central mark you made in Step 9 at the top of the shoe bag and make a mark, then line up the end of the handle with the raw edge and the inner side of the handle with the mark on the right side of the fabric’s center mark. The handle will face the main body of the fabric. Take care the handle is not twisted and line up the other end with the raw edge, and the inner side of the handle with the mark to the left of the center mark.
Pin each end in place, then pull up the zipper and pin the top layer in place over the handle.
STEP 14:
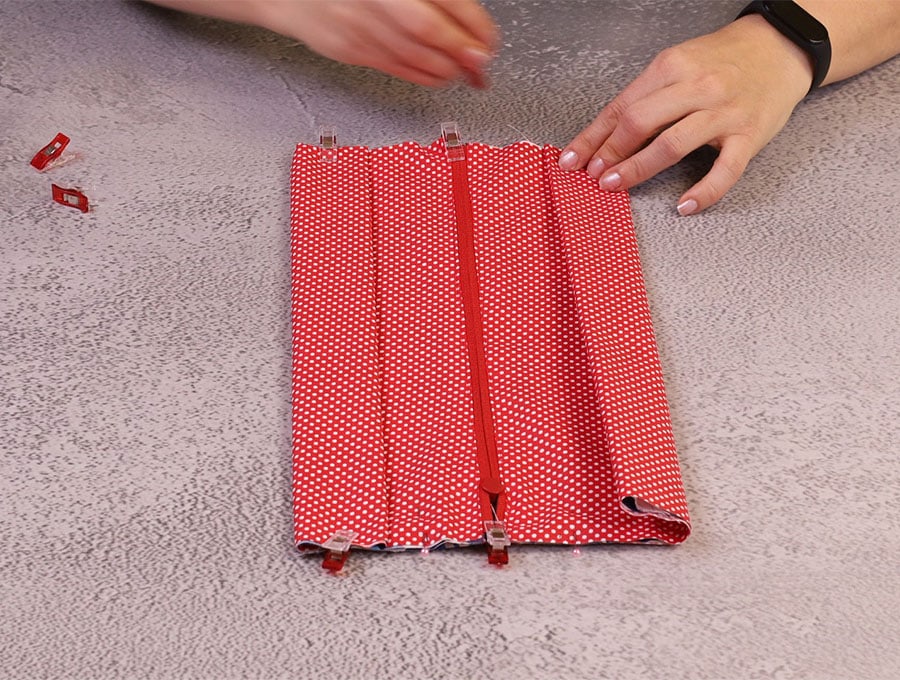
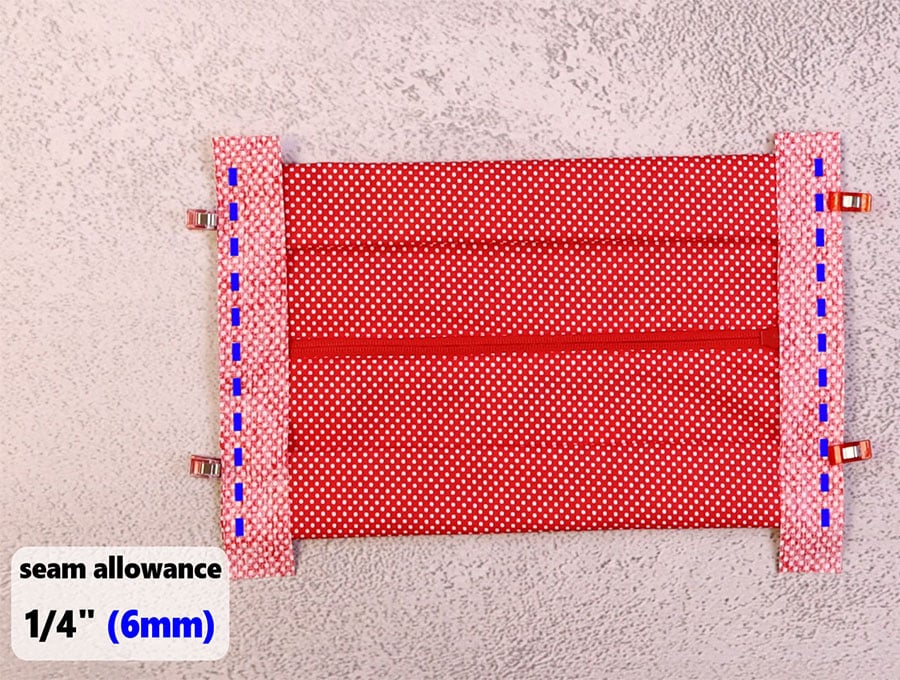
Take the folded side where you drew the line with the ruler and fold on that mark in to the main fabric along the length of the bag. Pin or clip in place at the top and bottom of the bag. Repeat with the other side.
STEP 15:
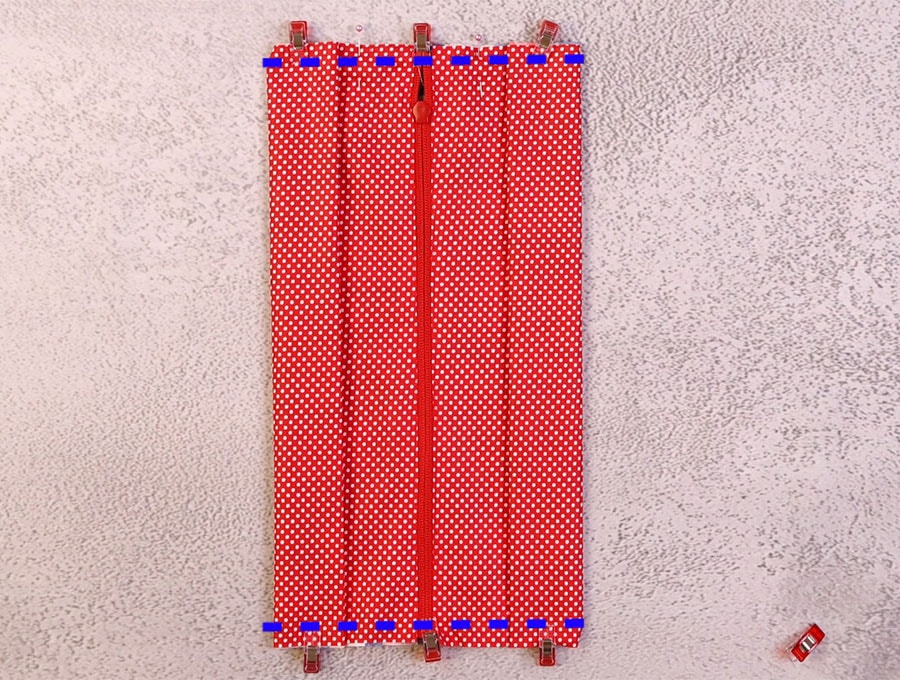
Stitch along the top and bottom 1/4 of an inch (6 mm) from the edge backtacking over the folds and over the area of the handle ends to ensure they are firmly attached.
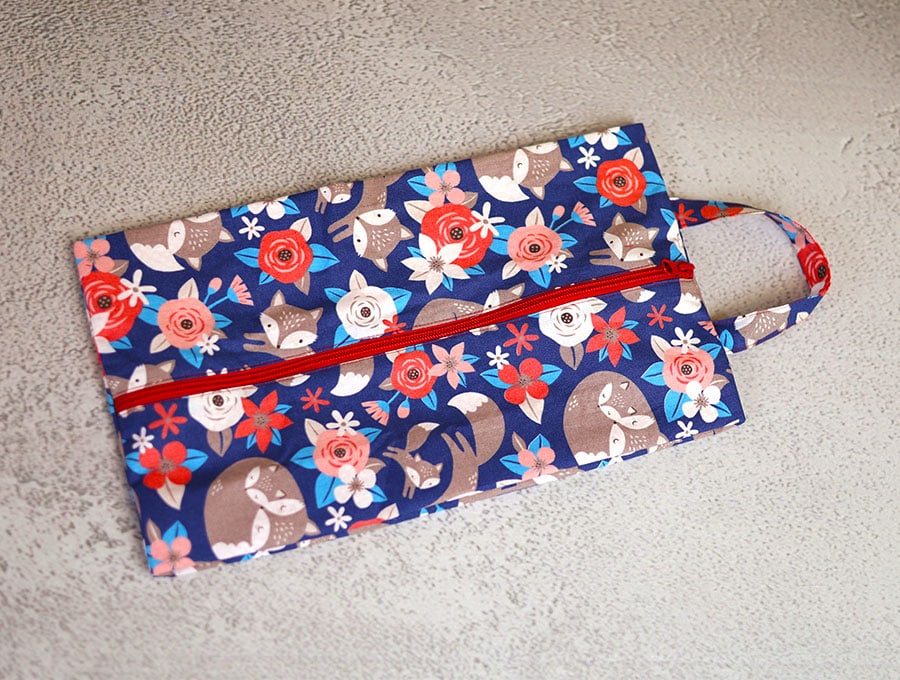
STEP 16:
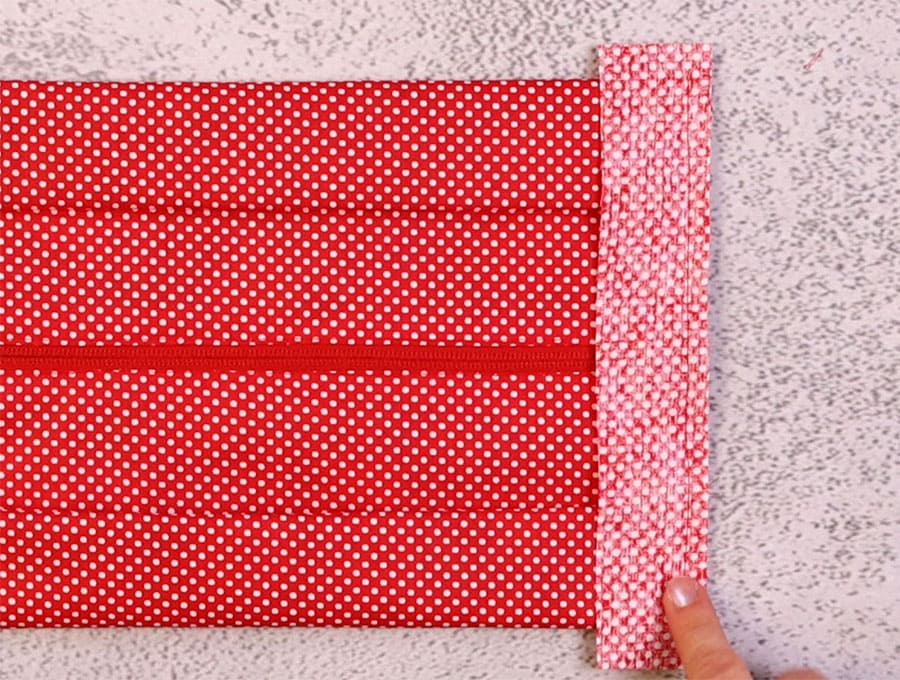
Trim any uneven fabric, so the ends are even, as the next step will be attaching the fabric to bind the raw edges.
STEP 17:
Take the two small pieces of lining fabric and lay them over each end, with a little overlap on each side, right side to right side of lining, and clip in place.
STEP 18:
Stitch the top and bottom of the shoe bag 1/4 of an inch (6mm) from the edge.
STEP 19:
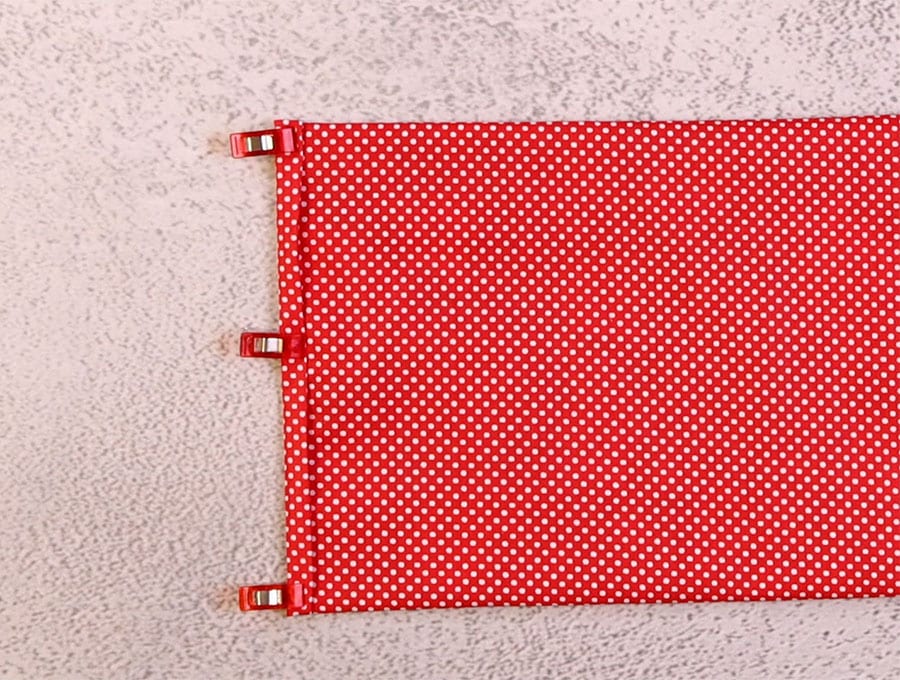
Fold the extra fabric down to the stitched edge and finger press, then turn in the extra fabric at the ends neatly, before folding again to cover the stitching neatly and clip in place. Repeat with the other end of the shoe bag. Leave the zip halfway open to turn the shoe bag later.
STEP 20:
Stitch as close to the folded edge as possible, where it meets the main fabric, at the top and bottom of the shoe bag.
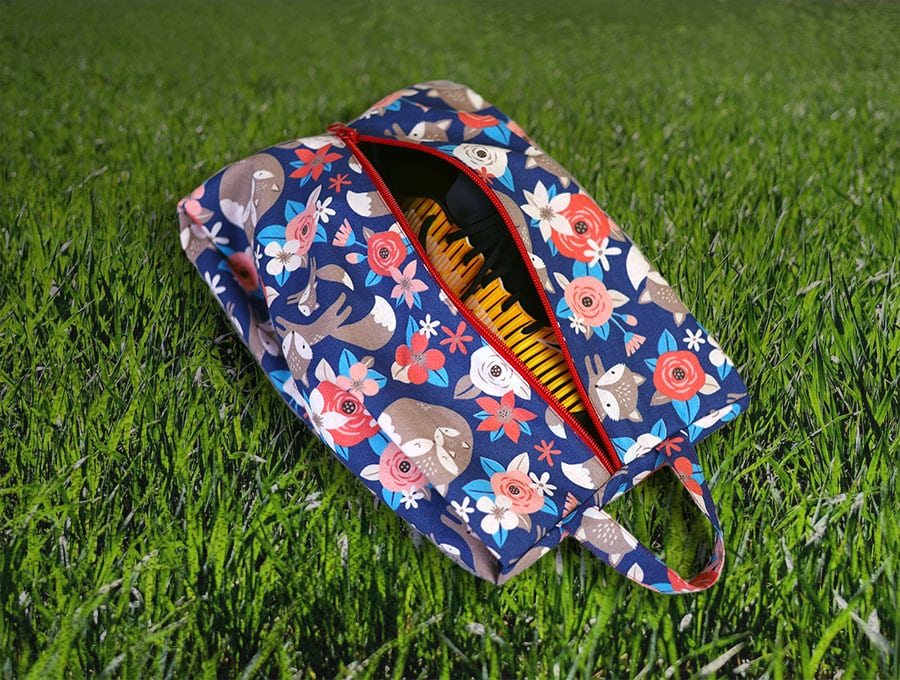
STEP 21:
The final step is to turn the bag the right way out and insert the shoes.
This shoe bag is just what you need – lined to prevent shoes coming in contact with your clothes in your suitcase. As a travel tip, put socks inside shoes to save space. The shoe bag means you are able to pack and go on a holiday with multiple stops without having to worry about shoes spoiling clean clothes; and to have shoes together so you are not digging through a suitcase to find the ‘other’ shoe.
If you loved this tutorial then like and subscribe for more like this. If you made a shoe bag from this tutorial then post a picture in the comments section. We’d specially love to see your shoe bag with a holiday location in the background.
Do you like this? Pin for later:
Wanna be friends? Click HERE and follow me on Pinterest
RELATED: