
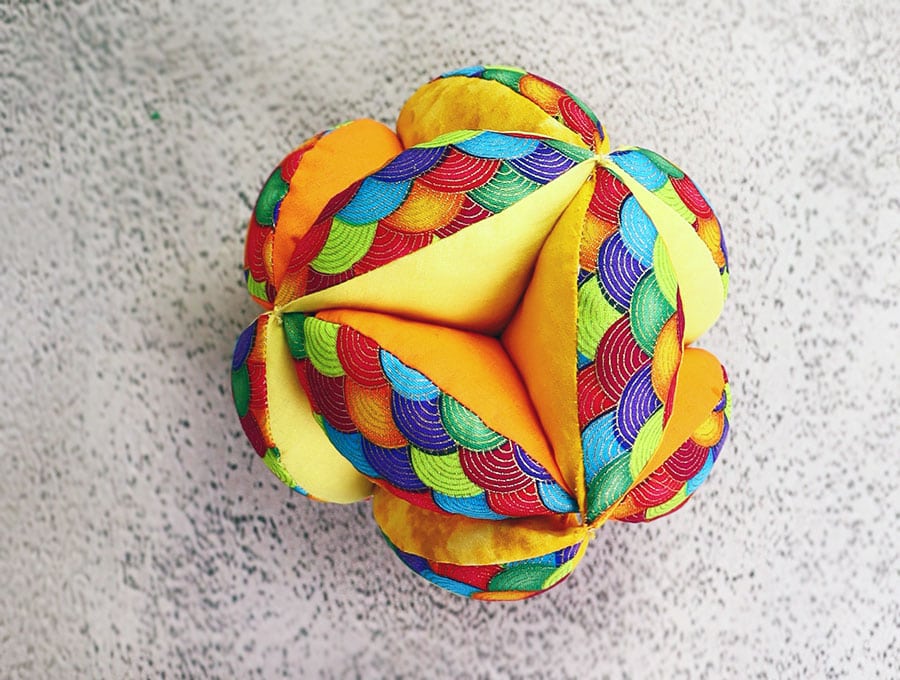
DIY Montessori Puzzle Ball [Pattern + Video]
Make the Montessori puzzle ball for the little ones in your life. It uses small pieces of fabric, and although there are quite a few pieces it comes together without too much fuss and has major benefits as a developmental play activity.
This ball can be used by babies from 3 months on to toddlers. Encourage babies to indulge in independent play as they explore and experiment with the ball at their own pace. The benefits are quite extensive and include:
- muscle strengthening
- coordination
- the pincer grip movement, essential later on for writing
Then there is the enhanced cognitive development that the ball encourages as babies explore the result of their actions in pulling the ball apart – the cause and effect. They see their mother put it back together and watch and learn.
By focusing on a specific activity it develops toddlers attention span. The colors and shapes stimulate visual and tactile senses. Lastly by being able to manipulate the ball toddlers develop their self-esteem.
For younger babies I recommend sewing the pieces at the center as well and making the ball smaller – using a 5-6″ or 13-15cm circle to start with.
Below you will find my step by step written tutorial how to make a colorful puzzle ball – the montessori gripping ball with VIDEO instructions for all the visual learners.
We occasionally link to goods offered by vendors to help the reader find relevant products. Some of the links may be affiliate meaning we earn a small commission if an item is purchased.
Table of Contents
How to make a Montessori Puzzle Ball
Supplies and tools
- main fabric – 3 pieces of plain or muted color fabric for the inside of the ball
- accent fabric – for the outside of the ball
- polyester stuffing
- matching thread
- scissors (or rotary cutter and a cutting mat)
- ruler or measuring tape
- iron and ironing board
- sewing clips or pins
DOWNLOAD: get the montessori puzzle ball pattern from Etsy
Follow us for free patterns & tutorials! [easy-profiles]
How to Sew a Montessori Puzzle Ball
Watch the diy montessori ball video first and then follow the written step by step instructions below.
Please enjoy and don’t forget to Like and SUBSCRIBE over on YouTube to be kept up to date with new videos as they come out.
Montessori Puzzle Ball VIDEO TUTORIAL
Materials:
main fabric – 3 different pieces of matching plain fabrics 20 x 40 cm (8 x 16″) each
accent fabric – 40 x 30cm (16″ x 12″)
Finished size:
- standard size ~ 18 cm (7″) diameter
- mini ~ 14 cm (5.5″) diameter
INSTRUCTIONS:
STEP 1:
Download, print and trim the pattern pieces or make your own pattern. I explain how to do it in the video and at the bottom of this post.
You will have two pattern pieces – a circle divided in quarters and an oval which fits perfectly in the quarter segment.
STEP 2:
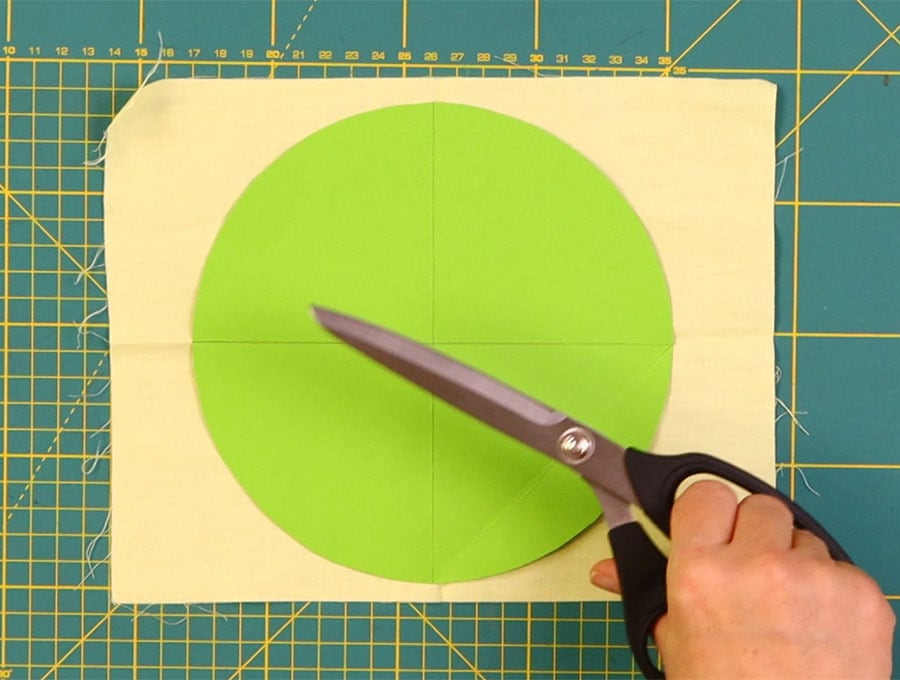
Place the circle over a piece of plain fabric and cut out the circle, cut the fabric into quarters then set aside. Repeat this step so you have two sets of quarter circles in plain fabric of the same color. Mark the wrong side of all pieces.
STEP 3:
Repeat the previous step two more times, using 2 other shades of plain fabric.
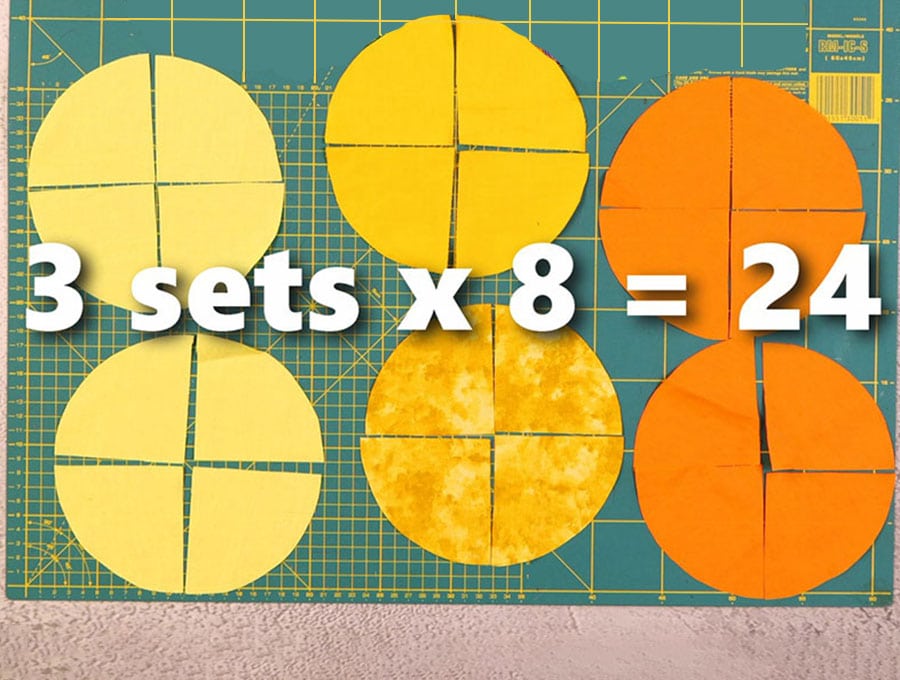
You will now have 6 circles in total: 2 circles in one plain color, 2 circles in another plain color, 2 circles in a third plain color, all cut into quarters.
This will make a total of 24 quarters or 3 sets of 8 quarters each.
TIP: If your fabric is a little small to fit the circle then place the half circle on the straight edge of the fabric, curve towards the top, flip the quarter pieces so they are near the corners at the top curve facing into the curve of the half circle.
STEP 4:
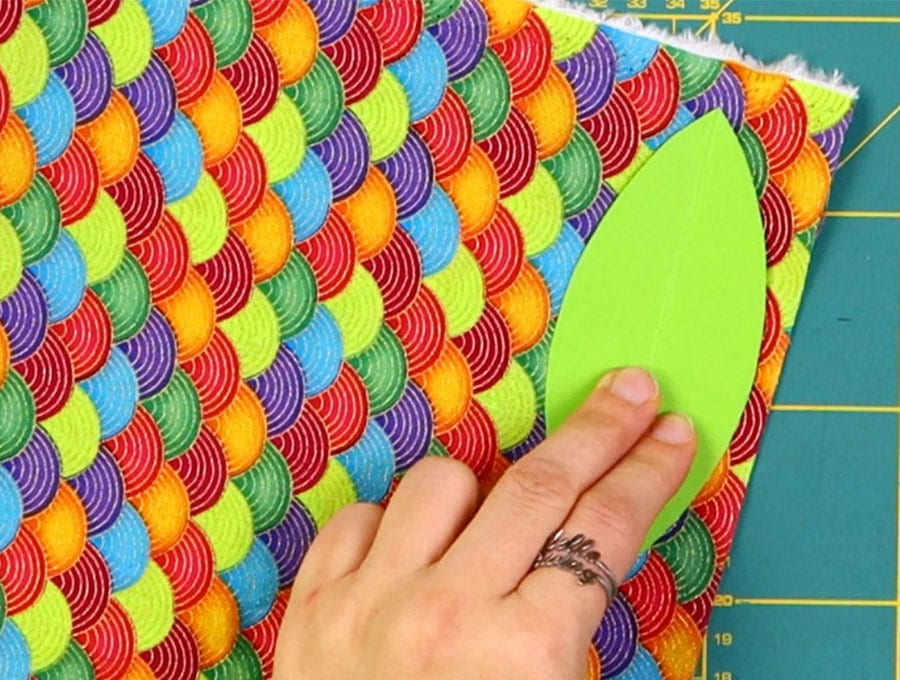
Fold your accent printed fabric in half with the right sides outside or on the inside – it doesn’t matter, then take the oval shaped pattern and mark out 6 shapes on the folded fabric.
STEP 5:
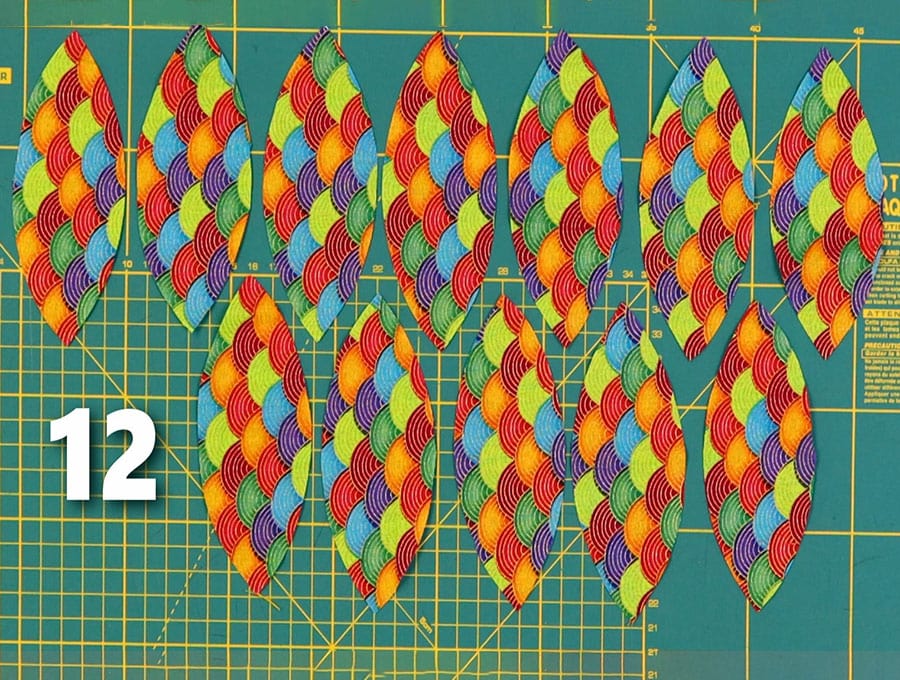
Cut out the 6 double shapes so you have 12 oval pieces.
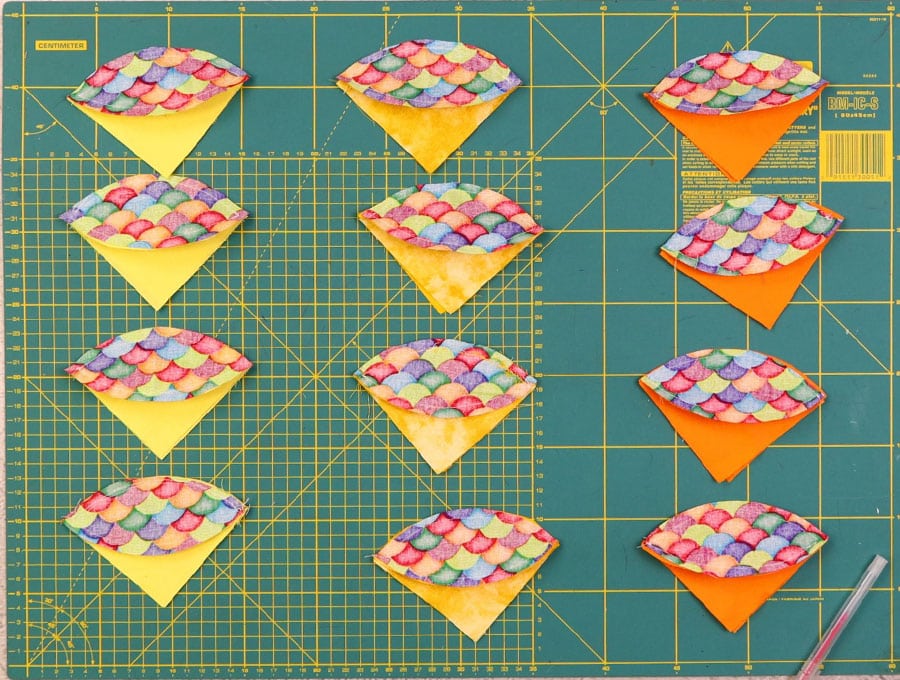
STEP 6:
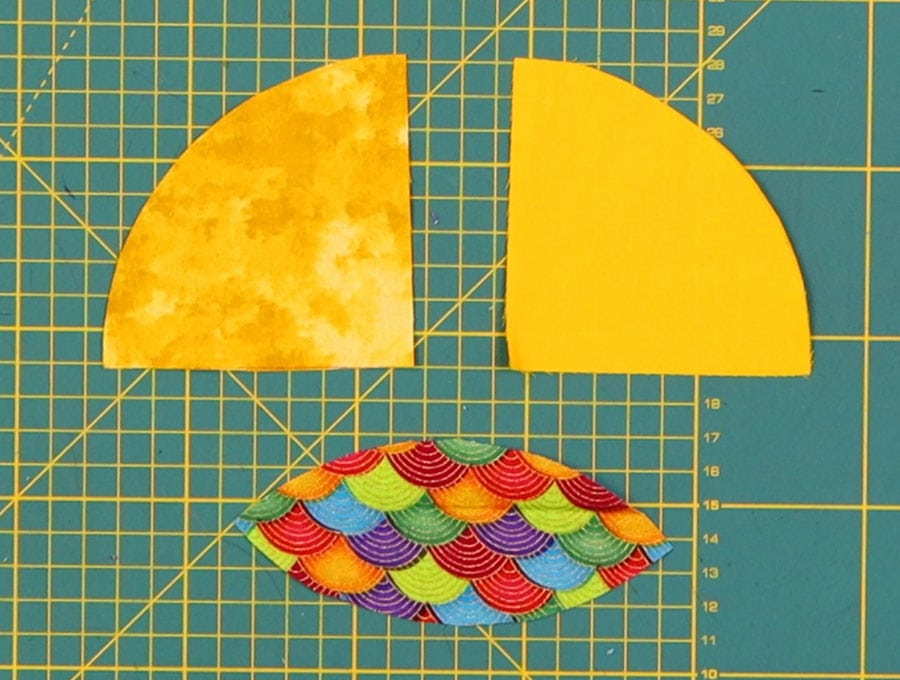
Assemble the sets – one oval and two quarter segments in the same or matching color. You will have 4 assemblies for every 2 circles matching in color for a total of 12 assemblies.
STEP 7:
Now assemble each set by fitting the curve of an oval to the curve of the quarter circle/segment, right sides facing and clip.
STEP 8:
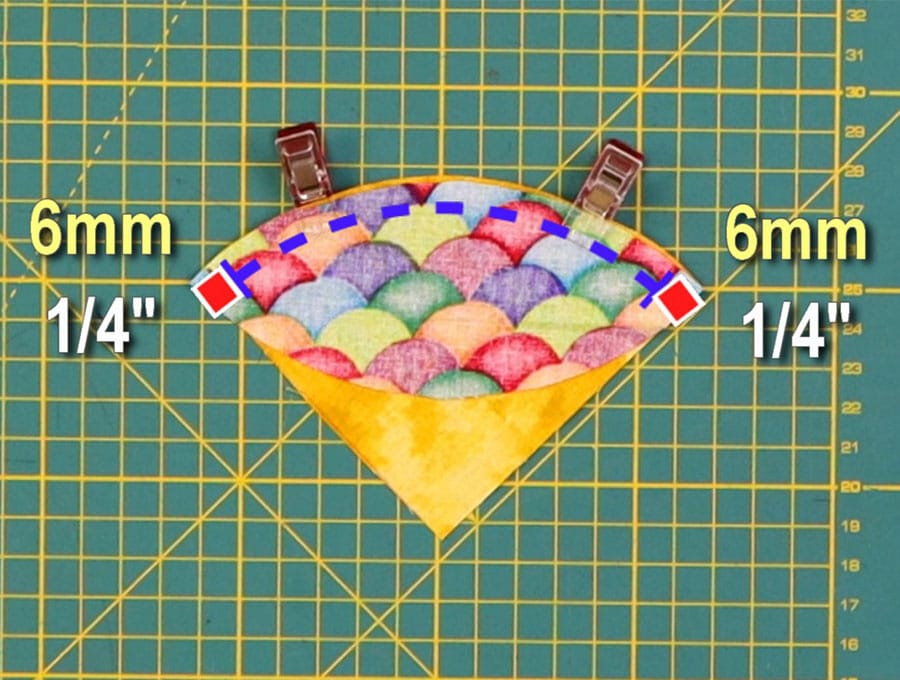
Stitch along the curved edge starting and ending 6mm (1/4″) in, backtacking at the start and finish using a ¼ inch (6mm) seam allowance.
STEP 9:

For each piece you stitched, open out and attach the other quarter segment right side to the right side of the curved edge of the oval, clip then stitch as in the previous step.
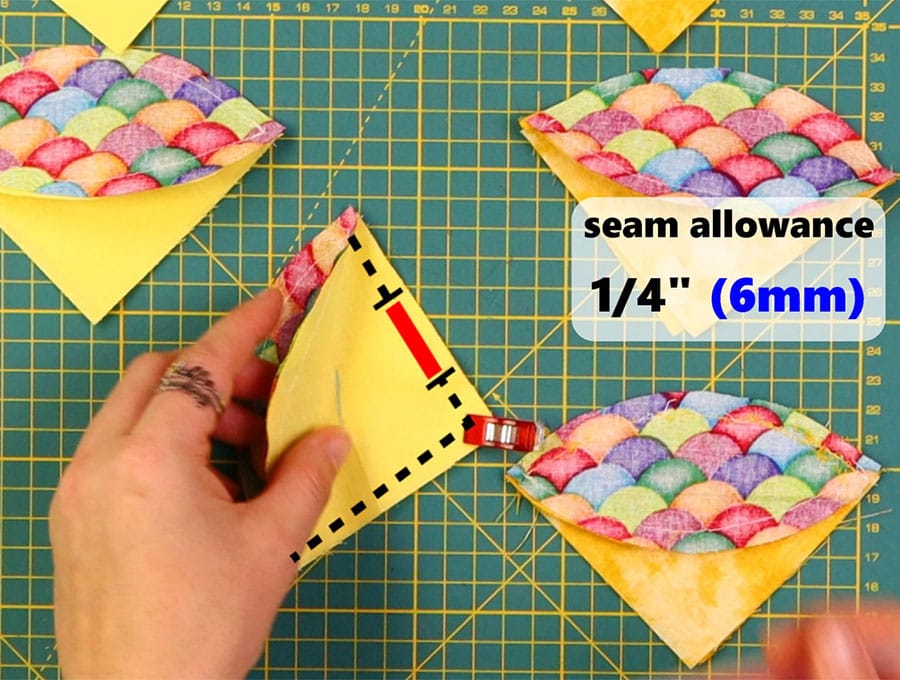
STEP 10:
Once you have your 12 pieces assembled, then for each one mark a gap in the side through which you will turn the fabric the right way out, then stitch the straight sides.
STEP 11:
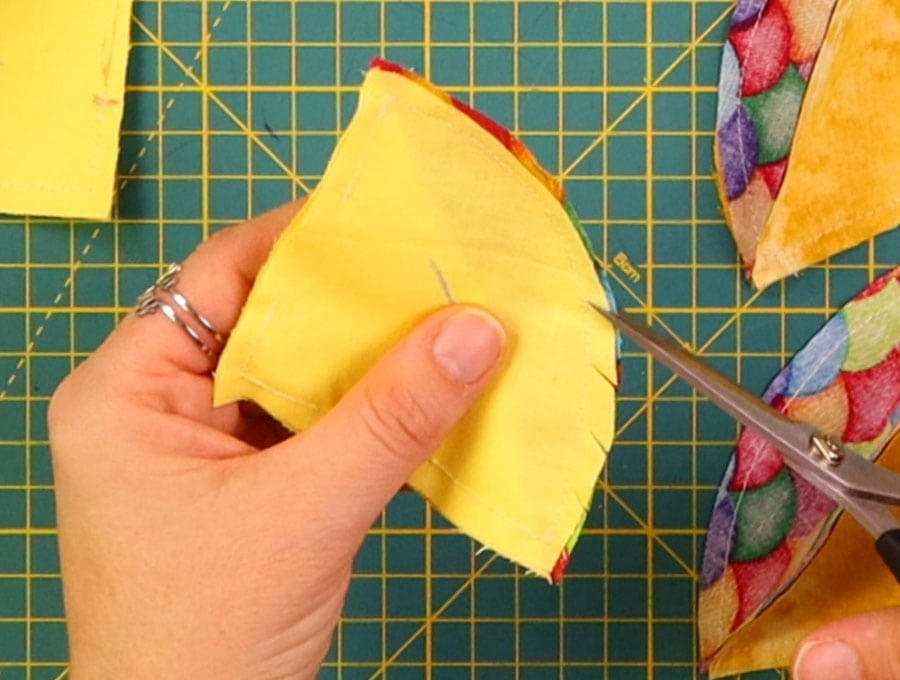
For each piece snip across the curved edges so the fabric will lie flat when turned.
STEP 12:
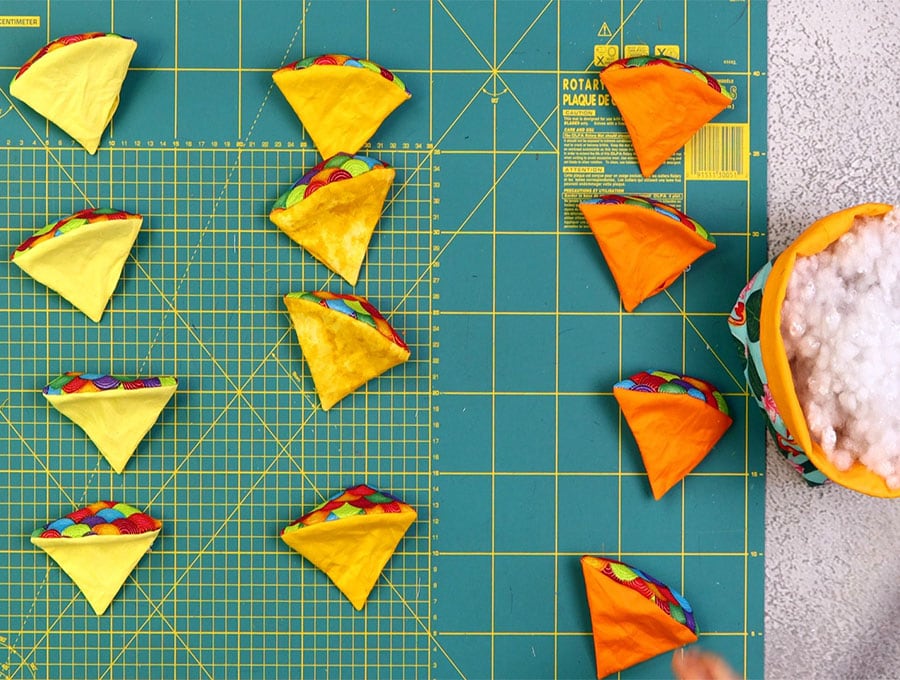
Turn each piece the right way out, using a turning tool to press out the edges neatly.
STEP 13:
Stuff each piece with polyfill stuffing.
STEP 14:
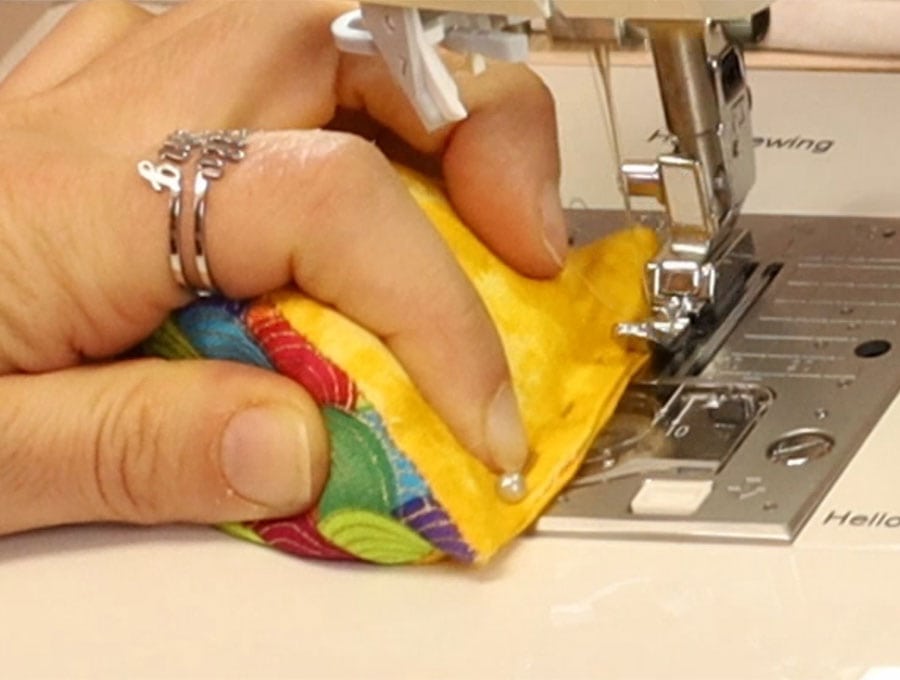
Turn in the raw edges of the gap in line with the seam, pin, and stitch closed on your machine, as close to the edge as possible.
STEP 15:
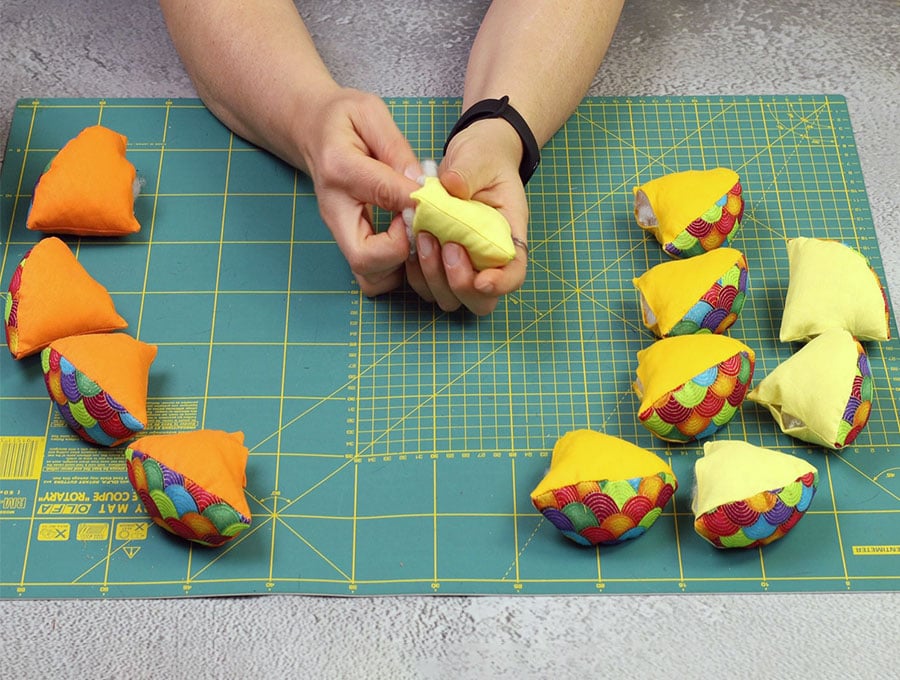
Adjust the stuffing so the pieces are not lumpy and the corners are filled.
STEP 16:
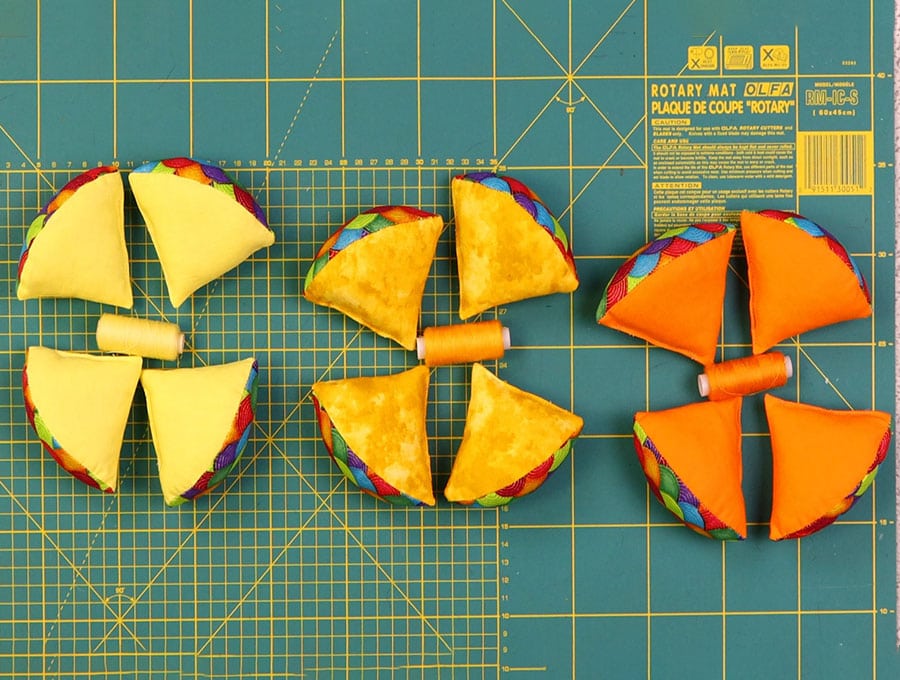
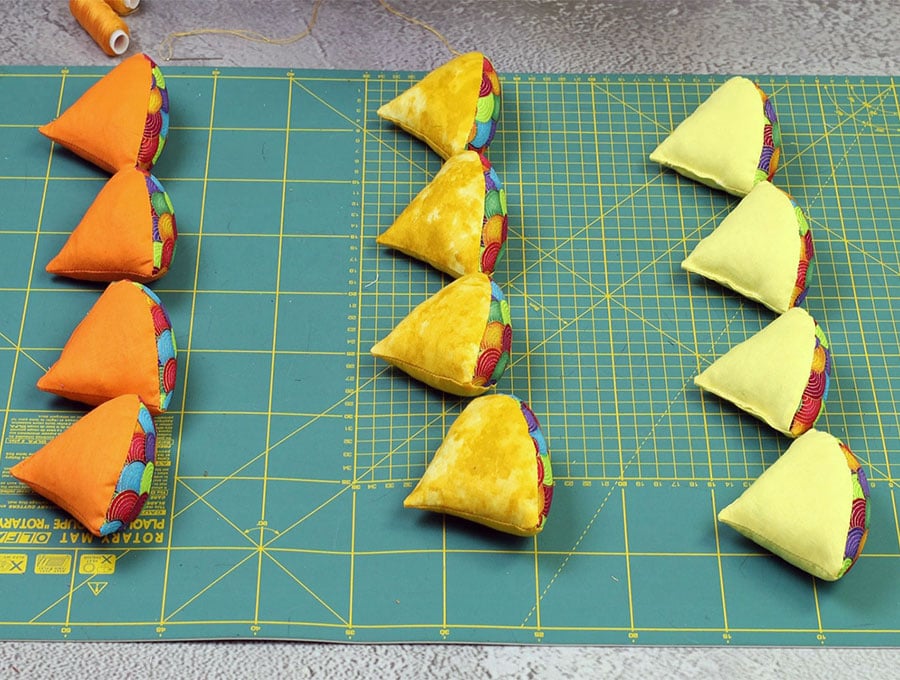
Assemble the circles with the correct colors together – you will have three sets of wedges.
STEP 17:
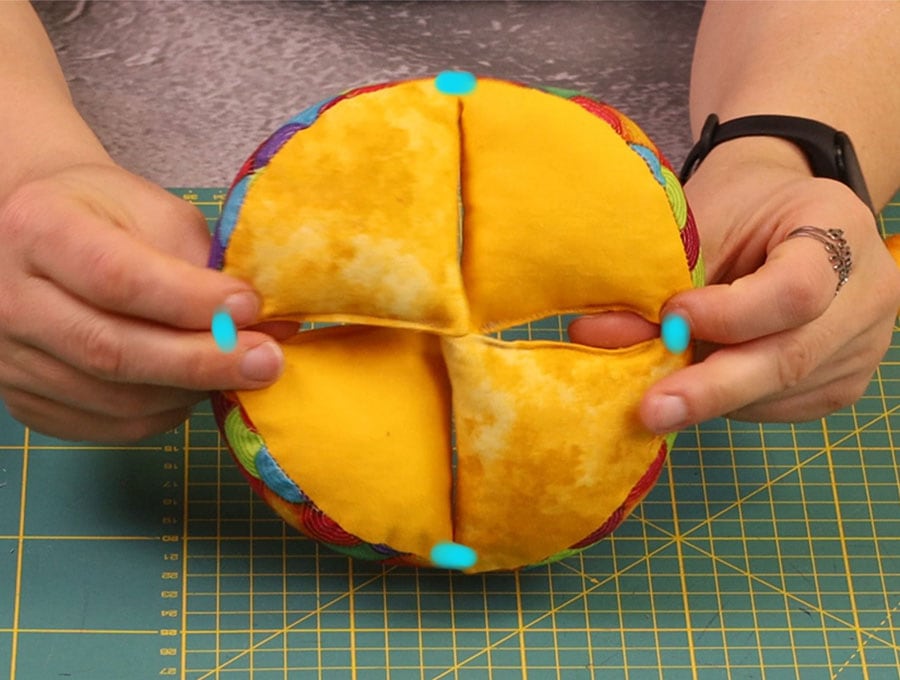
Using a hand sewing needle and double thread stitch each of the four wedges together at the points where the ovals meet the straight side to form a circle. Make sure your stitching is secure as these points will take some pressure with kids pulling the ball apart and reassembling it.
Repeat with the other sets of wedges.
STEP 18:

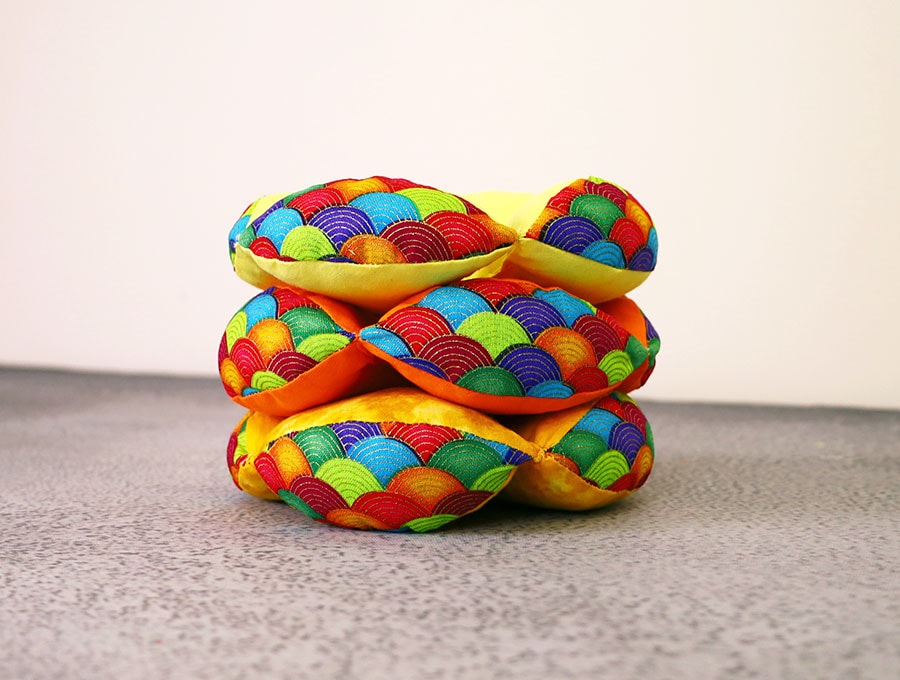
Once you have three joined circles assemble the ball by pulling one circle through another to have four ovals in a petal form, then add the next circle perpendicularly to the other two so you form another set of petals.
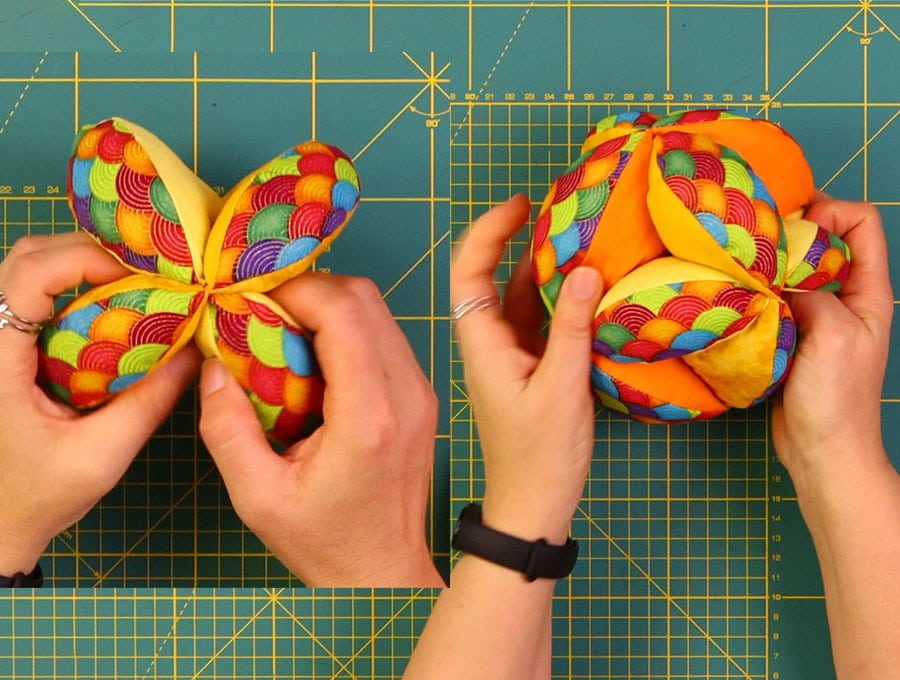
That’s it! Your DIY Montessori Puzzle Ball is ready!
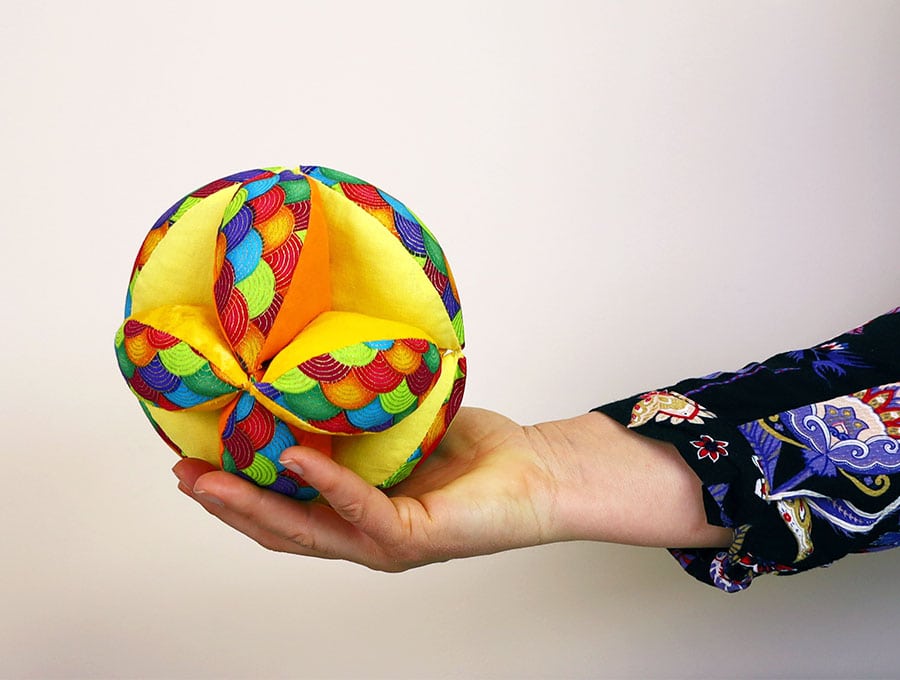
All that remains is to have fun with the ball. This is a perfect gift for babies and toddlers who will enjoy disassembling the ball then watching mum put it back together, until they learn to do it themselves as their skills develop. The ball’s hollow spaces make it easier for a baby to hold than a perfectly round ball and make playing catch the ball with little ones a whole lot easier for them. Start making these to have on hand as gifts for baby showers, Christmases and birthdays for special children in your life. Like, share, and subscribe for more fun ways to use up those little pieces of fabric in your stash.
Making your own montessori puzzle ball pattern:
- To start the puzzle ball first get a piece of paper and place a mathematical compass near the center of the paper, open up the leg of the compass and measure 3 ½ inches (9 cm) from the fixed point – this is the radius of the circle, then draw the full circle with a diameter of 7 inches (18 cm).
- Cut out the circle using scissors.
- Fold the circle in half, make a crease on the fold line and mark the line with a ruler and pen. Next fold again into quarter circle, and mark the line with a ruler and pen. You now have a cross on the paper pattern.
- From any two of the outer points of the cross on the circle fold up the paper along a ruler and mark the fold with a pen, then fold out again so it’s a full circle.
- Cut out the quarter circle where you folded and made the mark in the previous step, fold along the marked line to make an oval shape, then cut out the oval.
Do you like this? Pin for later:
Wanna be friends? Click HERE and follow me on Pinterest
RELATED: