
DIY Ice Cream Cozy with Handle // Sewing Pattern and Video
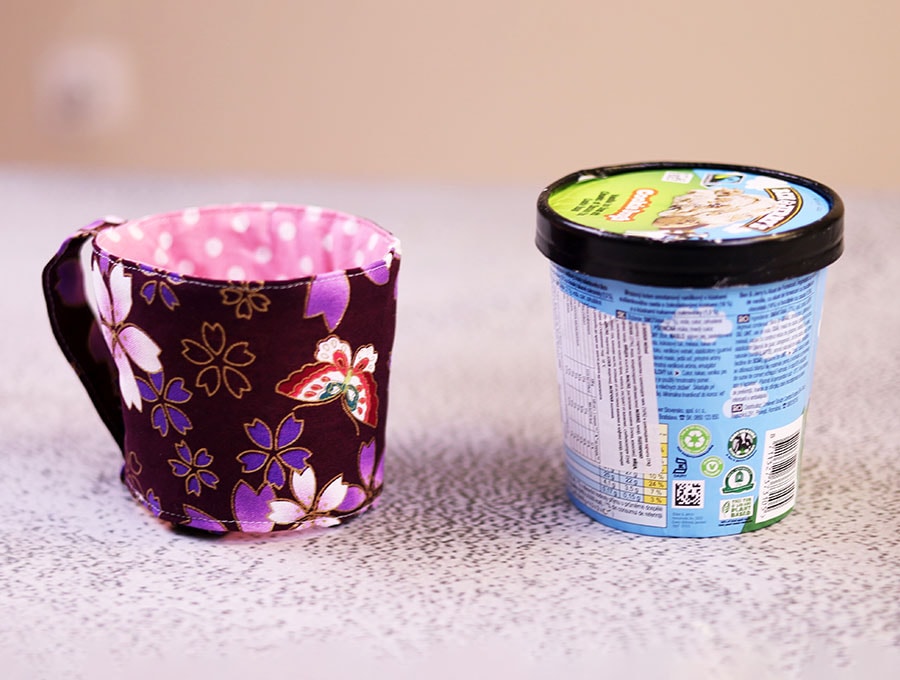
When you want to keep you ice cream cold and your hands from freezing to the tub, then pop your favorite pint of ice cream into this cozy that comes with a handle for a better grip.
The 3-piece printable sewing pattern from HelloSewing helps make this just the cutest and most useful project, especially when you have kids who insist on enjoying their ice cream on your couch. The handle makes for better grip and less accidental spills. Pick fabrics to suit each child’s interests and you’ll never have cries of, “Mom, someone ate my ice cream!” with the miscreant denying accountability saying, “Well the tubs looked the same”.
It’s a quick sewing project to use up cute prints, and if given as a gift can be themed to the recipient’s interests. We provide the free printable pattern and together with your sewing skills we’re a great team when it comes to ice cream.

Below you will find my step by step written tutorial with VIDEO instructions for all the visual learners.
We occasionally link to goods offered by vendors to help the reader find relevant products. Some of the links may be affiliate meaning we earn a small commission if an item is purchased.
Table of Contents
- 1 How to make the Ice Cream Cozy with Handle
- 2 Supplies and tools
- 3 How to Sew an Ice Cream Cozy with Handle
- 3.1 Ice Cream Cozy with Handle VIDEO TUTORIAL
- 3.2 INSTRUCTIONS:
- 3.3 STEP 1:
- 3.4 STEP 2:
- 3.5 STEP 3:
- 3.6 STEP 4:
- 3.7 STEP 5:
- 3.8 STEP 6:
- 3.9 STEP 7:
- 3.10 STEP 8:
- 3.11 STEP 9:
- 3.12 STEP 10:
- 3.13 STEP 11:
- 3.14 STEP 12:
- 3.15 STEP 13:
- 3.16 STEP 14:
- 3.17 STEP 15:
- 3.18 STEP 16:
- 3.19 STEP 17:
- 3.20 STEP 18:
- 3.21 STEP 19:
- 3.22 STEP 20:
- 3.23 STEP 21:
- 3.24 STEP 22:
- 3.25 STEP 23:
- 3.26 STEP 24:
- 3.27 STEP 25:
- 3.28 STEP 26:
- 3.29 STEP 27:
How to make the Ice Cream Cozy with Handle
Supplies and tools
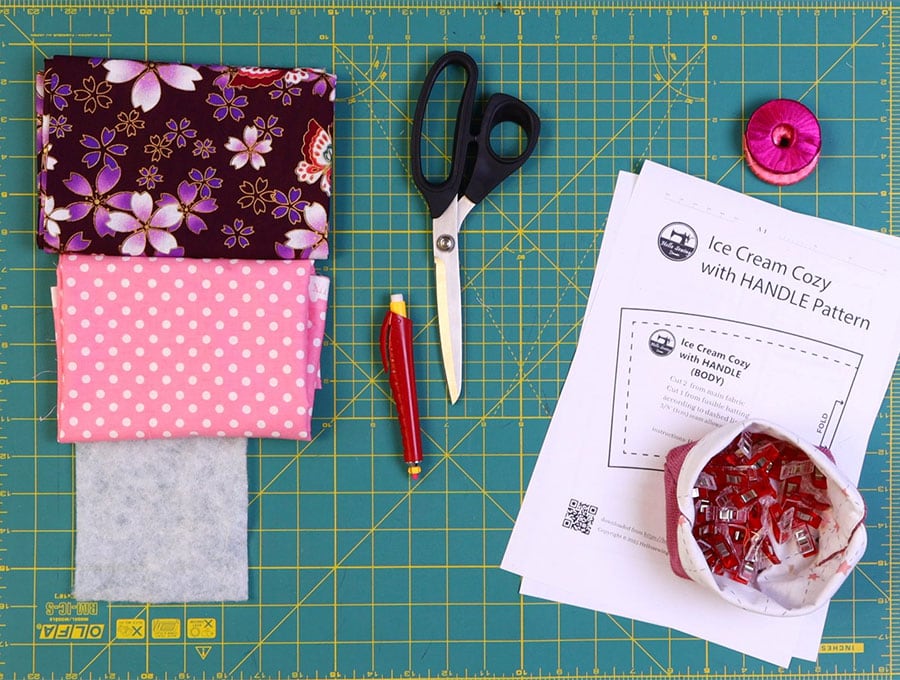
- fabric – 2 pieces of woven cotton (one main, one lining)
- fusible interfacing
- matching thread
- scissors (or rotary cutter and a cutting mat)
- ruler or measuring tape
- iron and ironing board
- sewing clips or pins
- fabric marker pen
DOWNLOAD: ice cream cozy with HANDLE pattern [Free pdf file]
Follow us for free patterns & tutorials! [easy-profiles]
How to Sew an Ice Cream Cozy with Handle
Watch the diy ice cream cozy with handle video first and then follow the written step by step instructions below.
Please enjoy and don’t forget to Like and SUBSCRIBE over on YouTube to be kept up to date with new videos as they come out.
Ice Cream Cozy with Handle VIDEO TUTORIAL
INSTRUCTIONS:
STEP 1:
Print out the template for the ice cream cozy with handle and cut out the pieces – there are three.
STEP 2:
Place the pattern piece marked BODY on the fold of a piece of fabric, lining up the fold instruction on the pattern with the straight grain of the fold, and cut out using scissors or a rotary cutter and self-healing cutting mat.
STEP 3:
Using the same pattern piece cut out the lining on a fold, then transfer the marks on the pattern piece to the wrong side of the lining.
STEP 4:
Take your outer piece and transfer the marks from the lining to the outer piece. Set aside.
STEP 5:
Trim the pattern piece marked BODY along the dotted lines, then place over a piece of batting. It’s awkward to fold batting so lay it flat, trace one side, then flip the pattern piece on it’s fold mark and trace the other side with a fabric marking pen.
STEP 6:
Place the outer fabric for the body wrong side up and over it place the batting, then the lining piece right side up. Set aside.
STEP 7:
Using the pattern piece provided cut out the bottom straps. You will need two pieces of 3 x 4 inches (7.5 x 10 cm).
STEP 8:
Cut out the handle piece from the outer fabric, which will be 4 x 5 inches (10 x 13 cm).
STEP 9:
To create the bottom straps, take each piece and fold in half on the long edge, right side outwards, and press in the center fold.
Open out, and with the wrong side upwards fold each side in to meet the center fold and press, fold again so the two folded edges meet, and press.
STEP 10:
To create the handle repeat the previous step with the handle fabric.
STEP 11:
Top stitch along both edges as close to the folds as possible on the bottom straps and the handle piece.
STEP 12:
Take the outer piece of fabric for the body of the ice cream cozy and turn up the seam allowance on the curved edges along the length so the batting piece fits neatly inside the turned up edges. Press before inserting the batting under the turned up edges.
STEP 13:
Place the bottom straps on the outer fabric on the marks indicated, turning down the seam allowance to do so, and pin in place.
STEP 14:
Stitch the bottom straps at the bottom only with a 1/8 of an inch (3 mm) seam allowance.
STEP 15:
Fold in half with the right sides inside, fold the seam allowance open at top and bottom and clip in place on the open side.
STEP 16:
Working with the lining, turn up the seam allowance on the long sides and press, then fold in half, open out the seam allowance and clip the short sides together.
STEP 17:
Stitch both the outer and the lining each with a ¼ inch (6 mm) seam allowance on the side that you clipped.
STEP 18:
Press the seams open.
STEP 19:
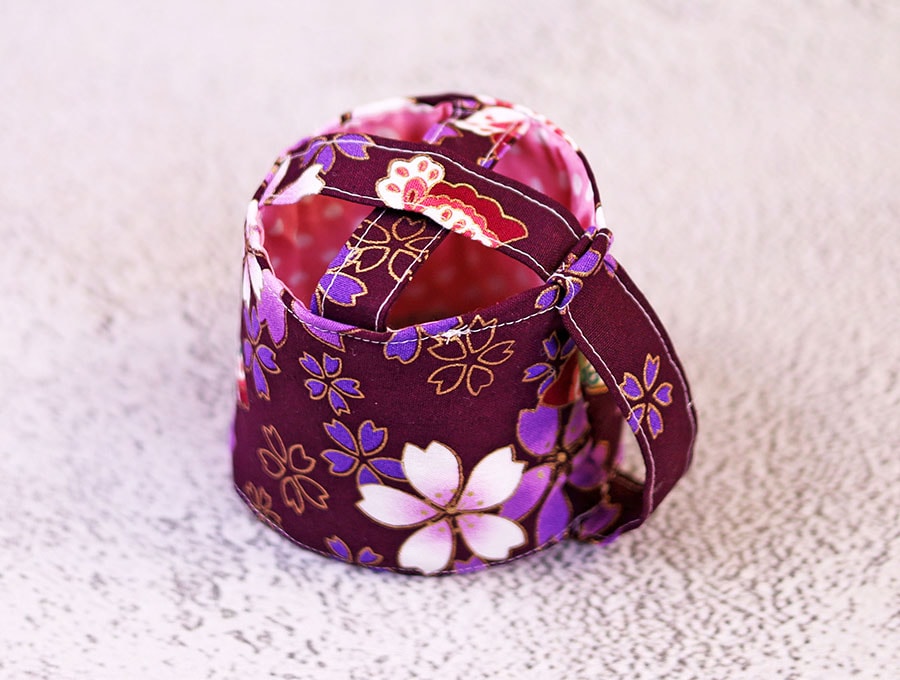
Turn the outer body of the ice cream cozy the right way out and over the seam pin he handle with the raw edges on the raw edges of the body at the top and bottom. There will be an extra bit of fabric to accommodate the curve of the handle so you can get your fingers through to hold it. Stitch with an 1/8 of an inch (3 mm) seam allowance at the top and bottom of the handle.
STEP 20:
Take the lining, which is still inside out and slip it over the outer part of the cozy lining up the seam with the seam where the handle is stitched, and clip in place at the top. Ensure the bottom straps are facing down so you don’t accidentally pin them into the top.
STEP 21:
Stitch around the top edge ¼ of an inch (6 mm) from the top edge, then pull the lining and outer so you have both right sides visible
STEP 22:
Fold the lining edge in along the pressed seam and clip.
Repeat for the outer edge.
STEP 23:
Push the lining inside the outer fabric ensuring the bottom straps are free and stick out, then clip the edges together at the bottom of the cozy.
STEP 24:
Top stitch from the one bottom strap to the other, backtacking at the start and finish.
STEP 25:
Fit the raw edges of the two straps into their appropriate spots on the opposite side of the cup, lining up with the mark made earlier and clip in position so the raw ends are sandwiched between the inner and outer layer of fabric.
STEP 26:
Top stitch the rest of the bottom of the ice cream cozy.
STEP 27:
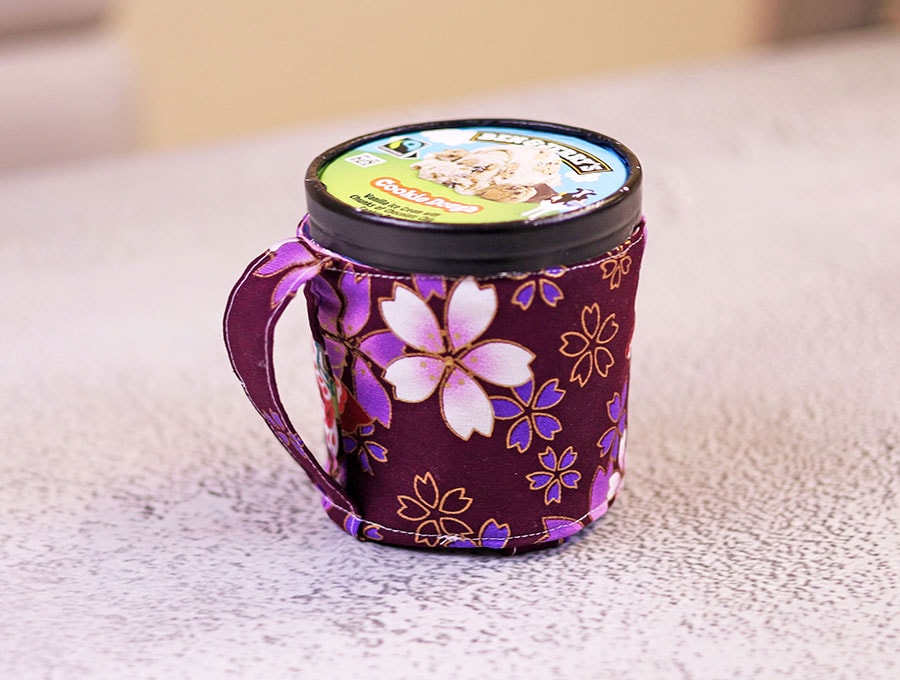
It is optional to top stitch around the top of the cozy – but I think it gives a neat finish to it.
The ice cream cozy is ready for you to pop in your favorite pint of ice cream. Enjoy the cozy and the contents without getting your hands frozen or damp while you are sitting working on your computer or watching TV. It’s great for kids who can hang onto the handle without the ice cream tub slipping out of their hands as a friend or sibling bounces down onto the sofa knocking it from their hands. Please tell us if you have never had an ice cream accident in your household! If you love this give us a like and subscribe and pass it on to parents who could benefit from having this at home.
Do you like this? Pin for later:
Wanna be friends? Click HERE and follow me on Pinterest
RELATED: