
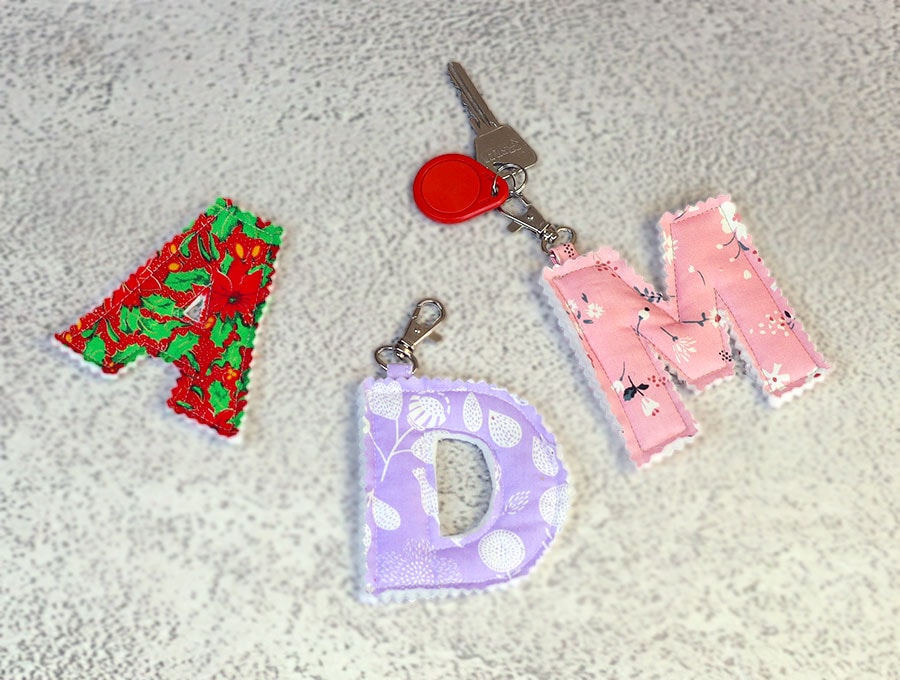
Personalized Fabric Letter Keychain [Video + Alphabet pattern]
Looking for a quick, meaningful gift that feels truly personal? This holiday season, I wanted to give something handmade but didn’t have hours to spare. That’s when I created this fabric letter keychain—a simple, fun project that adds a personal touch in no time. Whether it’s for a friend, family member, or yourself, this little keychain is the perfect way to show you care. Ready to make one? Let’s dive in!
Below you will find my step by step written tutorial with VIDEO instructions for all the visual learners.
We occasionally link to goods offered by vendors to help the reader find relevant products. Some of the links may be affiliate meaning we earn a small commission if an item is purchased.
Table of Contents
How to make the fabric letter keychain
Supplies and tools
- fabric – 2 pieces of 100% tightly woven cotton (one main, one lining)
- fusible batting
- matching thread
- scissors (or rotary cutter and a cutting mat)
- ruler or measuring tape
- iron and ironing board
- sewing clips or pins
DOWNLOAD: Fabric alphabet sewing pattern [Free pdf file]
Follow us for free patterns & tutorials! [easy-profiles]
How to Sew a Personalized fabric letter keychain
Watch the diy fabric letter keychain video first and then follow the written step by step instructions below.
Please enjoy and don’t forget to Like and SUBSCRIBE over on YouTube to be kept up to date with new videos as they come out.
Keychain with Initial VIDEO TUTORIAL
INSTRUCTIONS:
The finished letter is about 9 cm or 3.5 inches high (without the hanging loop) – you can enlarge or shring the pattern if you need to. the width varies depending on the letter.
STEP 1:
Download the alphabet pattern and cut out the letter/s you need. Set aside
STEP 2:
Take two pieces of fabric and two pieces of batting slightly larger than your letter (eg. 13 x 13cm or 5 x 5 inches)
STEP 3:
Take one of the fabric pieces and mark around your letter in the middle of the fabric.
STEP 4:
Layer your fabrics: fabric with wrong side up, then both pieces of batting, then the fabric with the letter on it, right side up. Pin everything together.
STEP 5:
Stitch along the marks, leaving a gap of at least 1 cm (3/8″) on top of the letter.
STEP 6:
Take the hanging loop piece. Fold it in half, press. Open up and fold each long raw edge to the middle. Press. Lastly fold along the central line and pin.
STEP 7:
Stitch the hanging loop.
STEP 8:
Fold in hanging loop in half and add the lobster clasp.
STEP 9:
Insert the raw short edges of the hanging loop though the gap in the letter, between both layers of batting. Pin in place.
STEP 10:
Stitch the top of the letter and voila! The personalized letter keychain in all ready.
And there you have it—a quick and easy way to create a personalized gift that’s sure to bring a smile this holiday season. I hope you have as much fun making your fabric letter keychain as I did! For more fun projects and patterns like this, be sure to subscribe to my newsletter so you never miss a new idea. Happy sewing!
Wanna be friends? Click HERE and follow me on Pinterest
RELATED: