
DIY Slit Handle Eco Bag // How to make a fabric bag with slit handle
The slit handle eco bag is perfect for slipping a gift into and then using multiple times afterwards for shopping. It folds up small, is quick to make, attractive and sustainable.

Go sustainable this year by using up those pretty fabrics in your stash to make gift bags that double as easily folded shopping bags that you can whip out of your purse to carry all those small shopping items, like cosmetics, and toiletries. The slit handle eco bag is quick and easy to make, comes with a boxed bottom for extra space, and looks great.
Below you will find my step by step written tutorial with VIDEO instructions for all the visual learners.
We occasionally link to goods offered by vendors to help the reader find relevant products. Some of the links may be affiliate meaning we earn a small commission if an item is purchased.
Table of Contents
- 1 How to make the slit handle eco bag
- 2 Supplies and tools
- 3 How to Sew a fabric bag with a slit handle
- 3.1 Slit handle eco bag VIDEO TUTORIAL
- 3.2 MATERIALS:
- 3.3 INSTRUCTIONS:
- 3.4 STEP 1:
- 3.5 STEP 2:
- 3.6 STEP 3:
- 3.7 STEP 4:
- 3.8 STEP 5:
- 3.9 STEP 6:
- 3.10 STEP 7:
- 3.11 STEP 8:
- 3.12 STEP 9:
- 3.13 STEP 10:
- 3.14 STEP 11:
- 3.15 STEP 12:
- 3.16 STEP 13:
- 3.17 STEP 14:
- 3.18 STEP 15:
- 3.19 STEP 16:
- 3.20 STEP 17:
- 3.21 STEP 18:
- 3.22 STEP 19:
- 3.23 STEP 20:
- 3.24 STEP 21:
How to make the slit handle eco bag
Supplies and tools
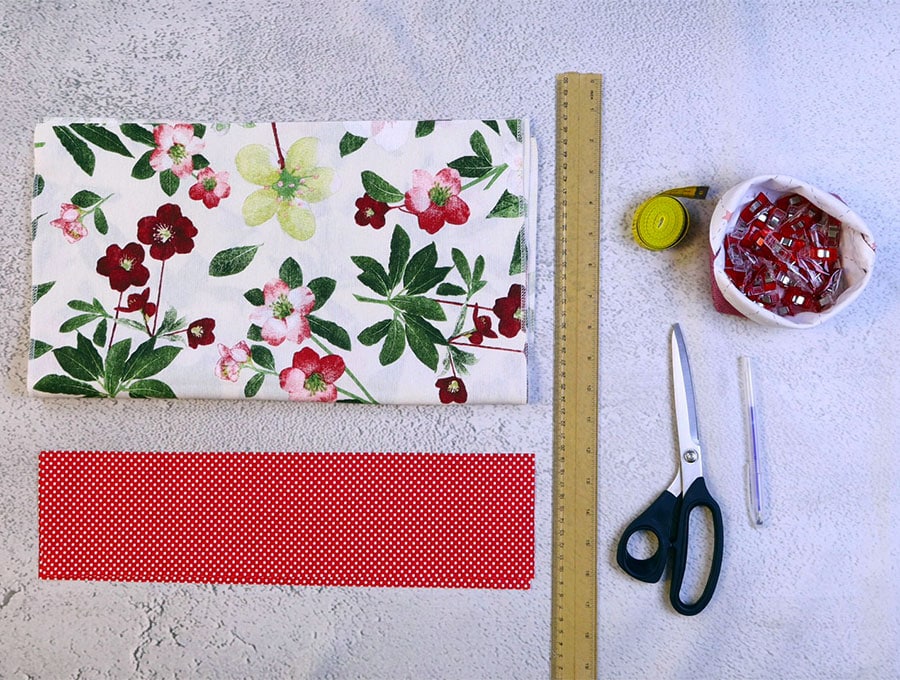
- fabric – 2 pieces of woven cotton (one for the body, one for the handle)
- matching thread
- scissors (or rotary cutter and a cutting mat)
- ruler or measuring tape
- fabric marking pen
- iron and ironing board
- sewing clips or pins
Follow us for free patterns & tutorials! [easy-profiles]
How to Sew a fabric bag with a slit handle
Watch the diy slit handle eco bag video first and then follow the written step by step instructions below.
Please enjoy and don’t forget to Like and SUBSCRIBE over on YouTube to be kept up to date with new videos as they come out.
Slit handle eco bag VIDEO TUTORIAL
MATERIALS:
Body of bag: 2 pieces of fabric 16 ½ x 19 inches (42 x 48 cm)
Handle: 2 pieces of fabric 4 x 16 ½ inches (10 x 42 cm)
INSTRUCTIONS:
STEP 1:
Place one side of the body of the bag, right side up, with the shorter sides parallel to the top and bottom of your worktop.
STEP 2:
Over the top section place one piece of the bag handle, right side to right side, lining up the top and side edges and clip in position.
STEP 3:
Fold the bag body with clipped section in half, left to right, and finger press a crease near the top to indicate the middle.
STEP 4:
Unfold and measure ¾ of an inch (2 cm) from the top on either side and make marks, then join up the marks with a ruler, drawing a line across the top.
STEP 5:
On the center finger pressed crease mark, make a mark with a fabric pen then measure 2 3/8″ (6cm) on either side of the center, and make marks. This is to indicate where the gap for the slit will be.
STEP 6:
Stitch from one side to the first mark, along the line you drew with the ruler, backtacking at the start and finish. Then stitch from the other side to the mark. You will have a gap of 4 ¾ inches (12 cm) in the middle.
STEP 7:
Repeat steps 1 to 6 with the piece of fabric and handle for the other side of the bag.
STEP 8:
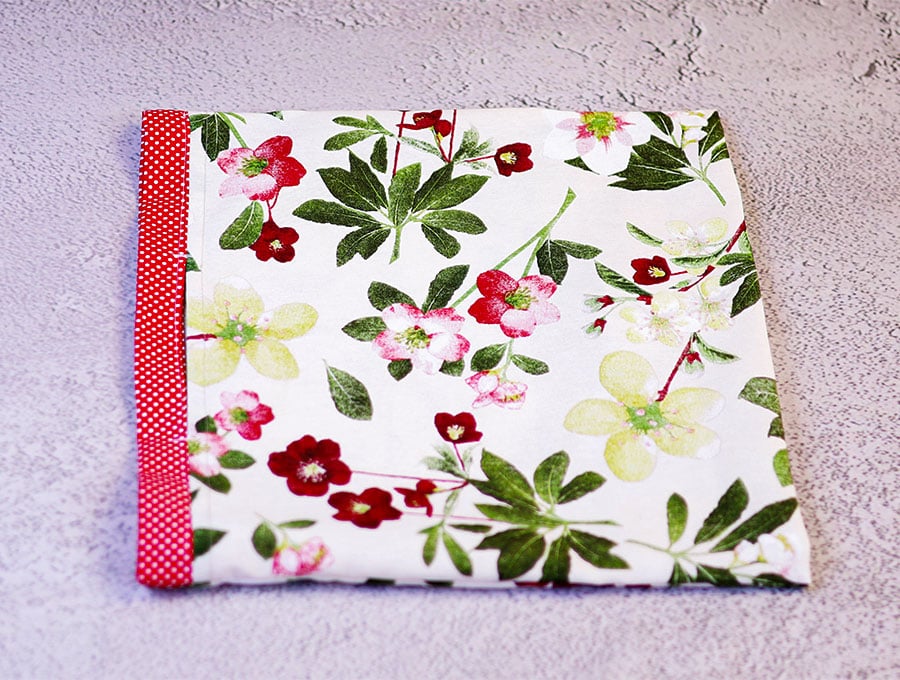
Open the stitched seam for each side of the bag and press flat.
STEP 9:
Turn under the seam fabric for the body of the bag by half and pin in place, then stitch as close to the folded edge as possible. Repeat with the other side of the bag.
STEP 10:
Match up the two halves of the bag, making sure the seams for the slit handle line up, wrong sides facing inwards, and clip in place.
STEP 11:
Stitch around the bag from the top of one side, backtacking at the start, right down to the bottom and up the other side, ¼ inch (6 mm) from the edge.
A tip for neat corners is to stitch to the position you want to turn, leave the needle down in the fabric, lift the presser foot, swing he fabric 90 degrees, depress the presser foot and continue stitching.
STEP 12:
Snip off a small triangle at the lower corners to reduce bulk when turning and trim off any excess from the seams then turn inside out, using a blunt tool to push out the corners.
STEP 13:
Press the edges of the seams so they lie flat.
STEP 14:
Stitch 3/8″ (1 cm) along the bottom of the bag from one side to the other, backtacking at the start and finish.
STEP 15:
Measure 4 inches (10 cm) up from the bottom on each side of the bag and make a mark.
STEP 16:
Fold the bottom corners up to meet the marks on each side and clip in place. This is to create the box bottom of the bag.
STEP 17:
Stitch from the bottom up each side 3/8 of an inch (1 cm) from the edge, to the top, backtacking at the start and finish.
STEP 18:
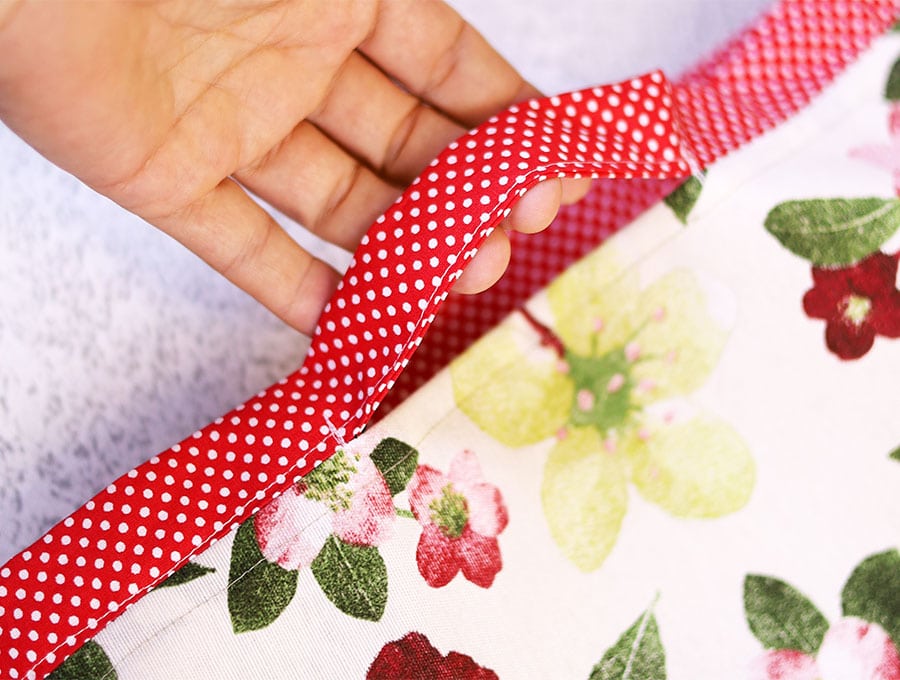
Divide the contrasting handle of the bag into three equal parts on each side, marking the sections with your fabric marking pen.
STEP 19:
Fold the top down to the first set of marks, then fold again to meet with the second set of marks, press, and then clip in place.
STEP 20:
Stitch along the bottom fold of the handle as close to the edge as possible.
STEP 21:
Reinforce each side of the slits with a small vertical row of stitches where the handle joins the main body of the bag for added strength.
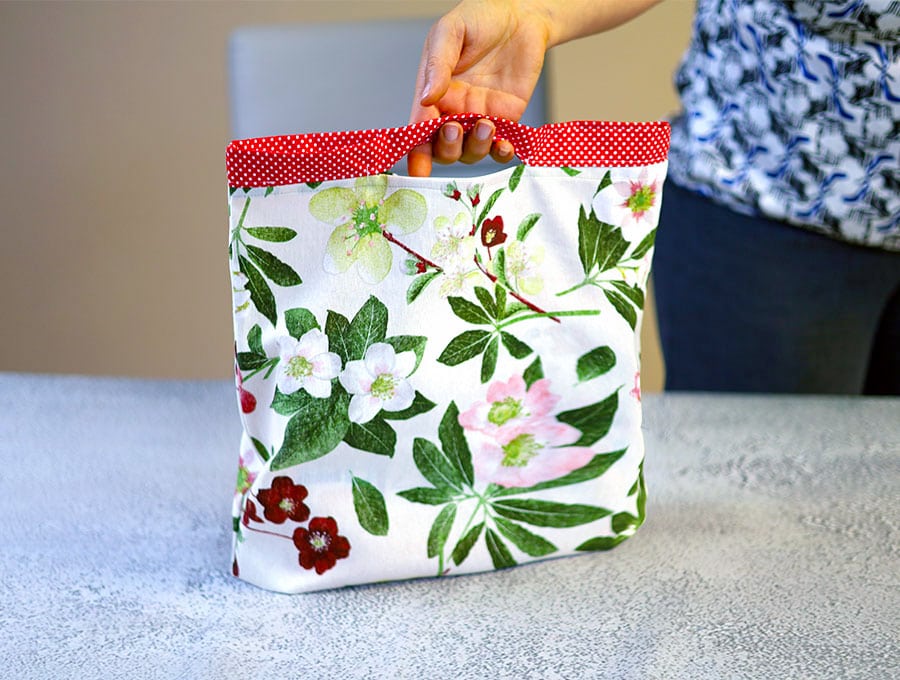
The bag is now ready for use, whether you are using in a shopping mall for a number of small purchases or using it as an eco-gift bag that can be reused many times.
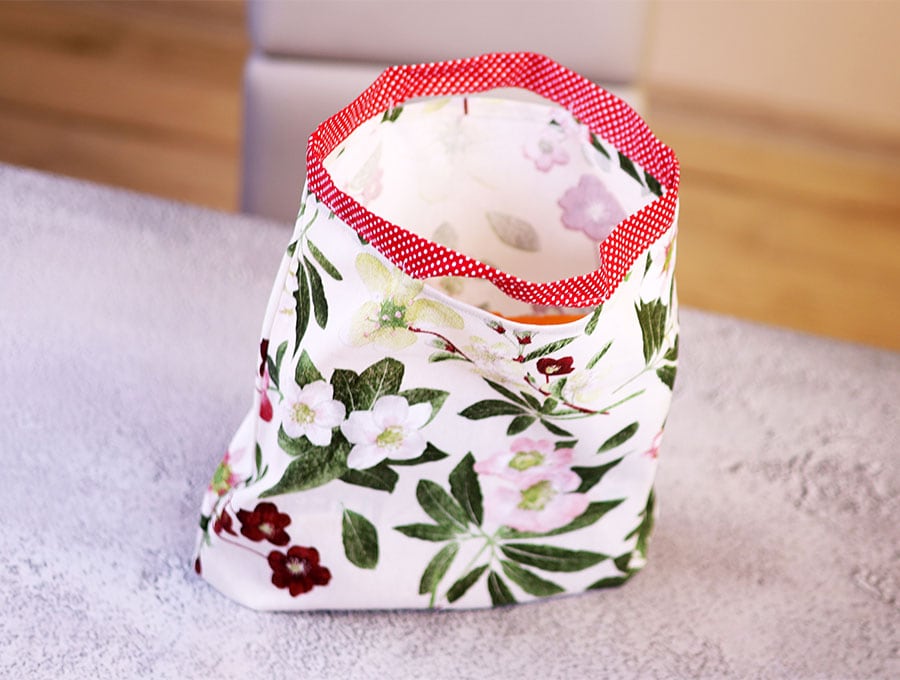
it has boxed corners and holds a lot of stuff

Please hit the like and subscribe buttons to be the first to know about our latest videos with the step-by-step tutorials as they go live. Have fun using items in your stash as the year draws to a close and the gifting season ramps up.
Do you like this? Pin for later:
Wanna be friends? Click HERE and follow me on Pinterest
RELATED: