
DIY Butterfly Sleeve Tutorial [How to Draft and Sew Butterfly Sleeves]
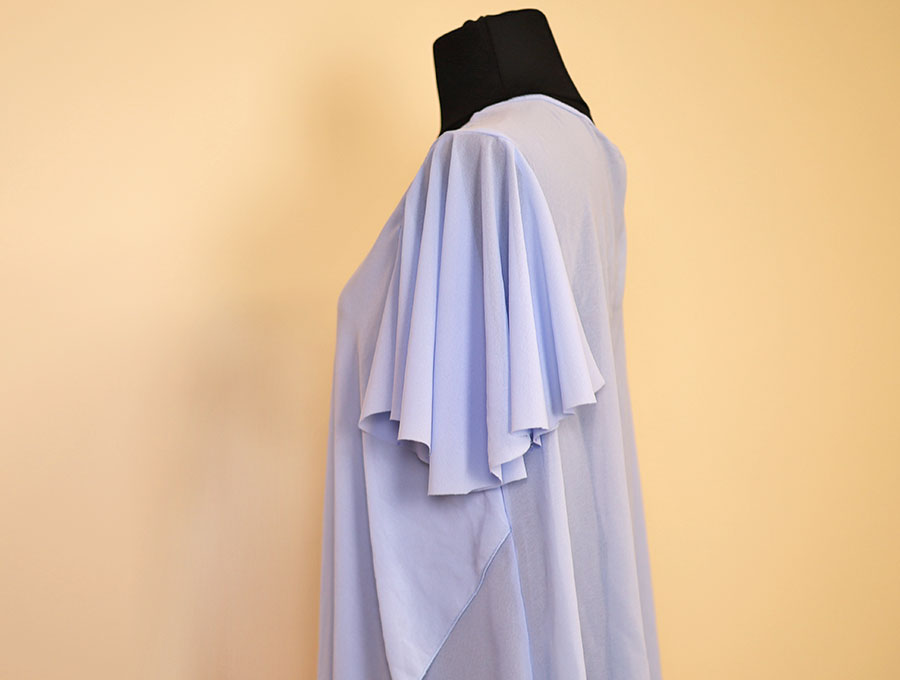
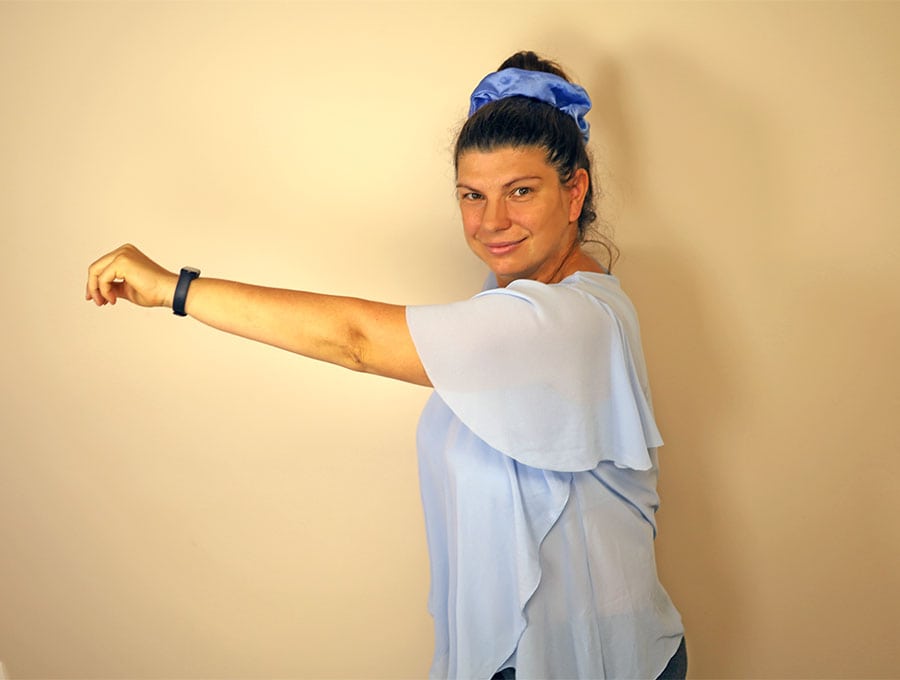
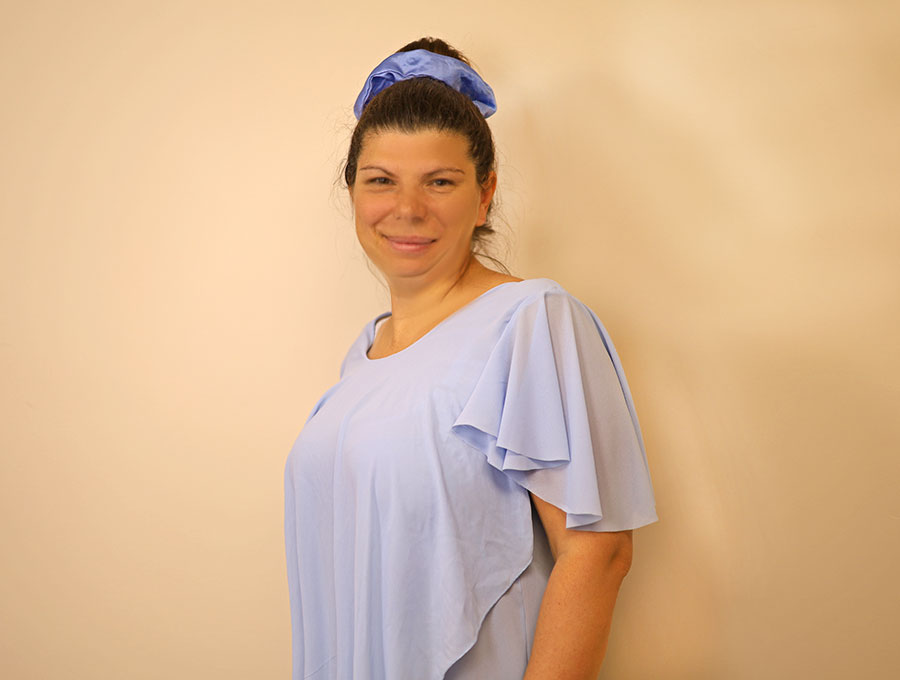
The butterfly sleeve is a lovely addition to summer blouses, providing just a little arm covering that ripples as the wearer moves, hence its name – butterfly sleeve. Add these to your clothing, creating a carefree summery look. I have visuals and step-by-step instructions for making this sleeve. The one must-do with this sleeve is to choose a soft fabric that drapes well for a good effect. Add some charm to clothing items you make this summer with the butterfly sleeve, either in the same fabric as the blouse, or using a soft lace or bead encrusted fabric for some extra glamour on summer evenings. The butterfly sleeve is perfect for little girls as they are always flitting around, ensuring the butterfly sleeve lives up to its name.
Are you baffled as to how to make the beautiful flowy butterfly sleeve? We have the answer here – watch our visuals to see how it’s done, supported by our step-by-step instructions. Soon you’ll be rocking these gorgeous sleeves on summer outfits. They are so easy to do once you know how. The only secret lies in choosing a fabric that drapes well and will fall correctly, otherwise, this is a really simple sleeve to create.
Below you will find my step by step written tutorial with VIDEO instructions for all the visual learners.
We occasionally link to goods offered by vendors to help the reader find relevant products. Some of the links may be affiliate meaning we earn a small commission if an item is purchased.
Table of Contents
How to add butterfly sleeves to Any Top or Dress
Supplies and tools
- fabric –Soft fabric of 20 x 20 inches (50 x 50 cm) to match your blouse
- matching thread
- scissors (or rotary cutter and a cutting mat)
- ruler or measuring tape
- iron and ironing board
- pins
- sewing machine
- Fabric marking pen
- Needle – Optional only if you are hand sewing the edge of the sleeve
Follow us for free patterns & tutorials! [easy-profiles]
How to Sew a Butterfly Flutter Sleeve
Watch the diy butterfly sleeve video first and then follow the written step by step instructions below.
Please enjoy and don’t forget to Like and SUBSCRIBE over on YouTube to be kept up to date with new videos as they come out.
Butterfly/Flutter Sleeve VIDEO TUTORIAL
INSTRUCTIONS:
STEP 1:
Fold the 20 x 20 inch fabric in half from top to bottom, then in half again, left to right, so you have a square. Place pins along the fold and in the center to hold the fabric together when you start measuring.
STEP 2:
Using a tape measure mark 10 inches from the top left-hand corner to the edge in a straight line across the fold, then, angling your ruler, mark 10 inches from the corner at various points in an arc until you reach the vertical fold on the left-hand side.
STEP 3:
Join the marks you made into a smooth arc and then cut off the excess fabric, open out and you will have a circle.
STEP 4:
Making sure the wrong side is facing upward, draw a straight line from the edge into the circle with your fabric marking pen and make a mark at 2 3/8 inches (6 cm).
STEP 5:
Place the blouse you have made, or one you want to add the butterfly sleeve onto on your worktop and measure the length of the armhole right around. Let’s say the total circumference of the armhole is 18 inches (46 cm)
STEP 6:
Place the fabric circle on the worktop and with the tape measure placed in a circle of 18 inches (46 cm) positioned with the top of the circle at the marked point draw around the circle. An option is to find a plate or dish with the same circumference and put it down on the fabric and draw around it to get the circle. Watch our visuals so this step is clear.
STEP 7:
Fold the fabric with the marked radius and the marked circle on the outside. Line up the halves of the drawn circle and cut out the circle. Do not cut along the radius line. You will have a circle with an off-center circle in it. Mark the edges of the fold where you have cut.
STEP 8:
Lay the butterfly sleeve fabric right side to right side with the blouse fabric. Line up the mark on the 2 3/8 inch (6 cm) fold with the side seam at the bottom of the armhole and the other mark with the shoulder seam at the top.
STEP 9:
Pin the butterfly sleeve to the armhole, easing the fabric into place.
STEP 10:
Stitch around the armhole ¼ inch (6mm) from the edge. You can finish off with a zigzag stitch, or if you have an serger (overlocker), finish off the raw edges.
STEP 11:
I used a non-fraying fabric for this sleeve, but if you want to finish off the edge of the sleeve you can either turn it up 1/8 of an inch (3 mm) and another 1/8 of an inch (3 mm), and stitch using a slight zigzag stitch.
The other option is to do a rolled edge if you have the machine foot for this. If you prefer you can do a thin edge by hand using slip stitches so the stitches are not visible on the outside.
The butterfly sleeve is a beautifully feminine addition to girl’s or women’s spring or summer clothing. It can be added in a lace fabric to create interest on an otherwise plain top, or in a chiffon or other see through fabric, or simply as I have done here in the same fabric as the blouse. If you enjoyed making this butterfly sleeve then like and subscribe to have more of our delightful projects delivered straight to your inbox.
Do you like this? Pin for later:
Wanna be friends? Click HERE and follow me on Pinterest
RELATED: