
DIY Cat Zipper Pouch | Cat Zipper Pouch Sewing Pattern
Sew your very own cat zipper pouch. It’s quick, it’s easy and the only hard thing to do is sewing the zipper. But worry not, my friend, I will show you the easiest way to do it!
Make our cute kitty pouch with a hanging loop and lobster claw so it can be fastened securely inside your bag or backpack. It’s large enough to take a cell phone, passport and small card holder, or to store whatever you choose – perhaps lipstick,mirror and mascara for touch ups on the go. Are you ready? Get the cat zip pouch pattern and let’s get sewing
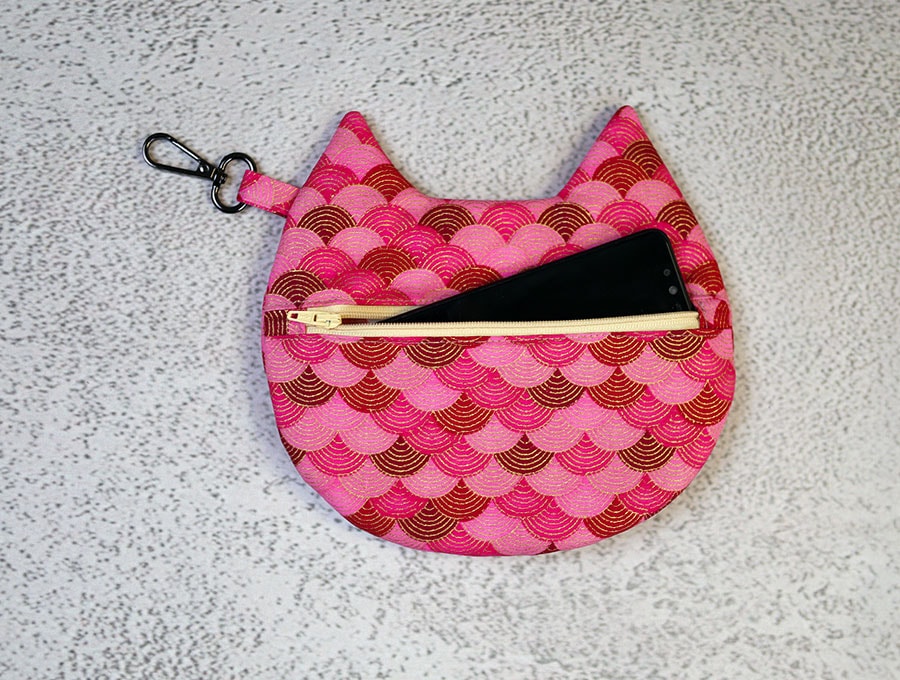
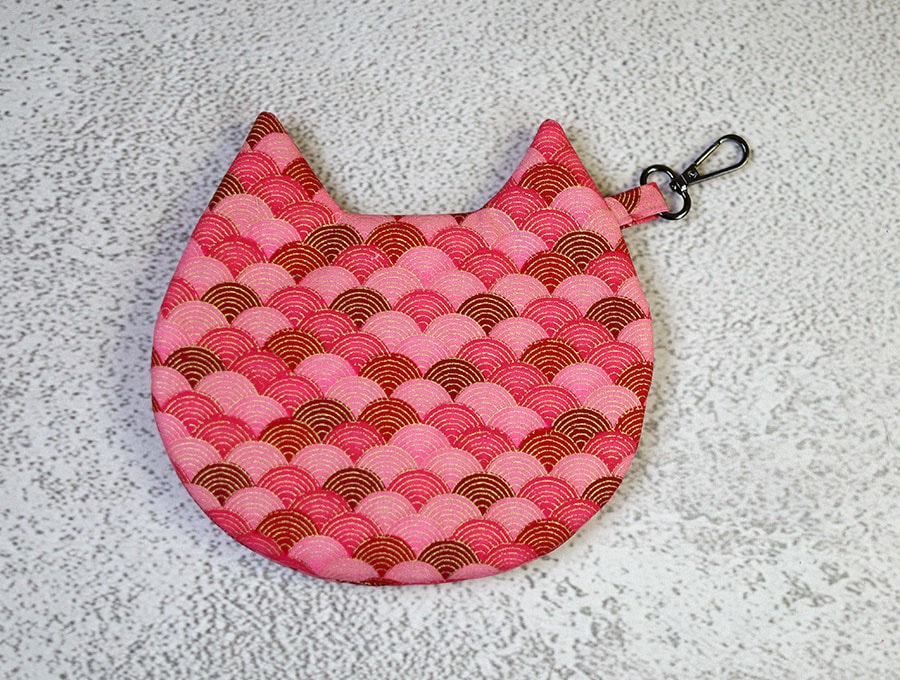
It’s absolutely stunning, and the zipper on the back looks like a kitty face.
Below you will find my step by step written tutorial with VIDEO instructions for all the visual learners.
We occasionally link to goods offered by vendors to help the reader find relevant products. Some of the links may be affiliate meaning we earn a small commission if an item is purchased.
Table of Contents
- 1 How to make a Cat Zipper Pouch
- 2 Supplies and tools
- 3 How to Sew a Cat Zipper Pouch
- 3.1 Cat Zipper Pouch VIDEO TUTORIAL
- 3.2 INSTRUCTIONS:
- 3.3 INSTRUCTIONS:
- 3.4 STEP 1:
- 3.5
- 3.6 STEP 2:
- 3.7 STEP 3:
- 3.8 STEP 4:
- 3.9 STEP 5:
- 3.10 STEP 6:
- 3.11 STEP 7:
- 3.12 STEP 8:
- 3.13 STEP 9:
- 3.14 STEP 10:
- 3.15 STEP 11:
- 3.16 STEP 12:
- 3.17 STEP 13:
- 3.18 STEP 14:
- 3.19 STEP 15:
- 3.20 STEP 16:
- 3.21 STEP 17:
- 3.22 STEP 18:
- 3.23 STEP 19:
- 3.24 STEP 20:
- 3.25 STEP 21:
- 3.26 STEP 22:
How to make a Cat Zipper Pouch

Supplies and tools

- fabric – 2 pieces of woven cotton or home decor fabric + cotton (one main, one lining)
- batting
- matching thread
- scissors (or rotary cutter and a cutting mat)
- ruler or measuring tape
- iron and ironing board
- sewing clips or pins
- zipper
DOWNLOAD: cat zipper pouch pattern [Free pdf file]
Follow us for free patterns & tutorials! [easy-profiles]
How to Sew a Cat Zipper Pouch
Watch the diy cat zipper pouch video first and then follow the written step by step instructions below.
Please enjoy and don’t forget to Like and SUBSCRIBE over on YouTube to be kept up to date with new videos as they come out.
Cat Zipper Pouch VIDEO TUTORIAL
INSTRUCTIONS:
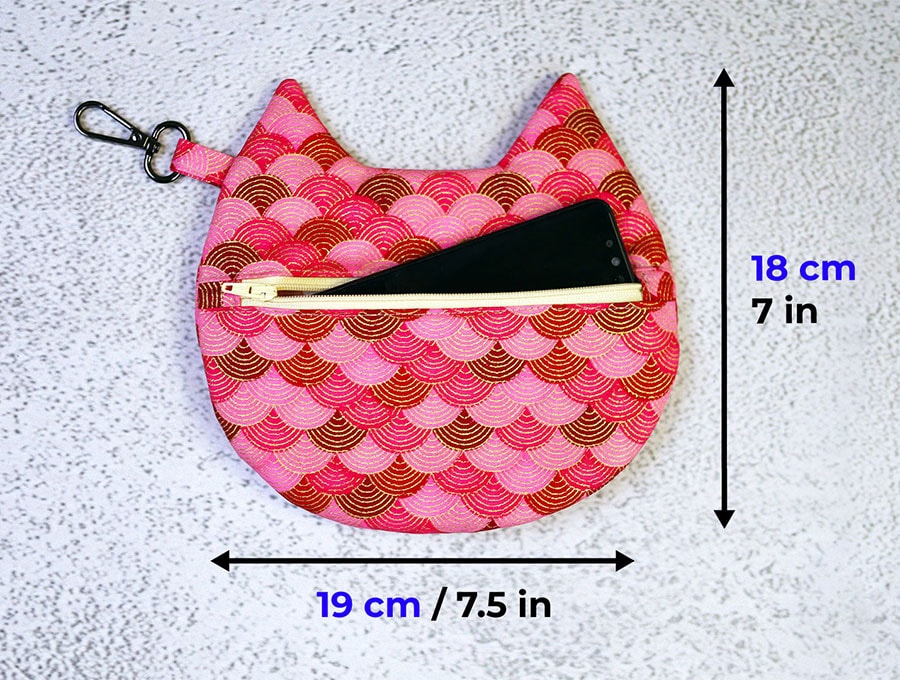
Finished size of the cat pouch: 19 x 18cm (7.5″ x 7″)
MATERIALS:
Main fabric – 2 pieces of home decor fabric or quilting cotton 22 x 22cm (8.5″ x 8.5″)
Lining fabric – 2 pieces of quilting cotton 22 x 22cm (8.5″ x 8.5″)
BATTING: 2 pieces of batting 19 x 18cm (7.5″ x 7″)
Zipper – 16cm (6.5″)
INSTRUCTIONS:
STEP 1:
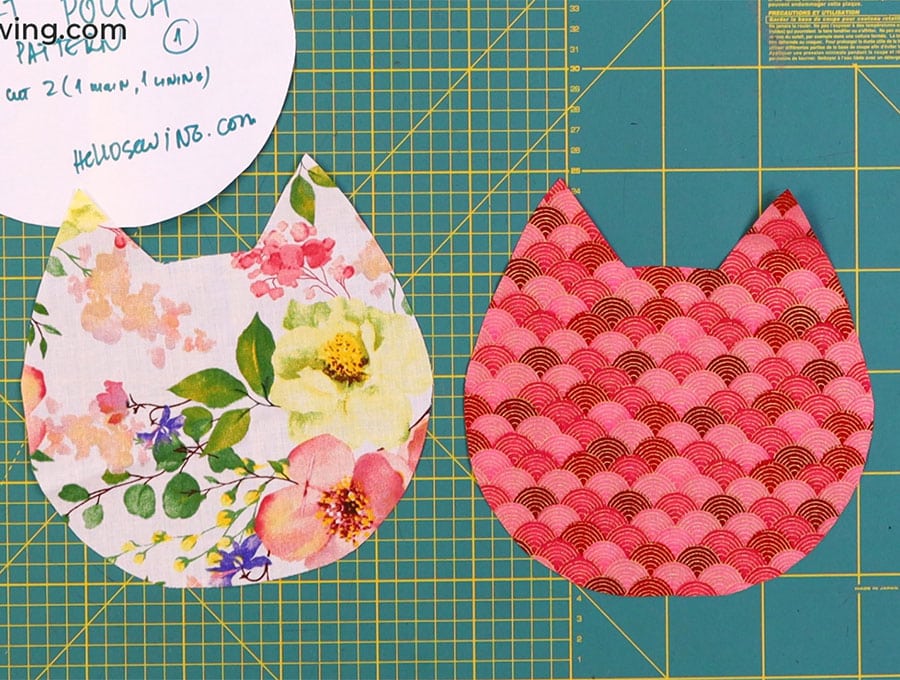
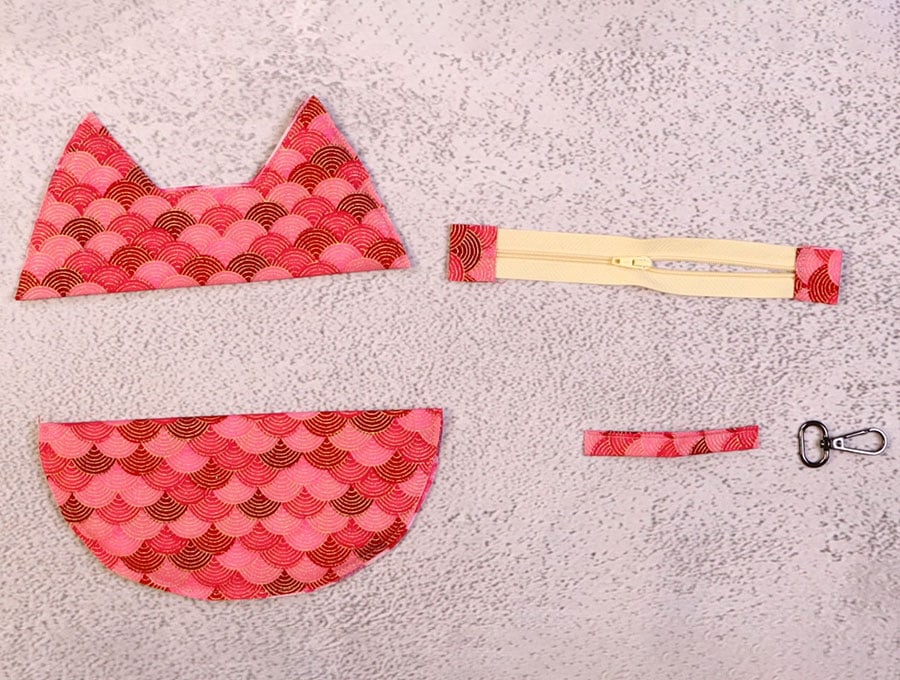
Cut two of the back pieces of the cat head in the main fabric and the lining fabric.
STEP 2:

Fold main fabric to comfortably fit the cat head front top and bottom, place each on the fold and cut.
STEP 3:
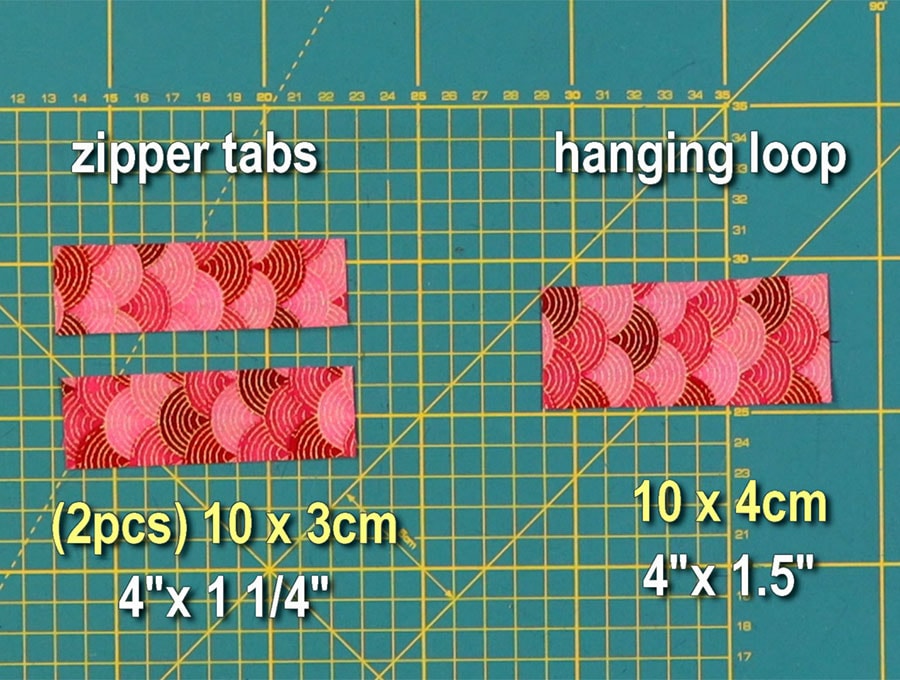
Cut 2 zipper tabs of 4 x 1 ¼ inch (10 x 3 cm) from the main fabric and one hanging loop of 4 x 1 ½ inches (10 x 4 cm).
STEP 4:
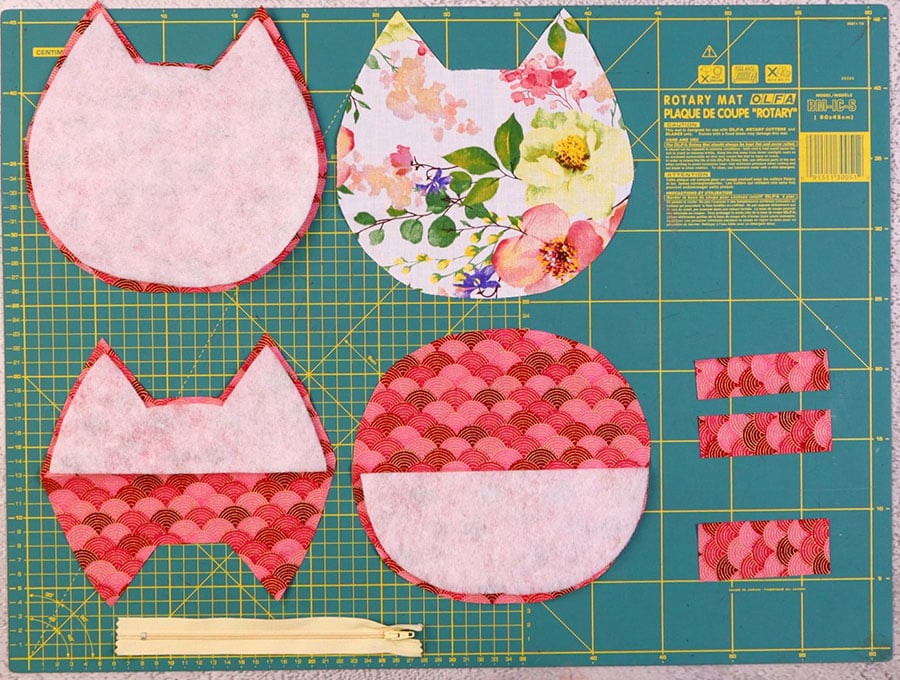
Cut fusible interfacing along the dashed line of the pattern -or 6mm (¼ inch) smaller than the fabric pieces for the back of the cat, the front top and the front bottom. Remember the pieces for the front are folded so you only need to cut half the fusible interfacing for the front pieces.
STEP 5:
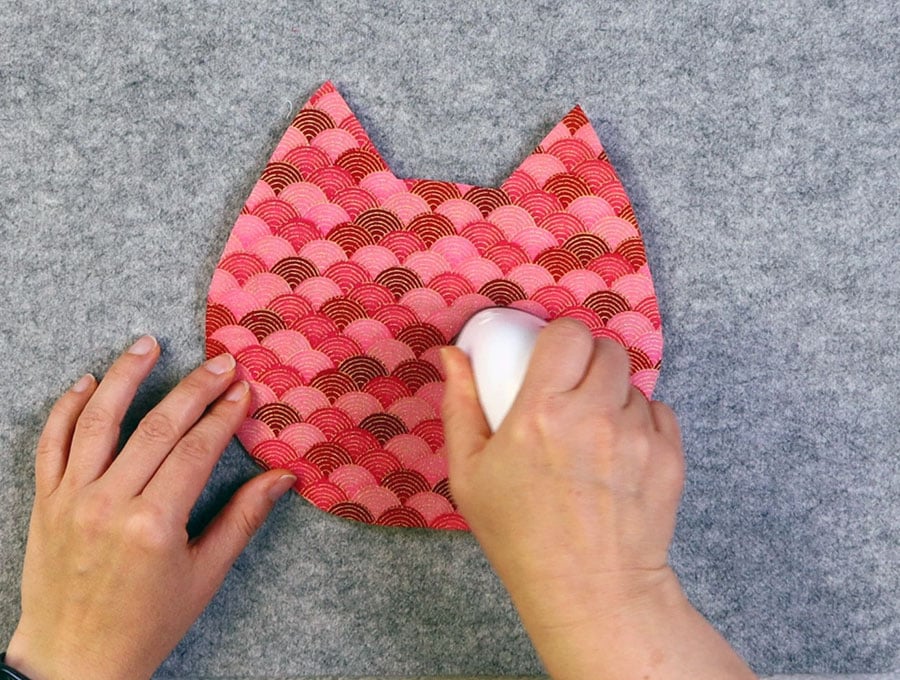
Take the cat head piece, top and bottom halves and fuse the interfacing to the wrong side of the fabric according to the manufacturer’s instructions.
STEP 6:

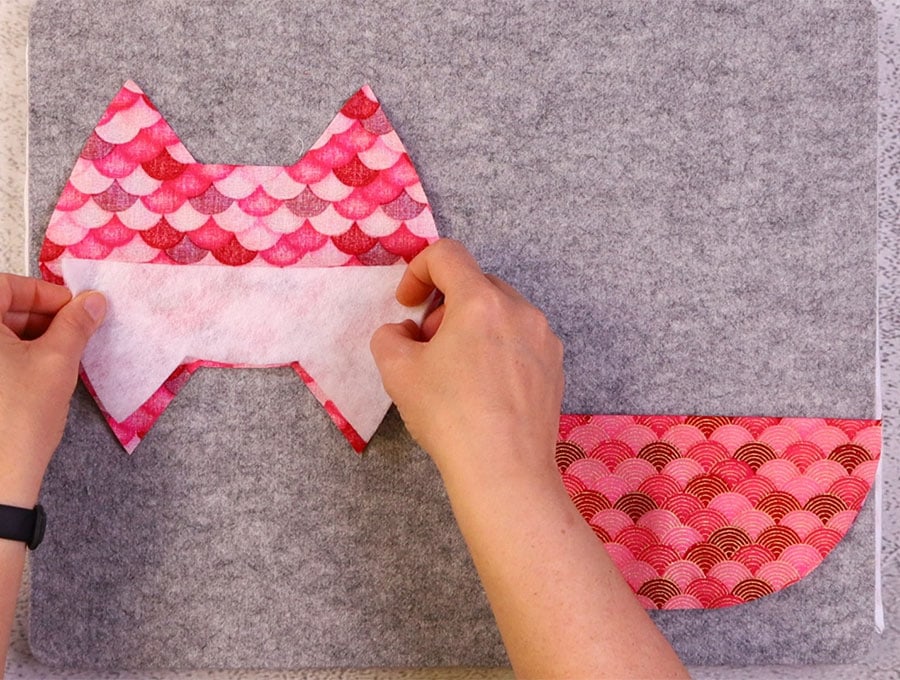
Stitch around the edges of the top and bottom halves of the front pieces, but DO NOT stitch over the folded edges, ¼ of an inch (6 mm) from the edge
STEP 7:
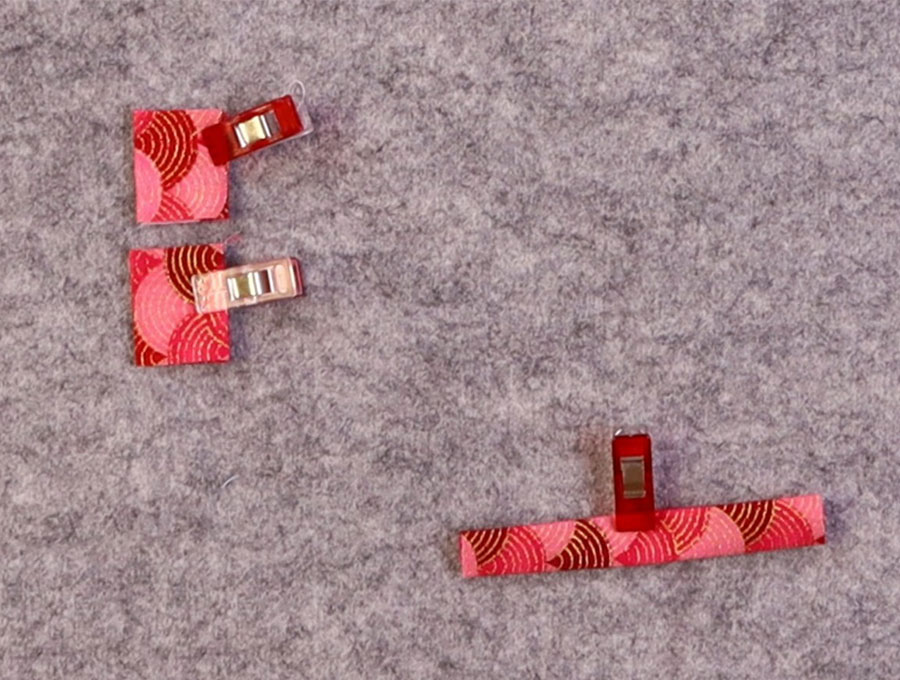
Create the 2 zipper tabs by folding each piece in half placing short side to short side, right sides outermost, so you have a piece of two inches (5 cm) and finger press, then open out and fold each end in towards the middle fold, fold again so you have a piece that is 1 inch (2.5 cm) and clip.
STEP 8:
For the hanging loop fold the fabric in half along the length with wrong sides facing and press. Open out and fold each long side in towards the middle fold and press, then fold again so no raw edges are visible along the length and press, then clip.
STEP 9:
Stitch as close to the edge as possible along the long open side of the hanging tab.
STEP 10:
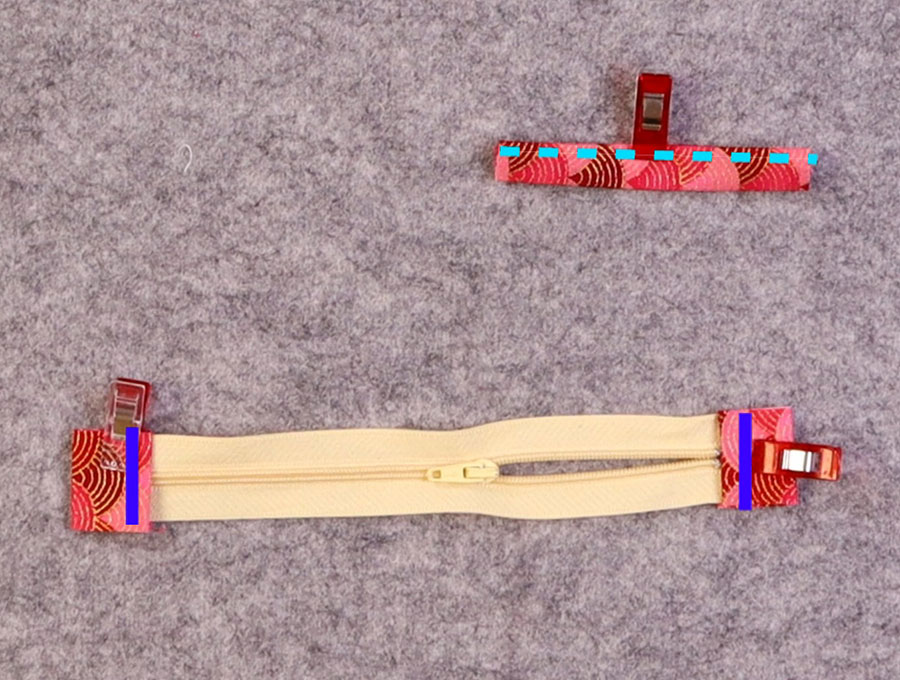
Take the zipper and unclip each folded tab, placing a tab one inch (2.5 cm) over each end of the zipper, then stitch as close to the point where the open end of the tab covers the zipper, backtacking at the start and finish.
STEP 11:
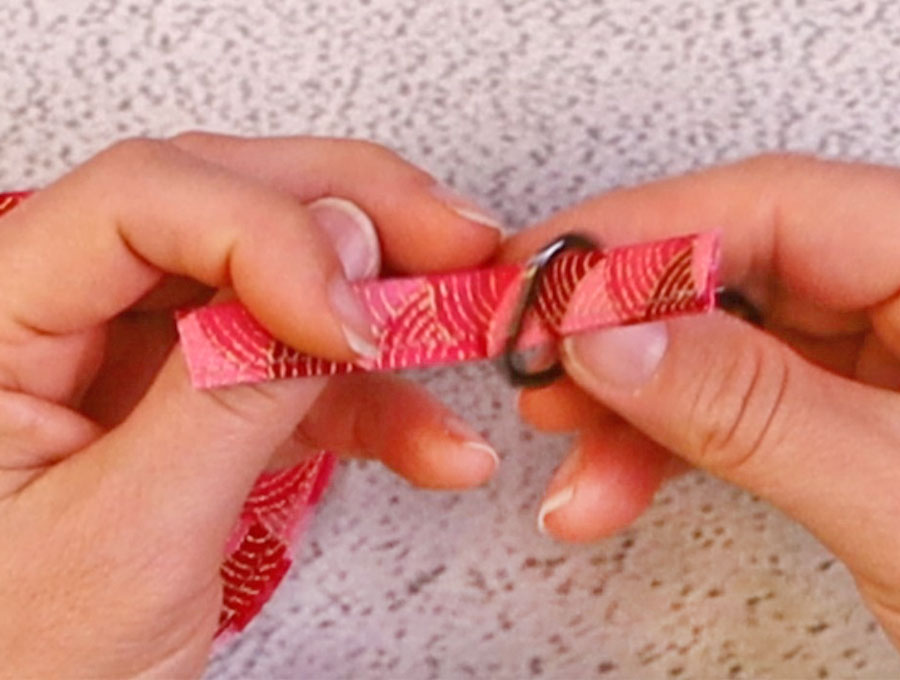
Take the hanging loop and thread it through the lobster claw, line up the ends then pin to the left side of the top of the cat face in the middle – near the base of the ear. Make sure the raw edges of the hanging loop are project beyond the raw edge of the fabric on the top part of the cat face, with the loop and lobster claw facing into the cat face and pin.
STEP 12:
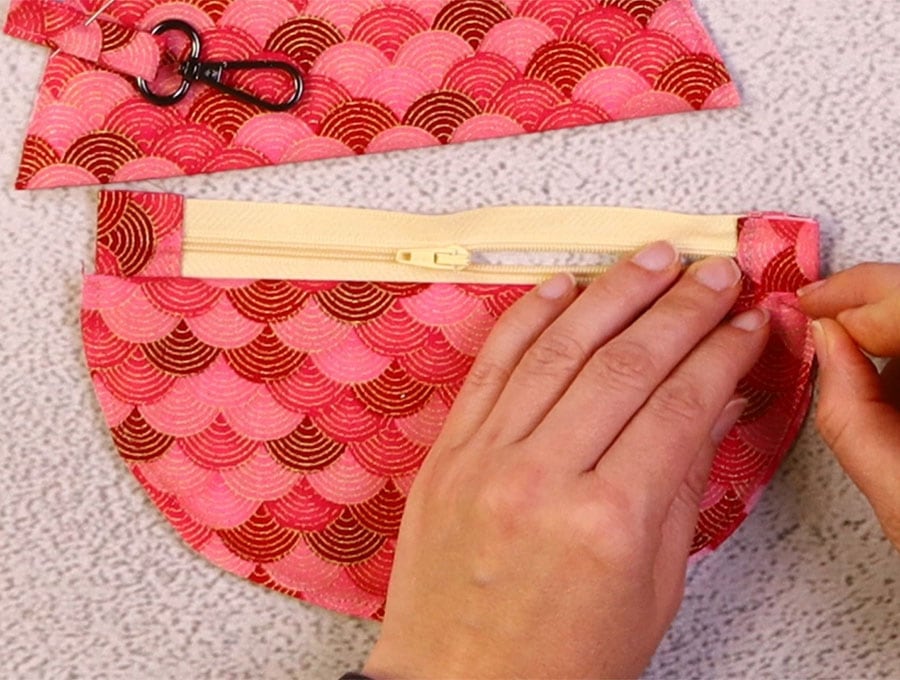
Lay the zipper with the stitched on tabs right side up on your worktop, then pin the bottom half of the cat face to the edge of the zipper.
STEP 13:
Pin the top half of the cat face to the top side of the zipper.
STEP 14:
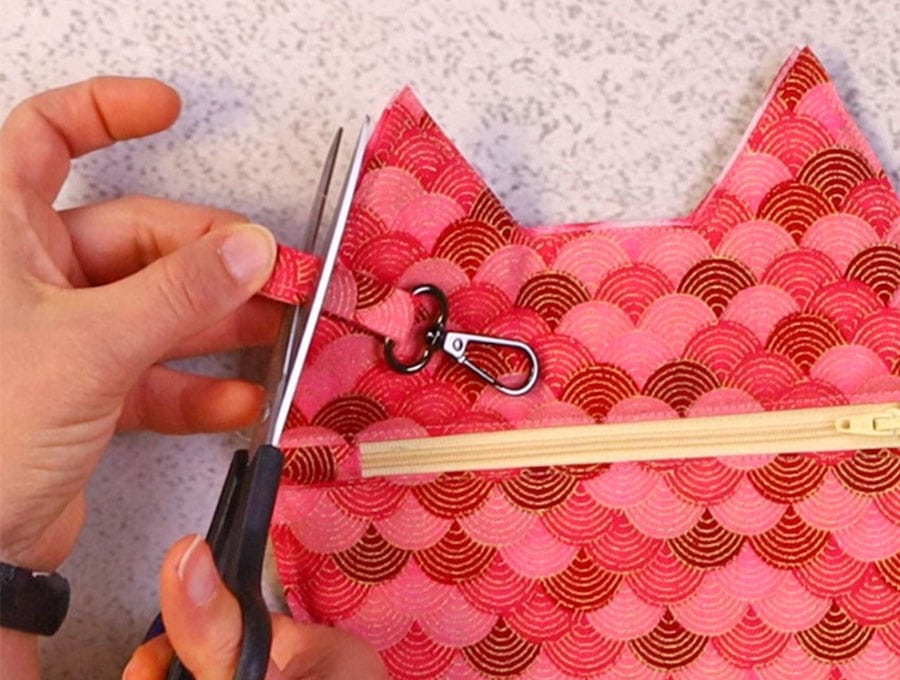
Stitch across the edge where the hanging loop is pinned, backtacking over the area to attach the loop firmly. Trim off the ends of the loop that project beyond the edge
STEP 15:
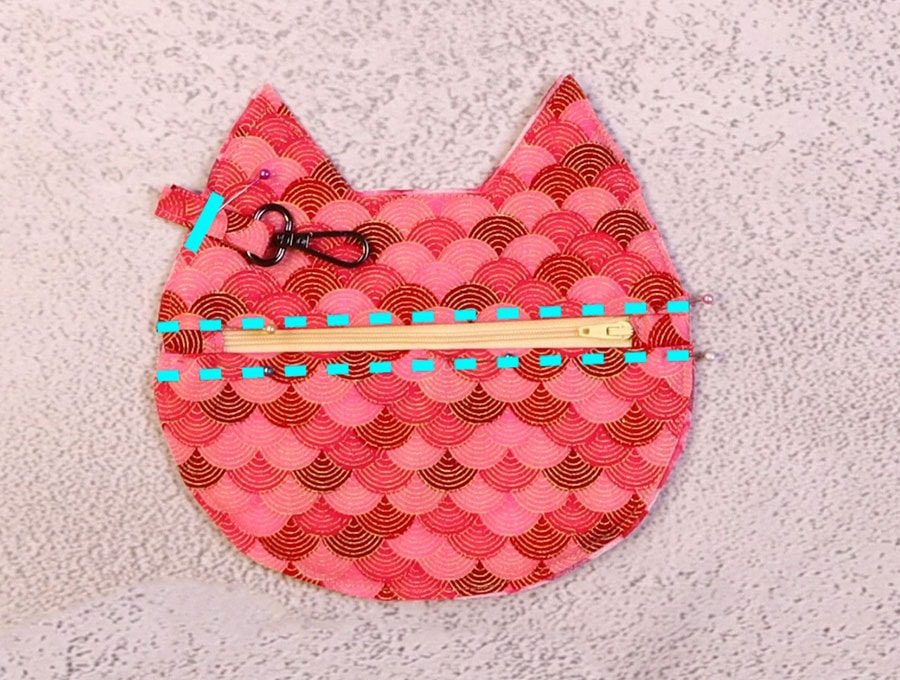
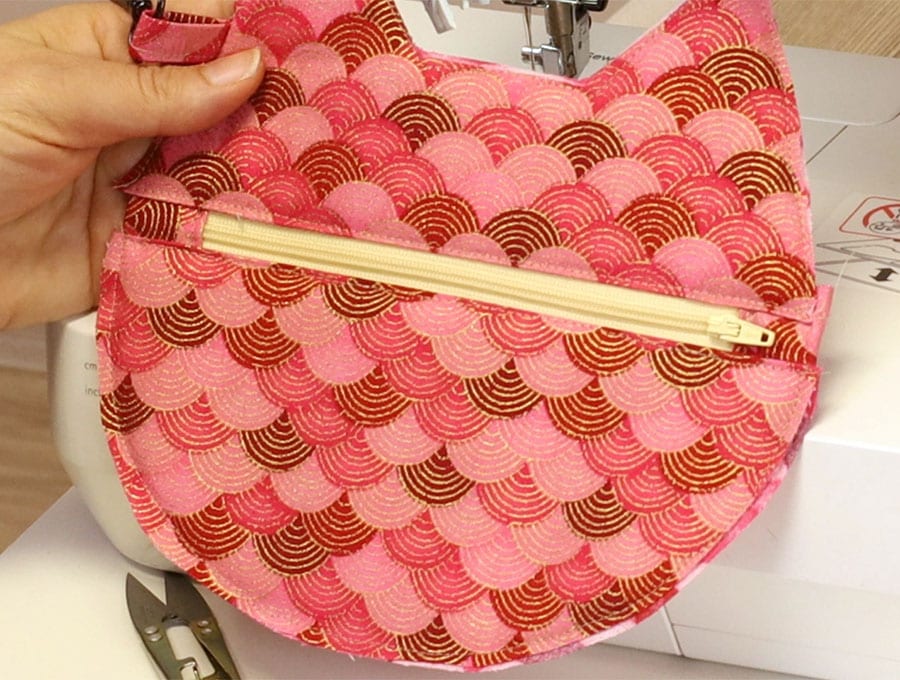
Stitch across the edges of the zipper, using a zipper foot to get close to the teeth on each side of the zipper, backtacking at the start and finish.
STEP 16:
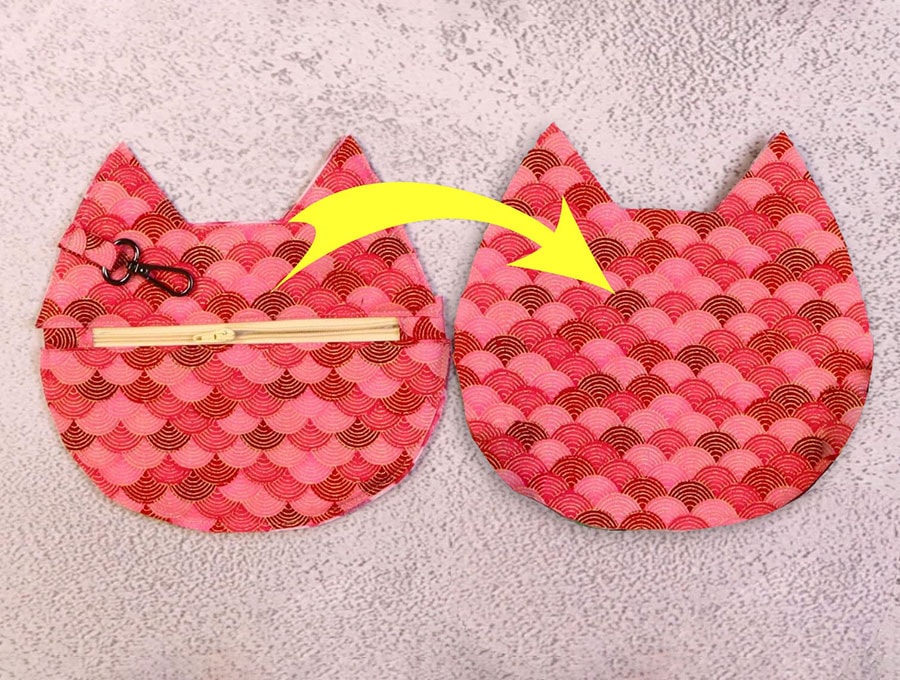
Open the zipper half way – this will enable turning the kitty purse the right way out later.
STEP 17:
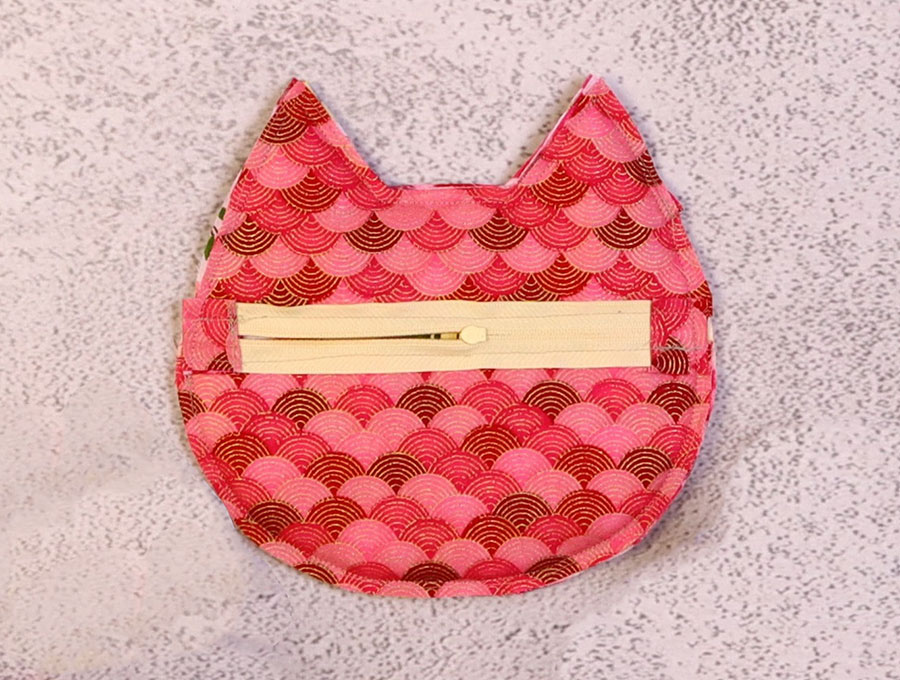
Take the back of the cat head and over the fused interfacing place the lining fabric right side out and clip in place.
STEP 18:
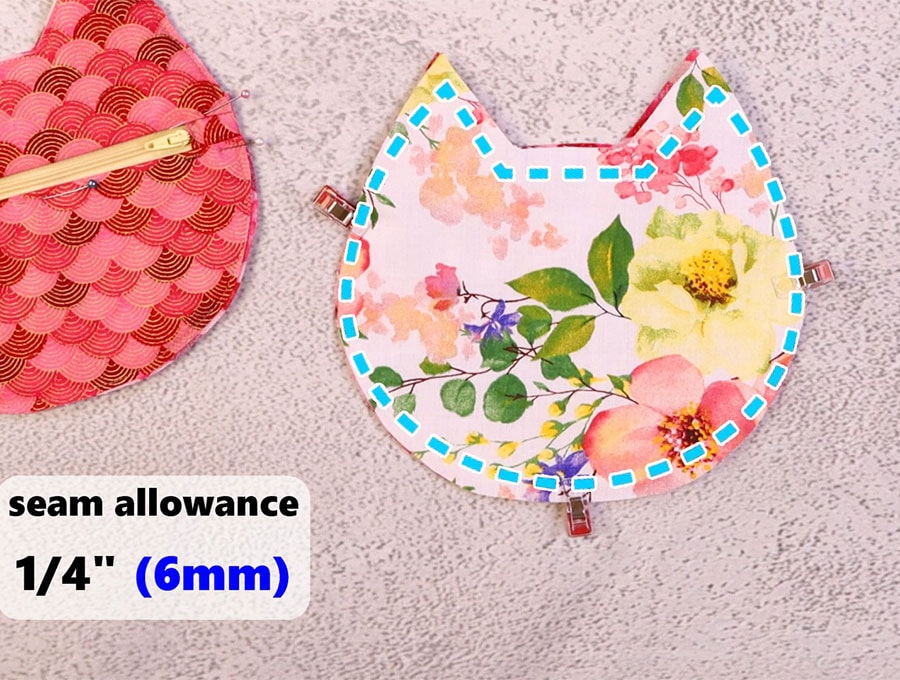
Stitch right around the back of the cat head ¼ of an inch (6 mm) from the edge.
STEP 19:
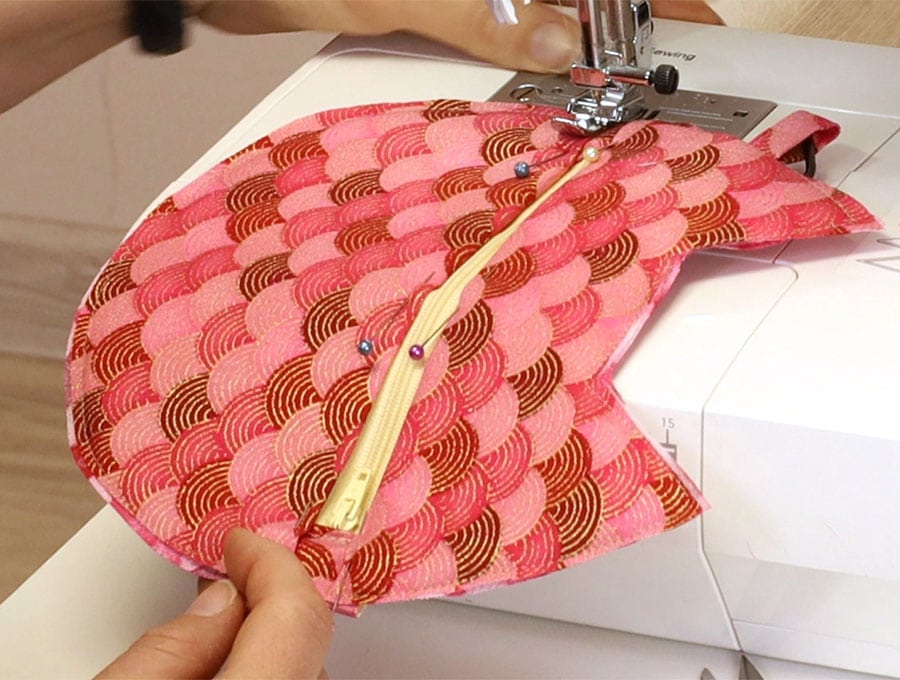
Place the back of the cat head right side up on your worktop and over it place the front of the cat face with the zipper wrong side up. Clip in place after lining up the edges.
STEP 20:
Stitch right around the purse 3/8 of an inch (1 cm) from the edge, taking care around the sharp points of the ears to leave the needle in the fabric, lift the presser foot and swing the fabric before depressing the foot and carrying on stitching – this gives a nice neat point.
STEP 21:
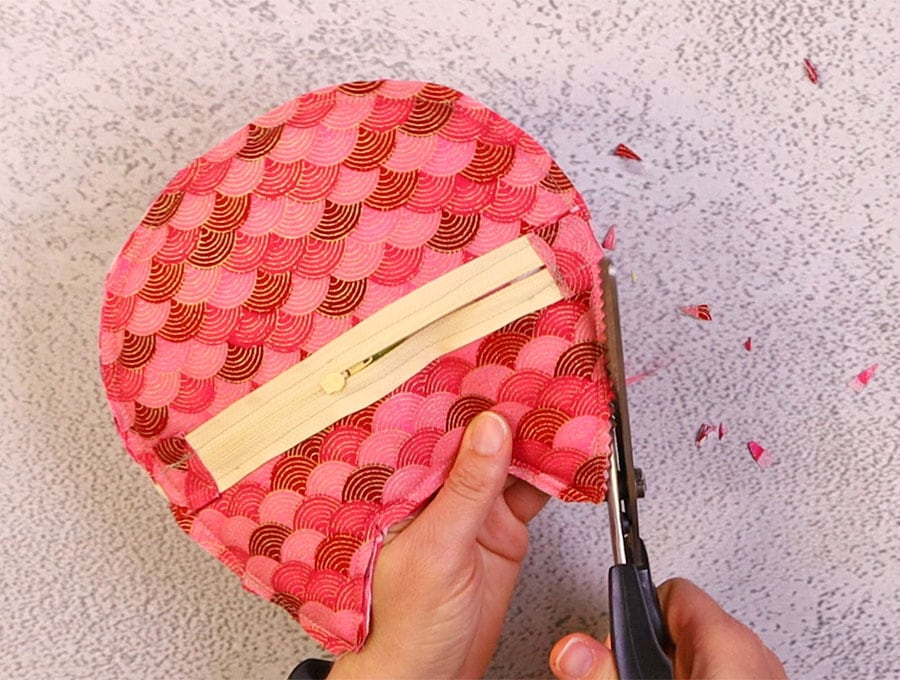
Use pinking shears to trim off extra fabric and make a neat edge. Turn the right way out by pulling the fabric through the open zipper.
STEP 22:
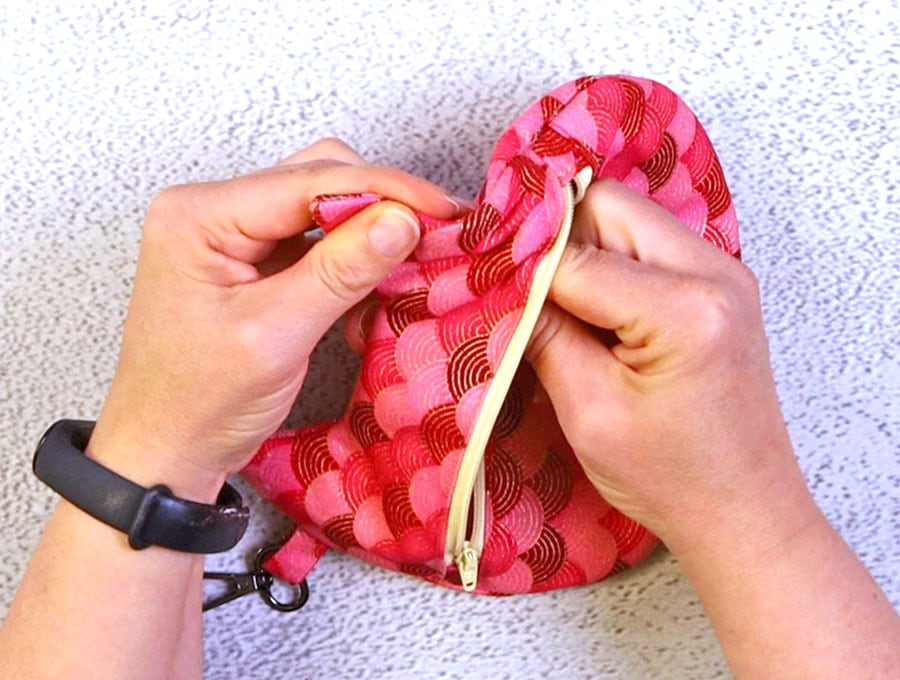
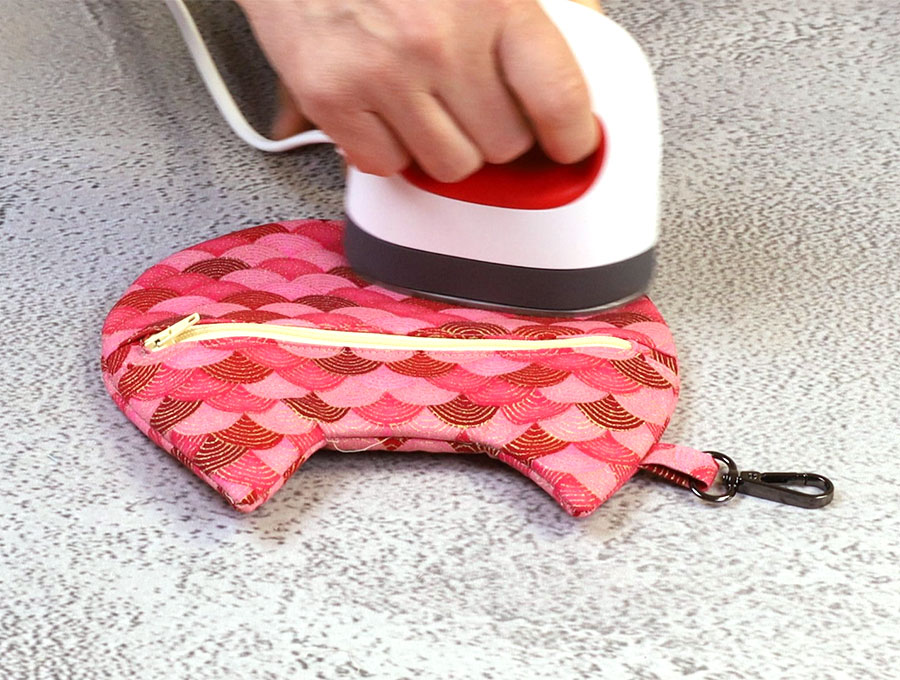
Use a turning tool to press out the ears neatly and give the kitty purse a press once it’s all turned and flat.
You can go one step further if you choose and add some luscious eyelashes to the kitty purse with black embroidery thread – or a light colour thread if you used a dark colour for the purse.
If you enjoyed this tutorial please don’t forget to give us a like and subscribe for more fun tutorials heading your way.
Second intro
Make the DIY kitty purse and brighten someone’s day! Its super easy with our free printable pattern and full instructions both visual and written. It can be made from the odd bits of leftover fabric in your stash. The best thing is it comes with a lobster claw to fasten securely to a backpack or inside a larger bag so you don’t lose your purse.
Do you like this? Pin for later:
Wanna be friends? Click HERE and follow me on Pinterest
RELATED: