
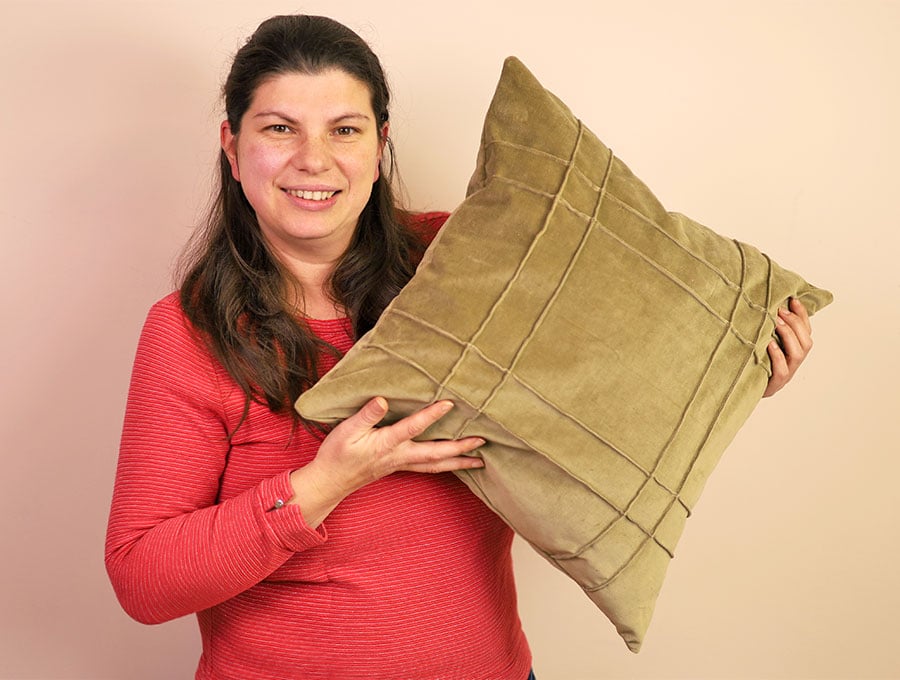
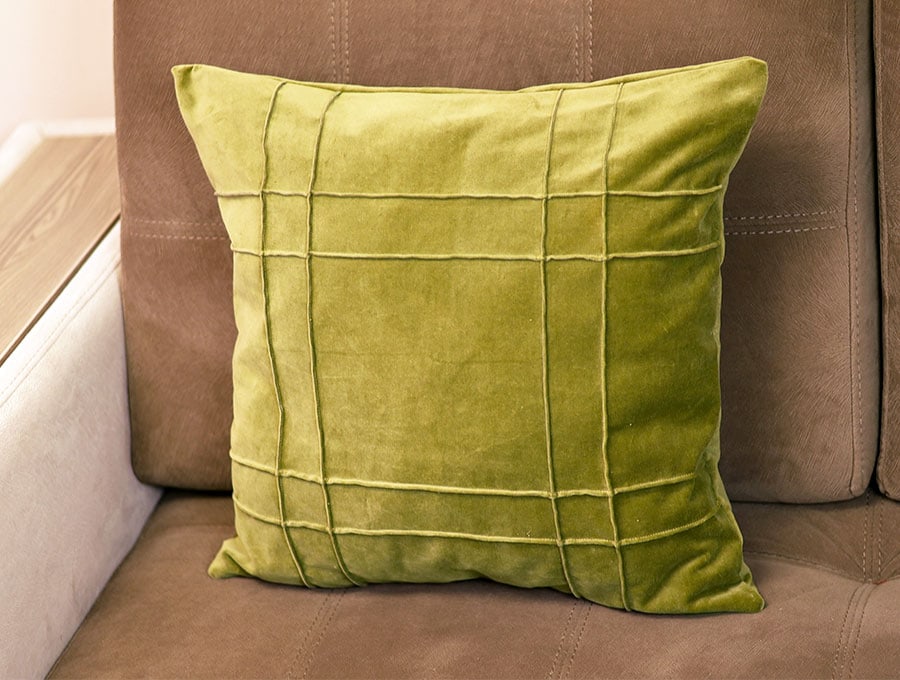
DIY Velvet Pillowcase with Checkered Design
If you have ever had pillow envy over those luxe velvet pillows you see in home décor magazines then this is the project for you – just 15 minutes to make a stunning pillow cover with a checkered design on the front.
For a Boho look go for deep purple, burgundy and dark blue velvet pillows. For a luxury designer look go for ivory, sand, beige and taupe velvet cushions. A sophisticated look with black leather couches would be white, grey and black, with possibly just one red velvet pillow.
A tip if you like a full pillow is to measure your pillow inner then make the pillow cover a little smaller so it’s a tighter fit. For example, if you have a 20 inch (50 cm) pillow, make the finished cover 19 x 19 inches (48 x 48cm). It will give you that puffy designer look pillow.
Below you will find my step by step written tutorial with VIDEO instructions for all the visual learners.
We occasionally link to goods offered by vendors to help the reader find relevant products. Some of the links may be affiliate meaning we earn a small commission if an item is purchased.
Table of Contents
How to make the Checkered design pillow
Supplies and tools
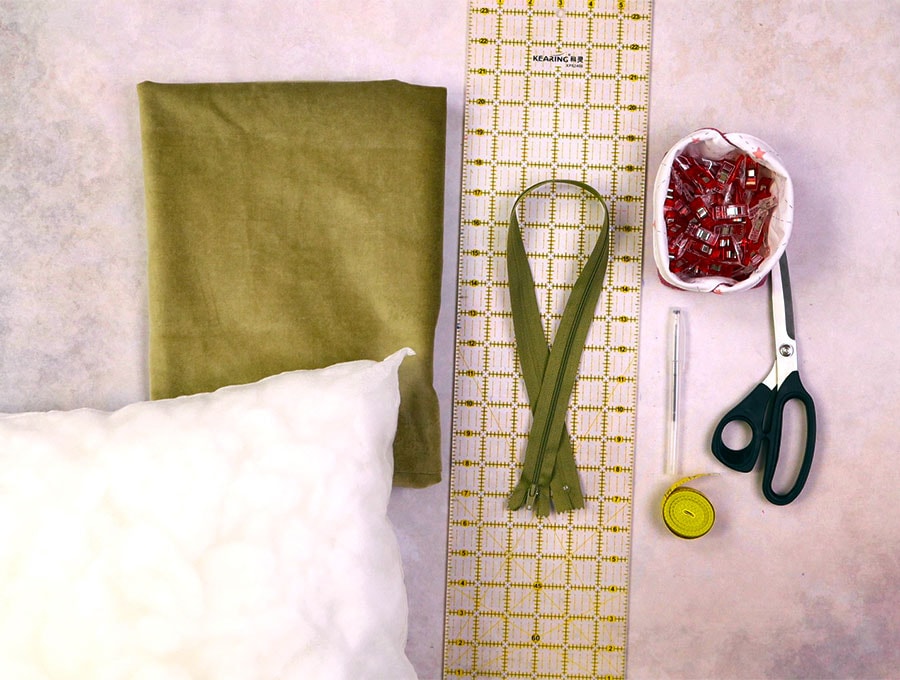
- fabric – velvet to accomodate the size of your pillow
- pillow form/insert
- 1 zipper 20 inches (50cm) long
- matching thread
- scissors (or rotary cutter and a cutting mat)
- ruler or measuring tape
- iron and ironing board
- sewing clips or pins
- fabric marking pen
- quick unpick tool
Follow us for free patterns & tutorials! [easy-profiles]
How to Sew a Velvet pillow with checkered design
Watch the diy checkered velvet pillow video first and then follow the written step by step instructions below.
Please enjoy and don’t forget to Like and SUBSCRIBE over on YouTube to be kept up to date with new videos as they come out.
Checkered design velvet pillow VIDEO TUTORIAL
INSTRUCTIONS:
STEP 1:
Measure the pillow inner you are planning on using. Mine was 19 x 19 inches (48 x 48 cm).
STEP 2:
Add an extra 2 inches (5 cm) in total, so the measurement for the fabric for the pillow front will be 21 x 21 inches (53 x53 cm). This is to accommodate the tucks you are going to create for the checkered effect.
For my 19 x 19 inch (48 x 48 cm) pillow I used:
- 1 piece of 21 x 21 inches (53 x53 cm).
- 2 pieces of 10 ¾ inches (27 cm) x 20 inches (50 cm)
- 1 zipper 20 inches (50cm)
STEP 3:
On the right side of the fabric make a mark at the bottom of the square 4 ¾ inches (12 cm) from the left, then 2 inches (5 cm) from the first mark. Moving to the right side make a mark 4 ¾ inches (12 cm) from the right and another 2 inches (5 cm) from the first mark.
STEP 4:
Repeat the marks at the top of the fabric square.
STEP 5:
Use a quilting ruler or a normal ruler to join the marks from top to bottom with 4 lines.
STEP 6:
To make the marks across:
On the left side, measure 4 ¾ inches (12 cm) from the top, then 2 inches (5 cm) down from the first mark.
On the right side , measure 4 ¾ inches (12 cm) from the top, then 2 inches (5 cm) down from the first mark.
Then on the left side of the square measure 4 ¾ inches (12 cm) from the bottom, make a mark, then measure 2 inches (5 cm) above that and make a mark.
On the right side of the square measure 4 ¾ inches (12 cm) from the bottom, make a mark, then measure 2 inches (5 cm) above that and make a mark.
STEP 7:
Join this next set of 8 marks with four lines using your quilting ruler or normal ruler.
STEP 8:
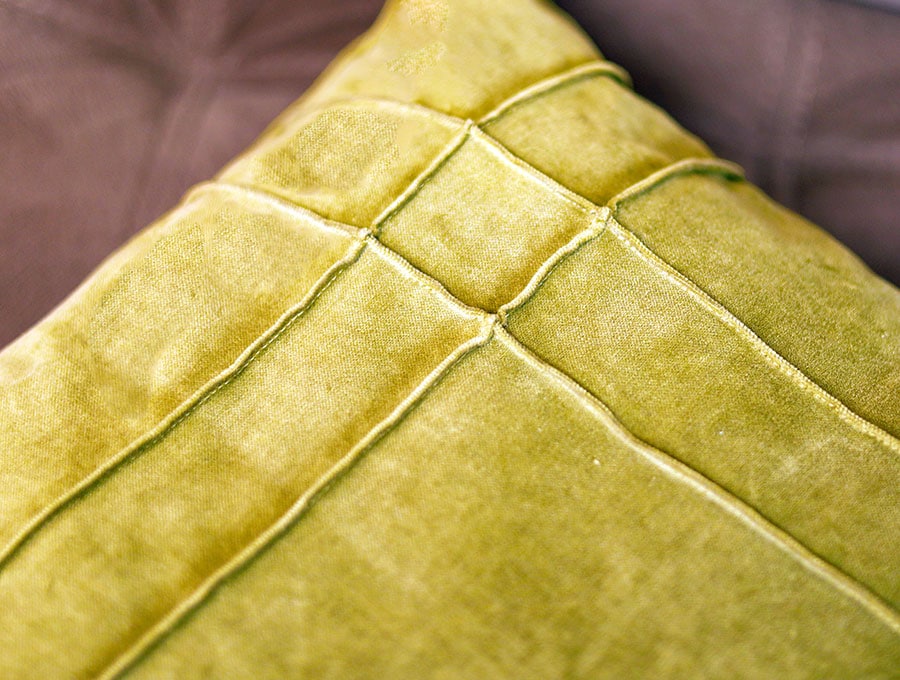
Pin and stitch the lines in a matching thread in the following manner: Start with one line and fold the fabric, right sides outwards, then pin along the line and stitch 1/8 of an inch (3 mm) from the folded edge. Do the same with all the lines parallel to each other. You are creating what dressmakers call pin-tucks to add some texture and interest to the pillow.
STEP 9:
Now start stitching the lines crossing the ones you have already stitched. Make sure that each line you stitch across has the pin-tuck facing to the right for a uniform look.
STEP 10:
Once you have your checkered front of the pillow done, lay it right side up on your worktop and measure. It should measure 20 x 20 inches (50 x 50 cm).
To make the back of the pillow we need to calculate the height of the back panels.
To do that add 1.5 inches (4 cm) and divide by 2, so, for example:
(20 +1 ½ inches) / 2 = 10 ¾ inches;
metric (50 + 4 cm) / 2 = 27 cm;
The width remains equal to the width of the front – in our case this is 20 inches (50 cm)
Now cut two pieces of velvet for the back of the pillow to the required size. My two back pieces were each 20 x 10 ¾ inches (50 x 27 cm).
STEP 11:
Place the back panels right side to right side and stitch together 3/8 of an inch (6 mm) from the edge on the 20-inch (50 cm) side.
STEP 12:
Open out the seam and flatten, then with the wrong side facing upwards pin your zipper in position with the middle where the teeth meet right over the seam your stitched. The zipper should reach to the edge of the fabric on each side.
STEP 13:
Mark 1 inch (2.5 cm) in from each side. Pin the zipper, right side down, in place, then stitch down each side and across the ends where you have made the mark, ensuring the zipper pull is inside the end stitch mark, and that you backtack where you stitch across the zipper teeth. Use your zipper foot for this step.
STEP 14:
Insert pins at the beginning and end of the stitching. Flip over to the right side and using your quick unpick tool, slide it along to unpick the seam between the pins. Snip off the extra zipper length and seal with a quick pass of a lighter to seal the ends.
STEP 15:
Lay the front of the pillow and back of the pillow right side to right side, line up the edges and stitch all the way around 3/8 of an inch (1 cm) from the edge. At the corner leave the needle in the fabric, lift the presser foot, swing the fabric 90 degrees, depress the pressure foot and continue stitching. Backtack at the start and finish.
STEP 16:
Serge (overlock) the edges, or use a zigzag stitch.
STEP 17:
Turn the pillow the right way out, pressing out the corners, then insert the pillow inner.
So you have it – designer style within a few minutes is at your fingertips. Spend just 15 minutes updating the décor of your lounge or bedroom with our easy checkered velvet pillow. The pin-tucks provide the checkered effect, so there’s no fiddly joining of bits of fabric. We also show you a super easy way to get a professional finish on the zipper.
If you enjoyed this tutorial then you know what to do – hit the like and subscribe button to be the first to have the latest tutorials drop in your inbox. And don’t forget to share this tutorial with people you know who are on a budget yet want to change the look of their décor. Often changing the pillow colors can elevate the décor of a room without having to do costly stuff like buy a new lounge suite or repaint, making pillows a sustainable yet fashion forward statement.
Do you like this? Pin for later:
Wanna be friends? Click HERE and follow me on Pinterest
RELATED: