
Christmas Tree Drawstring Bag – Free sewing pattern in 5 sizes
Sew the perfect festive gift bag! This Christmas drawstring bag pattern is just what you need to take your gifts from Good to WOW.
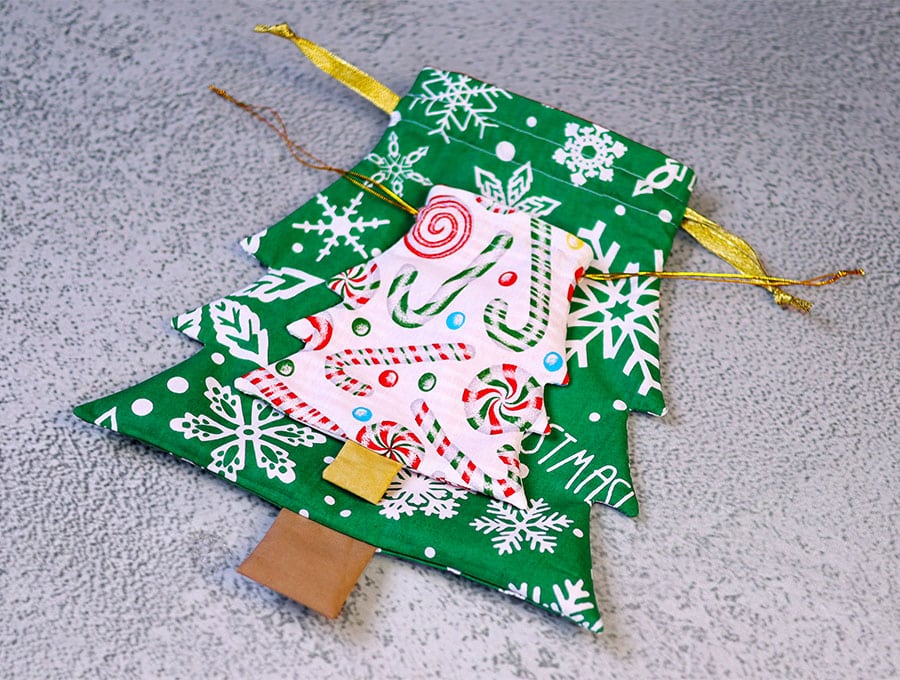
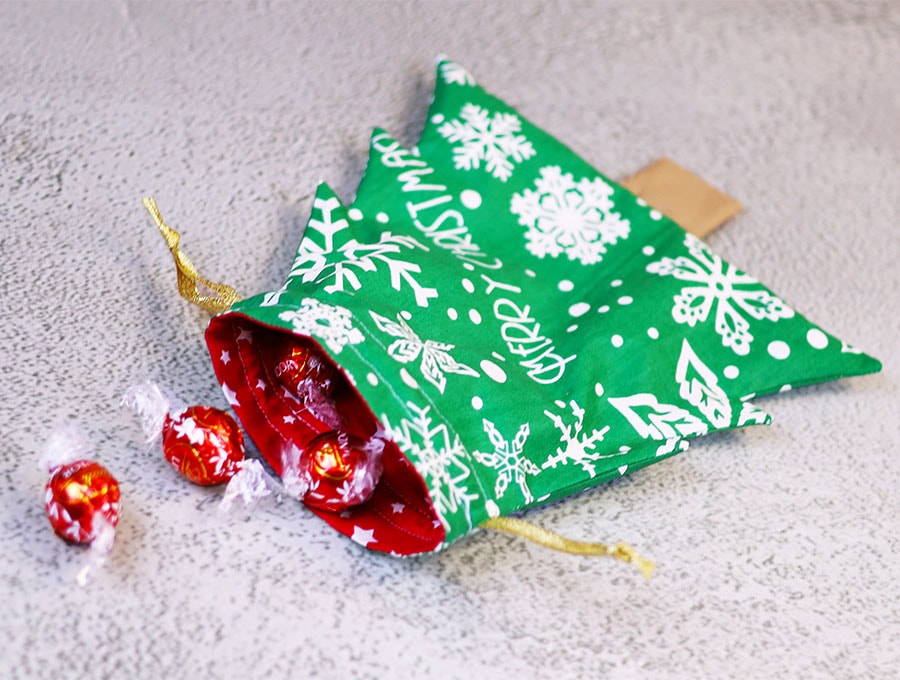
What could be prettier than a line of Christmas Tree Drawstring Bags packed with goodies, hanging on the mantelpiece among the twinkling lights. The bags are reusable, available in a range of 5 sizes and quick to make. Plus they are a great way to use up the smaller pieces of Christmas fabric in your stash. They can also be made in plain fabric and personalised with a person’s name in glitter fabric paint. So, let’s get sewing!
Below you will find my step by step written tutorial how to make this gorgeous Christmas tree gift bag with VIDEO instructions for all the visual learners.
We occasionally link to goods offered by vendors to help the reader find relevant products. Some of the links may be affiliate meaning we earn a small commission if an item is purchased.
Table of Contents
- 1 How to make the Christmas Tree drawstring bag
- 2 Supplies and tools
- 3 How to Sew a Christmas tree drawstring gift bag
- 3.1 Christmas tree drawstring gift bag VIDEO TUTORIAL
- 3.2 INSTRUCTIONS:
- 3.3 STEP 1:
- 3.4 STEP 2:
- 3.5 STEP 3:
- 3.6 STEP 4:
- 3.7 STEP 5:
- 3.8 STEP 6:
- 3.9 STEP 7:
- 3.10 STEP 8:
- 3.11 STEP 9:
- 3.12 STEP 10:
- 3.13 STEP 11:
- 3.14 STEP 12:
- 3.15 STEP 13:
- 3.16 STEP 14:
- 3.17 STEP 15:
- 3.18 STEP 16:
- 3.19 STEP 17:
- 3.20 STEP 18:
- 3.21 STEP 19:
- 3.22 STEP 20:
- 3.23 STEP 21:
- 3.24 STEP 22:
- 3.25 STEP 23:
- 3.26 STEP 24:
- 3.27 STEP 25: (optional)
How to make the Christmas Tree drawstring bag
Supplies and tools
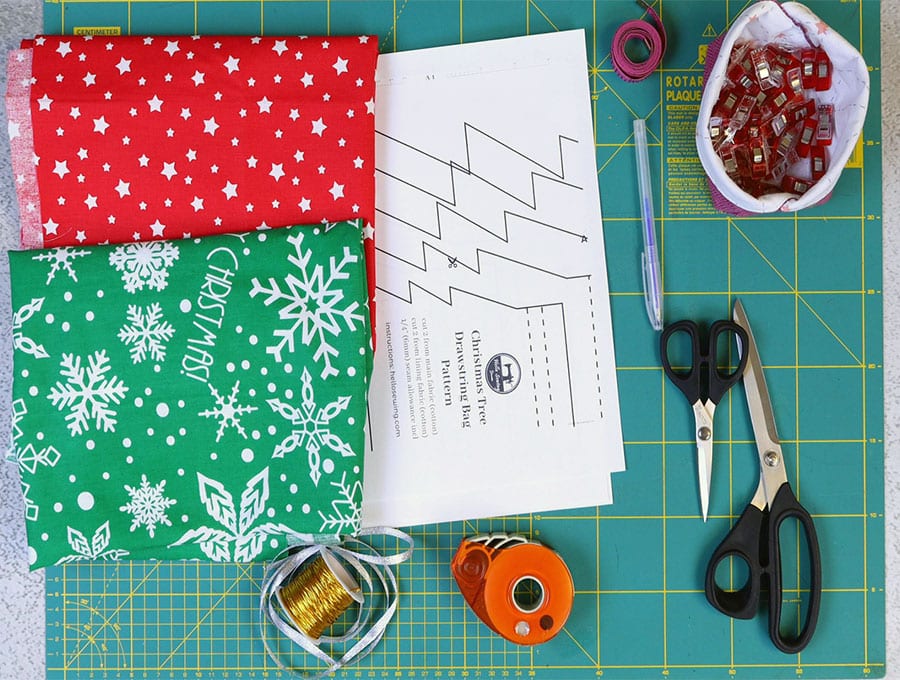
- fabric – 2 pieces of 100% tightly woven cotton (one main, one lining)
- matching thread
- scissors (or rotary cutter and a cutting mat)
- ruler or measuring tape
- iron and ironing board
- sewing clips or pins
DOWNLOAD: Christmas tree drawstring bag pattern [Free pdf file]
Follow us for free patterns & tutorials! [easy-profiles]
How to Sew a Christmas tree drawstring gift bag
Watch the diy Christmas tree drawstring bag video first and then follow the written step by step instructions below.
Please enjoy and don’t forget to Like and SUBSCRIBE over on YouTube to be kept up to date with new videos as they come out.
Christmas tree drawstring gift bag VIDEO TUTORIAL
INSTRUCTIONS:
STEP 1:
Print out the Christmas tree drawstring gift bag pattern, then glue or tape the 4 pieces of paper together to create the five size pattern. Decide which size you’ll need according to the size of the gift you’ll place inside.
STEP 2:
Cut out the pattern shape you want using scissors or a rotary cutter and self-healing cutting mat. Cut the corresponding trunk.
STEP 3:
Assemble your fabric – you will need two pieces of outer fabric and another two of the same size for the lining. Cut two of each according to the size of the tree pattern selected.
STEP 4:
Place the corresponding size pattern piece over the fabric for the tree trunk, pin and cut.
STEP 5:
Place one piece of lining and one piece of outer fabric right side to right side and pin together. Repeat with the other piece of fabric and lining.
STEP 6:
Place the Christmas tree gift bag pattern over the pinned pieces and mark the gaps for the casing where the drawstring will be threaded. Then turn the fabric over and mark the gaps, so they are marked on the lining and the outer on each side.
STEP 7:
Take the fabric piece for the tree trunk, fold in half on the long side, right side to right side and clip or pin.
STEP 8:
Stitch down the open sides of the fabric ¼ of an inch (6 mm) from the edge, so you create a small pocket.
STEP 9:
Take the two pieces for the tree you pinned in Step 5 and stitch along the top ¼ inch (6 mm) from the raw edge of each pair of pieces.
STEP 10:
Open out the pieces and finger press or press the seam open with an iron on the wrong side of the fabric.
STEP 11:
Turn the tree trunk piece right way out after snipping off the two top corners at the fold to reduce bulk. Give the piece a quick press with an iron then fold in half and make a small v notch to indicate the center.
STEP 12:
Take one of the pairs of tree outer and lining and find the center by folding the outer piece base in half to find the center, then make a small v notch in the center of the open end.
STEP 13:
Line up the tree trunk with the raw edges of the trunk facing the raw edge of the right side of the outer ( in our video it’s the green fabric), and align the notches. Pin in place.
STEP 14:
Line up the two outer sides right sides of the Christmas tree over each other, and the attached lining pieces over each other and pin.
STEP 15:
Mark the gap through which you will pull the fabric to turn it, at the bottom edge of the lining. The gap will be around 2 ½ to 4 inches (6 to 10 cm), depending on the size of the Christmas Tree drawstring bag you are making.
STEP 16:
Starting from one side of the gap with a backtack, stitch around the edge of the Christmas tree, working your way carefully around the branches with a ¼ inch (6 mm) seam allowance. REMEMBER that you have marked the lines for the elastic casing – make sure you do not stitch over these marks but backtack at the first one, then start on the other side of the second mark, backtacking to start. There will be four little gaps for the casing. When you get to the other side of the bigger gap in the base you will end with a backtack.
PRO tip for sewing points and angles is to stitch to the point where you need to turn the fabric, leave the needle down in the fabric, lift the presser foot, swing the fabric to where you need to keep stitching, depress the foot and carry on. This gives a precise point.
STEP 17:
Carefully snip off the extra fabric at the points of the branches of the tree, taking care not to get too close to the stitch line, then make tiny V-notches in the fabric where the angle lies between one branch ending and the next one starting. We do this to ease the fabric so it doesn’t strain and pucker when it is turned the right way out.
STEP 18:
Finger press the raw edges of the gaps for the casing in line with the seam, then turn the fabric the right way out by pulling it gently through the gap. Use a turning tool to press out the points so they are neat and the seams lie flat. Turn in the raw edges of the gap through which you turned the fabric.
STEP 19:
Once the fabric is turned and neat give it a quick press so everything is flat.
STEP 20:
Mark the edges of the small gaps on the outer piece only, then use a ruler to join the marks with two straight lines to indicate where you will sew the casing.
STEP 21:
Stitch the gap at the bottom of the lining closed by stitching 1/8 of an inch (3mm) from the edge.
STEP 22:
Push the lining inside the outer and make sure the branches all fit into each other and the gaps for the casing between the inner and outer line up.
STEP 23:
Stitch the marked lines for the casing, backtacking at the start and finish. To do this for the M, L and XL sizes you can remove the free arm of your machine so the bag fits over the stitch arm. For the smaller sizes you’ll just have to work carefully around the top of the bag bit by bit.
STEP 24:
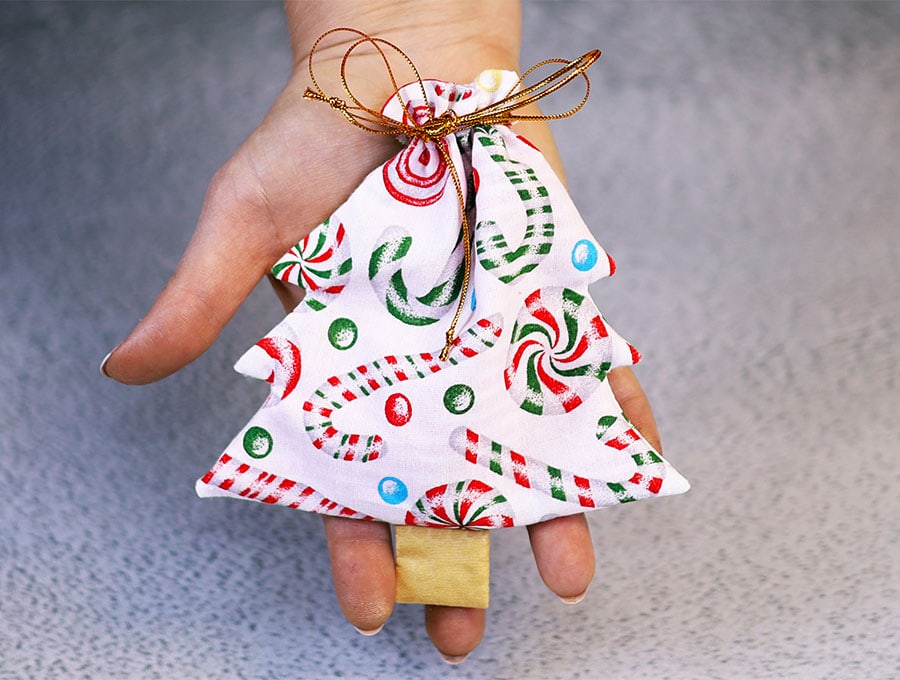
To insert the ribbon for the casing, use a bodkin or a safety pin to thread ribbon through the front casing piece, leaving enough sticking out of each end to tie a bow. Then thread a piece of ribbon through the back of the bag casing. Make sure the ends are equal. I prefer to tie a small knot in the two ribbon ends on each side to prevent them pulling out of the casing. Your drawstring bag is now ready to use.
STEP 25: (optional)
If you want to add a little extra you can put a small bell on each end of the tied ribbon, so it jingles when it is opened.
The last step is to fill it with goodies and hang the big ones on the mantelpiece. Smaller ones can be hung on the Christmas tree filled with sweet treats for unexpected visitors so everyone can share in the magic of the season.
Sew this cute Christmas tree drawstring bag to make a change from a Christmas sock. Imagine a little row of trees lined up on the mantelpiece with surprizes inside on Christmas morning. It’s an easy make and the free printable pattern can be made in five sizes from extra small to extra-large to accommodate gifts.
Like and subscribe if you are a Christmas craft addict! We have loads of fun and practical ideas. And for the rest of the year we have sewing projects for every festivity from Valentine’s Day, to Easter, Mothering Sunday, and Halloween. We also have practical projects to organise your home to perfection, and fashion items too that take you through the seasons from summer hats to winter scarves and just about everything in between.
Wanna be friends? Click HERE and follow me on Pinterest
RELATED: