")
DIY Classroom Door Security Curtain (Intruder Curtain)
If you are a teacher you’ll know most classrooms come with curtains or blinds to block out light when using media. The standard procedure in a lockdown situation is to lock doors, close windows, draw down blinds and remain silent should an armed intruder or some nutcase be roaming the corridors. But I have noticed the window panel in the door of the classroom is usually forgotten! That’s why you need a security curtain, also known as a classroom door window cover, privacy blackout shade or Lockdown Cover shades. They also come in handy when you are teaching to cover that classroom window so you don’t have random kids who happen to be roaming the halls stopping by and distracting those in the class. This design is also perfect for a clinic or office with that glass door panel, so you can ensure privacy of patients or clients.
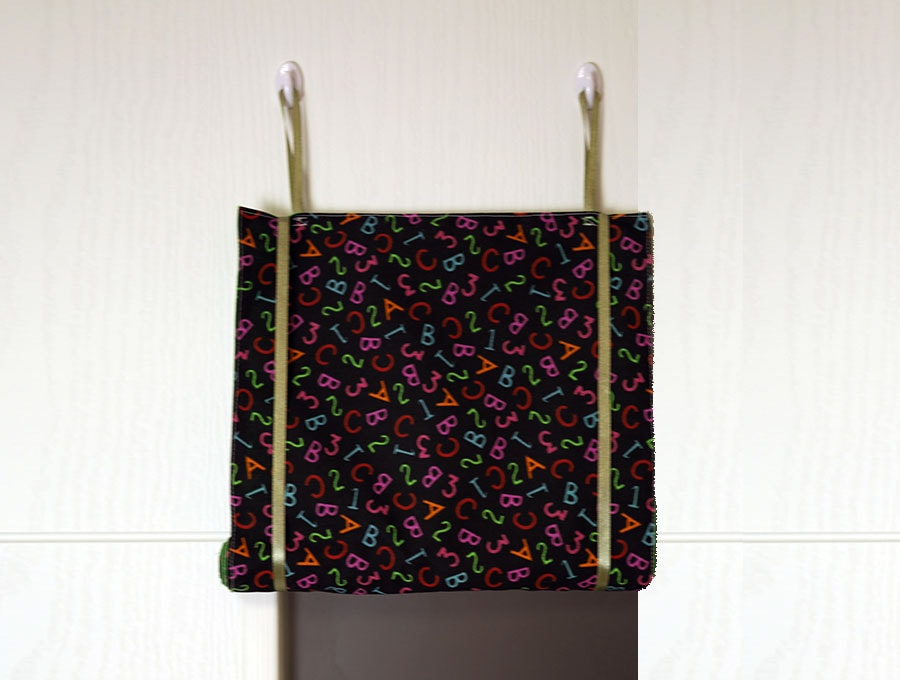
Our design is made with straps allowing you to easily install the blackout curtain on any window. It offers privacy for any classroom, clinic, office and apartment. You can roll up the blind with the straps attached to see who is at the door or roll it down for full privacy. This lockdown curtain has a very simple pattern, so one can sew it up very quickly, and you can adjust for the size of window easily.
Below you will find my step by step written tutorial with VIDEO instructions for all the visual learners.
We occasionally link to goods offered by vendors to help the reader find relevant products. Some of the links may be affiliate meaning we earn a small commission if an item is purchased.
Table of Contents
How to make a Classroom Intruder Curtain
Supplies and tools
- main fabric 36 x 11 inches (92 x 28 cm)
- lining fabric 36 x 11 inches (92 x 28 cm)
- wooden dowel 25cm x 1.3cm diameter (10-inch-long x ½ inch)
- 50 inches (128 cm) ribbon or tape
- matching thread
- scissors (or rotary cutter and a cutting mat)
- ruler or measuring tape
- iron and ironing board
- sewing clips or pins
Follow us for free patterns & tutorials! [easy-profiles]
How to Sew a Classroom Security Curtain

Watch the diy Classroom intruder curtain video first and then follow the written step by step instructions below.
Please enjoy and don’t forget to Like and SUBSCRIBE over on YouTube to be kept up to date with new videos as they come out.
Classroom Security Curtain VIDEO TUTORIAL
INSTRUCTIONS:
Finished size: appx 35 x 10″ (90 x 25cm) – you can make other sizes, just adjust the width and length of the fabrics accordingly. The hanging loops are an additional 3″(7.5cm) long
Fabrics:
- main fabric 92 x 28cm (36 x 11 inches)
- lining fabric 92 x 28cm (36 x 11 inches)
- 50 inches (128 cm) ribbon or tape to make hanging loops
STEP 1:
Place the main fabric and lining right side to right side, lining up the edges and clip or pin together.
STEP 2:
Mark a gap of around 5 inches (12.7 cm) using a fabric marking pen or pencil on one of the long sides, roughly near the middle. We never make the gap near the corner as this makes getting corners perfect a bit more difficult.
STEP 3:
Stitch around the edge of the fabric ¼ of an inch (6mm) from the edge, starting at one side of the gap, backtacking, then going around the fabric to end at the other side of the gap, again backtacking to finish. When you come to corners, for a neat finish stitch to the corner, leave the needle down, lift the presser foot, swing the fabric 90 degrees, put the presser foot down and continue stitching.
STEP 4:
Clip a small triangle off at each of the corners to reduce bulk so when you turn the DIY safety blind the right way out the corners lie flat. Just be careful not to cut too close to the stitching otherwise it will fray out when turned.
STEP 5:
Pull the blind through the gap in the fabric to get it the right way out, gently pushing out the corners with a turning tool or chopstick. Preferably don’t use your scissors – it is so easy to poke a hole through the fabric at the corner if you use something sharp and pointy. When you have turned it just make sure the seams are pushed out along the length, so there is not an overlap of cloth.
STEP 6:
Turn in the raw edges of the gap in line with the seam and clip or pin in place before giving the whole blind a press to ensure everything is lying flat.
STEP 7:
Top stitch around the edge 1/8 of an inch (3mm) from the edge stitching across most of the gap but leaving just an 1 inch (2.5 cm) opening – this is to insert the wooden rowel
STEP 8:
Take your 10-inch-long x ½ inch (1.27 cm diameter) wooden dowel and slide it through the gap, moving it up so it sits snugly at one end of the blind.
STEP 9:
Once it is in place run a line of stitching below the wooden dowel to hold it in place at what will be the bottom of the blind. Backtack at the start and finish.
STEP 10:
Stitch the gap where you inserted the dowel with a top stitch in line with the rest of the stitching, back tacking as start and finish.
STEP 11:
Cut 2 pieces of ribbon or tape 25 inches (64 cm) in length and use a lighter or match to seal the ends with a quick pass over the flame, so the ends don’t fray out.
STEP 12:
Set the two ends neatly over each other by about ¼ of an inch, then make the top loop– use your ruler or measuring tape to ensure the top loop is 3 inches (7.5 cm), then holding carefully, pin the looped ribbon or tape to the lining side of the security curtain about an inch (2.5 cm) in from the edge on the end opposite the dowel.
STEP 13:
Repeat step 12 and pin the other loop to the other end of the DIY security curtain.
STEP 14:
Stitch over both each ribbon or tape making sure that you catch both ends of the ribbon, and backtack to make sure it is securely fastened.
STEP 15:
To install the curtain screw two cup hooks into the wood, or if the door is metal use stick on hangers, making sure the distance is the same as the distance the loops are apart and that they are level.
STEP 16:
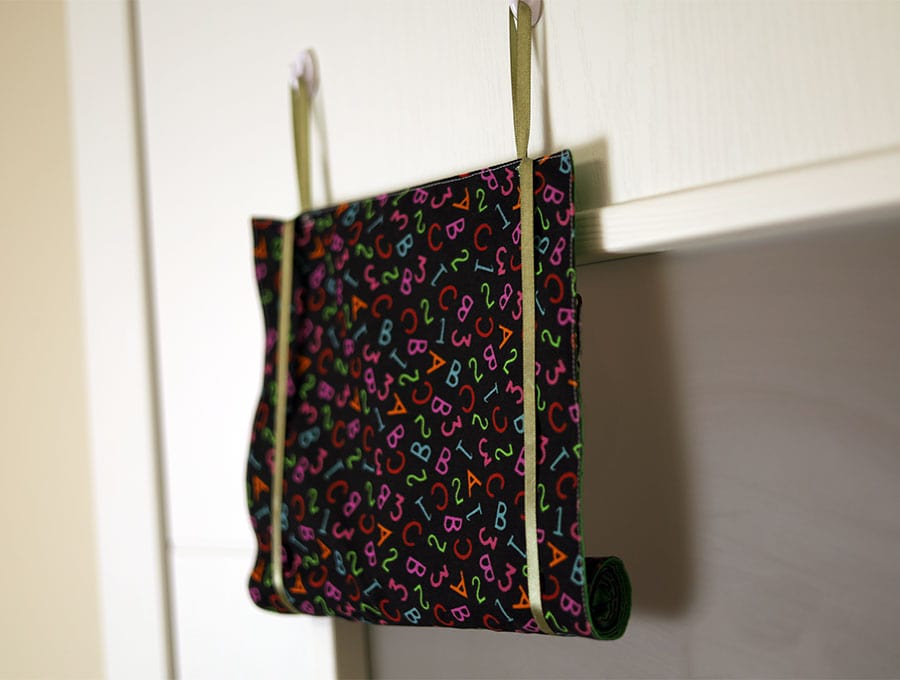
Slide the top 3-inch(7.5cm) loops over the hangers or cup hooks, with the extra loop hanging behind. The weight of the wooden dowel will keep the curtain hanging down and ensure privacy. To raise it simply roll up the curtain with the wooden dowel providing a guide, then slip the extra loops hanging behind up and over the hangers to keep the security blind in the ‘up’ position.
It only take a second to unhook the loops and let it roll down in case of an emergency or lockdown procedure. It also keeps pesky kids from interrupting your class by pressing their noses against the glass or licking it – eeuw – to get the attention of your class. No audience removes the temptation. This is also a perfect way to provide a screen in the glass panel of the door of an examination room in doctor’s offices, or in an office or apartment.
Make our lockdown security blind for the glass panel in your classroom door to keep your class safe in the event of any school invasion, or make it for a house with an odd size window, an apartment, office or clinic when you need privacy. We have the quick visual tutorial backed up with step-by-step instructions. Friends and family who are teachers will love this as a gift – you may just need to ascertain the dimensions of the glass panel in the door of the classroom first. You can adjust the width and length to suit any glass door panel. It can be made in a few minutes and could make a huge difference in a lockdown situation in a school.
If you found this useful do share with someone who is keep to keep their classroom or office private and give us a like and subscribe.
Do you like this? Pin for later:
Wanna be friends? Click HERE and follow me on Pinterest
RELATED: