
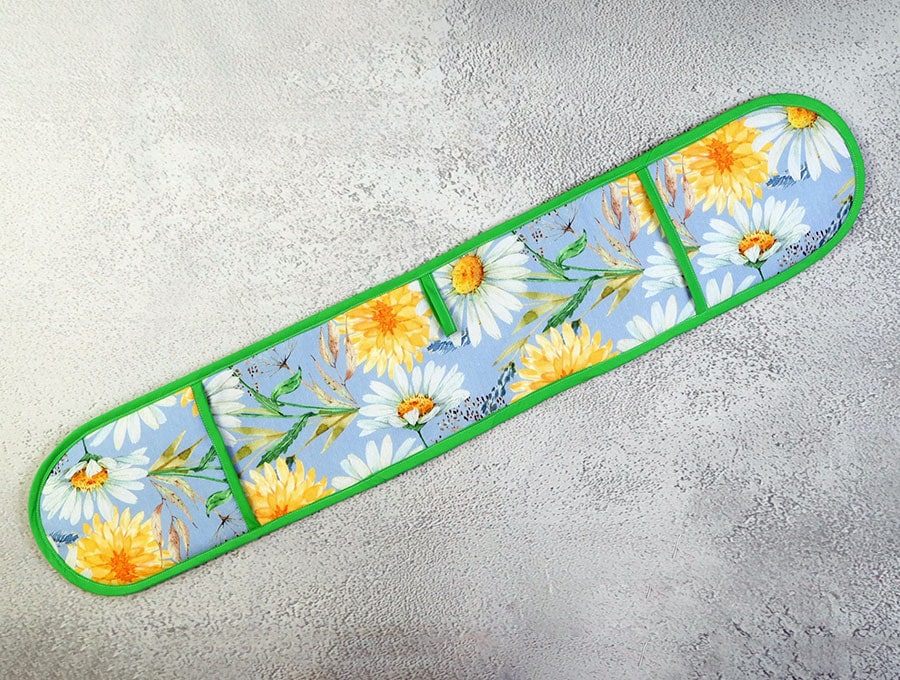
DIY Double Oven Mitt
Make the double oven mitt in minutes using our free printable pattern. It’s one of the most useful items to have in your kitchen to protect you from burns when removing casseroles and roasting pans from the oven. It’s a great project to use those longer skinny bits of cotton fabric. Better than separate oven mitts, the double oven mitt means you’ll never be searching for the that one missing mitt!

The double oven mitt is a very useful item to have in your kitchen when removing casseroles and roasting pans from the oven. Make it in a few minutes from your longer cotton offcuts in your stash. You’ll need some bias binding and batting to complete this great project using our printable pattern.
Below you will find my step by step written tutorial with VIDEO instructions for all the visual learners.
We occasionally link to goods offered by vendors to help the reader find relevant products. Some of the links may be affiliate meaning we earn a small commission if an item is purchased.
Table of Contents
- 1 How to make a Double Oven Mitt
- 2 Supplies and tools
- 3 How to Sew a Double Oven Mitt
- 3.1 Double Oven Mitt VIDEO TUTORIAL
- 3.2 INSTRUCTIONS:
- 3.3 STEP 1:
- 3.4 STEP 2: Cut fabric for the pockets
- 3.5 STEP 3: Cut batting for the pockets
- 3.6 STEP 4: Cut fabric for the main and back part
- 3.7 STEP 5:
- 3.8 STEP 6:
- 3.9 STEP 7:
- 3.10 STEP 8:
- 3.11 STEP 9:
- 3.12 STEP 10:
- 3.13 STEP 11:
- 3.14 STEP 12:
- 3.15 STEP 13:
- 3.16 STEP 14:
- 3.17 STEP 15:
- 3.18 STEP 16:
- 3.19 STEP 17:
- 3.20 STEP 18:
- 3.21 STEP 19:
- 3.22 STEP 20:
How to make a Double Oven Mitt
Supplies and tools
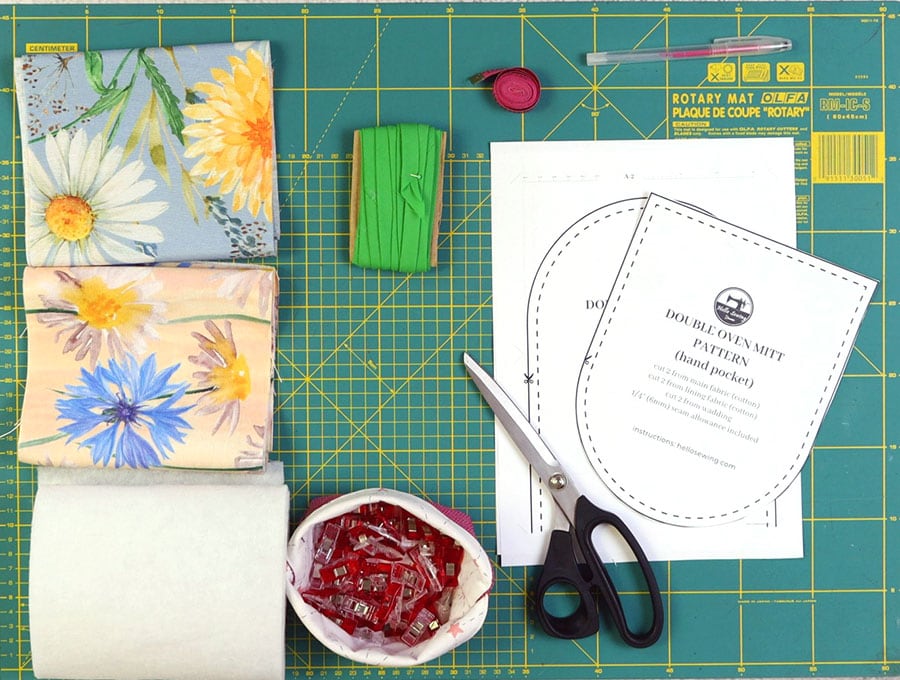
- fabric – 2 pieces of 100% woven cotton or home decor fabric (one main, one lining)
- batting
- HelloSewing’s free printable double oven mitt pattern (BELOW)
- matching thread
- scissors (or rotary cutter and a cutting mat)
- ruler or measuring tape
- iron and ironing board
- sewing clips or pins
DOWNLOAD: double oven mitt pattern [Free pdf file]
Follow us for free patterns & tutorials! [easy-profiles]
How to Sew a Double Oven Mitt
Watch the diy double oven glove video first and then follow the written step by step instructions below.
Please enjoy and don’t forget to Like and SUBSCRIBE over on YouTube to be kept up to date with new videos as they come out.
Double Oven Mitt VIDEO TUTORIAL
INSTRUCTIONS:
FRONT AND BACK:
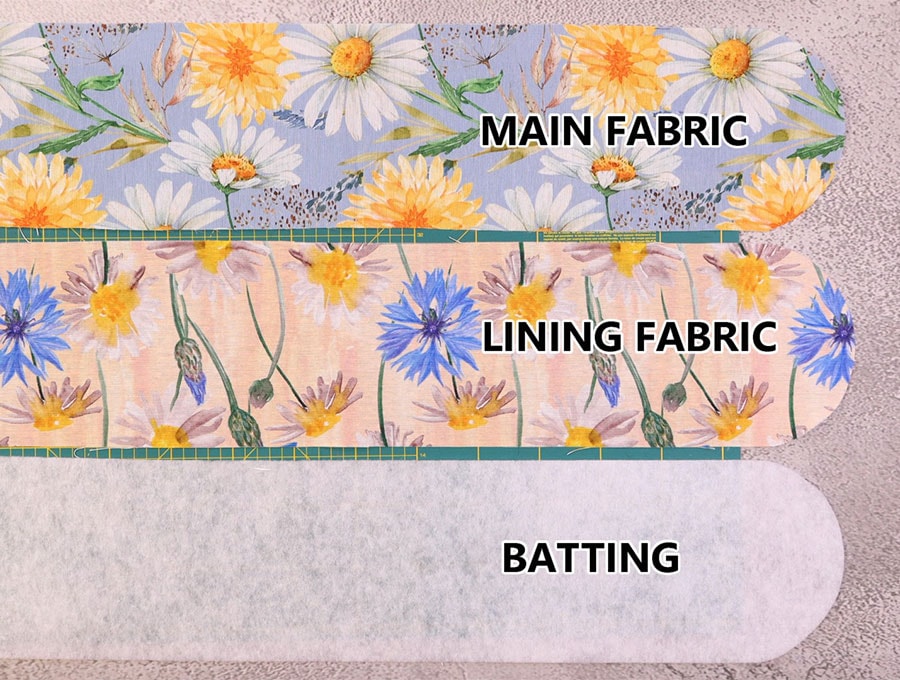
- 2 x outer fabric of 8 ¼ x 6 ¾ inches (21 x 17 cm)
- 2 pieces of lining fabric of 8 ¼ x 6 ¾ inches (21 x 17 cm)
- 1 piece of batting of 8 ¼ x 6 ¾ inches (21 x 17 cm)
POCKETS:
- 2 x outer fabric of 8 ¼ x 6 ¾ inches (21 x 17 cm)
- 2 pieces of lining fabric of 8 ¼ x 6 ¾ inches (21 x 17 cm)
- 2 pieces of batting of 8 ¼ x 6 ¾ inches (21 x 17 cm)
BIAS BINDING
- 3 yards (250 cm) of double edge bias binding
STEP 1:
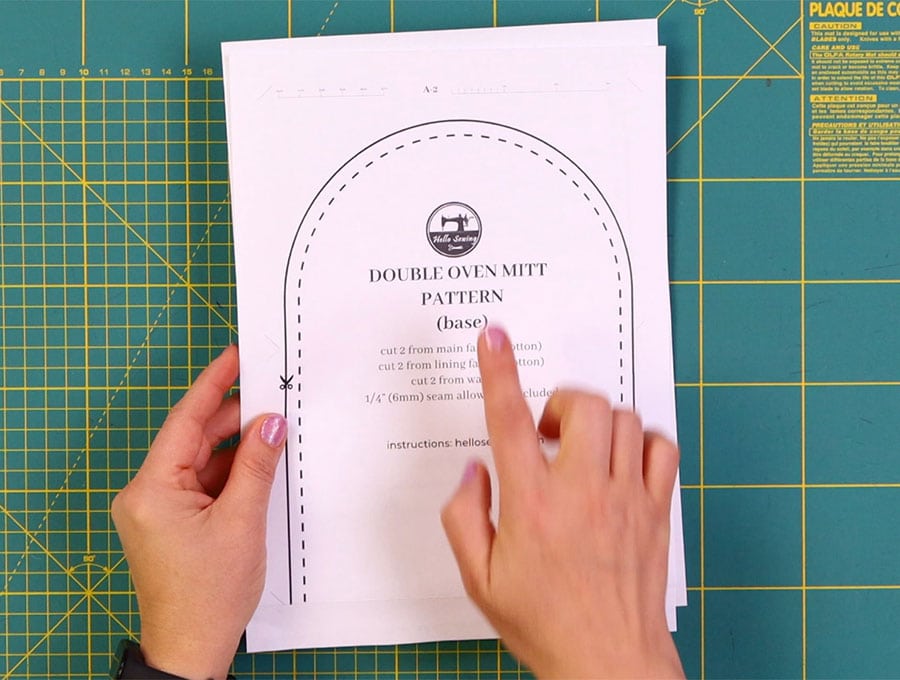
Print out our free double oven mitt pattern. Cut out the shapes and join together the pattern pieces where indicated with clear tape.
STEP 2: Cut fabric for the pockets
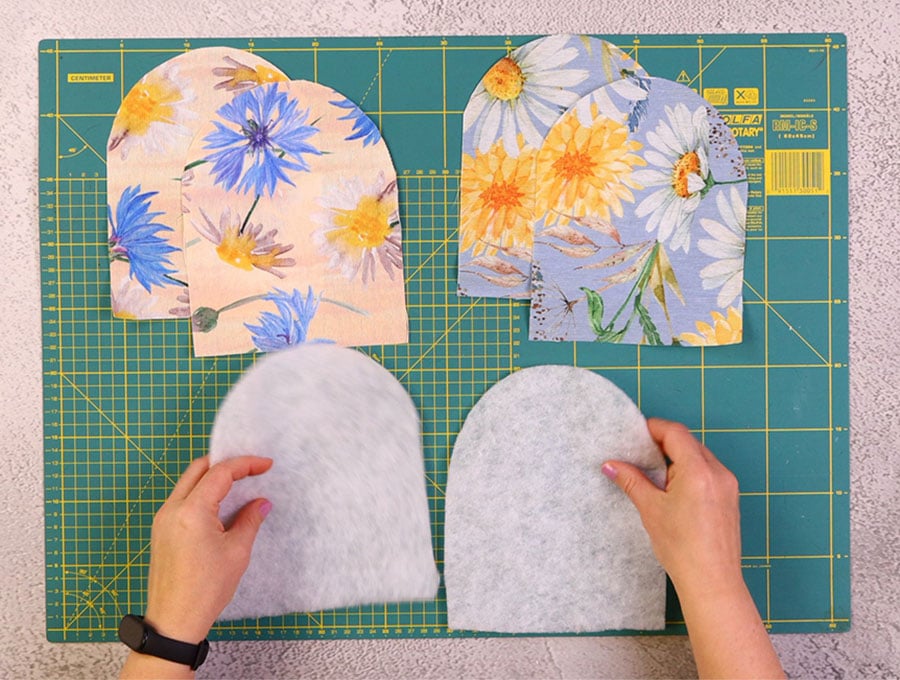
Lay out your fabric for the pockets on your worktop. Lay the pattern piece over the outer fabric placed right to right side and cut 2 pockets. Repeat with the lining fabric.
STEP 3: Cut batting for the pockets
Cut out 2 pieces of the batting from the pocket pattern, but trim them just slightly smaller than the fabric – this is to reduce bulk when stitching. Set these pieces aside.
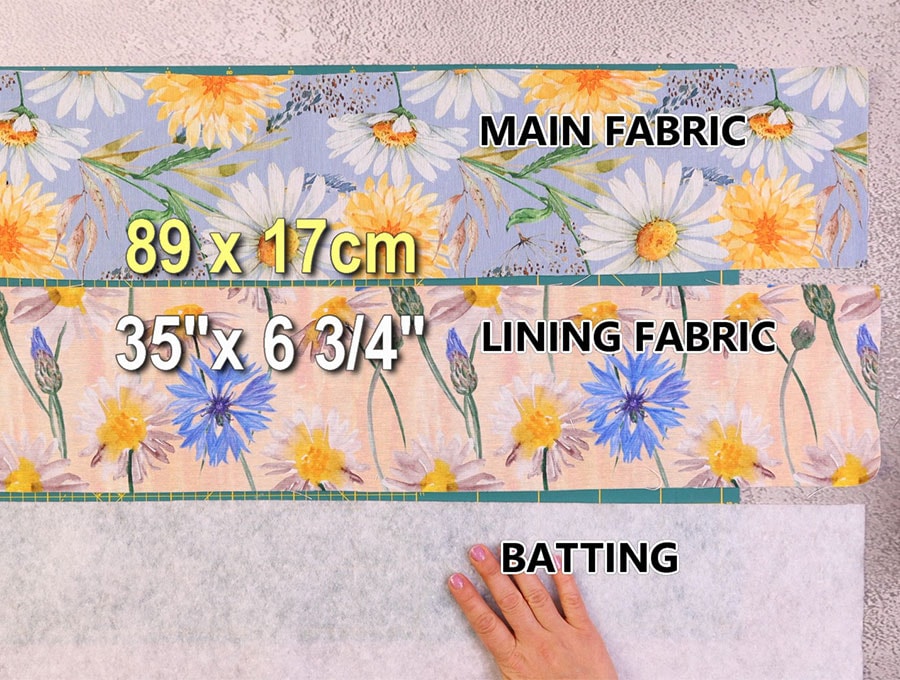
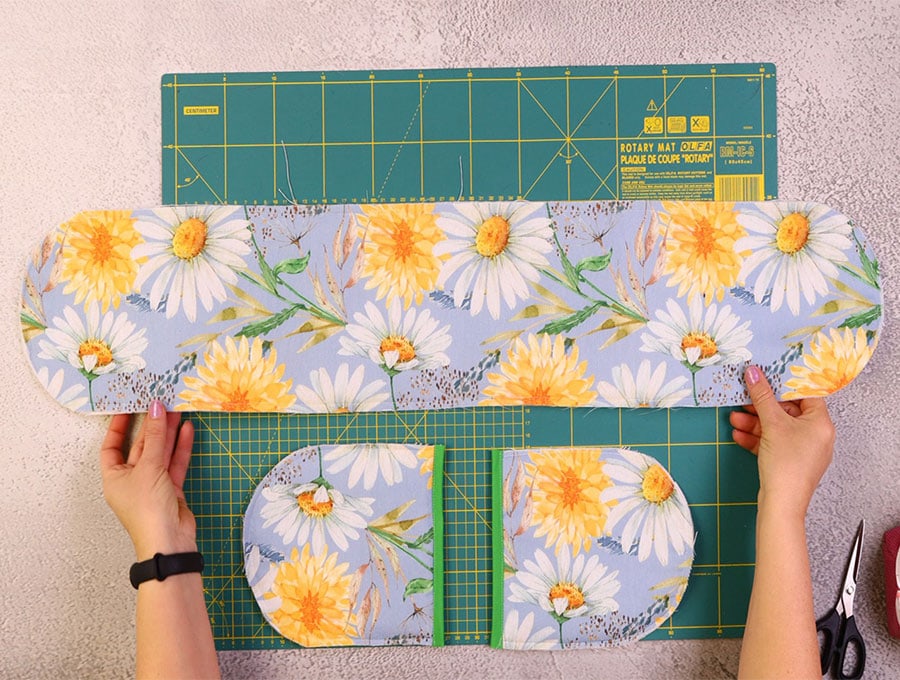
STEP 4: Cut fabric for the main and back part
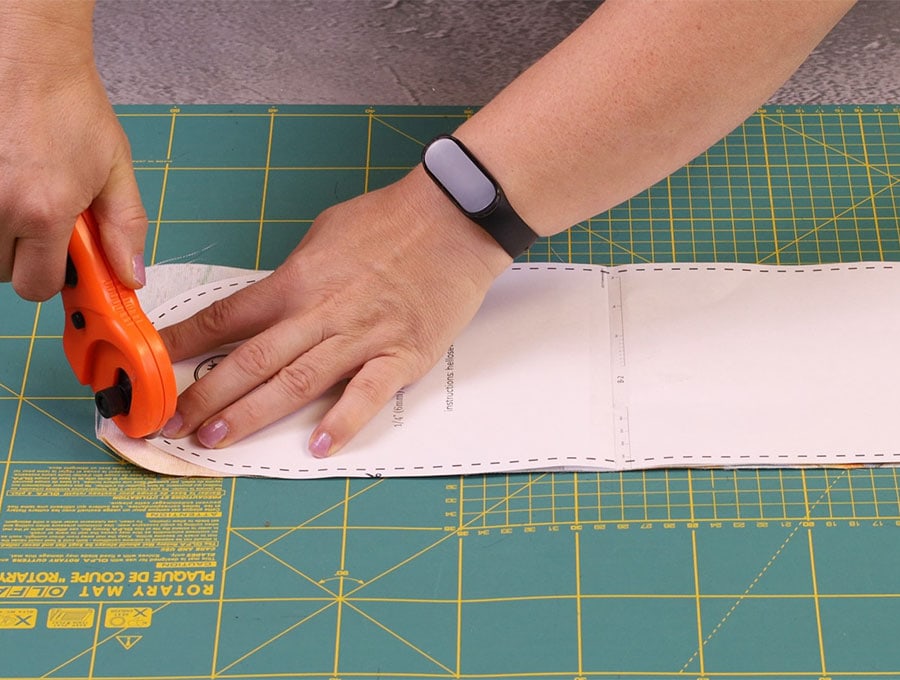
Take the long outer fabric piece, fold in half and over it place the pattern with the pattern fold indicator on the fabric fold and pin. Cut out using a rotary-cutter and self-healing cutting board or a pair of scissors. Repeat for the lining.
STEP 5:
Cut out one piece of batting slightly smaller than the template
STEP 6:
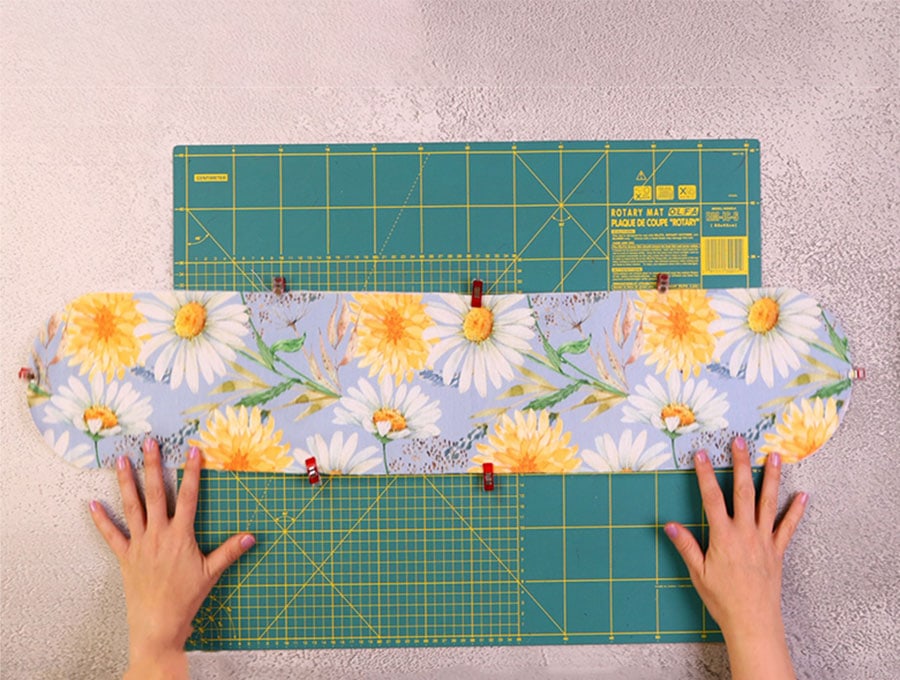
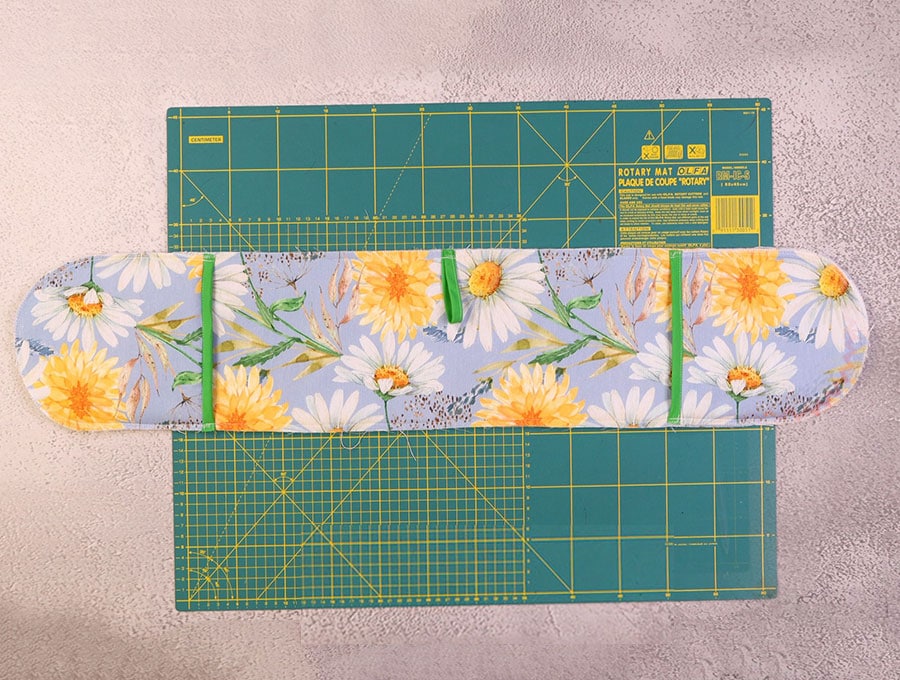
Place the lining fabric right side down on your worktop, over it place the batting fabric, then over that the outer fabric right side up and clip together.
STEP 7:
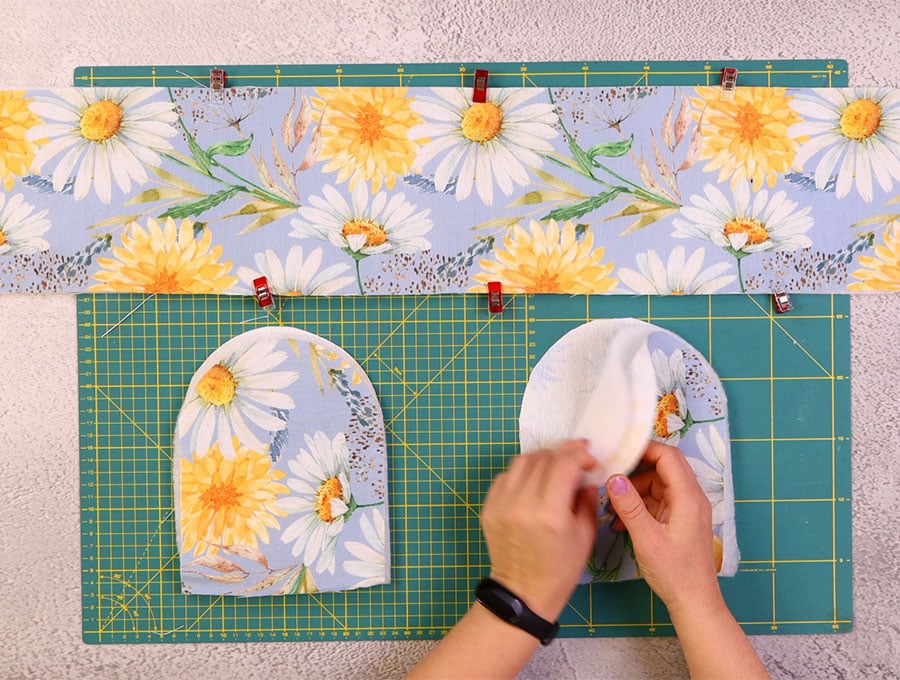
Take the two lining pieces for the pockets and place them side by side, right side down on the worktop, over them place each of the batting fabric pieces, then over each the outer fabric right side up and clip together.
STEP 8:
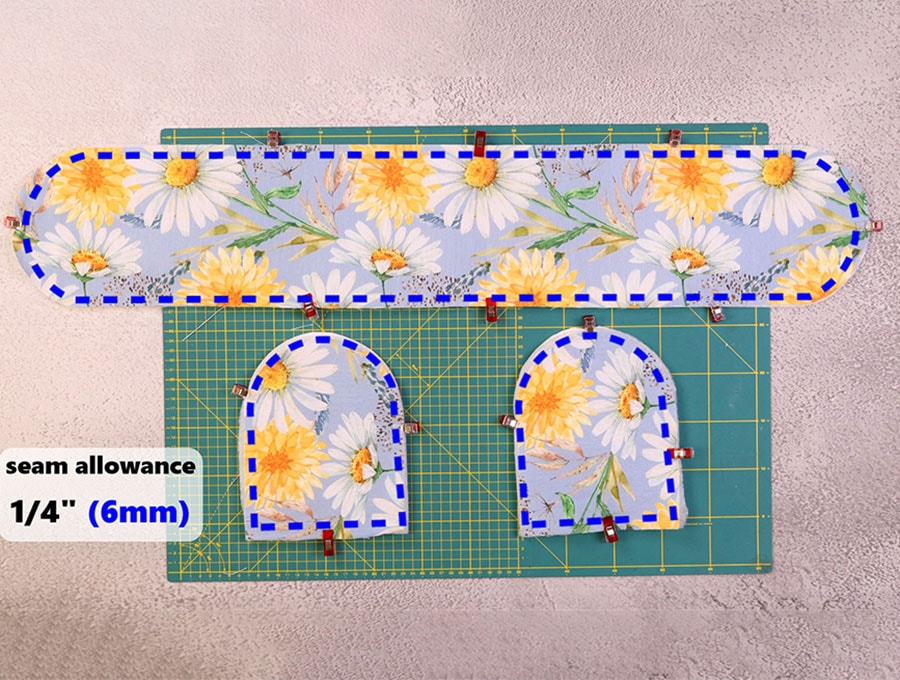
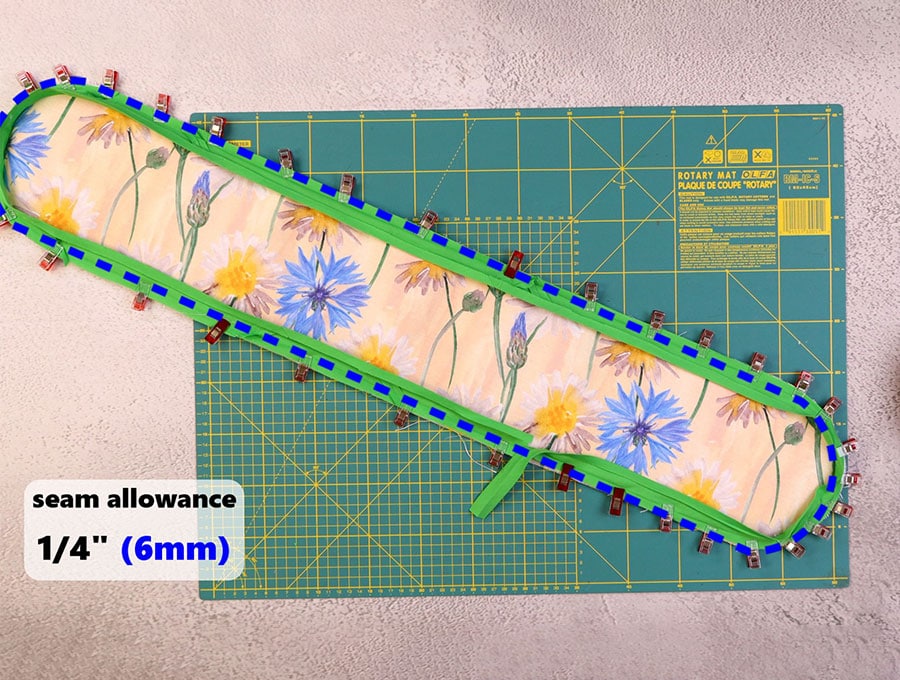
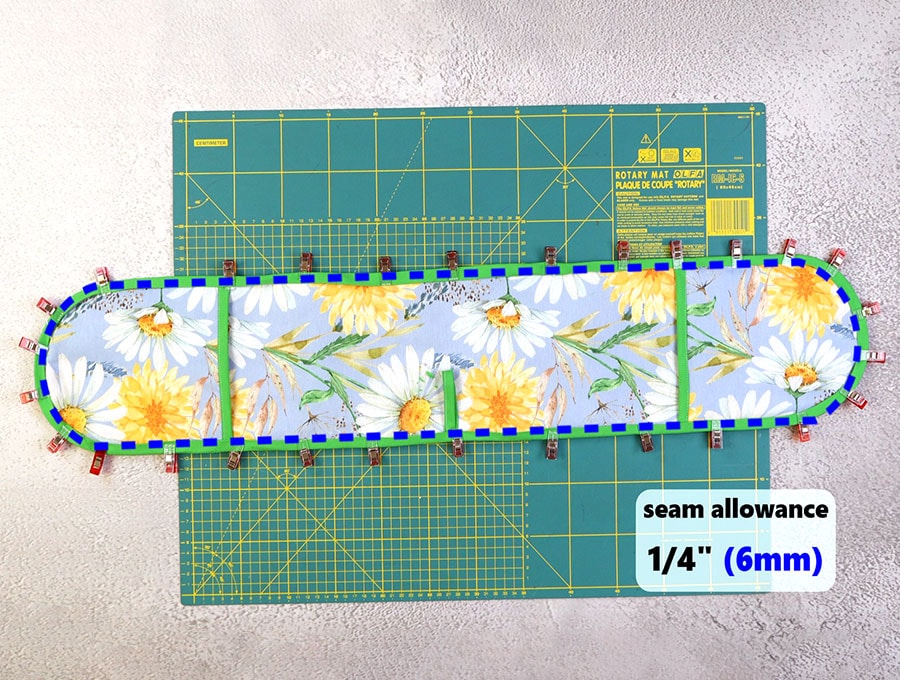
With a ¼ inch (6 mm) seam allowance, stitch all around the edge of the large piece of the oven mitts, then around each of the hand pieces.
STEP 9:
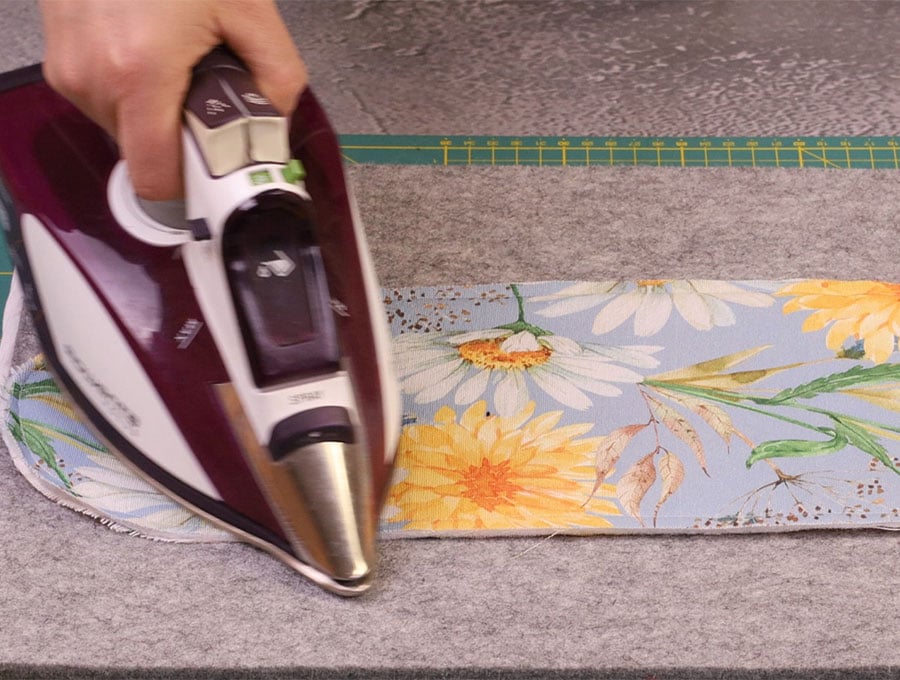
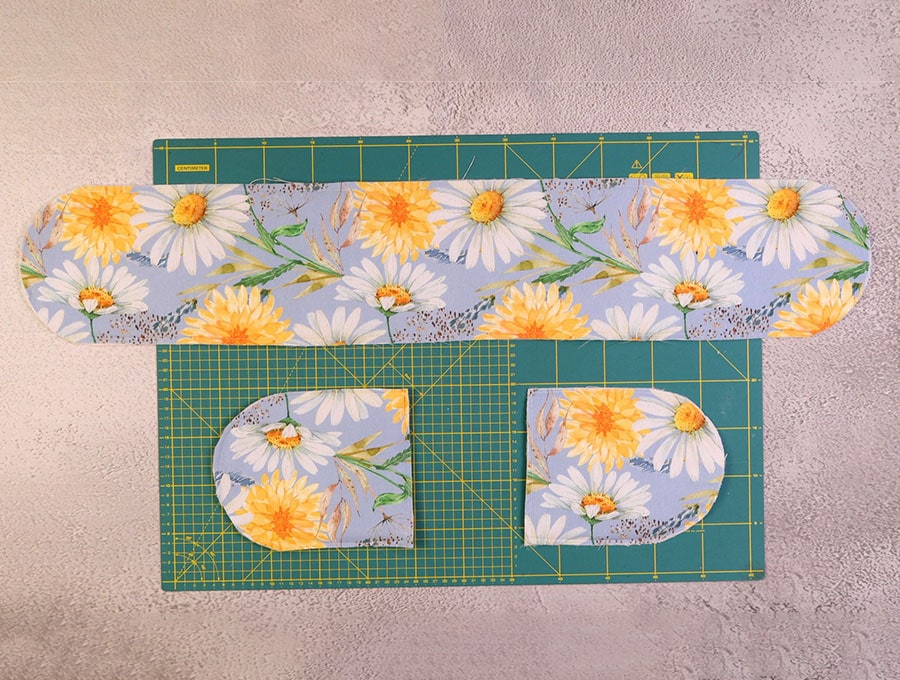
Press the pocket pieces and the long piece of the oven mitts.
STEP 10:
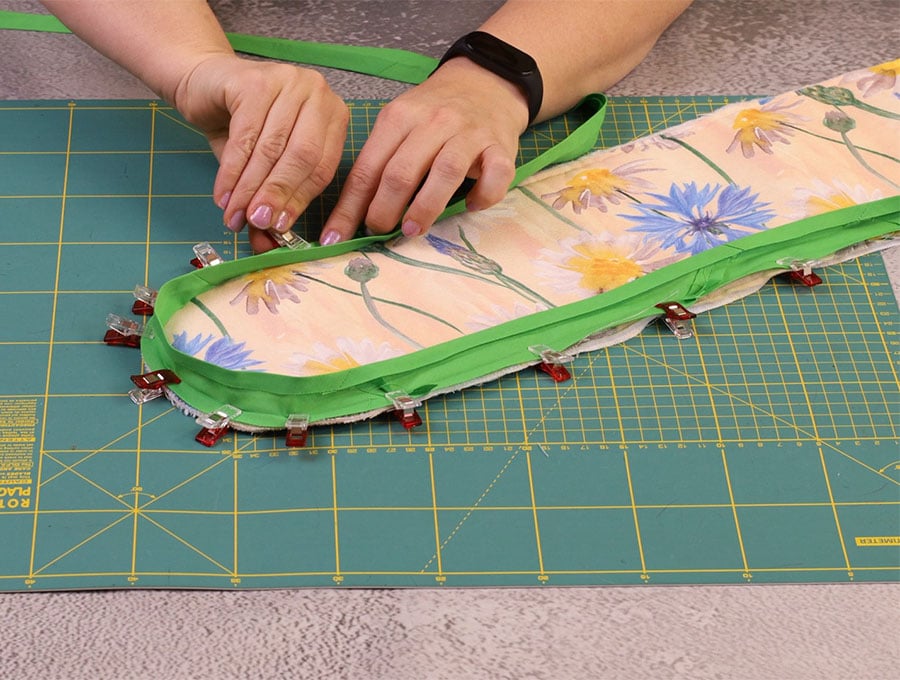
In total you should have approximately 3 yards (250 cm) of bias tape available for the project. Take your 3/8 of an inch (1 cm) double fold bias tape and cut two pieces to go the length of the straight side of the pocket piece, with a slight overlap on each end.
STEP 11:
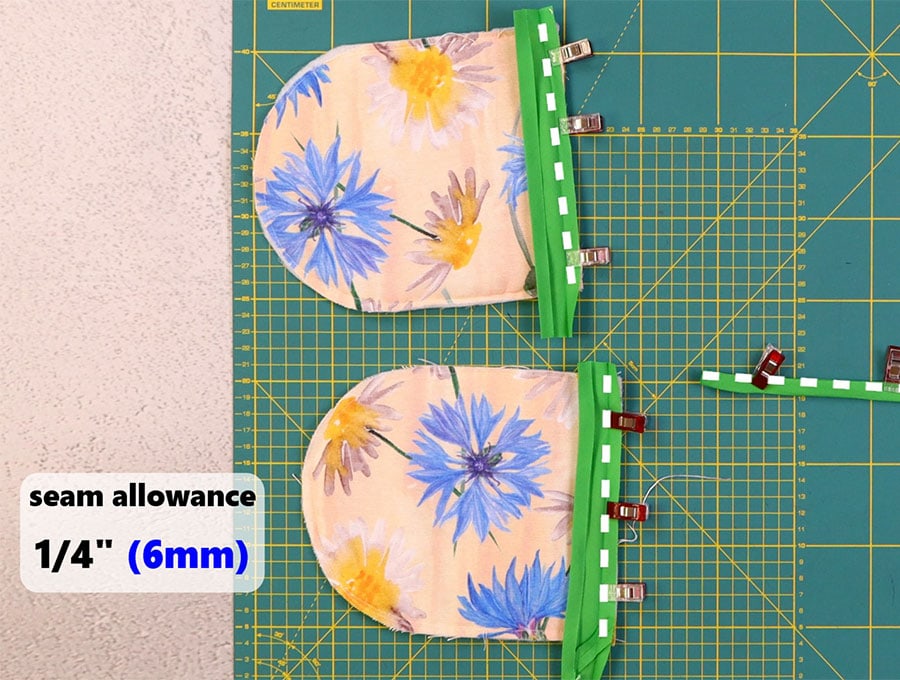
Open out the tape and line up the edge with the raw edge on the lining side and clip or pin in place. Repeat with the other pocket piece.
STEP 12:
Cut a 6-inch (15 cm) piece of bias binding, fold in half along the length, and clip before stitching as close to the edge as possible. This is the tab for hanging up the oven mitts.
STEP 13:
Stitch along the fold line of the bias binding on each piece.
STEP 14:
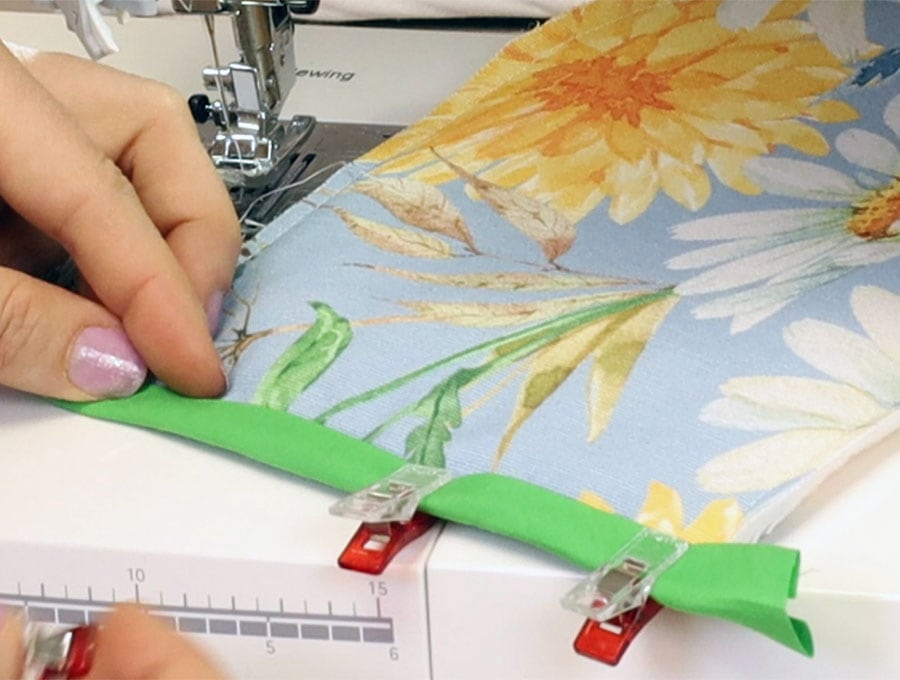
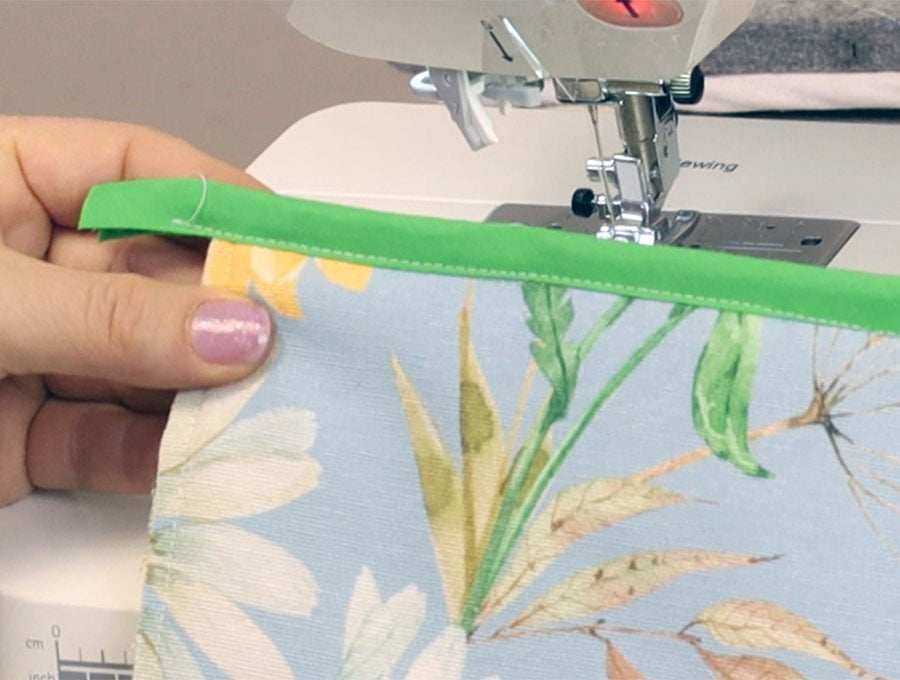
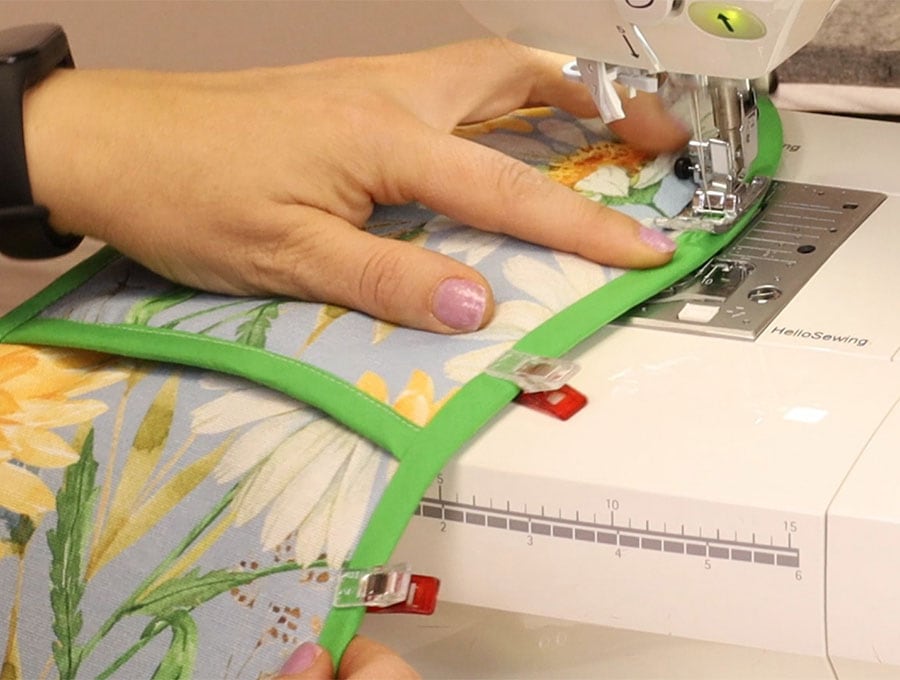
Fold over the binding to the long outer fabric side and clip in place then stitch as close to the edge as possible on each piece.
Trim the extra bias binding at the ends.
STEP 15:
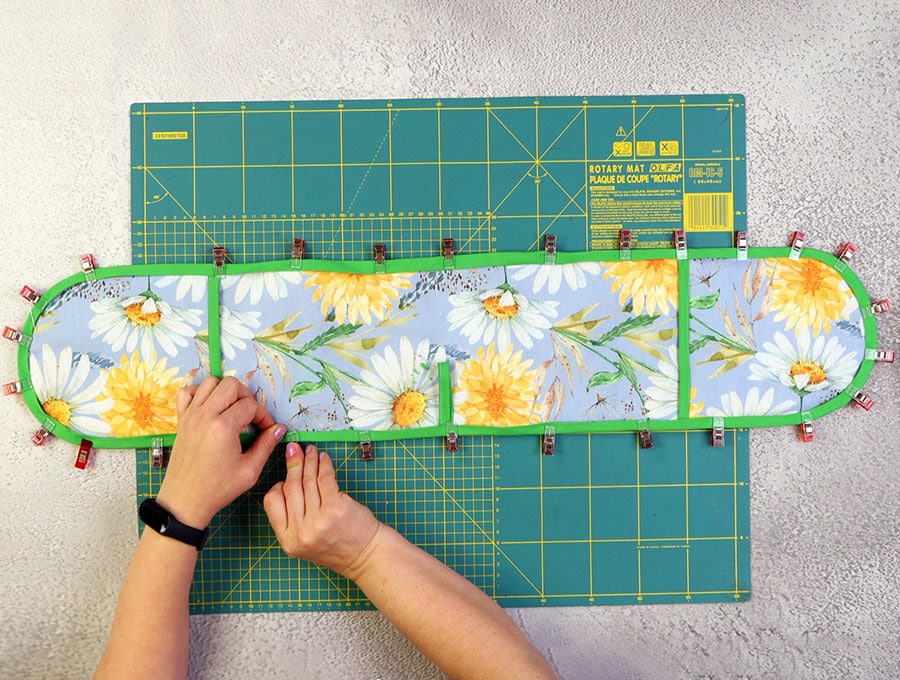
Place the long piece with the outer fabric upwards on your worktop, on top at each end place the hand pieces, outer fabric uppermost and clip in place.
STEP 16:
Fold the entire piece in half and make a mark on one side, then place the hanging tab you stitched, folded in half with the raw edges to the raw edge of the fabric, and loop facing in to the body of the fabric. Clip, then stitch in place.
STEP 17:
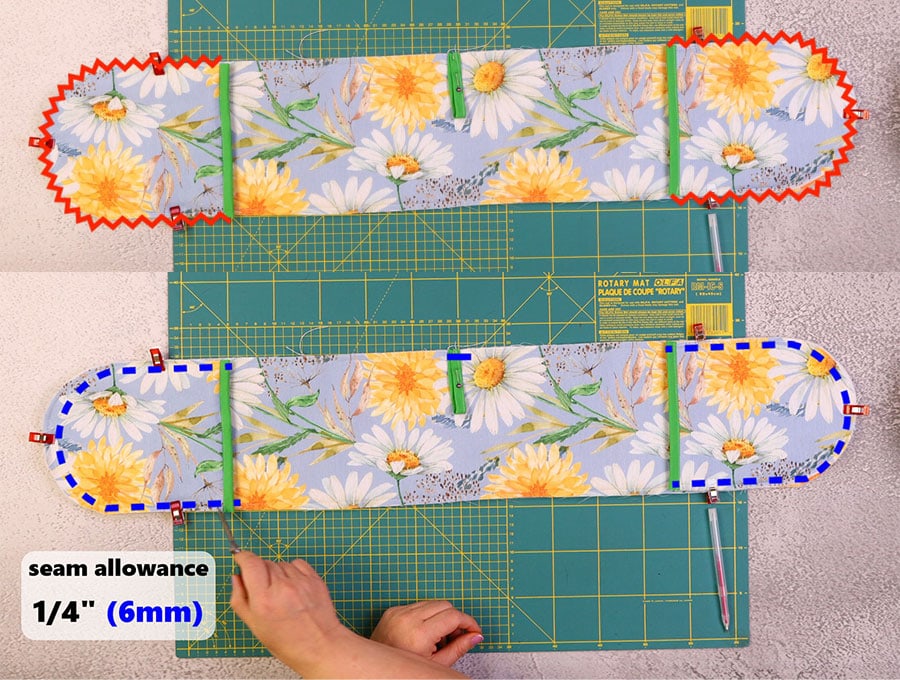
Stitch the pocket pieces in place using a straight stitch ¼ of an inch (6 mm) from the edge, then run a zig-zag stitch as close to the edge as possible.
The zig-zag stitching serves to flatten the fabric and batting, making it easier to fit the bias binding in the next step.
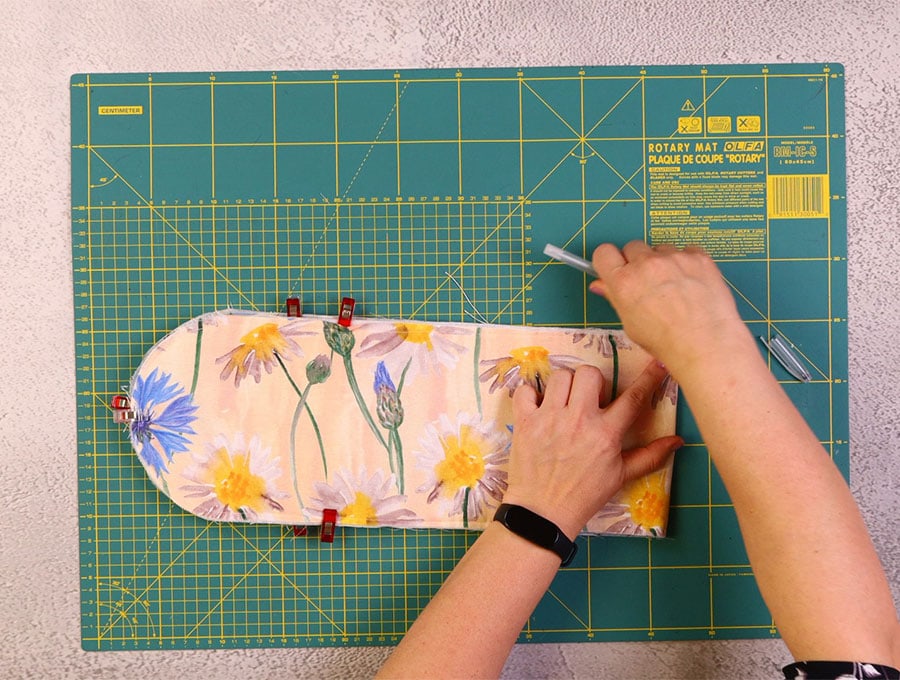
STEP 18:
Starting near the middle of the long piece start clipping the bias binding on the lining side, easing it around the curves until you reach the point where you started clipping.
Fold the first part you clipped back on itself by ½ an inch (1.3 cm), then overlap the piece you ended with, folding it down at a 45-degree angle, then marking the angle on the first bit you folded back. Pin the two angles together and stitch, then trim off the extra fabric.
STEP 19:
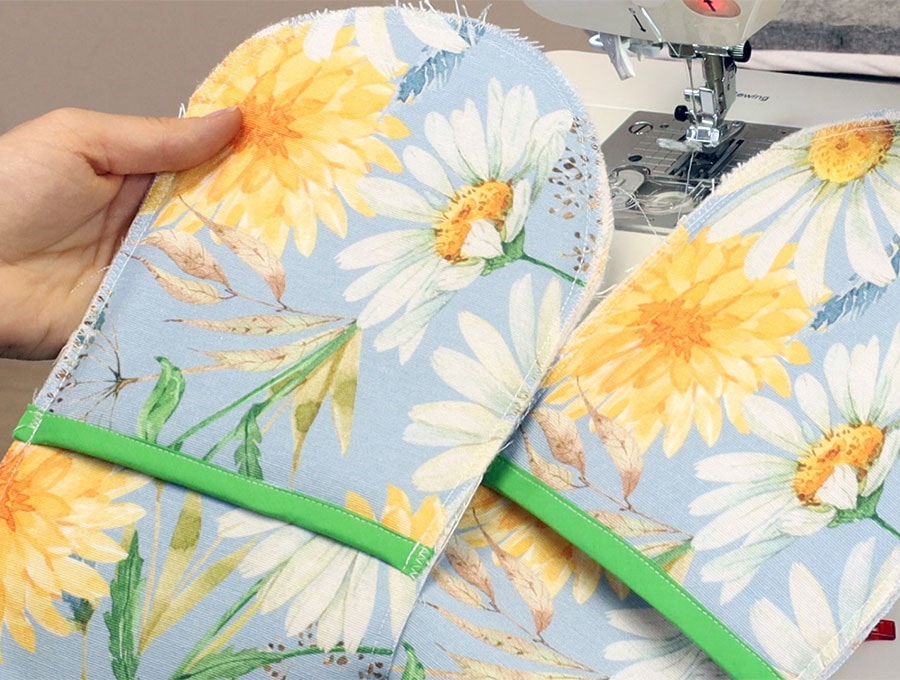
Flip the fabric over to the right side and ease the binding over to the right side, clipping in place all the way around the double oven mitt.
STEP 20:
Stitch around the edge of the binding on the right side.
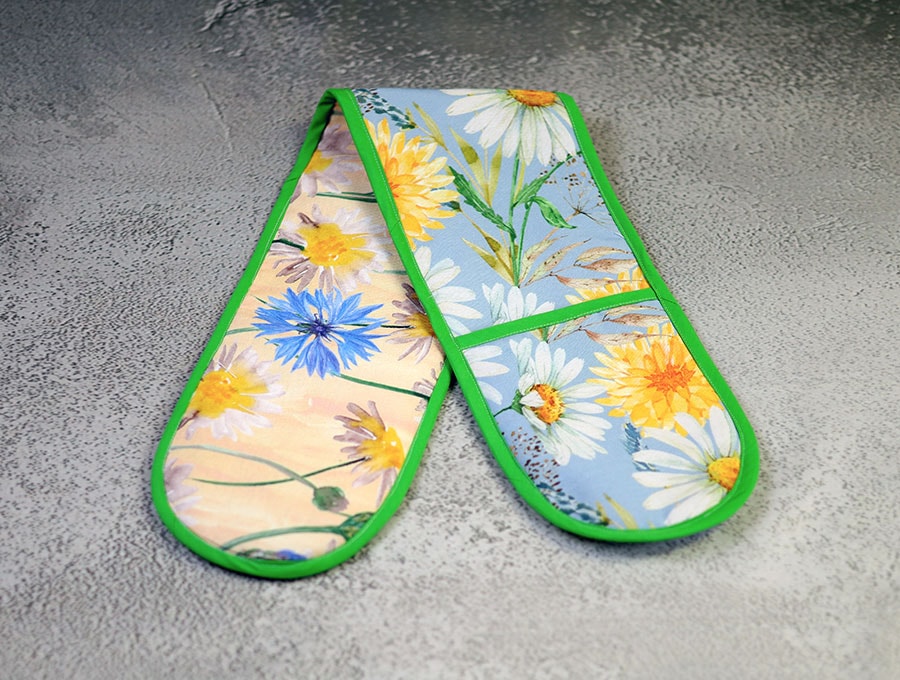
Your new double oven mitt I now ready to use. It’s long enough to handle larger casseroles and roasting pans, and because they are attached you’ll never be hunting for the ‘other’ oven mitt. If you know someone still risking a finger burn by using a dishcloth, then please share this tutorial. In the interests of avoiding burns if the person can’t sew, gift them the double oven mitt. These are also a good market seller.

and that’s how it looks on the back

You know what to do if you enjoyed this content – like and subscribe. Here at HelloSewing we are continually developing new content to provide useful sewing projects and advice, and subscribers are first to receive the content.
Do you like this? Pin for later:
Wanna be friends? Click HERE and follow me on Pinterest
RELATED: