
Fabric Door Wedge // Sewing Pattern and Video
Do your doors rattle or creak when the wind blows? This door wedge was designed as a solution to our bedroom doors rattling. When they were closed at night with windows open, they rattled in the door frame! The wedge is now doing a great job of keeping the door firmly in place, nearly fully shut but just shy of the frame.
Also known as the Soft Door Wedge, Under Door Wedge, the Fabric Door Wedge, or Fabric Doorstop – it doesn’t matter what you call it, this door wedge is designed to stop a door rattling in the frame when the wind blows, or if you need to leave a door slightly ajar at night but don’t want a breeze banging it shut and waking people.
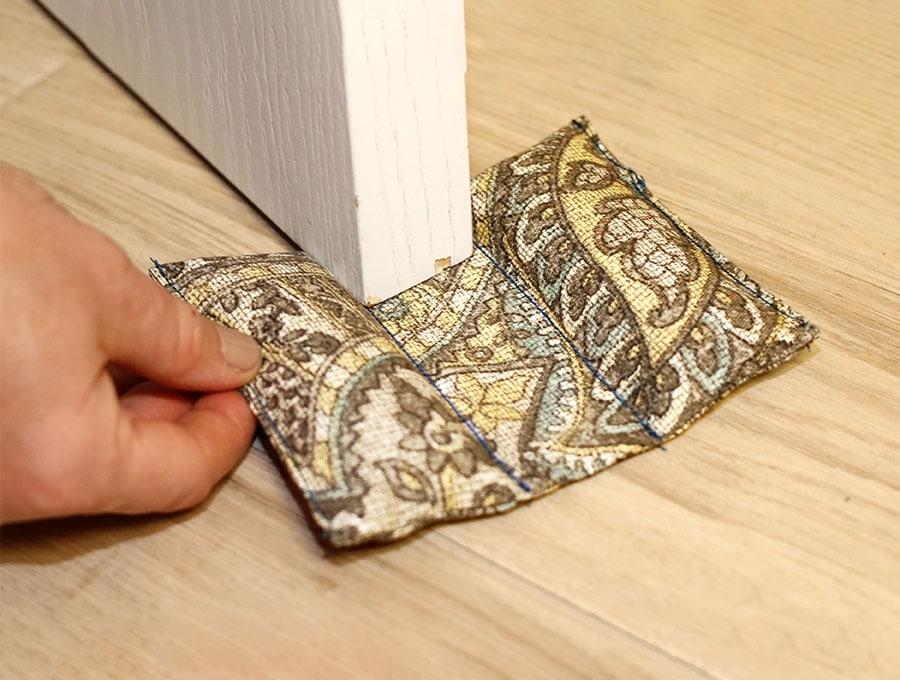
The video shows how easily the wedge slides in and out under the door frame. It will still allow the door to open and close when pushed or pulled so you don’t need to remove it. The door wedge was tested on a medium-deep pile carpet, but I see no reason why it wouldn’t work with hard floors providing the door frame is close enough to the floor. The door shown in the photo has a gap of just over an 1/8 of and inch (4 mm) between the base of the door and carpet.
Below you will find my step by step written tutorial with VIDEO instructions for all the visual learners.
We occasionally link to goods offered by vendors to help the reader find relevant products. Some of the links may be affiliate meaning we earn a small commission if an item is purchased.
Table of Contents
How to make the soft door wedge
Supplies and tools
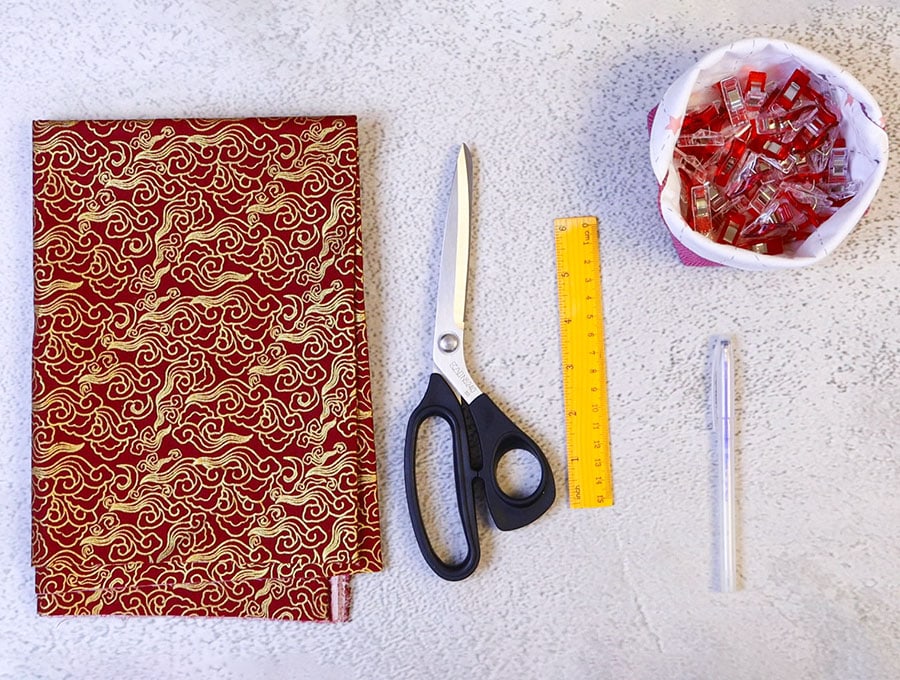
- fabric – medium weight décor fabric
- 4 ounces (120g) of rice or coarse river sand
- matching thread
- scissors (or rotary cutter and a cutting mat)
- ruler or measuring tape
- iron and ironing board
- sewing clips or pins
- funnel for the rice
- zipper foot
DOWNLOAD: Fabric door wedge pattern [Free pdf file] pattern ONLY
Fabric door wedge (Pattern with illustrated PRINTABLE instructions in my Etsy shop)
Follow us for free patterns & tutorials! [easy-profiles]
How to Sew a Fabric door wedge
Watch the diy fabric door wedge video first and then follow the written step by step instructions below.
Please enjoy and don’t forget to Like and SUBSCRIBE over on YouTube to be kept up to date with new videos as they come out.
Under door wedge VIDEO TUTORIAL
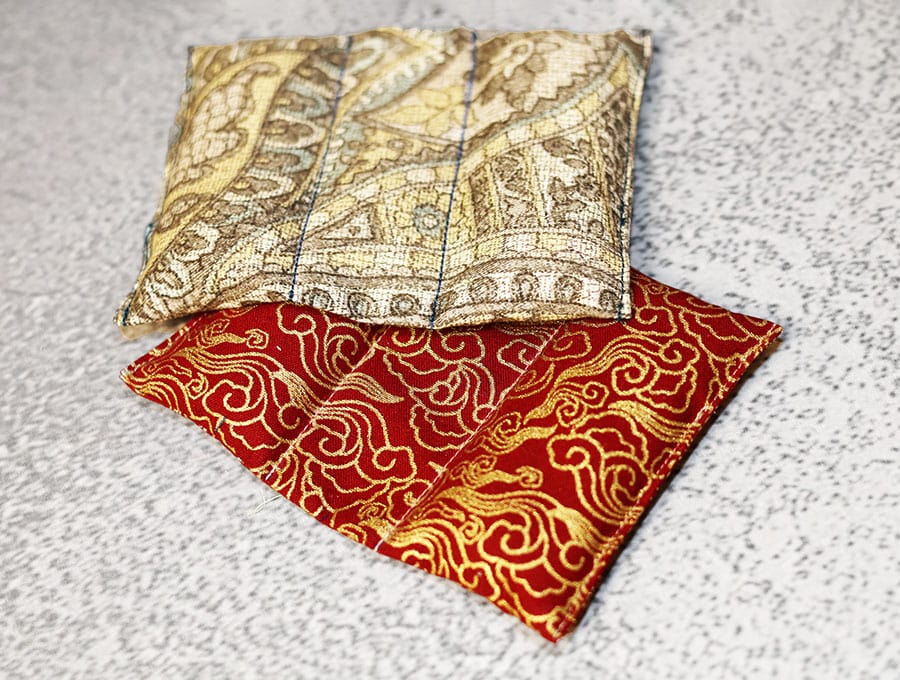
FINISHED SIZE:
The finished size of the little door wedge is:
Width: 4 1/3 inches (11 cm)
Length: 6 inches (15 cm)
Flat section (for sliding under frame): 1 ½ inches (4 cm)
The door shown in the photo has a gap of approx. 4 mm between the base of the door and carpet.
Care Instructions: Spot clean only. You can also use stain removing wipes.
INSTRUCTIONS:
STEP 1:

Download the door wedge pattern and print it at 100% (no scaling). Trim the excess paper and put aside.
You will need a piece of medium weight décor fabric cut acording to the pattern. Cut the fabric according to the door wedge pattern or according to the following dimensions: 6 ¾ x 9 ½ inches (17 x 24 cm)
NOTE: If you don’t have a printer to print the pattern cut the fabric according to those dimensions, skip step 8 and mark according to step 8.2. The rest of the instructions are the same.
STEP 2:
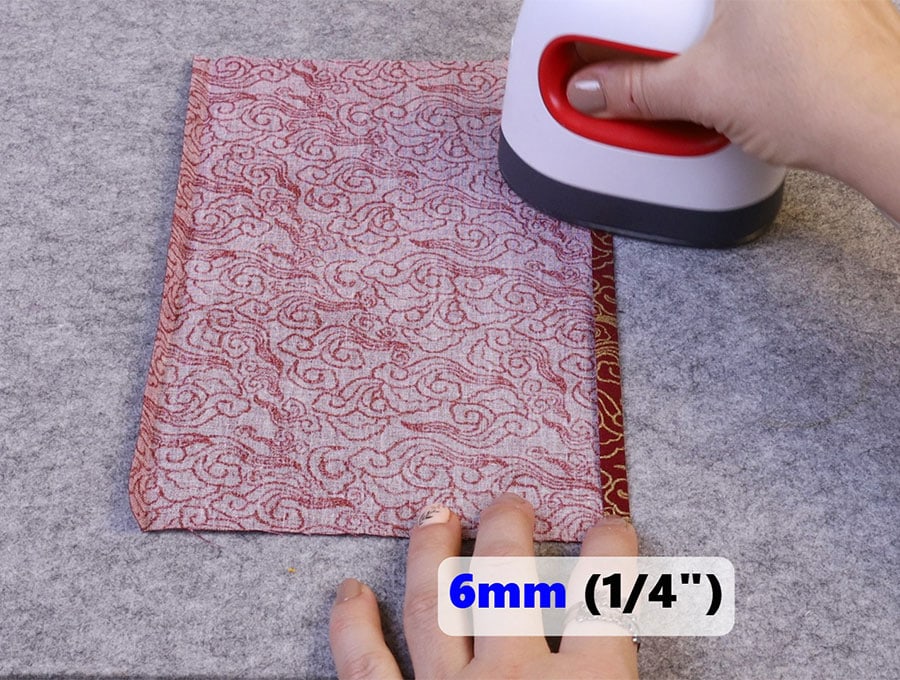
Fold in the long side ¼ of an inch (6 mm) on each side and press.
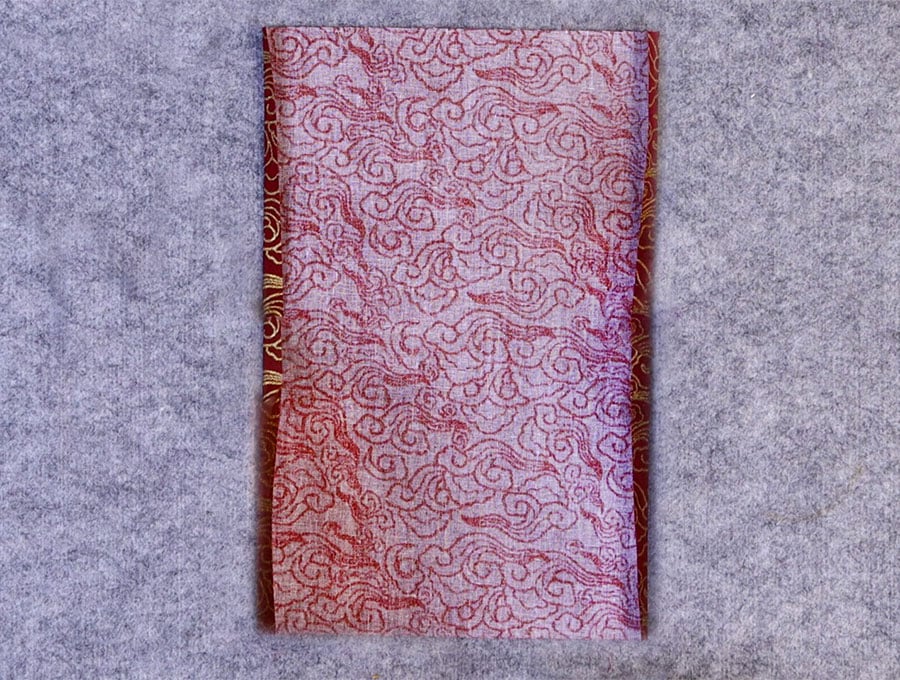
STEP 3:
Fold the fabric in half – short edge to short edge, right sides inside, and clip the short sides together.
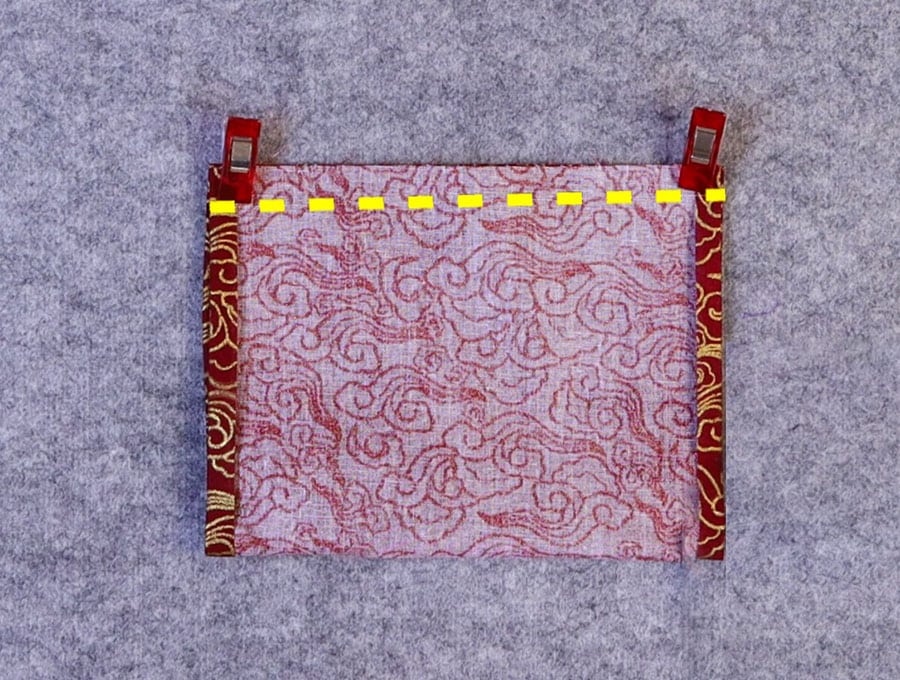
STEP 4:
Stitch ¼ of an inch (6 mm) from the edge on the short side, backtacking at the start and finish.
STEP 5:
Open out the seam you just stitched and press flat.
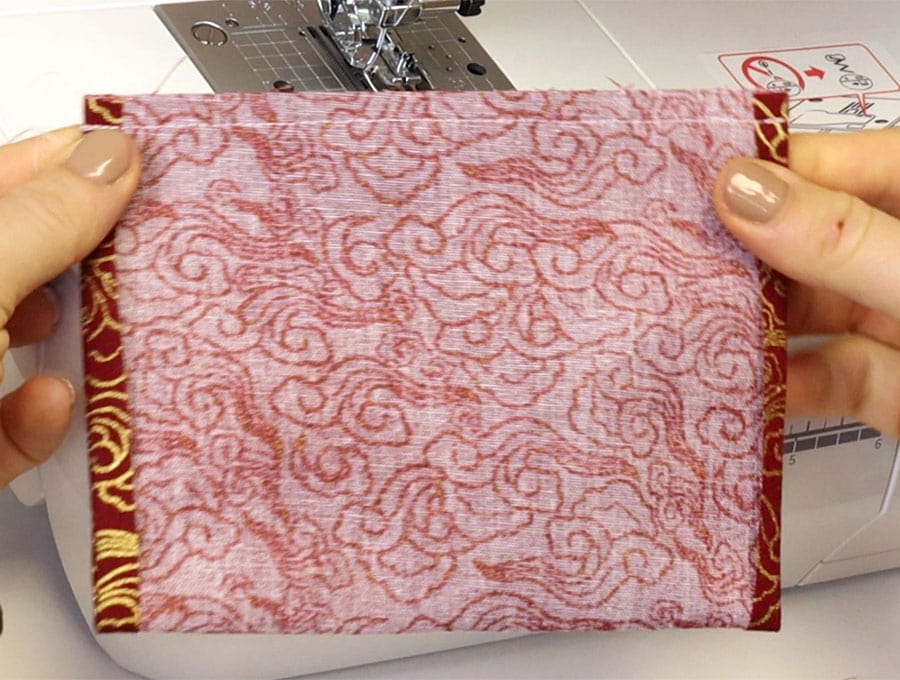
STEP 6:
Turn the tube the right way out.
STEP 7:

Make sure the seam is in the middle of one side and press.
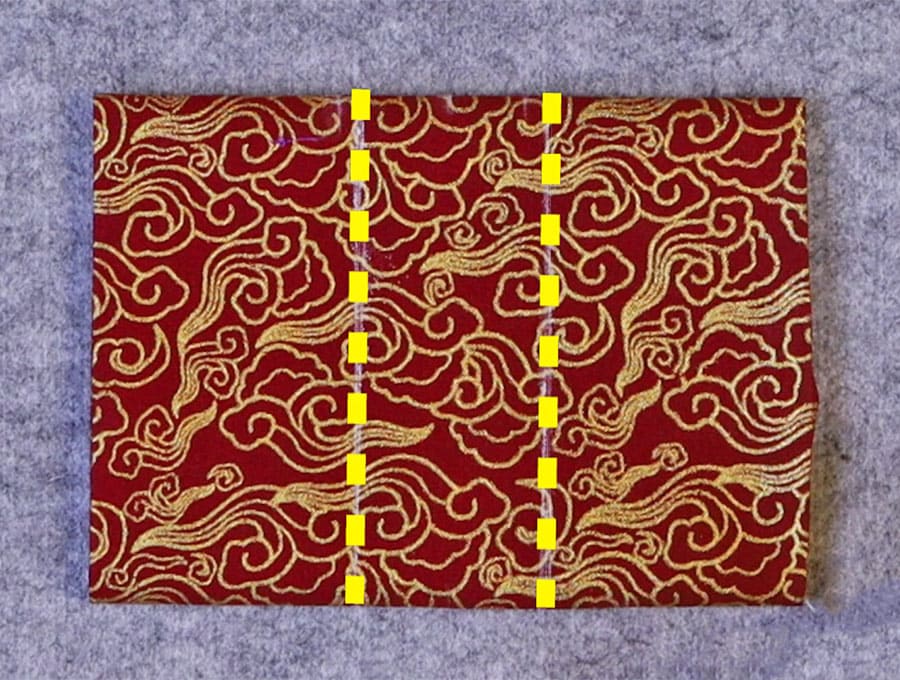
STEP 8:
Using the pattern transfer the 2 vertical lines for the flat section (dashed lines in the middle of the pattern) and the gaps at each open end. To do so fold the paper pattern in half and then crease along all 4 vertical lines.
Transfer the 2 vertical lines in the middle first. Fold the paper pattern up to the first line. Mark along the line.
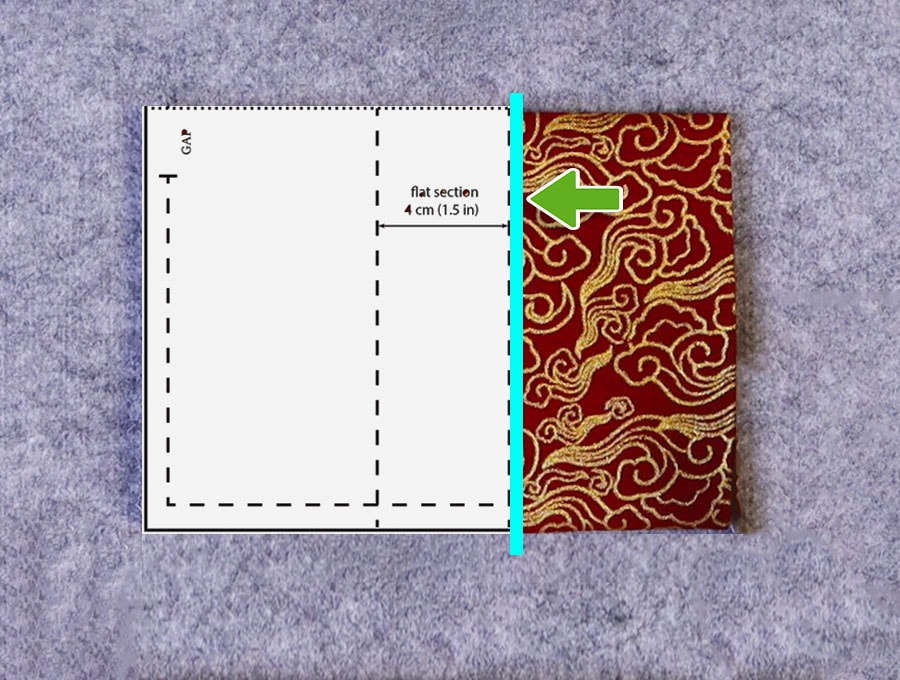
Fold the pattern along the second vertical line in the middle. Mark along the line.
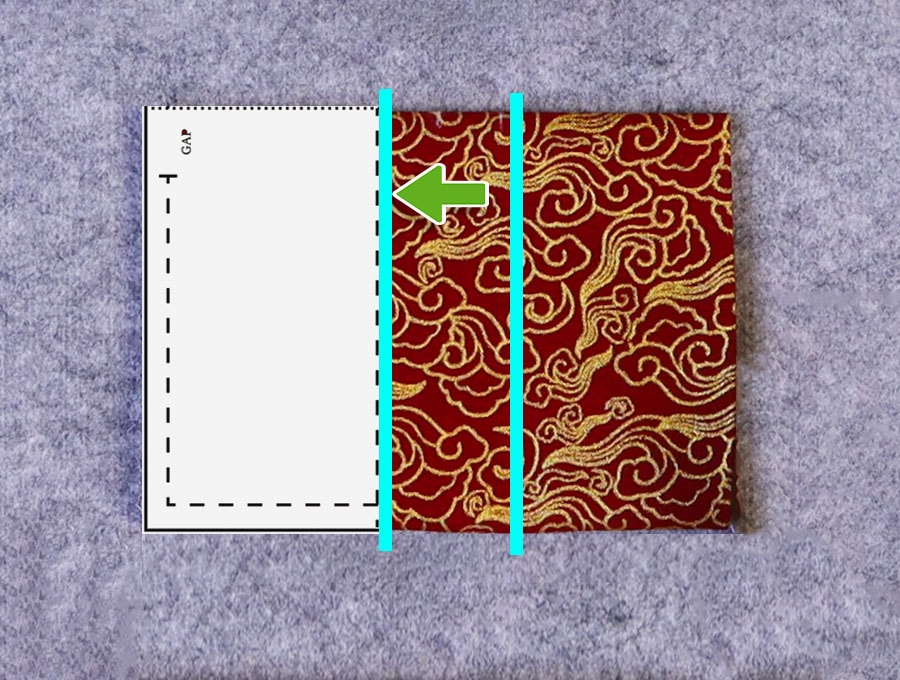
Open up the pattern and fold along the seam allowance on both sides. Mark the gaps at each end.
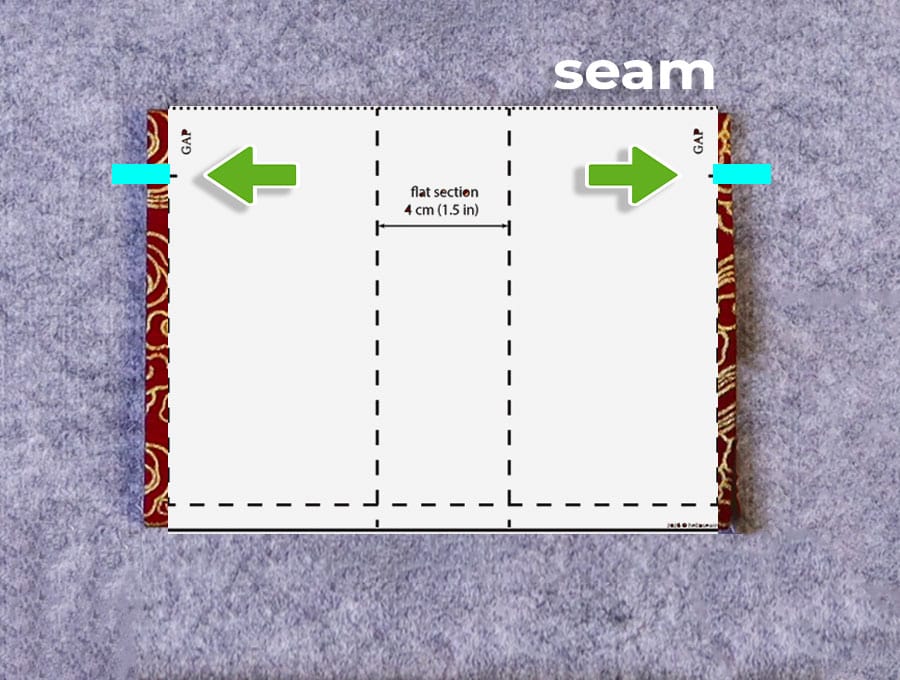
Your stitch lines will look like this:

STEP 8.2. —> If you don’t have a printer measure and mark as follows:
- Find the middle at the top fold and mark, then measure ¾ of an inch (2 cm) on each side and mark.
- Find the middle at the bottom fold and mark, then measure ¾ of an inch (2 cm) on each side and mark.
- Join the top and bottom marks on each side of the middle, using a ruler and a fabric marking pen.
- At each open end mark ¾ of an inch (2 cm) from the top.
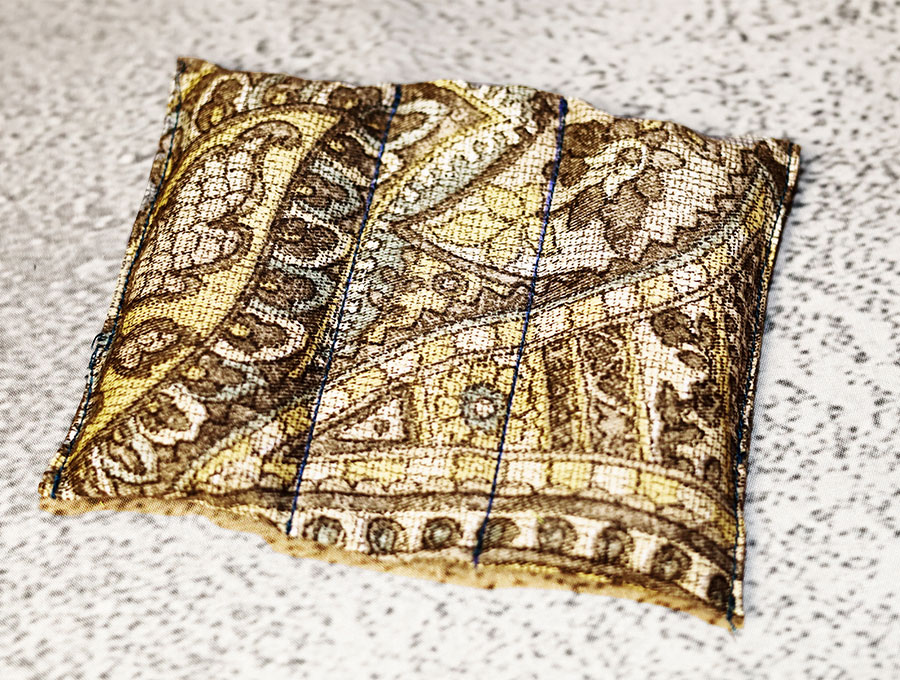
STEP 9:
Stitch down the two middle marked lines, backtacking and the start and finish of each line.
STEP 10:

Stitch down each side 1/8 of an inch (3 mm) from the edge starting from the mark and going to the bottom – backtacking at the start and finish.
STEP 11:

Measure out 2 ounces (60g) of rice or coarse river sand and fill one side of the door wedge through the ¾ inch (2 cm) gap. Pin or clip closed.
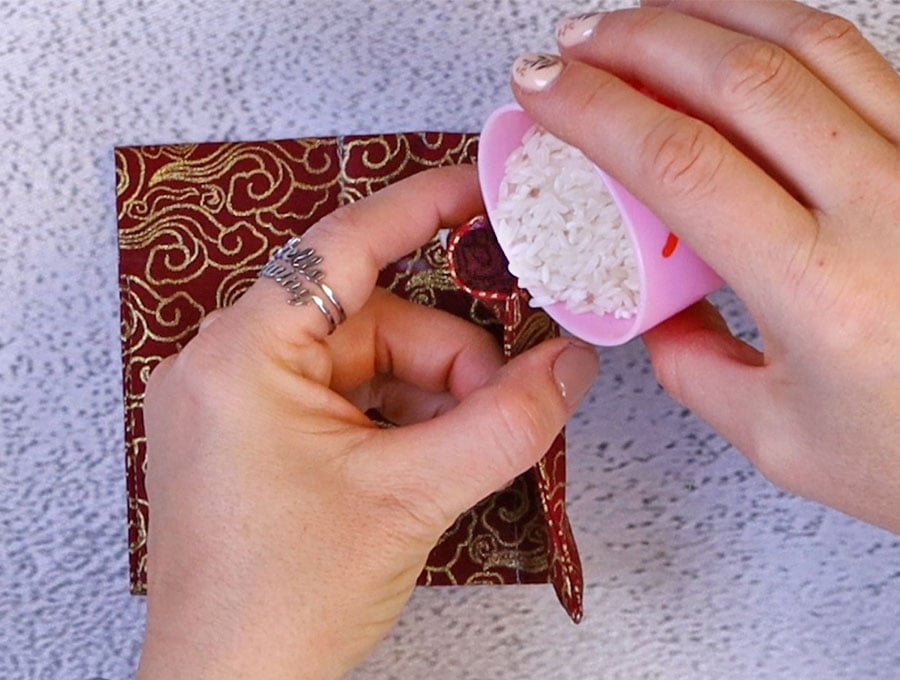
TIP: Using a small plastic or metal funnel will help get the rice or sand into the opening without spilling.
STEP 12:
Use another 2 ounces (60g) of rice or coarse river sand and fill the other side of the door wedge before pinning or clipping closed.
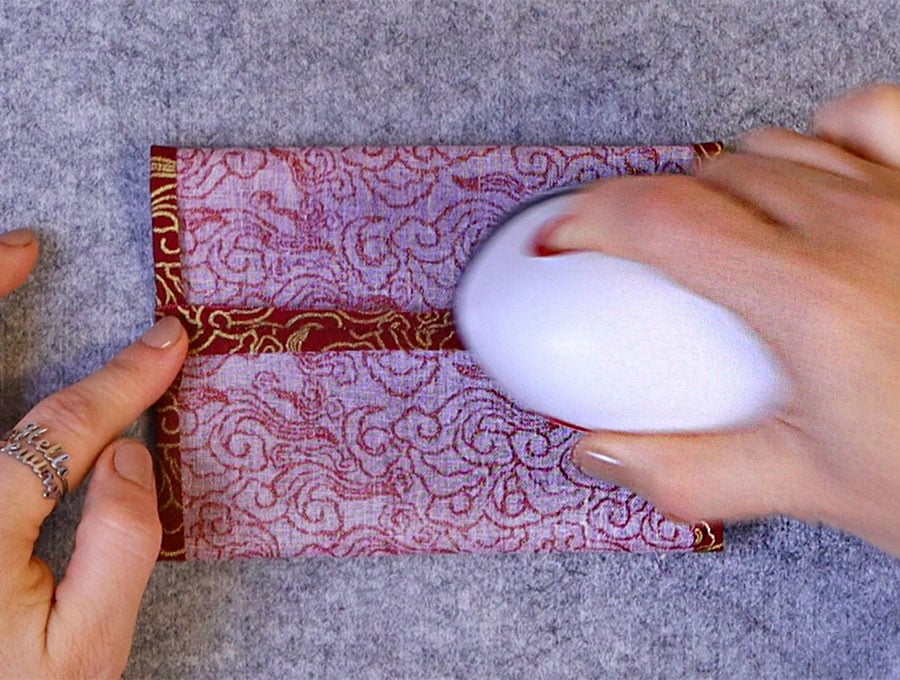
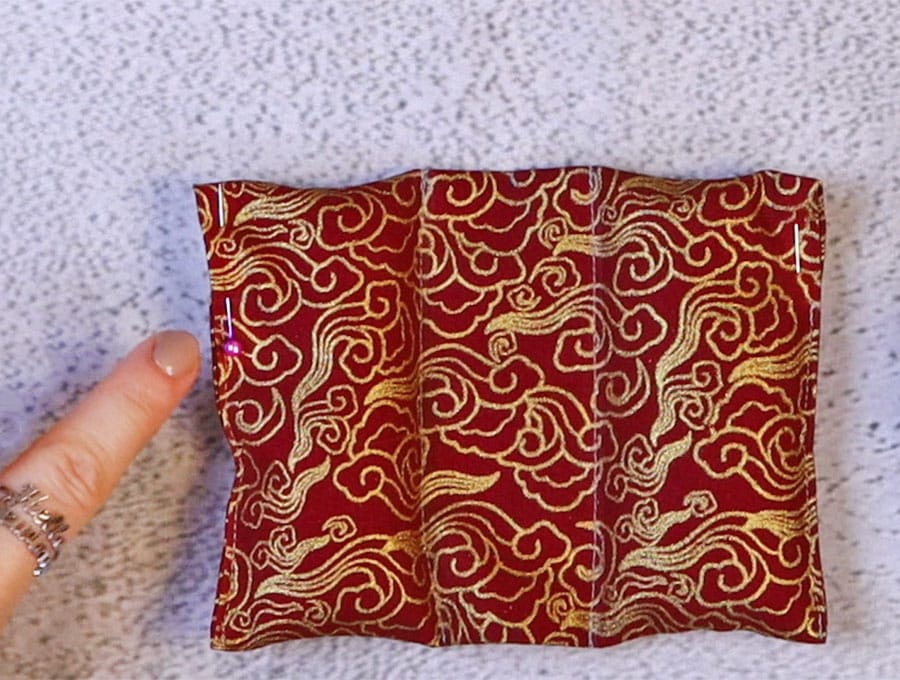
STEP 13:
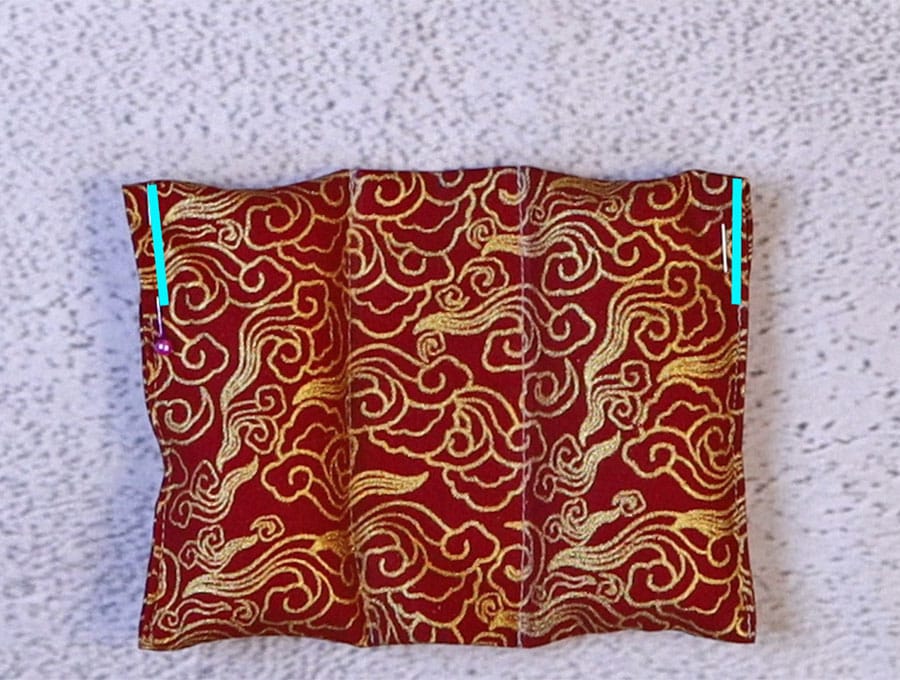
Stitch each of the gaps closed carefully, 1/8 of an inch (3 mm) from the edge, in line with the rest of the seam, making sure to backtack at the start and finish.
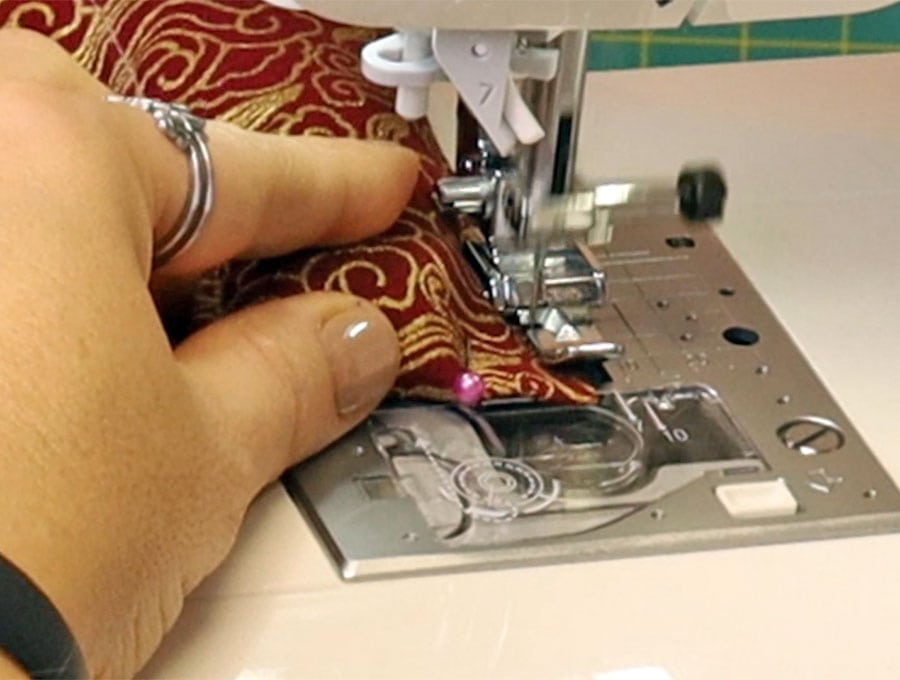
TIP: Changing to a zipper foot for stitching the gaps closed will enable you to get up close to the rice or sand without a problem.

All that remains is to slip the flat part without the rice or sand filling under the door to keep it from moving. The flat part is 1 ½ inches (4 cm) wide which should be fine for most standard doors. If your door is a bit wider or narrower, then adjust the width in Step 8 to accommodate your door width.
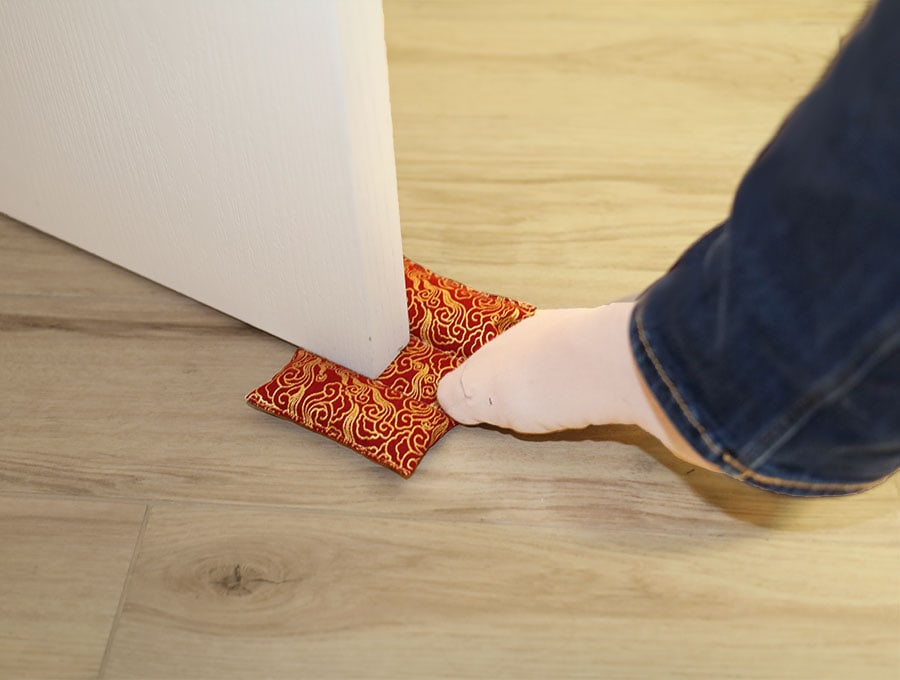
Do you have kids who insist the bedroom door be left slightly open at night, then a small gust of wind blows it shut disturbing everyone in the house? Then you seriously need this fabric door wedge. Slip it under the door and have peace of mind as it stays in place when those night breezes rattle the doors. The best part is the door can still open and close so if kids get nervous, they can come to your bed without difficulty or you can check in on them without disturbing their sleep. The soft door wedge allows the household to sleep peacefully without rattling or creaking doors at night waking people up. It works in the day too if you have babies or toddlers who need their afternoon nap, or even elderly relatives who need their afternoon nap.
If you enjoyed this tutorial then please give us a like and subscribe for more useful tutorials that use the small fabric pieces in your stash to create useful items for virtually no cost at all.
Do you like this? Pin for later:
Wanna be friends? Click HERE and follow me on Pinterest
RELATED: