
DIY Fabric Wine Bottle Bag in 15 minutes with FREE pattern [Reversible]
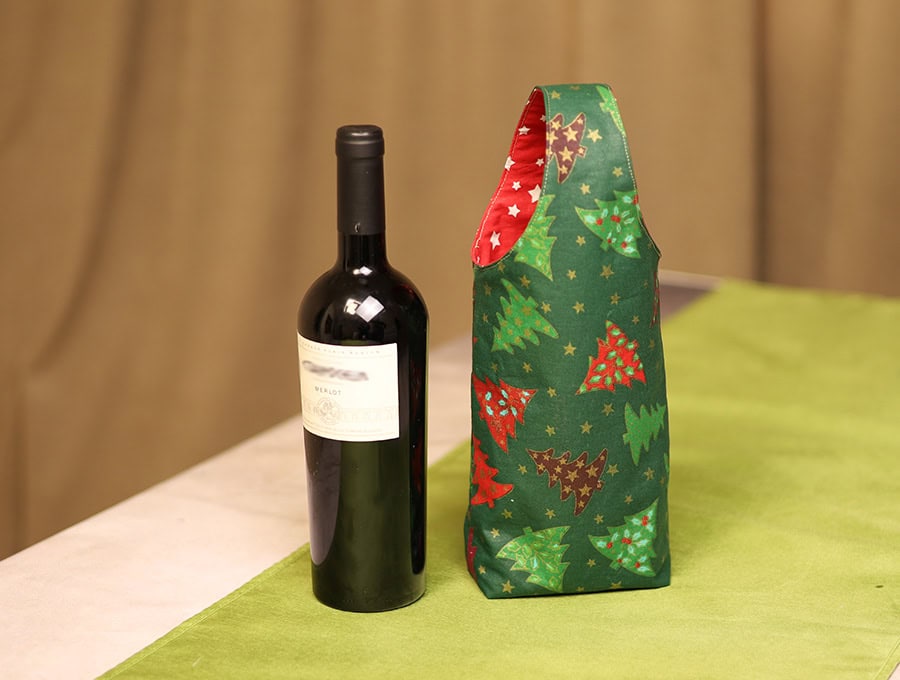
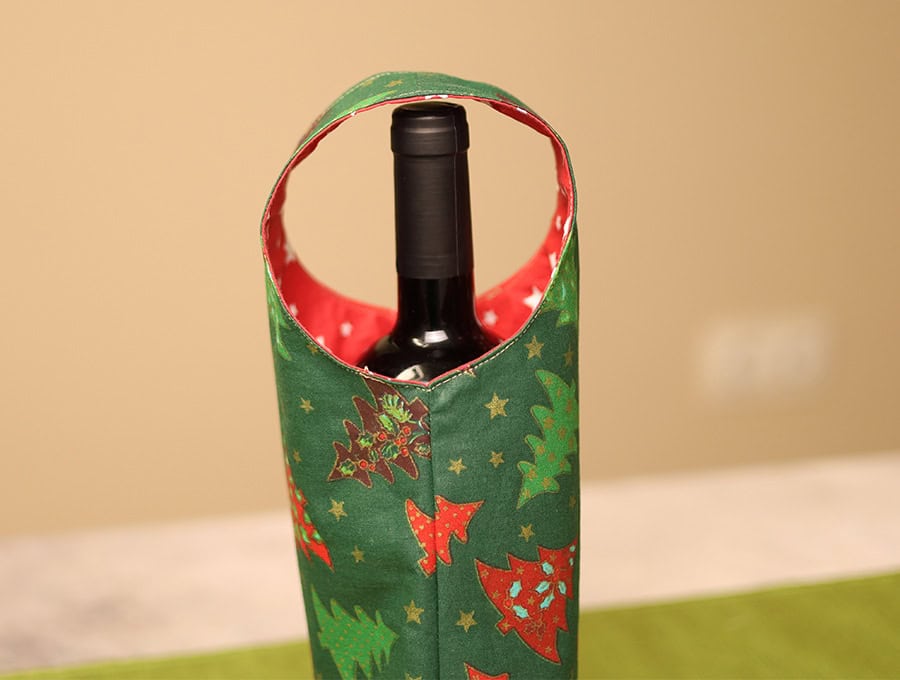
Make your gift of wine or a spirit bottle memorable with a reusable fabric wine bottle bag. This nifty design allows you to carry the bag using the built-in handle. This is a gift and packaging in one that keeps spreading the joy.
The reversible wine bottle carry bag becomes part of the gift which the recipient can reuse to display sprays of dried flowers or herbs or re-gift with a new bottle of wine. It can even work as a bag to keep small knitting projects handy. It uses up smaller pieces of fabric from your stash, and if your stash is like mine, it’s ever-growing! Make up a few to have on hand when those unexpected events pop up and you need to gift a bottle of wine or champagne.
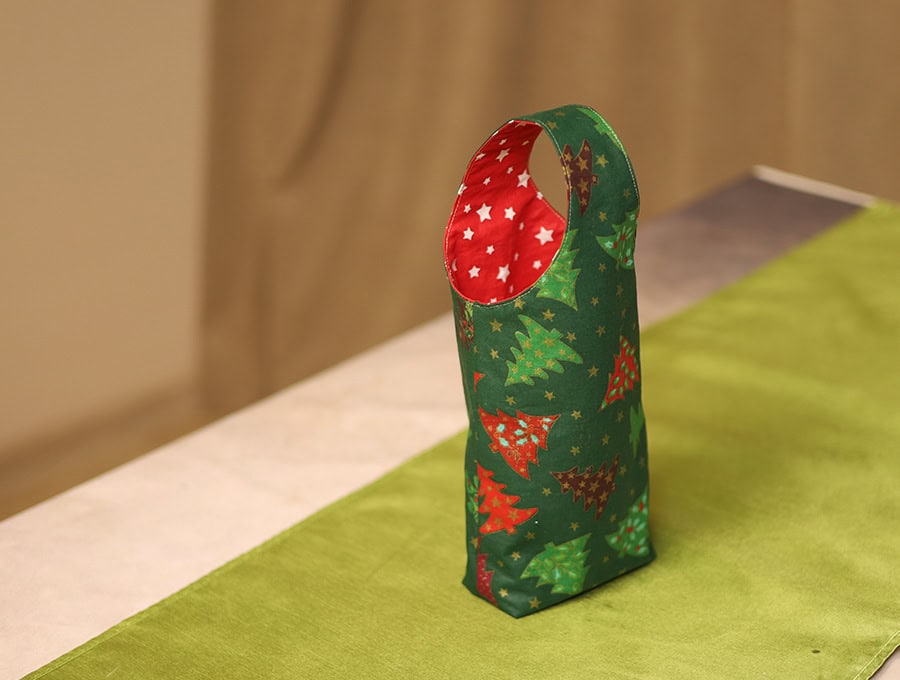
Our fully lined, fabric DIY wine bottle bag has a built-in handle so there is absolutely no risk of the handle coming loose, or splitting at the side or bottom as paper gift bags tend to. We show you how to make a pattern that you can re-use to make a bunch of these wine bottle bags. The wine bottle carrier pattern is adjustable to any size bottle – short dumpy wine bottles, the taller slimmer ones, and even the oversized. Never get caught without a nifty wine bottle gift bag again when you suddenly realise you need to give a gift.
Below you will find my step by step wine bottle carrier written tutorial with VIDEO instructions for all the visual learners.
We occasionally link to goods offered by vendors to help the reader find relevant products. Some of the links may be affiliate meaning we earn a small commission if an item is purchased.
Table of Contents
How to make a Wine bottle bag
Supplies and tools
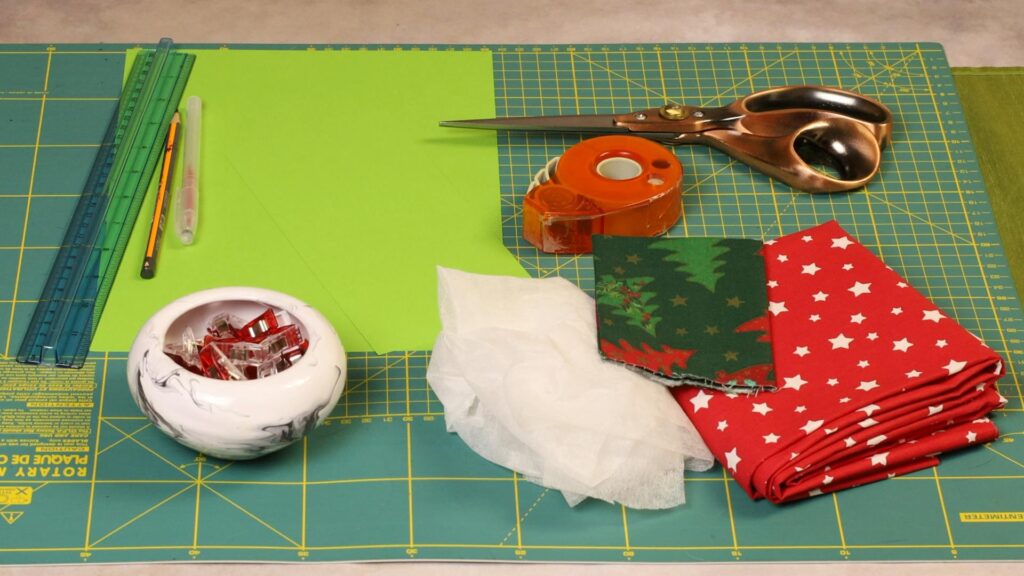
- fabric – 2 pieces of woven cotton (one main, one lining)
- fusible interfacing
- matching thread
- scissors (or rotary cutter and a cutting mat)
- ruler or measuring tape
- iron and ironing board
- sewing clips or pins
- paper for the pattern (if making your own pattern)
DOWNLOAD: wine bottle bag pattern [Free pdf file]
Follow us for free patterns & tutorials! [easy-profiles]
How to Sew a Wine Bag with Built in Handle
Watch the diy Fabric Wine Gift Bag video first and then follow the written step by step instructions below.
Please enjoy and don’t forget to Like and SUBSCRIBE over on YouTube to be kept up to date with new videos as they come out.
Wine Bottle Bag VIDEO TUTORIAL
INSTRUCTIONS:
STEP 1:
Download, print and trim the excess paper of the template. Make sure to print at 100% (no scaling)
If you want to draw your own pattern, see instructions at the bottom of the post
STEP 2:
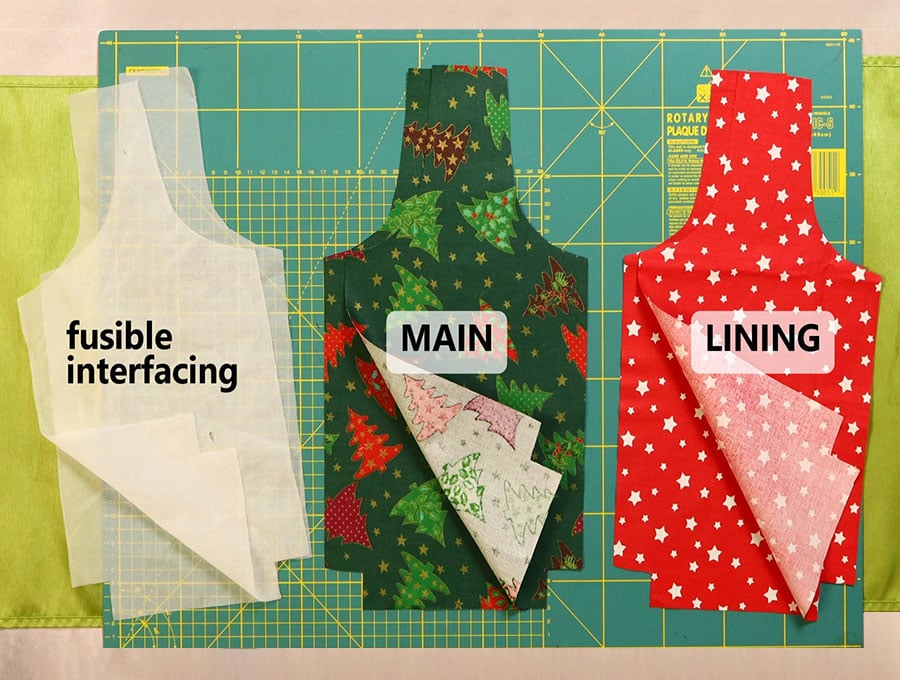
Grab your fabric and cut out the 2 outer pattern pieces, the 2 lining fabric pieces and the 2 x fusible interfacings.
STEP 3:
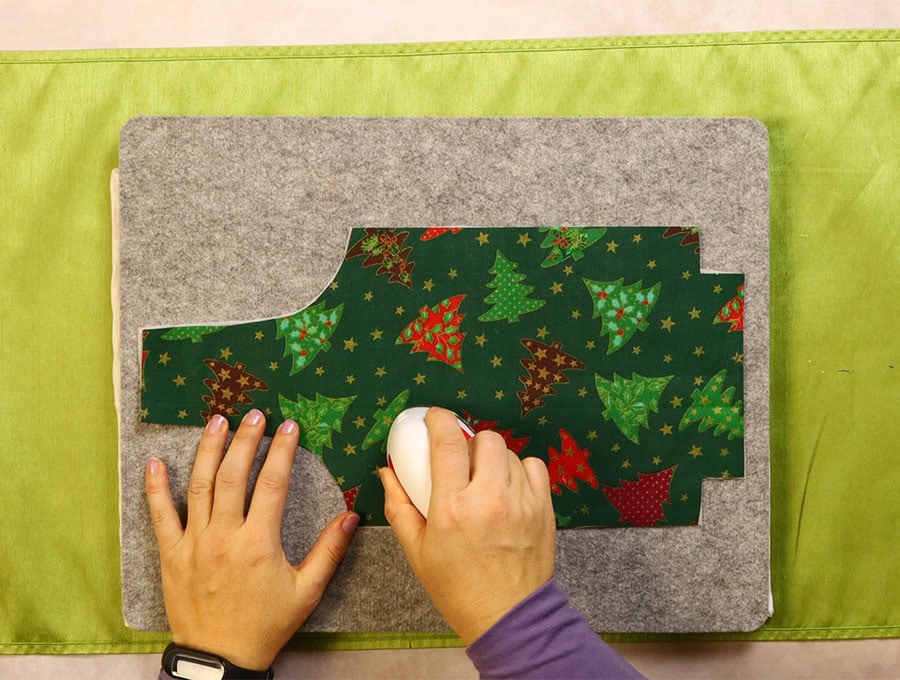
Place one of the outer fabric pieces wrong side up on the ironing board, and place the fusible interfacing with the fusible side down, lined up neatly with the edges of the fabric.
Flip to the right side and iron to attach. Repeat with the other piece of outer fabric and fusible interfacing.
STEP 4:

Line up the outer fabric with right sides facing and clip to hold in place, then stitch across the top with a 3/8 inch (1 cm) seam allowance.
STEP 5:
Place the two lining pieces with right sides facing each other, line up and clip then stitch across the top with a 3/8 inch (1 cm) seam allowance.
STEP 6:
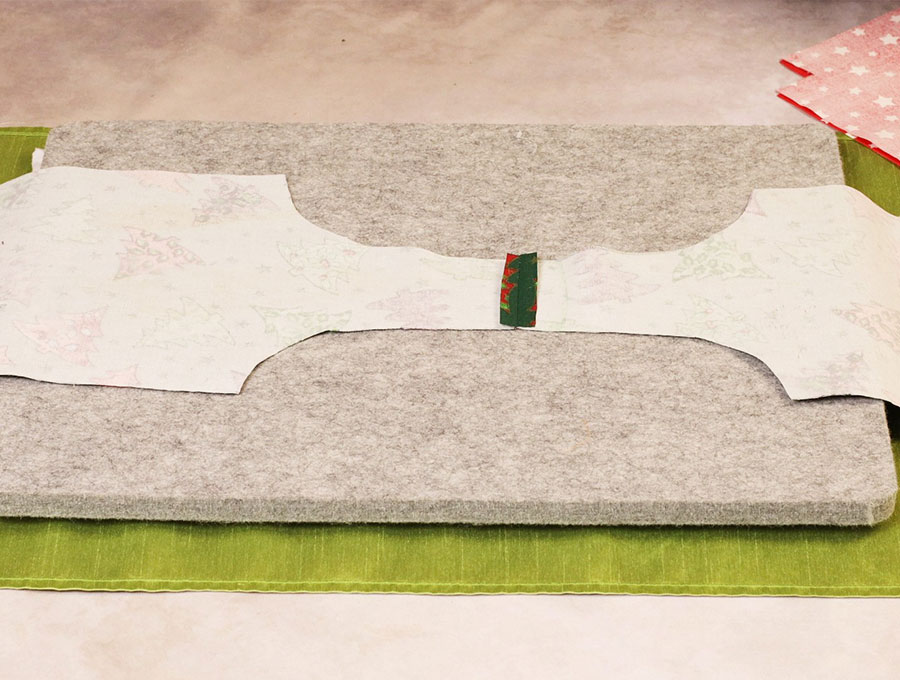
Place the opened out outer pieces on your ironing pad, wrong side up, open the seams and press flat. Repeat with the lining piece.
STEP 7:
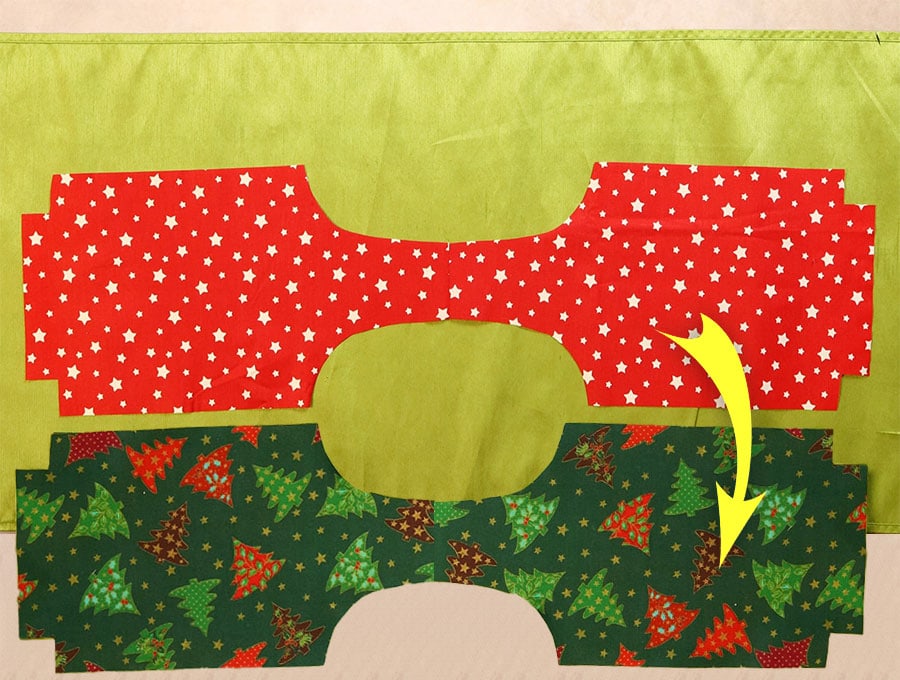
Place the joined lining piece over the joined outer piece, right sides facing, and line up the edges.
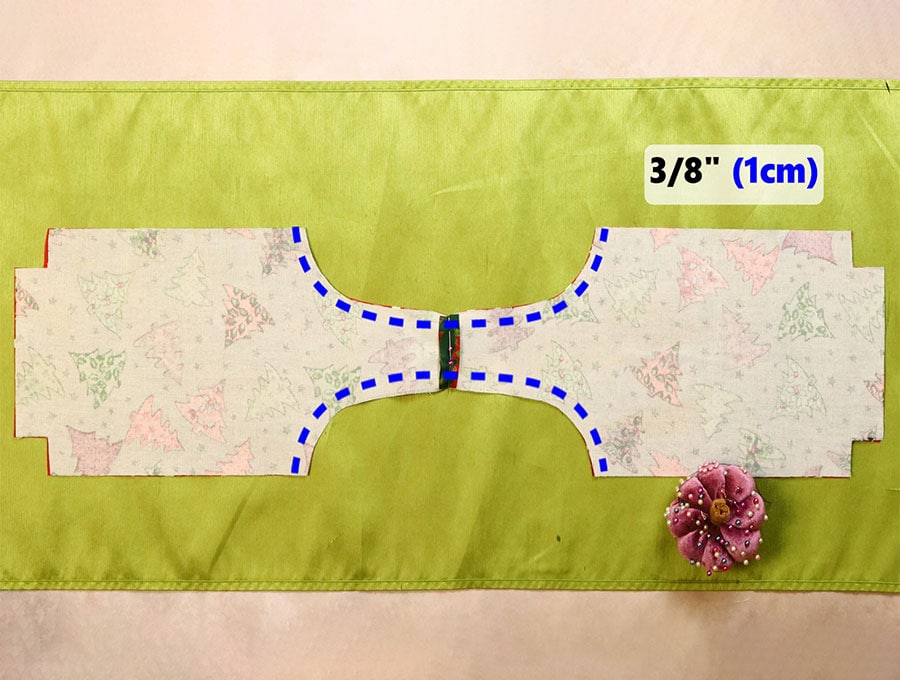
Pin the flattened stitched seams together, then stitch around the curves on each side with a 3/8 inch (1 cm) seam allowance.
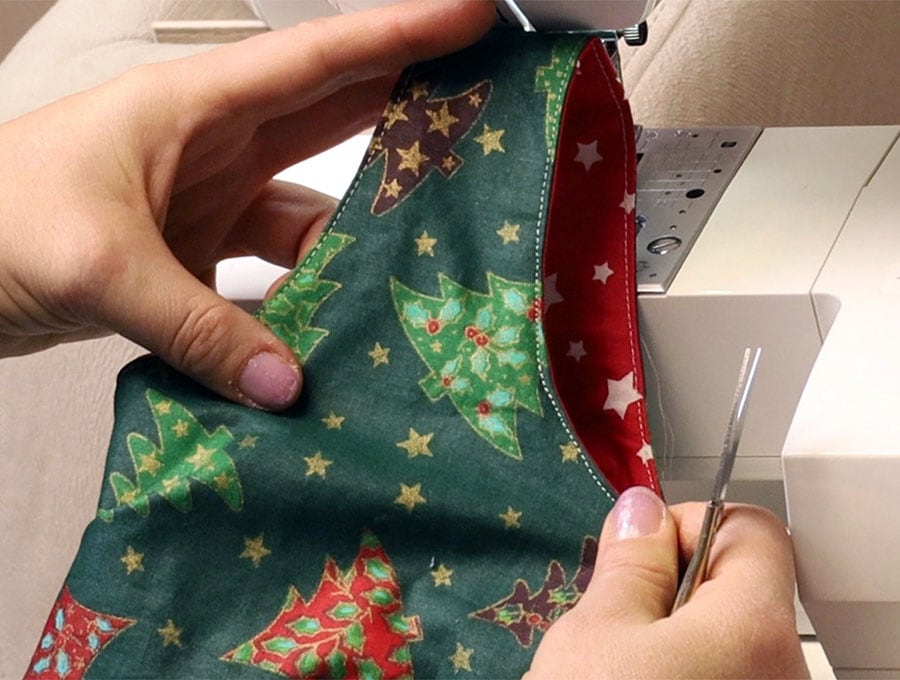
STEP 8:
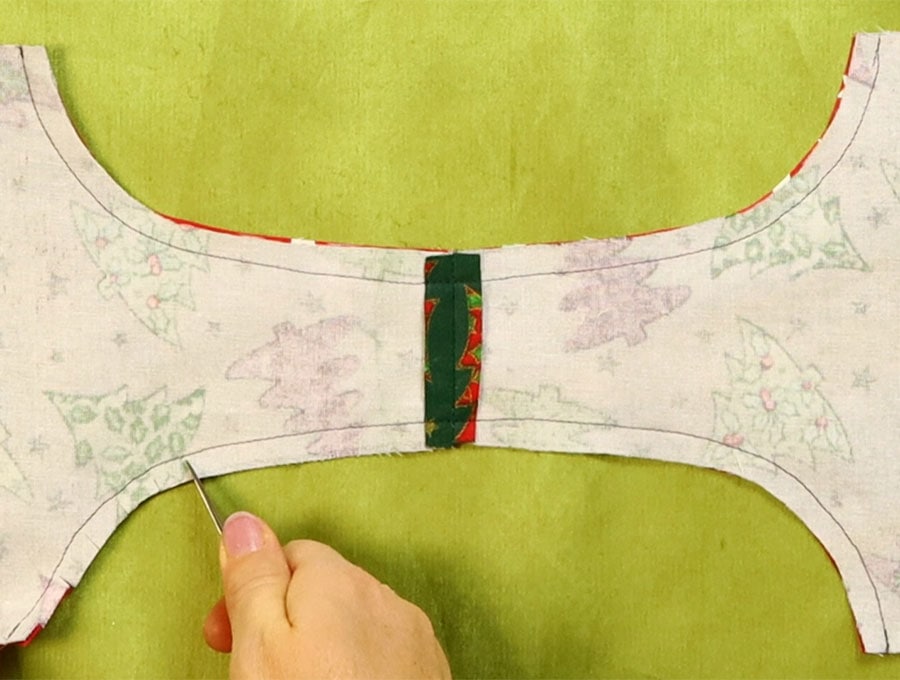
Make small cuts into the seam allowance to allow the fabric to lie flat when turned the right way out. Just be careful not to get too close to the stitch line otherwise it will fray out.
STEP 9:
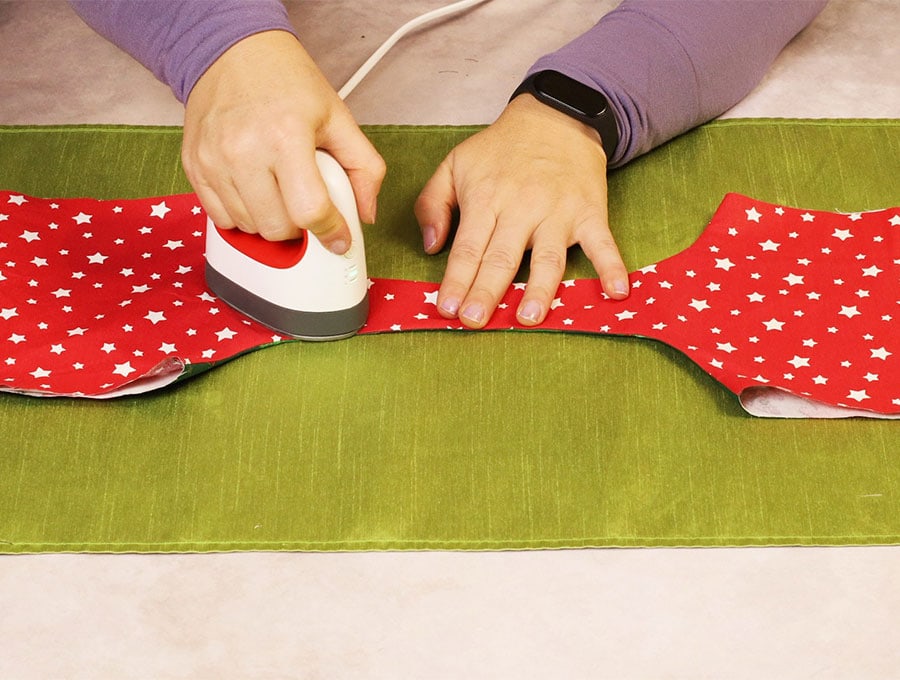
Turn the wine bottle bag the right way out and press the seamed curves so they lie flat and neat.
STEP 10:
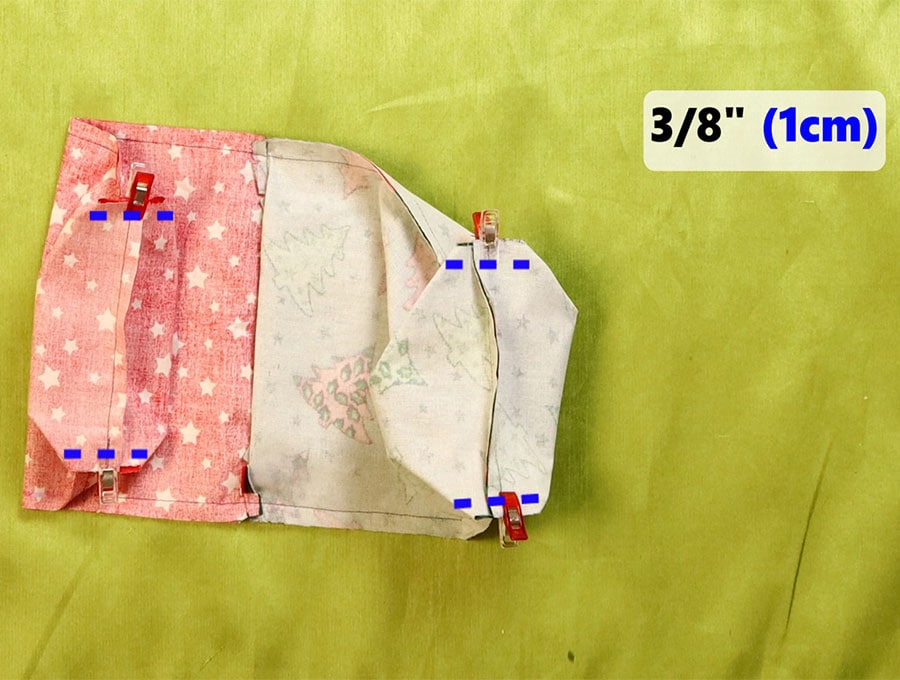
Place the two ends of the outer fabric together and pin, then put the lining fabric together and pin, making sure the seams line up.
STEP 11:
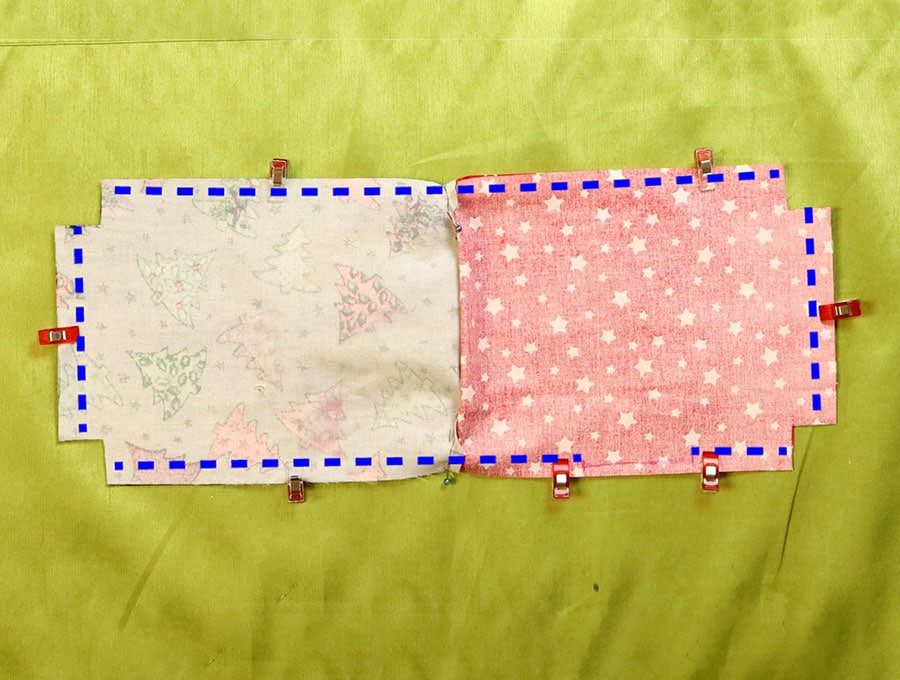
Stitch all the way around the edge, skipping the cut-out corners, and leaving a gap of around 3 inches on the one side of the lining fabric to enable you to pull the fabric through to turn the wine bottle bag the right way out.
STEP 12:
Next take the cut-out corners you did not stitch and pull so the seams line up, with one side of the seam to the left and the other to the right to reduce the number of layers you have to stitch through, and with a fold on either side. Stitch across the corner with a 3/8 inch (1 cm) seam allowance.
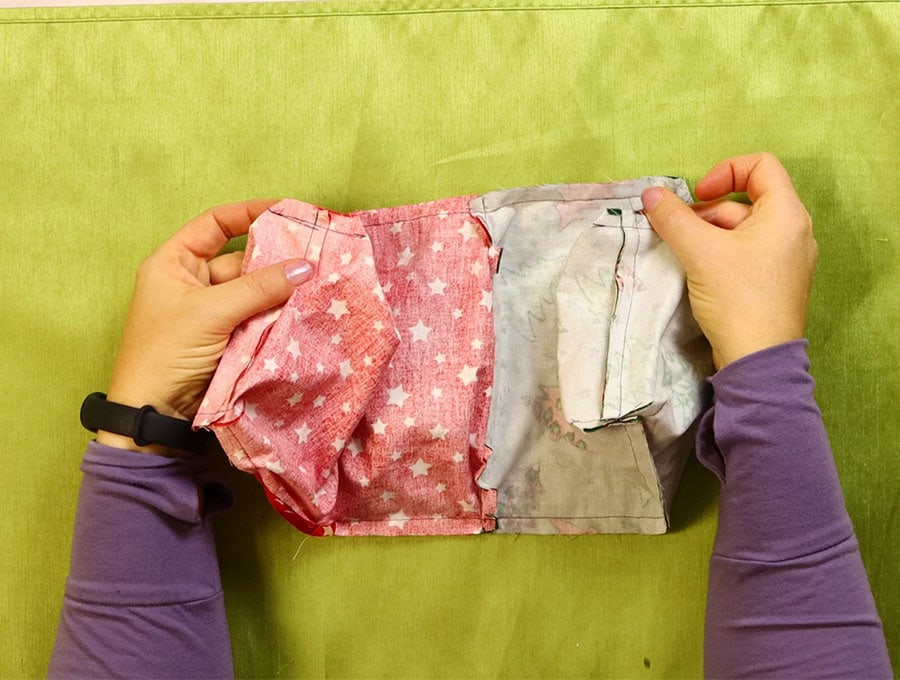
Repeat with the other 3 corners.
STEP 13:
Pull the fabric through the gap until it is the right way out and make sure the seams are lying flat.
STEP 14:
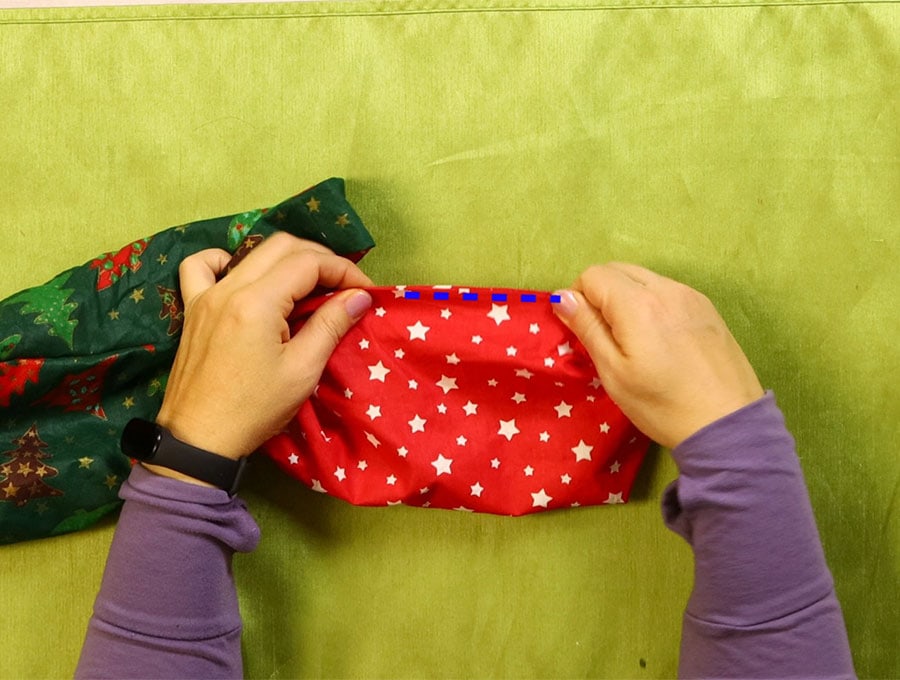
Turn in the raw edge of the gap in line with the seam and stitch closed with a matching thread as close to the edge as possible.
STEP 15:

After trimming any loose threads, push the lining into the outer fabric, then top stitch around both curves 1/8 of an inch (3 mm) from the edge.
Your wine bottle bag is ready to use.
Create a few of these bags to have on hand to pop a bottle into when you belatedly realise it is someone’s birthday or you’re invited to dinner at someone’s home. For men make the bags from dark masculine colours and neutrals. There is nothing to stop you joining two pieces of the outer fabric so you have a darker base and a lighter top. You can add embellishments like buttons or a bow tie – let your imagination run free with the fabrics and haberdashery items you have in your stash.
Recipients can reuse the bag or pass it on with a new bottle of wine when they need a gift bag. These could even become a source of income at markets, as people switch to more sustainable products rather than once off packaging.
If you enjoyed making this easy DIY re-usable wine bottle bag then like and subscribe to have more patterns like this delivered to your inbox as they go live online.
MAKING YOUR OWN PATTERN:
Making the pattern:
To create the free pattern, watch the visuals.
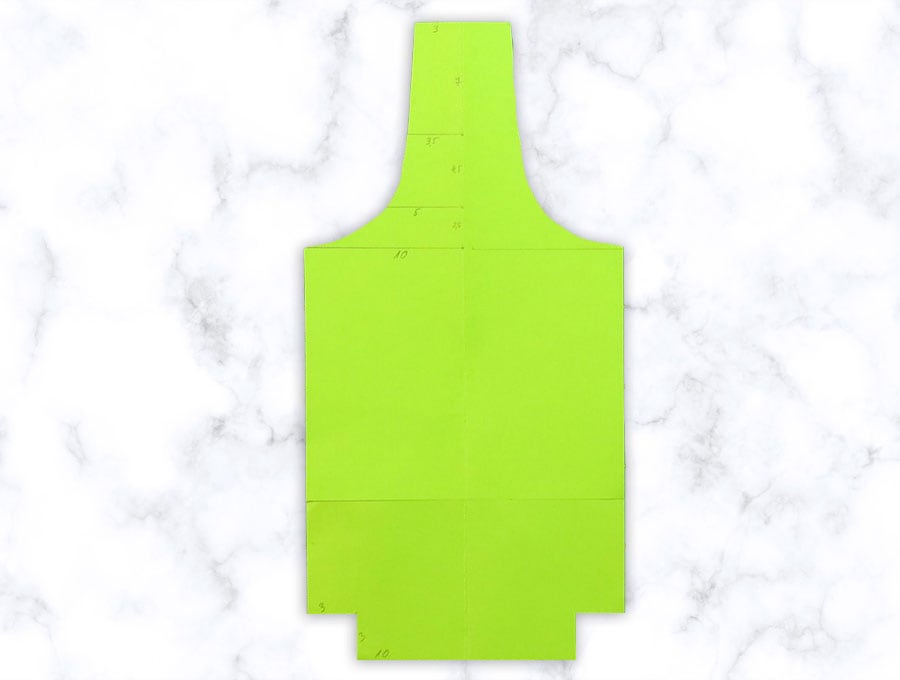
You will need a piece of A4 paper folded in half. Depending on the size of the wine bottle it may need to be a little longer, so place the paper next to the wine bottle you plan on gifting and measure the distance from the base to where the bottle narrows to the neck, and adjust the space accordingly. You may need to glue an extra piece on the top of the paper to add the length. Once this is done follow the visuals to see how to make the pattern.
The measurements are given below for a standard wine bottle. You may need to cut the fabric a bit wider if it’s one of those shorter, wider bottles.
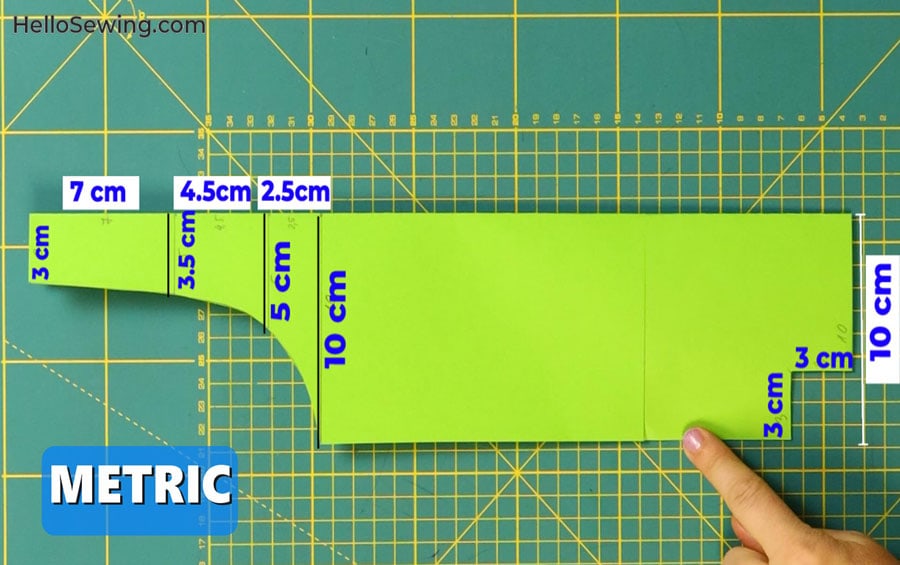
The metric measurements are:
Top 3 x7 cm, second section 3.5 x 4cm, third section where the shoulder of the bottle stands 5 cm x 2.5 cm, main part of bottle 10 cm x whatever length you need to accommodate the bottle. Last measure the section which forms the base 3cm x 10cm. This will be very clear when you see the visuals and how you curve the top section.
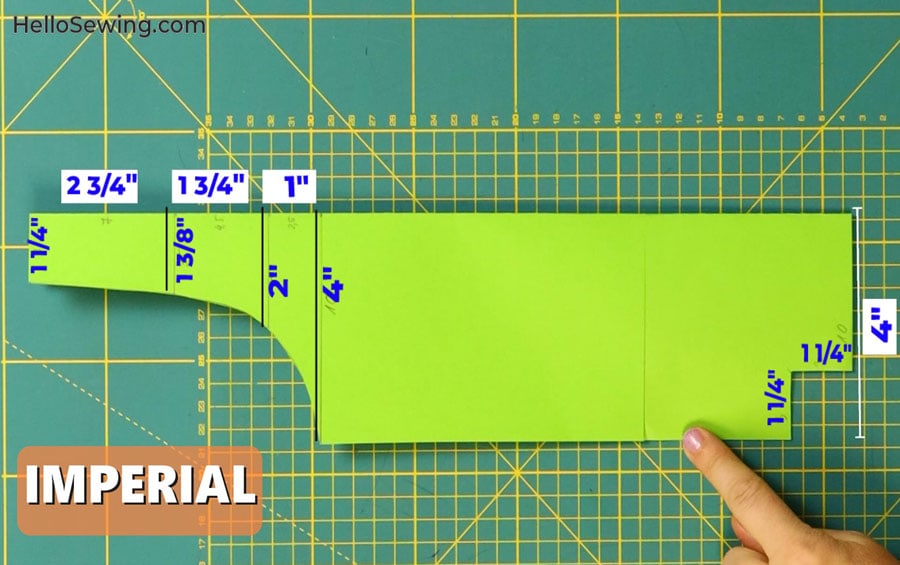
The Imperial or US measurements are:
1 ¼ inch x 2 ¾ inches, second section 1 3/8 inches x 1 ¾ inches, third section – the shoulder of the bottle 2 inches x 1 inch, main part of bottle 4 inches x whatever length needed to accommodate the bottle. Last measure the section which forms the base 1 ¼ inches x 4 inches. This will be very clear when you see the visuals and how you curve the top section.
Once you have your pattern cut out then measure 1 ¼ inches (3 cm) along the base, on the side opposite the fold and 1 ¼ inches (3 cm) upward, then cut out the 2 small squares from the folded paper pattern – this will create the boxed corner later.
Do you like this? Pin for later:
Wanna be friends? Click HERE and follow me on Pinterest
RELATED: