
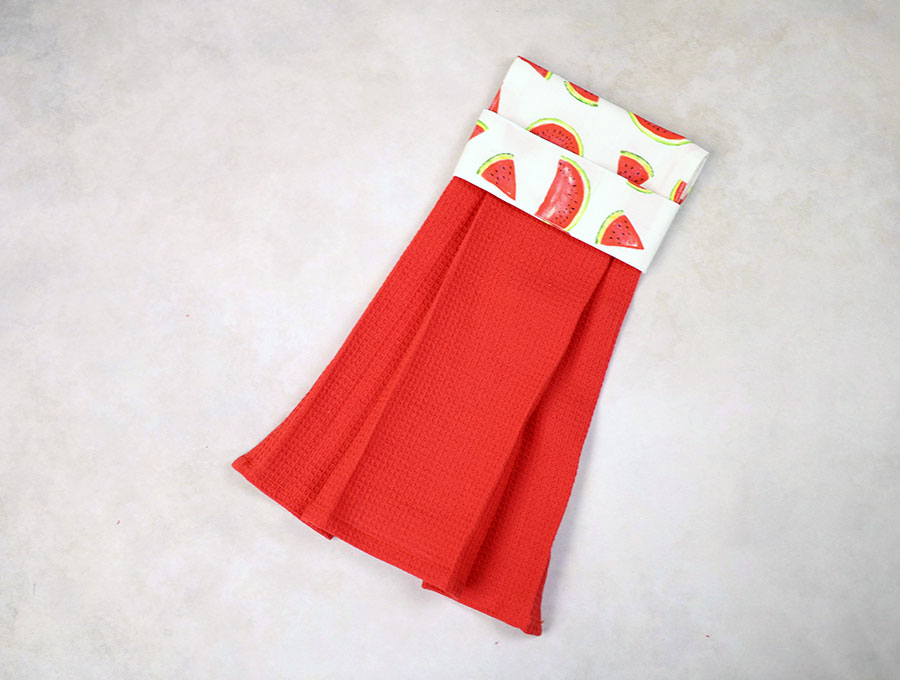
DIY Hanging Tea Towels
Tired of tea towels slipping of the rail of your oven? Try this hanging tea towel that slips through a loop. It’s super easy to make and will keep the tea towel securely at hand to use while you are cooking. All you need is a little fabric from your stash and half a tea towel. Make another hanging tea towel with the other half, because once you make this you’ll realise just how easy they are to make.
Below you will find my step by step written tutorial with VIDEO instructions for all the visual learners.
We occasionally link to goods offered by vendors to help the reader find relevant products. Some of the links may be affiliate meaning we earn a small commission if an item is purchased.
Table of Contents
How to make hanging tea towels

Supplies and tools
- one new tea towel or hand towel
- fabric – small colorful piece of fabric
- fabric marking pen
- matching thread
- scissors (or rotary cutter and a cutting mat)
- ruler or measuring tape
- iron and ironing board
- sewing clips or pins
Follow us for free patterns & tutorials! [easy-profiles]
How to Sew Hanging Tea Towels
Watch the diy hanging tea towels video first and then follow the written step by step instructions below.
Please enjoy and don’t forget to Like and SUBSCRIBE over on YouTube to be kept up to date with new videos as they come out.
Hanging Tea Towels VIDEO TUTORIAL
INSTRUCTIONS:
TIP: Use any new tea towel or hand towel – the dimensions can be slightly larger than the standard tea towel size of 18 x 28 inches (45 x 70 cm) or the standard hand towel size of 18 x 32 inches (45 x 81 cm). Our tea towel was 19 x 26 inches (50 x 70 cm). It does not affect the other dimensions.
STEP 1:
Find the middle of the tea towel or hand towel by folding in half and marking the middle on each side of the fold then cut in half using a rotary cutter and cutting mat, or marking with a ruler and cutting with your scissors.
STEP 2:
Mark on the wrong side of the raw edge of the half towel as follows:
Find the middle of the raw edge by folding in half and making a mark. Then on each side of the central mark measure 4 inches (10 cm) on either side, and then 3 inches (7.5 cm) on either side.
STEP 3:
Fold the 4 inch (10 cm) mark towards the middle to form a fold, repeat with the other side, then clip or pin the fold in place.
STEP 4:
Fold the hemmed edge of the tea towel to the 3inch (7.5 cm) mark you made on each side and pin or clip in place.
STEP 5:
Press the folds in place. The top of the tea towel should measure 6 inches (15.5 cm) across.
STEP 6:
Stitch along the raw edge to hold the folds in place ¼ inch (6mm) from the edge, backtacking at the start and finish.
STEP 7:
Cut the band of 7 ½ x 8 inches (19 x 20 cm) after using the clear plastic to decide exactly where you want that third section lined up on the print.
TIP: When you cut the band, if you have a pattern that you want to be in the mid-section of the band and not cut in half you can prepare a piece of clear firm plastic with the dimensions of the band with lines drawn across the 7 ½ inch (19 cm) width, 2 inches (5cm) apart down the 8 inch (20 cm) length. The third 2 inch (5cm) strip down will be the fron.
STEP 8:
Fold the band in half on the long edge, and finger press, then open out the fabric and place wrong side up on your worktop, then fold from the bottom towards the center fold, and from the top down to meet the center fold. Fold over again so all raw edges on the length are hidden.
STEP 9:
Stitch around the edge of the band 1/8 of an inch (3mm) from the edges.
STEP 10:
Take the original top piece of 7 x 15 inches (18 x 38 cm), fold in half and mark the center with a finger press, then mark the center with a marking pen on each side, fold along the other axis and again mark the mid points.
STEP 11:
Place the hanging band you stitched in Step 9 with the top edge lined up with the central mark of the fabric and stitch on the right side to attach the ends of the hanging loop after pinning.
STEP 12:
Fold the fabric in half, lining up the edges, right side to right side, and the fold will be where you stitched the top of the hanging loop. Stitch down each side of the hanging loop, but no further.
STEP 13:
Place the fabric right side up on your worktop and over it place the right side of the tea towel, lining up the raw edge on the right side of the fabric where the hanging loop is. Position in the middle so the towel is equidistant from the edges of the fabric and pin in place.
STEP 14:
Roll the tea towel up towards the raw edge, then flip the fabric from the fold down and also pin in place, then stitch across the raw edges where the fabric meets the tea towel.
STEP 15:
Turn the right way out and fold under the raw edges on the sides and pin or clip.
STEP 16:
Top stitch down the side, across the bottom where the fabric joins the hand towel, and up the other side.
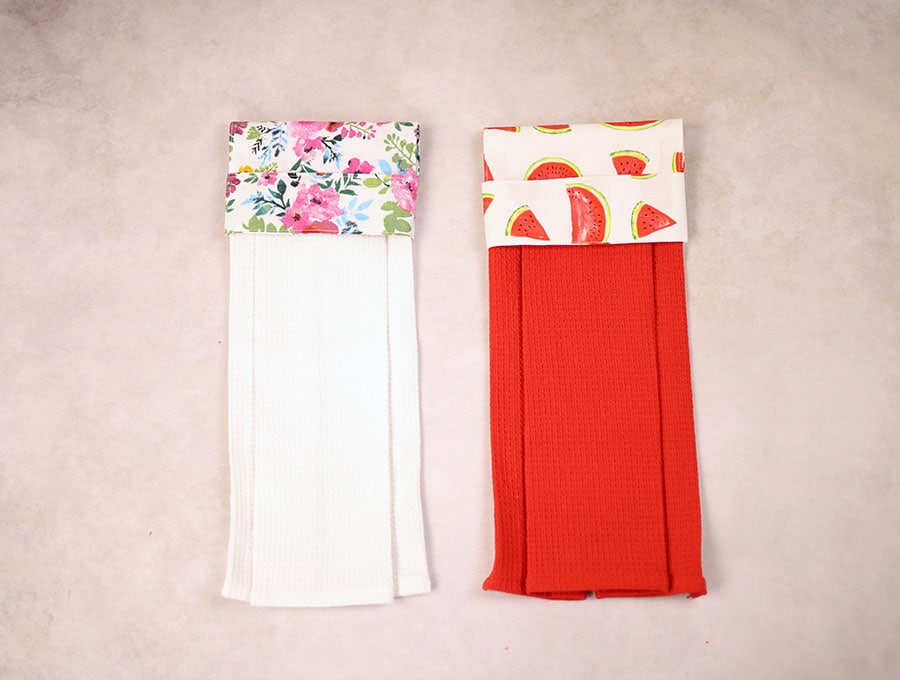
The hand towel is now ready to use – no buttons, no Velcro – just slip it over the rail on your oven and pull through to have a tea towel ready to wipe your hands on as you cook. You will have the other half of the tea towel left over, so maybe make two of these so you can have one in the wash and one in use. This hanging tea towel will make a good present combined with a set of the pot holders made with squares and rectangles. (link to pot holder tutorial)
Like and subscribe so we can share more of our sewing projects with you as they go live.
Do you like this? Pin for later:
Wanna be friends? Click HERE and follow me on Pinterest
RELATED: