
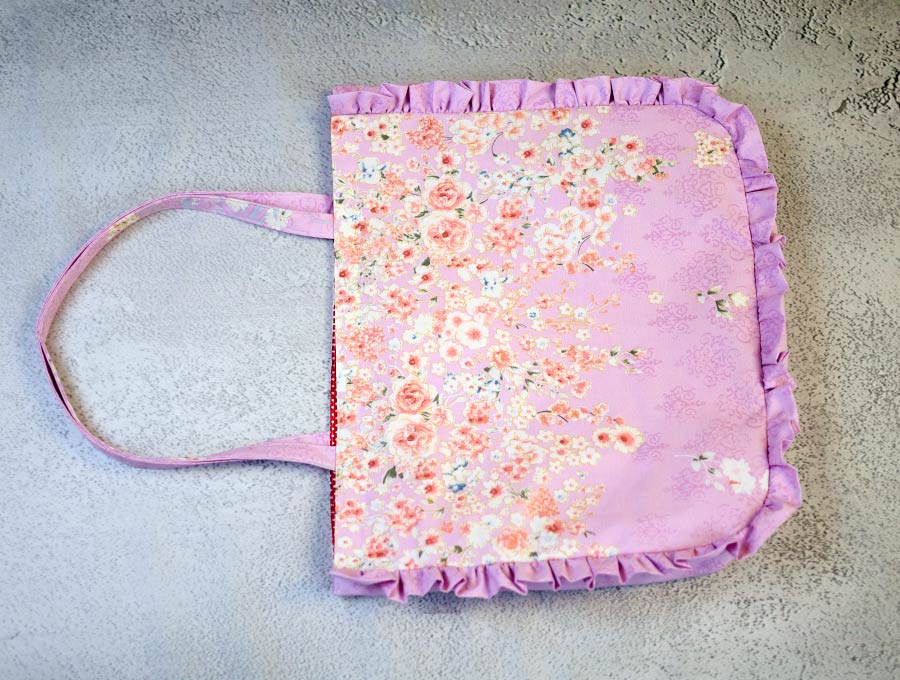
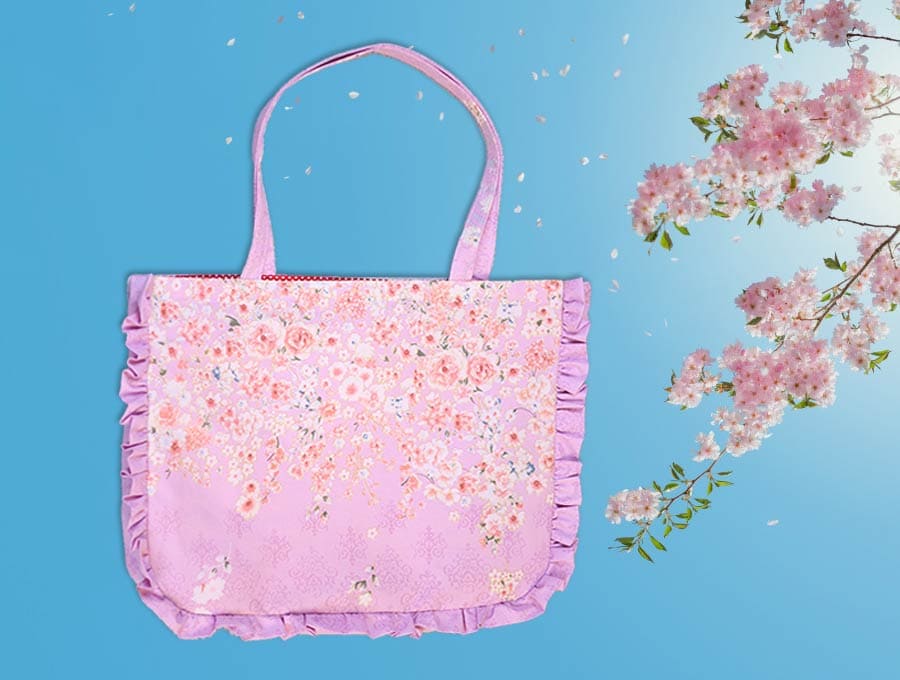
DIY Large Ruffle Bag [Sewing Pattern + VIDEO]
Learn how to sew this lovely large ruffle bag. This is the ideal spring and summer bag where you can pack you stuff for a day near the water, be it the beach, a water-park or a lake. It has ample room for everything you need, whether you are taking a sewing project across to a friend’s house, having a picnic with kids, or breezing off to the shops for a few items. It’s quick to make, has a free printable HelloSewing pattern, and all the instructions.
Below you will find my step by step written tutorial with VIDEO instructions for all the visual learners.
We occasionally link to goods offered by vendors to help the reader find relevant products. Some of the links may be affiliate meaning we earn a small commission if an item is purchased.
Table of Contents
- 1 How to make a Large Ruffle Bag
- 2 Supplies and tools
- 3 How to Sew a Large Ruffle Bag
- 3.1 Large Ruffle Bag VIDEO TUTORIAL
- 3.2 MATERIALS:
- 3.3 INSTRUCTIONS:
- 3.4 STEP 1:
- 3.5 STEP 2:
- 3.6 STEP 3:
- 3.7 STEP 4:
- 3.8 STEP 5:
- 3.9 STEP 6:
- 3.10 STEP 7:
- 3.11 STEP 8:
- 3.12 STEP 9:
- 3.13 STEP 10:
- 3.14 STEP 11:
- 3.15 STEP 12:
- 3.16 STEP 13:
- 3.17 STEP 14:
- 3.18 STEP 15:
- 3.19 STEP 16:
- 3.20 STEP 17:
- 3.21 STEP 18:
- 3.22 STEP 19:
- 3.23 STEP 20:
- 3.24 STEP 21:
- 3.25 STEP 22:
- 3.26 STEP 23:
- 3.27 STEP 24:
- 3.28 STEP 25:
- 3.29 STEP 26 (optional):
How to make a Large Ruffle Bag
Supplies and tools
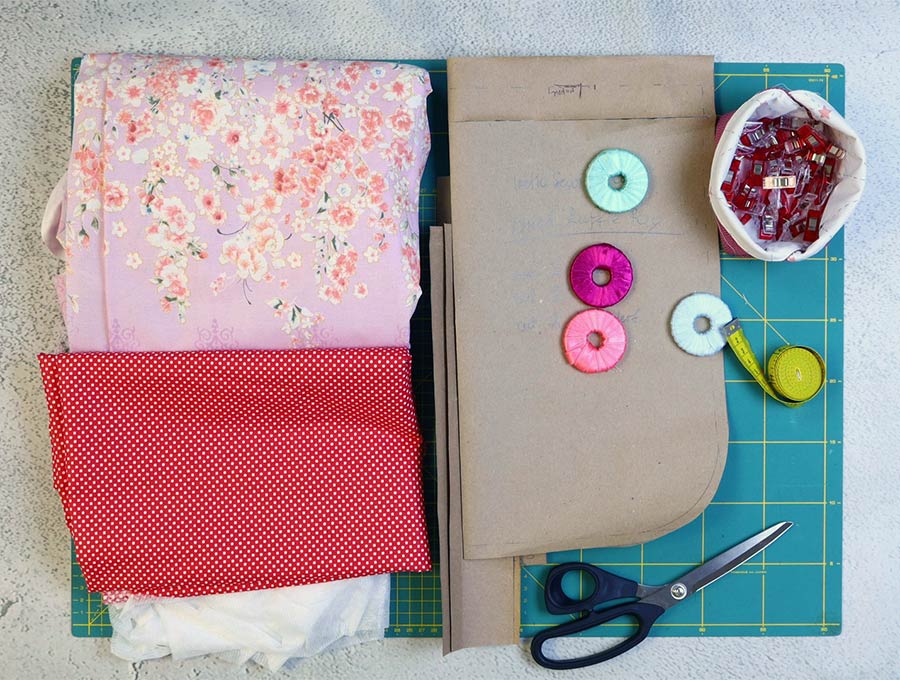
- fabric – 2 pieces of 100% woven cotton (one main, one lining)
- fusible interfacing
- matching thread
- scissors (or rotary cutter and a cutting mat)
- ruler or measuring tape
- iron and ironing board
- sewing clips or pins
DOWNLOAD: Large Ruffle Bag Pattern[Free pdf file]
Follow us for free patterns & tutorials! [easy-profiles]
How to Sew a Large Ruffle Bag
Watch the diy large ruffle bag video first and then follow the written step by step instructions below.
Please enjoy and don’t forget to Like and SUBSCRIBE over on YouTube to be kept up to date with new videos as they come out.
Large Ruffle Bag VIDEO TUTORIAL
MATERIALS:
BODY of the bag:
- (2) 17 ¼ x 16 inches (44 x 40 cm) from outer/main fabric
- (2) 17 ¼ x 16 inches (44 x 40 cm) from fusible interfacing
- (2) 17 ¼ x 16 inches (44 x 40 cm) from lining.
Ruffle:
- 68 ½ x 3 ¼ inches (174 x 8 cm) from outer fabric
Handles:
- (2) 27 x 3 ¼ (68 x 8 cm) from outer/main fabric
- (2) 27 x 3 ¼ (68 x 8 cm) from fusible interfacing
Side panel:
- 46 x 3 ¼ (116 x 8 cm) from outer/main fabric
- 46 x 3 ¼ (116 x 8 cm) from fusible interfacing
- 46 x 3 ¼ (116 x 8 cm) from lining.
INSTRUCTIONS:
STEP 1:
Print out the pattern at 100% (no scaling) on either A4 or US letter paper and trim the excess paper.
To make your own pattern transfer the measurements below and cut out the pattern:
- Main fabric for bag 17 ¼ x 16 inches (44 x 40 cm) 2 of outer fabric, 2 of lining and 2 of interfacing and round the bottom edges using a small bowl or plate.
- Ruffle 68 ½ x 3 ¼ inches (174 x 8 cm)
- Handles (cut on fold) 2 of 13 ½ x 3 ¼ (34 x 8 cm) 2 from main fabric and 2 from interfacing
- Side panel 23 x 3 ¼ (58 x 8 cm) cut on fold. 1 of main fabric, 1 of interfacing. 1 of lining.
STEP 2:
Place the two pieces of the main body of the bag wrong side up and place the interfacing over each piece, sticky or knobbly side down and iron to fuse according to the manufacturer’s instructions.
STEP 3:
Attach the interfacing to the wrong side of the handles.
STEP 4:
Make the handles by folding each handle piece right side out in half along the length and ironing in the center crease.
STEP 5:
Fold along each long side 3/8 of an inch (1 cm) in and iron. You can use a piece of cardboard to guide you with the fold.
STEP 6:
Give each handle a press right sides out when you fold the long edges together. Clip in place.
STEP 7:
Stitch along each edge of the handle pieces 1/8 of an inch ( 3mm) from the edge.
STEP 8:
To make the ruffle fold the fabric in half along the length, right sides out and press with the iron to mark the center.
STEP 9:
Open out the fabric at the ends and fold over the short edges 3/8 of an inch (1 cm), then fold on the marked crease and press.
STEP 10:
Take a piece of strong thread or dental floss slightly longer than the ruffle. Set your sewing machine to a zig zag stitch. Attach the thread by holding it up at a 45 degree angle as you sew and zig zag stitching across the strong thread ¼ of an inch (6 mm) from the edge.
STEP 11:
When finished cut the machine thread and gently pull up the strong thread from each end, working it until the ruffles are even and the length is the same as the bag bottom and sides.
STEP 12:
Place the main bag piece wrong side facing upwards, on your ironing pad and fold down the top of the bag 1 inch (2.5 cm) and press. Repeat with the other side of the body of the bag and the two lining pieces.
STEP 13:
With one of the outer bag pieces right side up, clip or pin the ruffle to the bag, starting just below the fold your pressed in place, going around the bag and ending up at the other side just below the fold. The top fold must be opened up and the raw edges of the ruffle lined up with the raw edges of the main bag piece.
STEP 14:
Stitch the ruffle to the bag using a ¼ inch (6 mm) seam allowance, backtacking at the start and finish.
STEP 15:
Take the side piece of the bag – it’s the long all in one strip and start pinning or clipping right side to the right side of the main piece, over the ruffle.
STEP 16:
Stitch the side piece using a 3/8 inch (1 cm) seam allowance
STEP 17:
Take the lining fabric for the body of the bag and to it pin the side piece all the way around, then stitch using a 3/8 of an inch (1 cm) seam allowance.
STEP 18:
Place both the outer piece and the lining piece that you have attached the side panel to right side up, near each other on your worktop. Pin the second outer piece to the side panel, lining up and making sure they fit neatly. Repeat with the other side of the lining bag piece. Stitch around the edges of the outer and lining separately using a 3/8 of an inch seam allowance.
STEP 19:
Mark the position of the handles at the top of the bag, following the markings on the pattern piece. Flip around the outer bag piece and repeat the markings on the other side
STEP 20:
Clip the seam allowance at the curved corners of the bag so it lies flat when turned – do this for the outer and the lining fabric.
STEP 21:
On the outer bag fabric press the seam allowances towards the side panel. On the lining press the seam allowance towards the body of the bag. This reduces the number of layers to stitch through when you put the lining and outer together.
STEP 22:
Turn the outer bag right side out. Slip the lining inside the bag and line up the sides. The seams at the top of the bag and lining you pressed must be turned down so there are no raw edges visible. Clip the sides.
STEP 23:
Mark the bag handles 1 inch (2.5 cm) from each end and draw a line across.
STEP 24:
Insert the bag handles in line with the marks you made on each side of the outer and ensuring the line you drew is in line with the top edge. Clip in place. Over this clip the lining.
STEP 25:
Top stitch 1/8 of an inch (3 mm) from the edge on one side of the bag. Start just after the ruffle and end at the ruffle on the same side. Do not stitch over the ruffle. Backtack to start and finish, then do the other side of the bag in the same way.
STEP 26 (optional):
It is optional if you want to reinforce the handles by stitching down 1 inch (2.5 cm) in a square over the handle and making an x with your stitching to ensure they are firm. This is necessary if you are carrying heavy items in the bag. If it just for light use then the top stitching will be fine. Another option is to run a second line of top stitching around the top as you did in Step 26, but ½ an inch (1.3cm) below your first line of stitching to reinforce the attachment of the handles.
That’s it! The Large ruffle bag is ready!
If you have a few minutes, some medium size fabric, and our free printable HelloSewing pattern then you can sew this up as a quick project that will bring joy as a gift or be super useful for taking out on trips to the beach, park, or shopping at the mall.
Please give us a like and subscribe to HelloSewing if you enjoyed this tutorial. We have heaps of video tutorials and step-by-step instructions for projects in the pipeline that we just can’t wait to share with you.
Do you like this? Pin for later:
Wanna be friends? Click HERE and follow me on Pinterest
RELATED: