
Layered Christmas Tree Ornament
Try this Scandinavian style layered Christmas tree ornament that involves basically three circles. This is a great project to get kids involved as you teach them a little about mathematics in a fun and practical way. They can measure the diameter of a circle and choose items from the kitchen to draw the three circles closest to the dimensions, then fold the circles into halves and quarters to make the Christmas tree ornament. We have visuals and step-by-step instructions to show you exactly how it is done. Kids will enjoy using the fabric glitter glue and maybe even doing some hand stitching to create the ornament.
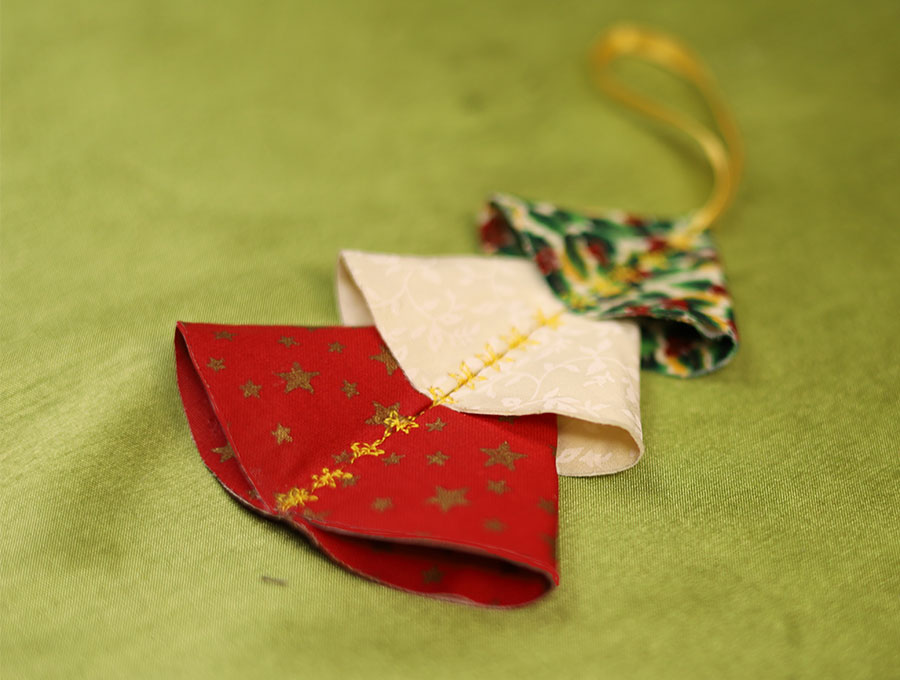
Want to create something festive for the tree that the kids can help with? Then we have the perfect project for you – these little Scandi style tree ornaments are a breeze to make. All they require are three circles in different sizes that can be decorated with fabric glitter glue and either machine stitched or hand stitched. We have a short video that shows how they are made and step-by-step instructions to print out and follow. Enjoy creating a little Scandi spirit this season. There’s nothing to stop you adding a little glitter snow to them too.
Below you will find my step by step written tutorial how to make layered christmas tree ornament with VIDEO instructions for all the visual learners.
We occasionally link to goods offered by vendors to help the reader find relevant products. Some of the links may be affiliate meaning we earn a small commission if an item is purchased.
Table of Contents
How to make a Layered Christmas Tree Ornament
Supplies and tools
- Three circles of fabric – 6 inches, 4.5 inches and 3 inches in diameter.
- (optional) Glitter fabric glue to match your fabric choices
- Piece of thin gold or silver ribbon or cord 8 inches (20 cm) long
- Sewing machine – optional
- Needle and sprakly thread
- Ruler
- Mathematical compass (optional)
- Double sided fusing (optional)
- scissors (or rotary cutter and a cutting mat)
- ruler or measuring tape
- iron and ironing board
- sewing clips or pins
DOWNLOAD: pattern coming soon [Free pdf file]
Follow us for free patterns & tutorials! [easy-profiles]
How to Sew a layered Christmas Ornament
Watch the diy layered christmas ornament video first and then follow the written step by step instructions below.
Please enjoy and don’t forget to Like and SUBSCRIBE over on YouTube to be kept up to date with new videos as they come out.
layered christmas ornament VIDEO TUTORIAL
INSTRUCTIONS:
STEP 1:
Cut your circles. If you don’t have a compass to draw the circles, simply find some objects in your kitchen that are closest to your measurements – a side plate, ice cream or yoghurt tub lid, coffee mug etc.
PRO TIP: I love the olfa compass cutter – it makes cutting circles a breeze!
STEP 2:
If you prefer to use double-sided fusible interfacing for a little firmer ornament then cut half circles of interfacing to suit each of the three circles.
STEP 3:
Place the interfacing lined up with the edge of the circle, fold over and iron so you have a semi-circle. Repeat with the other two circles
STEP 4:
Take a half circle and fold in half again, finger pressing to make a central mark, then open out and fold each side inwards to line up with the central fold. You now have one layer of the Christmas tree. Pin or clip the folded sides quite close to the base to hold them in position
Repeat with the other half circles, pinning/clipping on the folded sides as you did with the first one.
STEP 5:
Assemble the Christmas tree starting with the largest folded circle at the base, then slipping the next one over the top, and lastly the smallest folded circle. Adjust so there are almost equal amounts of fabric showing below each layer and clip in place along the sides.
STEP 6:
Time to insert the hanging loop. Fold the 8-inch (20 cm) ribbon or cord in half, then insert into the top of the point where the fold is and secure with a pin, making sure both the ends of the loop are secured.
STEP 7:
It is now up to you if you want to stitch along the back of the ornament where the folds meet with an embroidery stitch on your machine, or whether you want to hand sew little stars or snowflakes in a row up to the top hanging loop to secure the three layers of the Christmas tree together. If this is an ornament young kids are helping with, maybe just draw two lines with a fabric marking pen, one on each side of the folds and let children do a running stitch up the ornament. Make sure the hanging loop is stitched in securely.
STEP 8:
Remove the clips and fluff out the bottom of each layer of the Christmas tree ornament to give it some shape.
If you like you can add a couple of beads to the front of the ornament, or leave it as is and hang on the tree.
Make a few of these to give your home a festive look. They can go on wreaths, on the main tree, or on a swag over the mantelpiece. Give us a like and subscribe to have more festive fun projects delivered to your inbox. We love to see what our subscribers create- so please share a photo in the comments section.
VARIATION: Glittered Layered Christmas Tree
You only need to change steps 2 and 3:
Step 2
Edge each circle with fabric glitter glue right at the edge so they do not fray. If you have a serger you can serge the edge, or use a zigzag stitch with your machine.
Step 3
Fold each circle in half, lining up the edges neatly then press the fold – avoid putting the hot iron on the fabric glitter glue if you have used it. Then proceed with step 4
Do you like this? Pin for later:
Wanna be friends? Click HERE and follow me on Pinterest
RELATED: