
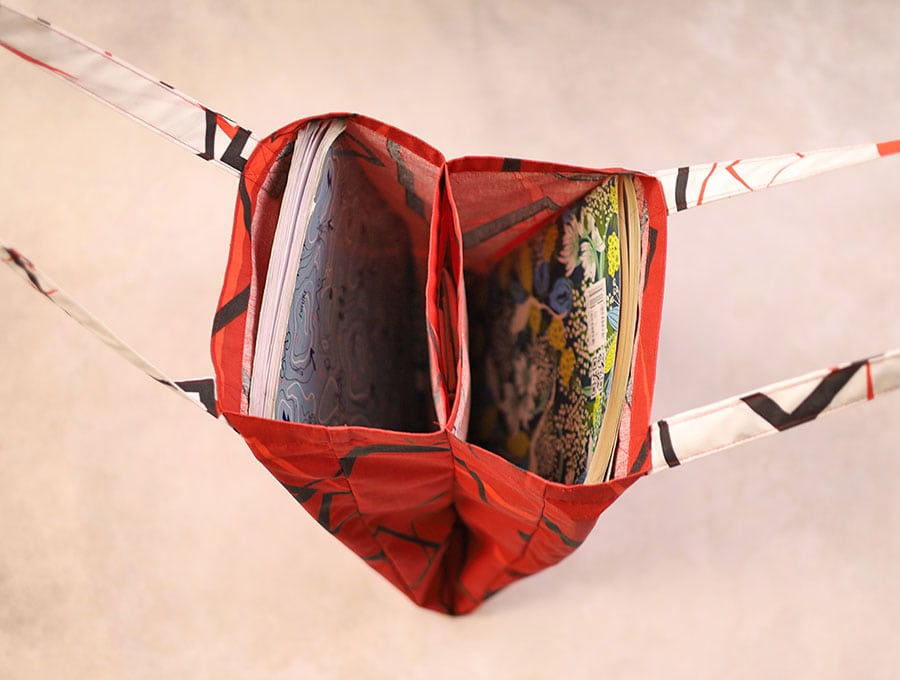
Tote bag with 3 pockets
As a child I watched grannies dig through their handbags and decided I never wanted to have to scratch for my belongings – it just seemed such an ‘old’ thing to do. That’s why I love bags with compartments where everything is organised in its own space! A comfortable tote bag with three pockets is just what you need. This tote bag ticks the boxes for organisation. It is so easy once you follow our step-by-step instructions and watch the video tutorial. The bag comes together like magic.
Below you will find my step by step written tutorial with VIDEO instructions for all the visual learners.
We occasionally link to goods offered by vendors to help the reader find relevant products. Some of the links may be affiliate meaning we earn a small commission if an item is purchased.
Table of Contents
- 1 How to make a library tote bag with 3 pockets
- 2 Supplies and tools
- 3 How to Sew a tote bag with 3 pockets
- 3.1 tote Bag with 3 pockets VIDEO TUTORIAL
- 3.2 INSTRUCTIONS:
- 3.3 STEP 1:
- 3.4 STEP 2:
- 3.5 STEP 3:
- 3.6 STEP 4:
- 3.7 STEP 5:
- 3.8 STEP 6:
- 3.9 STEP 7:
- 3.10 STEP 8:
- 3.11 STEP 9:
- 3.12 STEP 10:
- 3.13 STEP 11:
- 3.14 STEP 12:
- 3.15 STEP 13:
- 3.16 STEP 14:
- 3.17 STEP 15:
- 3.18 STEP 16:
- 3.19 STEP 17:
- 3.20 STEP 18:
- 3.21 STEP 19:
- 3.22 STEP 20:
How to make a library tote bag with 3 pockets
Supplies and tools
- fabric – 2 pieces of quilting cotton, measurements below
- matching thread
- scissors (or rotary cutter and a cutting mat)
- ruler or measuring tape
- iron and ironing board
- sewing clips or pins
DOWNLOAD: [Free pdf file]
Follow us for free patterns & tutorials! [easy-profiles]
How to Sew a tote bag with 3 pockets
Watch the diy tote with 3 pockets video first and then follow the written step by step instructions below.
Please enjoy and don’t forget to Like and SUBSCRIBE over on YouTube to be kept up to date with new videos as they come out.
tote Bag with 3 pockets VIDEO TUTORIAL
INSTRUCTIONS:
Fabric measurements:
Bag body:
Quilting type cotton 23 x 29 inch (58.5 x 74 cm)
Handles
quilting type cotton 2 pieces of fabric of 31 x 4 inch (80 x 10 cm)
Marking the cards needed for this project:
Cut one piece of card 12 inches (30 cm) long and 6 inches (15cm) wide.
On one side mark ¾ of an inch (2 cm) on each end of one edge and draw a straight line to connect the marks – this will help you with pressing your seam allowance. It can be kept for other projects too – it just makes it so much easier! On the opposite long edge mark 3/8 of an inch (1 cm) on each end and connect with a ruler. This is for another seam allowance you will need for this project. You can keep this template and use for other projects too.
Cut a piece of card 6 x 8 inches (15 x 20 cm)
Mark the midpoint on one of the 6 inch (7.5 cm) edges. This will help you make the third pocket.
STEP 1:
Place the bag body fabric wrong side upwards and press a ¾ inch (2cm) seam on the short side, using the card as shown in the video as a guide. Fold up towards the wrong side, then fold over again ¾ of an inch (2 cm) and press.
Repeat on the opposite site
STEP 2:
Fold out the pressed seams and fold in half so the two long sides 29-inch (74 cm) line up with the right sides facing outwards. Pin the corners opposite the fold to keep the fabric in place.
STEP 3:
Stitch ¼ inch (6mm) in from the raw edge along the length of 29-inch (74 cm) on the right side.
STEP 4:
Now turn the tube you have created so the wrong side is outside. Below the seam you stitched on the right side, now stitch a seam on the wrong side of ¾ of an inch (2 cm) to encase the raw edges. You have just created a French seam.
STEP 5:
Back to the short sides. Cut two small nicks in the French seam opposite the folds, but not cutting right into the stitching. Remove the end piece by cutting alongside the stitch for the first ¾ inch (2cm). This is to reduce bulk. Now turn the seam in once and once again along the pre-pressed folds. Clip or pin in place.
Repeat with the other side of the tube.
STEP 6:
Stitch on the wrong side as close to the edge of the folded seam as possible, backtacking at the start and finish.
STEP 7:
Take the strip for the handle and fold in half along the length, right sides facing outwards and press with your iron. Repeat with the other handle.
STEP 8:
Open out the first handle and with the wrong side facing upward press one side in to line up with the pressed fold in the center, then press the other side in to meet the central pressed fold.
Repeat this step with the other handle.
STEP 9:
Fold the handle in half along the first seam pressed in Step 9 and clip in place. Repeat with the other handle.
STEP 10:
Stitch along the edge of each of the long sides of the handle 1/8 of an inch (3mm) from the edge. Repeat with the other handle. You will have 4 stitch lines – two on each handle.
STEP 11:
Take the body of the bag and turn the tube the right way out, flattening along the French seam. Fold it in half so the open ends of the tube line up. Finger press the fold, then open it out and mark with a fabric pen.
STEP 12:
Mark 2 inches (5cm) in from the edge on either side of the end of the tube, just in line with the seam you stitched ¾ inch (2cm) in from the edge. Repeat with the other end of the tube.
STEP 13:
Fold the short end of the handle over 1 inch (2.54 cm) and then line it up 1 inch below the t edge of the seam and on the inner side of the mark you made 2 inches (5cm) in from the edge. Clip in place.
STEP 14:
Fold the other short end of the handle over 1 inch (2.54 cm) and making sure the handle is not twisted, line it up as you did with the other end of the handle and clip in place.
STEP 15:
Repeat the previous 2 steps with the other side of the bag.
Once you have all four ends of the handles clipped in place stitch along the fold you marked with the marker pen in Step 12 – this creates the two pockets.
STEP 16:
Back to the handles – stitch around the edge 1/8 of an inch from the edges on the block that is folded over, then stitch a cross through the middle – this will prevent the handles from tearing loose if you load the bag with heavy items. Finish all four handle ends in this way.
STEP 17:
To make the third smaller pocket, turn the bag one side over the other, so the wrong side of one half has the right-side half of the bag inside it.
STEP 18:
Find the middle points of the two sides and make a mark on each, then line up the mid points. Take your prepared card that is 6 x 8 inches (15 x 20 cm) and line up the midpoint of the 6-inch (15cm) side with the mid-point on the bag between the handles of the half that is turned inside out. Use a marker pen or dressmakers chalk to mark right around the card, then pin, ready for sewing.
STEP 19:
Stitch carefully from the top, backtacking at the start and go around the three sides, then end at the top of the bag with a backtack. This has created your third pocket for smaller items. Make sure not to catch any of the other fabric or handles as you stitch this pocket.
STEP 20:
Once done stitching, pull the bag the right way out again and press out the corners. Your three-pocket tote bag is complete and ready to use.
You will find you’ll want to make a few of these tote bags as they are so useful. Make some as gifts for birthdays and Christmas too. They serve as useful ‘packaging’ for gifts and are perfect for a sustainable lifestyle. Pease keep spreading the good sewing vibes by completing all three options – share, like and subscribe.
Do you like this? Pin for later:
Wanna be friends? Click HERE and follow me on Pinterest
RELATED: