
How to Sew a Tissue Holder with Boxed Corners [Clever Gift in the Sniffle Season]
If you are anything like me you cannot bear to throw away perfectly beautiful scraps of fabric, hoping to find a project where they can be used. Well, I have the answer – a practical, hygienic, tissue pack holder that keeps those little packs of tissues handy at work, in the car, at home, and when you are about and about. You’ll be making these up in quantity to have on hand to add to gift bags as they are perfect for hay fever and sniffle season.
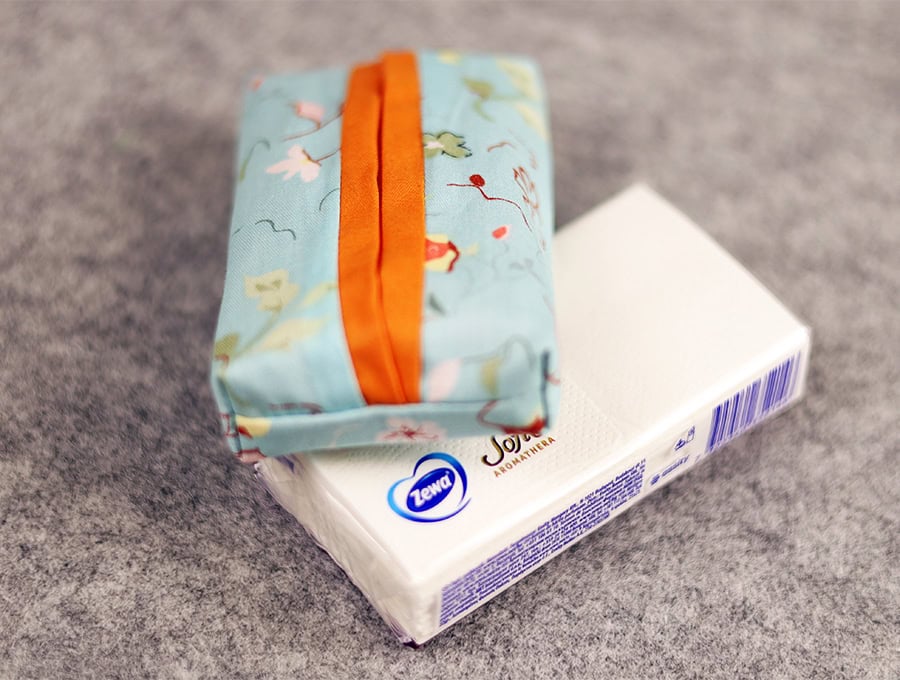
This is a clever gift that anyone would appreciate – perfect for a handbag, in the glove compartment of a car, handy in a drawer in a desk – anywhere you may need a tissue but do not want to have a huge box of tissues on display. It’s a great way to use up all the tiny bits of fabric that are just too pretty to discard, turning them into something practical, discreet, and hygienic. Watch our visuals to see how easy they are to make. I also have step-by-step instructions to help you get started – but after you’ve made a couple you virtually be able to make these on auto-pilot.
Below you will find my step by step written tutorial with VIDEO instructions for all the visual learners.
We occasionally link to goods offered by vendors to help the reader find relevant products. Some of the links may be affiliate meaning we earn a small commission if an item is purchased.
Table of Contents
How to make the Tissue Holder with Boxed Corners
Supplies and tools
- 1 x main fabric 6 ½ x 5 ¾ inches (16.5 x 14.5cm)
- 1 x backing fabric 7 ¾ x 5 ¾ inches (19.5 x 14.5 cm)
- matching thread
- scissors (or rotary cutter and a cutting mat)
- ruler or measuring tape
- iron and ironing board
- sewing clips or pins
- plastic snaps (you will need a sewing owl and snap pliers
- press studs
- hook and loop dots/tape
DOWNLOAD: [Free pdf file]
Follow us for free patterns & tutorials! [easy-profiles]
How to Sew a Tissue Holder with Boxed Corners
Watch the diy Tissue Holder with Boxed Corners video first and then follow the written step by step instructions below.
Please enjoy and don’t forget to Like and SUBSCRIBE over on YouTube to be kept up to date with new videos as they come out.
Tissue Holder with Boxed Corners VIDEO TUTORIAL
INSTRUCTIONS:
STEP 1:
Place the two pieces of fabric right sides facing each other and line up the top and bottom and one side on the left. Pin the left-hand side.
STEP 2:
There will be extra fabric, which will form the trim of the tissue holder, so you now line up the right-hand sides and pin – there will be extra of the lining fabric, but you’ll soon see how this works.
STEP 3:
Stitch down each side you have pinned using a seam allowance of ¼ of an inch (6 mm), backtacking at the start and finish of each seam.
STEP 4:
Turn the right way out and press the seam allowance towards the backing fabric.
STEP 5:
Adjust the fabric so the main fabric has an equal amount of the backing fabric showing on each side – use your ruler or measuring tape to make sure they are equal.
STEP 6:
Fold over so the main fabric is face to face, with the stitched seams lined up and press the fold.
STEP 7:
Open out the fabric, main fabric piece uppermost and fold in each of the sides to meet on the middle fold and clip in place.
STEP 8:
Stitch along the top raw edge with a seam allowance of ¼ inch (6 mm), then repeat with the opposite raw edge.
STEP 9:
Use a medium zig-zag stitch to finish off the raw edges, or use a serger (overlocker) if you have one.
STEP 10:
To make the boxed corners take each corner and pull to create a triangle, use a measuring tape to measure up 3/8 of an inch (1cm) up from the corner and draw a line across the base of the triangle. Repeat with the other 3 corners, placing a pin in each to keep them in place.
STEP 11:
Stitch across each of the four corners, backtracking to ensure they are secure.
STEP 12:
Trim the extra threads and turn the right way out.
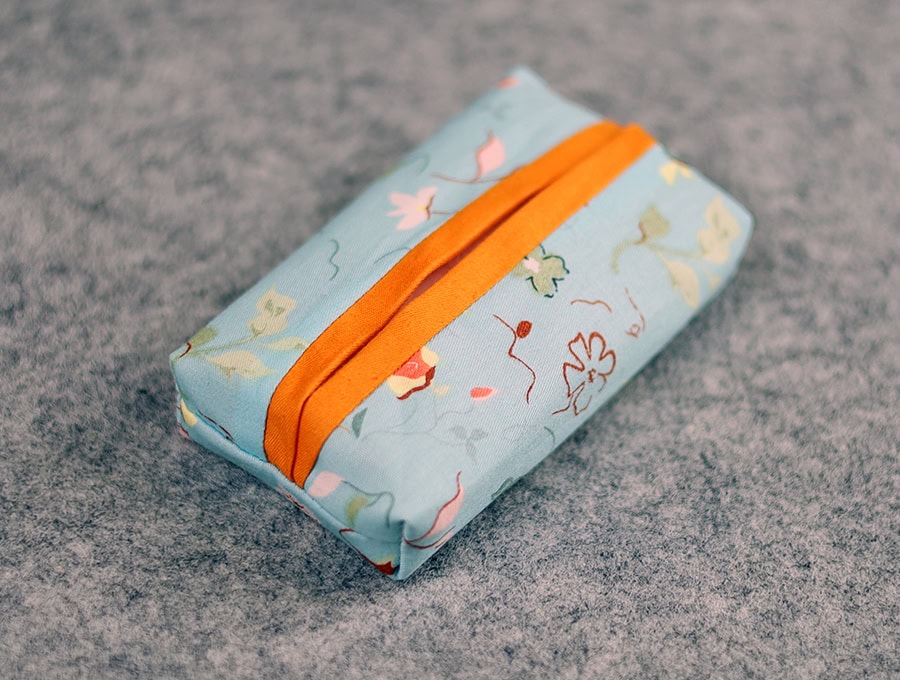
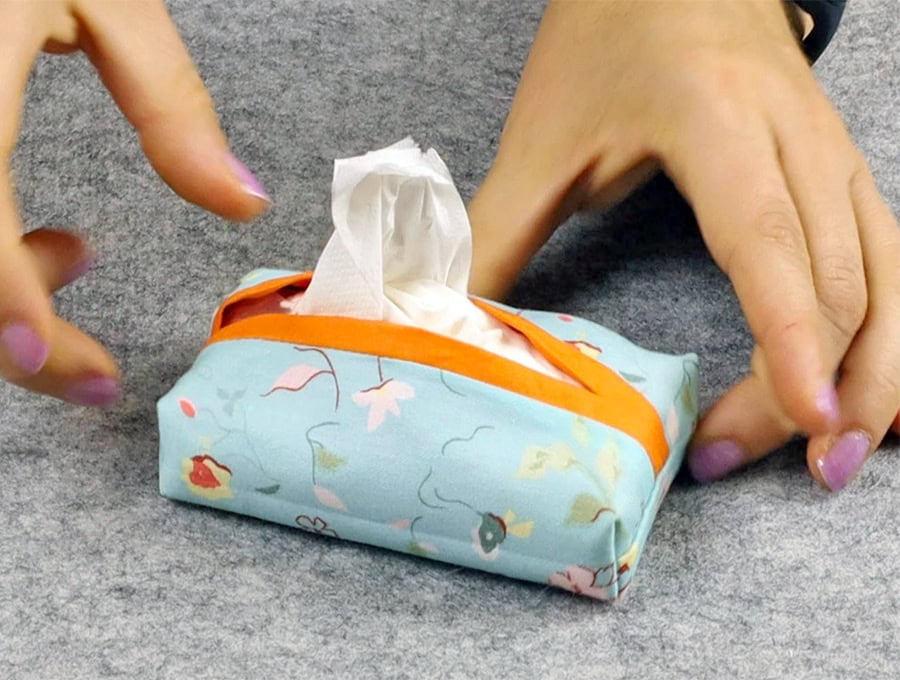
That’s it – you tissue pack holder is all ready to use! Just insert a small pack into your tissue holder. Make a slit in the plastic packaging to be able to extract a tissue at a time and everyone on your gift list will be ready for the sniffle season.
Like and subscribe to have similar projects that use up those small scraps of fabric in your stash. If you are anything like me you cannot bear to throw away fabric and are always looking for a way to use up even the tiniest bits and pieces. Here at Hello Sewing we know all about it and go out of our way to provide you with useful projects. Please share this very simple and practical tissue pack holder with fellow sewists.
Do you like this? Pin for later:
Wanna be friends? Click HERE and follow me on Pinterest
RELATED: