
Vivian Pouch – DIY Pouch
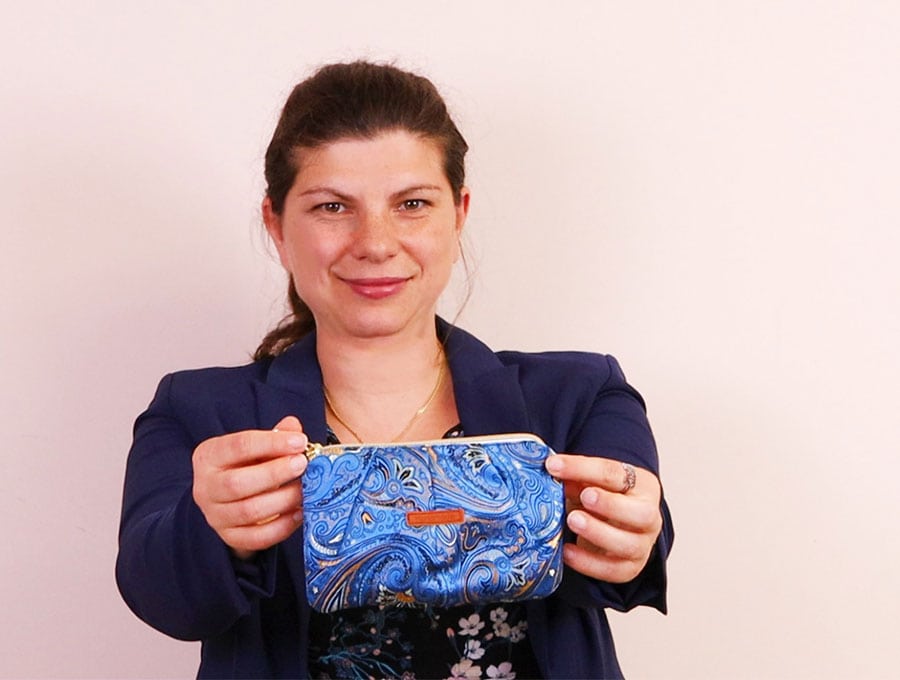
A night on the town or a prom deserves a discreet luxury designer style zippered purse that holds the essentials and creates a statement without a huge price tag. Create it in opulent fabric and in less than 30 minutes you can have this head turning item ready to use.
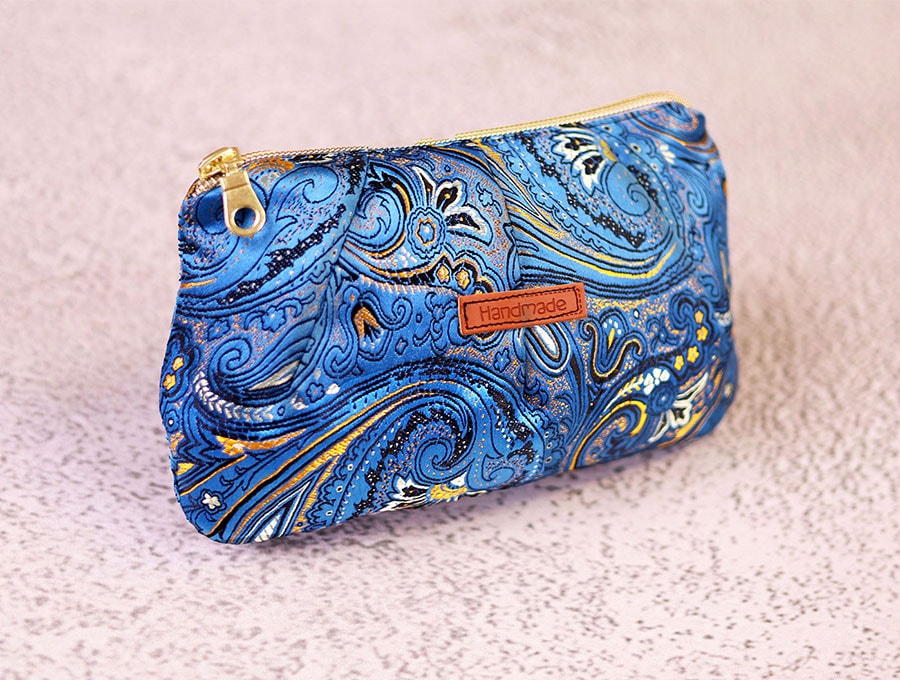
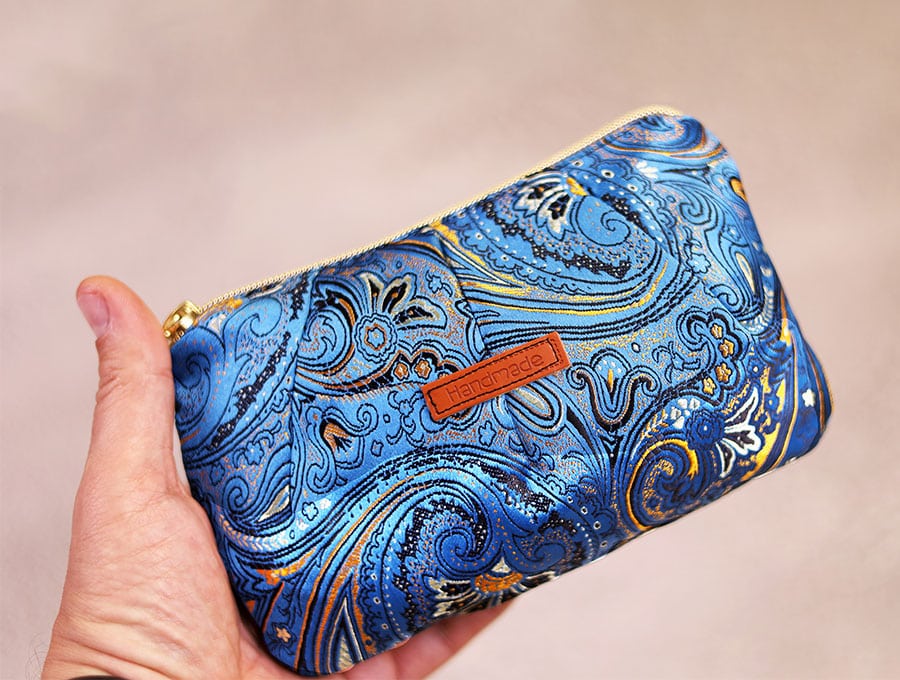
A luxurious Vivian zipper pouch with darts is quick to make and so classy. It’s the perfect way to use up opulent bits of brocade or printed velvet and create a designer styled item that will have people wondering where you bought it. HelloSewing provides you with a free printable pattern too.
Below you will find my step by step written tutorial with VIDEO instructions for all the visual learners.
We occasionally link to goods offered by vendors to help the reader find relevant products. Some of the links may be affiliate meaning we earn a small commission if an item is purchased.
Table of Contents
- 1 How to make the Vivian pouch
- 2 Supplies and tools
- 3 How to Sew the Vivian pouch
- 3.1 Vivian Pouch VIDEO TUTORIAL
- 3.2 INSTRUCTIONS
- 3.3 Step 1:
- 3.4 Step 2:
- 3.5 Step 3:
- 3.6 Step 4:
- 3.7 Step 5:
- 3.8 Step 6:
- 3.9 Step 7:
- 3.10 Step 8:
- 3.11 Step 9:
- 3.12 Step 10:
- 3.13 Step 11:
- 3.14 Step 12:
- 3.15 Step 13:
- 3.16 Step 14:
- 3.17 Step 15:
- 3.18 Step 16:
- 3.19 Step 17:
- 3.20 Step 18:
- 3.21 Step 19:
- 3.22 Step 20:
- 3.23 Step 21:
- 3.24 Step 22:
- 3.25 Step 23:
- 3.26 Step 24:
How to make the Vivian pouch
Supplies and tools
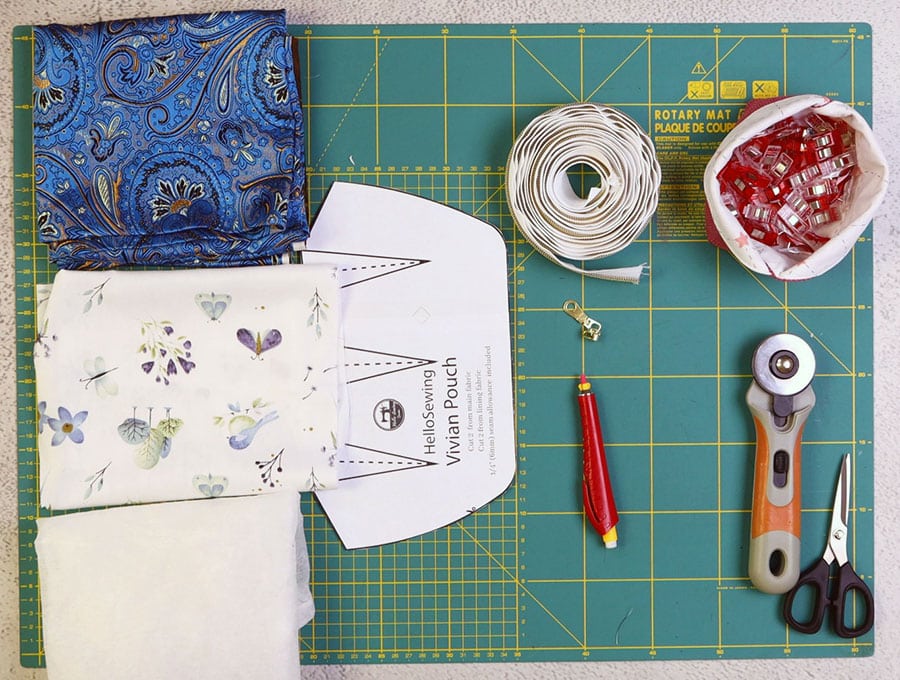
- Main fabric 12 x 16 inches (30 x 40 cm)
- Lining 12 x 16 inches (30 x 40 cm)
- Zipper tape and zipper pull
- Optional: small label
- Optional wristband: main fabric 12 inches (30 cm) x 1 3/8 inches (4 cm)
- fusible interfacing
- twisty ties or rubber bands
- matching thread
- scissors (or rotary cutter and a cutting mat)
- ruler or measuring tape
- iron and ironing board
- sewing clips or pins
DOWNLOAD:
- option 1: Flash 24- hr giveaway: CLICK HERE [Free pdf file] to get the pattern for FREE
- option 2: get pattern and the printable tutorial from my Etsy shop
Follow us for free patterns & tutorials! [easy-profiles]
How to Sew the Vivian pouch
Watch the diy pouch video first and then follow the written step by step instructions below.
Please enjoy and don’t forget to Like and SUBSCRIBE over on YouTube to be kept up to date with new videos as they come out.
Vivian Pouch VIDEO TUTORIAL
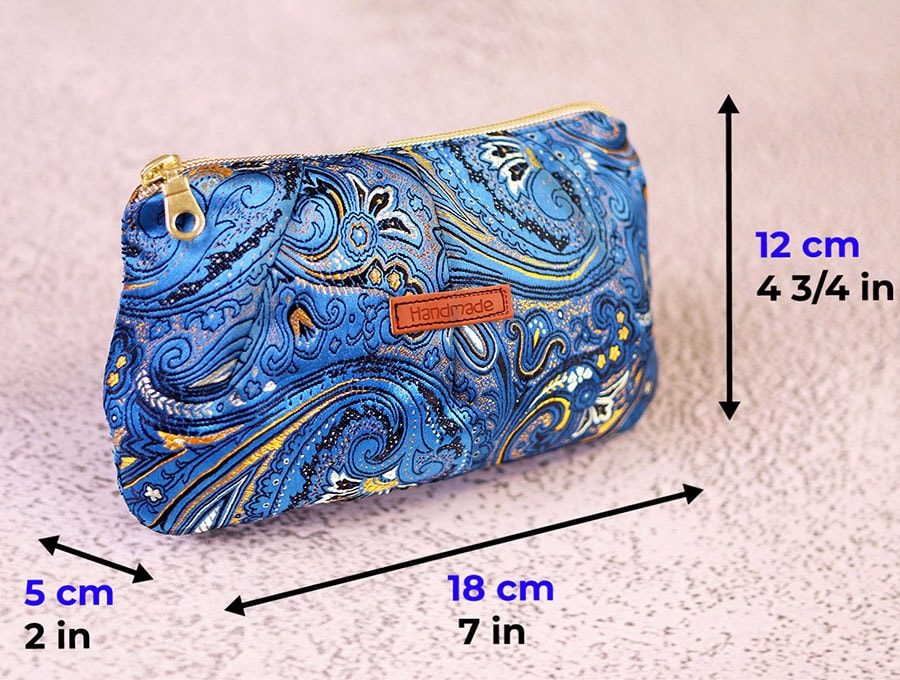
Finished measurements are 7 inches (18 cm) long, 4 ¾ inches (12 cm) high and 2 inches (5 cm) wide.
INSTRUCTIONS
Step 1:
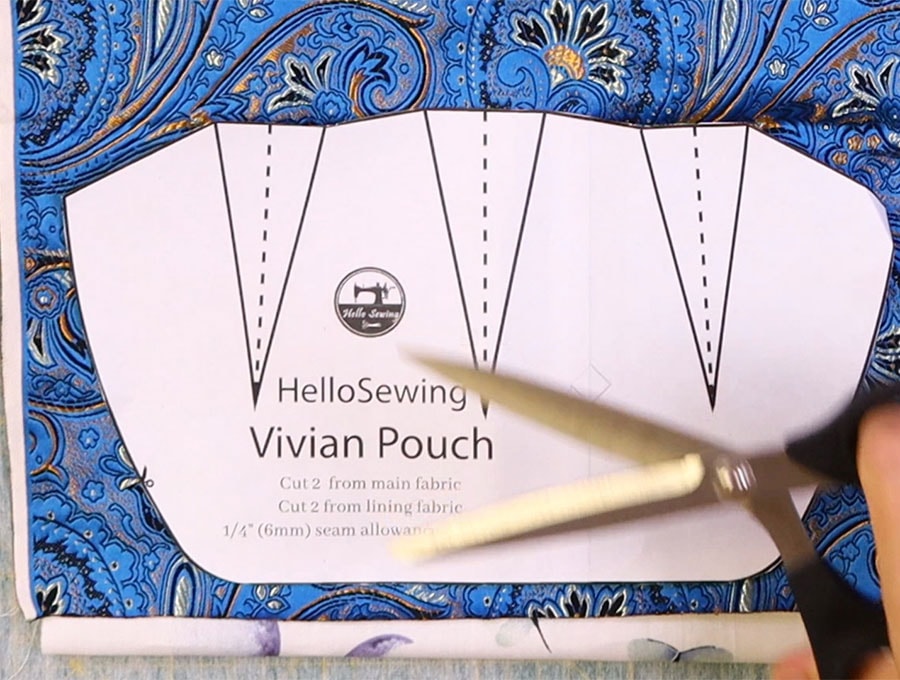
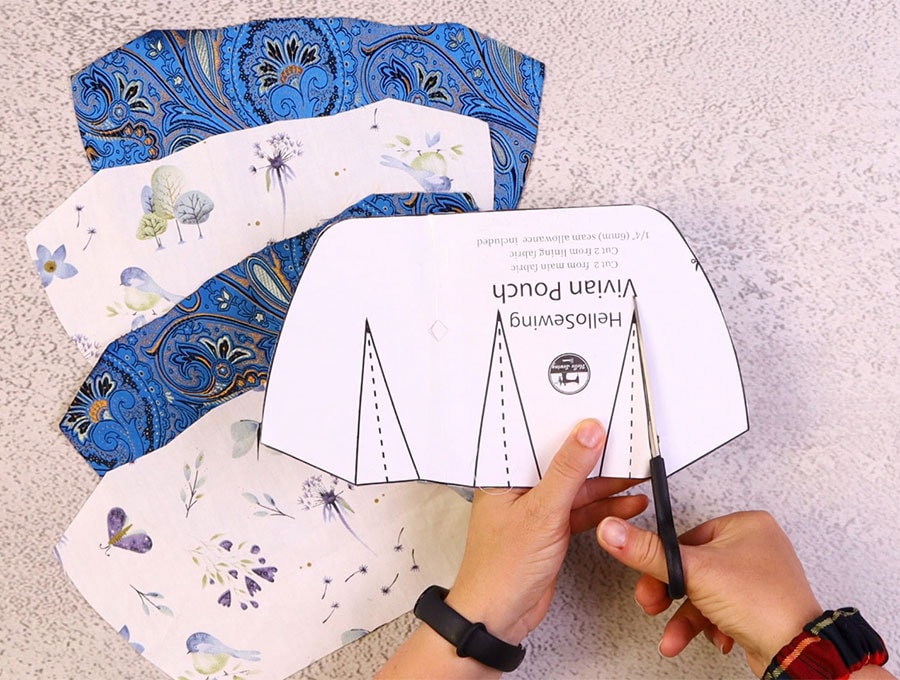
Layer your fabric as follows: lining, fusible interfacing and outer fabric.
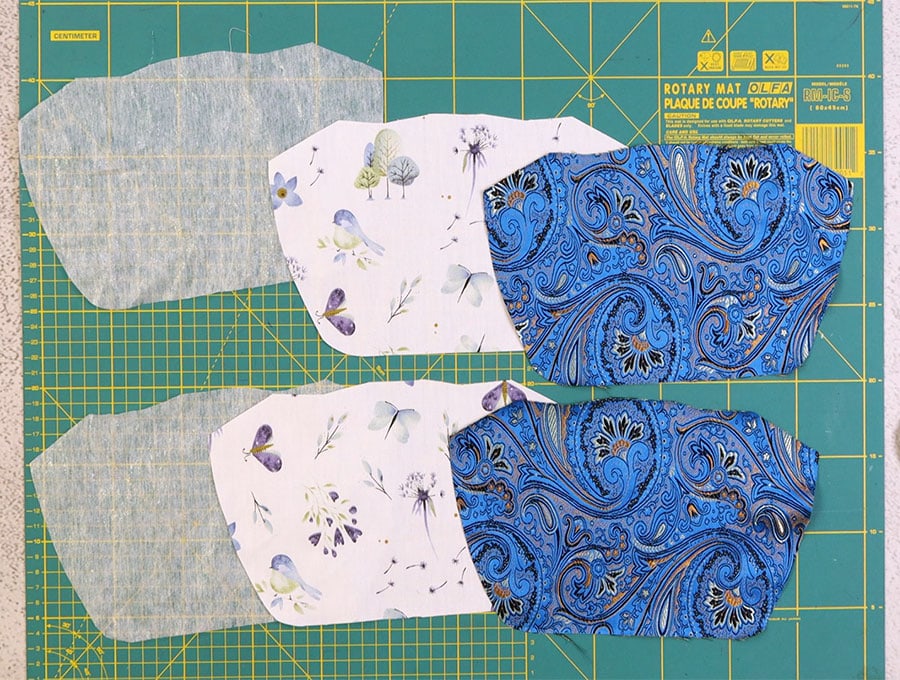
Place the printed pattern over the three layers and cut out x 2 so you have 6 pieces in total – 3 for the front and three for the back of the pouch.
Step 2:
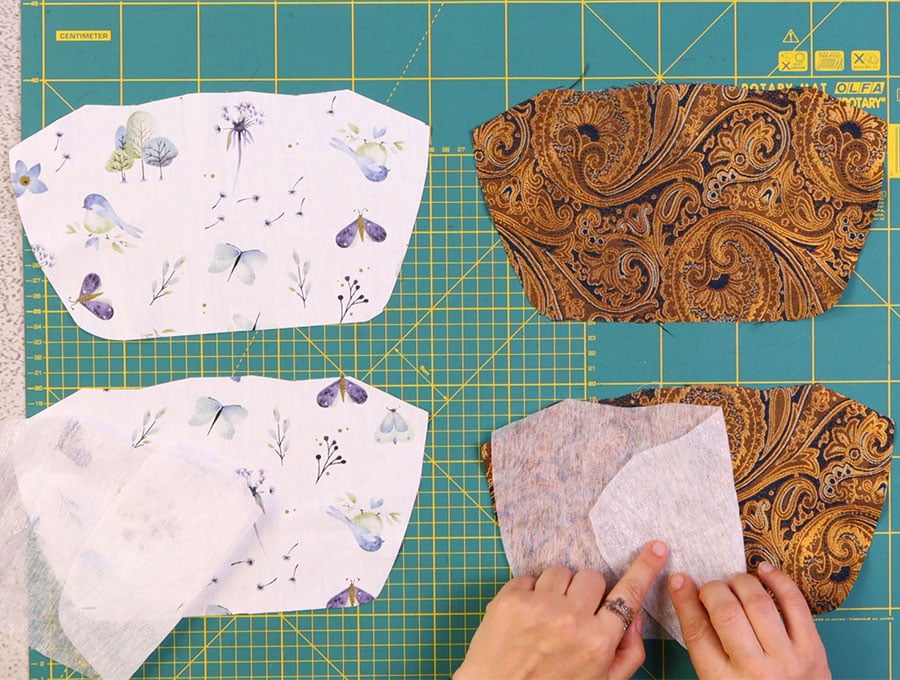
Lay the two outer pieces of fabric alongside each other, wrong side up and over each place a piece of fusible interfacing, with the fusible side down.
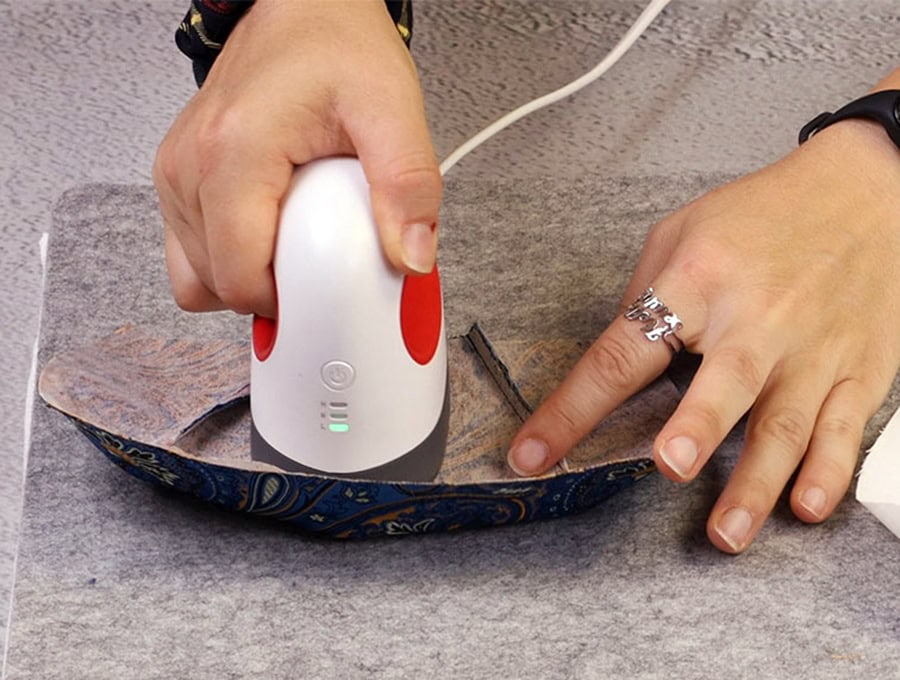
Step 3:
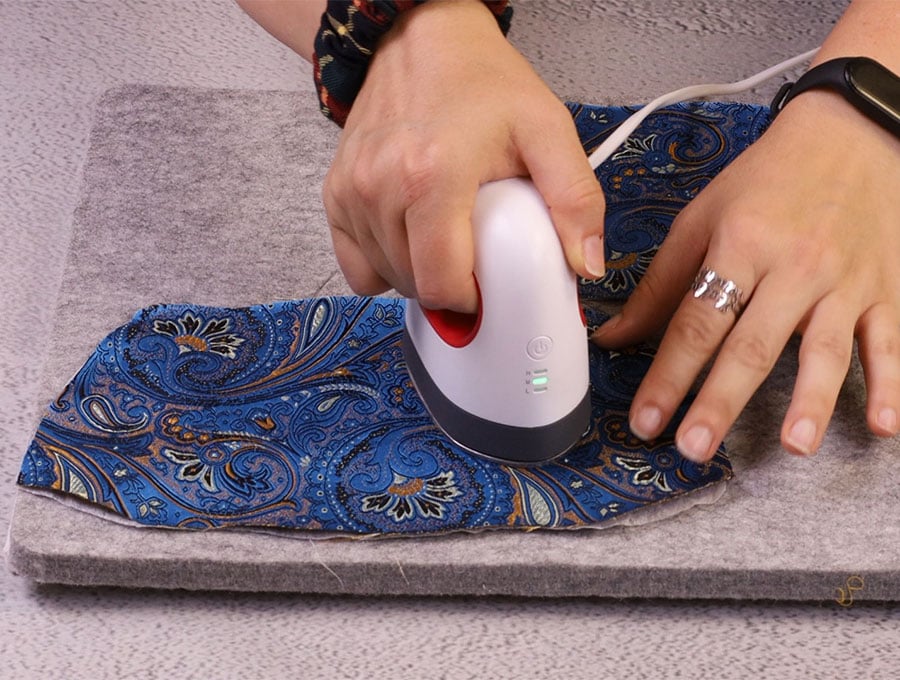
Flip over to the right side of the main fabric and press to fuse the interfacing to the outer fabric according to the manufacturer’s instructions.
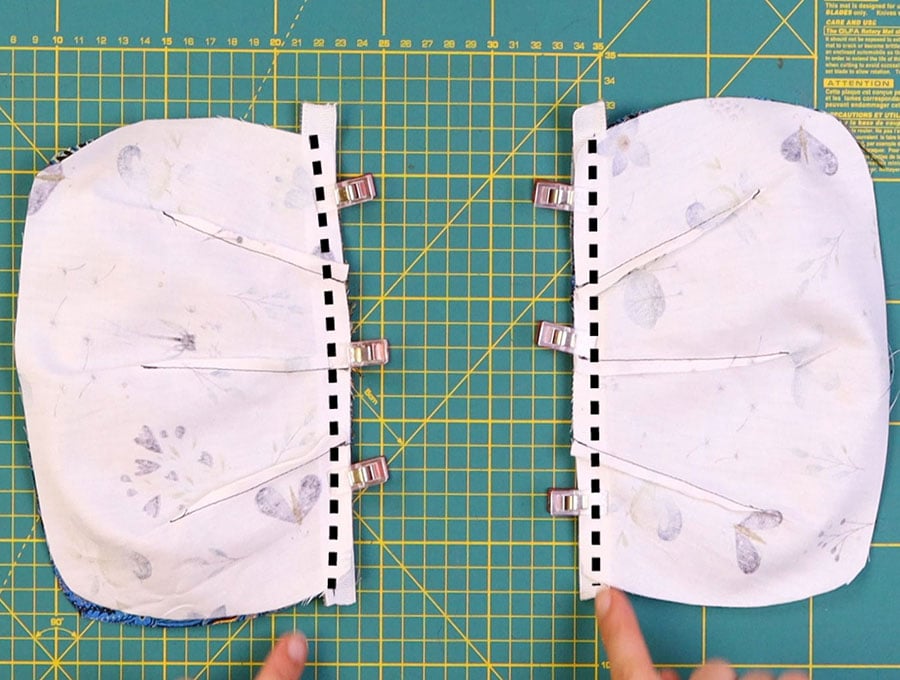
Step 4:
On your printed pattern cut the right-hand side of each of the three darts on the solid line, fold on the dotted line, then fold again on the left-hand solid line.
Step 5:
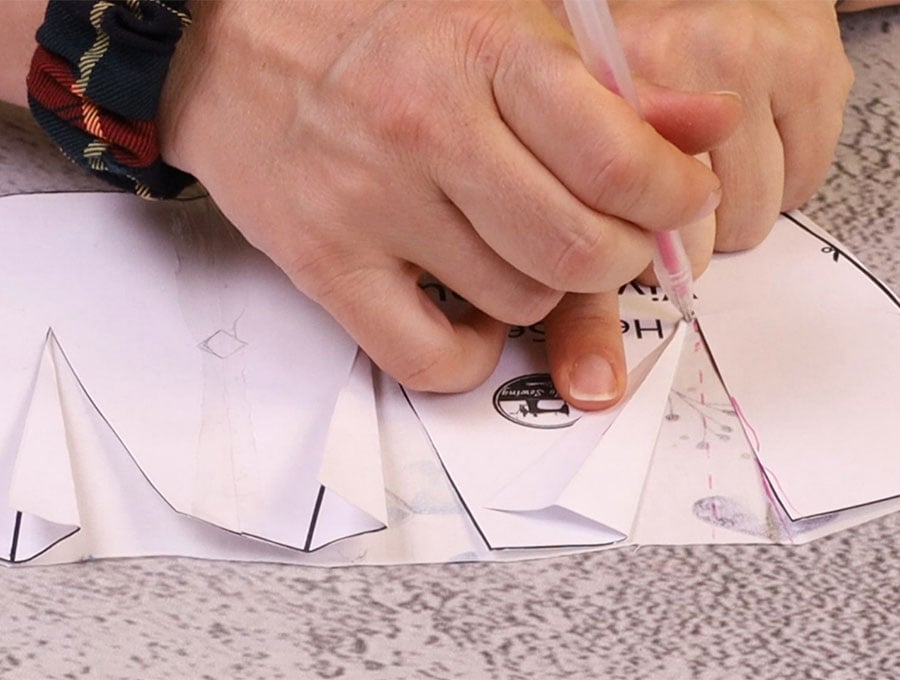
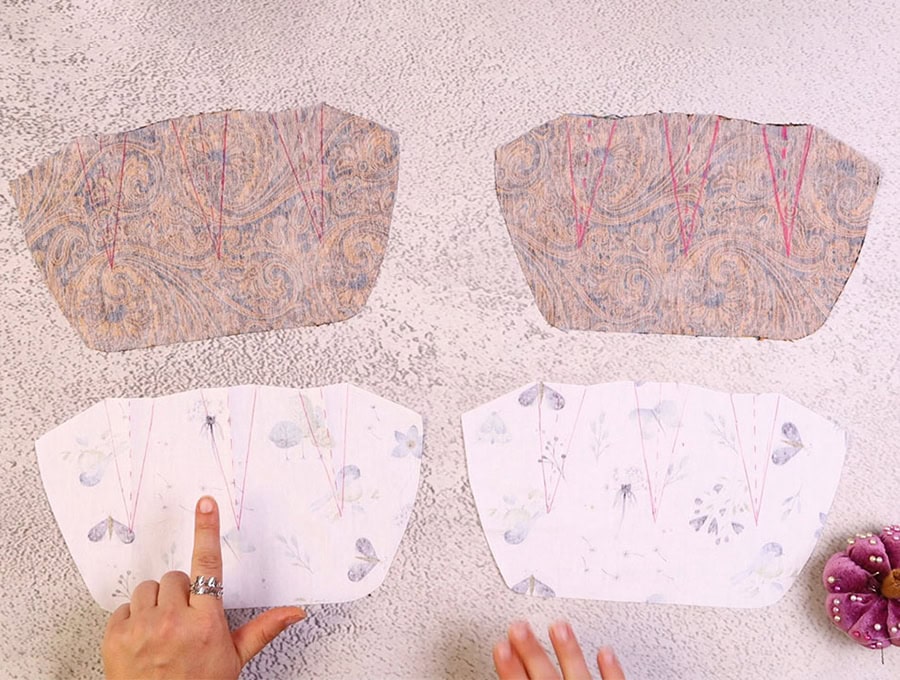
Transfer the markings for the darts to the wrong side of the lining using a fabric pen – solid lines for the right and left-hand side of the darts and a dotted line for the middle of the dart.
Step 6:
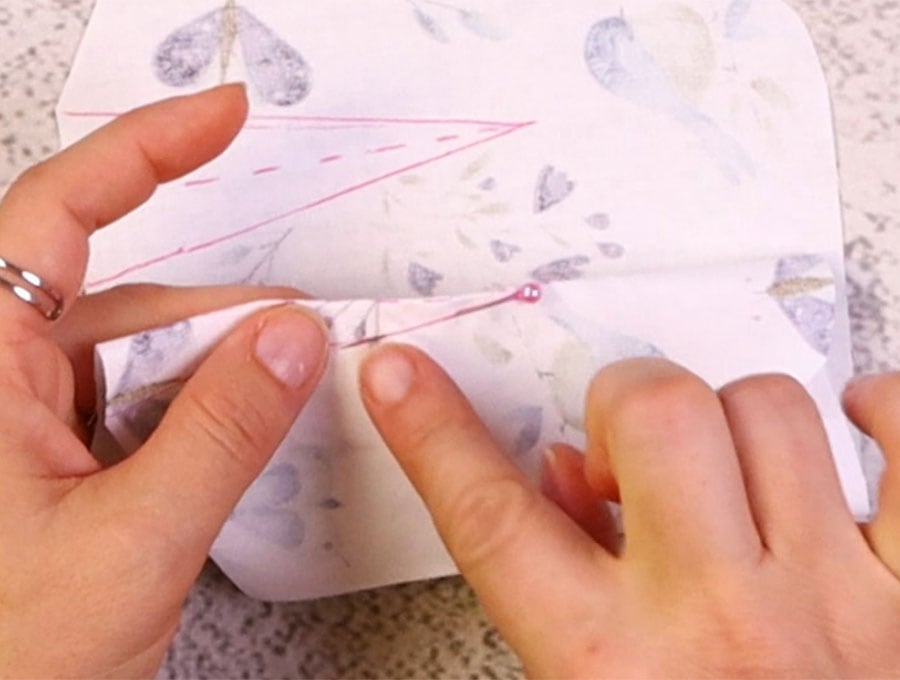
Pin the darts through the marked lines, inserting the pins from the base of the dart towards the large end, so when you sew from the large end of the dart the pins are easy to remove.
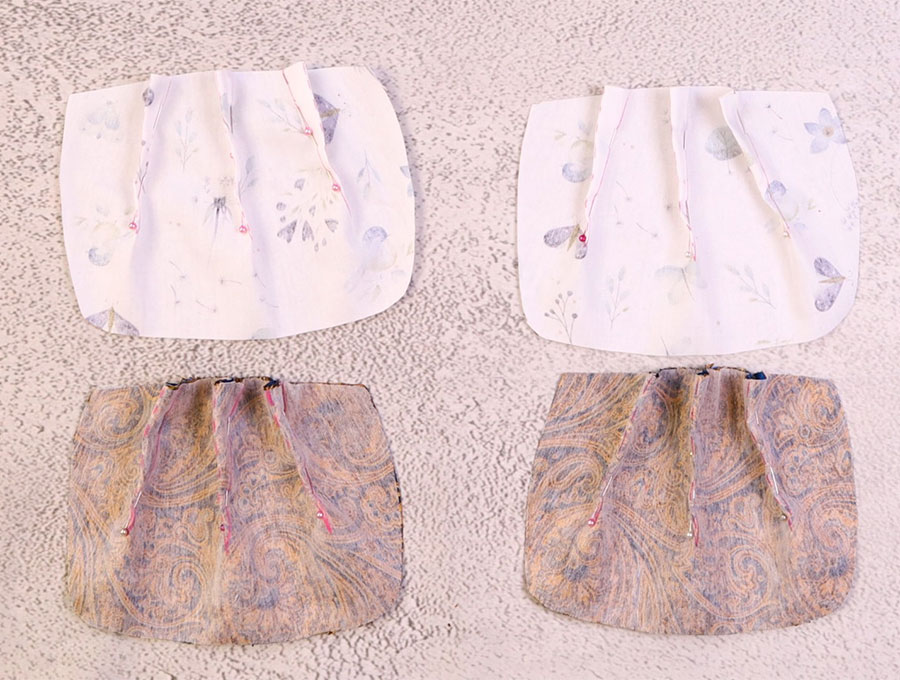
Step 7:
Sew along the solid lines of the three darts, backtacking at the start and finish.
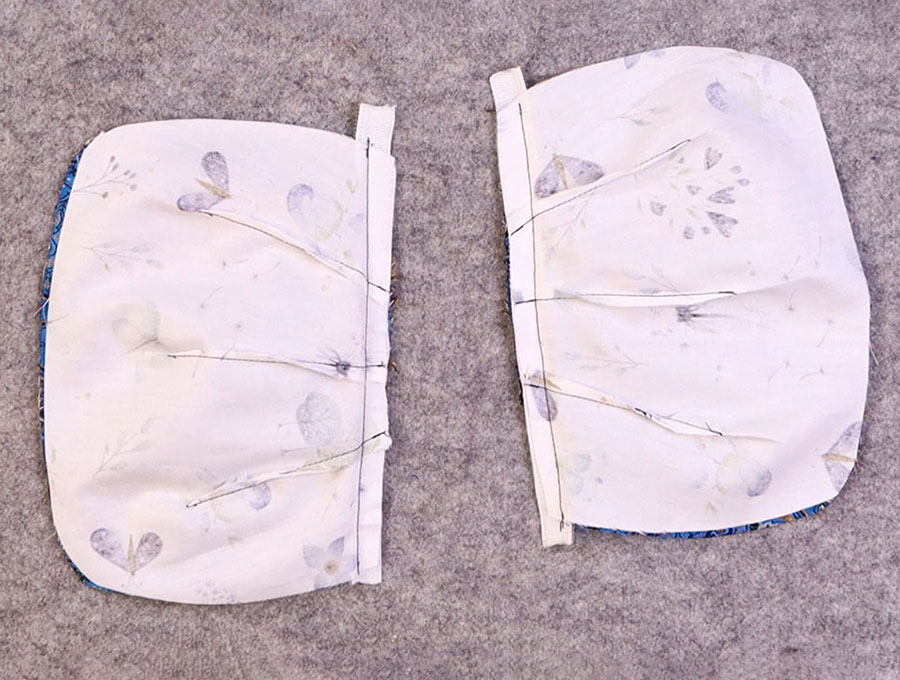
Step 8:
Repeat steps 5 to 7 for the outer fabric with the fused interfacing.
Step 9:
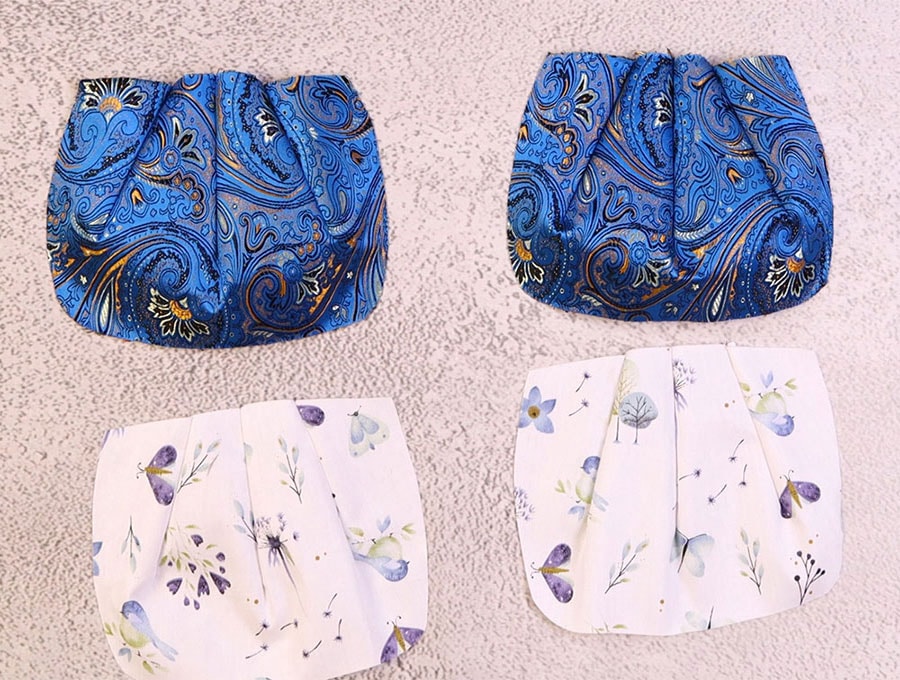
Trim off the extra fabric from the darts, taking care not to cut too close to the stitch line. If using brocade, which frays easily seal the edges with a quick pass of a lighter.
Step 10:
Press the darts to the side – which side doesn’t matter, as long as they are flat.
Step 11:
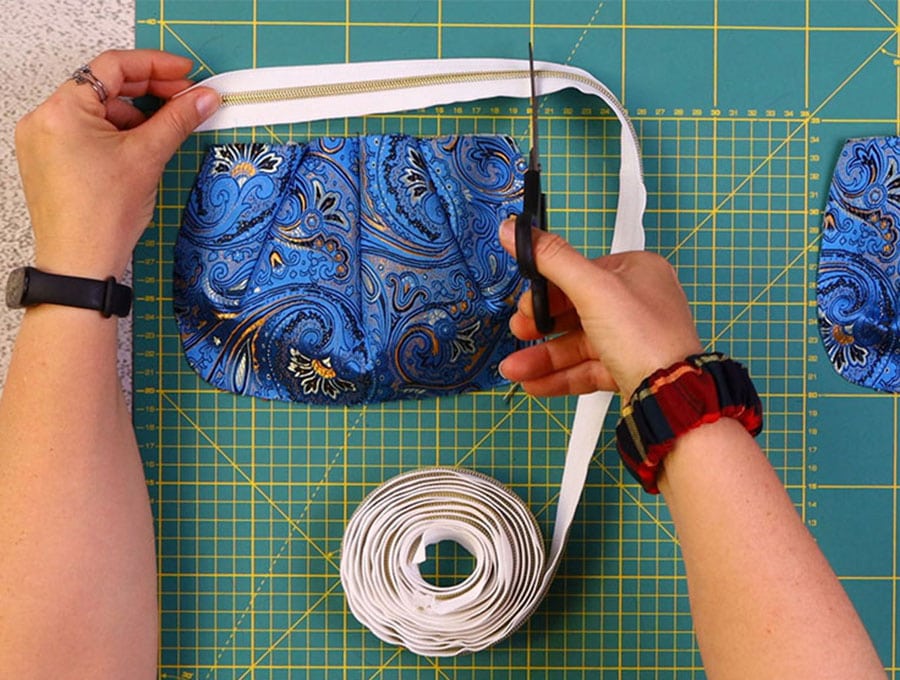
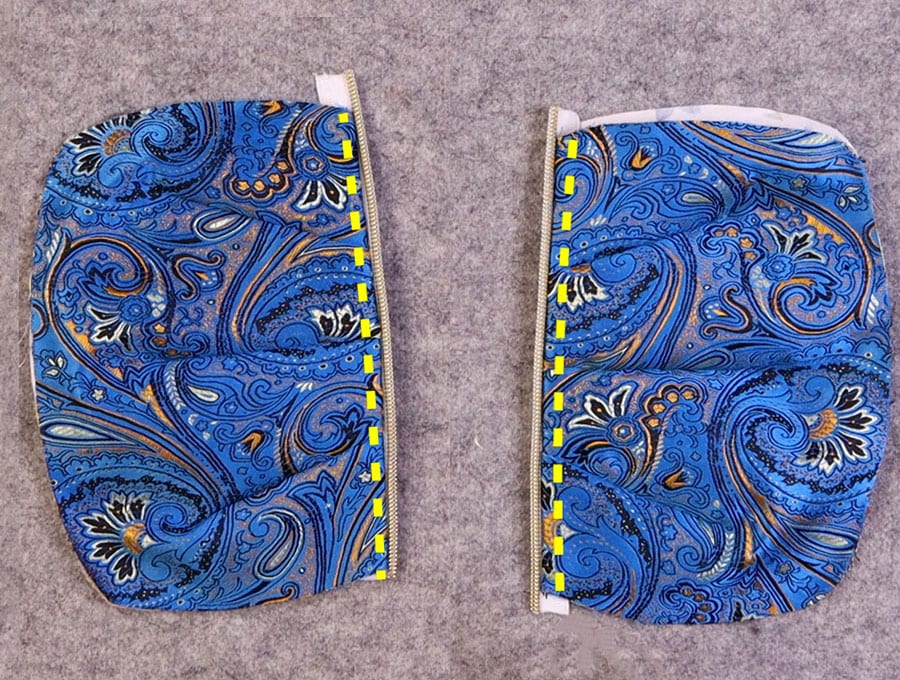
Take your zipper on a roll and cut a piece to the size of the top of the purse, plus an extra inch (2.5 cm). Fuse the ends with a pass of the lighter, then pull the two sides apart.
Step 12:
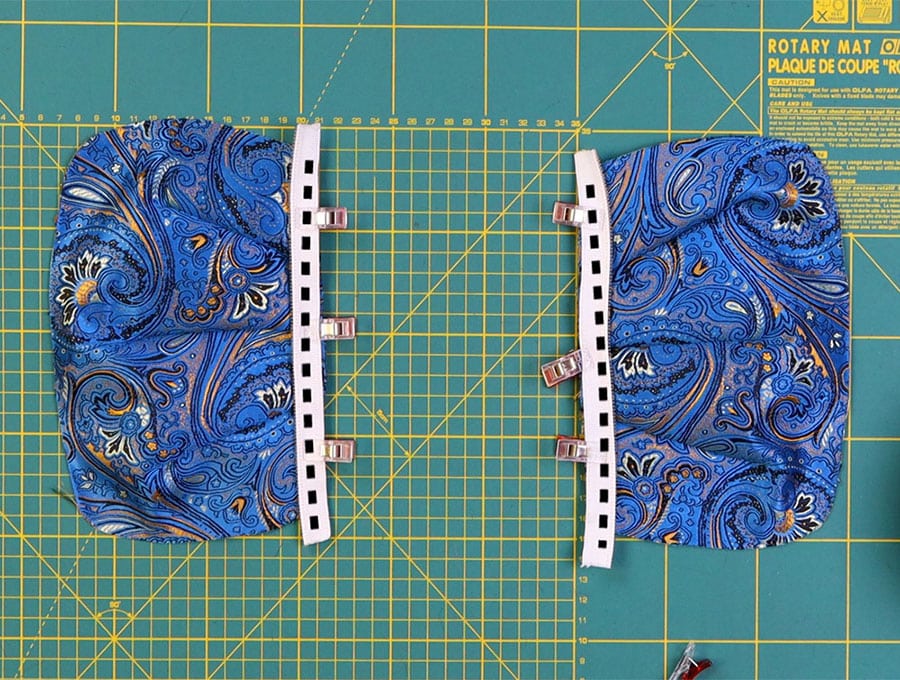
Pin or clip the zipper sides to the brocade pieces, right side of zipper teeth to right side of the fabric, with the zipper teeth facing into the body of the fabric.
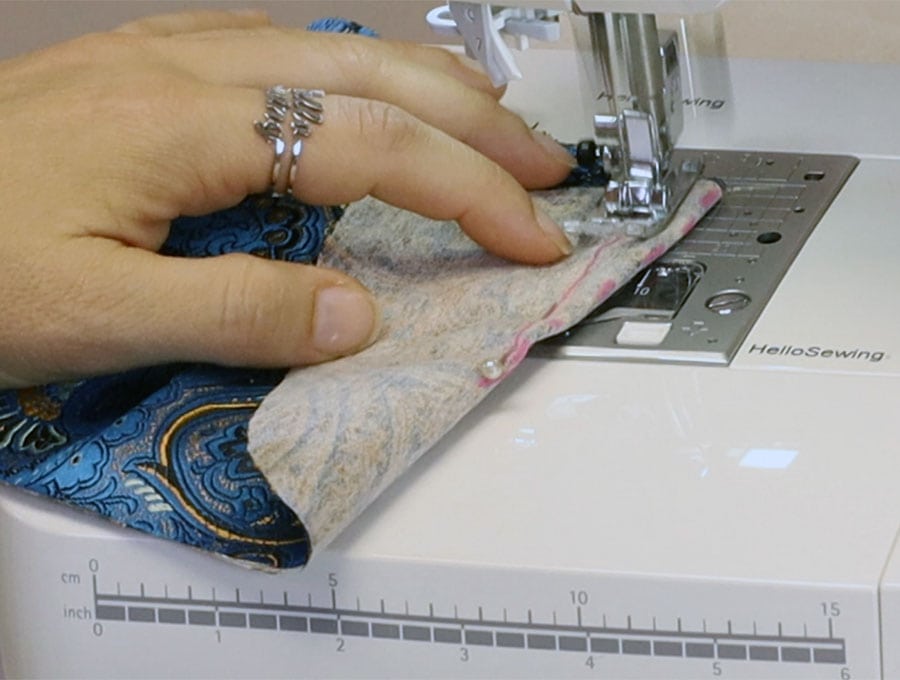
Step 13:
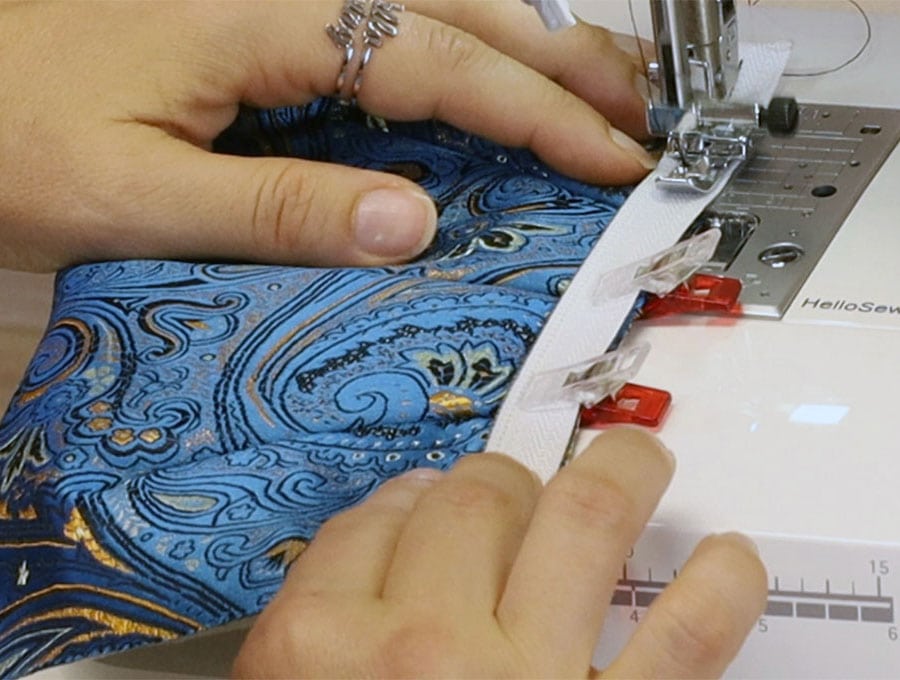
Stitch down as close to the zipper teeth as possible, using the zipper foot on your machine. Do this with both pieces of brocade.
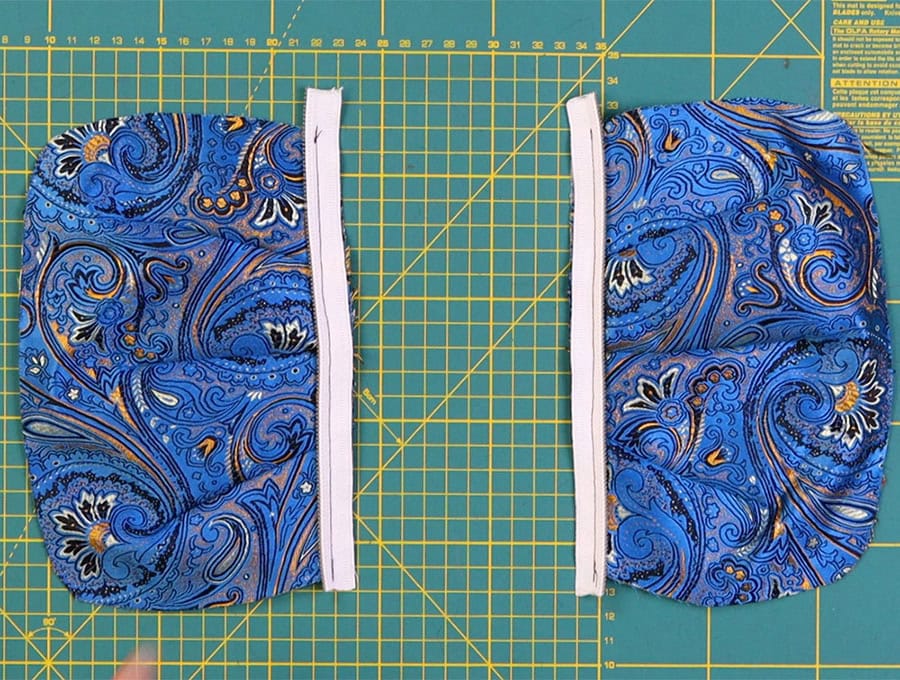
Step 14:
Position the lining pieces over the brocade pieces with the zipper sides attached and clip or pin in place along the zipper piece.
Step 15:
Stitch as close to the zipper teeth as possible on each piece.
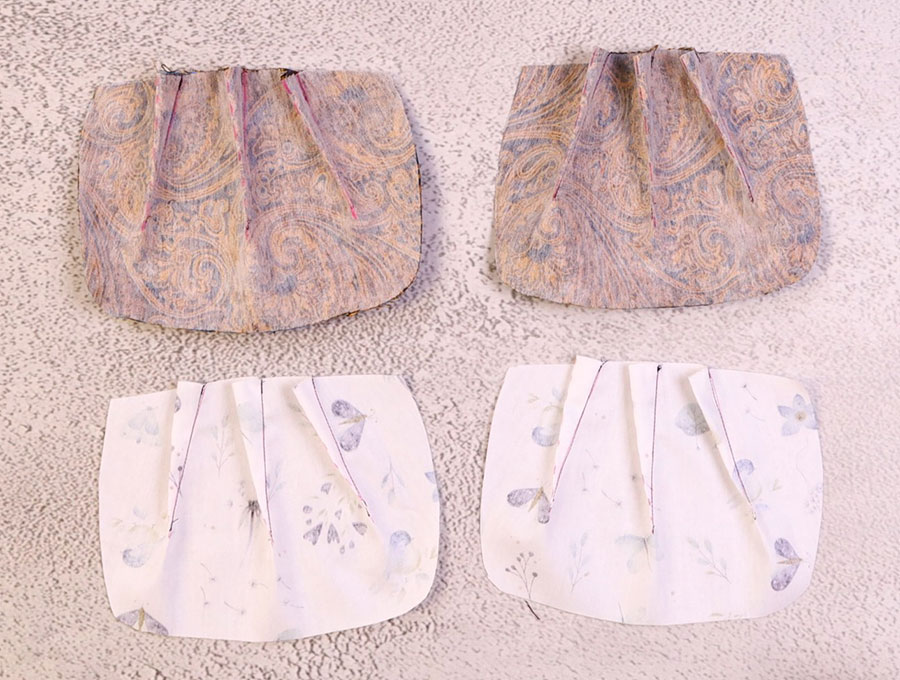
Step 16:
Open out each side and fold so the wrong sides of the fabric are together, give the fabric a press to ensure it lies flat near the zipper.
Step 17:
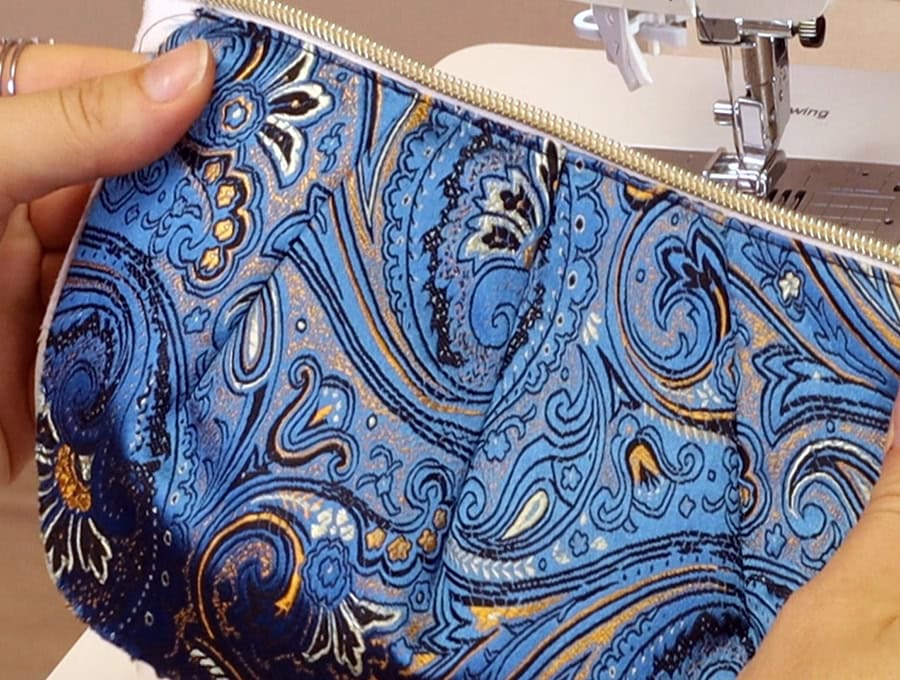
Top stitch along the edge closest to the zipper on each side, still using your zipper foot on the machine.
Optional Step to include a label for the purse:
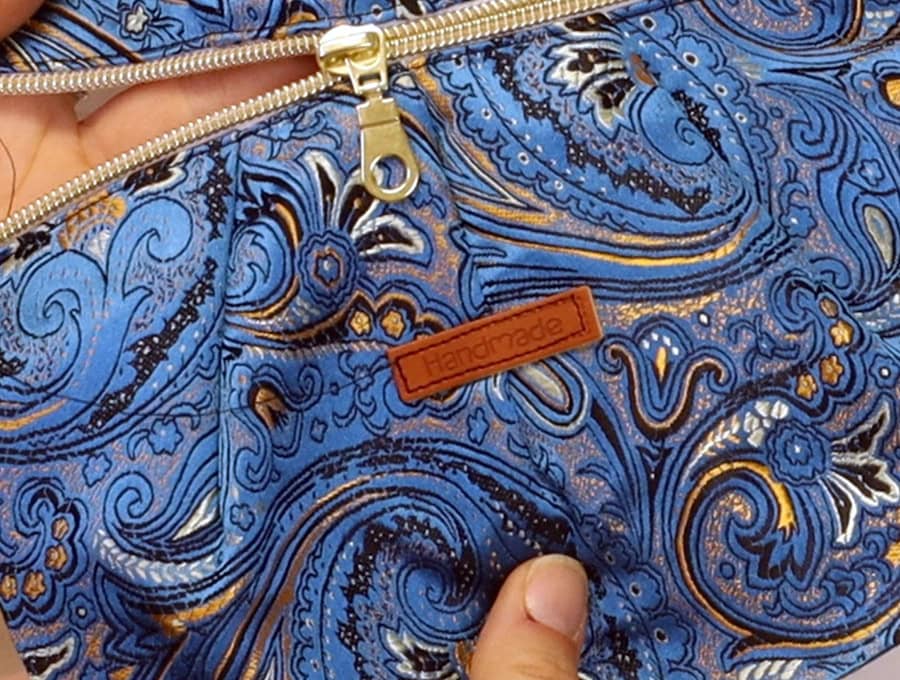
If you want to add a small label for your purse at this stage, then line it up parallel to the zipper teeth on the middle dart, making sure it is straight and the center of the label lines up with the stitch line of the dart. It should be about 2/3 of the way down the dart. Stitch around the edges of the label.
Step 18:
Slide on the zipper pull and close to around half way.
Optional step to make a wrist strap
Take a piece of the brocade fabric 12 inches (30 cm) by 1 3/8 inches (4 cm) and fold along the length, right side out and press. Open out then with the wrong side up press each side to the center fold you pressed in, then fold again so you have a strip with the two folded edges together. Press and then stitch along the open edge as close to the edge as possible.
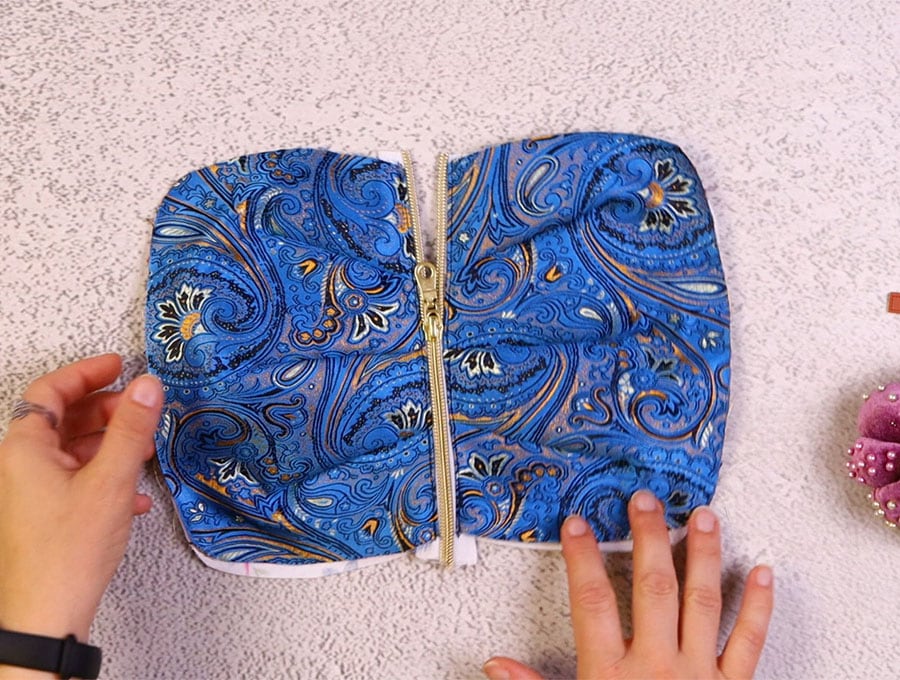
Step 19:
Open the bag out to ensure the right sides are facing each other, brocade side to brocade side and lining side to lining side.
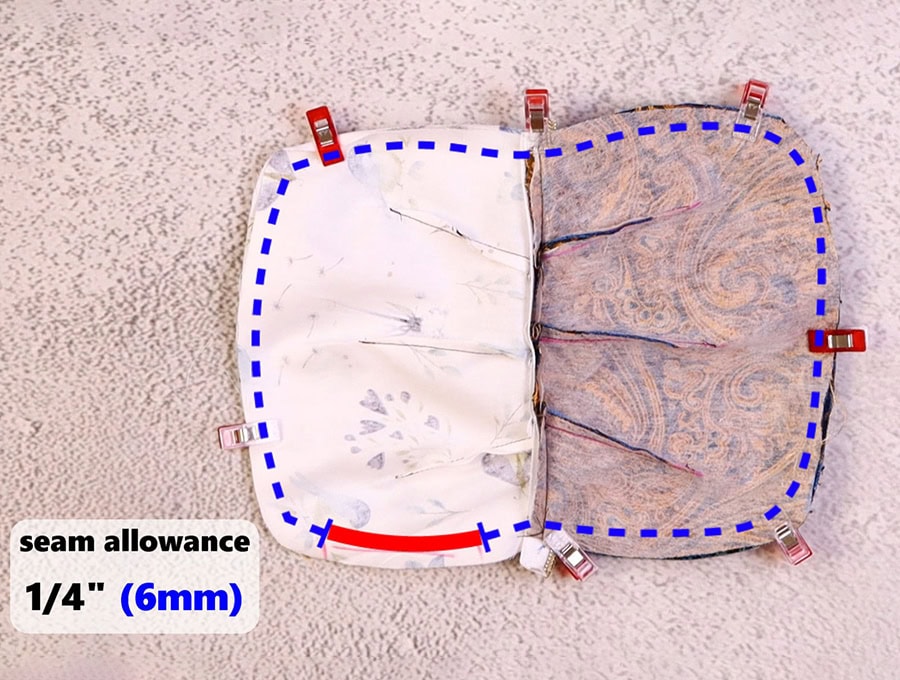
Step 20:
Clip or pin around the whole bag, making sure the fabrics are lined up. Do not clip or pin across a gap of about 4 inches (10 cm) you mark on one side of the lining.
Step 21:
Stitch around the bag except for the gap making sure to backtack a couple of times over the area where the wrist strap is inserted and across the zipper ends. Backtack just once at the start and end of the gap.
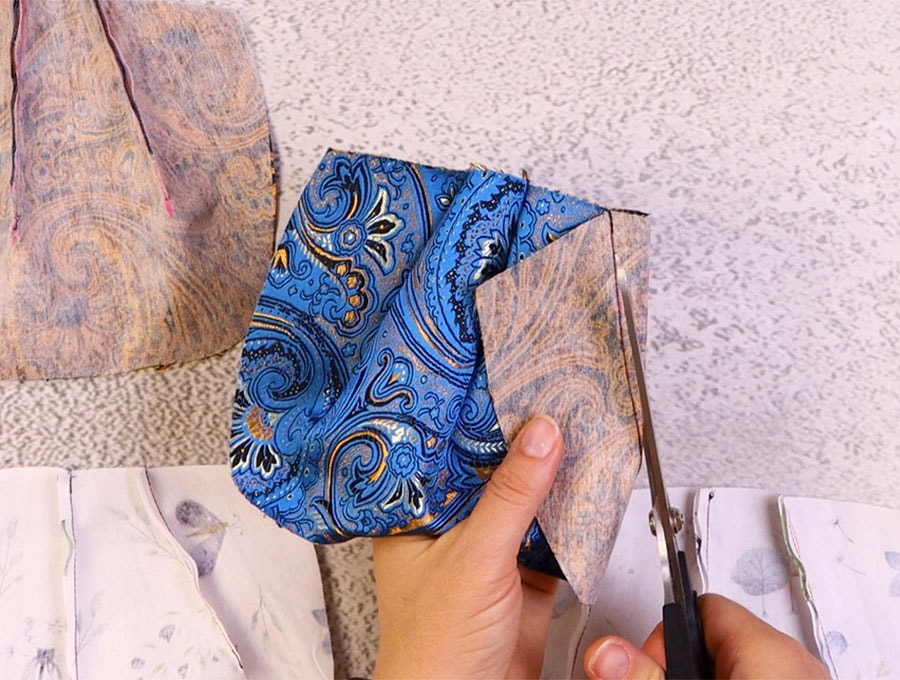
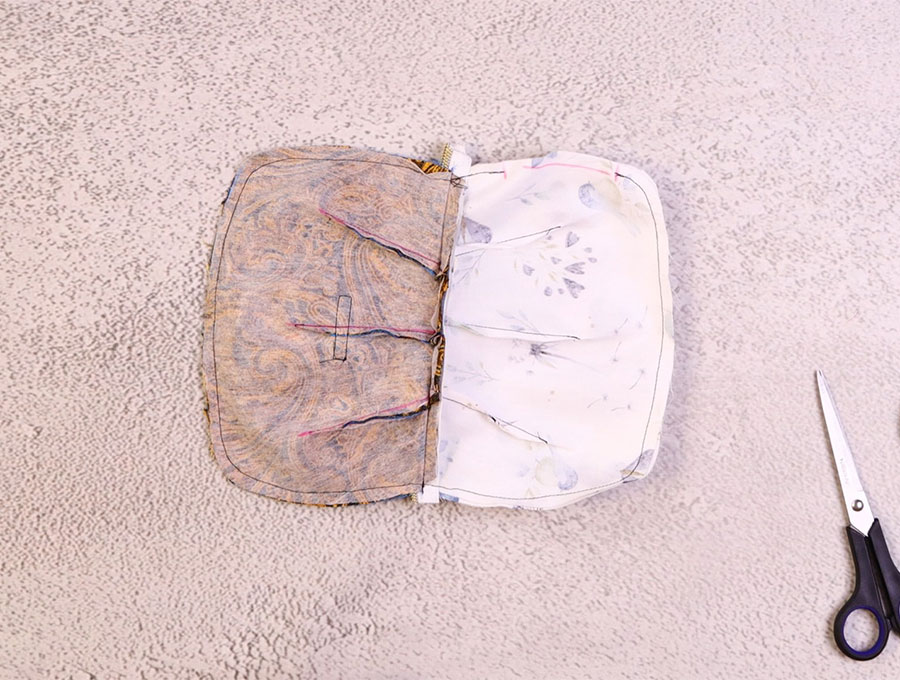
Step 22:
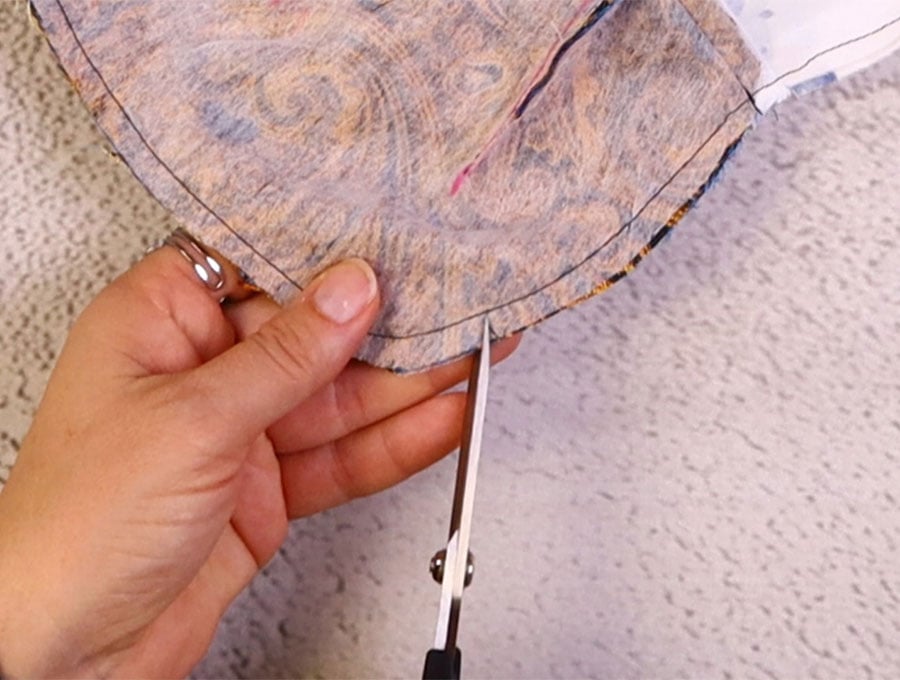
Clip around the curves edges of the purse, making small notches into the fabric so when it is turned it lies flat. Make sure not to nick too close to the stitch line. Cut off the extra ends of the zipper that stick out. Finger-press the edges of the gap in line with the seam.
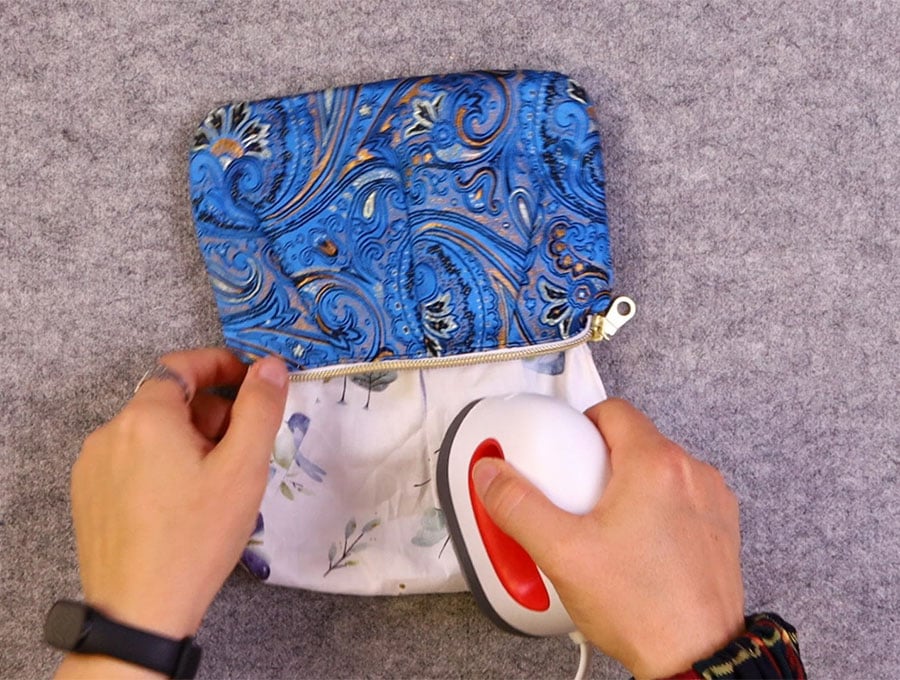
Step 23:

Turn the bag the right way out, then stitch as close to the folded edges of the gap in the lining with your machine, or if you prefer, slip stitch the gap closed by hand so the stitching is virtually invisible.
Step 24:
Slip the lining into the pouch, make sure it lies flat inside the brocade outer and give the luxury little purse one quick final press and it is ready to use or gift.
Like and subscribe if you enjoyed this tutorial. We have loads of useful and practical items to make as well as great décor ideas. Get all the latest projects delivered straight to our inbox when you hit that subscribe button.
Do you like this? Pin for later:
Wanna be friends? Click HERE and follow me on Pinterest
RELATED: