
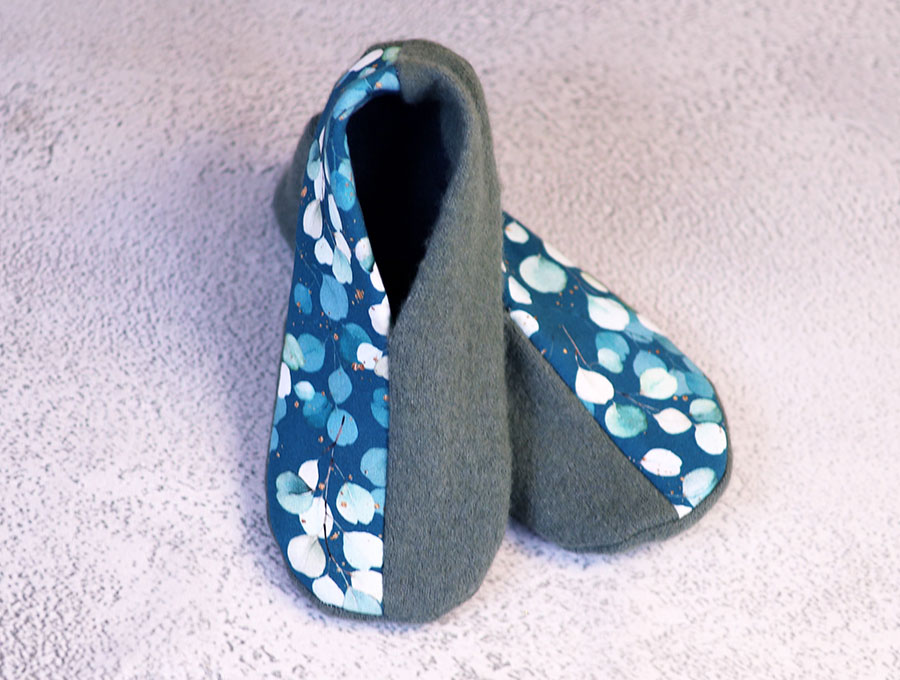
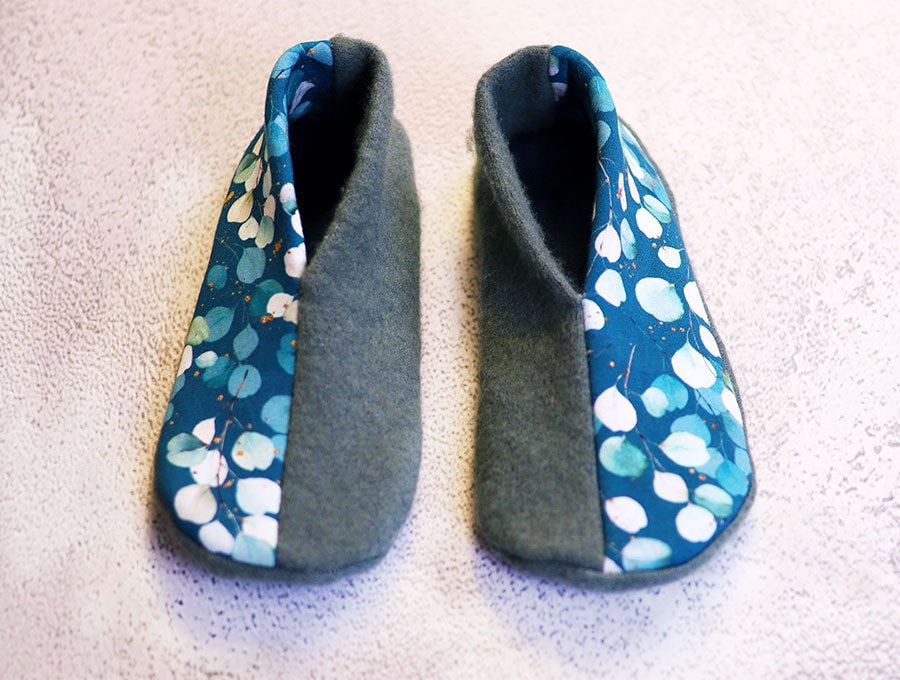
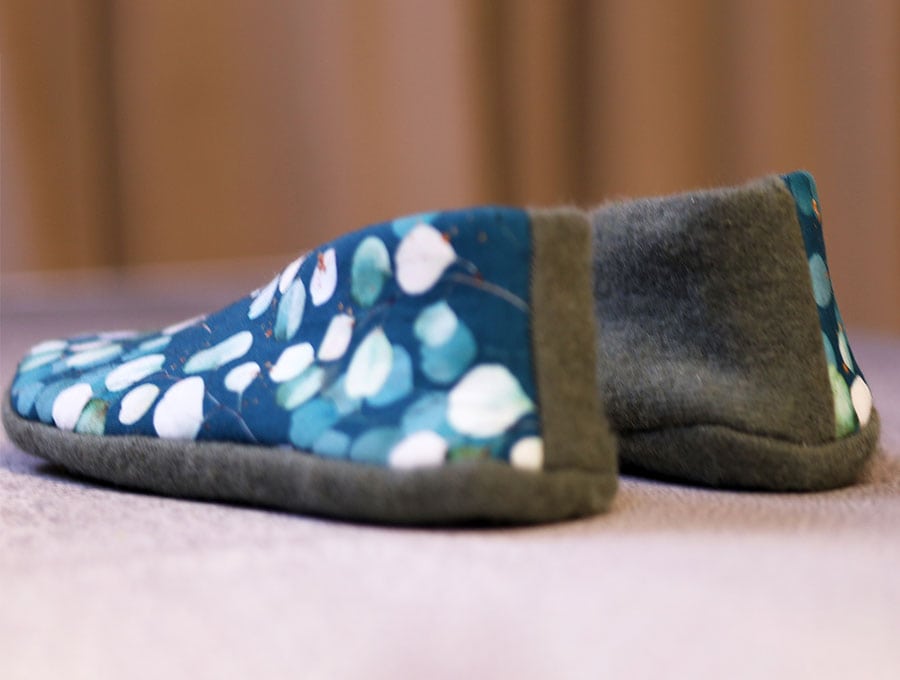
Warm Winter Slippers – Cute and Easy Upcycled Fabric Slippers [Video + Pattern]
Learn how to sew these warm winter slippers in a matter of minutes!
Here’s a last minute gift to sew in minutes for anyone who needs to keep cozy this winter. The best part is they are custom made for the person – all you need to do is get them to stand on a piece of paper and measure their instep for a perfect fit.
Feet feeling a bit frosty this winter? With your sewing machine and some offcuts, or recycled, denim and sweatshirt fabric, you can have these slippers on your feet in 30 minutes from making the custom pattern to fit your foot and sewing them up. Breathe a new life into an old wool sweater with this sewing idea.
Why not have some fun and make them up in red and green and add a couple of bells for the festive season? Flowers and butterflies are a great idea for Spring. Black and orange with some spooky spiders or bats embroidered on them would be fun for Halloween too.

Below you will find my step by step written tutorial with VIDEO instructions for all the visual learners.
We occasionally link to goods offered by vendors to help the reader find relevant products. Some of the links may be affiliate meaning we earn a small commission if an item is purchased.
Table of Contents
- 1 How to make warm house slippers
- 2 Supplies and tools
- 3 How to Sew a warm winter slippers
- 3.1 Warm slippers VIDEO TUTORIAL
- 3.2 INSTRUCTIONS:
- 3.3 STEP 1:
- 3.4
- 3.5 STEP 1:
- 3.6 STEP 2:
- 3.7 STEP 3:
- 3.8 STEP 4:
- 3.9 STEP 5:
- 3.10 STEP 6:
- 3.11 STEP 7:
- 3.12 STEP 8:
- 3.13 STEP 9:
- 3.14 STEP 10:
- 3.15 STEP 11:
- 3.16 STEP 12:
- 3.17 STEP 13:
- 3.18 STEP 14:
- 3.19 STEP 15:
- 3.20 STEP 16:
- 3.21 STEP 17:
- 3.22 STEP 18:
- 3.23 STEP 19:
- 3.24 STEP 20:
- 3.25 STEP 21:
- 3.26 STEP 22:
- 3.27 STEP 23:
- 3.28 STEP 24:
- 3.29 STEP 25:
How to make warm house slippers
Supplies and tools
- fabric – felted wool from a sweater
- polyester stuffing
- fusible interfacing
- twisty ties or rubber bands
- matching thread
- scissors (or rotary cutter and a cutting mat)
- ruler or measuring tape
- iron and ironing board
- sewing clips or pins
- plastic snaps (you will need a sewing owl and snap pliers
- press studs
- hook and loop dots/tape
Follow us for free patterns & tutorials! [easy-profiles]
How to Sew a warm winter slippers
Watch the diy warm fabric slippers video first and then follow the written step by step instructions below.
Please enjoy and don’t forget to Like and SUBSCRIBE over on YouTube to be kept up to date with new videos as they come out.
Warm slippers VIDEO TUTORIAL
INSTRUCTIONS:
STEP 1:
Harvest materials – look around your home for some old, sturdy wool sweaters, or even wool coats. If you don’t have any, I recommend going to a thrift store. You can use a wool coat or even an woolen blanket for the outer layer, which especially good for use on very cold winter days. Try to find fabric with as with as many threads per square inch as possible. Densely woven fabric will make these last much longer.
For the inside part use either the same fabric, or some thick cotton-based (knit) fabric to avoid irritation on you ankles and soles. Either denim or some heavy duty, thick, all or mostly cotton sweater or sweatshirt would be perfect for this.
STEP 1:
To create the diy slippers pattern place a large enough piece of paper or card on the floor to accommodate the length and breadth of the foot.
STEP 2:
Place the person’s foot on the paper/card and trace around the outline, or get someone else to do this if you are making them for yourself. If making slippers for kids it’s easy to get them to stand on the paper while you trace around their feet.
STEP 3:
Even up the bumps where the toes are and where the foot narrows before the heel making a line on the outside of the lumps, and smoothing the outline.
Mark a dotted outer line around the foot pattern you traced that is 3/8 of an inch (1 cm) larger, which will be your pattern’s cutting line.
STEP 4:
Cut out the pattern for the sole and set aside.
STEP 5:
Now get another piece of paper or card and create the top of the slipper pattern by measuring the length of your foot and adding ¾ of an inch (2 cm), then measure the width of the widest part of the instep of the foot and add ¾ of an inch (2 cm). My instep measurement was 5 ½ inches (14 cm). Cut out the rectangle.
STEP 6:
Fold the paper/card in half along the length. Grab a small plate or other circular object that is 6 inches (15 cm) in diameter and place one side on the edge and the other on the fold at the top end of the folded rectangle – use a marker to draw the convex arc to join the two points.
STEP 7:
Measure ¾ of an inch (2 cm) from the back of the pattern on the fold line and make a mark. Draw a gentle concave arc from the back corner to the mark.
STEP 8:
Cut out the two arcs.
STEP 9:
Measure 4 ¾ to 5 inches (12 to 13 cm) from the folded tip convex tip down the shoe length and make a mark. Open out the card or paper and draw a line to that mark.
STEP 10:
Use this top pattern piece to cut out 4 identical pieces of fabric from a sweatshirt style fabric.
Option: If you want to make 2 color slippers, like those shown in the video, then cut 2 more pieces out of a cotton knit fabric.
STEP 11:
Cut two soles out of sweatshirt fabric and 2 out of denim fabric (old jeans are perfect for this).
STEP 12:
Cut two insoles (this is optional, but it does insulate the slippers better from cold floors), from felted wool. These will be cut slightly smaller than the solid line on the pattern – that is just over ¾ of an inch (1 cm) smaller than the dotted line of the pattern.
STEP 13:
Take the upper pieces and place right side to right side and clip together. If making two color slippers, add the extra knit fabric into the sandwich of fabric – right side to right side
STEP 14:
Place the pattern piece over each of the uppers in turn and with the pattern folded in half mark to the 4 ¾ or 5 inches (12 to 13 cm) mark you made earlier, drawing a line from the middle of the toe to the mark.
STEP 15:
Stich down the line from the toe to the mark backtacking at the start and finish. Repeat with the other slipper upper.
STEP 16:
Stitch across the concave curve at the other end of the slipper ¼ of an inch (6 mm) from the edge.
STEP 17:
Once you have stitched the concave curve cut a small v notch in the middle of the concave curve – to get the perfect center place your folded pattern across the top and mark the center.
STEP 18:
Press the fold on either side of the v notch – one side up and one down, then pull the slipper upper through the gap between the line stitched and the curve. Suddenly it now looks like a slipper upper. Repeat with the other upper.
STEP 19:
Clip the edges together, ensuring they lie smoothly, then take one of the denim soles and with the right side of the denim facing upwards, place the slipper upper over it, right side up, and clip the sole in position, realigning your clips to accommodate the extra piece of fabric.
STEP 20:
Stitch right around the edge of the sole with the slipper upper at the top, ¼ of an inch from the edge. Repeat with the other sole.
STEP 21:
Trim any excess fabric around the edge of the slipper, then on top of the slipper upper place the sole piece right side down and clip in place, before repeating with the other slipper.
STEP 22:
Mark a gap on the inner side of the foot on each slipper through which you will pull the whole slipper. The gap should be about 3 to 4 inches (7 ½ to 10 cm) long.
STEP 23:
Set your machine to a zigzag stitch of 1.
Stitch around the edge of each slipper with a seam allowance of 3/8 of an inch (1 cm) starting at one side of the gap and working your way around to the other side of the gap, backtacking at the start and finish.
STEP 24:
Trim any excess or uneven fabric from the slipper edges before turning each one the right way out, easing the fabric gently through the gap.
STEP 25:
Time to insert the optional inner soles into the slipper – pushing them in through the gap and settling them into the sole of the slipper. If you chose not to use insoles then all that remains is to stitch the gap closed using a hand sewing needle and a matching thread. It is best to turn in the raw edges in line with the seam and pin before stitching.
The slippers are now ready to wear or to gift, custom made to the person’s foot so you don’t have to worry about a narrow foot or a wide foot because you did all the measuring to make sure they were perfect for the person’s feet before you started.

What a lovely warm project that was really very easy to sew. You could use fabric left overs or they can be cut from a sweatshirt and jeans that were no longer fashionable, or a member of the family had grown out of, but the material was good. We love sustainability and recycling!
Remember to like and subscribe. Joining our large group of over 97,400 subscribers on our YouTube channel means you get the new videos and free patterns as they are released, giving you a head start on projects. You can also share how the items you made turned out by posting photos in the comments section, so other sewists can see how the patterns can be customized.
Do you like this? Pin for later:
Wanna be friends? Click HERE and follow me on Pinterest
RELATED: