
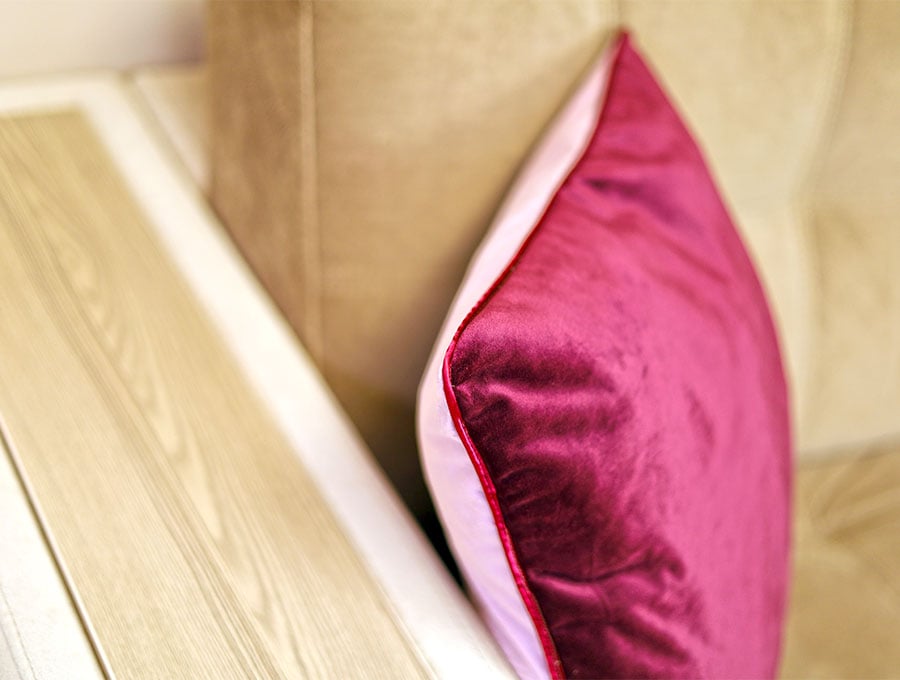
DIY Pillow Cover with Piping and Zipper // Zippered pillow with piping [VIDEO + Tutorial]
Try this super easy tutorial when you want to add a personalised touch to your home décor. Nothing updates décor like a few great pillows. Pick a stunning fabric, get some matching, or contrasting piping and we’ll show you how to make a piped pillow in less than 30 minutes.
You can make the front and back from the same fabric, or have a different print or color for the front…whatever takes your fancy.

Below you will find my step by step written tutorial with VIDEO instructions for all the visual learners.
We occasionally link to goods offered by vendors to help the reader find relevant products. Some of the links may be affiliate meaning we earn a small commission if an item is purchased.
Table of Contents
How to make the Pillow with Piping and Zipper
Supplies and tools
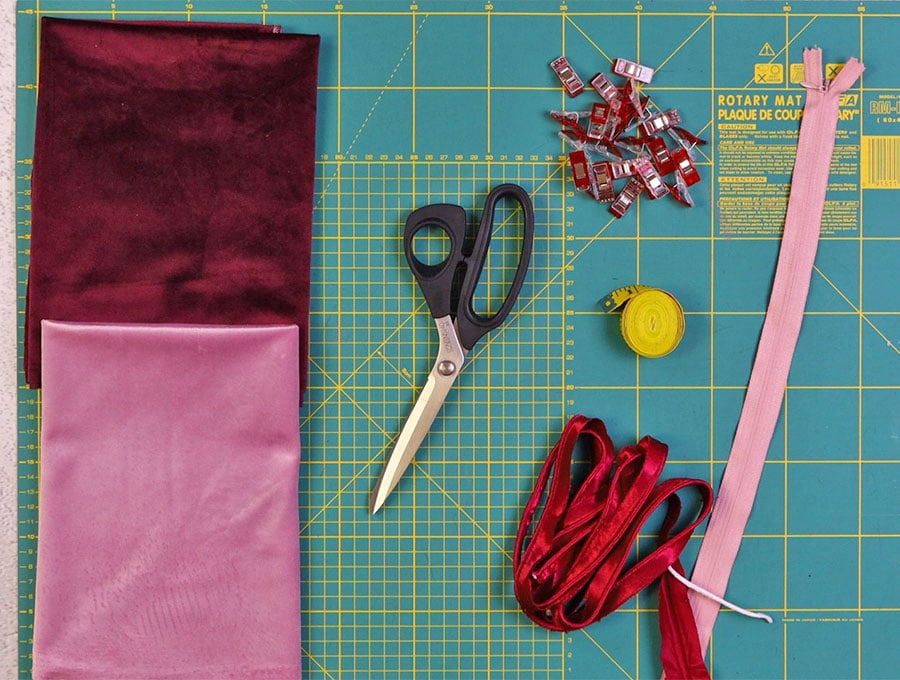
- 2 pieces home décor fabric for front and back 21 ½ x 20 inches (54 x 50 cm) each
- Piping – 75 inches (190 cm)
- Invisible zipper – 18 inches (45 cm)
- matching thread
- scissors (or rotary cutter and a cutting mat)
- ruler or measuring tape
- iron and ironing board
- sewing clips or pins
Follow us for free patterns & tutorials! [easy-profiles]
How to Sew a Pillow with Piping and Zipper
Watch the diy zippered cushion with Piping video first and then follow the written step by step instructions below.
Please enjoy and don’t forget to Like and SUBSCRIBE over on YouTube to be kept up to date with new videos as they come out.
Zippered Pillow with Piping VIDEO TUTORIAL
INSTRUCTIONS:
STEP 1:
Serge (overlock) or zigzag one of the short 20-inch (50 cm) edges on the front and the back fabric pieces.
STEP 2:
Starting from a corner on the lining, where the serged (overlocked), or zigzag edge ends, clip or pin the piping to the cushion, lining up the raw edges of the fabric with the raw edges of the piping tape. The piping tape will face inwards to the main cushion body.
At the corners ease the piping around by making small snips in the piping tape but not too close to the stitching. The piping will not be a point but slightly rounded on the corners. When you get back to where you started overlap and ease the piping off to the edge.
STEP 3:
Using a zipper foot stitch as close to the piping as possible all around the cushion backtacking at the start and finish.
STEP 4:
Take the zipper and place right side down, lining it up with the serged (overlocked) or zigzagged edge. The body of the zipper will be facing towards the inner part of the fabric and the tape towards the serged edge. Clip in place.
STEP 5:
Use the zipper foot and stitch as close to the zipper teeth as possible. Back tack at the start and finish.
STEP 6:
Lay the front right side up on your worktop and over it place the back with zipper and piping attached right side to right side, lining up the zipper with the serged edge and clip in place.
STEP 7:
Stitch as close to the zipper teeth as possible using the zipper foot.
STEP 8:
Open up the zipper about a third of the way so you will be able to turn the pillow once stitched, then clip the front to the back piece, lining up the edges.
STEP 9:
Start near the zipper and backtack, then turn the corner and stitch along the three sides, ending up at the zipper on the 4th side where you will stitch a little and back tack.
STEP 10:
Serge (overlock) or zigzag the raw edges.
STEP 11:
Turn the pillow cover the right way out by pulling the fabric through the zipper opening. And that’s it – you’re done! The piped pillow cover is ready for the insert.
Creating a pillow with piping is so easy with this tutorial. Never again will you look wistfully at expensive designer pillows. Find gorgeous fabrics to bring a pop of color and luxe to your home, see how we add the piping and you’ll soon be sewing up a designer storm.
Please give us a like and subscribe for more easy tutorials. We love spreading the word about sewing tutorials that bring a little sunshine to your life, so be sure to share this one with a friend who also loves no-fuss sewing tutorials.
Do you like this? Pin for later:
Wanna be friends? Click HERE and follow me on Pinterest
RELATED: