
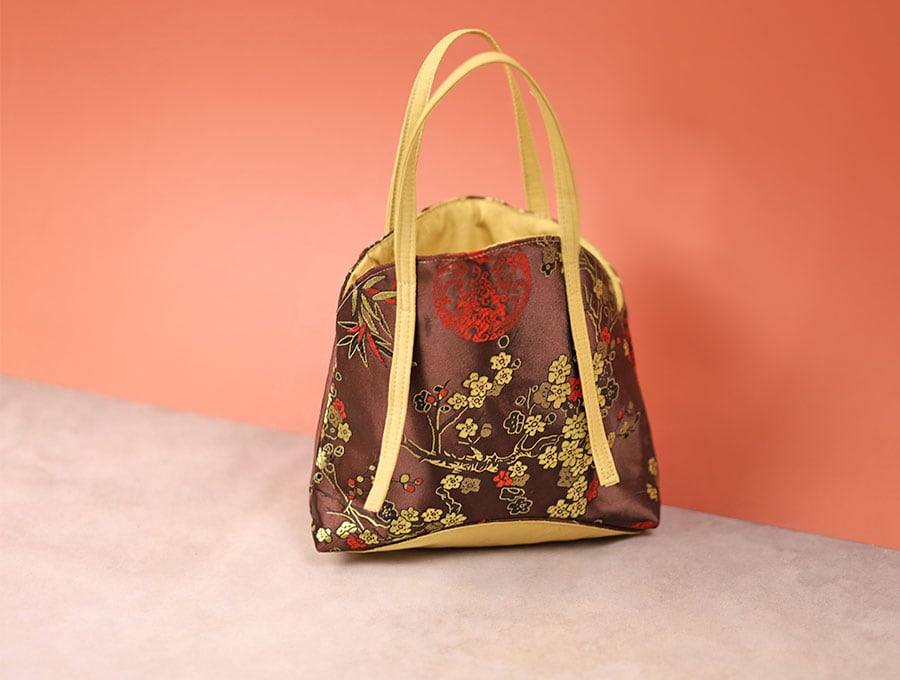
2 Fabric Circles Gift – Stunning Gift YOU Can Sew
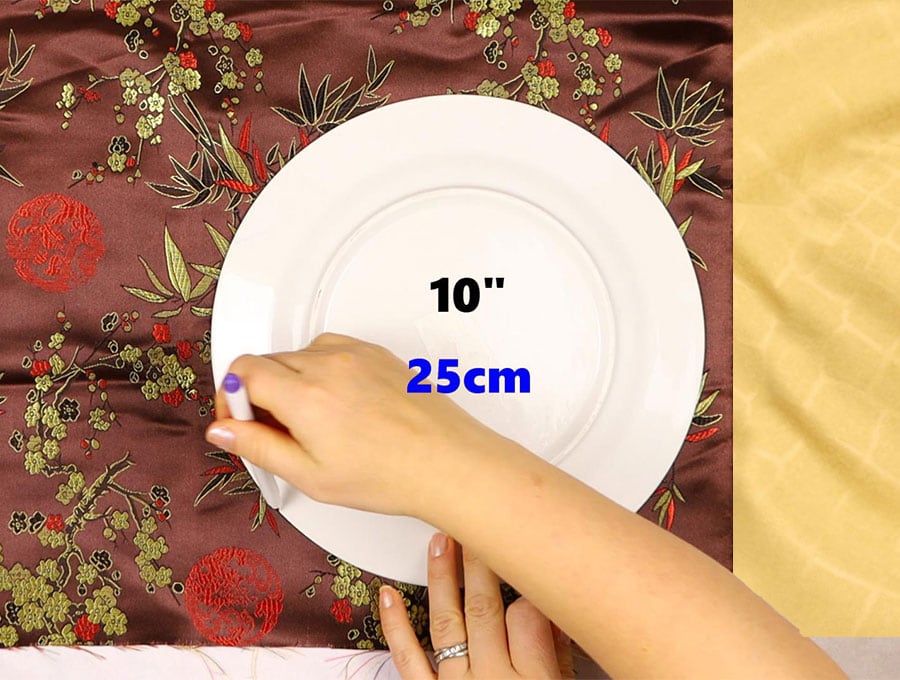
This gift bag is one for the times you suddenly need a gift bag but you don’t want to go out and join the rush in stores to search for one. The reasons may vary, from the time and cost of getting to the stores or bad weather – icy roads, snow, or if you live in the southern hemisphere extreme heat. If fact once you have learned the simple technique of making this gift bag you can make a few to stash for future use. You can make them in various sizes too. The instructions in this tutorial are for a 10 inch bag (25cm) – all you need to do it adjust the diameter of the circle.
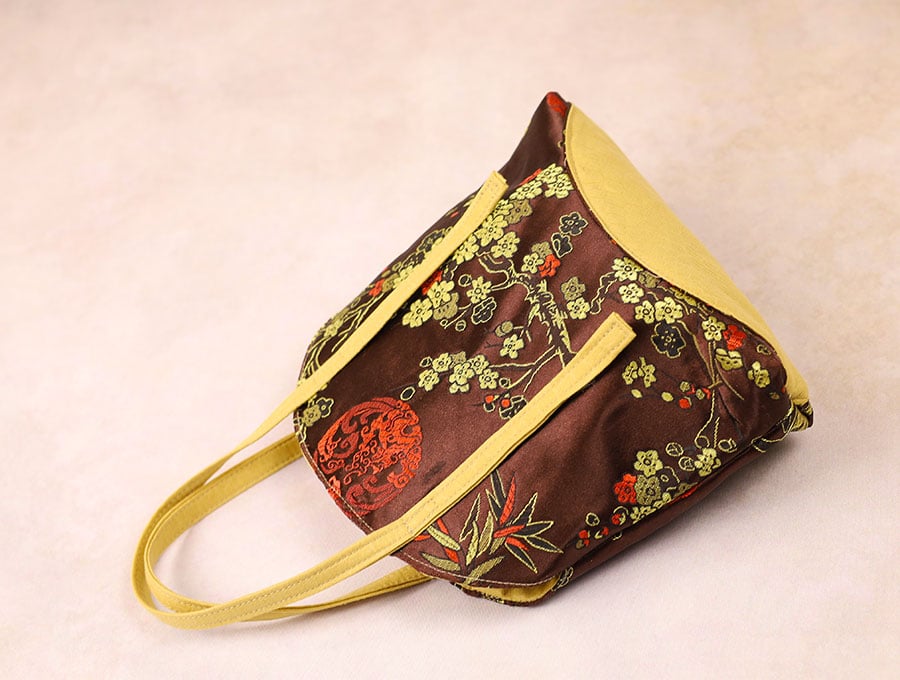
This gift bag may look like it contains a lot of steps but it is super easy to make and all you need to do is follow our visuals to see exactly how it is done. We have provided the step by step tutorial to print out and keep with you while sewing. When you have fabric scraps and a bit of time why not make a whole lot of these to have ready for birthdays, anniversaries and Christmas. They use up the pretty scraps in your stash and are washable and reusable. Once you have made the first one you’ll be ready to take off and experiment with different sizes.
Below you will find my step by step written tutorial with VIDEO instructions for all the visual learners.
We occasionally link to goods offered by vendors to help the reader find relevant products. Some of the links may be affiliate meaning we earn a small commission if an item is purchased.
Table of Contents
- 1 How to make 2 fabric circles gift
- 2 Supplies and tools
- 3 How to Sew a 2 fabric circles gift
- 3.1 2 fabric circles gift bag VIDEO TUTORIAL
- 3.2 INSTRUCTIONS:
- 3.3 STEP 1:
- 3.4 STEP 2:
- 3.5 STEP 3:
- 3.6 STEP 4:
- 3.7 STEP 5:
- 3.8 STEP 6:
- 3.9 STEP 7:
- 3.10 STEP 8:
- 3.11 STEP 9:
- 3.12 STEP 10:
- 3.13 STEP 11:
- 3.14 STEP 12:
- 3.15 STEP 13:
- 3.16 STEP 14:
- 3.17 STEP 15:
- 3.18 STEP 16:
- 3.19 STEP 17:
- 3.20 STEP 18:
- 3.21 STEP 19:
- 3.22 STEP 20:
- 4
How to make 2 fabric circles gift
Supplies and tools
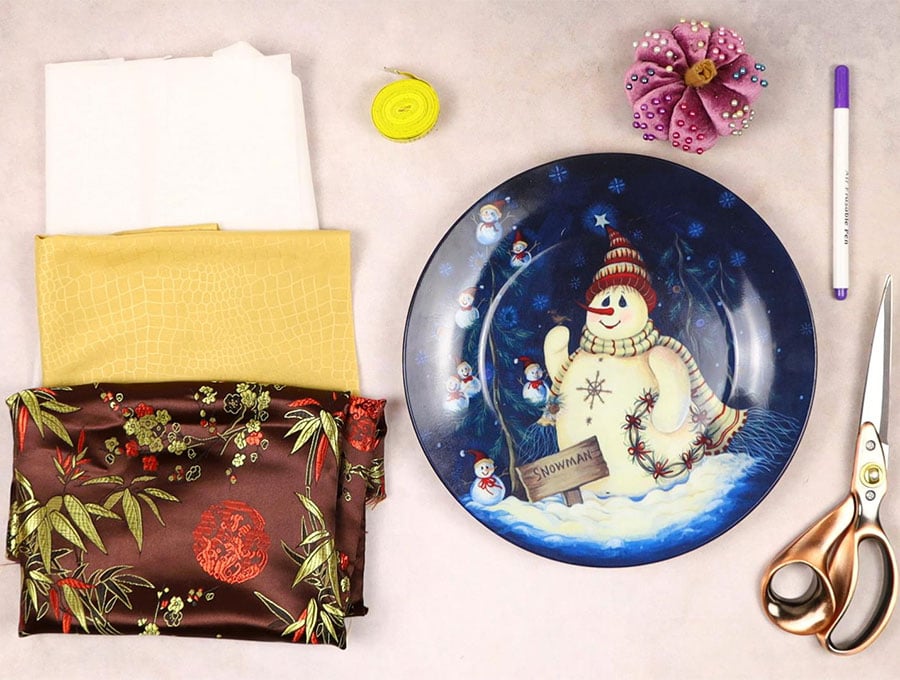
- Outer fabric – Two 10 inch (25cm) circles in a suitable cotton fabric as the outer
- Lining fabric – Two 10 inch (25cm) circles in a suitable cotton fabric as the lining
- Lining fabric – Two pieces 1 ½ inches x 20 inches (4cm x 50cm) for the handles
- Iron-on interlining – two circles cut to 9 inches ( 23cm)
- Compass to draw the circle, or a round plate or bowl 9 inches in diameter.
- matching thread
- scissors (or rotary cutter and a cutting mat)
- ruler or measuring tape
- iron and ironing board
- sewing clips or pins
- fabric marking pen
Follow us for free patterns & tutorials! [easy-profiles]
How to Sew a 2 fabric circles gift
Watch the diy 2 fabric circles tote bag video first and then follow the written step by step instructions below.
Please enjoy and don’t forget to Like and SUBSCRIBE over on YouTube to be kept up to date with new videos as they come out.
2 fabric circles gift bag VIDEO TUTORIAL
INSTRUCTIONS:
STEP 1:
Place your two pieces of fabric – the inner and outer with right sides facing each other and place the plate or bowl you are using, or use the compass, to draw 2 circles next to each other.
STEP 2:
Cut out the pairs of circles, and separate the fabric, placing the outer fabric circles right side down on your worktop.
STEP 3:
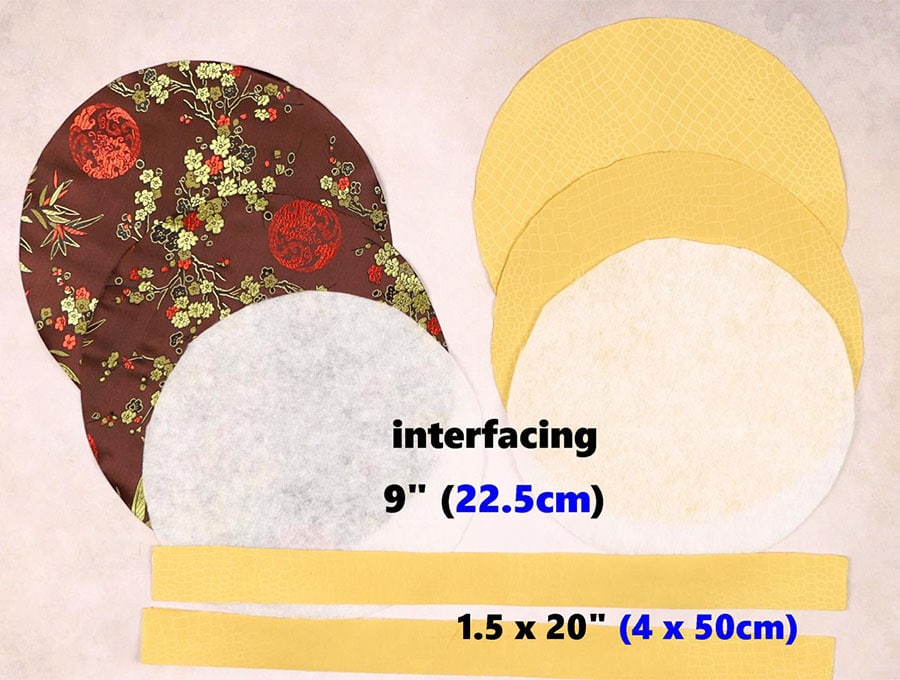
Cut two circles of iron-on interlining to 9 inches (23 cm) by placing the bowl or plate you used and cutting just ½ an inch (1.3cm) inside the line you drew. If you can find an 9 inch plate or bowl that makes it easier.
you’ll also need 2 strips of your lining fabric – 1.5 x 20″ (4 x 50cm)
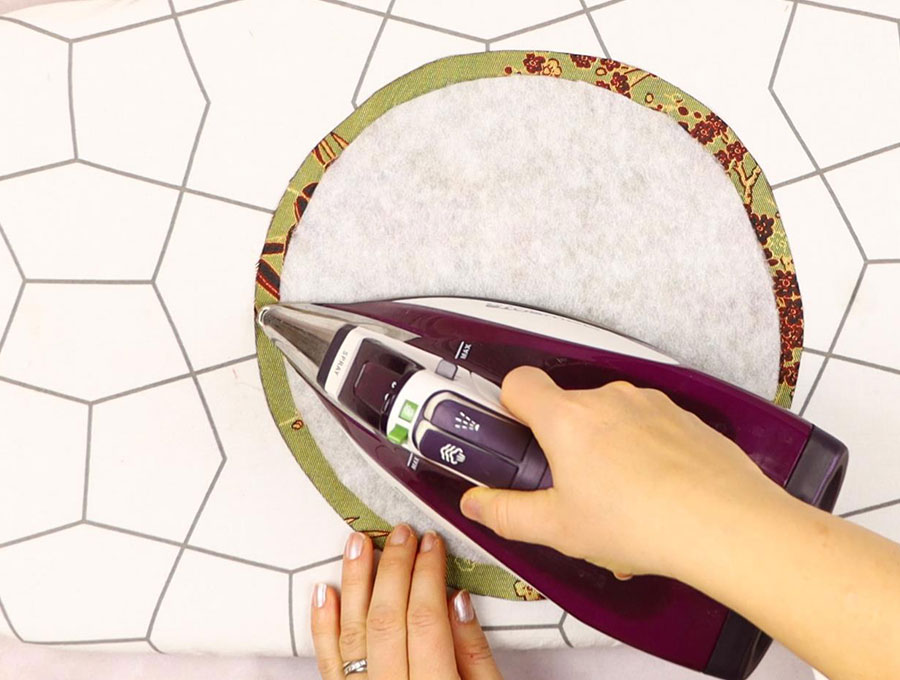
STEP 4:
Align the interlining so you have a ½ inch (1.3cm) from the edge all round. Attach the interlining to the wrong side of the outer fabric circles with your iron according to the manufacturer’s instructions.
STEP 5:
Place the interlining circles over the lining circles with right sides facing each other, then mark a 2 inch (5 cm) gap using a ruler anywhere on the edge of the circles before pinning them together. Mark the edges of the gap with a pin at the start and finish of each gap so you don’t mistakenly sew over them. The gaps are to turn the fabric circles right way out.
STEP 6:
Stitch around the edge of the circles justover ¼ inch (.7cm) from the edge so you are not actually stitching over the interlining . Backtack at the start and finish of each gap.
STEP 7:
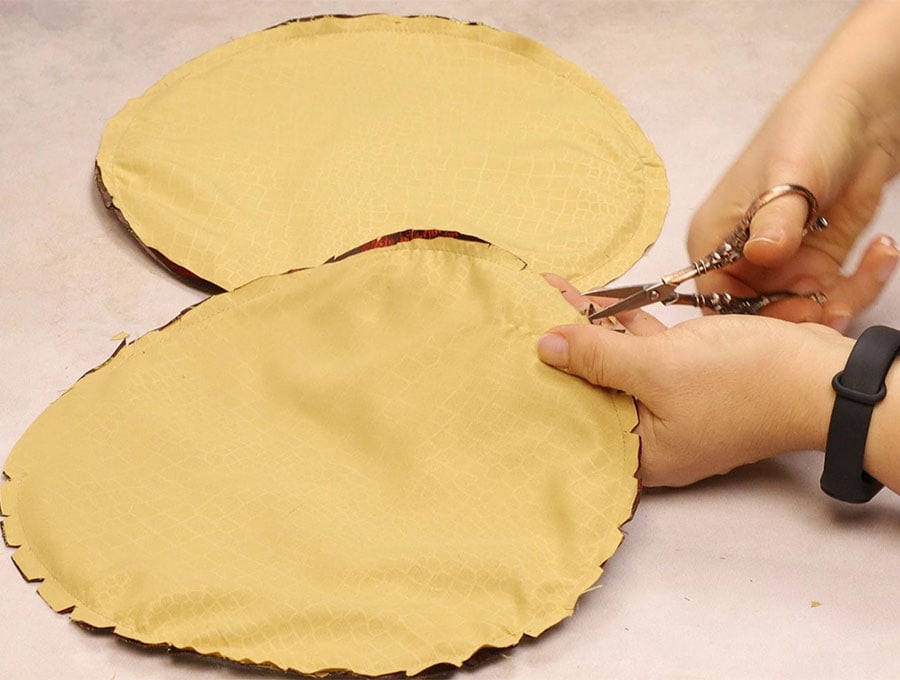
Make small snips along the edges of the circle all the way round, making sure not to snip too close to the stitch line – this helps ease the fabric once it is turned. Turn the circles the right way out by gently pulling the fabric through the gaps.
STEP 8:
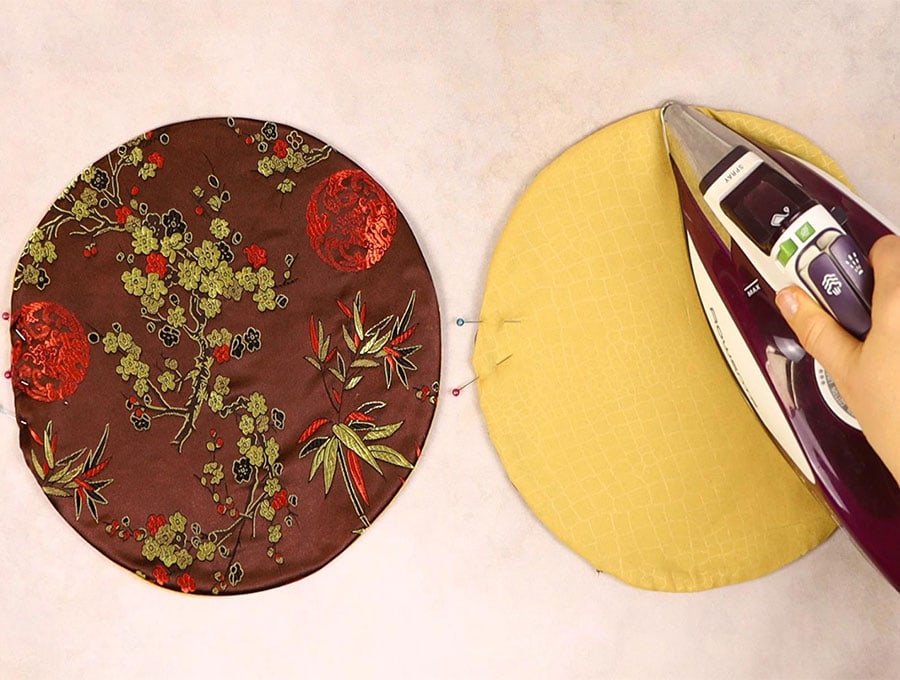
Use your iron to press the circles flat making sure the raw edges as each gap are turned in to line up with the rest of the circle.
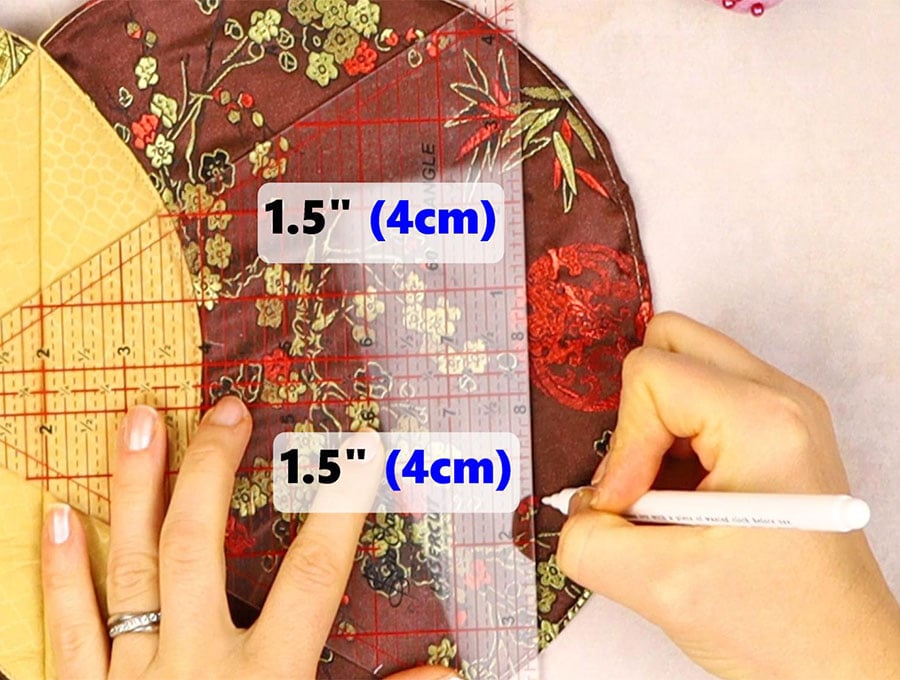
STEP 9:
Fold one circle in half to obtain the centre point, crease lightly, then open out and measure 1.5 inches (4 cm) in from the edge along the creased line, mark the point with an erasable fabric pen and rule a line across the edge of the circle.

STEP 10:
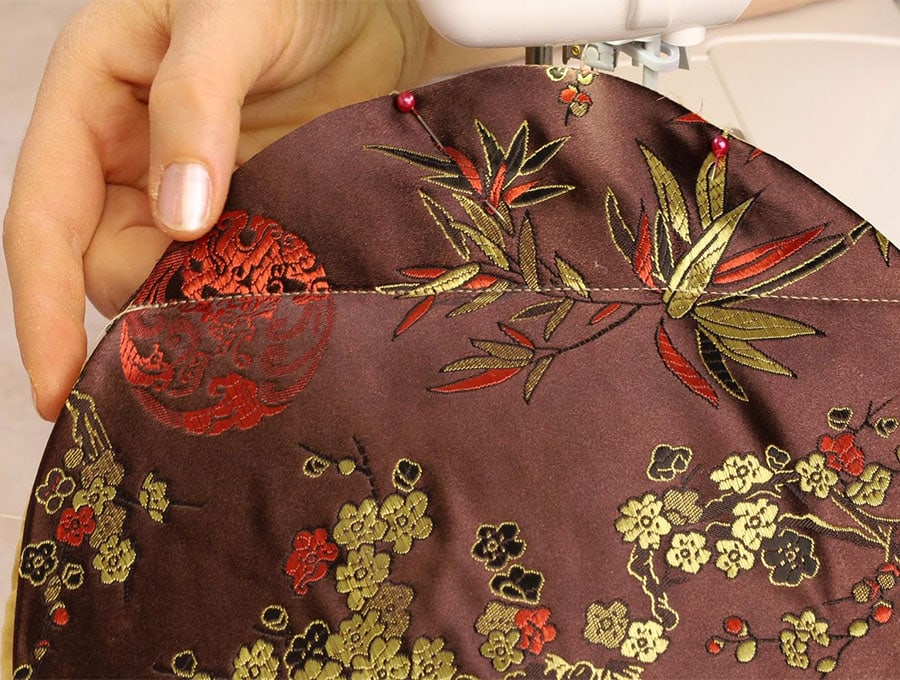
Place the marked fabric circle on top of the other one, making sure the inner sides are facing each other and pin then place then stitch along the line you marked, remembering to back tack at the start and finish.
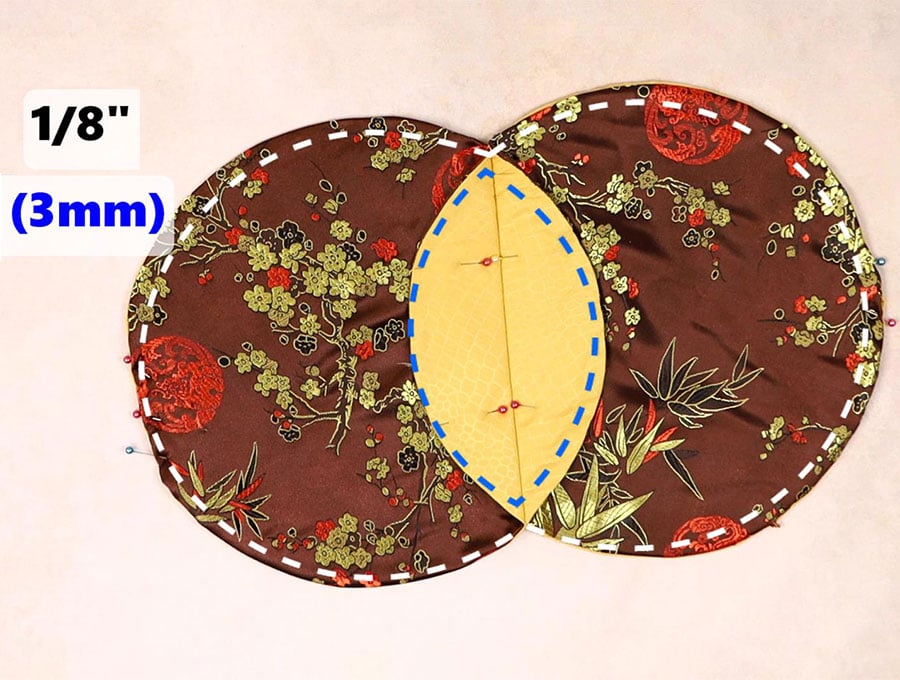
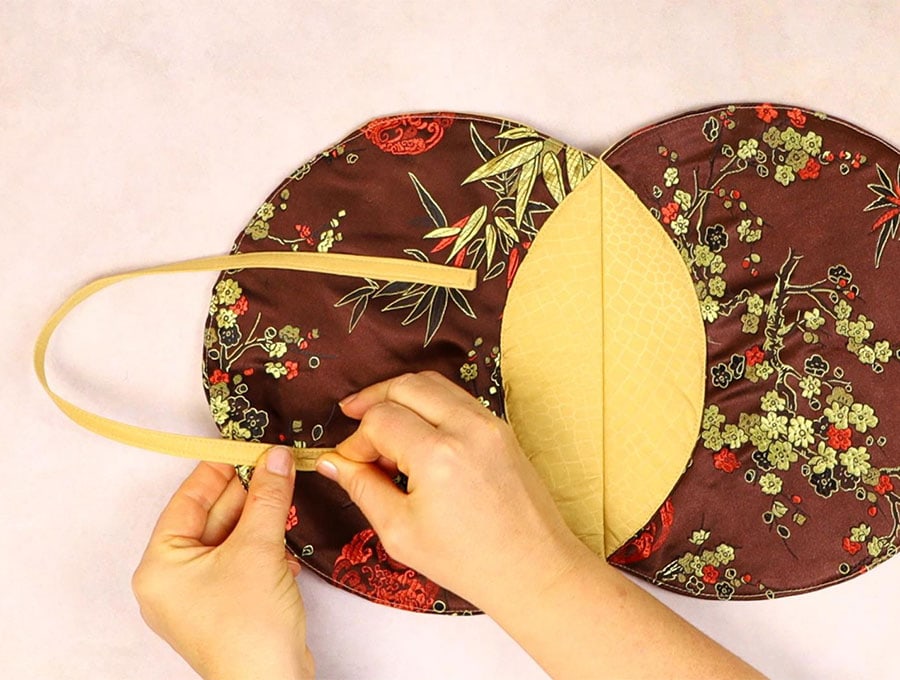
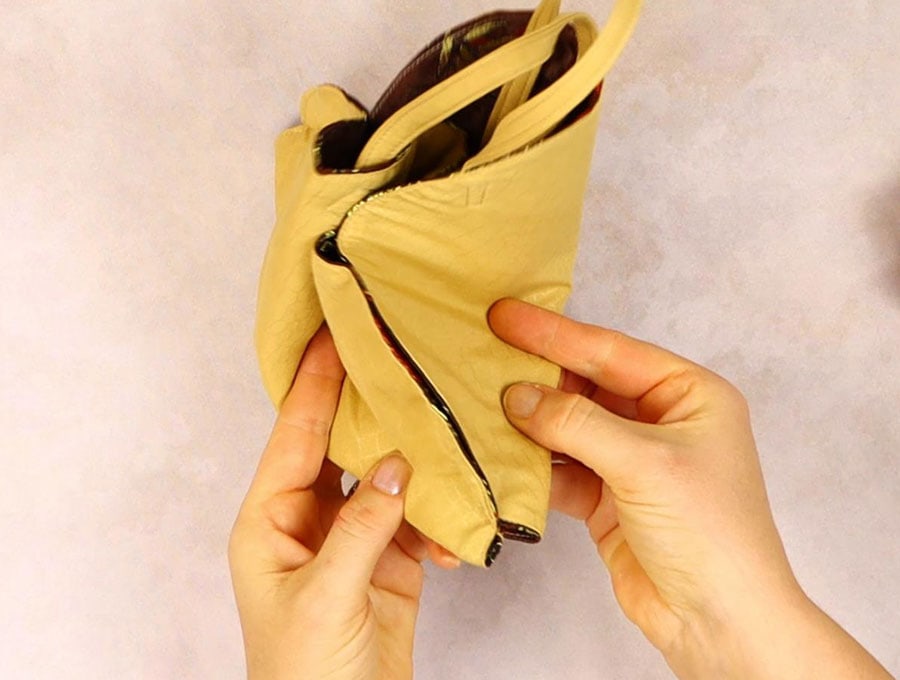
STEP 11:
Open out your two attached circles and stitch round the edge of one circle from the line you just stitched to the other end of the line, stitching as close as possible to the edge. Repeat with the other attached circle.
STEP 12:
Open out the flaps created by the stitch line in Step 5, press flat with your iron and stitch around the edge of the oval shape the flaps create, again as close to the edge as possible. When you come to the pointed ends of the oval leave your needle in the machine, lift the presser foot and swing the fabric before depressing the presser foot, then keep on stitching. This will give you a neat finish at the points.
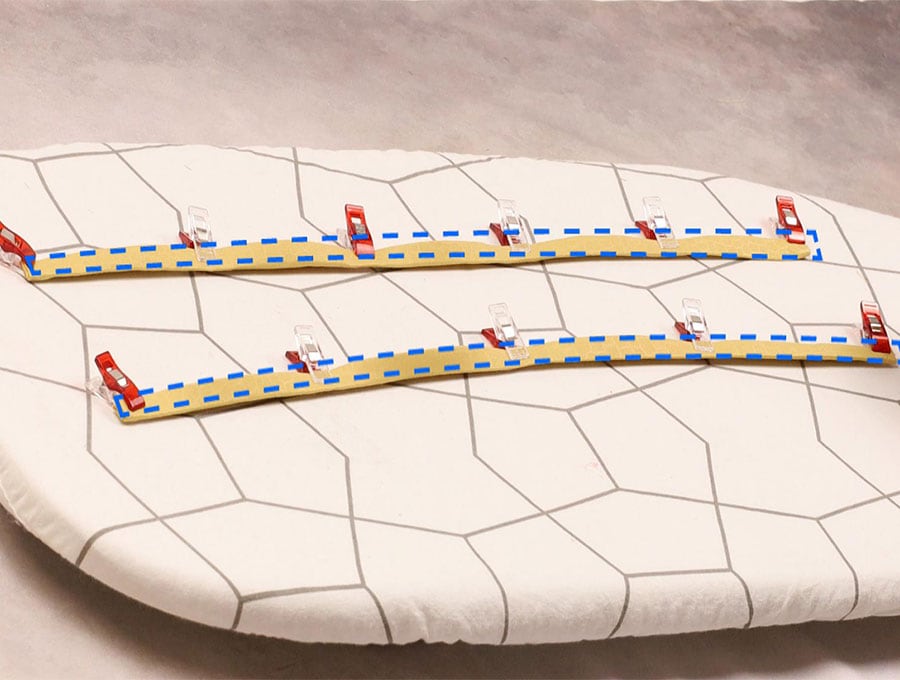
STEP 13:
First lay out the two strips on your ironing board, wrong side uppermost, then turn in ½ inch (1.3cm) at each end and press flat. Next fold each strip in half along the long edge and iron in the center crease before opening out again and turning in each of the long edges to meet up with the center crease, pressing as you go. Fold over on the center crease and give a last press.
STEP 14:
Stitch across the end of the one strap, along the open edge and across the other end of the strip. Repeat with the second strap, then set aside.
STEP 15:

Fold the one half of the top of the bag and mark with a small crease to obtain the center, then place a ruler across from where the stitch line ends to the other side and measure 1 inch (2.5cm) on either side of the crease, marking the spot.
Repeat on the other side of the gift bag.
STEP 16:
Pin the straps in place on the points marked
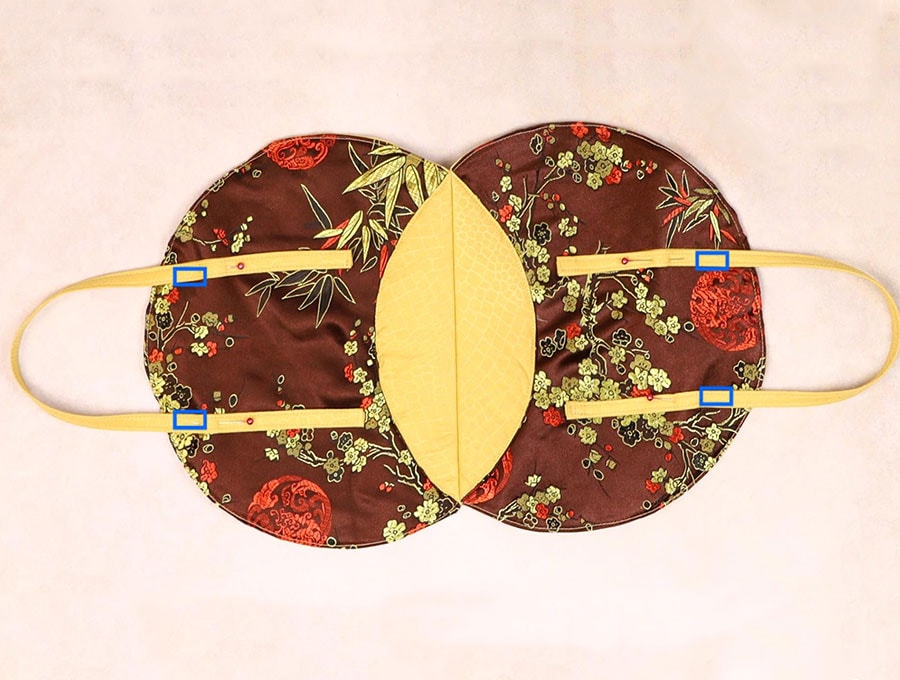
Stitch around each strap in a square to hold it firmly in place. The length of the handles can be adjusted, but our example shows a bag with fairly short handles and extra fabric loose on the ends below the stitching. Just make sure the handles are of equal length.
STEP 17:
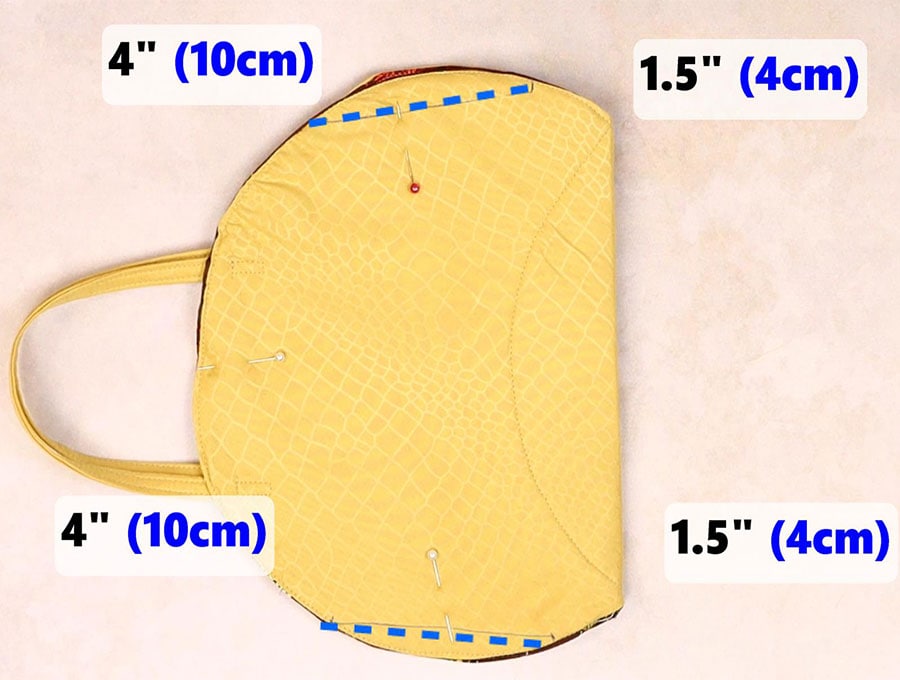
Open out the circles and fold in half, with the outer sides facing each other. Mark 1.5 inches (4 cm) up from the straight stitch line on each side to the edge of the circle, then from the end of that mark another 4 inches (10cm) to the edge of the circle and pin inside the marked line.
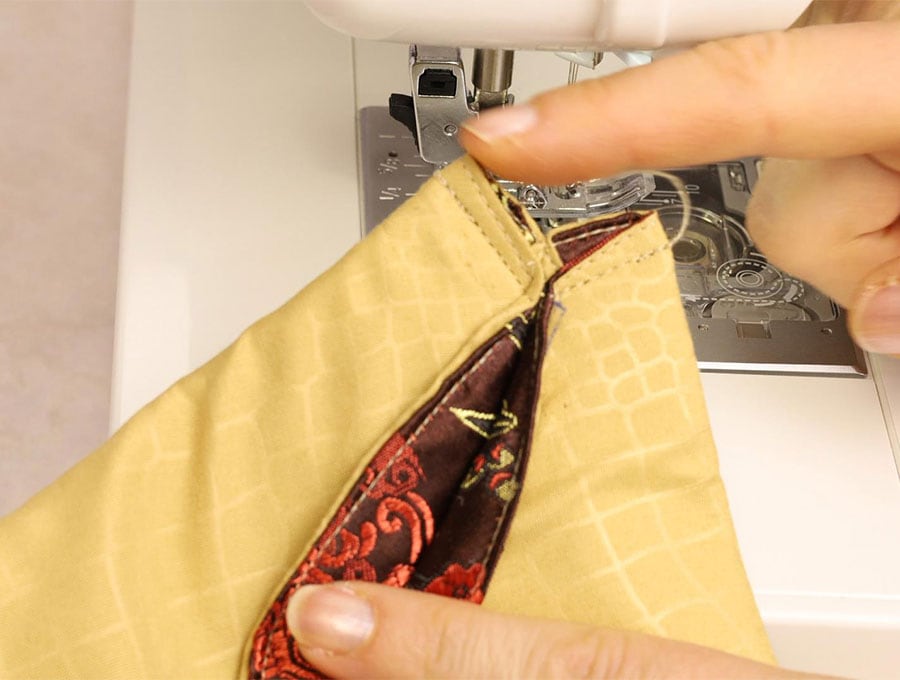
STEP 18:
Stitch only along the 4 inches (10cm) marks on either side, back tacking at the start and finish, just over ¼ inch (.7cm) from the edges
STEP 19:
Now fold the open ends flat on either side of the 4 inches (10cm) stitch line to create the box bottom for the gift bag. Stitch just over ¼ inch (.7cm) from the edges, back tacking at start and finish.
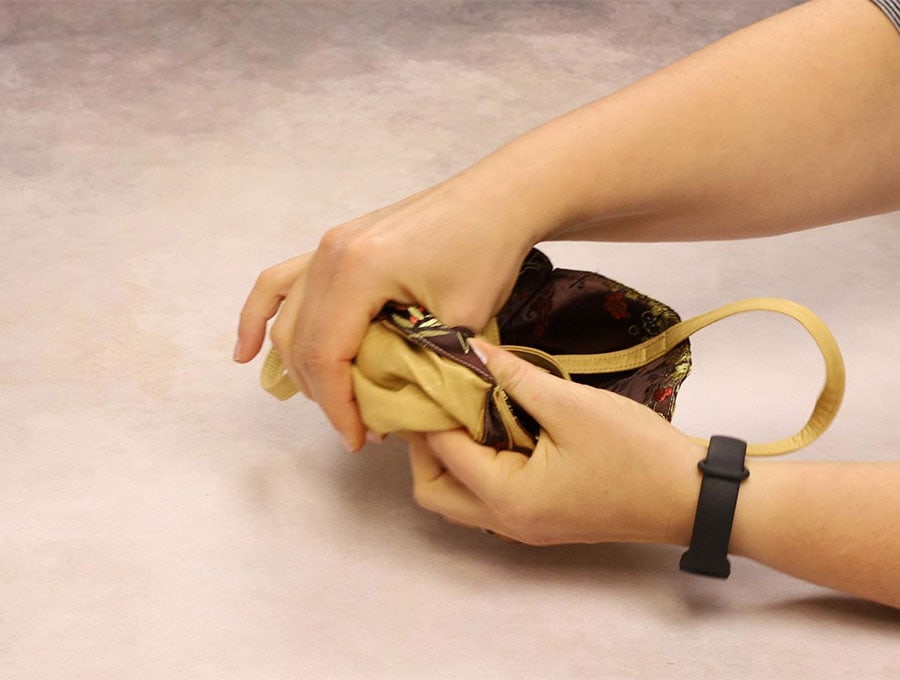
STEP 20:
Turn the bag the right way out, pushing out the corners of the box bottom neatly and set aside while you make the handles for the gift bag.
All that is left is to pop your gift into the bag and give it to the recipient.
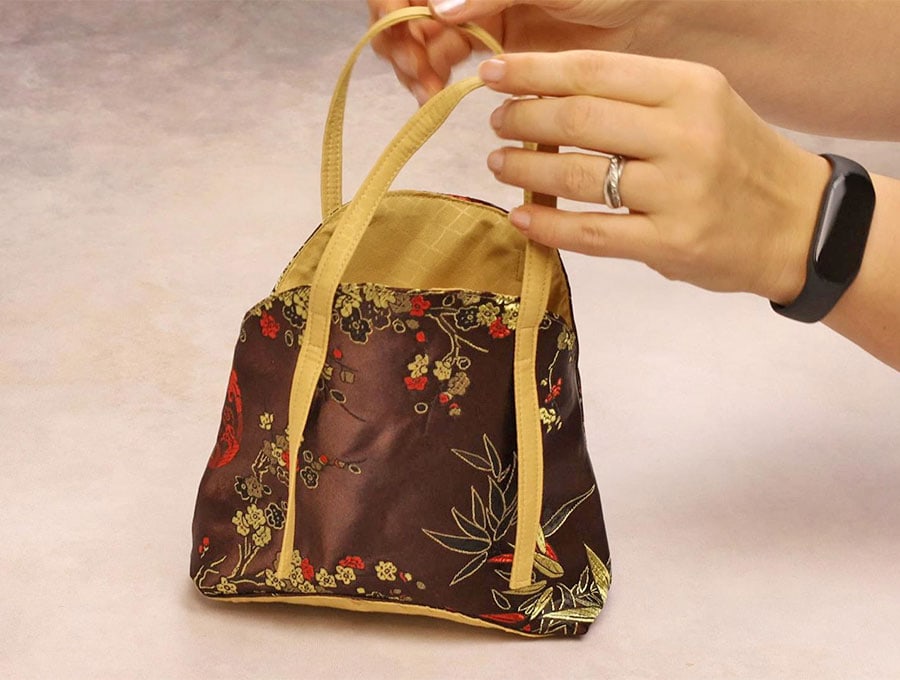
If you enjoyed this tutorial then please give us a like and subscribe. We would love to see how your gift bag turned out by posting a photo in the comments section.
Do you like this? Pin for later:
Wanna be friends? Click HERE and follow me on Pinterest
RELATED: