
How to make a Double Slide Zipper – Head to Head or Back to Back Sliders – Very Easy tutorial
Learn how to attach two-way zipper sliders on a zipper by the yard tape. Double zippers look stunning and allow for so many customization options. Learn how to attach the zipper pulls either head to head or back to back!
I’ll show you the easiest way to attach sliders to make a double slide zipper and I will show you how to make your zipper perfect every single time! No bulging, no fiddling. All you need to get started are 2 zipper pulls and some zipper tape / zipper yardage.
We occasionally link to goods offered by vendors to help the reader find relevant products. Some of the links may be affiliate meaning we earn a small commission if an item is purchased.
Table of Contents
How to Make a Double Slide Zipper
Watch the Double slide zipper video first and then follow the written step by step instructions below.
Please enjoy and don’t forget to Like and SUBSCRIBE over on YouTube to be kept up to date with new videos as they come out.
Double Slide Zipper VIDEO TUTORIAL
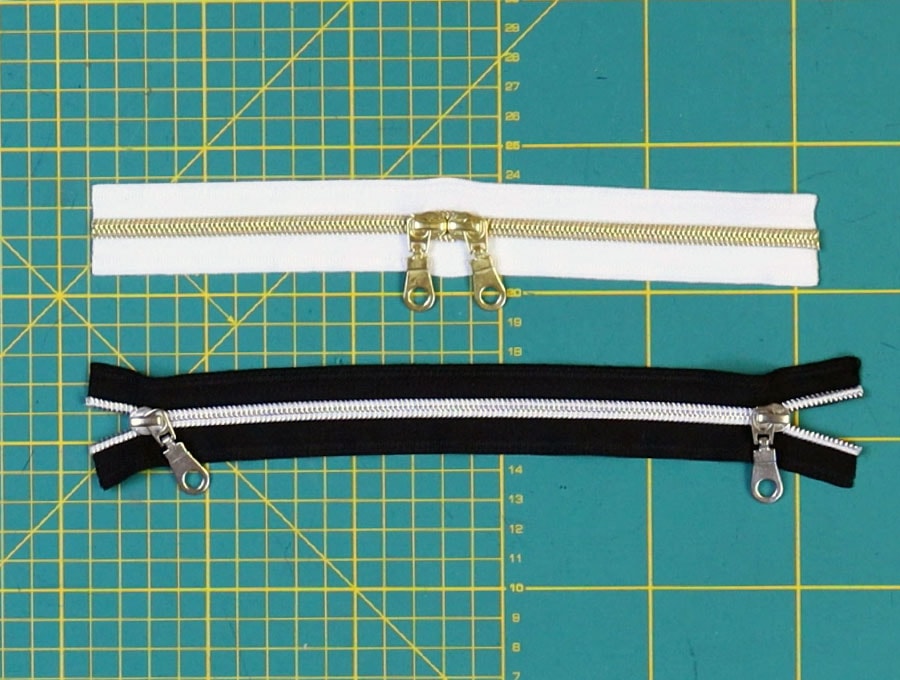
Difference between Head-to-head and Back-to-back double slide zipper
What’s the difference you may ask?
Well with the first head to head method you can open up the item from the middle – say to reach an inside secret pocket, get to check a baby’s nappy without opening the whole garment, grab the contents of a backpack from the middle, or open up a tent enough to get in or out without opening up the whole tent.
The second back to back method it is ideal for cardigans or parkas where you may want to slide the zipper down so the top is a little open, and the bottom zipper up a bit to reach into a pants pocket, or to accommodate you when driving, so the item doesn’t bunch, yet the garment remains fastened in the middle so you don’t get cold. With the back to back method you also have the option of separating the two sides of the garment completely, by sliding both zippers down to the bottom.
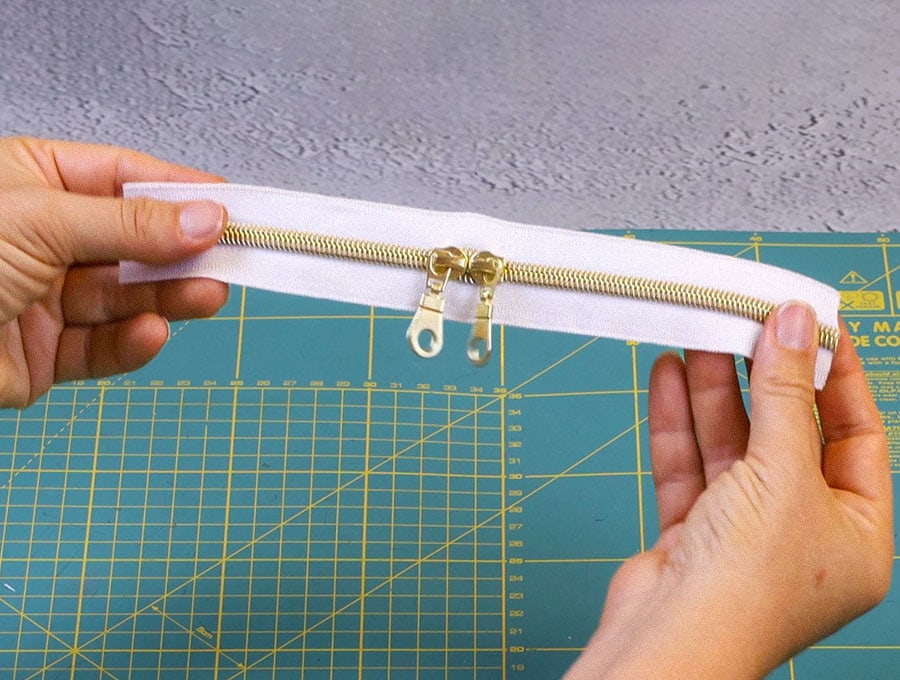
1. Head to Head Double Slide Zipper instructions:
STEP 1:
From your roll of zipper tape cut the length you will need.
STEP 2:
Singe each end of the zipper tape with a quick pass of a lighter to make sure the zipper tape ends don’t fray.
STEP 3:
Examine the end of the zipper tape on the face (right) side to determine which tooth is further out, left or right.
STEP 4:
In our video it was the right zipper tooth so we started from the right side – in your case it might be the left. Slide the zipper slide (with the right side facing towards you, top uppermost), onto the zipper tooth that is furthest out, then insert the other side of the zipper teeth into the other side.
STEP 5:
Pull up the slide to around halfway up the zipper. Done – one of the double sliders is complete.
STEP 6:
Turn the zipper to the top on the face (right) side to determine which tooth is further out, left or right. In our case it was the left so we started on the left hand side. The top of the zipper slide went on first, putting the zipper teeth into the left part of the slide, then followed up with the zipper teeth on the right-hand side.
STEP 7:
Once hooked in, all that remained was to slide the puller down until it met the first one you installed on the zipper. The two zipper pulls are head to head – that is the tops are facing each other.
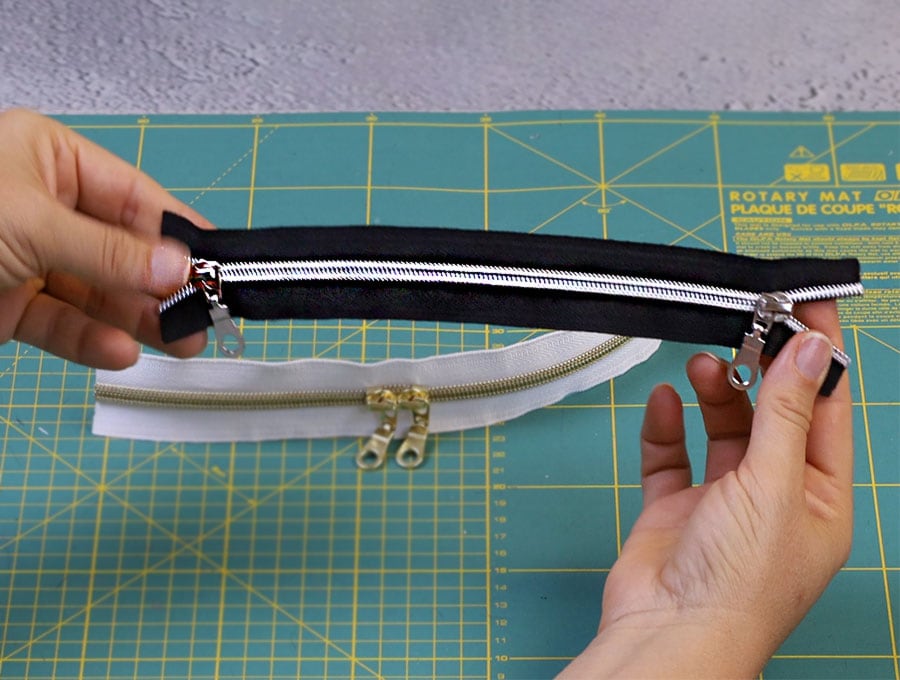
2. Back to Back Double Slide Zipper instructions:
STEP 1:
From your roll of zipper tape cut the length you will need.
STEP 2:
Singe each end of the zipper tape with a quick pass of a lighter to make sure the zipper tape ends don’t fray.
STEP 3:
Examine the end of the zipper tape on the face (right) side to determine which tooth is further out, left or right.
STEP 4:
In our video it was the right zipper tooth so we started from the right side – in your case it might be the left. Slide the zipper slide (with the right side facing towards you, top uppermost), onto the zipper tooth that is furthest out, then insert the other side of the zipper teeth into the other side of the pull.
STEP 5:
Pull up the slide to around halfway up the zipper. Done – one of the double sliders is complete. The bottom of the zipper pull is facing you.
STEP 6:
To do the back to back zipper pull method do not turn the zipper around but slide another zipper slide into the zipper teeth from the bottom end again, this time with the zipper slide bottom first, as you did in Step 4.
STEP 7:
Once the teeth are caught in the zipper slide pull it up so the bottom of the zipper slide faces the bottom of the one you first threaded – they are now back to back.
I hope you found this tutorial easy to follow! I know I struggled with attaching 2 zipper sliders to one zipper tape for a looong time. So I decided there must be an easier way that works every time. I made the video that shows you two methods for installing double zipper slides onto a zipper to create versatility in an item you make. We show you the head to head method and the back to back method – and we explain the benefits of each, so you can choose the one most suited to your needs.
If you loved this tutorial, then you should definitely subscribe to our weekly newsletter packed full of handy tutorials just like this
Do you like this? Pin for later:
Wanna be friends? Click HERE and follow me on Pinterest
RELATED: