
Crafting the Perfect DIY Baby Hat for Your Little One [FREE Baby hat Pattern]
Sewing a DIY baby hat, can be a fun and exciting activity, especially if you’re expecting a new addition to the family, or know someone who is. With baby hats being a must-have accessory for every new-born, having a collection of handmade hats for your little one can not only be a cost-effective alternative but also something that holds sentimental value.
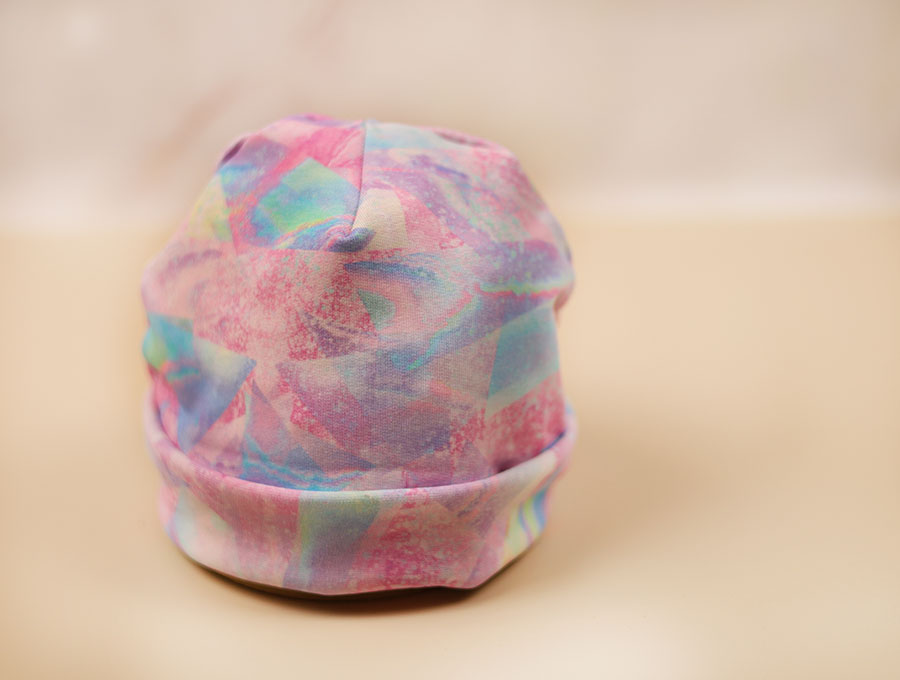
Get creative with our free DIY baby hat pattern and within five minutes create a cute baby hat to use for your own child or as a gift. We guide you through the easy steps with visuals and step-by-step instructions to sewing DIY baby hats that look too cute for words. Once you get the hang of making these you’ll want to mass produce them from the knits in your fabric stash – or go out and buy some of the adorable patterns and colors available to create sets of these hats that mothers will thank you for. They are inexpensive to make and are one way to create a designer statement for babies. In this blog post, we’ll guide you through how to make a baby hat that is simple yet perfect for the little one. We also include a free baby hat sewing pattern.
Below you will find my step by step written tutorial how to make a baby hat with a free pattern and with VIDEO instructions for all the visual learners.
We occasionally link to goods offered by vendors to help the reader find relevant products. Some of the links may be affiliate meaning we earn a small commission if an item is purchased.
Table of Contents
- 1 How to make a baby hat
- 2 Baby hat Supplies and tools
- 3 How to Sew a Baby hat
- 3.1 Baby Hat VIDEO TUTORIAL
- 3.2 INSTRUCTIONS:
- 3.3 Step 1: Gathering Supplies
- 3.4 Step 2: Preparing the baby hat template
- 3.5 Step 3: Cut out the fabric
- 3.6 Step 4: Pin the darts and the band
- 3.7 Step 5: Sew the darts and the band
- 3.8 Step 6: Pin the top part of the hat
- 3.9 Step 7: Stitch the top curve
- 3.10 Step 8: Join the top and the band
- 3.11 Step 9: Stitch the band to the hat
- 3.12 Step 10: (optional) ADD a pom pom
How to make a baby hat
Baby hat Supplies and tools
- fabric – knit fabric – interlock knit or jersey knit 16 by 8 inches (40 x 20 cm)
- matching thread
- scissors (or rotary cutter and a cutting mat)
- ruler or measuring tape
- iron and ironing board
- sewing clips or pins
DOWNLOAD: baby hat pattern [Free pdf file]
Follow us for free patterns & tutorials! [easy-profiles]
How to Sew a Baby hat
Watch the diy baby hat video first and then follow the written step by step instructions below.
Please enjoy and don’t forget to Like and SUBSCRIBE over on YouTube to be kept up to date with new videos as they come out.
Baby Hat VIDEO TUTORIAL
INSTRUCTIONS:
Step 1: Gathering Supplies
To start, you’ll need to have the right supplies. You’ll need a sewing machine, scissors, pins, a piece of fabric that is around 16 by 8 inches (40 x 20 cm) and coordinating thread. Fleece, or knit are excellent options as they have some stretch to them and will accommodate the baby’s head comfortably. A rotary cutter and mat can also be used instead of scissors to create clean cuts. Having these supplies squared away before starting will help ensure you have everything you need and minimize any hiccups during the process.
Step 2: Preparing the baby hat template
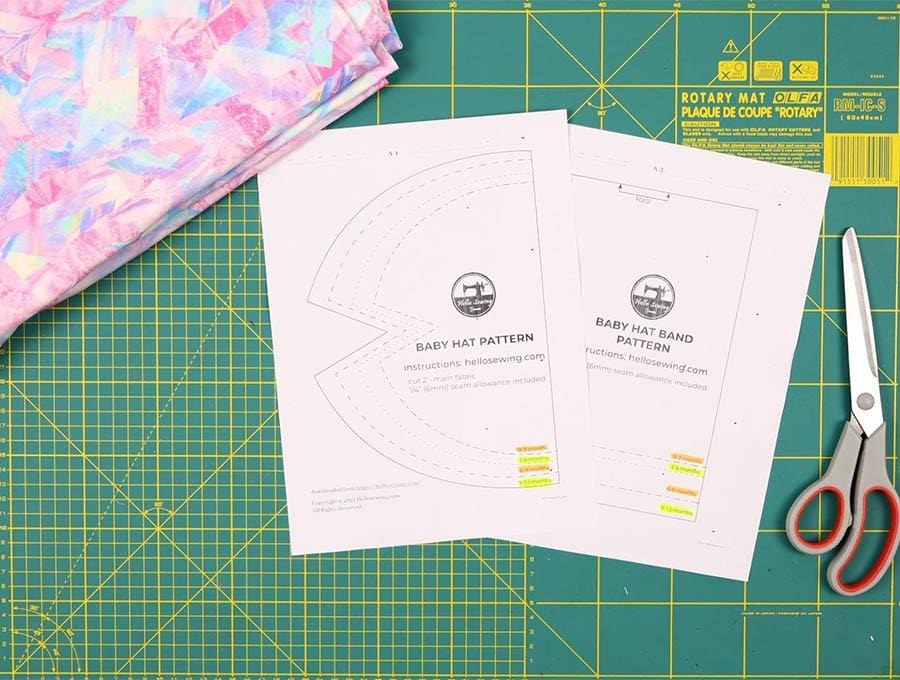
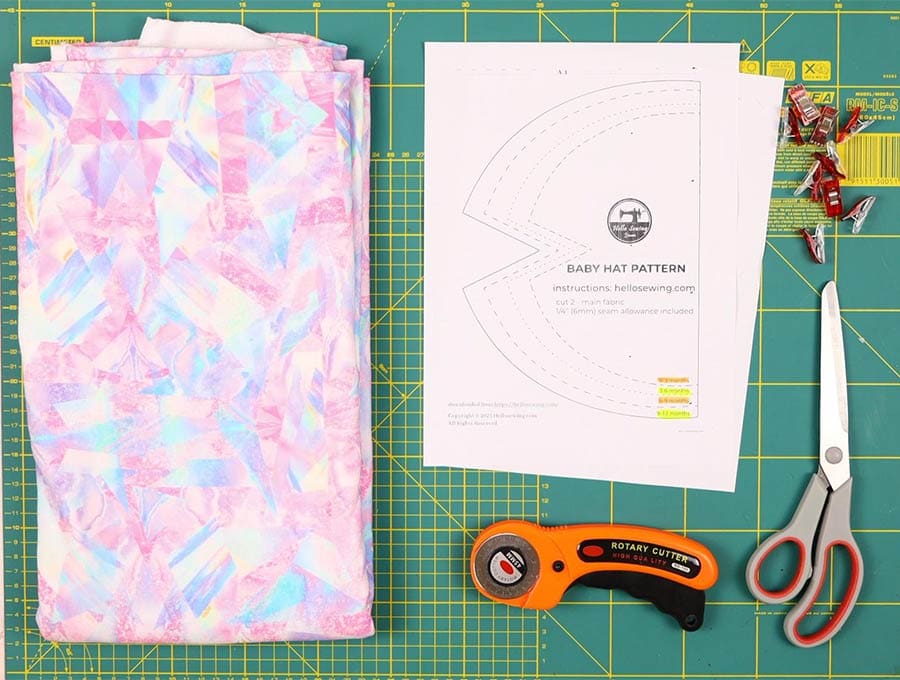
Print out the free baby hat pattern that is supplied with this blog post and cut out the size that you need.
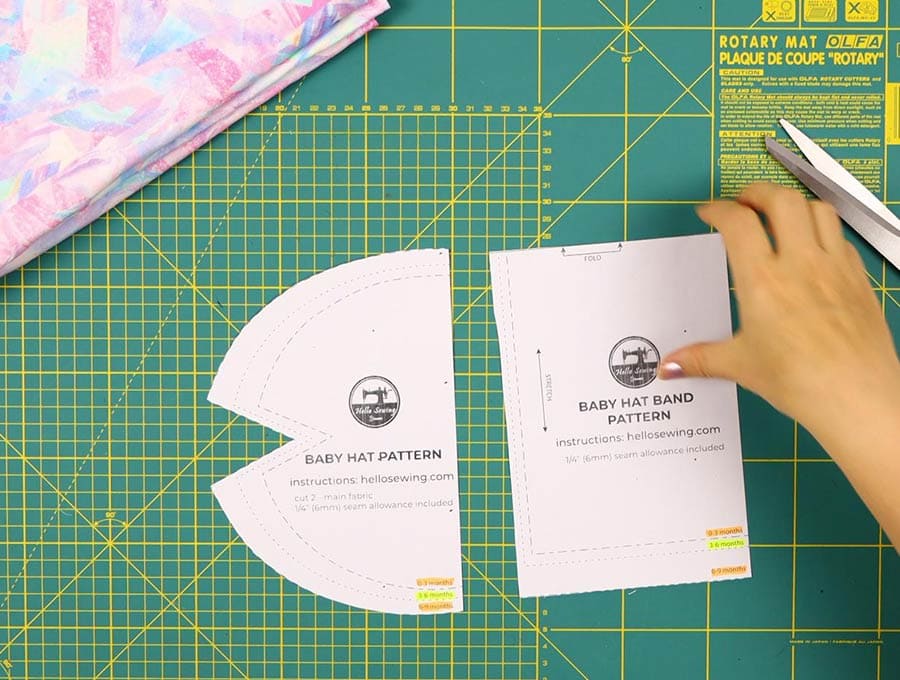
Baby hat pattern sizes:
- 0-3 months
- 3-6 months
- 6-12 months
- 12-24 months
Then mark the place where the dart will be. Of course, as baby grows you can increase the size by cutting the hat a little larger to accommodate different baby head sizes.
Step 3: Cut out the fabric
Begin by folding your fabric in half to create two 8″x 8″ (20 x 20 cm squares). The right sides will be facing outwards. Pin the baby hat top pattern to the fabric, making sure the stretchy part of the fabric is across the base of the hat, then cut it out using your rotary cutter or a pair of scissors so you have two identical sides to the hat. Remove the pins.
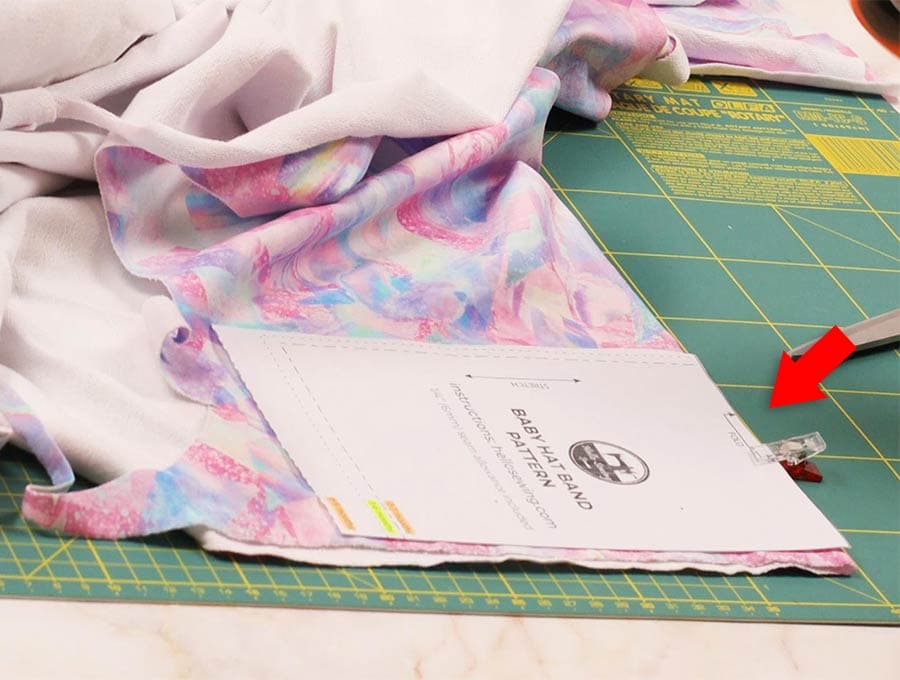
Use the other template to cut out the baby hat band. Fold the fabric and place the template on the fold. Cut it out.
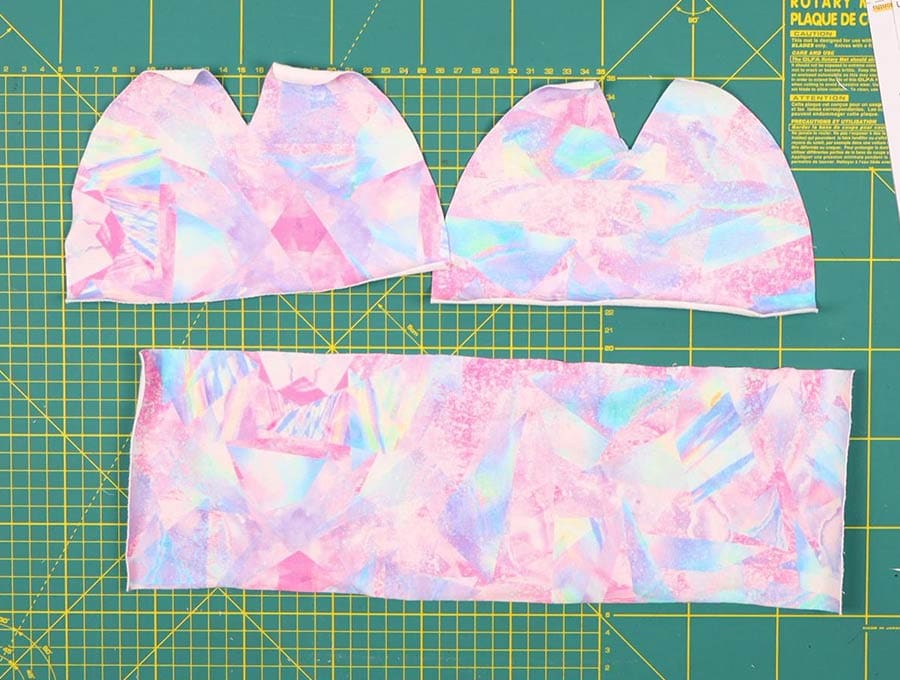
Now you have all three fabric pieces to make the baby hat
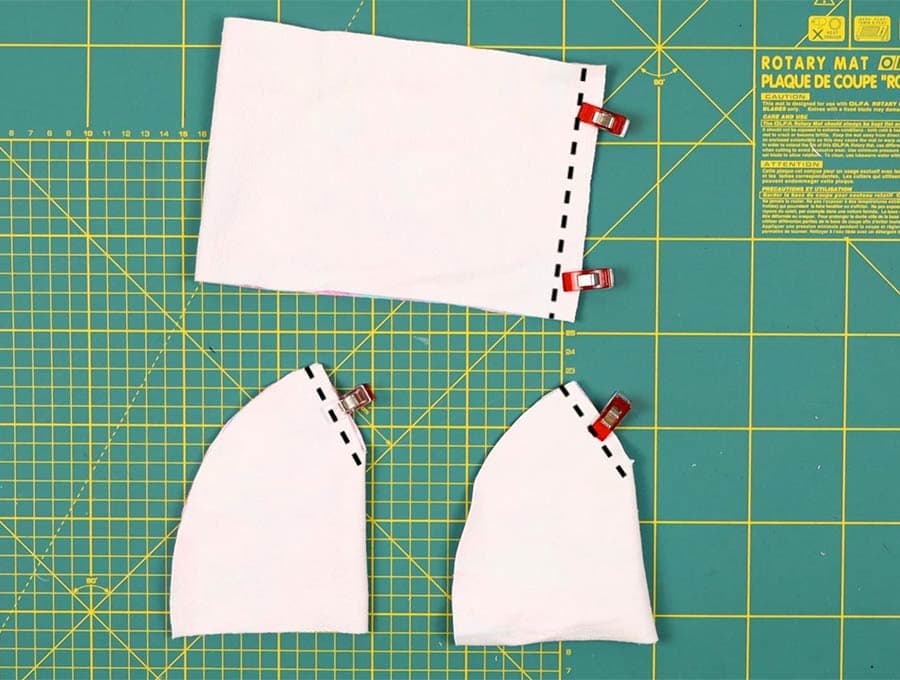
Step 4: Pin the darts and the band
Fold each side in half, with the wrong side outwards and pin in place, outside the dart area. Repeat with the other side of the hat.
Fold the band in half with right sides facing, meeting the short edges. Pin in place.
Step 5: Sew the darts and the band
On your machine use either a stretch stitch or a zig zag OR a straight stitch for an even edge to the dart and start by backstitching at the top (the larger side of the dart), then run the stitching down the marked line, ending just beyond the edge of the fabric and back stitching.
Do the same for the band
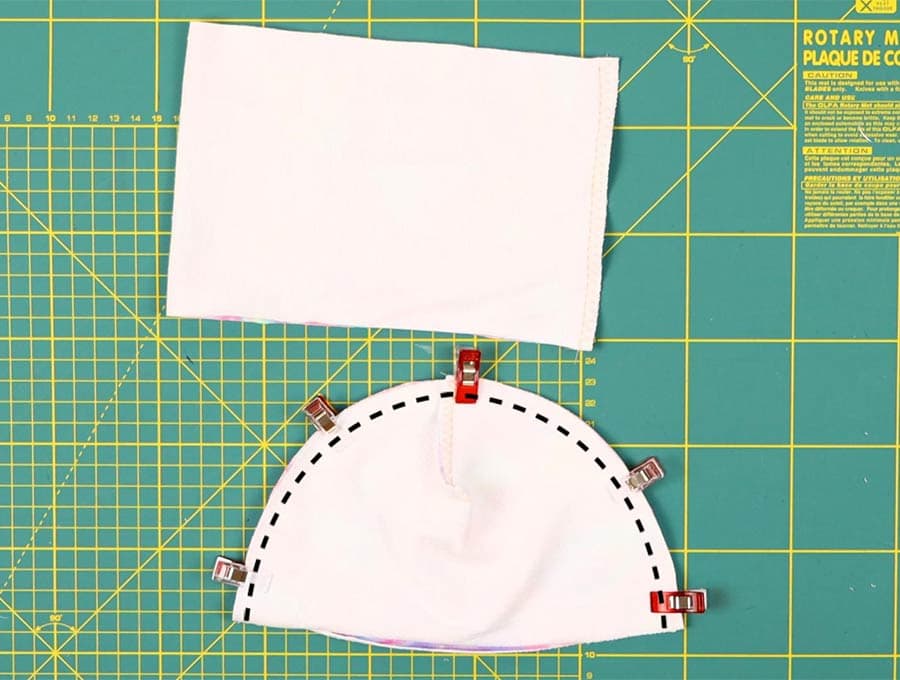
Step 6: Pin the top part of the hat
Remove the pins and open out your two pieces of the hat. Place them on top of each other, right sides facing and pin. MAke sure to pin the seam allowances at the very top in different directions to reduce bulk
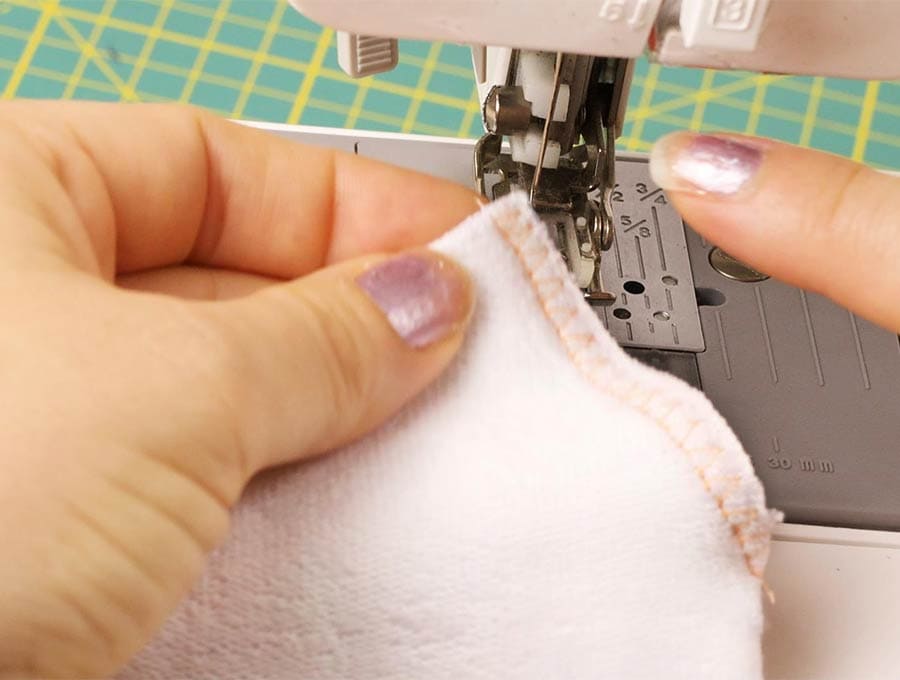
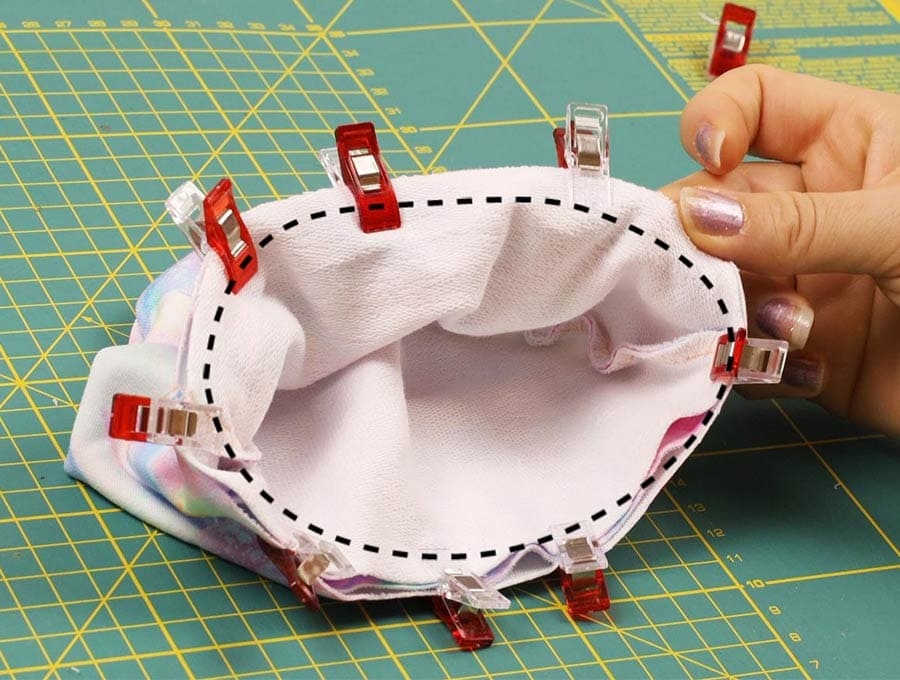
Step 7: Stitch the top curve
Set the machine to a zig zag stitch and run the machine stitch along the top curve. Starting from the base of the hat, stitch about ¼ inch (6mm) from the edge, back stitching at the start, then slowly working your way around the curve of the hat. Remember not to stretch the material as this will create a lumpiness – rather lift the pressure foot and allow the fabric to ease, then depress it again and stitch further around the curve, repeating when necessary until you reach the base on the other side of the hat where you will back stitch again before ending off and trimming the threads from the hat.
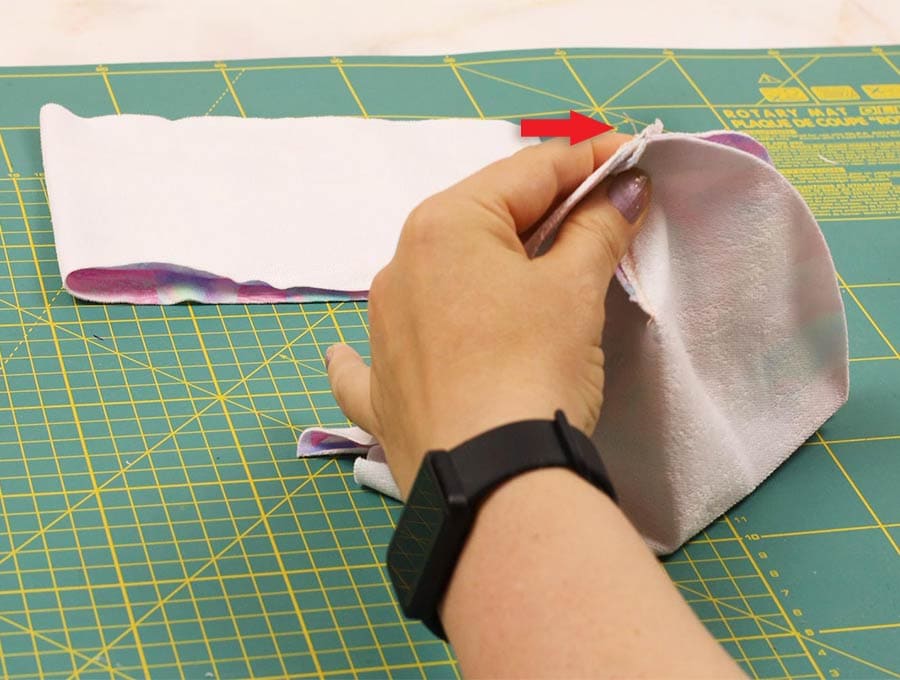
Step 8: Join the top and the band
Fold the band in half along the length, wrong sides together, meeting the raw edges.
Insert the top of the hat into the band, rights sides out. Align the raw edges of the band with the raw edges of the hat
Step 9: Stitch the band to the hat
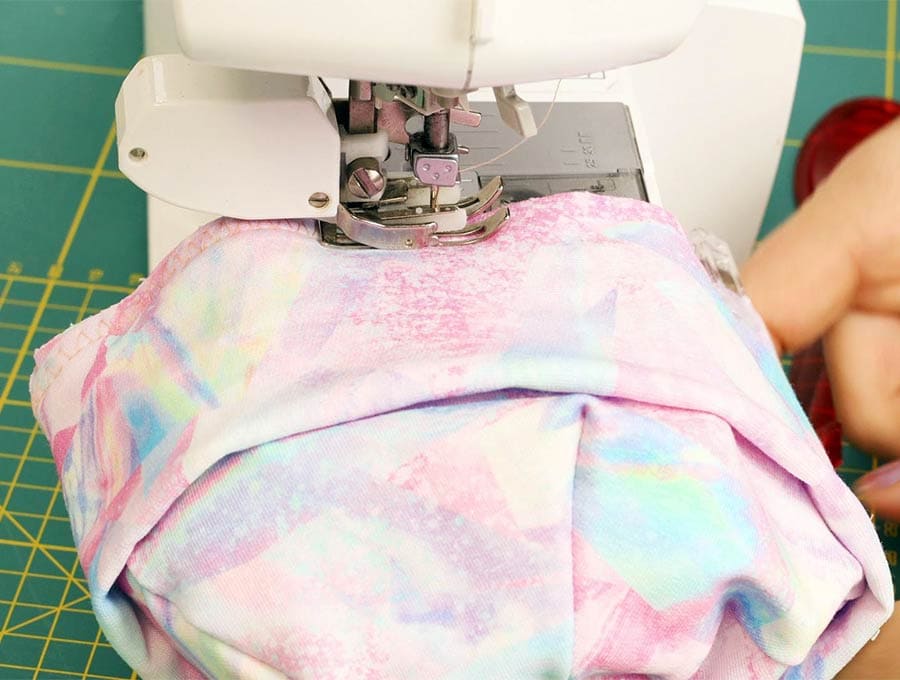
Stitch all around using stretch stitch or a zig zag stitch.
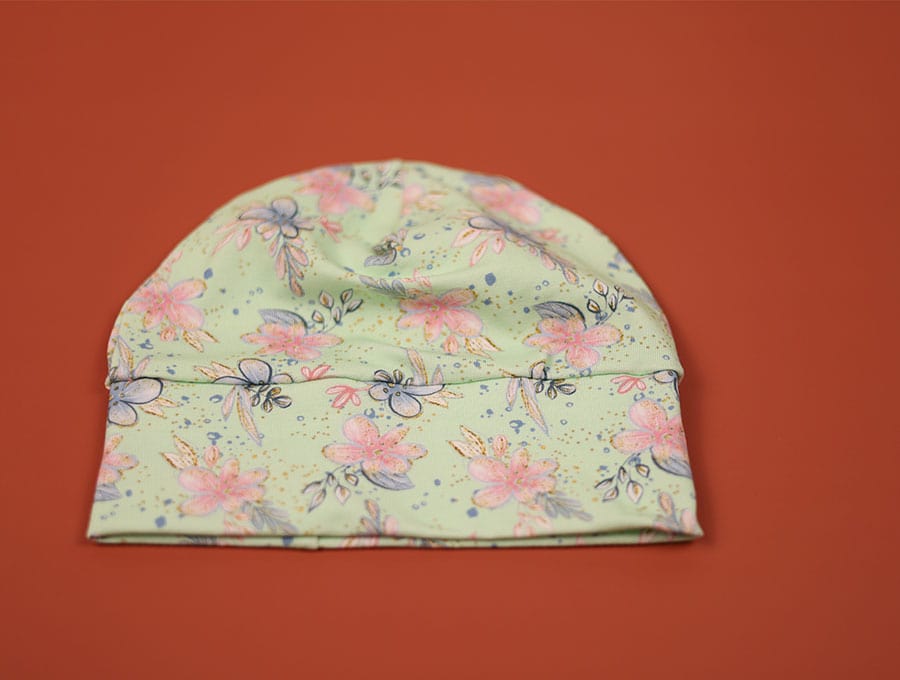
Voila, the hat is finished – it takes longer to explain than to actually do it. Once you know the method you will be able to produce a hat in around five minutes! If you want extra flair, you can add a pompom
Step 10: (optional) ADD a pom pom
All that remains is adding a pompom, if you chose. Pompoms look great on a hat for the day, but I would suggest night time hats are left plain for the most comfortable sleep for baby. Pompoms can vary from fairly small to quite large ones which make a statement. Alternatively, you can add a crocheted flower to the side of the hat, or whatever trim pleases you as long as it is baby safe. To add a pompom, use a knotted double thread on your hand sewing needle and push the needle through the centre crown of the baby hat from the inside, then through the pompom, stitching it firmly to the hat by repeating the step a few times. End off the thread by creating a knot. You do this by placing the needle through a loop in the thread, then pulling tight. Repeat a couple of times to make sure the thread is securely knotted, then trim the ends
The DIY baby hat is now ready for the new-born. Making a baby hat is a fun activity, and knowing that your little one will have something you’ve personally made for them can be rewarding. As you perfect the craft, you can explore different fabrics, colors, patterns, and incorporate other decorations such as crochet flowers, or appliques. I would personally tend to stay away from adding buttons or beads as they tend to be hard and can be uncomfortable if the baby falls asleep on the side the button or bead is added – they also pose a risk of being swallowed should they come loose.
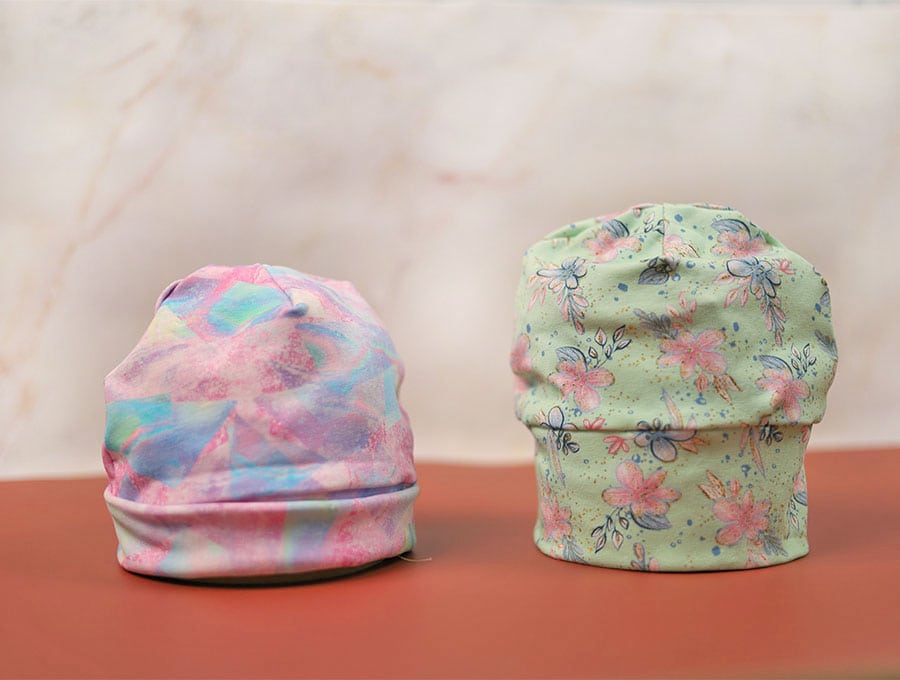
Get creative and enjoy this DIY baby hat project complete with the free baby hat pattern! I like to make a few baby hats at a time and stash them for those unexpected baby showers or as surprise gifts for new mothers. Having some sets of baby hats on hand, already wrapped in lovely tissue paper really makes gifting easy. The ability to make a baby hat in five minutes means you can match hats to various outfits and create unique looks for baby. If you enjoyed this project then we have plenty more easy baby projects lined up for you – simply click on our subscribe button and never miss out on a project.
Do you like this? Pin for later:
Wanna be friends? Click HERE and follow me on Pinterest
RELATED: