
How to Make a Hen Apron | Free Chicken Saddle Pattern
Making a chicken apron or hen saddle can certainly help stop bullying in your flock. People who keep hens will appreciate these nifty little garments that help stop chickens pecking and hurting each other. If they are made in bright colors it will make chickens, which blend into the undergrowth, easier to find and put in a safe coop for the night. The pattern is easy and can be made with elastic to fit onto the hen or you can use a snap fastener. Follow along for the steps to make this easy hen saddle.
Before we get into making the hen saddle let’s discuss the colors to use. It’s a great way to use up scraps of fabric but please avoid any fabric that has pink or red in it. Chickens have sensitive vision and these colors remind them of flesh and blood, so they would be more inclined to peck at a chicken if you give it a red or pink colored saddle, and that is precisely the behavior you are trying to break with the hen saddles.
Chicken eyes have four cones that let them see red, blue, green and ultraviolet light, whereas humans only have three cones to see red, blue and green light, with only around 25 % of humans having a fourth cone to enable them to see colors more accurately.
The hen saddle also protects the hen’s back when the rooster mounts her. If you don’t have roosters then the hen saddles or hen aprons may not be so necessary. Once the rooster’s claws have made a bald patch on the hen’s back and she has no feathers to protect her from the cold the hen saddle can keep her warm as the feathers regrow.
Below you will find my step by step chicken apron written tutorial with VIDEO instructions for all the visual learners.
We occasionally link to goods offered by vendors to help the reader find relevant products. Some of the links may be affiliate meaning we earn a small commission if an item is purchased.
Table of Contents
- 1 How to make a hen saddle
- 2 Supplies and tools
- 3 How to Sew a Chicken Apron
- 3.1 DIY Hen Saddle VIDEO TUTORIAL
- 3.2 DIY HEN SADDLE APRON INSTRUCTIONS:
- 3.3 STEP 1: Cut out the chicken saddle pattern
- 3.4 STEP 2: (optional) Only if using lightweight fabrics
- 3.5 STEP 3: Attach the elastic
- 3.6 STEP 4: Stitch the elastic
- 3.7 STEP 5: Layer fabrics
- 3.8 STEP 6: Stitch around the chicken saddle
- 3.9 STEP 7: Clip and trim the seam allowance
- 3.10 STEP 8: Turn around and press
- 3.11 STEP 9: Create a casing for the elastic
- 3.12 STEP 10: Topstitch
- 3.13 Step 11: (Optional) Decorate
- 4 Hen Saddle FAQs
How to make a hen saddle
Supplies and tools
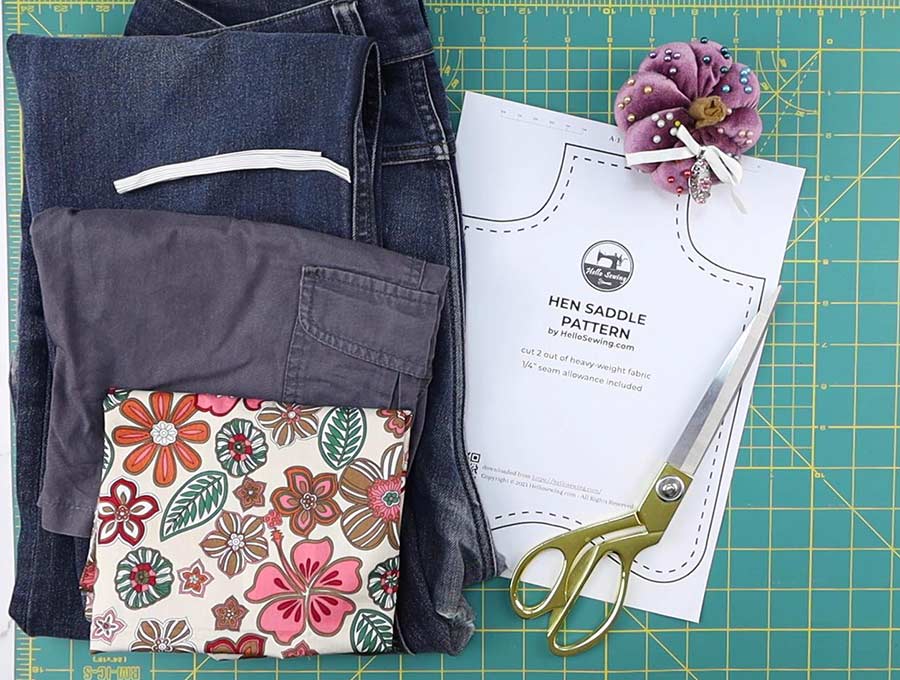
- fabric – 2 pieces of 100% tightly woven cotton (one main, one lining)
- 1/4″ flat elastic – 11″ long (27cm)
- matching thread
- scissors (or rotary cutter and a cutting mat)
- ruler or measuring tape
- iron and ironing board
- sewing clips or pins
- sewing machine
DOWNLOAD: hen apron or chicken saddle pattern(Free PDF file)
Follow us for free patterns & tutorials! [easy-profiles]
How to Sew a Chicken Apron
Watch the diy chicken saddle video first and then follow the written step by step instructions below.
Please enjoy and don’t forget to Like and SUBSCRIBE over on YouTube to be kept up to date with new videos as they come out.
DIY Hen Saddle VIDEO TUTORIAL
DIY HEN SADDLE APRON INSTRUCTIONS:
STEP 1: Cut out the chicken saddle pattern
Chicken saddles will need to be washed, so it is suggested you use a durable cotton – and you are sure to find plenty of pieces in your stash that would be suitable. Using the template supplied you will need to cut the outer piece and the lining as well as a fusible inter-lining to give the hen saddle or hen apron more body so it protects the chicken and keeps her warm.
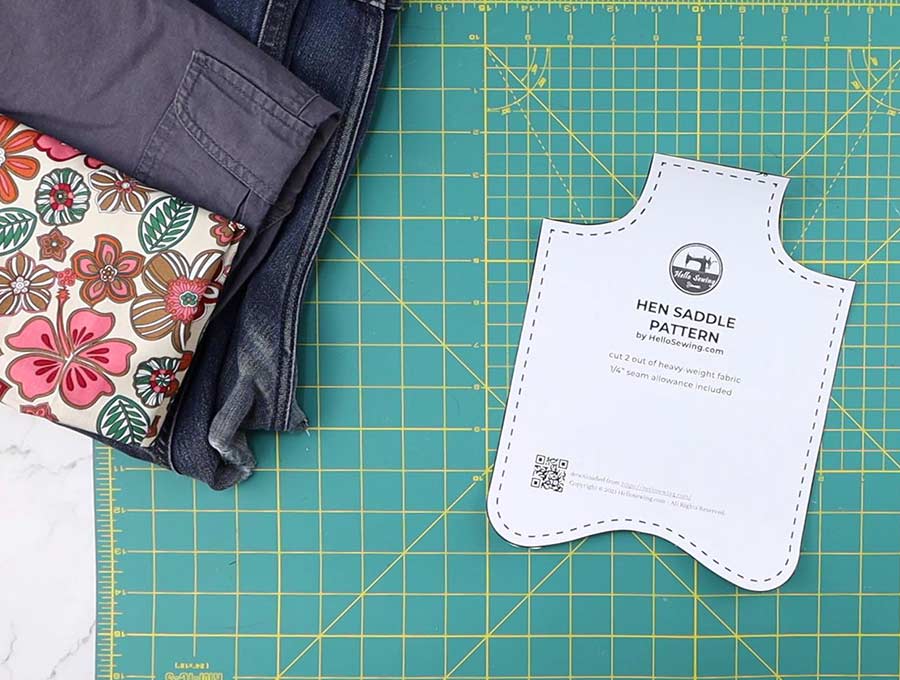
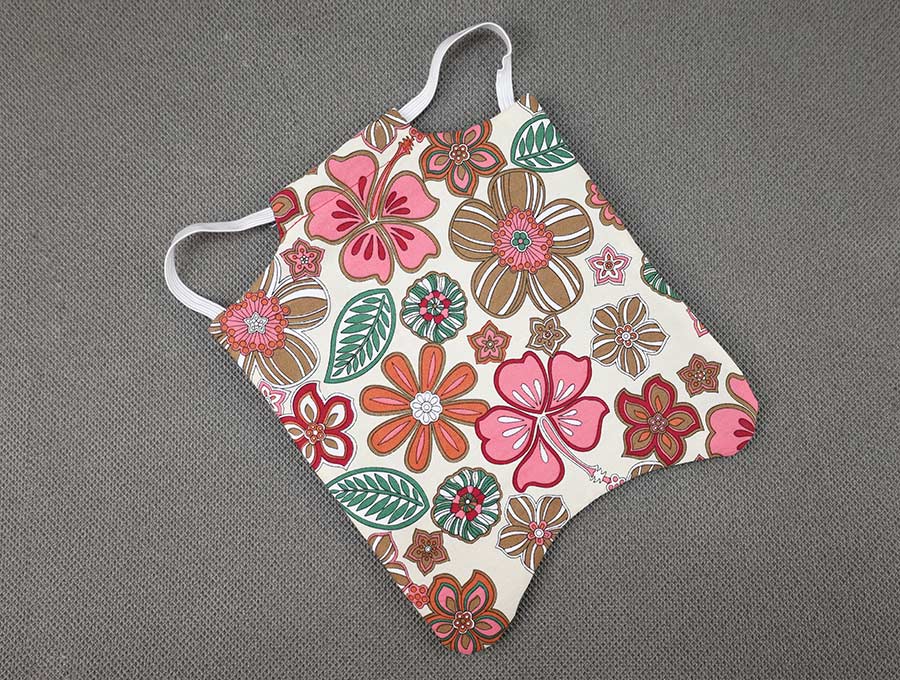
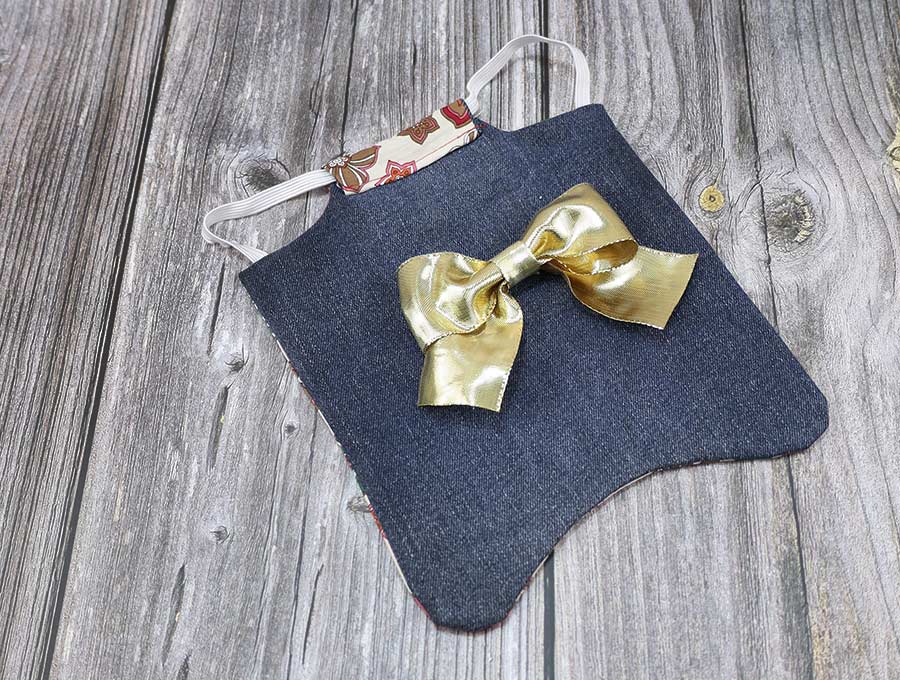
Cut an outer and inner piece from the free chicken saddle pattern supplied (link to get the pattern above). The chicken apron can be reversible if you choose two prints.
STEP 2: (optional) Only if using lightweight fabrics
Cut the fusible inter-lining just ¼ inch (6mm) smaller all round than the outer piece. This is to avoid bulkiness on the seams when you stitch the hen saddle.
Attach the fusible interlining according to the manufacturer’s instructions to the wrong side of the outer layer of fabric, lining it up carefully so there is a ¼ inch (6mm) seam allowance all around.
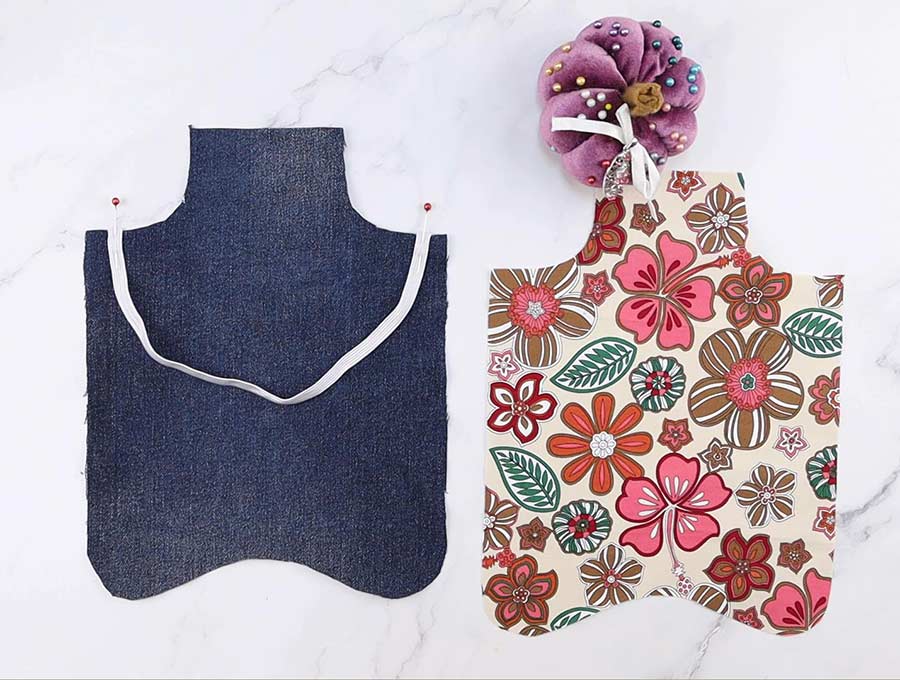
STEP 3: Attach the elastic
Lay down the outer piece on your worktop with the right side facing you and pin or the ends of your 10-inch (25cm) piece of elastic approximately 1/8″ (3mm) in from the stitching line (dashed line on the pattern – check the image below to see the placement). If you have very large hens your elastic may need to be longer – 11 inches (27cm) should be sufficient for most large hens. To ensure the elastic doesn’t get tangled with the seam when you stitch the saddle pieces together take a safety pin and pin the elastic approximately in the middle to the middle of the outer piece.
STEP 4: Stitch the elastic
Stitch the ends of the elastic in place, back tacking a couple of times so the elastic is secured firmly to the right side of the outer piece – stitch between the marked seam allowance and the edge of the fabric.
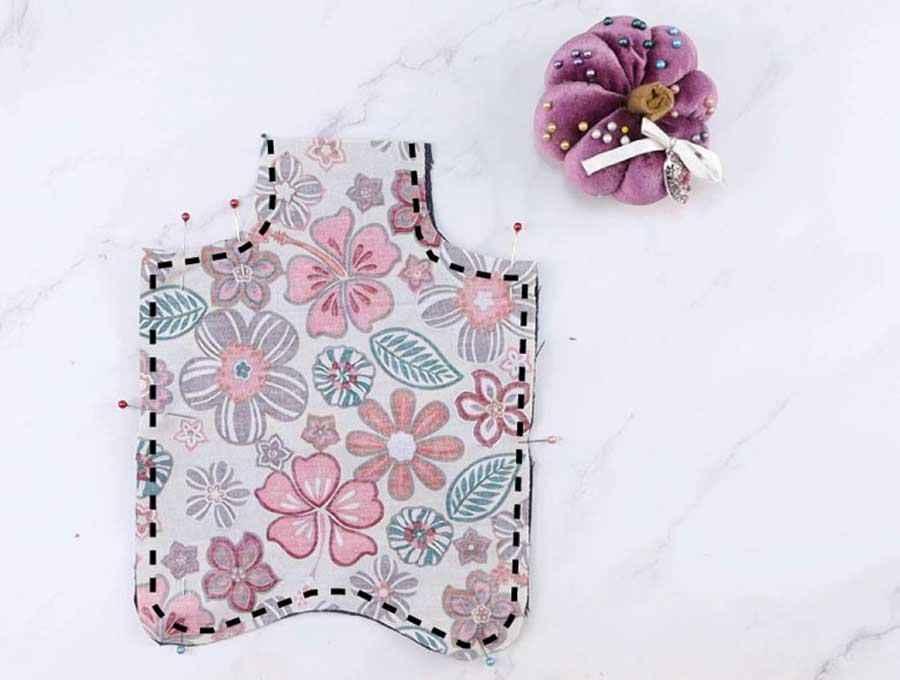
STEP 5: Layer fabrics
Carefully place the inner piece over the outer piece, right side to right side. The wrong side should be uppermost. Pin or clip in position. Once you have turned the hen saddle the fusible lining will be inside and you will have the right sides of the prints showing.
STEP 6: Stitch around the chicken saddle
Stitch right around the chicken saddle, back-tacking across the two points where the elastic is secured. To keep corners neat leave the needle in the fabric at the corners, but lift the machine foot so you can turn the fabric. Back tack at the start and end to create a strong seam. Do not sew across the narrow end near the chicken’s neck – you will be turning the fabric through this opening. This is to allow you to make a casing for the elastic later.
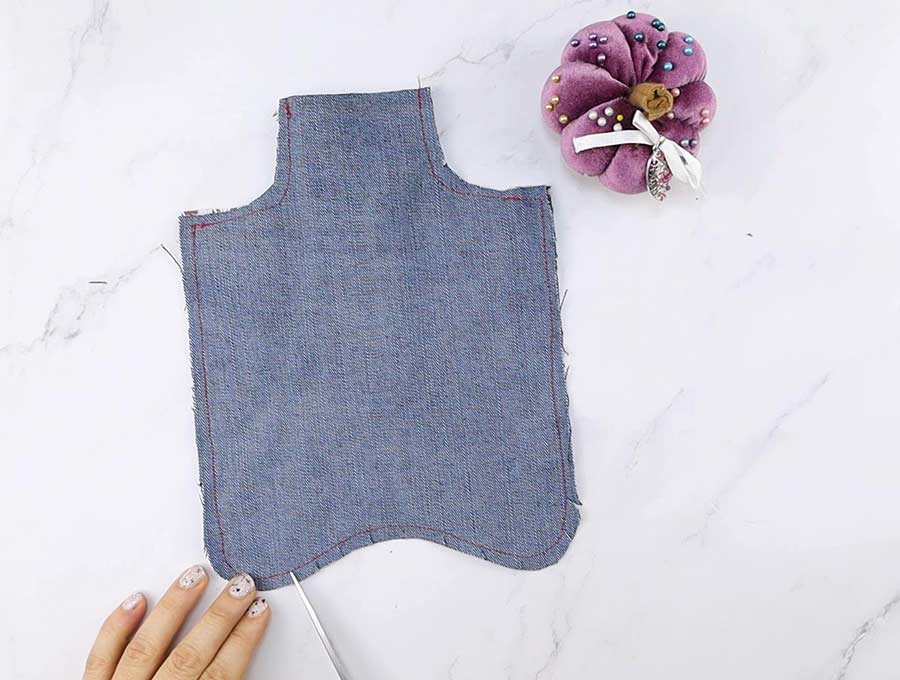
STEP 7: Clip and trim the seam allowance
Clip the curves and trim the fabric across the ends at the corners, taking care not to cut too close to the stitch line.
STEP 8: Turn around and press
Turn the hen saddle or hen apron the right way out by pulling the fabric through the gap. Use a chopstick or knitting needle to carefully turn out the corners so they are smooth and neat, then give it a press with a warm iron after removing the safety pin that held the elastic out of the way of getting tangled in the seam.
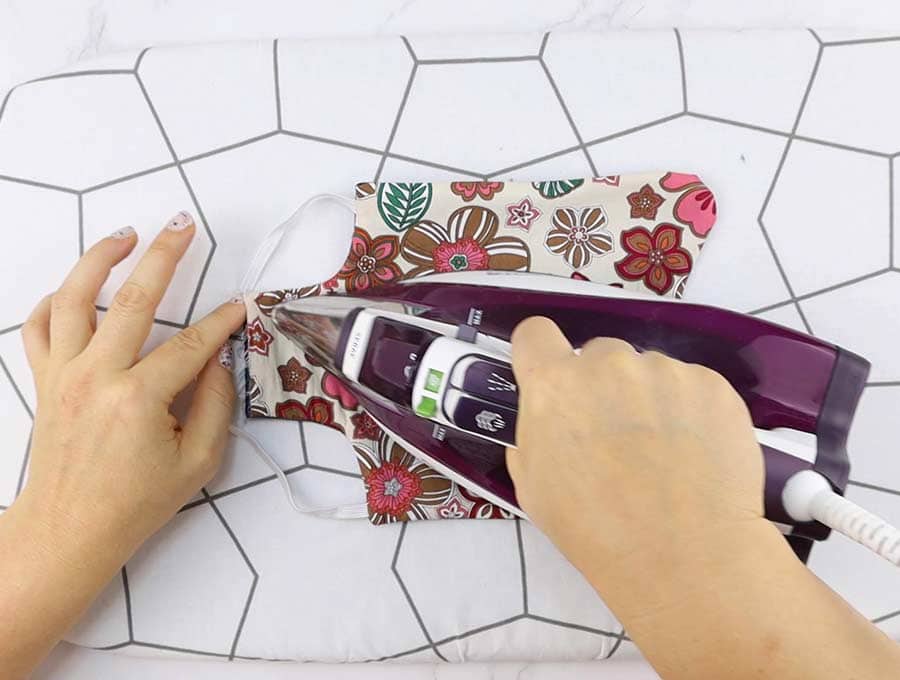
STEP 9: Create a casing for the elastic
Time to finish off the hen saddle now by turning in the seam across the top and creating a casing for the elastic. This is a little tricky as you will be stitching the casing with the elastic inside it, but you want to be sure not to stitch through the elastic, so it can slide freely.
Press flat. Now fold the top neck part down 1/2″ (1.3cm) twice so the raw edges are inside and the outside is smooth, and then position the elastic inside the fold, making sure it is not twisted, pinning on the outer edge right at the edge of the fabric. Test that the elastic is not caught in the pins and can run freely through the casing.

STEP 10: Topstitch
Stitch along the bottom fold as close to the edge as possible.
Step 11: (Optional) Decorate
It is optional, but to give the saddle a neat finish you can topstitch all around the edge of the saddle, except for the side where the elastic casing is situated. You can attach a cute bow or use a pleated trim around the bottom edge.
Hen Saddle FAQs
Q: When should I put the hen saddle on the hen?
A: It should be placed on the hen before the rooster is released to the hens to prevent damage to the skin on her back and prevent her from losing feathers. It can also be placed on all hens when you are introducing new members to the flock as there may be a bit of scuffling as they establish their pecking order. It can also be placed on a chicken that the others seem to be picking on. Just monitor the situation to make sure weaker chickens are not bullied. They may need to be placed somewhere safe until they are stronger.
Q: Why is it called a chicken apron?
A: Similar to the way a chef wears an apron to protect from accidental spills and hot food, the apron gives the chicken some protection. It does seem to be an odd name as an apron is worn across the stomach, whereas the chicken apron is worn across its back. A chicken-saddle would be a more accurate description of the fabric covering.
Q: Do hen saddles actually help?
A: Yes, they do, otherwise people wouldn’t be putting them on their hens – it is not a silly fashion accessory for hens but a practical help to give a chicken some protection and keep them warm if they have lost feathers. It also allows you to put medication on a bare patch, or broken skin on the back, and cover it from flies, which would otherwise lay eggs and create maggots in the wound.
Q: Should hens wear chicken aprons all the time?
A: Only put the hen saddles or hen aprons on the hen when it is necessary – either to prevent damage or allow her a chance to recover after being hurt. They should not be worn all the time.
Q: How to I put the chicken apron on the hen?
Catch the hen and with her securely held on your lap gently fit the chicken saddle to your hen by placing it on her back and slipping the elastic loops over her wings, making sure the saddle is aligned down the center of her back. The hen saddle is comfortable and when she flaps her wings after releasing her the saddle will adjust to the hen and keep her warm and safe.
Q: Can I decorate the chicken saddle?
A: By all means get creative and add a ricrack (zig-zag) trim around the edge, or other braids of your choice. I’d just stay away from beads or bobbles that the chickens may be tempted to peck off.
If you enjoyed this chicken saddle pattern and tutorial then please hit the subscribe button to have more ideas delivered to your inbox. We have loads of practical ideas to use up the small bits in your fabric stash. Once you get going on the chicken apron it will be fun to make some in Halloween colors, with Christmas prints, and for all sorts of special occasions. The people who keep hens will be delighted. Just stay away from pink and red fabric – for the chicken’s sake.
Do you like this? Pin for later:
Wanna be friends? Click HERE and follow me on Pinterest
RELATED: