
DIY Chicken Coasters with Free Sewing Pattern
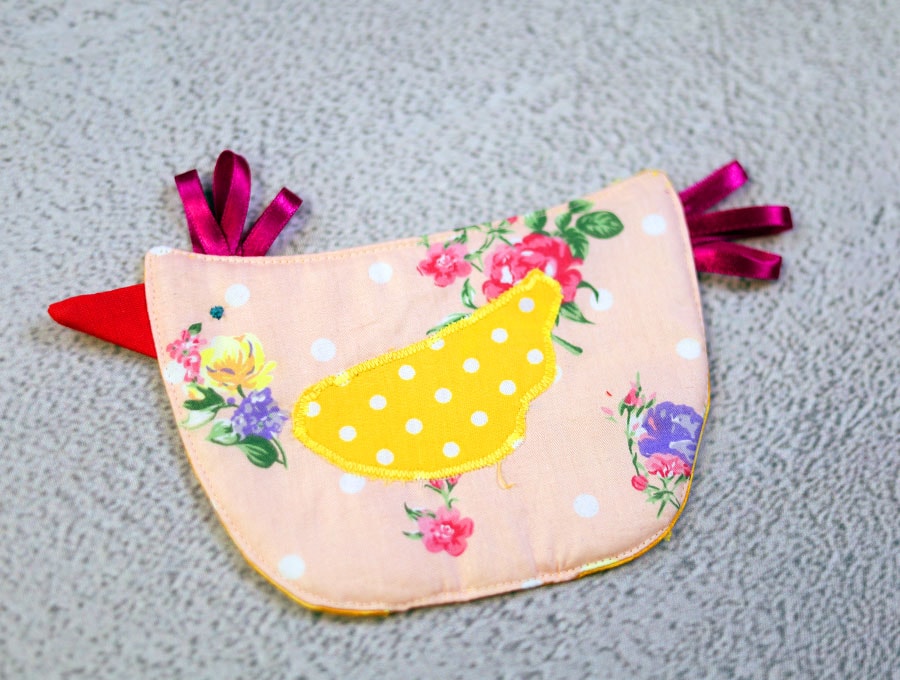
Start the day on a happy note with the cheerful chicken coaster. Use our handy printable pattern to create this cute reversible chicken coaster – perfect for someone who loves their chickens and great for the breakfast table. It uses small pieces of fabric from your stash – we love zero waste projects. It can be made quite quickly and makes a perfect project to get kids involved in as they select the colors for the chicken and match the pattern pieces to the fabric.

Add a playful and charming touch to your home decor with these chicken coasters! Whether you’re hosting a cozy dinner or simply enjoying a cup of coffee, these adorable coasters will bring a smile to your face.
Not only are they a fun project to sew, but they’re also practical, protecting your surfaces from coffee rings and spills. With their bright colors and quirky design, these chicken coasters will make a wonderful addition to your table setting or even as a thoughtful handmade gift. Grab the free chicken coaster pattern (below) and let’s sew this
Below you will find my step by step written tutorial with VIDEO instructions for all the visual learners.
We occasionally link to goods offered by vendors to help the reader find relevant products. Some of the links may be affiliate meaning we earn a small commission if an item is purchased.
Table of Contents
- 1 How to make Chicken Coasters
- 2 Supplies and tools
- 3 How to Sew a Chicken Coaster
- 3.1 Chicken Coaster VIDEO TUTORIAL
- 3.2 INSTRUCTIONS:
- 3.3 STEP 1:
- 3.4 STEP 2:
- 3.5 STEP 3:
- 3.6 STEP 4:
- 3.7 STEP 5:
- 3.8 STEP 6:
- 3.9 STEP 7:
- 3.10 STEP 8:
- 3.11 STEP 9:
- 3.12 STEP 10:
- 3.13 STEP 11:
- 3.14 STEP 12:
- 3.15 STEP 13:
- 3.16 STEP 14:
- 3.17 STEP 15:
- 3.18 STEP 16:
- 3.19 STEP 17:
- 3.20 STEP 18:
- 3.21 STEP 19:
- 3.22 STEP 20:
- 3.23 STEP 21:
How to make Chicken Coasters
This adorable chicken coaster measures approximately 14 x 10 cm or 5 1/2″ x 4″ (main body) and is a lovely addition to any table
Supplies and tools
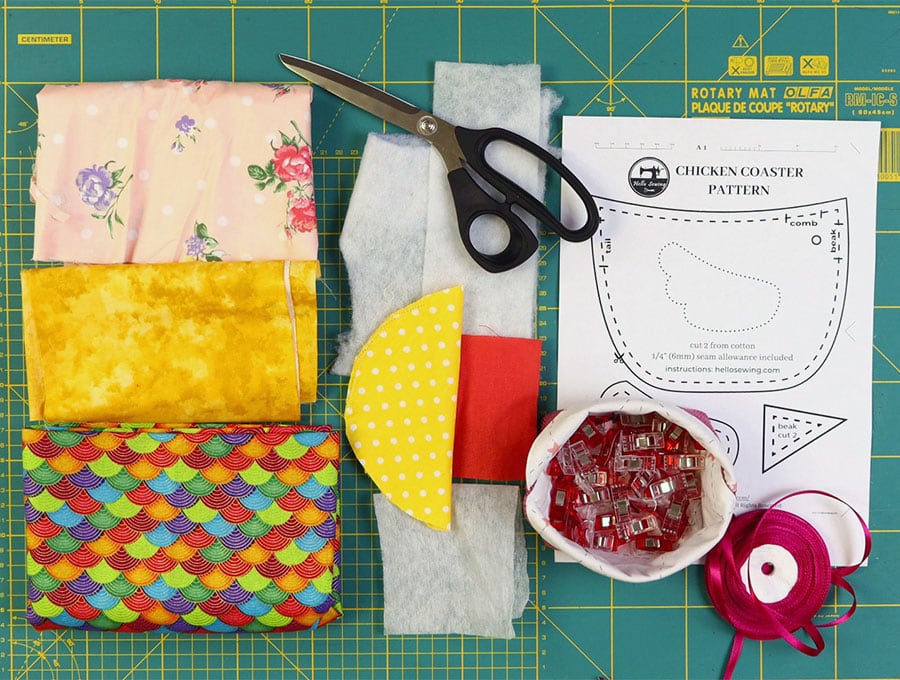
- fabric – 2 pieces of 100% tightly woven cotton (one main, one lining)
- fusible interfacing
- wadding
- twisty ties or rubber bands
- matching thread
- scissors (or rotary cutter and a cutting mat)
- ruler or measuring tape
- iron and ironing board
- sewing clips or pins
DOWNLOAD: chicken coaster sewing pattern [Free pdf file]
Follow us for free patterns & tutorials! [easy-profiles]
How to Sew a Chicken Coaster
Watch the diy chicken coaster video first and then follow the written step by step instructions below.
Please enjoy and don’t forget to Like and SUBSCRIBE over on YouTube to be kept up to date with new videos as they come out.
Chicken Coaster VIDEO TUTORIAL
INSTRUCTIONS:
STEP 1:
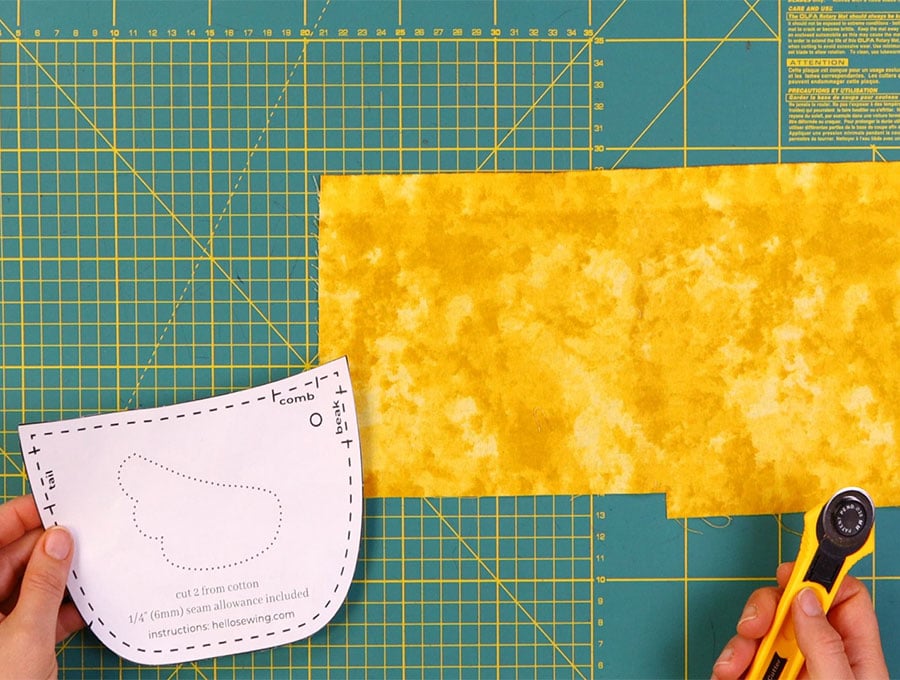
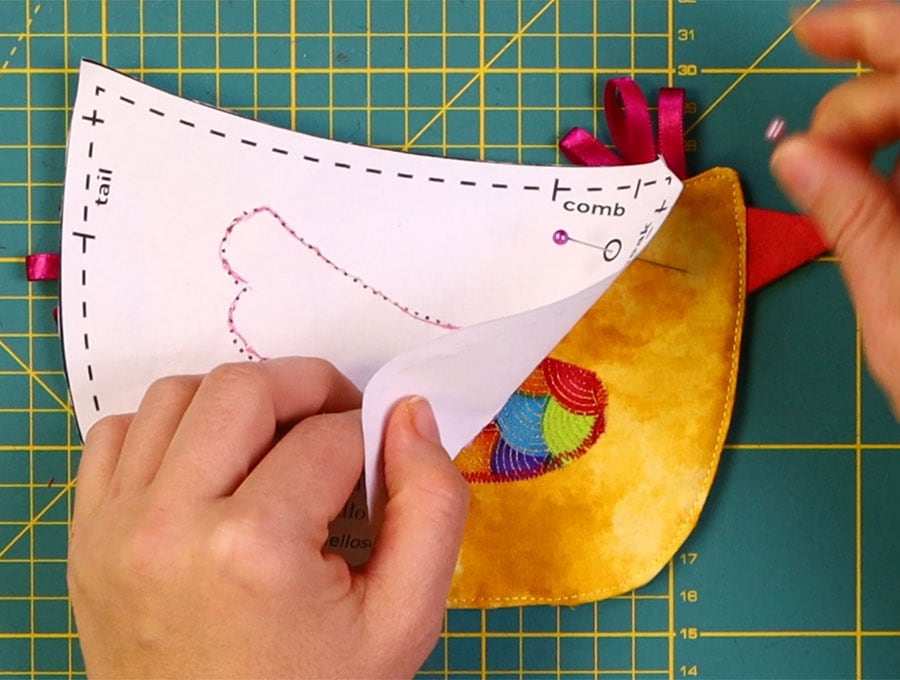
Print out the handy pattern and cut the beak, body and wing pattern pieces out, then check your fabric scraps for suitable sizes for the parts of the chicken.
STEP 2:

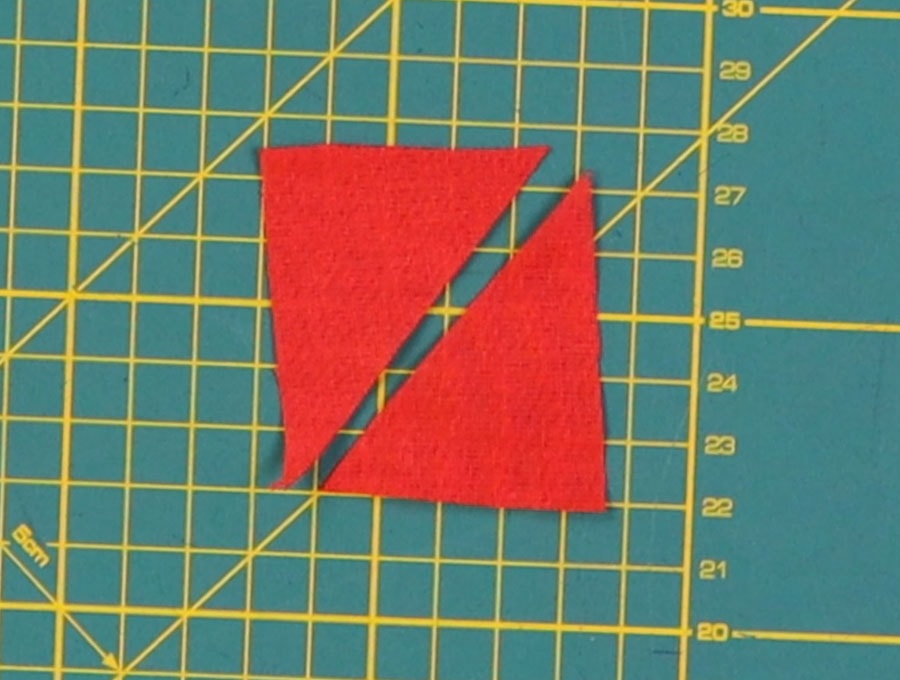
Once you have two pieces, one for the front and one for the back of the chicken body, place the two pieces right side to right side and cut out the shape.
Alternative Method: If your pieces are quite small you may need to do some juggling for the sizes. So, cut out the shape of the body of the chicken for the front, then flip the pattern and cut out a piece from the backing fabric.
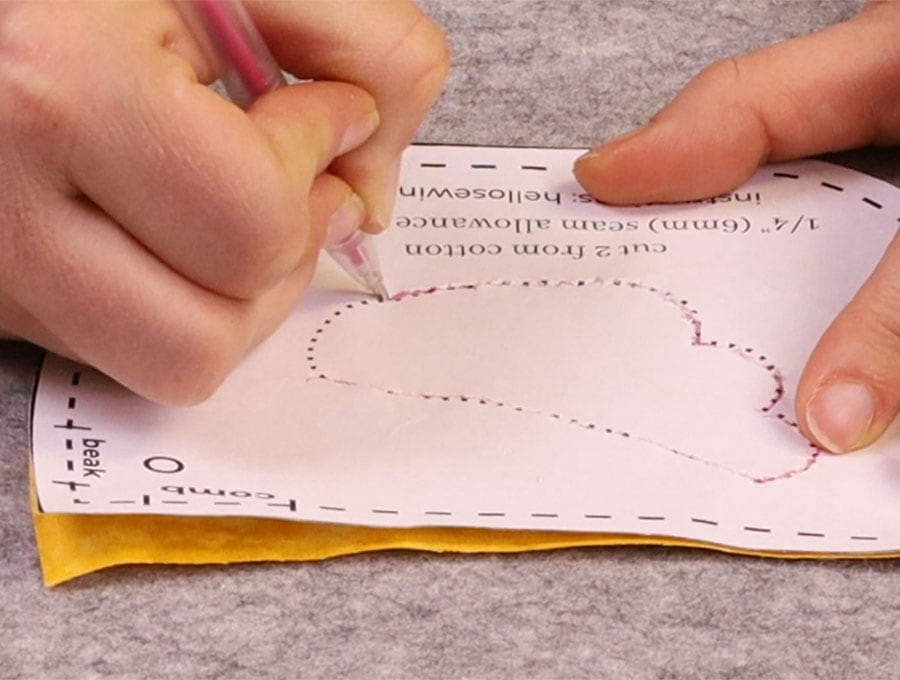
Mark the positions for the wing, beak, comb and tail, which will be added later, on one side of the body shape, and set aside.
STEP 3:
Cut the beak from red or yellow fabric – place the scraps of fabric right side to right side and cut the two pieces for the beak. Then cut the interfacing from the same pattern – right side to right side of interfacing.
STEP 4:
Turn over the beak pieces, wrong side upward, and match the interfacing pieces over the beak pieces, fusible side down. Use your iron and press to attach. Once done clip or pin the beak pieces together, right side to right side, and set aside to sew later.
STEP 5:
Fold you fusible interfacing in half and place the wing shape over it and cut out.
STEP 6:
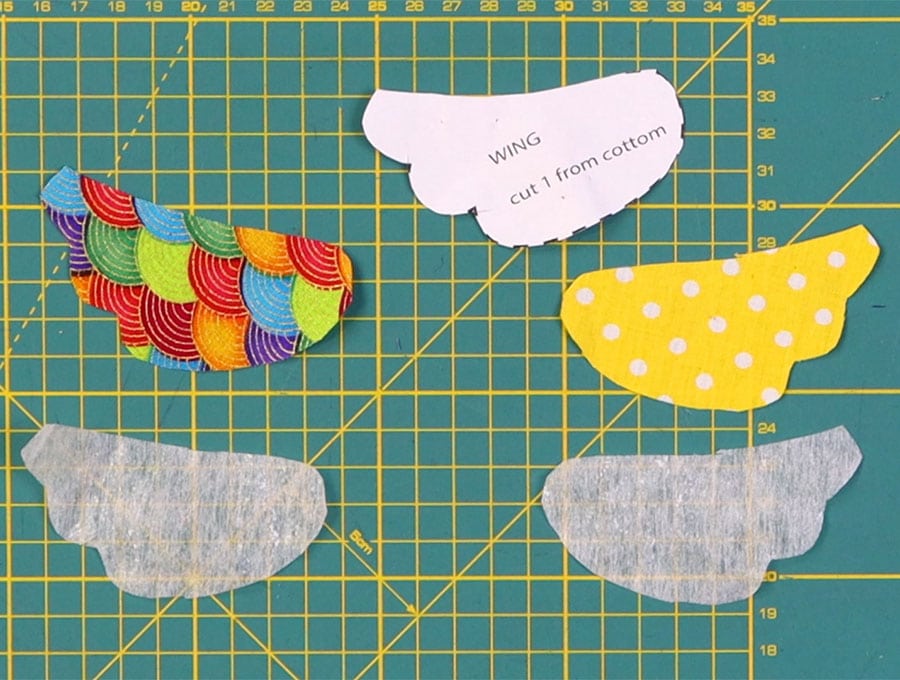
Choose the fabric for the wing front to complement the fabrics on the front and back of the chicken body. Place the two fabrics right side to right side and cut out the wing shapes.
STEP 7:
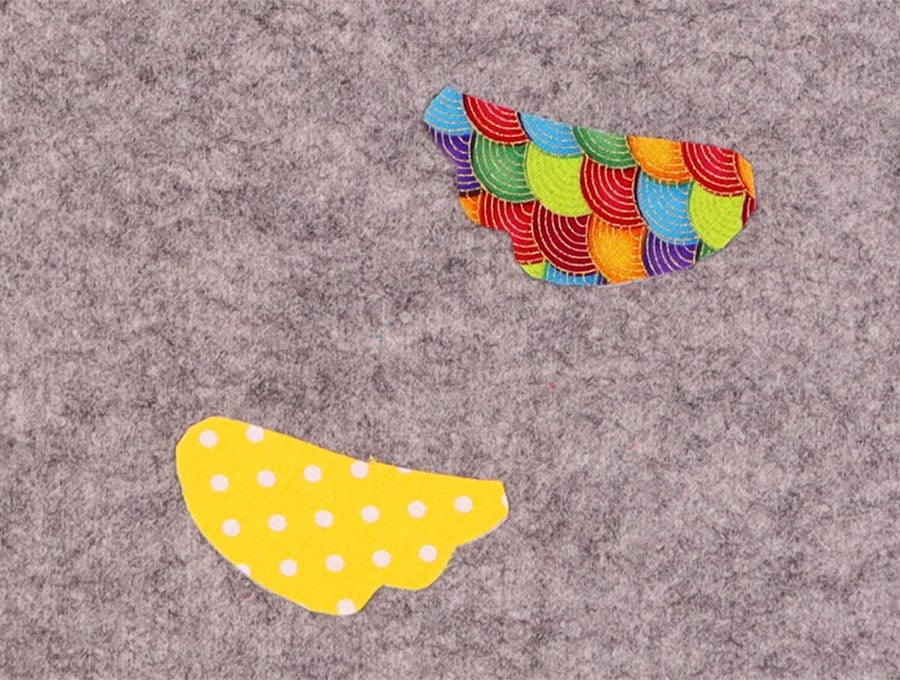
Place the wing pieces wrong side up on your ironing board, and over them place the interfacing, fusible side down, and press to attach with your iron.
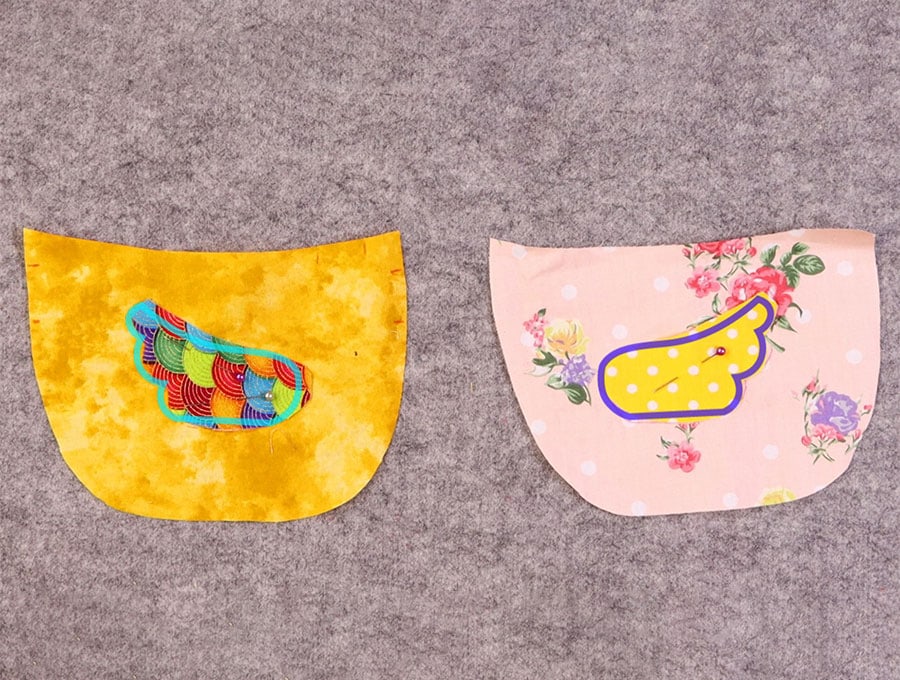
STEP 8:
Place the wings in position on the front and back of the body pieces, using the marking on the paper pattern as a guide. Pin in position, then using a tight zigzag set to length .6 and width 3.6, stitch all the way around the edge of the wings.
STEP 9:
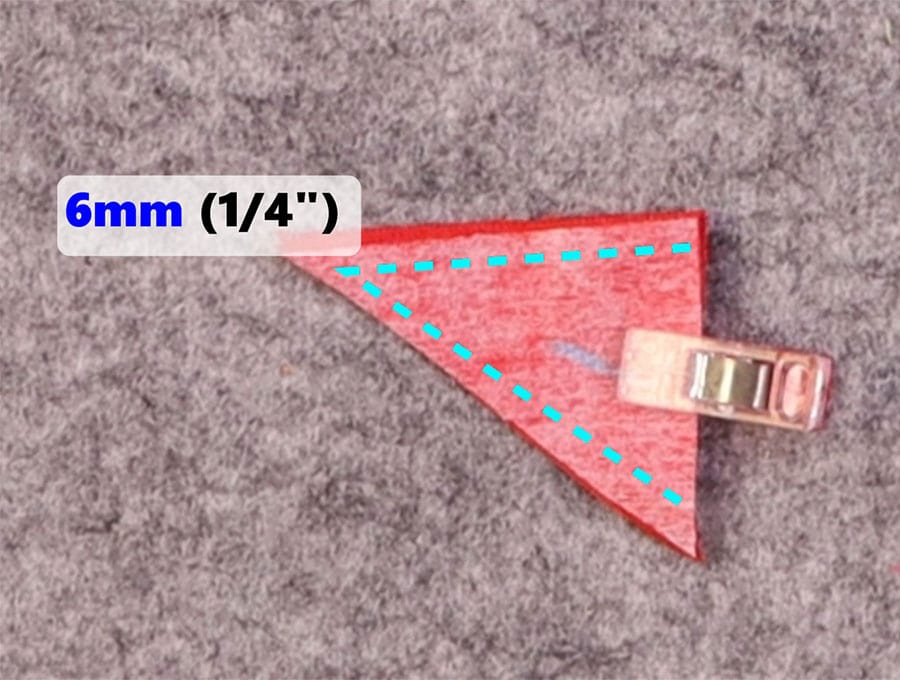
Stitch around the two sides of the beak piece ¼ inch (6 mm) from the edge, leaving the base of the beak open.
STEP 10:
Turn the beak right way out and press.
STEP 11:
Pin the beak in position on the marks on one side of the chicken body, with the raw edges of the beak lining up with the raw edge of the body and the beak facing inwards to the fabric.
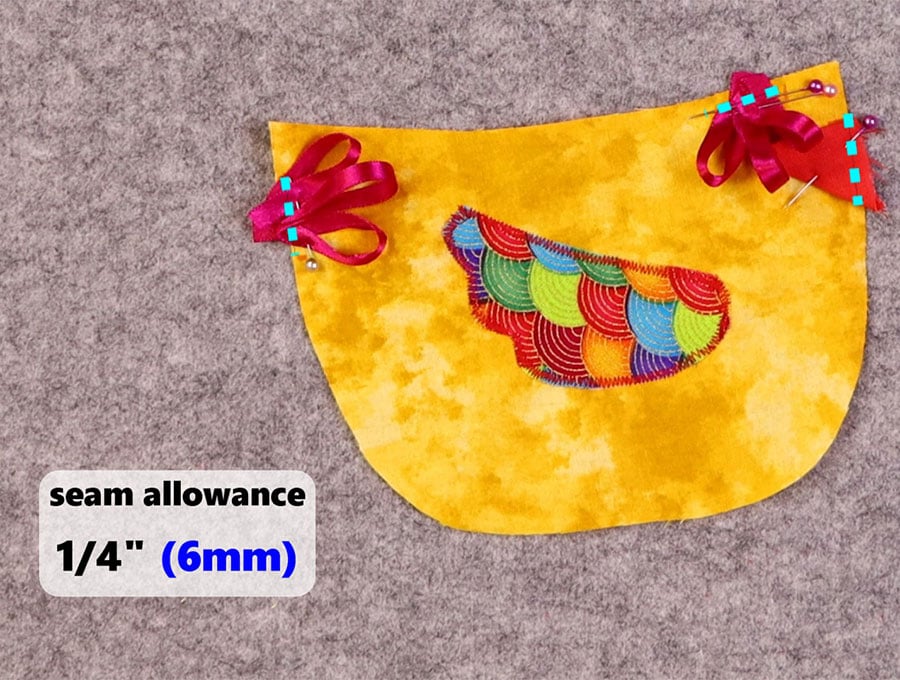
STEP 12:
On the same body piece you pinned the beak, pin the tail after making three loops with the ribbon in the marked position – loops facing in towards the main part of the fabric and ensuring the ends of the ribbon just extend over the raw edges.
STEP 13:
Make another three loops from the grosgrain ribbon for the comb and pin in position on the marks, loops facing in to the main body of the fabric.
STEP 14:
Stitch the beak, tail and comb to hold them in position less than ¼ of an inch (6mm) from the edge.
STEP 15:

Cut one piece of wadding for the coaster using the chicken body pattern piece.
STEP 16:
Place the side with the beak and comb attached right side up on your worktop. Over it place the other body piece right side to right side and on top of that place the wadding, then clip all the layers in place.
STEP 17:
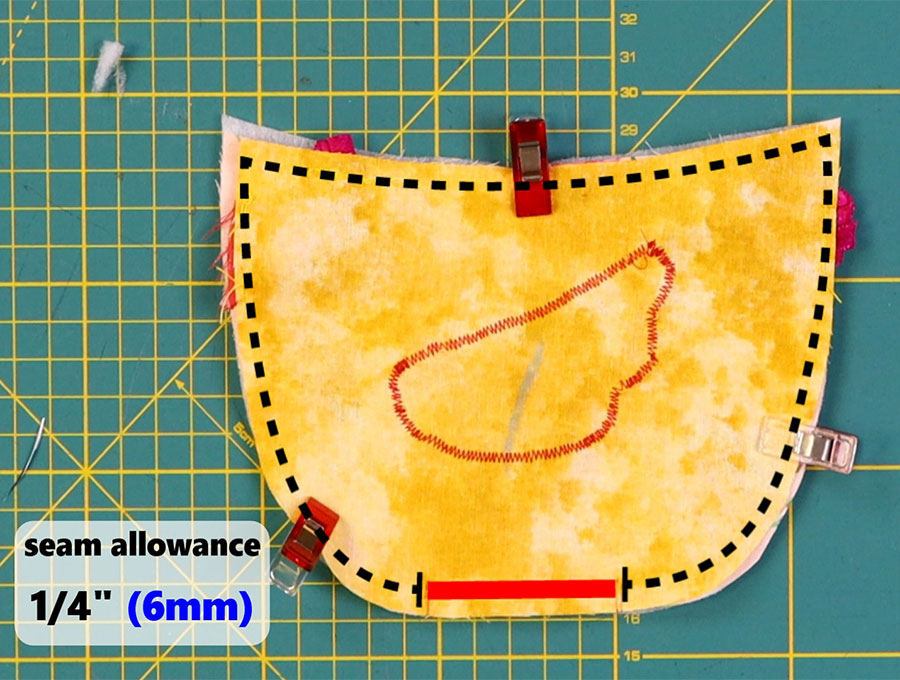
Stitch around the edge, on the wrong side of the piece you attached the beak, tail and comb, using a ¼ inch (6mm) seam allowance, so you can be sure you are stitching inside the lines of stitching you used to attach the parts. Leave a gap of around 2 inches (5cm) in the belly section of the chicken to allow you to turn the coaster the right way out.
STEP 18:
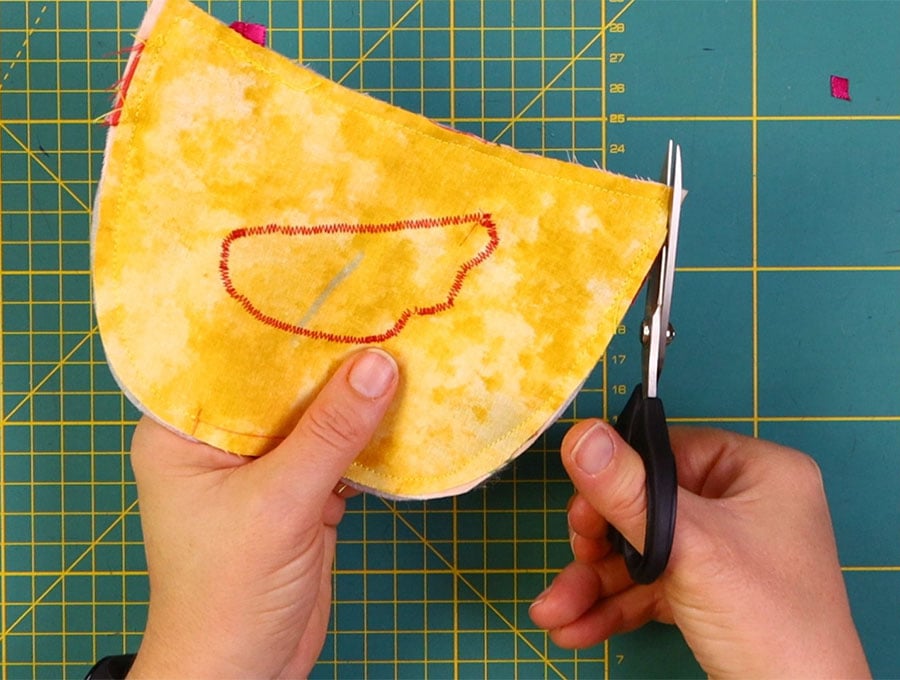
Trim the corners and make small nicks in the fabric taking care not to get too close to the stitch line so the material will ease once the coaster is turned right way out.
STEP 19:

Turn the coaster right way out, turning in the edges of the gap and pinning. Ensure the fabric is fully pressed out and lies flat before pressing.
STEP 20:
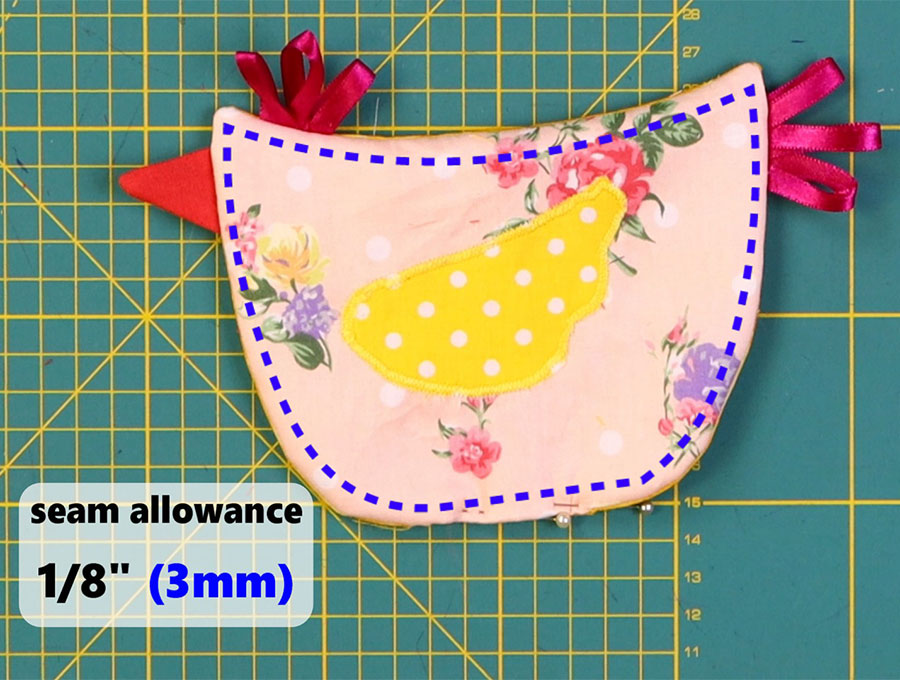
Top stitch around the edge of the chicken body 1/8 of an inch (3 mm) from the edge, including over the gap.
STEP 21:
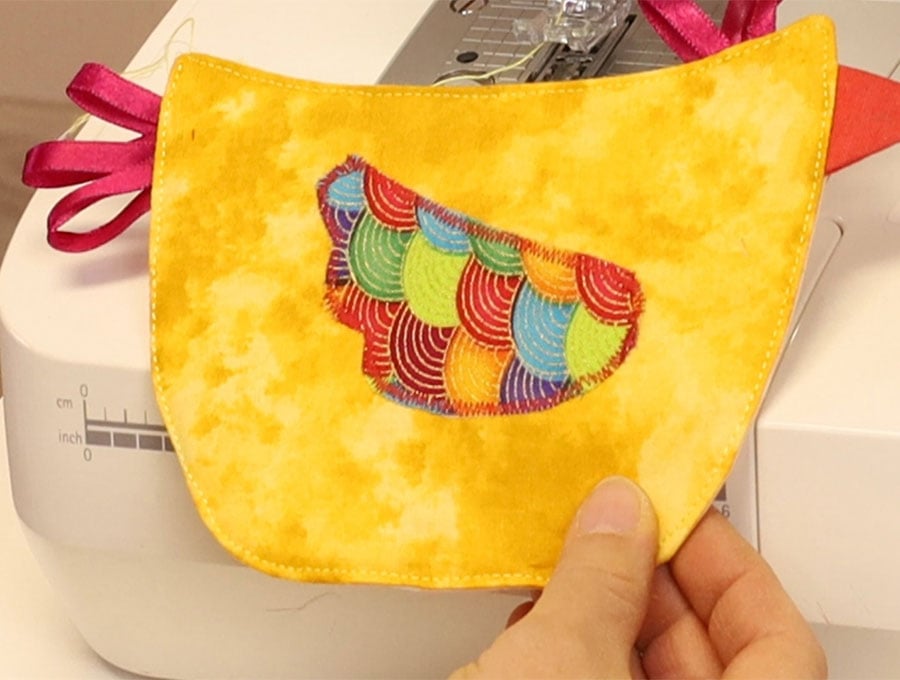
The last step is to stitch in the eye – use your pattern to mark the position of the eye with a fabric marking pen, then embroider the eye in a circle using a black thread, ensuring it looks good on both sides.

The Coaster is reversible – if you choose complementary colors you can flip the coaster to suit the occasion.
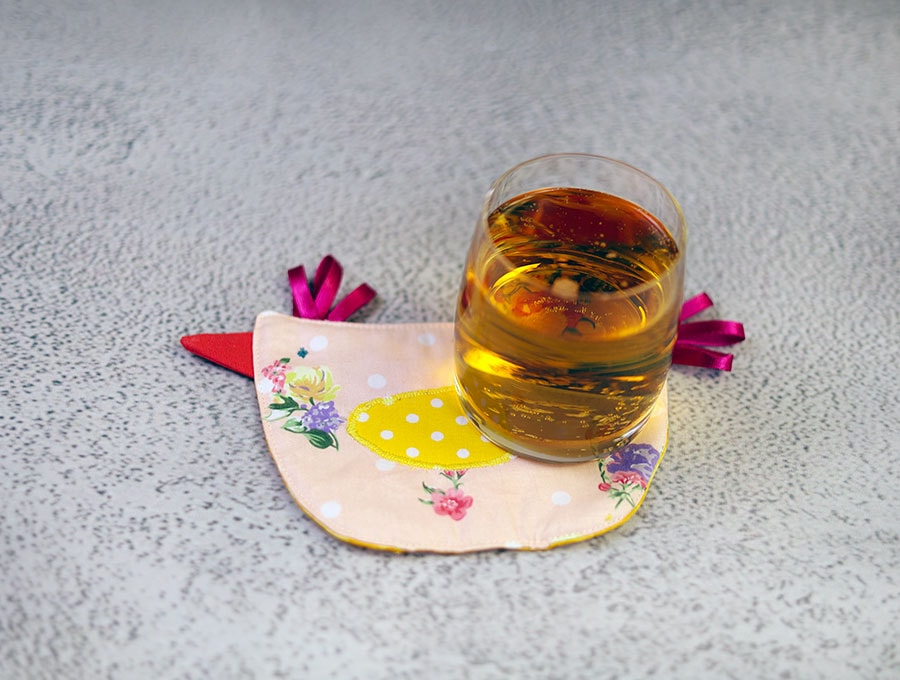
Like and subscribe for more fun projects, and share with someone who loves chickens, so they can enjoy a morning mug of tea or coffee with the cheerful chicken coaster to keep surfaces protected, and start the day with a smile.
Do you like this? Pin for later:
Wanna be friends? Click HERE and follow me on Pinterest
RELATED: