
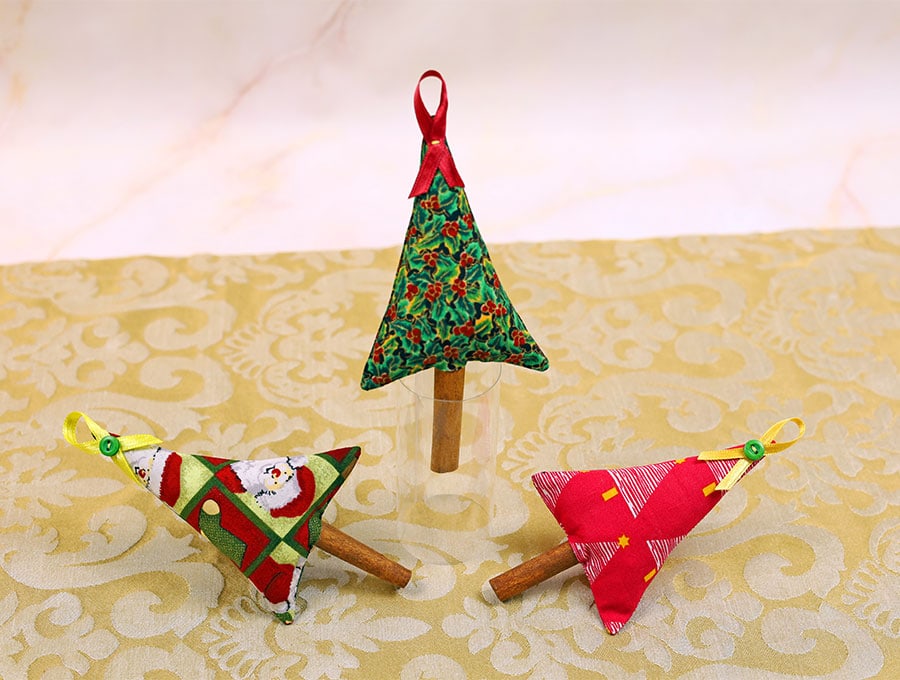
DIY Cinnamon Stick Christmas Tree Favors / Decoration
Making tree decorations brings the family together, and this is a straightforward decoration that even toddlers can have a hand in creating. The Christmas tree trunk is made of a stick of rolled cinnamon, adding another dimension as the cinnamon subtly scents the room. You can also make simple Christmas trees to decorate the plates. Use a silver or gold glitter pen to write people’s names on the tree, and they become place cards. Guests can take them home to hang on their trees to remind them of the Christmas spent at your home!

Watch our easy-to-follow visuals to make the simple Christmas tree ornament in minutes. It’s a perfect project for involving young kids in preparing for the festive season. Our step-by-step instructions are easy to follow, and within minutes, you’ll be turning out these little ornaments. It’s a great way to use up what you have in your fabric stash instead of spending on plastic ornaments. These simple fabric Christmas tree ornaments will last for years if properly looked after.
Below you will find my step by step written tutorial with VIDEO instructions for all the visual learners.
We occasionally link to goods offered by vendors to help the reader find relevant products. Some of the links may be affiliate meaning we earn a small commission if an item is purchased.
Table of Contents
How to make a Cinnamon stem Christmas Tree Favor / Decoration
Supplies and tools
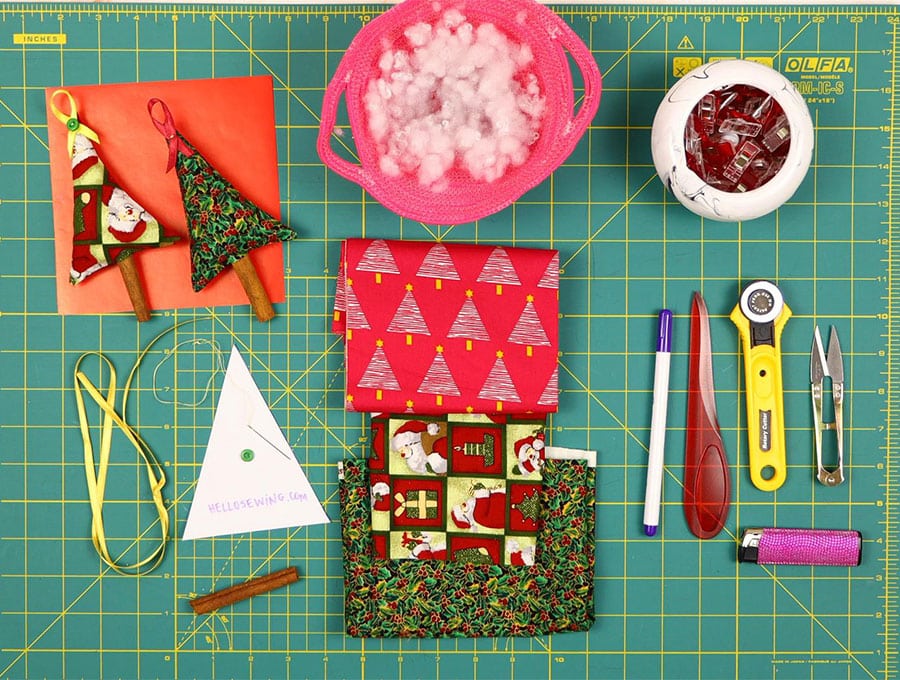
- Small scraps of Christmas prints around 3 x 5 inches
- A small amount of polyester stuffing to fill the trees
- One cinnamon stick for each ornament
- One piece of 1/8 of an inch (3 mm) ribbon 7 inches long ( 18cm) for each ornament
- matching thread
- scissors (or rotary cutter and a cutting mat)
- ruler or measuring tape
DOWNLOAD: Christmas tree favors pattern [Free pdf file]
Follow us for free patterns & tutorials! [easy-profiles]
How to Sew a simple Christmas tree favor /decoration
Watch the diy Cinnamon stem Christmas Tree Favor video first and then follow the written step by step instructions below.
Please enjoy and don’t forget to Like and SUBSCRIBE over on YouTube to be kept up to date with new videos as they come out.
Cinnamon stem Christmas Tree Favor VIDEO TUTORIAL
INSTRUCTIONS:
STEP 1:
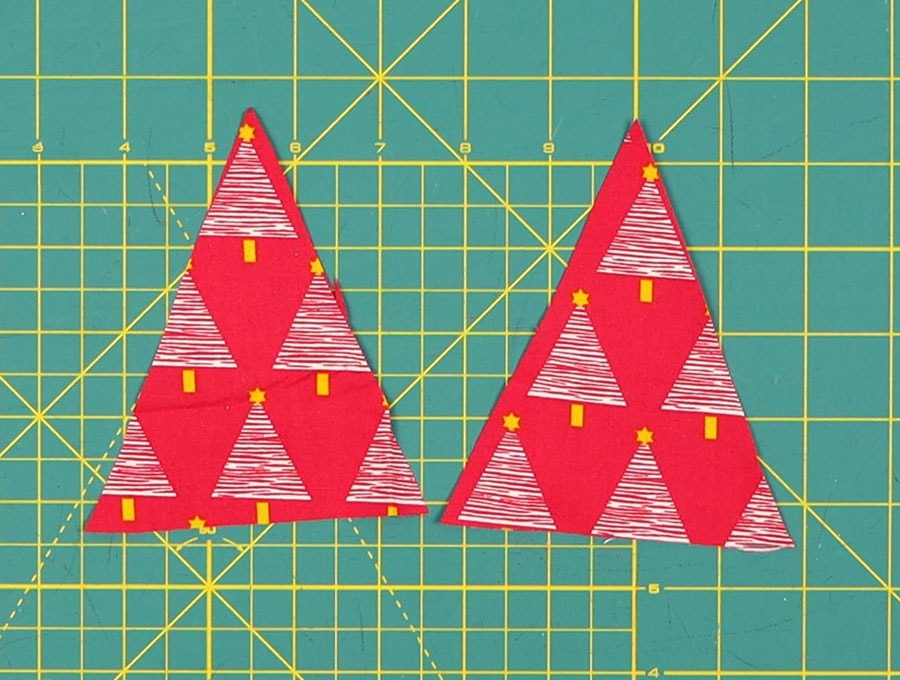
Choose Christmas print fabric or plain fabrics in festive colors. This is the perfect way to use up those little pieces of fabric. See our printable pattern or cut a tree shape of your own – it’s just a triangle. You can play around with the proportions to make shorter, cuter Christmas trees by widening the triangle or elongating it to make tall, elegant trees.
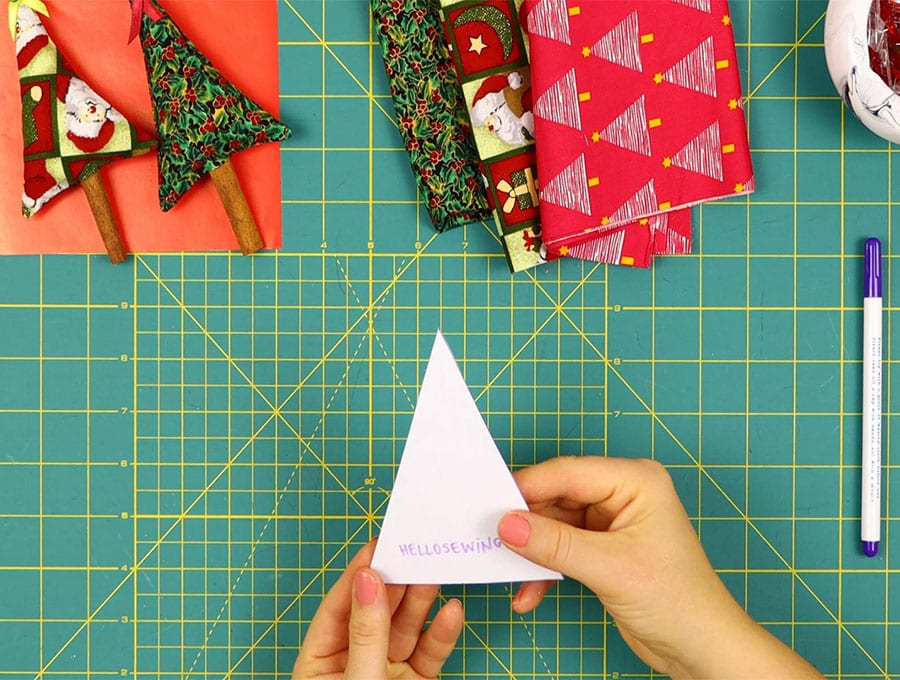
Once your triangle shape is cut out of paper, find all the scrap pieces that could work. You may want a happy mix of prints, or you may want to limit the colors so you only have red, green, or white trees. You will need two sides to each tree, so make sure you have enough fabric to cut two tree shapes. If you have directional Christmas print fabric, ensure the print does not end upside down on one half of the tree.
STEP 2:
Either lay two pieces of fabric right sides together on your worktop or fold over a larger piece to create two layers with the wrong sides facing outwards. This will depend on what size scraps of fabric you have available and if the print is directional. Pin the paper triangular pattern on the straight grain of the fabric.
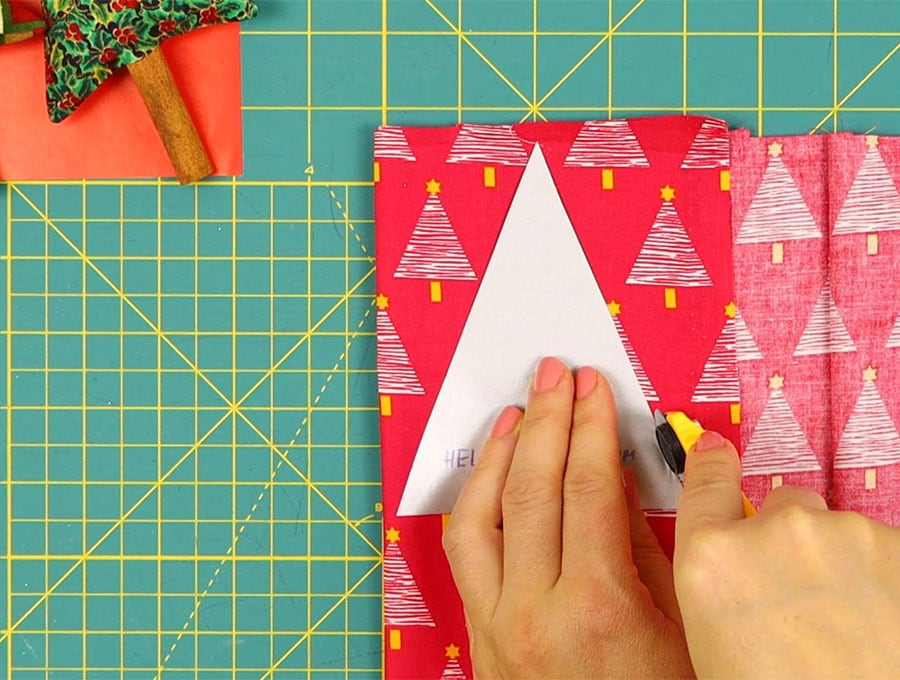
STEP 3:
Cut out the triangle shape.
STEP 4:
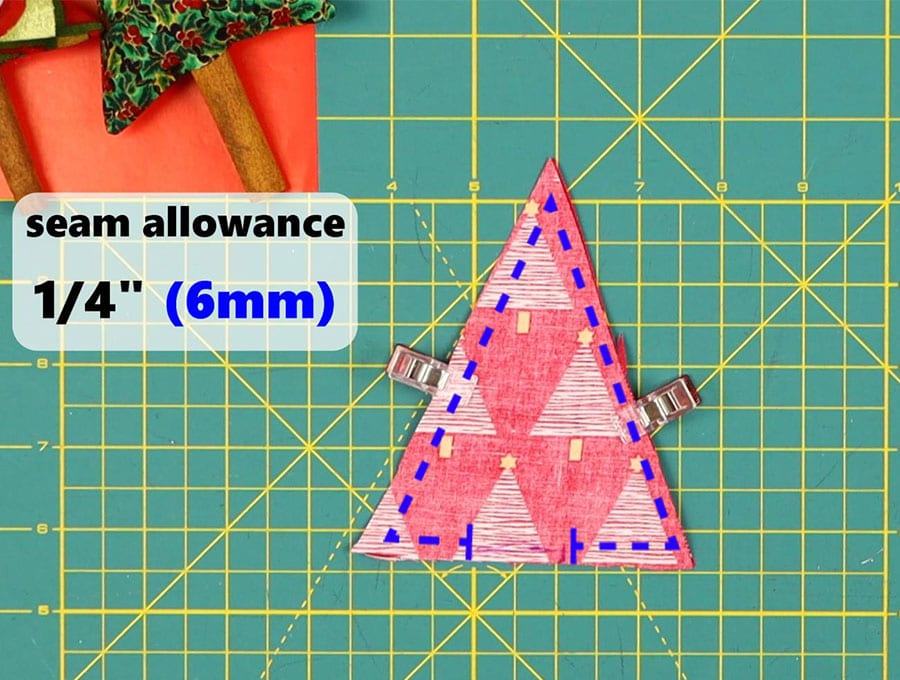
Pin and mark 1.5 inch (4cm) gap in the center of the base of the tree with a fabric marking pen.
Cut a thin ribbon matching color to hang the ornament from the tree.
STEP 5:
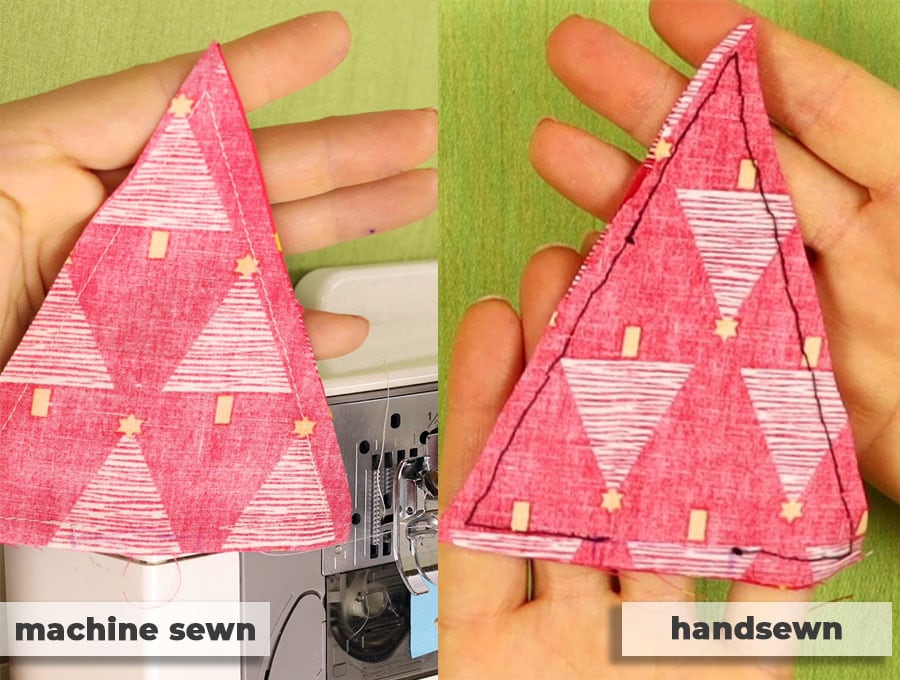
To machine, stitch, start at the mark on the base, stitch, back-tack, and go along the base until you reach the corner. Leave the needle down in the fabric, lift the presser foot, swing your fabric around, and depress the foot before heading up the next side of the triangle. Repeat at all three corners until you are back to the base, where you will end off with a back-tack before the second mark you made.
STEP 6:
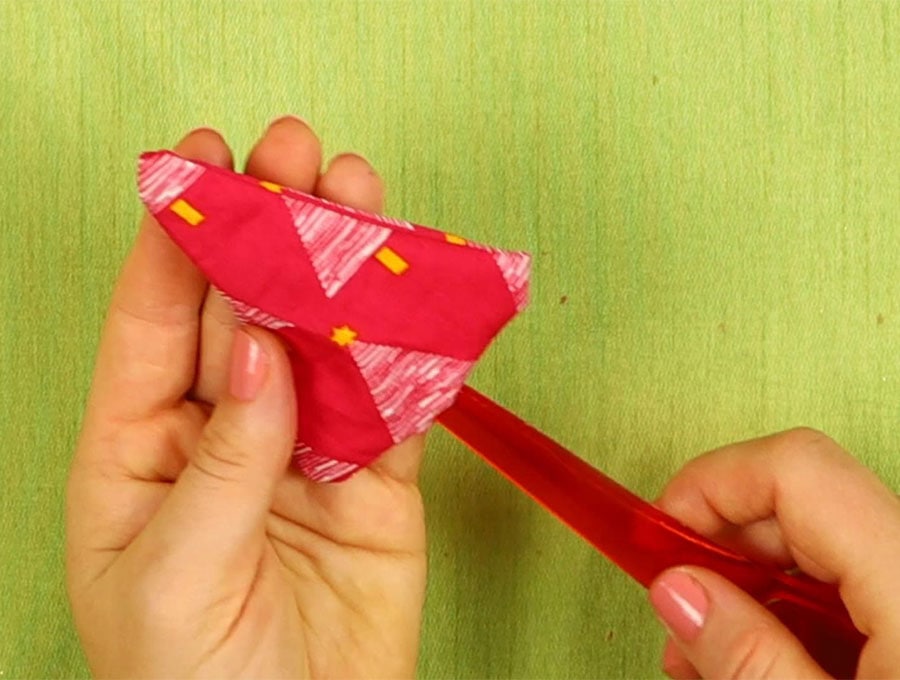
Clip the corners of the tree to reduce bulk, then turn the simple Christmas tree ornament the right way out. Use a turning tool or the end of a chopstick so the corners lie flat.
STEP 7:
Turn in the raw edges of the gap in line with the base seam, then press the tree with a warm iron.
STEP 8:
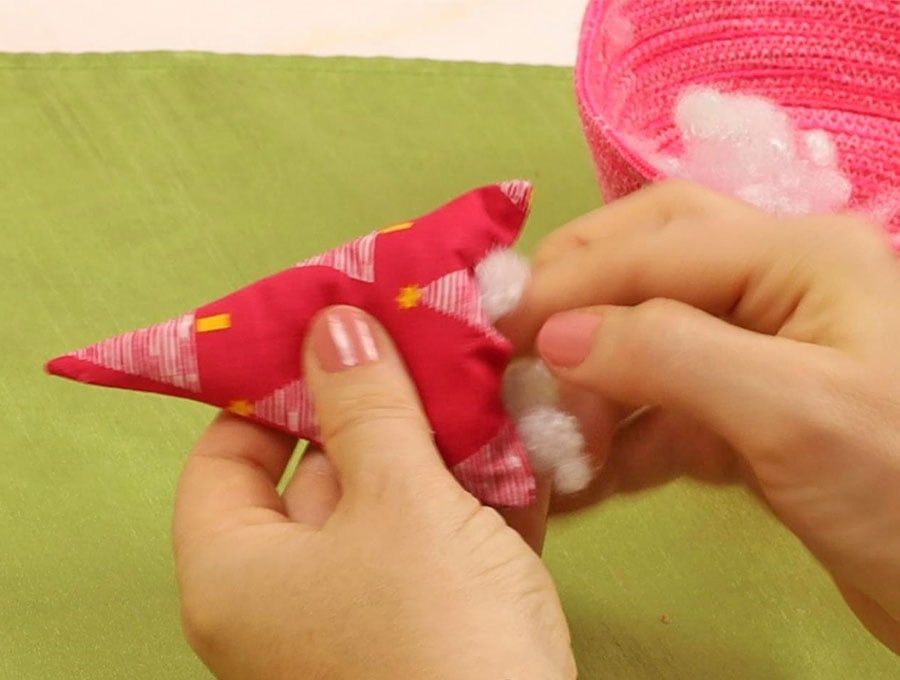
Use small amounts of stuffing at a time to stuff the tree, making sure you get it into the corners – you can use a chopstick for this, so it is pretty firm. This is the step where children’s tiny fingers can be very helpful!
STEP 9:
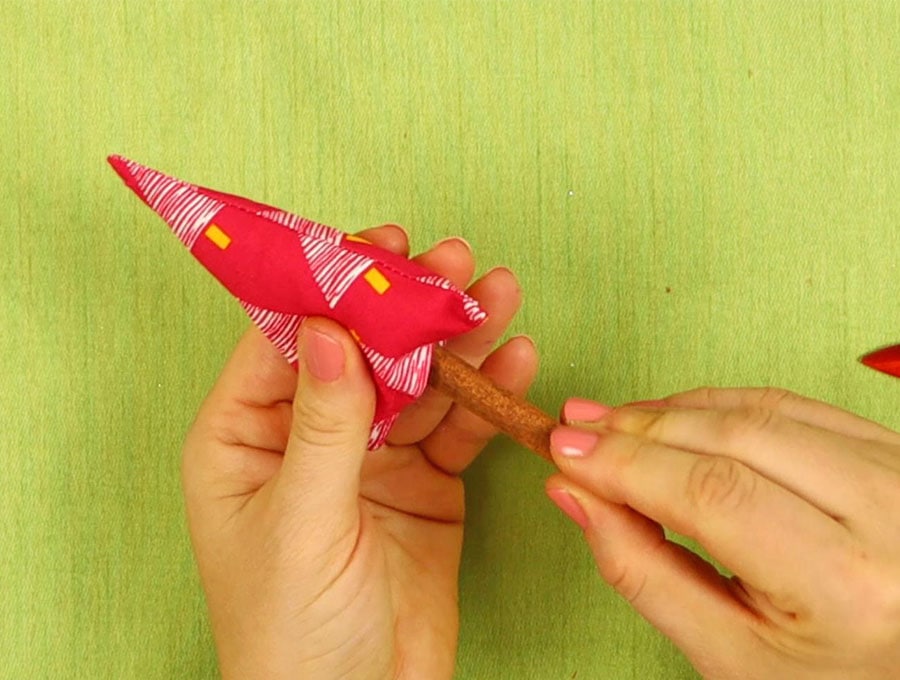
Thread your needle with matching cotton, grab the cinnamon stick, and insert it into the base of the tree.
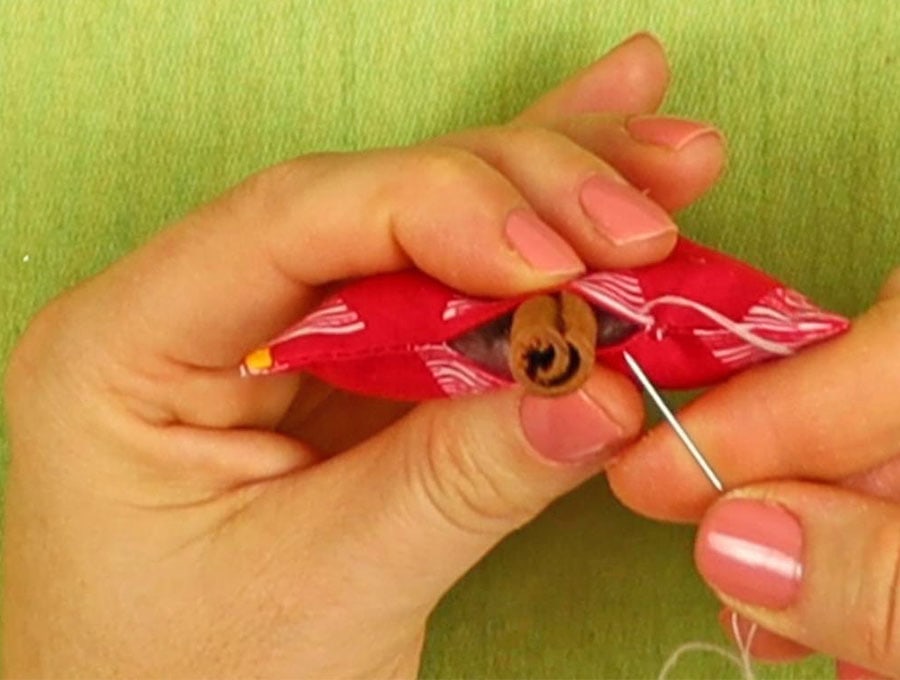
Neatly close the gap with tiny stitches on either side of the cinnamon stick to ensure it remains in place, using a slip stitch, which is almost invisible, following the edges of the seam you pressed in the base.
STEP 10:
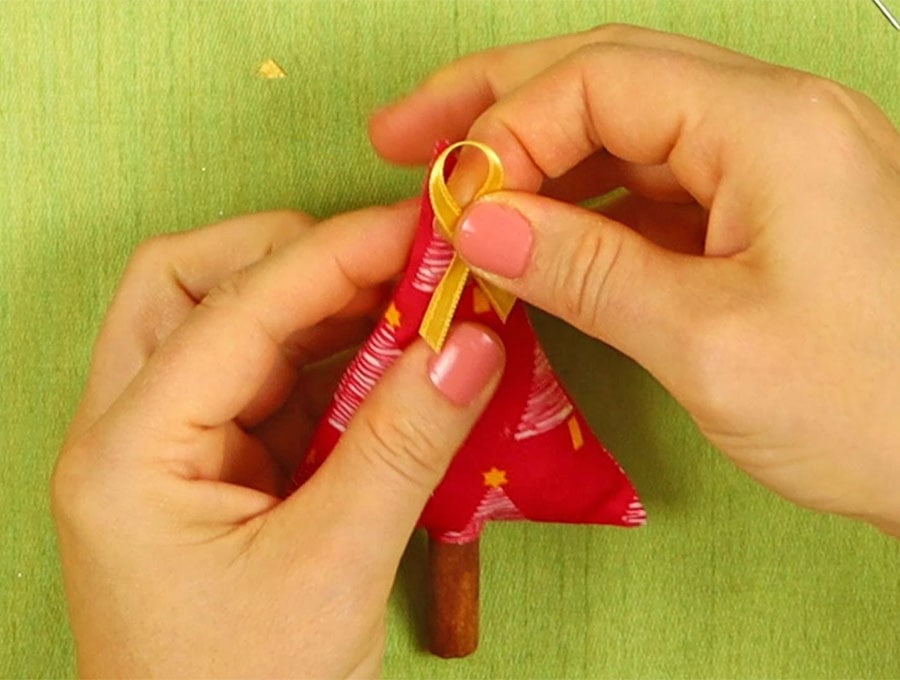
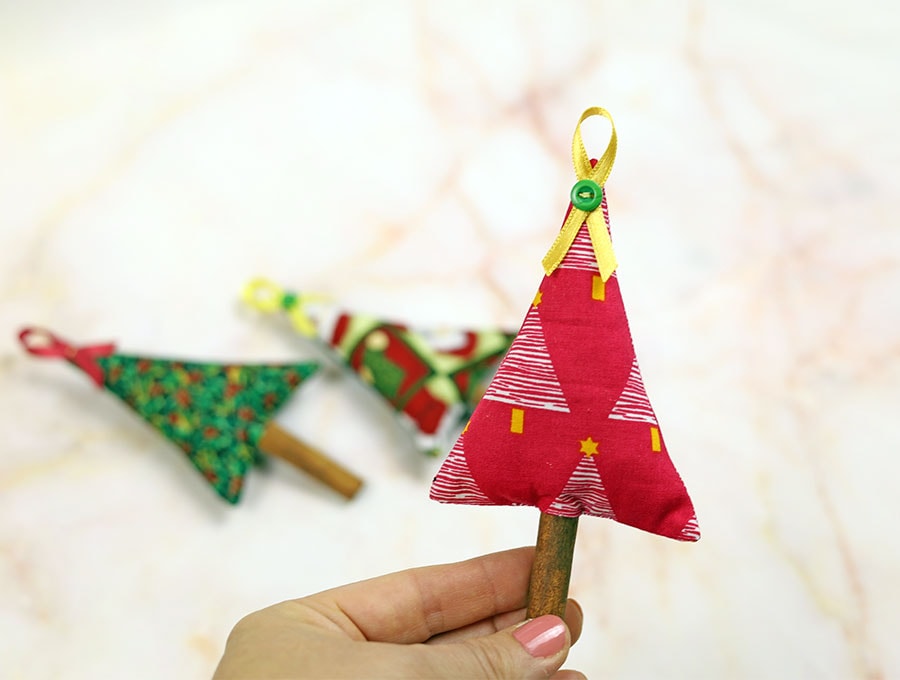
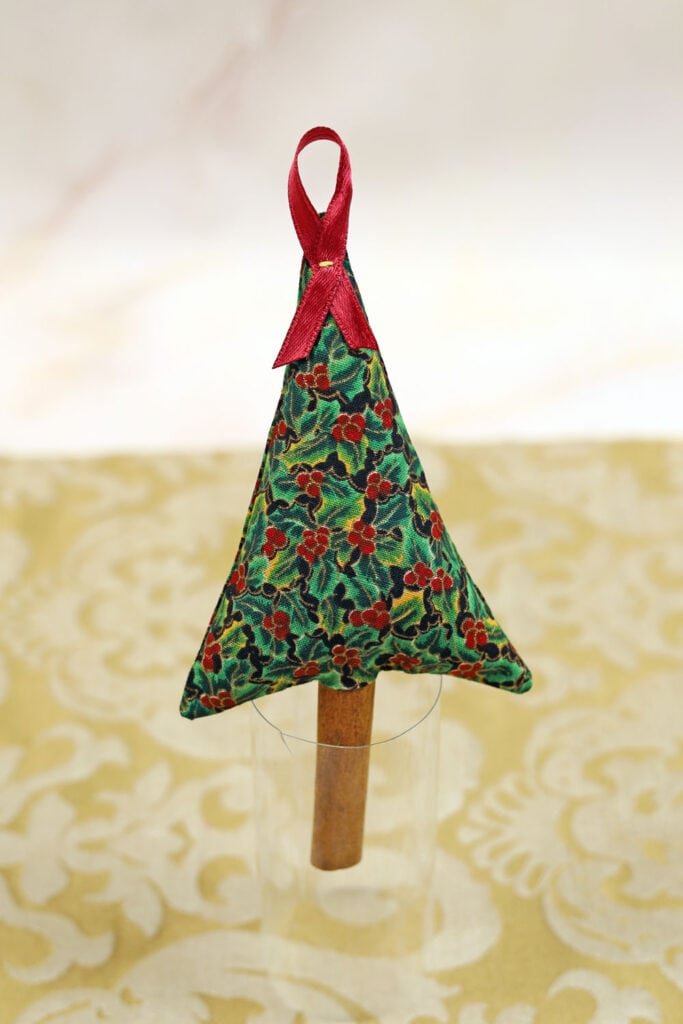
Take your ribbon by the ends and fold it to create a small loop so that both the ends are crossed at the front and facing down. Pin in place at the top of the Christmas tree. Make a stitch with a handsewing needle to keep it in place. You can attach a button if you like or make a couple more stitches to secure the ribbon.
Trim off any loose threads, and your Christmas tree ornament is ready to hang on the tree.
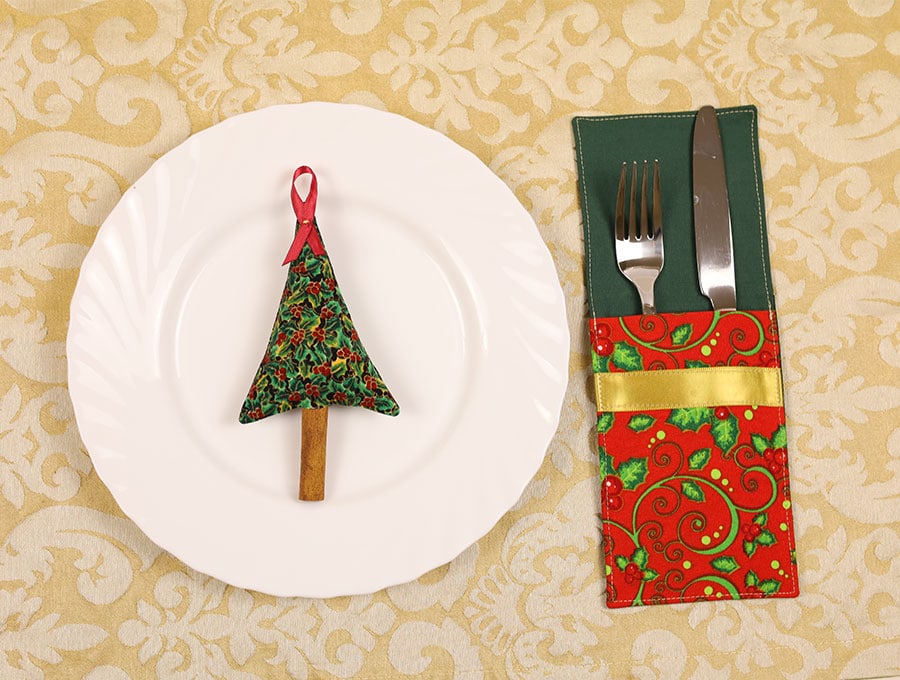
Go ahead and make as many as you like. An alternative use for the simple Christmas tree ornament is as a plate decoration – imagine a lot of little trees to add a pop of color to your table décor.
If you want to use these little trees as place tags, then write each person’s name on the tree with a silver or gold glitter pen before you stuff them and after you have ironed them. Your guests can take them home to hang on their trees as a memento of the good times. Your place will be subtly scented with cinnamon, whether you use them on a tree or at the table. If you like, you can even hang the little trees in the wardrobe after Christmas to keep moths away from clothing – for some reason, bugs hate the smell. If you loved this quick and easy tutorial, like and subscribe so you never miss another of our posts. Honestly, it takes longer to describe how to make one than to actually make it – and once you have made the first simple Christmas tree ornament, you will want to do loads more.
*** FAQs and tips:
Do you like this? Pin for later:
Wanna be friends? Click HERE and follow me on Pinterest
RELATED: