
DIY Cutlery Pouch with a Napkin – Foolproof tutorial
The DIY cutlery pouch with a napkin is very useful for picnics as you can take as many pouches as you will need. You can make as many as you will need and are so quick to make once you have the idea. They use up all those little scraps of fabric you have hanging around – especially the long strips a person never knows what do with – other than making scrunchies. Instead of messing around handing out the cutlery and the napkins separately everything is in the handy little pouch ready to dispense the ‘eating kit’ to whoever needs. These are great for barbeques, work lunch, and family dinners.
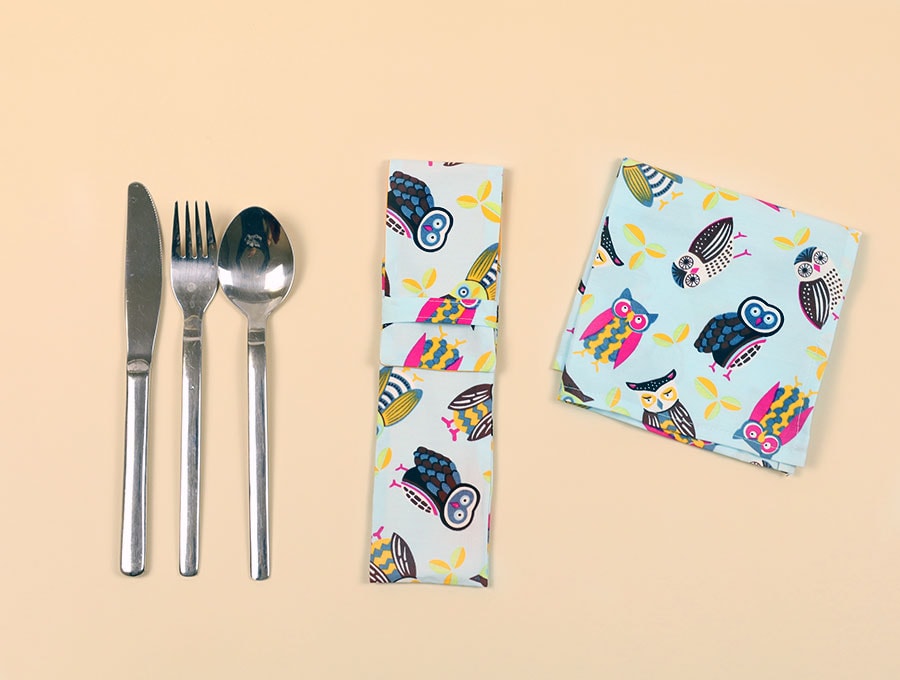
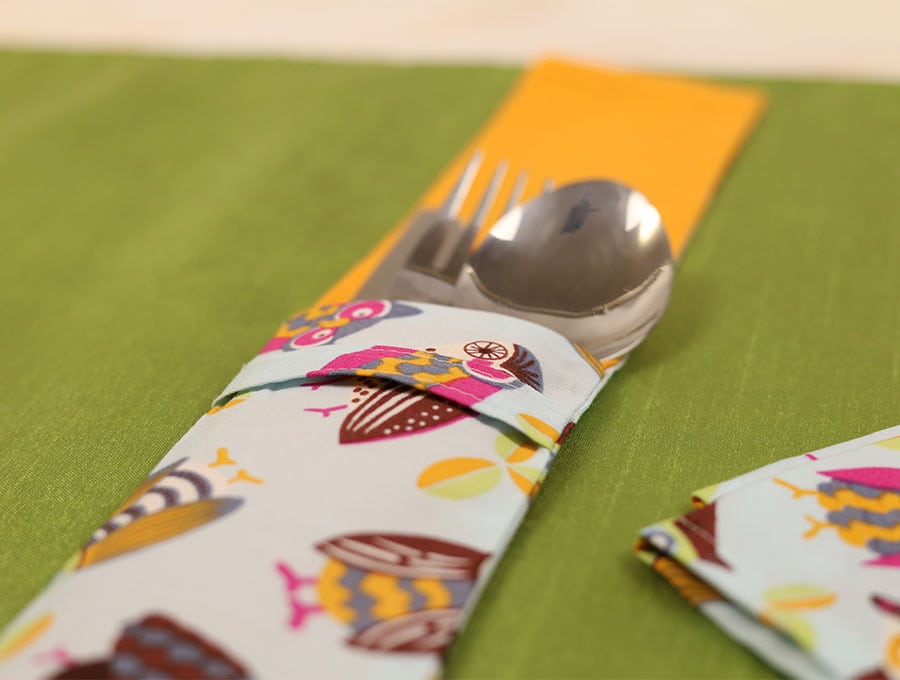
Everything fits well in the pouch and takes up very little space – this is quite convenient to carry in your purse or picnic bag.
Below you will find my step by step written tutorial with VIDEO instructions for all the visual learners.
We occasionally link to goods offered by vendors to help the reader find relevant products. Some of the links may be affiliate meaning we earn a small commission if an item is purchased.
Table of Contents
- 1 How to make a cutlery pouch with a napkin
- 2 Supplies and tools
- 3 How to Sew a Cutlery pouch with a napkin
- 3.1 DIY cutlery pouch with a napkin VIDEO TUTORIAL
- 3.2 INSTRUCTIONS:
- 3.3 STEP 1: Cut the fabrics
- 3.4 STEP 2:
- 3.5 STEP 3:
- 3.6 Step 4:
- 3.7 Step 5:
- 3.8 Step 6:
- 3.9 Step 7:
- 3.10
- 3.11 Step 8:
- 3.12 Step 9:
- 3.13 Step 10:
- 3.14 Step 11:
- 3.15 Step 12: Turn right side out
- 3.16 Step 13:
- 3.17 Step 14:
- 3.18 Step 15:
- 3.19 Step 16:
- 3.20 Step 17:
How to make a cutlery pouch with a napkin
Supplies and tools
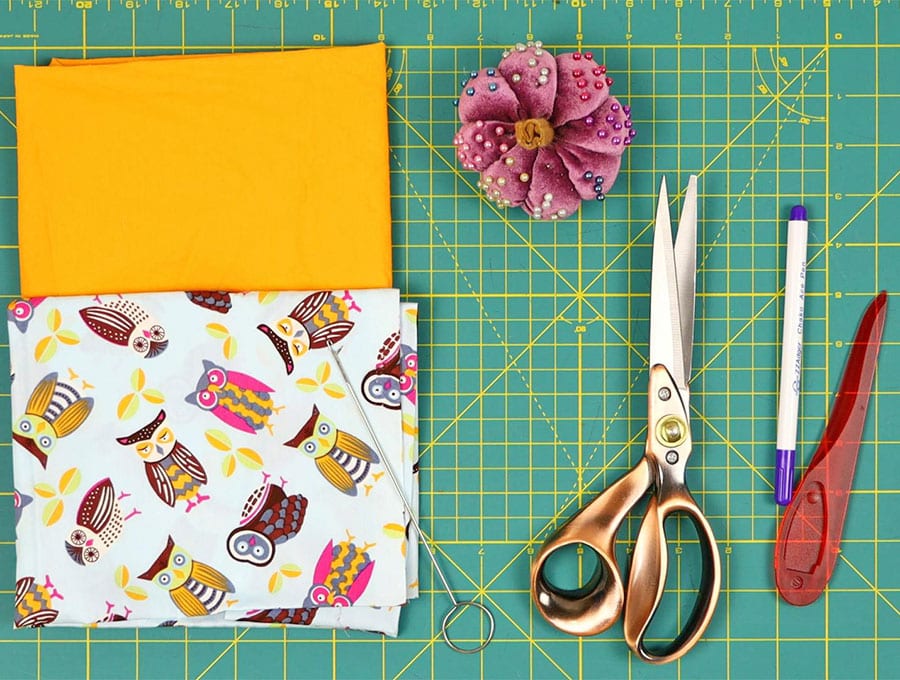
- fabric – 2 pieces of woven cotton (one main, one lining)
- matching thread
- scissors (or rotary cutter and a cutting mat)
- ruler or measuring tape
- iron and ironing board
- sewing clips or pins
Follow us for free patterns & tutorials! [easy-profiles]
How to Sew a Cutlery pouch with a napkin
Watch the diy cutlery pouch with a napkin video first and then follow the written step by step instructions below.
Please enjoy and don’t forget to Like and SUBSCRIBE over on YouTube to be kept up to date with new videos as they come out.
DIY cutlery pouch with a napkin VIDEO TUTORIAL
INSTRUCTIONS:
STEP 1: Cut the fabrics
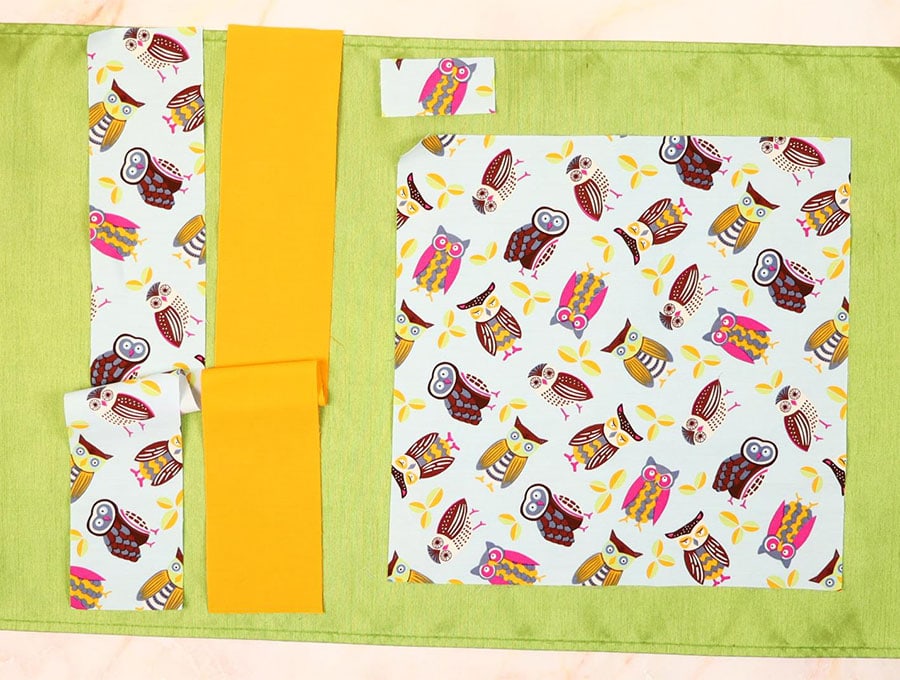
- 1 x strip of printed fabric for the outer, 3 inches (7.5cm) x 21 inches (53cm)
- 1 x strip of plain cotton fabric for the lining, 3 inches (7.5cm) x 21 inches (53cm)
- 1 piece of printed fabric 3 x 1.5” (7.5 x 4cm)
- 1 x 12 inch (30cm) square piece of printed fabric
STEP 2:
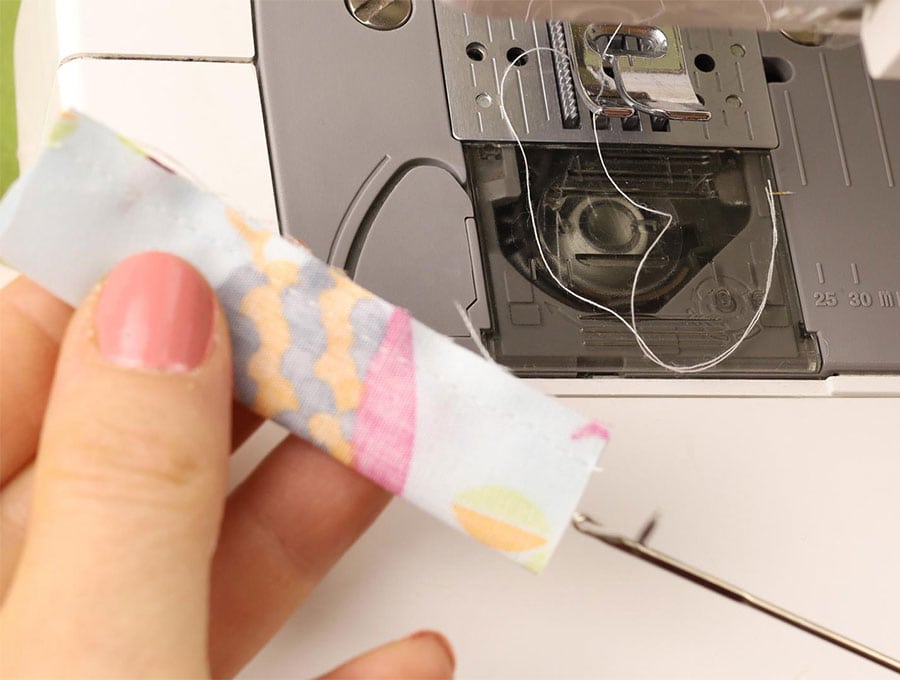
Take the small piece of printed fabric and put the right sides together then stitch along the long edge 1/8 (3mm) from the edge.
STEP 3:
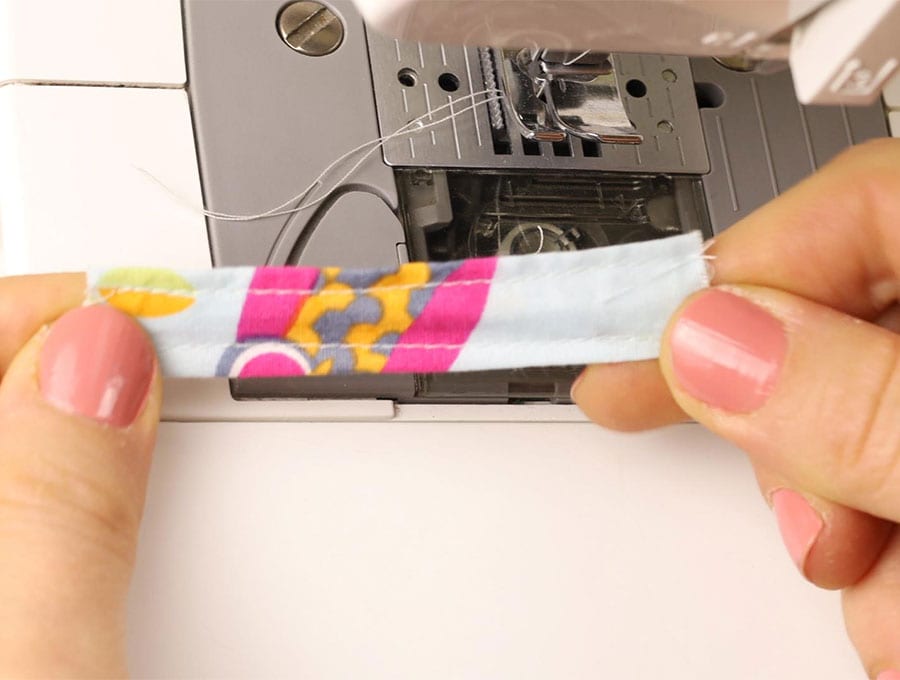
Turn the piece right way out, and make sure the seam is in the middle at the back then top stitch on both long edges of the side that doesn’t have the seam. Don’t worry about the raw ends because they will soon be hidden.
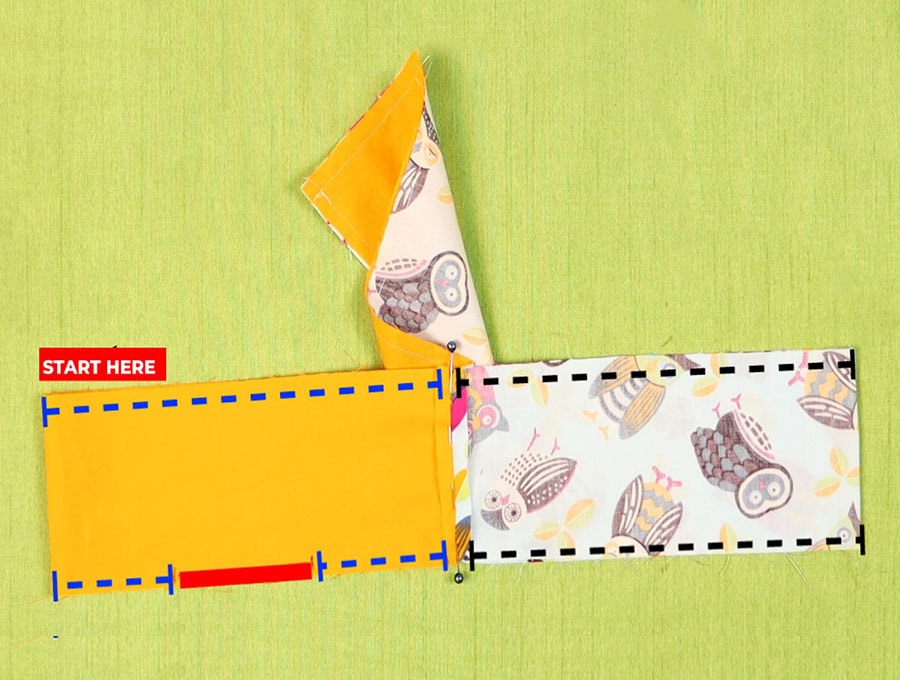
Step 4:
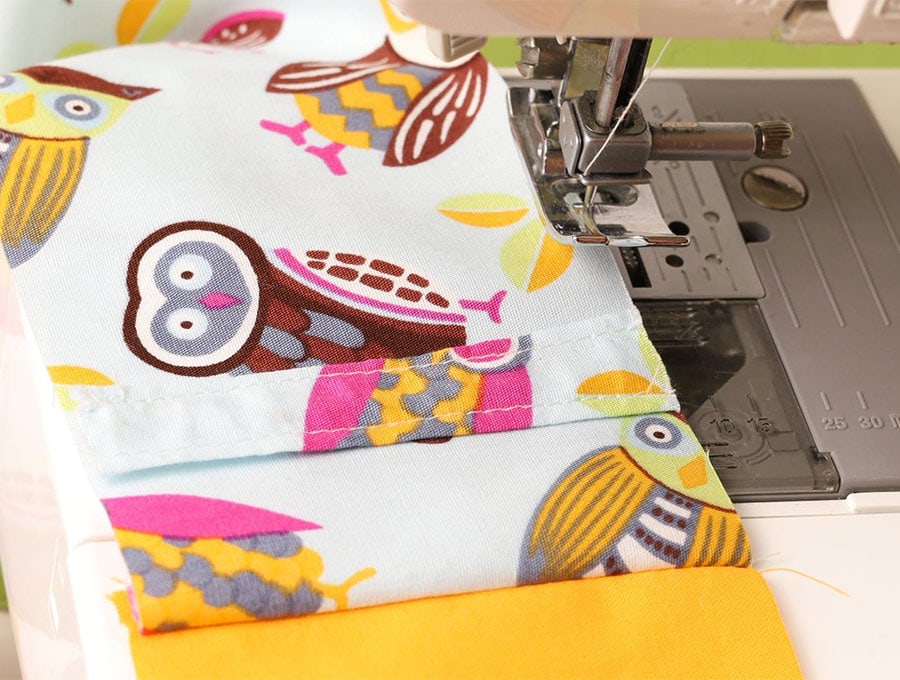
Place the strip you have just sewn 3/8 inch (1 cm) from the top of the right side of the long printed strip. Pin in place and run a few stitches down each end of the topstitched strip to keep it in place.
Step 5:
Take the long plain strip of fabric of and place it right side down facing the right side of the printed strip. Pin the ends in place.
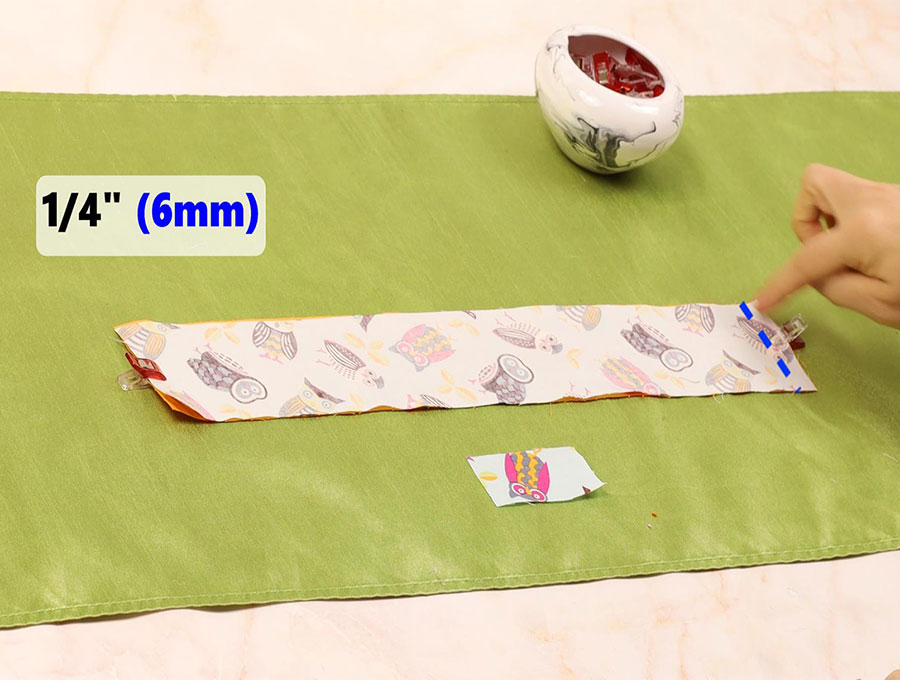
Step 6:
Stitch each end just under ¼ inch (6mm) from the edge. When opened out you will have a long circular band.
Step 7:
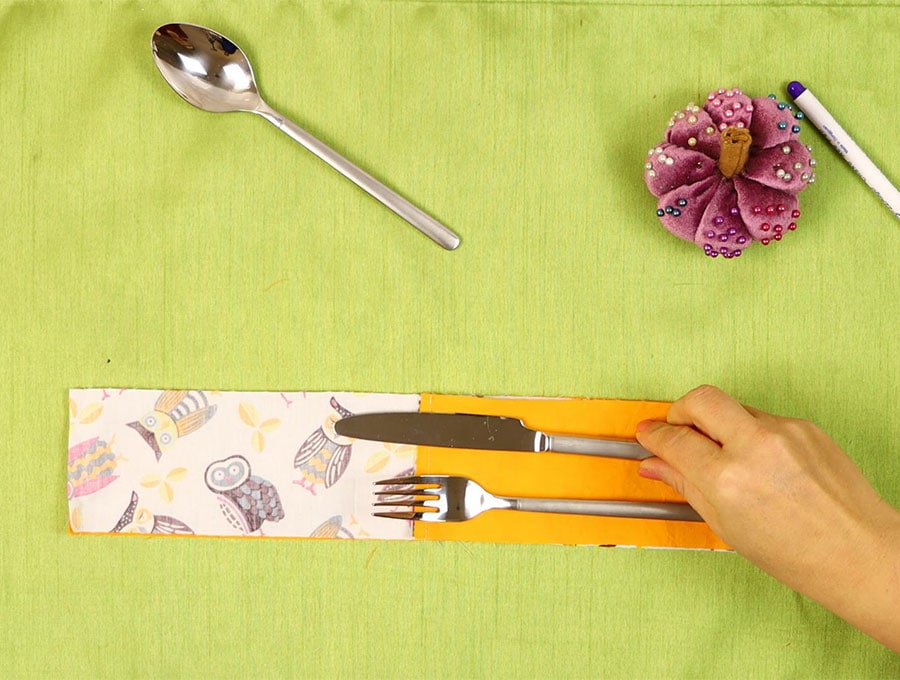
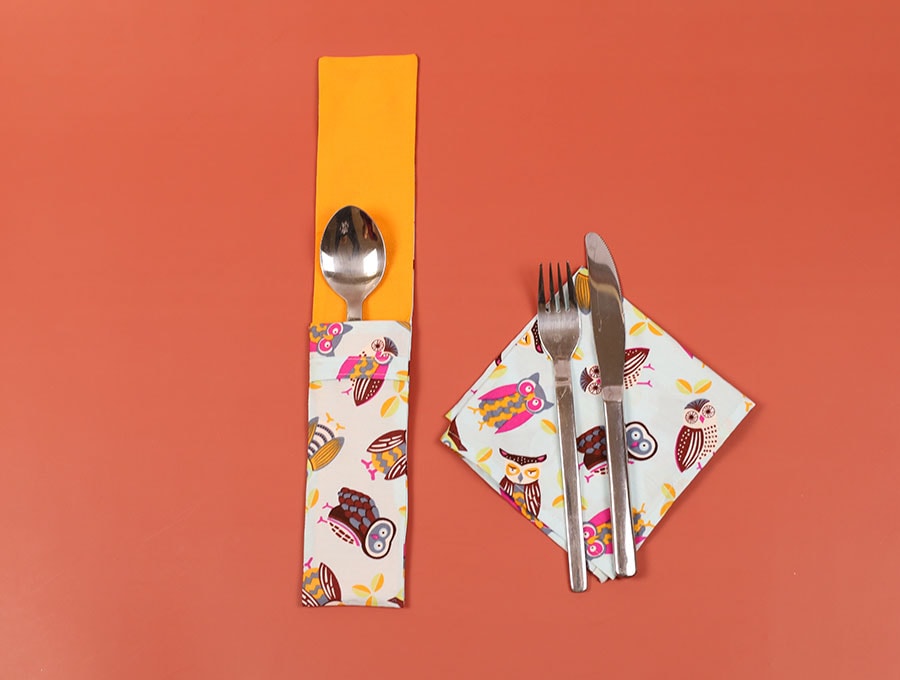
The end with the little strip sewn to it to make a closure will be the pocket of the bag where you insert the cutlery and the other end will be the flap to secure the cutlery in place that will thread under the strip. So, fold up the piece with the strip attached upwards, with the lining side uppermost and choose the cutlery you want to insert in the bag to work out how deep the bag needs to be. The longer the cutlery the shorter the flap over – if you are using the shorter bamboo cutlery obviously the bag will not be as deep. Just leave about ½ inch (1.3cm) above the end of the longest piece of cutlery.

Mark with a fabric pen or pins, ensuring an equal distance on both sides – this is very important as you want the side seams equal in length.
Step 8:
Stitch from the pen mark to the end of the flap piece, on each side of the strip.
Step 9:
Fold out the strip and line up the printed sides facing each other, and the plain sides facing each other. Pin in place, making sure the seams line up.
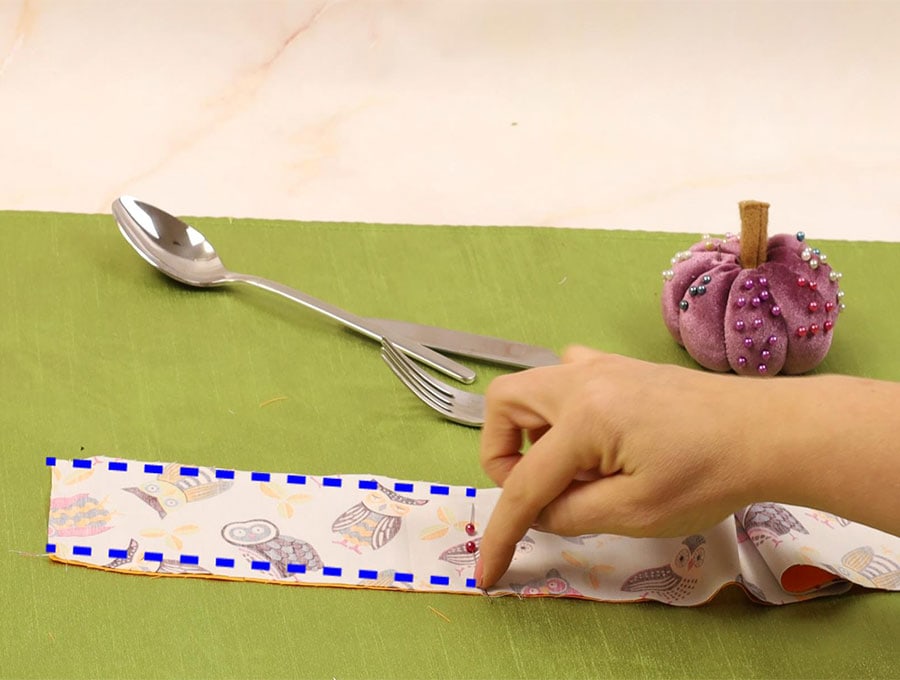
Step 10:
Stitch down the printed side ¼ inch (6mm) from the seam where the flap is to the fold at the bottom, back tacking at the start and finish. Repeat with the other side.
Step 11:
Now on the plain side stitch right down one side from the seam to the fold, but on the other side stitch down only about one third of the way then leave a 2 inch (5cm) gap before stitching down to the fold – this gap will enable you to turn the whole cutlery pouch the right way out.
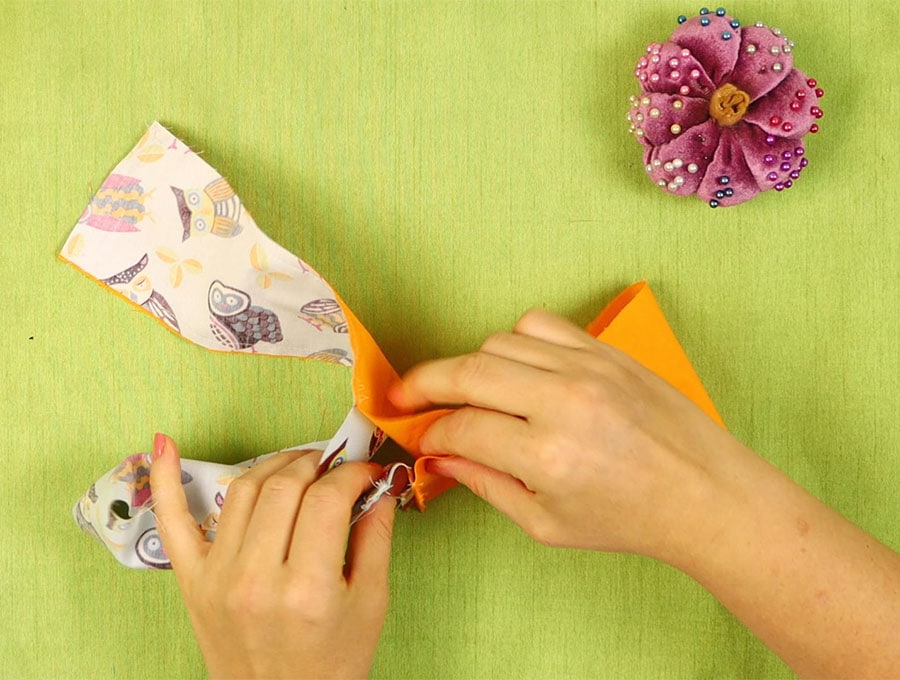
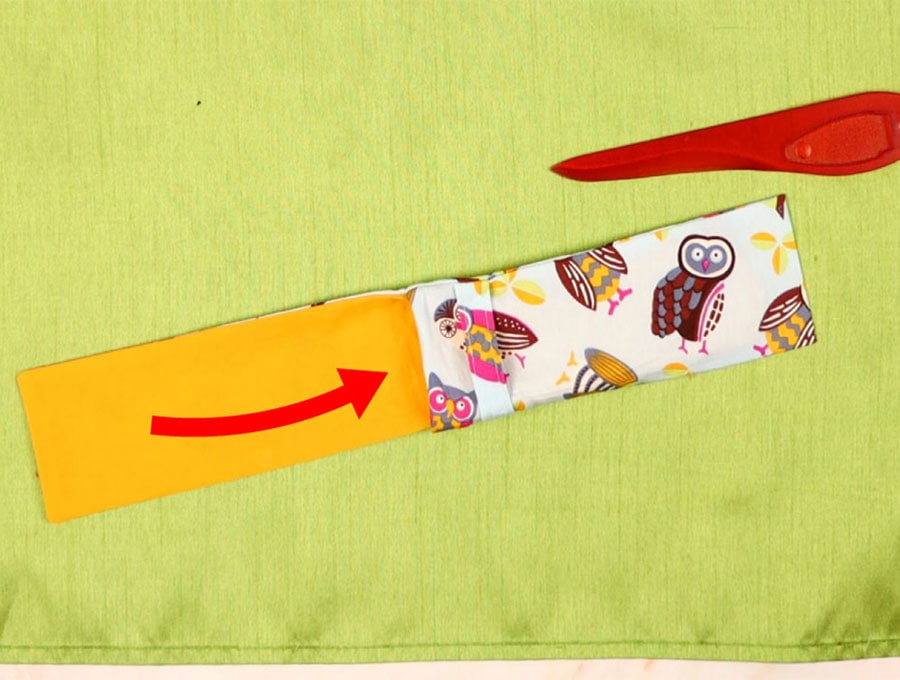
Step 12: Turn right side out
Clip off the corners so there is not so much bulk of material when you turn the right way out – the corners will sit better. Pull the fabric through the gap. Do this by putting your finger through the gap and pulling out what will be the flap first, then pull through the printed section that is the outer casing and lastly turn the lining right way out.
Step 13:
Turn out all the corners of the flap, the outer and the lining – its best to use a chopstick. Scissors can be used but be very careful not to poke a hole in the fabric!
Step 14:

Turn in the raw edges of the gap to line up with the rest of the seam and slip stitch closed.
Push the lining inside the outer and the cutlery pouch is ready
Step 15:
The napkin comes next. Take the piece of fabric cut to a square and clip a little triangle off the corners. This will give you less bulk when doing the double seam I chose to do a 12inch (30cm) square napkin in a matching print, but you can make it a bit smaller if you wish.
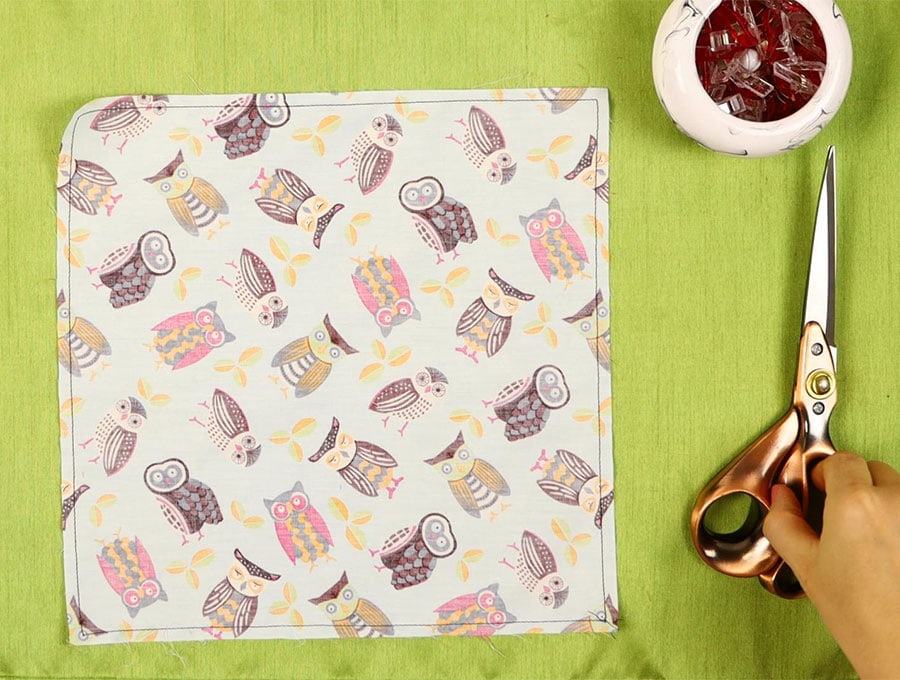
Run a line of stitching 6mm from the edge all around the napkin.
Step 16:
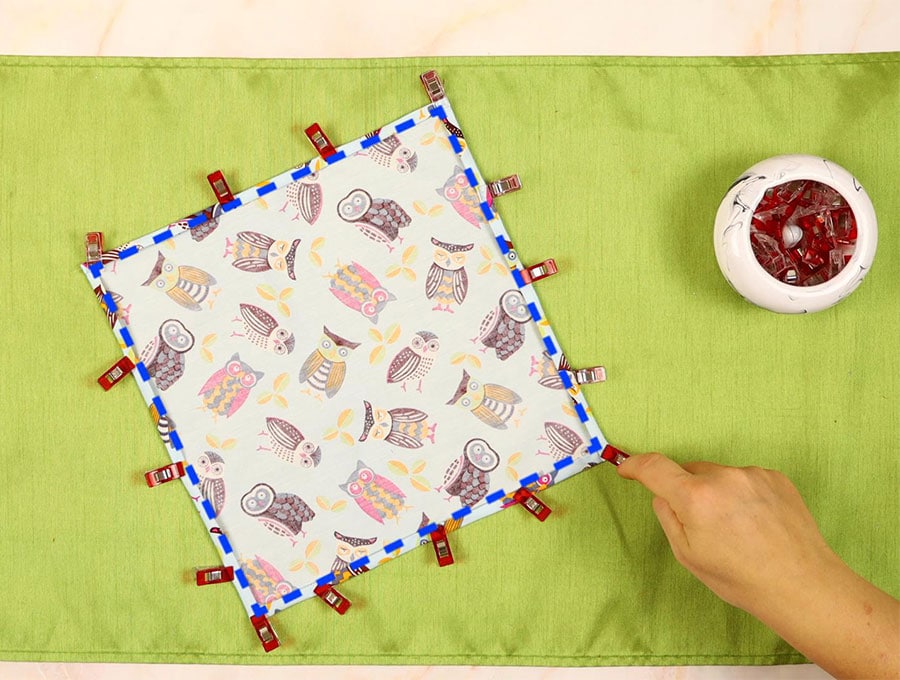
Fold over ¼ inch (6 mm) along the seam you just sew and then ¼ inch again (6mm), pin and stitch as close to the edge as possible.
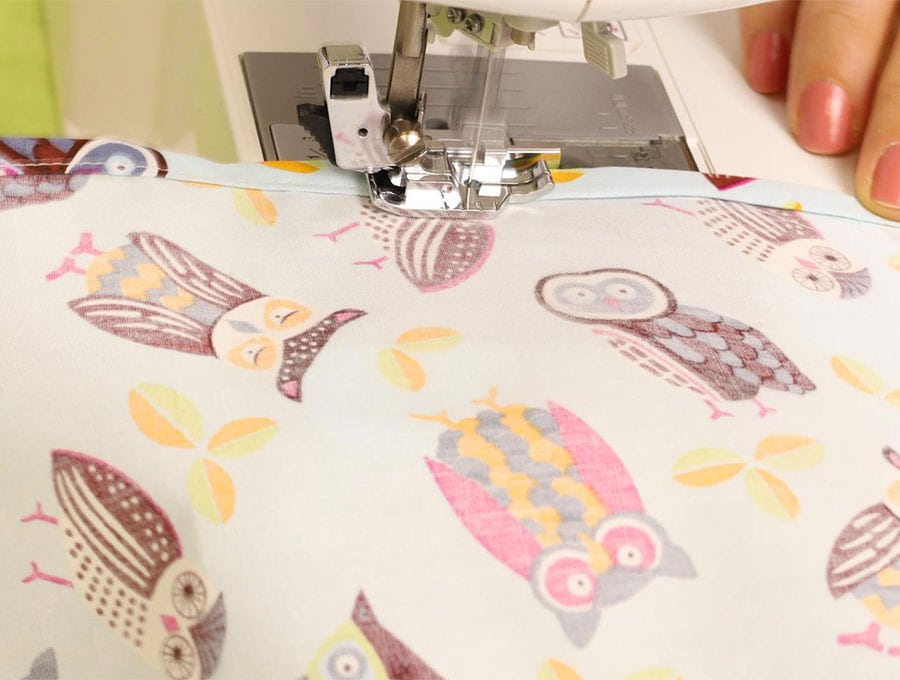 Repeat for the other three sides and voila – you have a napkin ready to slip in the pouch with your cutlery.
Step 17:
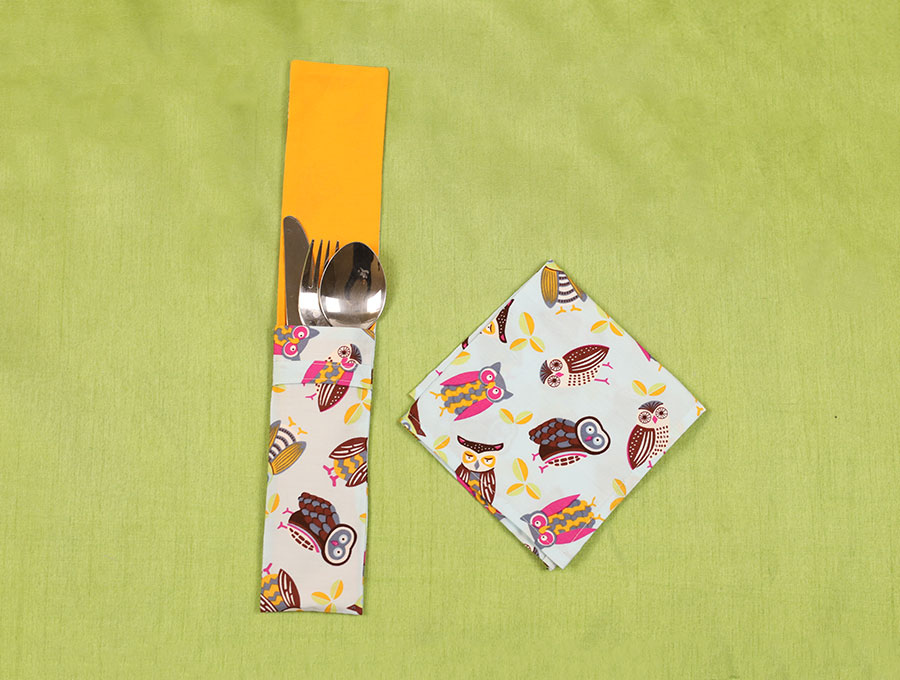
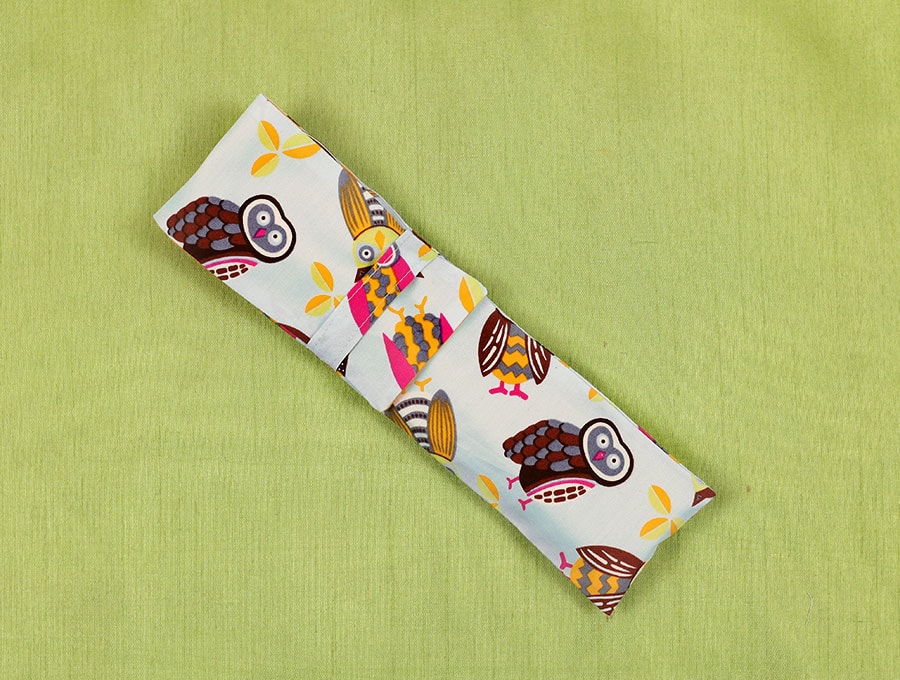
Press the DIY cutlery pouch so it lies flat, press the napkin and insert into the pouch with your cutlery – all ready to go.
If you enjoyed this tutorial then please like and subscribe. We would love to see how your DIY cutlery pouch with the napkin turned out so please post your photos in the comments section.
Making this DIY cutlery pouch with a napkin is really easy and the pouch will use up those long strips of fabric we always seem to have in our fabric stashes just begging to be turned into something useful. Watch our visuals and follow our step-by-step instructions to see how quick and simple this is to make. These DIY cutlery pouches are great for get togethers outdoors where you can pack everything in advance. I also love the idea of taking my cutlery to work like this. It can be washed and returned to its handy pouch in your drawer so you never again land up with no cutlery.
Do you like this? Pin for later:
Wanna be friends? Click HERE and follow me on Pinterest
RELATED: