
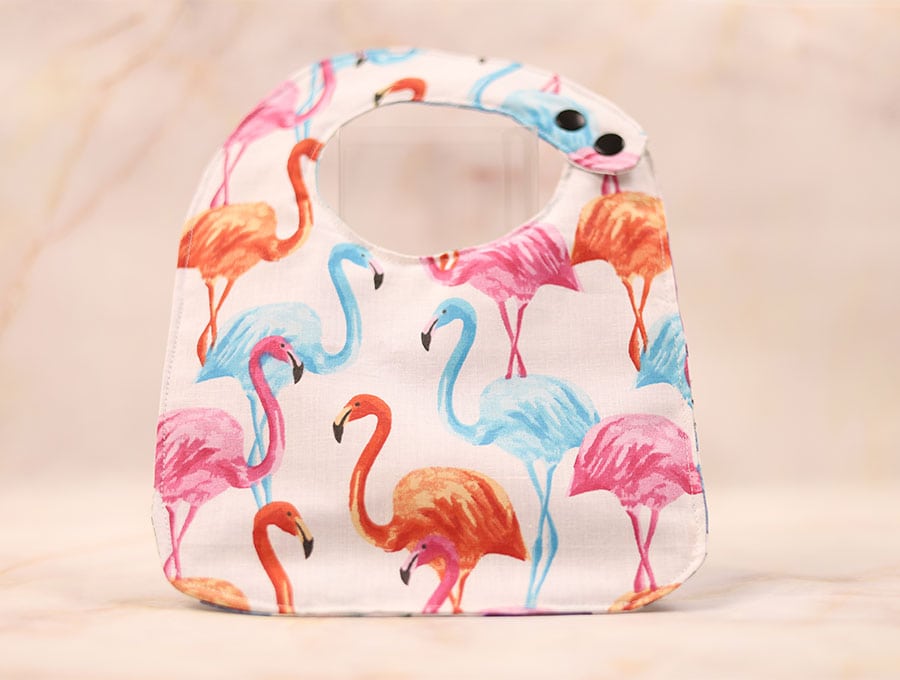
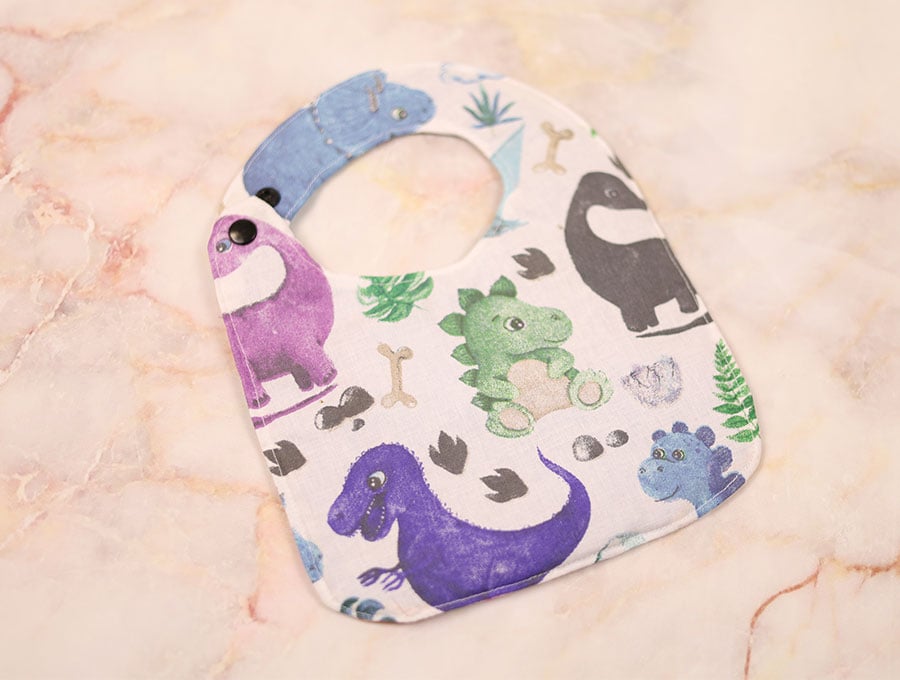
How to Make a Baby Bib – with FREE baby bib pattern
One of the best gifts for a new mom is a set of handmade baby bibs. Our free baby bib pattern comes in two sizes.. The visuals and step by step instructions will lead you through this easy project. Baby bibs stop the drool getting onto the baby’s neck and chest, possibly leading to drool rash. Baby bibs also save clothing and will catch those little milk spews or bits of food, keeping clothes clean and fresh smelling. It’s far easier to change a bib than to change a whole outfit, and you can whip off the bib to show off the cute outfit when grandma arrives for a cuddle. They save on multiple washes of clothing, which is a boon for a busy mom.
Below you will find my step by step written tutorial with VIDEO instructions for all the visual learners.
We occasionally link to goods offered by vendors to help the reader find relevant products. Some of the links may be affiliate meaning we earn a small commission if an item is purchased.
Table of Contents
- 1 How to make a baby bib
- 2 Supplies and tools
- 3 How to Sew a baby bib
- 3.1 Baby bib VIDEO TUTORIAL
- 3.2 INSTRUCTIONS:
- 3.3 STEP 1: Prepare the pattern
- 3.4 STEP 2: (optional) Piece together the front
- 3.5 STEP 3: Mark around the template
- 3.6 STEP 4: Cut the fabrics
- 3.7 STEP 5: Layer the fabrics
- 3.8 STEP 6: Sew around
- 3.9 STEP 7: Clip around
- 3.10 STEP 8: Turn right side out
- 3.11 STEP 9: Press
- 3.12 STEP 10: Topstitch
- 3.13 STEP 11: Mark the snap placement
- 3.14 STEP 12: Attach the snaps
- 4 DIY Baby bib FAQs and tips:
How to make a baby bib
Supplies and tools
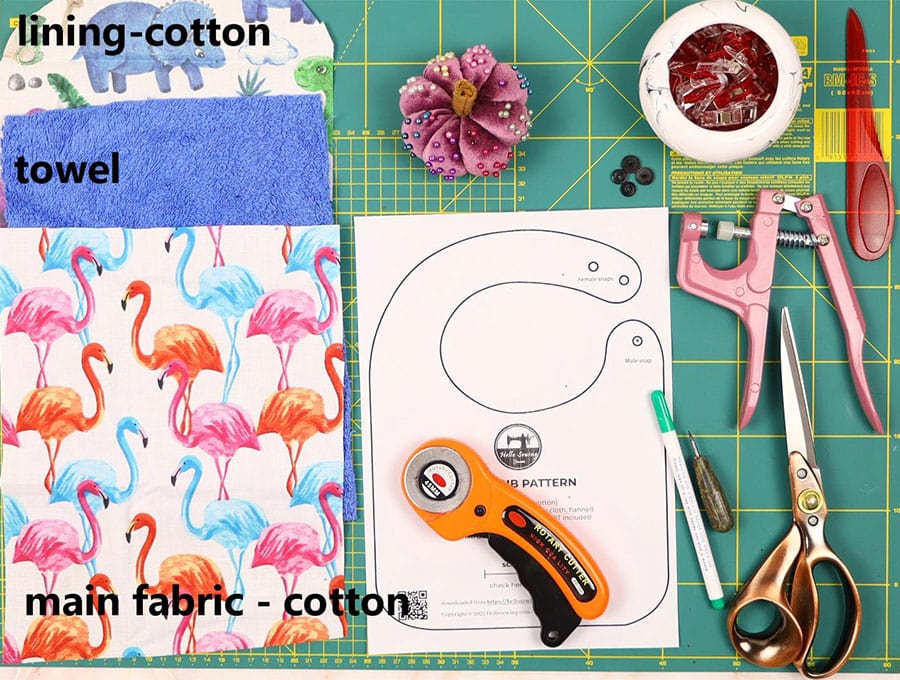
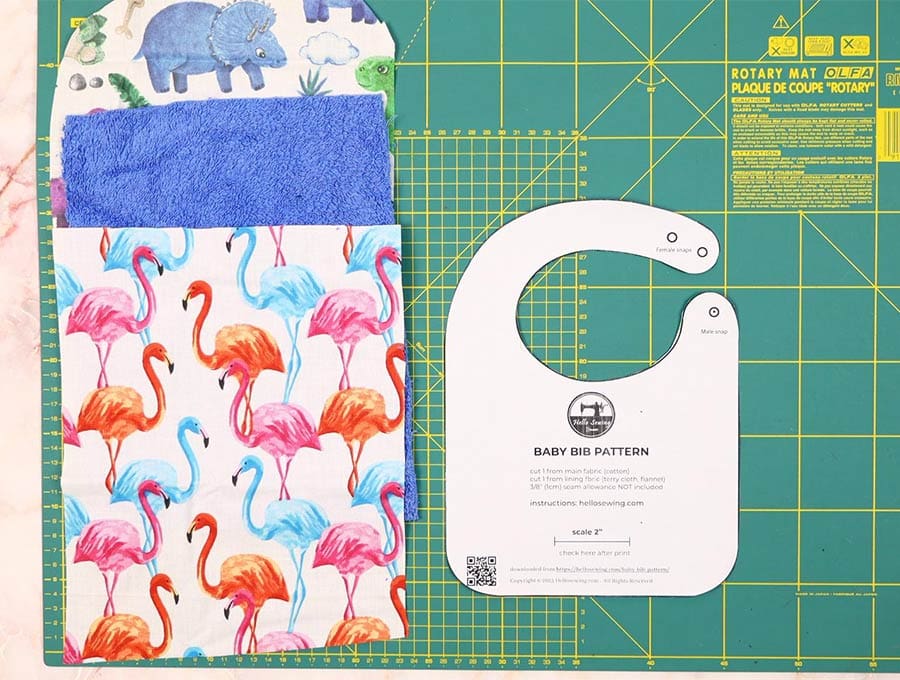
- fabric – 2 pieces of 100% tightly woven cotton (or one fat quarter in suitable baby colors)
- 1 piece of towel or flanelette
- plastic snaps (you will need a sewing awl and snap pliers
- matching thread
- scissors (or rotary cutter and a cutting mat)
- ruler or measuring tape
- iron and ironing board
- sewing clips or pins
DOWNLOAD: baby bib pattern [Free pdf file]
Follow us for free patterns & tutorials! [easy-profiles]
How to Sew a baby bib
Watch the diy baby bib video first and then follow the written step by step instructions below.
Please enjoy and don’t forget to Like and SUBSCRIBE over on YouTube to be kept up to date with new videos as they come out.
Baby bib VIDEO TUTORIAL
INSTRUCTIONS:
STEP 1: Prepare the pattern
Print out the free baby bib pattern provided at 100%. Trim the excess paper
STEP 2: (optional) Piece together the front
Decide whether you want the bib in one piece of fabric of whether you want to piece a couple of different fabrics together to create the bib. If you are piecing fabric cut and stitch the fabric together using a ¼ inch (0.6cm) seam allowance, and press seams open before cutting the pattern.
STEP 3: Mark around the template
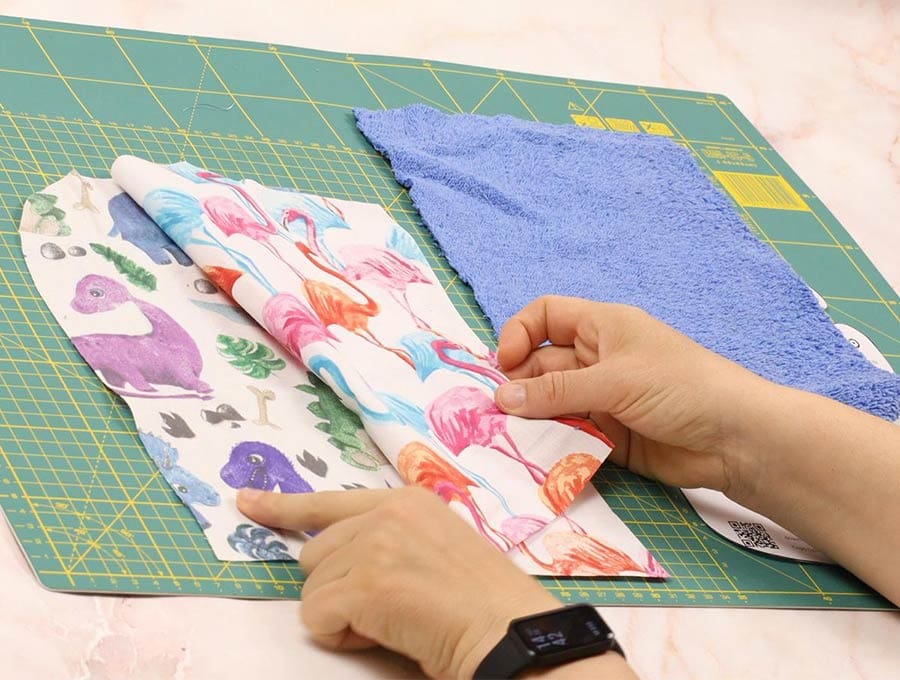
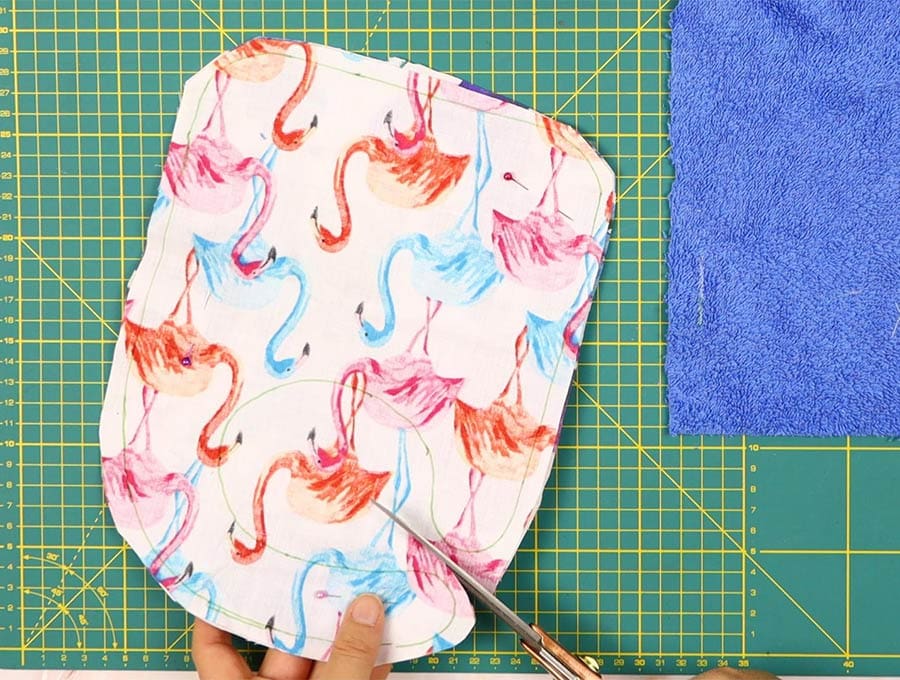
Place main fabric on top of the lining fabric, right sides facing and pin them together. Place the baby bib template on top of the main fabric, face down and mark around the pattern. Trim the excess fabric
STEP 4: Cut the fabrics
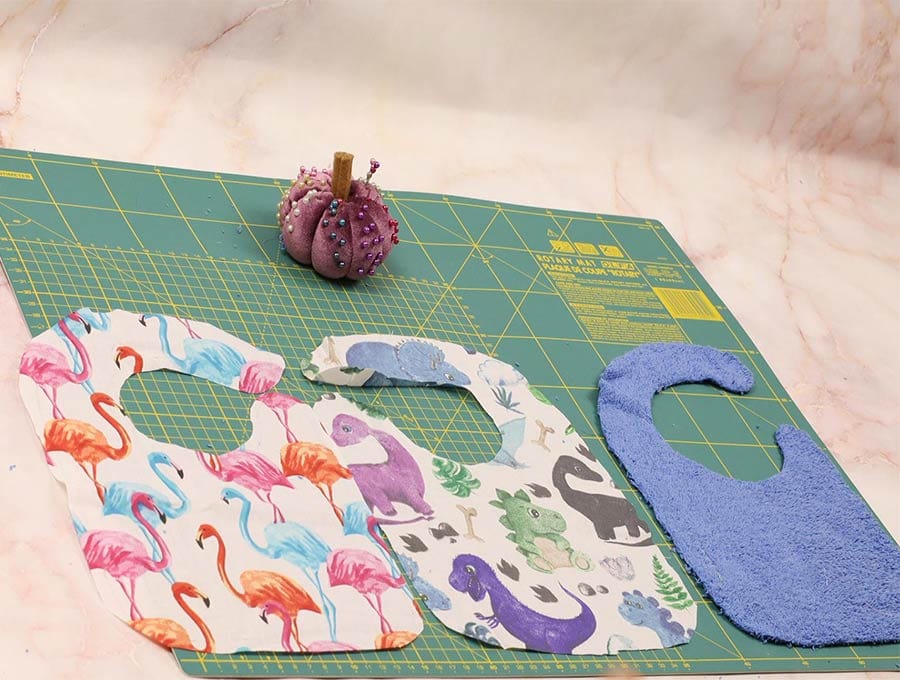
Cut two pieces for the front and back of the bib from the free pattern supplied 3/8″ from the edge of the pattern to allow for seam allowance.
Then cut the one piece of the terry cloth interfacing from the same pattern, this time do not add seam allowance. Terry cloth really is the best fabric to use, but you can use flannelette or a fairly thin sew-in batting or interfacing. For babies that tend to drool the terry cloth is the most absorbent and soft solution.
STEP 5: Layer the fabrics
Lay out the bib pieces on your worktop starting with the terry cloth (or alternative you have chosen, then lined up on top of it the front of the bib piece right side facing upward, then the back piece of the bib, wrong side facing upwards, on top of that.
STEP 6: Sew around
Clip the layers in place, making sure they all line up neatly. Using a short stitch length, and a 3/8-inch (1 cm) seam allowance), stitch around the edge of the bib leaving a 3-inch (7cm) gap at the bottom. Sew carefully around the curves at the neck of the bib, sometimes lifting the presser foot with the needle still in the fabric and gently easing the fabric around before depressing it again to get around the smaller curves where the bib will fasten. Back tack at the start and finish of the gap in the bottom of the bib.
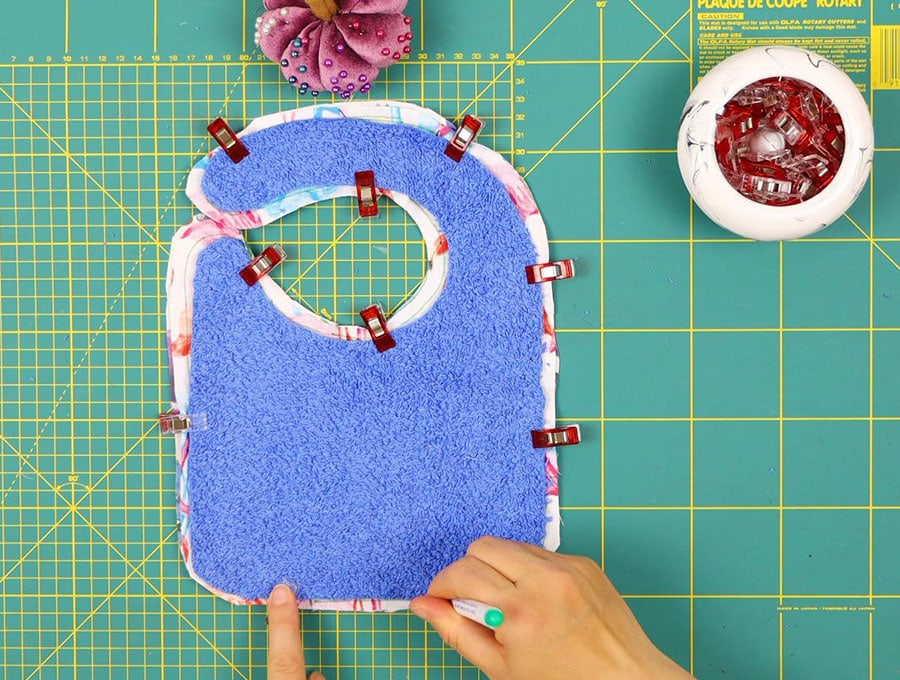
STEP 7: Clip around
After stitching, make small V shaped notches into the fabric, not reaching the stitching – this will allow the fabric to ease when turned the right way out so it lies flat. Do it all the way around EXCEPT for the 3-inch gap you haven’t stitched.
STEP 8: Turn right side out
Turn the bib the right way out by pulling the fabric through the gap. Use a knitting needle or chop stick to gently poke out the edges and ends where the bib will fasten so they are even and lie flat.
STEP 9: Press
Using an iron press the bib all the way around, folding up the seam allowance into the inside of the bib across the 3-inch gap so the edges are smooth and neatly pressed.
STEP 10: Topstitch
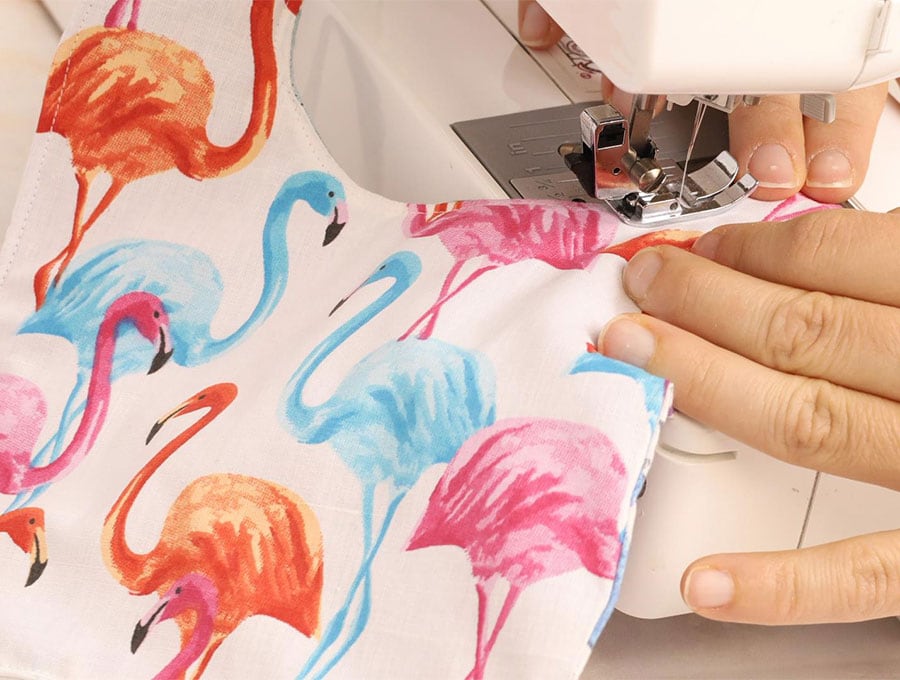
Top-stitch all the way around the bib, including across the gap.
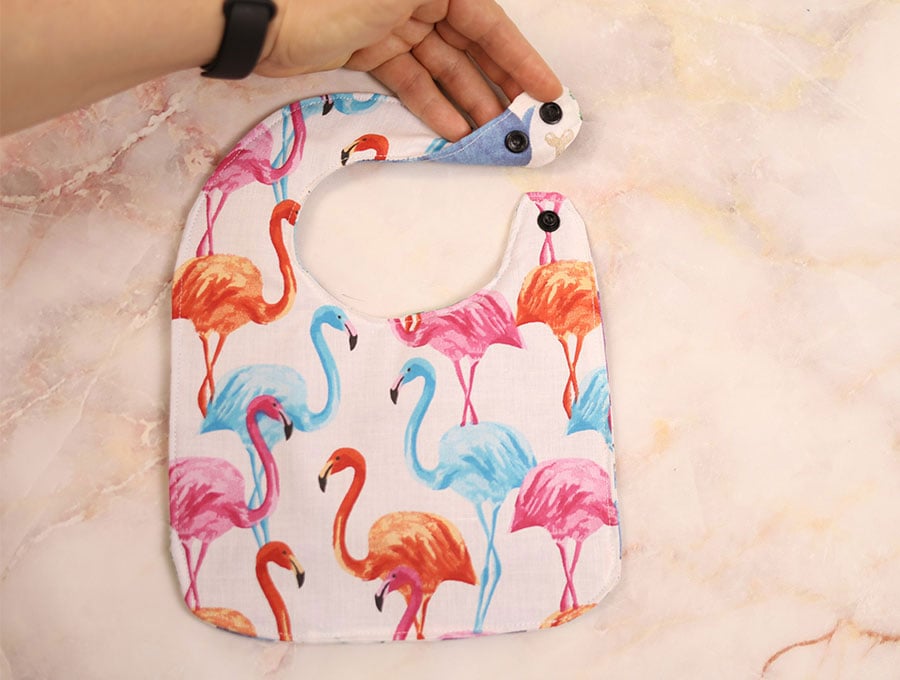
STEP 11: Mark the snap placement
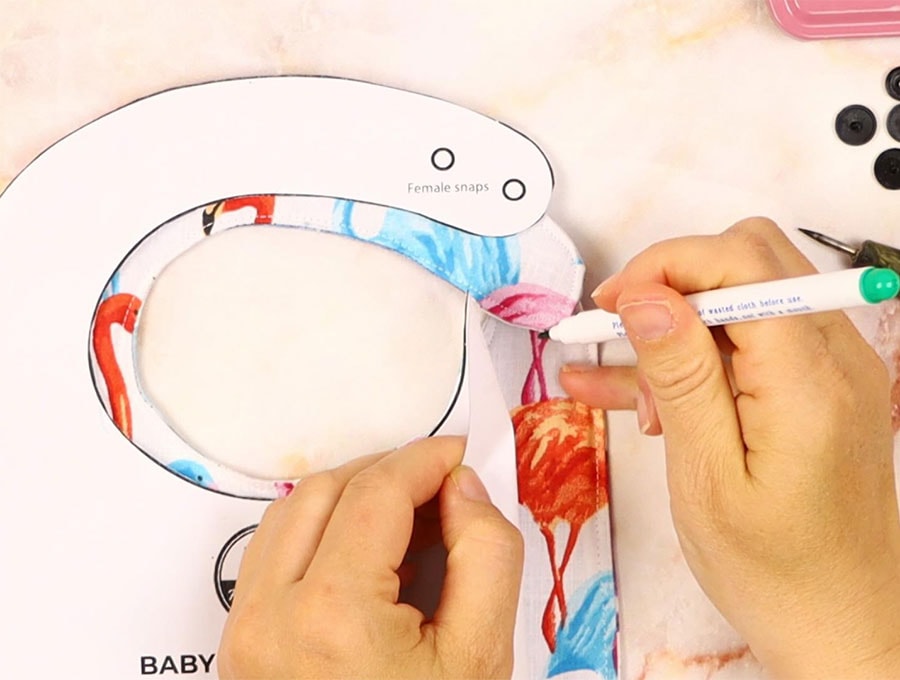
Place the baby bib template on top of the baby bib and transfer the positions of the snaps (two female, one male as shown in the pattern)
STEP 12: Attach the snaps
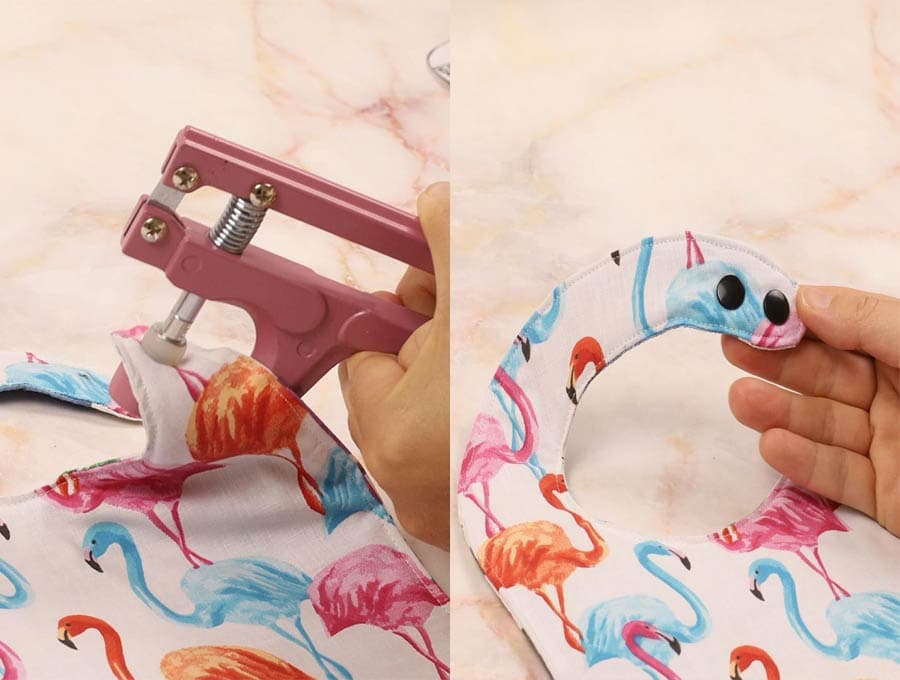
The last step it to attach the fastening system. You can use KAM snaps which are easy to install using the KAM snap fastening tool. If you prefer you can use two small pieces of Velcro, positioned at the ends of the bib so it closes neatly. You can attach the Velcro with your sewing machine, stitching around the four corners of each small square, or attach by hand if you don’t want the stitches to show on the top side of the piece that fastens the bib. Another alternative is to use press studs, but babies tend to pull at their bibs vigorously as they get older and it may come unfastened.
DIY Baby bib FAQs and tips:
Q: Can I add lace to the edge of the bib?
A: A narrow lace is very pretty on infant bibs. You can stitch it on by hand after completing the bib, by inserting the needle in every third tiny hole at the edge so it makes an even gather. Remember to turn over the ends twice at the start and finish, stitching along the small seam so the lace doesn’t unravel.
Baby bibs make great baby shower gifts, and if you can make them in a variety of sizes the mom-to-be will be well supplied from birth right through to toddler stage.
These homemade baby bibs you make can be customized with the name of the child embroidered on the bib, either by hand or using a machine with an embroidery function, or iron-on decorative motifs. They are super easy and quick to make following our video tutorial, or if you prefer use our step-by-step instructions. Make a few for your own children and to keep some on hand for those invitations to baby-showers or as gifts for new babies.
If you enjoyed making these baby bibs then please hit the subscribe button to have our latest baby sewing projects delivered straight to your inbox.
Do you like this? Pin for later:
Wanna be friends? Click HERE and follow me on Pinterest
RELATED: