
How to Sew a Card Wallet
Sewing a card wallet to take a few cards makes life so easy when you need to reach for a card in a hurry. The card wallet opens up so you don’t spend time extricating the card from the tight confines of card holders in commercial wallets while the cashier waits patiently at the till point. Best of all this takes a few minutes and costs next to nothing if you use fabric you have in your stash. We have step-by-step instructions and visuals to explain the process.

Want to sew a quick card wallet in a jiffy? Our step-by-step tutorial shows you how, accompanied by our visuals which make is easy to understand the concept. This fun project is useful, saves you money and uses up some of those gorgeous fabrics in your stash you’ve been saving but haven’t been quite sure how to use. Now’s your chance to let them take center stage with the three-division card wallet.
Below you will find my step by step written tutorial with VIDEO instructions for all the visual learners.
We occasionally link to goods offered by vendors to help the reader find relevant products. Some of the links may be affiliate meaning we earn a small commission if an item is purchased.
Table of Contents
How to make a Card Wallet
Supplies and tools
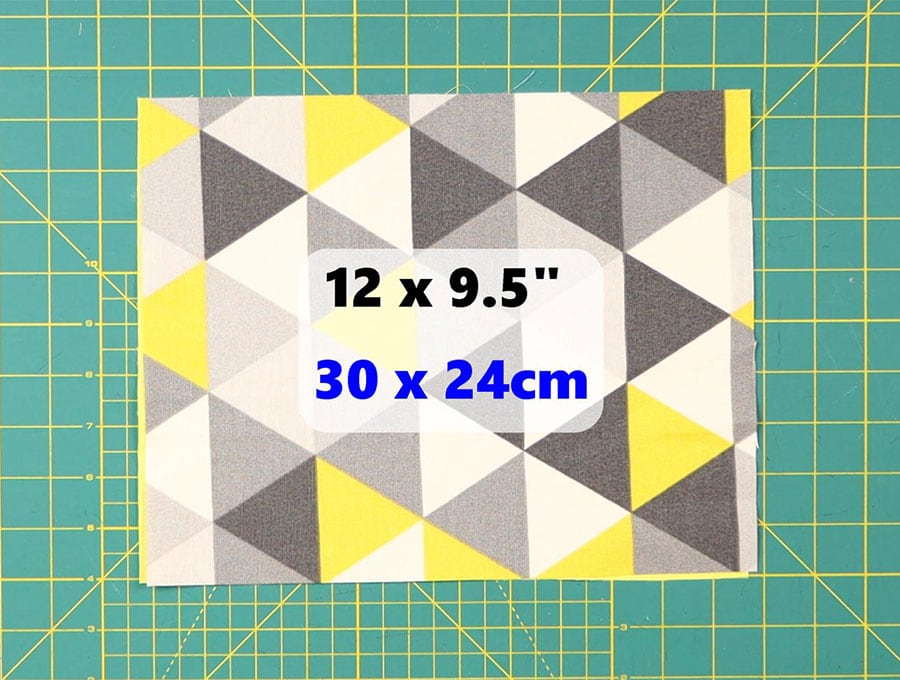
- 12 x 9.5 inches (30 x 24 cm) printed outer fabric
- 12 x 9.5 inches (30 x 24 cm) plain inner lining fabric
- matching thread
- scissors (or rotary cutter and a cutting mat)
- ruler or measuring tape
- iron and ironing board
- sewing clips or pins
- plastic snaps (you will need a sewing awl and snap pliers
- Fabric marking pen
DOWNLOAD: card wallet pattern [Free pdf file]
Follow us for free patterns & tutorials! [easy-profiles]
How to Sew a Card wallet
Watch the diy card wallet video first and then follow the written step by step instructions below.
Please enjoy and don’t forget to Like and SUBSCRIBE over on YouTube to be kept up to date with new videos as they come out.
Card Wallet VIDEO TUTORIAL
INSTRUCTIONS:
STEP 1:
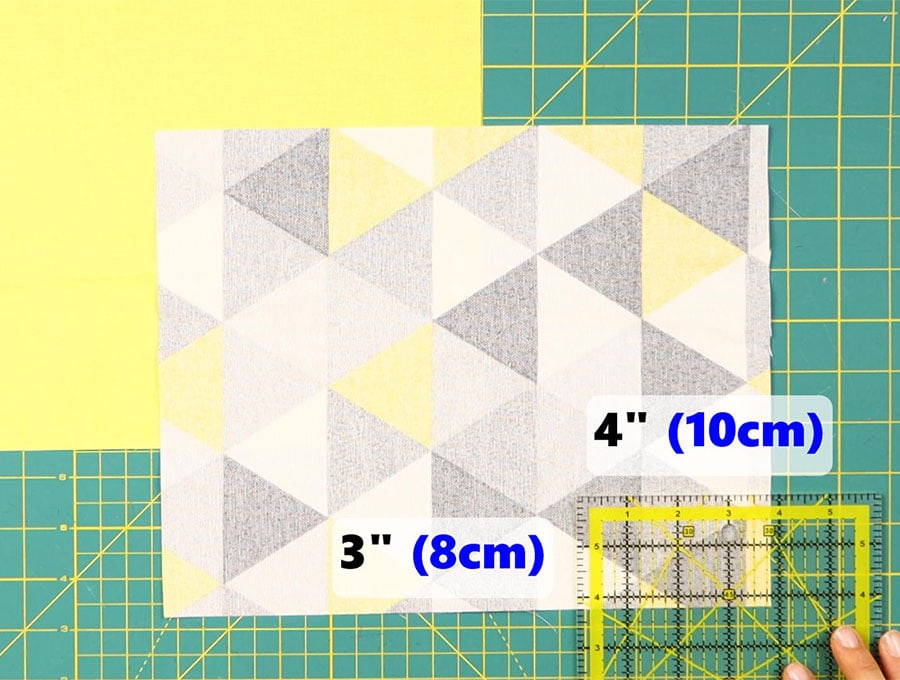
Lay your two blocks of fabric right side to right side on your worktop and clip the sides to hold them in place while you make measurements.
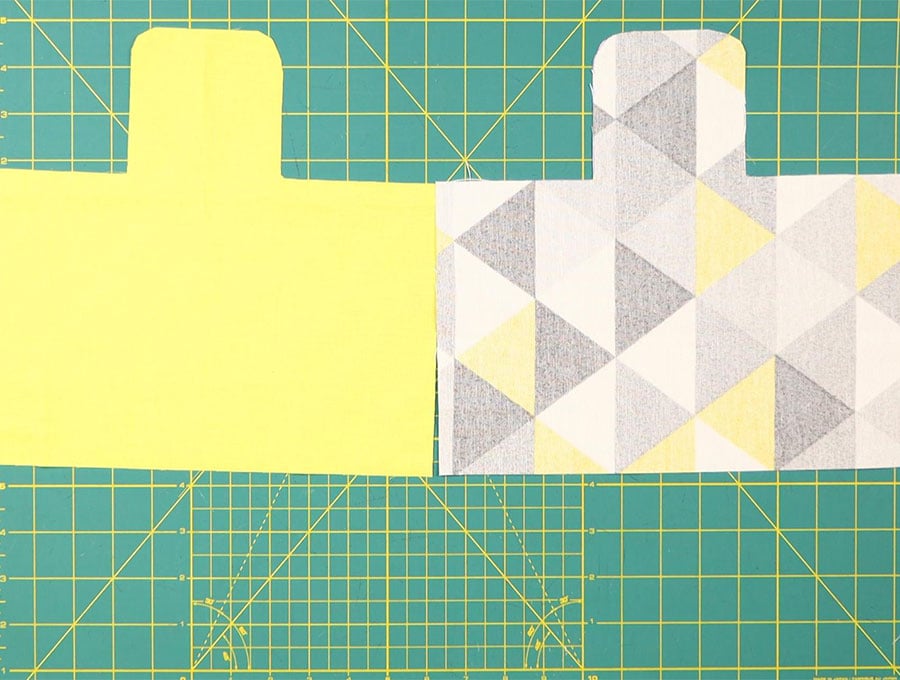
STEP 2: Making your own card wallet pattern
Continue to the next step if you are using our downloadable card wallet pattern
- Using a quilting ruler for accuracy measure 4 inches (10 cm) inwards from the left hand corner of the long side of the rectangle and 3.2 inches (8 cm) down on the short side. Check the block is straight using the quilting ruler then mark that block on the left hand side.

- Fold the fabric in half on the long side and line up so you can cut a block on the right hand side that is also 4 inches (10 cm) by 3.2 inches (8 cm). Pin in place and cut.
- While still folded round off the corner of the flap at the top.
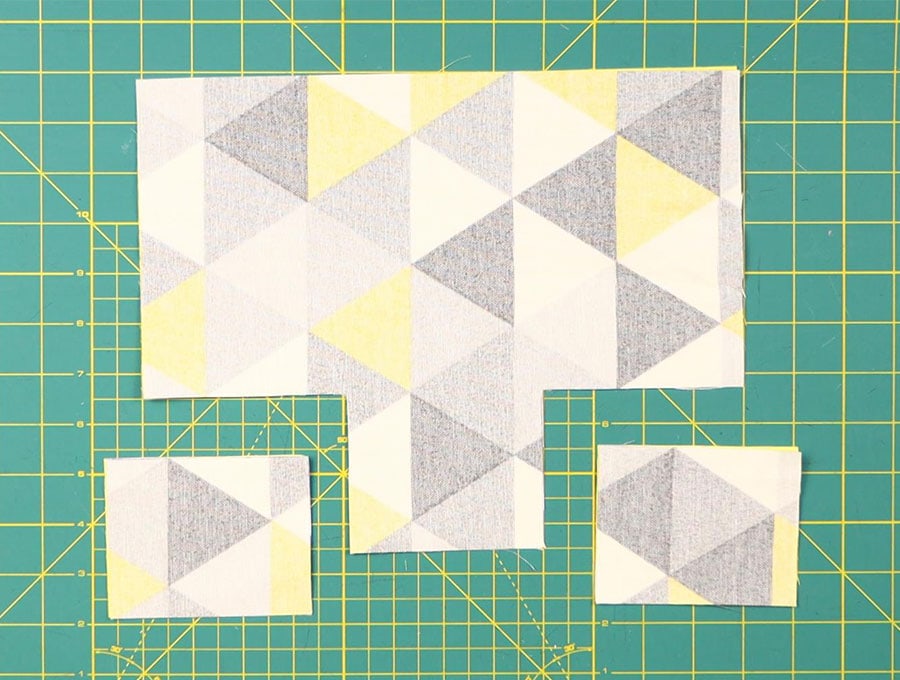
Your pieces will look like this:
Step 3:
Fold out the shape and make sure to pin or clip the edges in place ready for sewing.
Step 4:
Stitch all around the edge except for a gap at the bottom of the long edge opposite the flap of around 3 inches (7.5cm)
Step 5:
Clip across the corners and where the flap piece extends form the body make a small snip on either side towards the stitched corner to make the inverted corner lie flat. Turn the right way out by pulling the fabric through the gap, ensuring the corners are turned out neatly.
Step 6:
Turn in the raw edges of the gap in line with the seam and press flat.
Step 7:
Do a line of top stitching all around the card holder 1/8 of an inch (3mm) from the edge.
Step 8:
Time to create the pockets for the cards. With the outer fabric placed face down on your worktop, flip up the sides to meet the line where the cover flap extends. Mark on each side.
Step 9:
Stitch the two side together that you marked with a straight line of stitching. Then open out the sides, folding them back. (Our visuals make this step easy)
Step 10:
Fold up the wallet to meet the point where the cover flap will bend over, then carefully stitch across each side 1/8 of an inch (3 mm) from the edge. This creating the compartments for three cards.
Step 11:
All that remain is to attach a stud to close it, using your press stud machine/snap fastener, taking care to mark where each half of the stud lines up.
And that’s it – all done – your card holder is ready to gift or to use. It’s just a perfect way to use gorgeous pieces of fabric in your stash. If you enjoyed this quick and easy tutorial then please like and subscribe to have our fun easy projects delivered straight to your inbox. Have fun sewing and please share how this turned out with a photo in our comments section. We really love seeing what how our creative community uses their fabrics. Like and subscribe to get more easy and fun projects like this one delivered to your inbox so you don’t miss any of our fabulous sewing ideas.
*** FAQs and tips:
Do you like this? Pin for later:
Wanna be friends? Click HERE and follow me on Pinterest
RELATED: