 with Free Pattern")
DIY Casserole Carrier (Insulated Food Carrier) with Free Pattern
This insulated food carrier is stylish and easy to make with our step-by-step instructions. It’s just perfect for keeping food insulated while you travel to a destination. Whether it is warm food or a cake, as long as it is in a sealed container, it can be safely carried with our DIY insulated food carrier. Imagine taking along a plum pudding, a Christmas cake, a warm stew, or apple pie to a gathering in this classy-looking carrier. You can make the food carriers in colors and prints to suit the season, whether Christmas, Easter, or Halloween.
If you’ve been asked to bring a dish to a function, this is DIY food carrier is perfect for keeping food insulated while you travel. As long as the food is in a sealed container, it can be safely carried. The carrier can also be given as a gift, together with its edible contents. I’m thinking Christmas cake, plum pudding, mince pies, gingerbread biscuits, brownies or any treats you want to gift.
Below you will find my step by step written tutorial with VIDEO instructions for all the visual learners.
We occasionally link to goods offered by vendors to help the reader find relevant products. Some of the links may be affiliate meaning we earn a small commission if an item is purchased.
Table of Contents
How to make a Casserole Carrier
Food carrier Supplies and tools
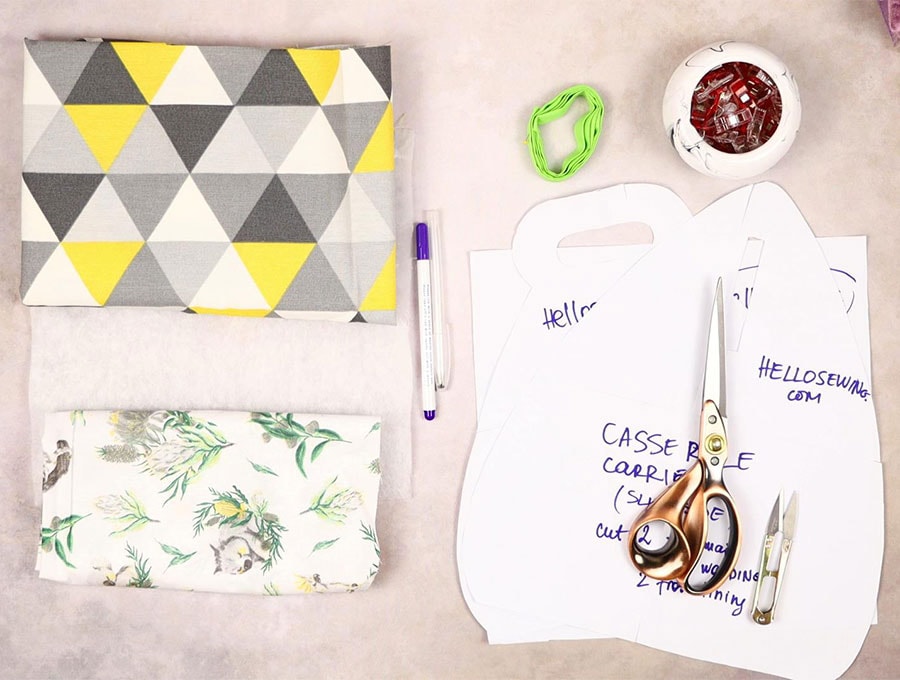
- outer fabric – medium weight home decor fabric or cotton fabric
- lining fabric – cotton
-
heat fusible wadding for all pattern pieces
-
bias binding – 1 yard (1m) of 1/4″ (6mm) wide double fold bias tape
- matching thread
- scissors (or rotary cutter and a cutting mat)
- ruler or measuring tape
- iron and ironing board
- sewing clips or pins
DOWNLOAD: Casserole carrier pattern [Free pdf file]
Follow us for free patterns & tutorials! [easy-profiles]
How to Sew a Casserole Carrier
Watch the diy food carrier video first and then follow the written step by step instructions below.
Please enjoy and don’t forget to Like and SUBSCRIBE over on YouTube to be kept up to date with new videos as they come out.
DIY food carrier VIDEO TUTORIAL
DIY Casserole Carrier INSTRUCTIONS:
STEP 1:
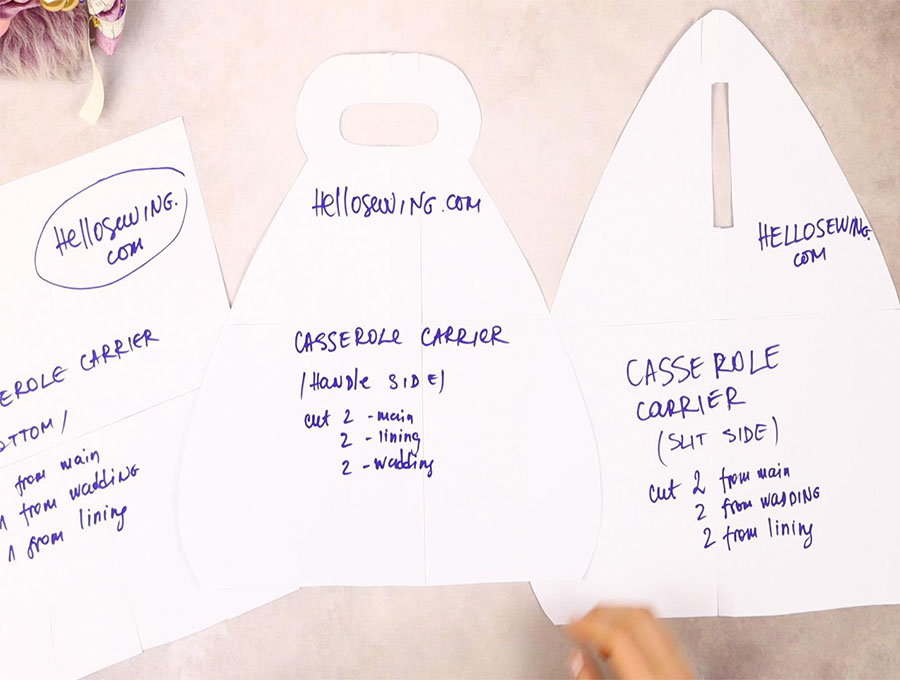
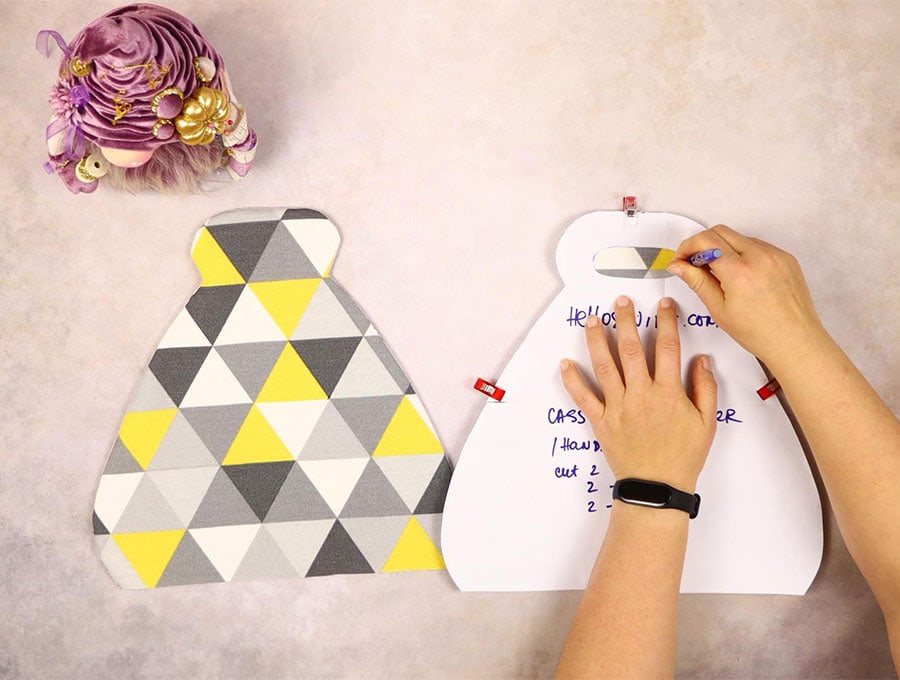
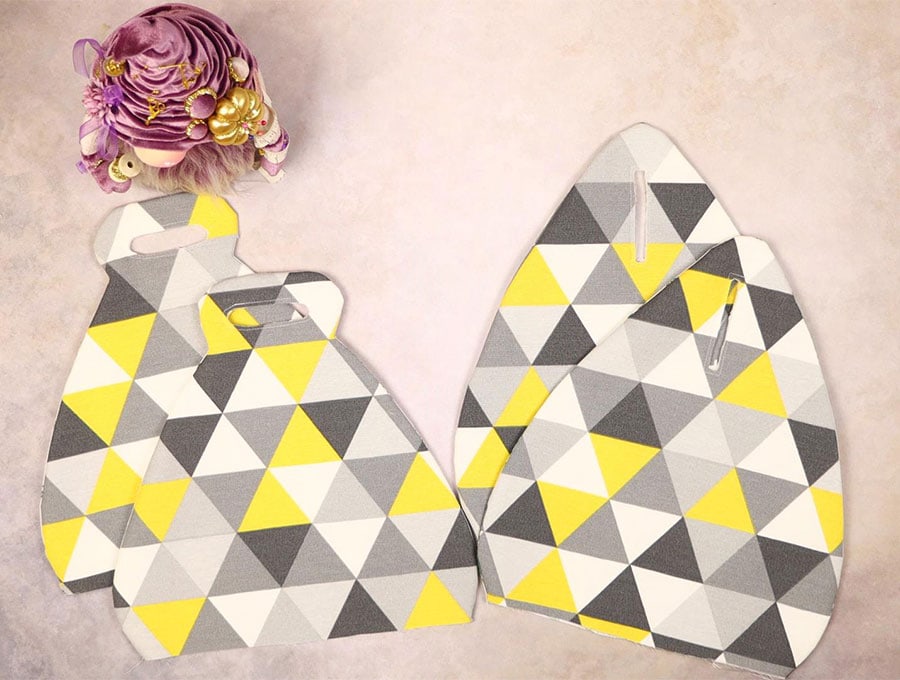
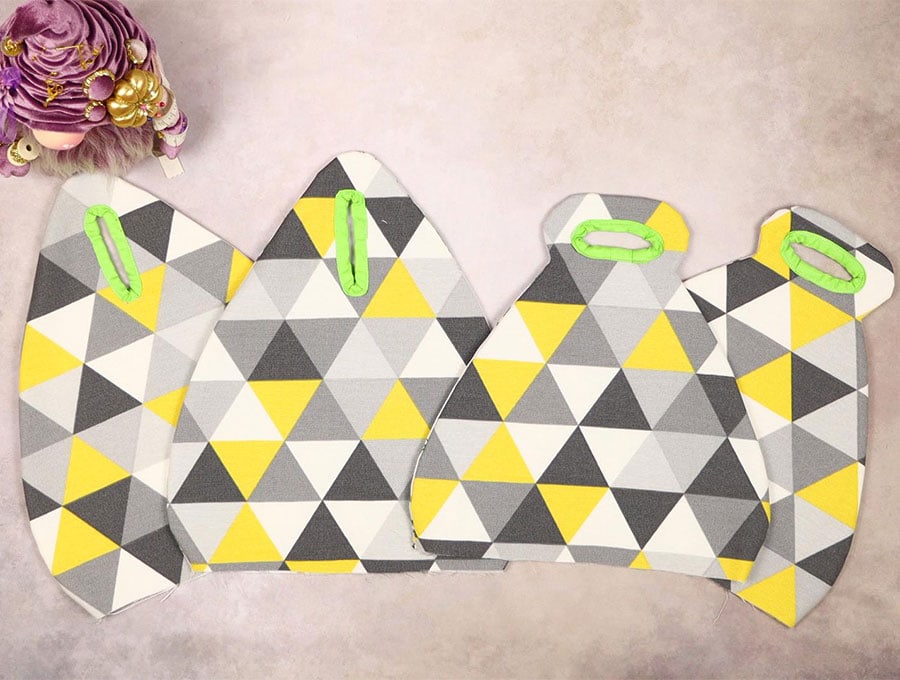
Print the pattern supplied and cut it out along the marked lines. There are two different side pattern pieces – one has a hole near the top of the pattern, and one has a slit. The pieces cleverly fit together for fastening the food carrier when completed. You will also need to cut out the square base piece.
![]()
STEP 2:
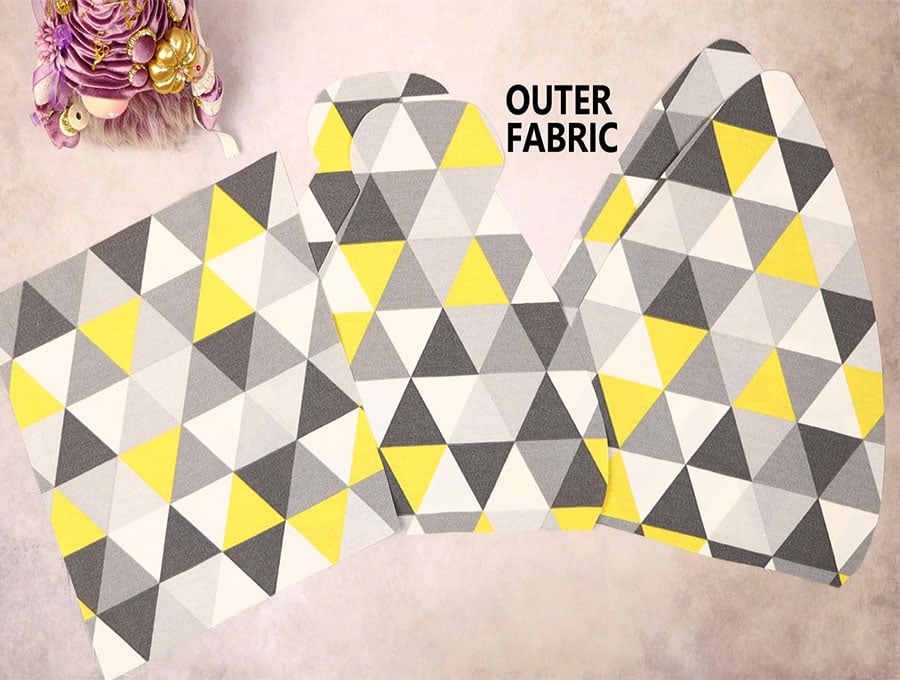
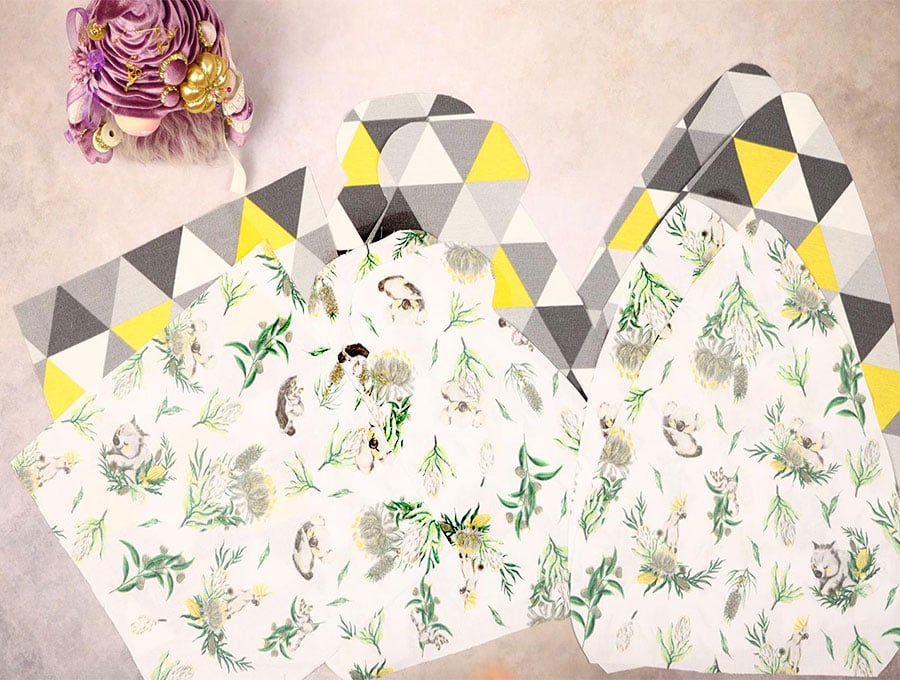
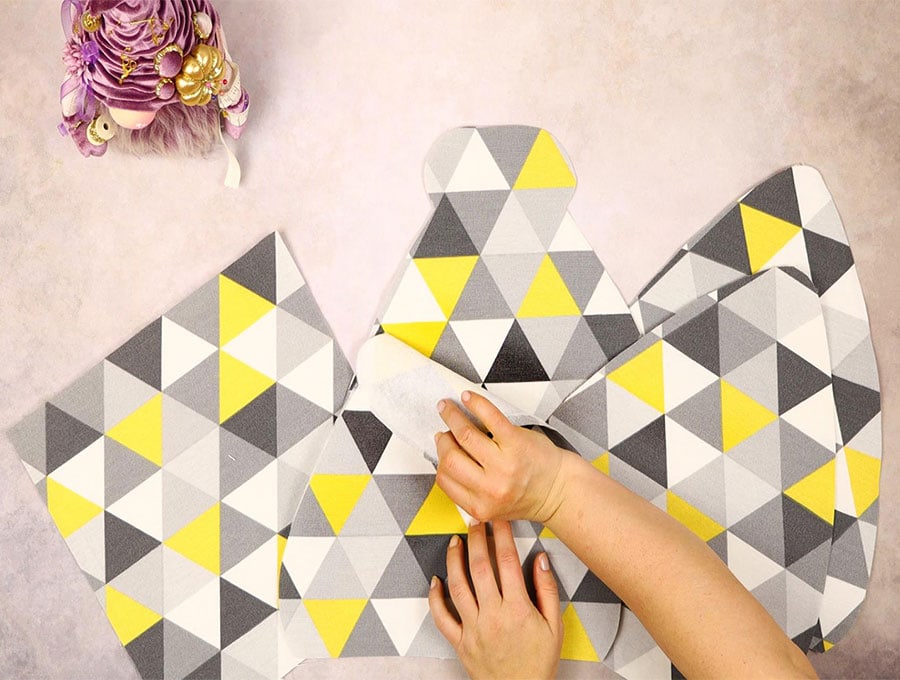
Lay out your fabric. You will need to cut 2 of each side pattern piece from the outer fabric and 2 of each side pattern piece from the lining fabric. You will also need to cut an outer and lining fabric for the square base.
STEP 3:
Cut the heat-adhesive wadding for the DIY food carrier – two from the one pattern piece with the hole, two from the pattern piece with the slit, and one for the base. Make sure to cut the wadding 1/4 of an inch (6mm) smaller than the actual pattern pieces.
STEP 4:
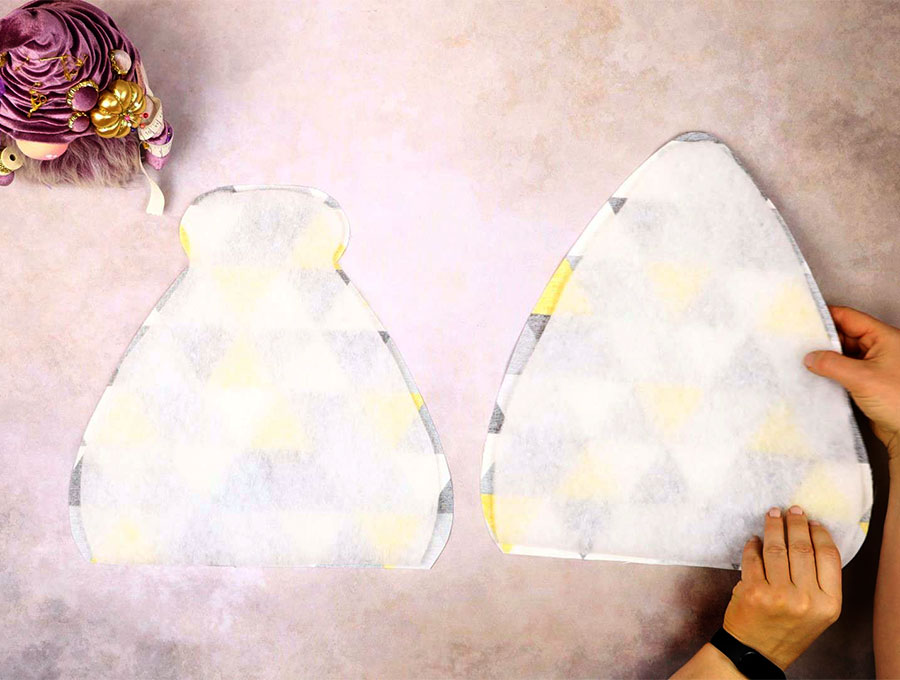
Apply the wadding using your iron according to the manufacturer’s instructions. It needs to be applied to the wrong sides of each outer fabric pattern piece and to the base.
STEP 5:
Once applied, place your paper casserole carrier pattern piece over the side with the hole in it. Use a fabric marking pen to trace around the edge of the hole.
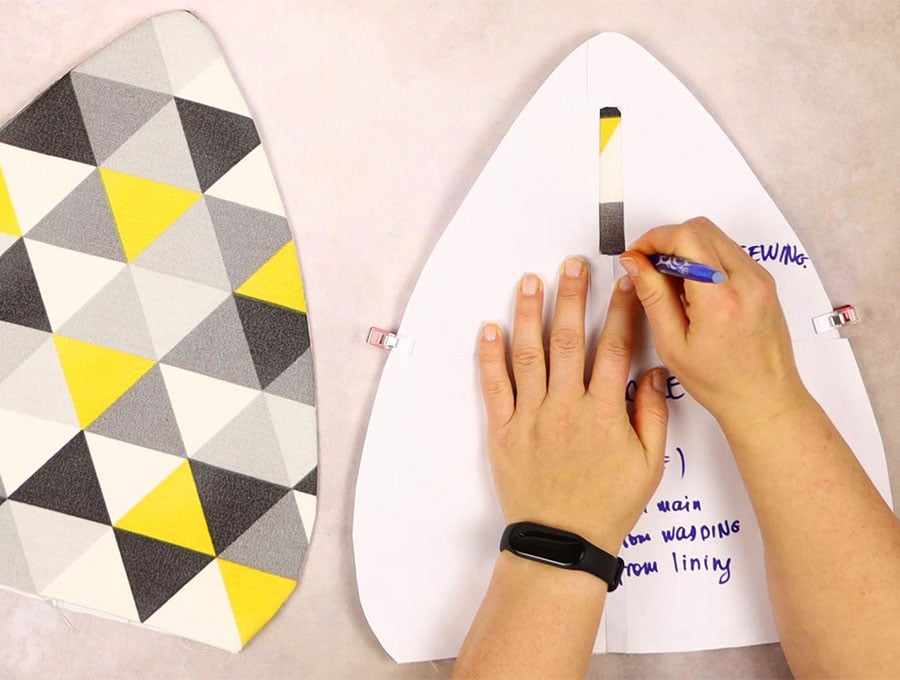
Repeat with the other pattern piece.
Place the pattern piece with the slit in it over the outer fabric, right side up, and outline the slit shape with a fabric marking pen.
TIP: You can transfer the hole and the slit pattern after you stitch the outer and lining together and turn them around as I did in the video
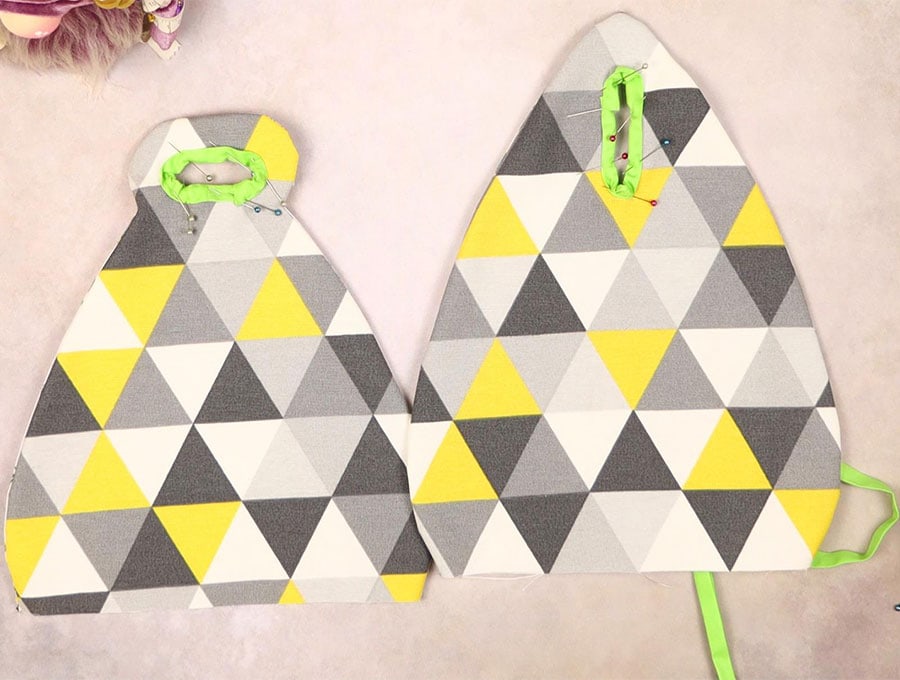
STEP 6:
Place one outer wadded piece with the slit in it wadding side down on the worktop, and carefully align the lining piece over it with right sides facing each other and pin in place. Repeat with the other side and for the pieces with the holes
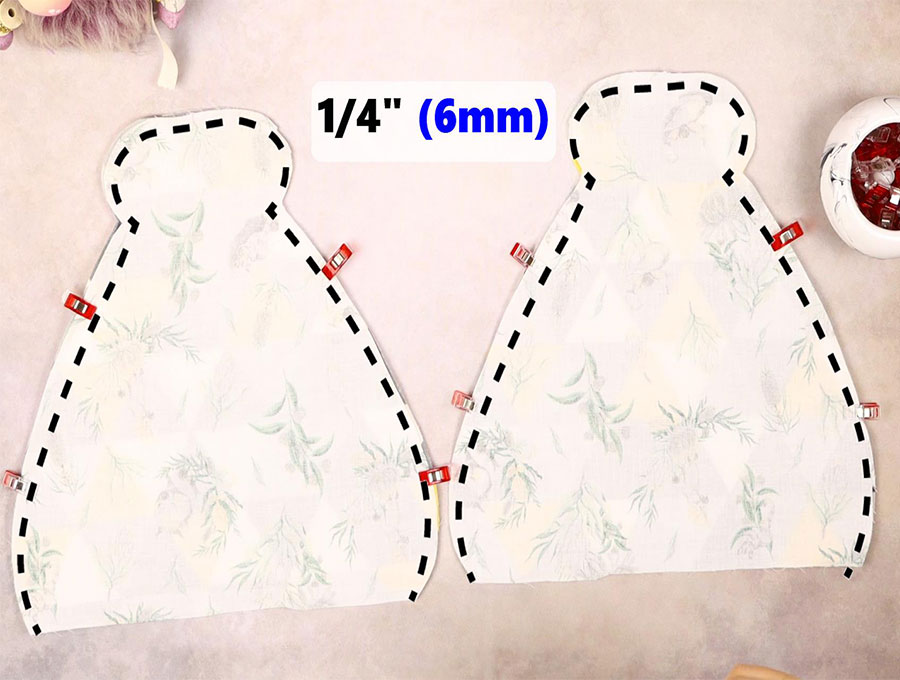
STEP 7:
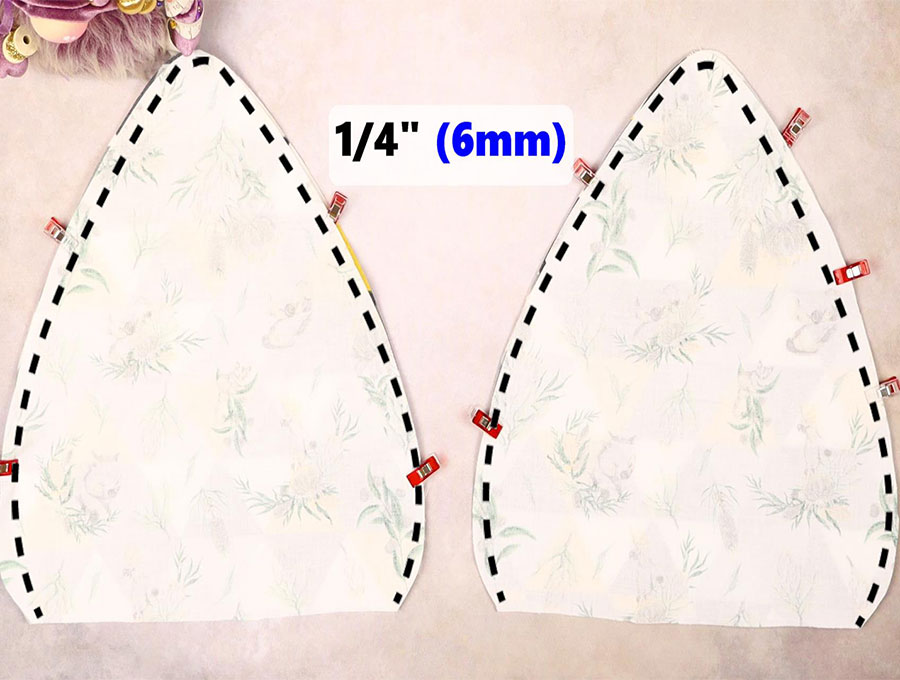
Stitch around the pieces 1/4 inch (6mm) from the edge, leaving the base open.
STEP 8:
Make small snips in from the edge to ease the fabric on the curved areas, taking care not to snip too close to the stitch line.
STEP 9:
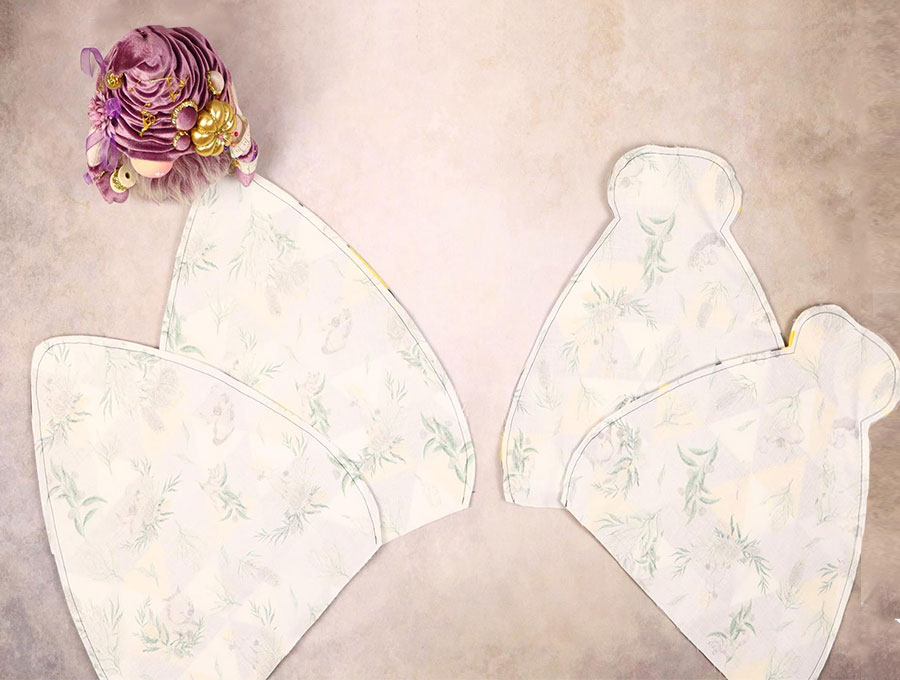
Turn the pieces the right way out.
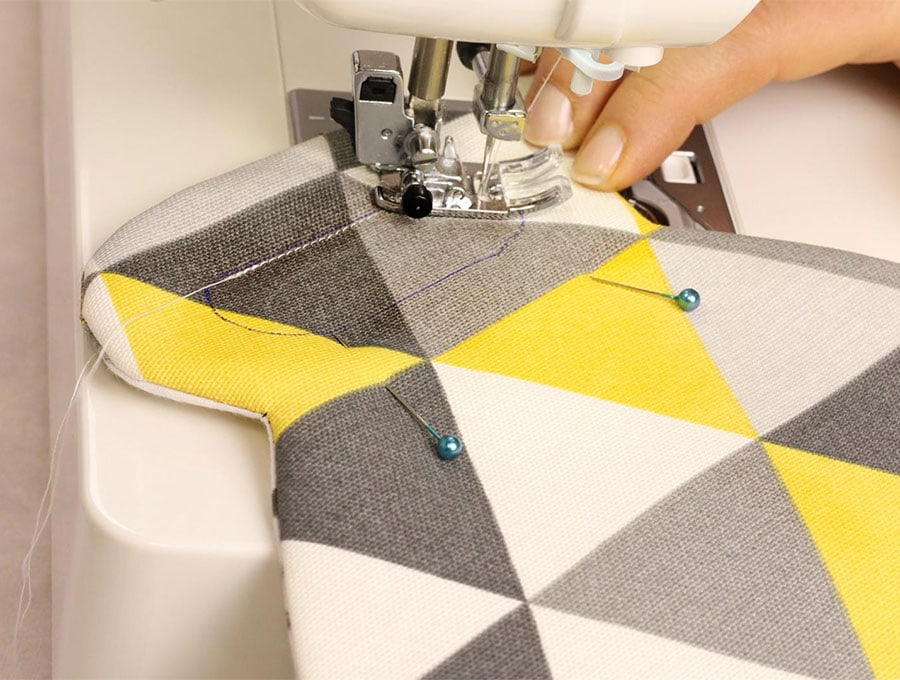
STEP 10:

Make sure the fabric is lying flat and the edges gained before pressing, then stitch around the areas with the slits and holes that you marked with the fabric pen, back tacking at the start and finish. Repeat for the other side.
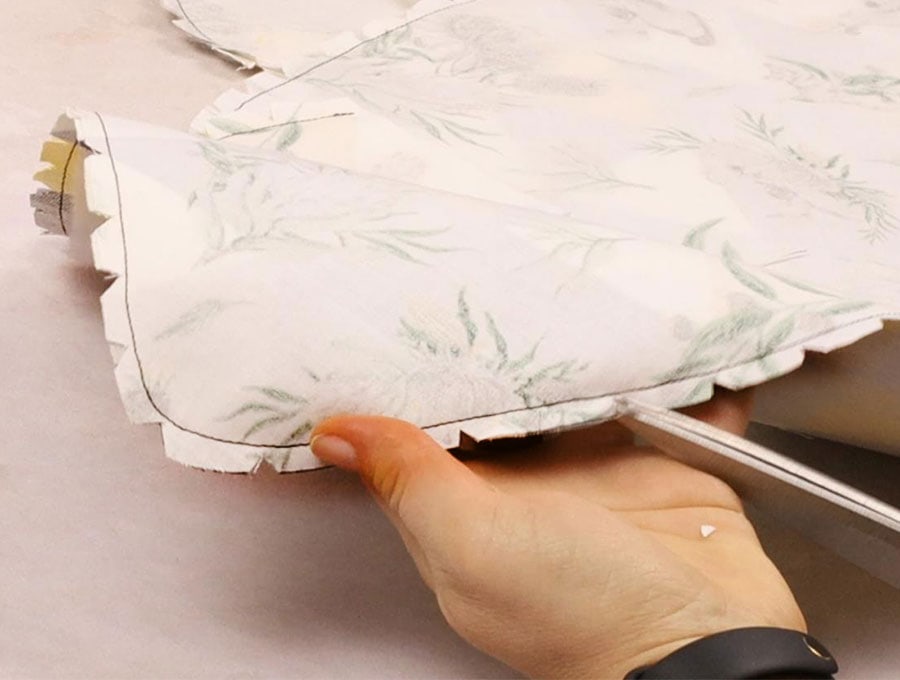
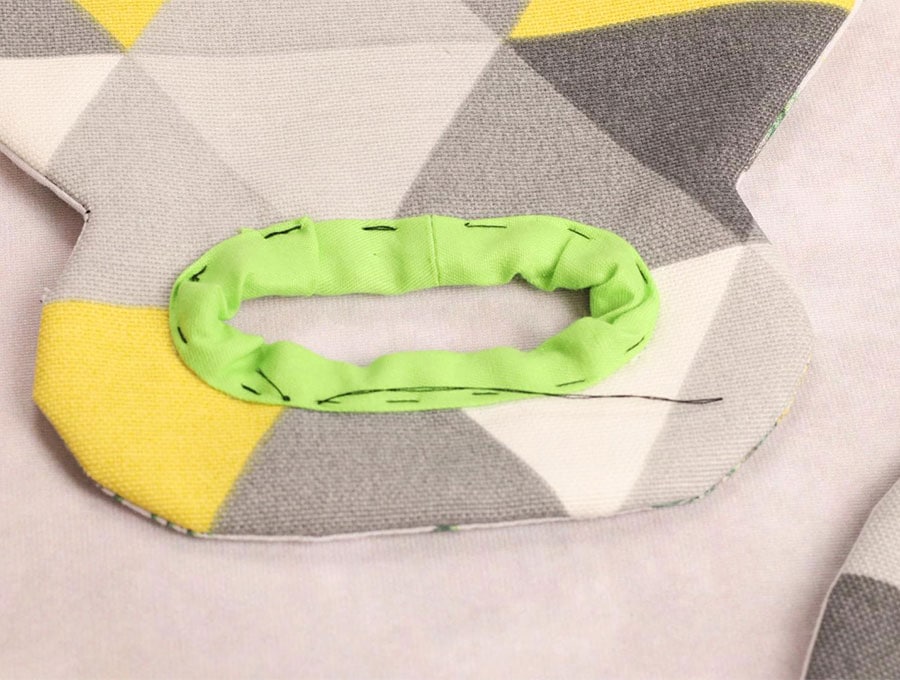
STEP 11:
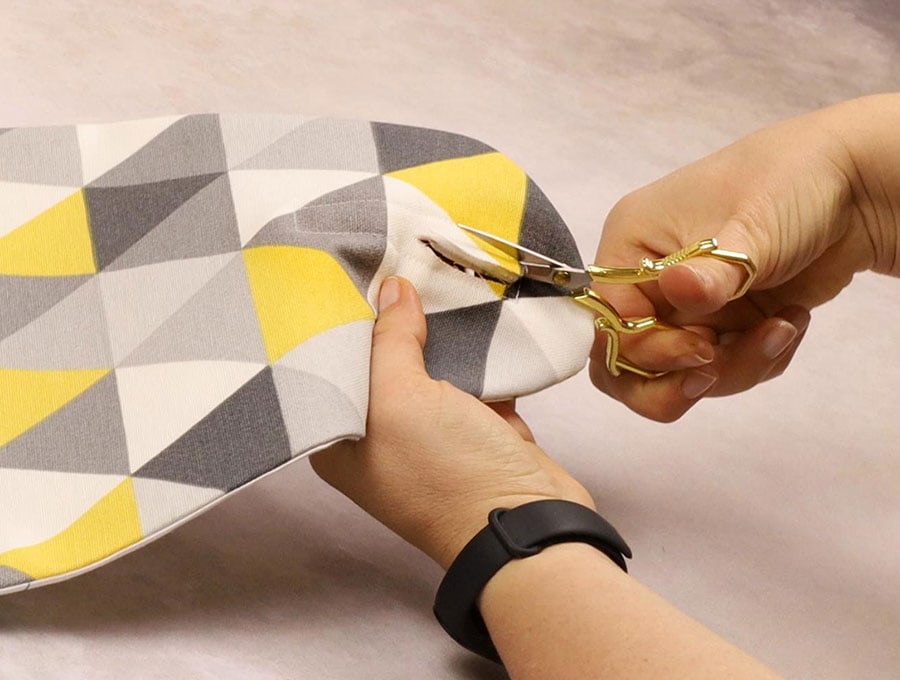
Take all four pieces you have stitched and carefully cut out the slit and the holes, leaving about 1/8 of an inch (3 mm) of fabric extending beyond the stitch line.
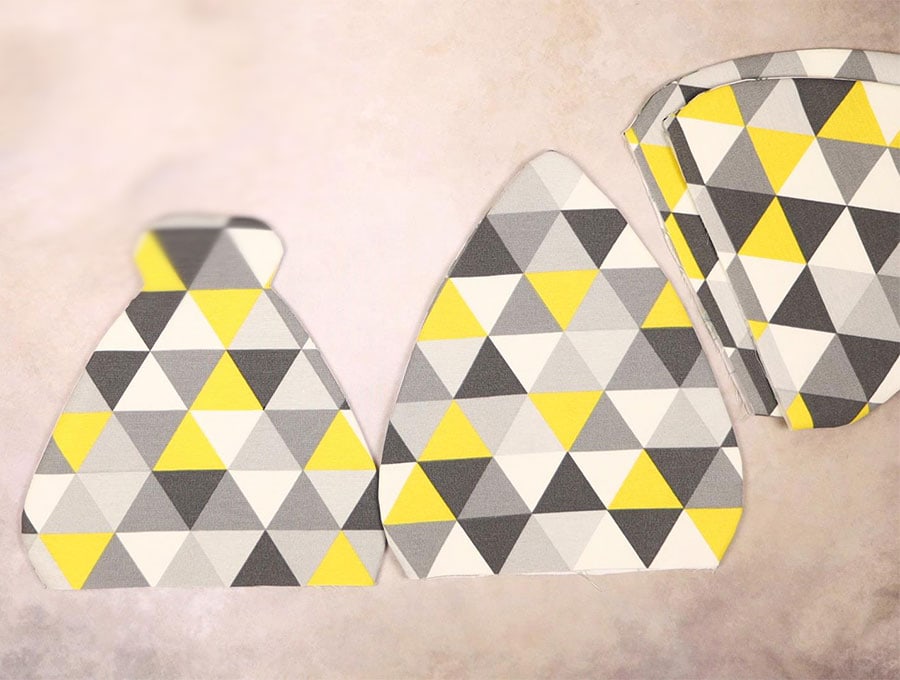
 STEP 12:
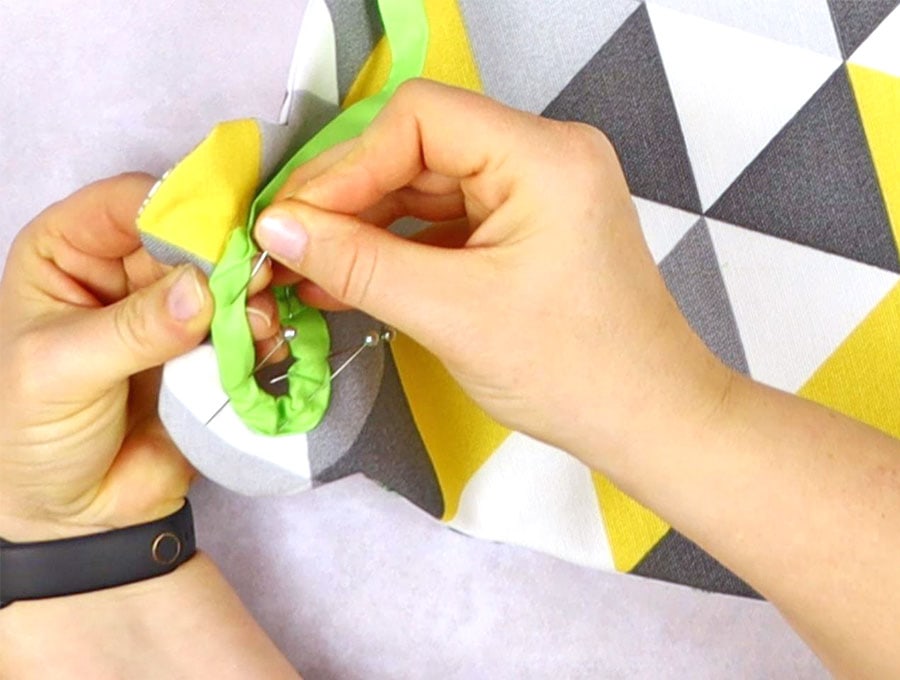
Take your bias binding and fold it in half lengthways; pin it with the fold on either side of the slit or hole, taking care to ease it around the bottom and top parts of the slit. End the bias binding by cutting and folding it over by 1/2 of an inch (1.3cm) beyond where it started.
To make the final machine stitching easier you can baste the bias binding using running stitches, by hand, to ensure the bias binding is even on the front and back of the fabric.
STEP 13:
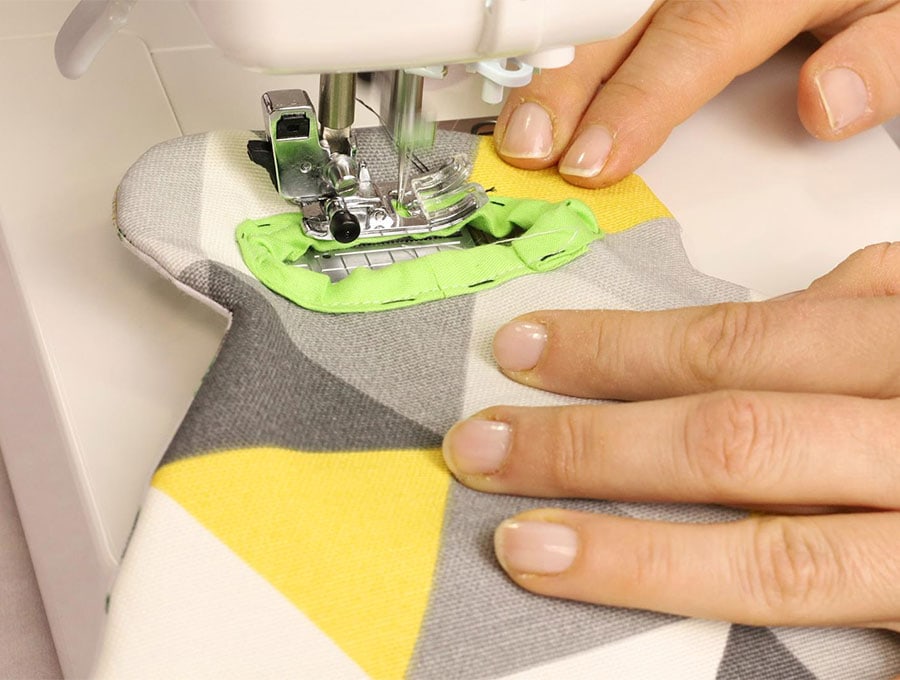
Stitch around the two holes and two slits, back tacking at the start and finish, and make sure you have caught both sides of the binding with the stitching. Trim and set aside.
Remove the basting stitch if you basted in the previous step.
STEP 14:
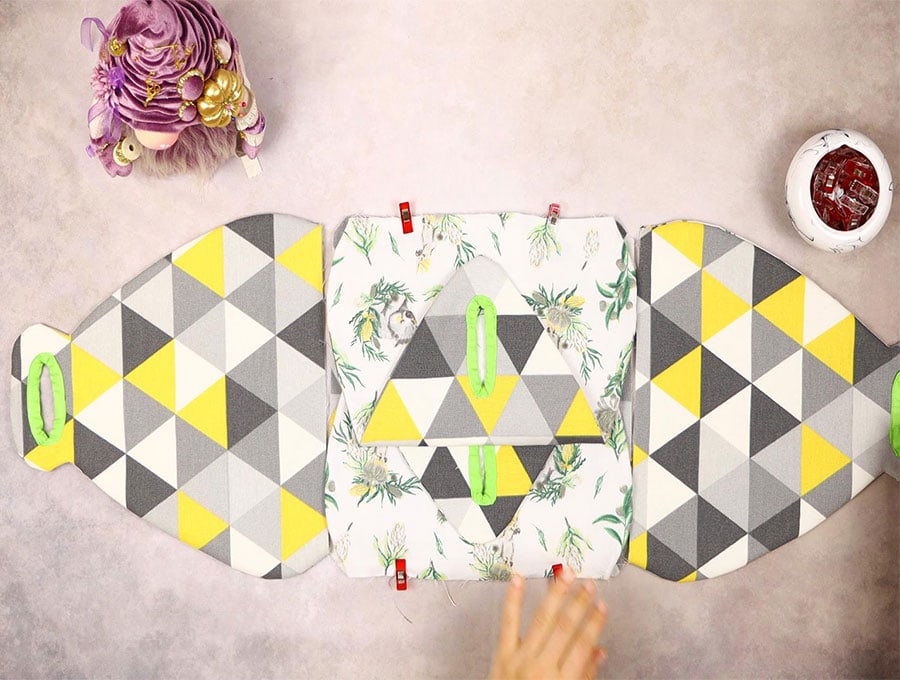
Place the outer base piece with wadding attached, right side up on your worktop. Then place the four sides around the square, making sure the sides with slits and the sides with holes are opposite each other. The outer fabric should be facing upwards on the sides. Pin one side to the base, right side to right side, leaving a small gap on each end as the base will be slightly larger than the side, and stitch 1/4 of an inch from the edge (6mm).
STEP 15:
Repeat the process with the other 3 sides – checking before stitching that the holes are directly opposite each other, and the same with the sides with the slits.
Tuck in and pin the four sides so they do not extend beyond the outer base.
STEP 16:
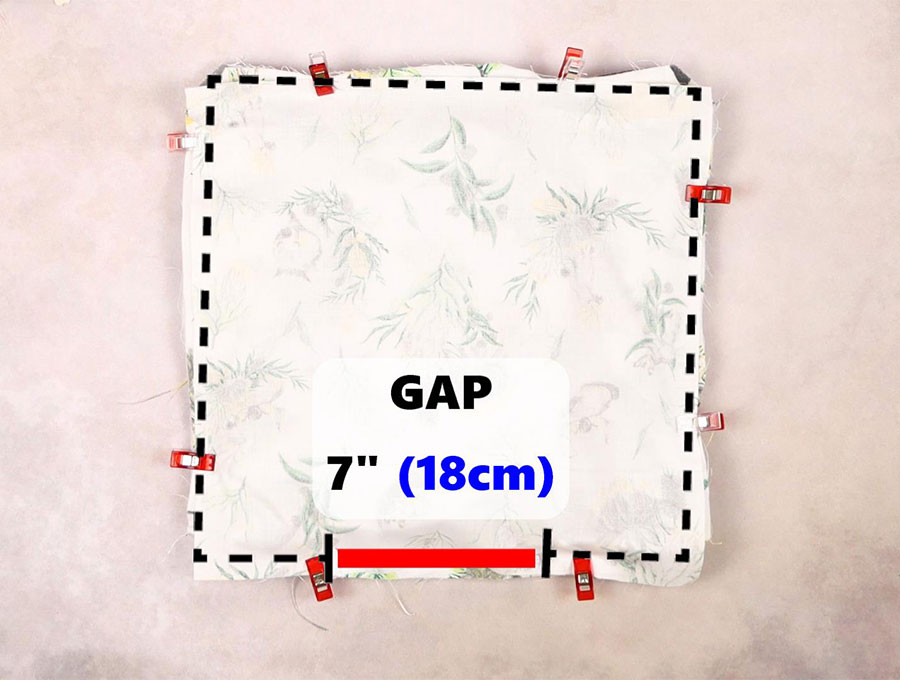
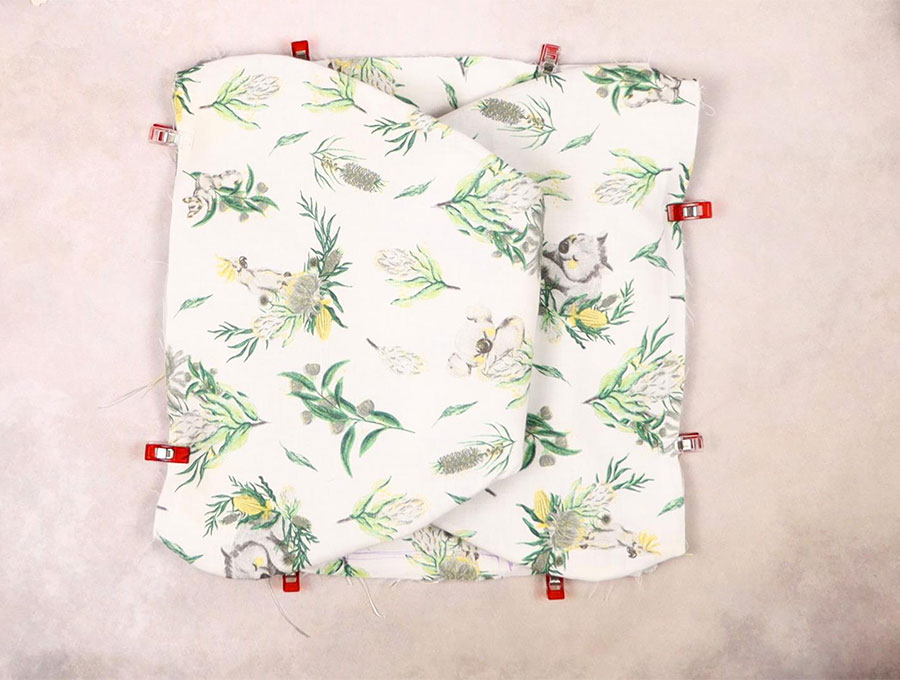
Place the lining square for the base wrong side up over the whole thing. Pin in place leaving a gap of 7 inches (18cm) on one side of the square near the middle.
STEP 17:
Stitch around the base, ½ inch (1.3 cm) from the edge, lifting the pressure foot at the corners while leaving the needle in the fabric, swinging the fabric 90 degrees, and lowering the pressure foot before stitching. This will give you neat corners. Backtack at the start and finish of the gap.
STEP 18:
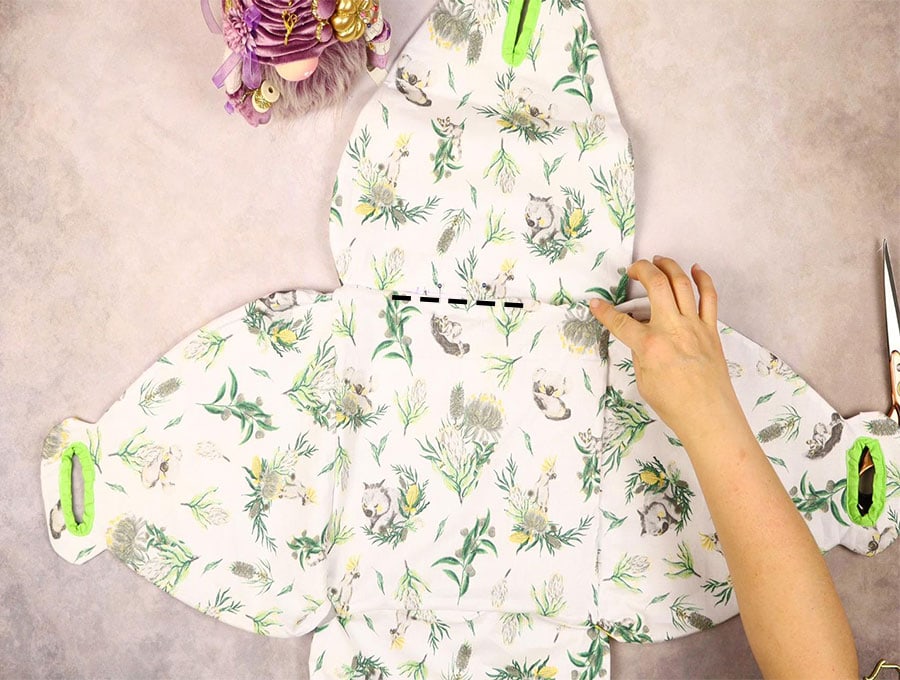
Trim off the corners to reduce the bulk, then pull the whole food carrier through the gap so it is the right way out. Close the gap you pulled through by turning in the edges, pressing, and using concealed hand stitching to complete.
PRO TIP: If you don’t feel like hand-stitching, just machine stitch all around the base. this will also close the gap

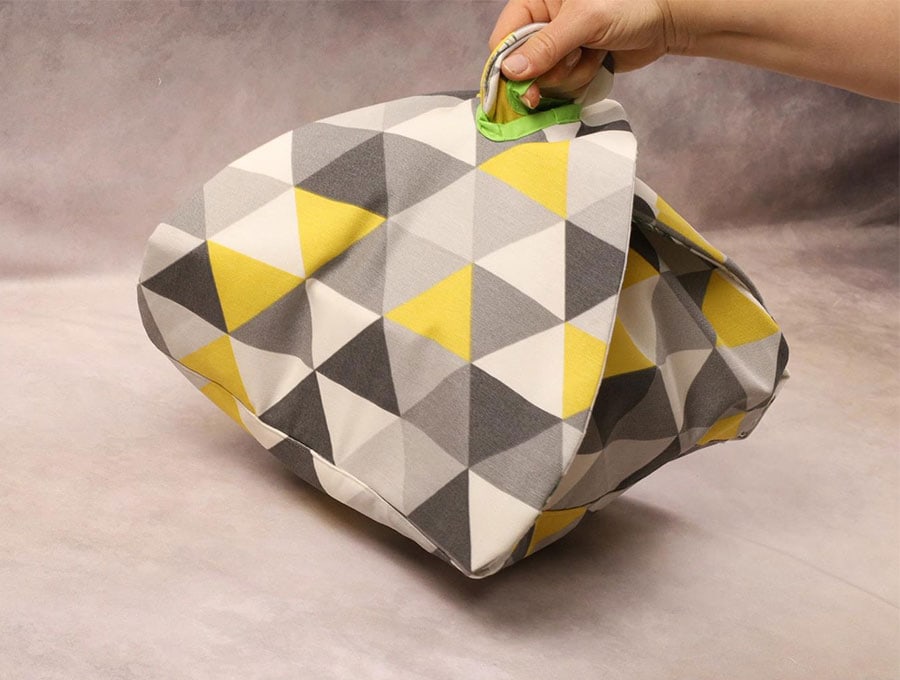
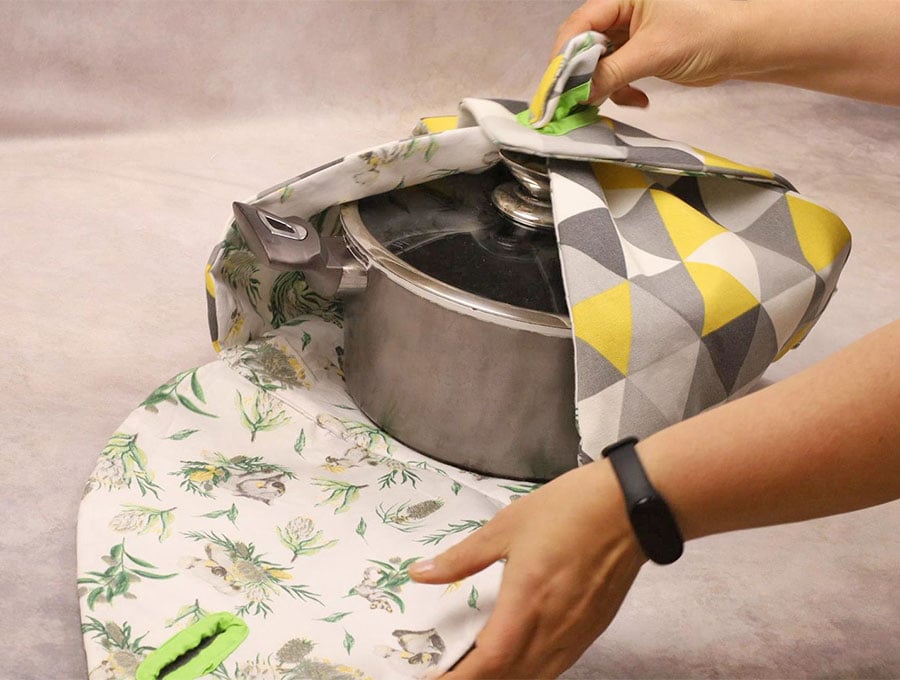
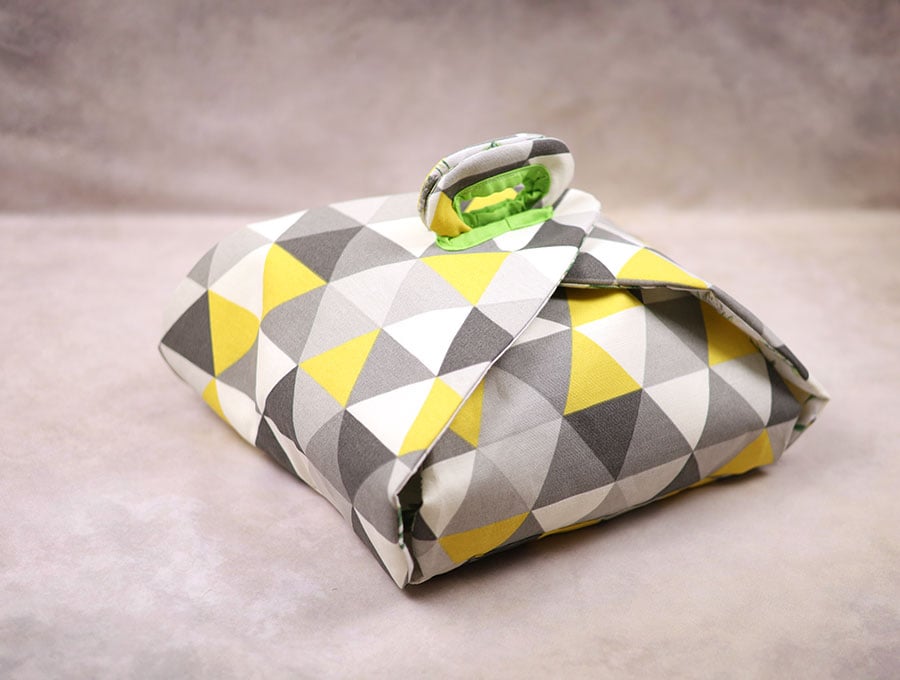
Your cake or hot food carrier is now ready to use. Place the two handles with the holes in them together, ease one slit side over the handles, ease the other slit side over, and your carrier is ready to go – keeping food warm and protected. If you enjoyed this tutorial please give us a like and subscribe to Hello Sewing to have exciting and easy projects delivered to your inbox.
Do you like this? Pin for later:
Wanna be friends? Click HERE and follow me on Pinterest
RELATED: