
DIY Cat Hammock – How to Make the Purr-fect Kitty Bed
“Come and see what I have for you,” I called to the furry felines.
The two of them came over to inspect my DIY cat hammocks. I’d made two, just to make sure they each had one. They explored the way they had been set up and after some rubbing and purring they hopped up to explore this new contraption. I watched as they swatted each other, rolled and played in the hammocks, then settled down for a contented snooze. Success! So, today I’ll show you how to make a cat hammock.
What led to making these DIY cat hammocks was that one of my readers, Sharon, told me that she was making cat hammocks for animal organizations and offered to send me her cat hammock pattern and instructions so I can share them with you. These handmade cat hammocks are used in animal shelters to help cats destress, and have become quite a fashionable pet accessory in people’s homes. Shelter staff noticed that cats needed a place that was higher up where they could rest in safety and survey their quarters from a higher vantage point, that there were less respiratory infections in animals living in shelters who had these cat or ferret hammocks, and that they provided a new space to explore and play on. Then there were the cute Pinterest pictures with kitties in their Christmas tartan hammocks, and deck chair stripes, that led to me thinking, “The kitties would love one of those!” My mind went into hyperdrive. What about reversible hammocks – cooling cotton for summer, and cuddly fur pile for winter on the reverse? Spring florals, autumn leaf prints, a pop of neon, sophisticated grey or black… the ideas kept coming. They can be fastened underneath a chair, a table, to a DIY stand, or even attached between trees outside.
I decided to do some reading up on the advantages of these handmade cat hammocks before starting, and it appears that cats like to be elevated – hence their love of climbing the curtains to perch on curtain rails, climbing trees, and settling on the top of high pieces of furniture. They feel safer from a higher vantage point, out of reach of predators, even though they are predators themselves. Now it needn’t be extreme – just enough height to keep them off the ground. The other advantage is the play aspect as they test their balancing skills on the soft surface, and then there is the comfort aspect – they are not on a hard surface covered with a cushion, but on a soft surface that molds to their body. Lastly, the hammocks are breathable – so there is no build-up of dampness or fur where they sleep. They are also great for cat cages when the animal needs to be confined, as the hammock places them above water and food containers and any fecal matter. What I love is that they are lightweight and can be tossed in the washer so the cat always has a clean place to sleep.
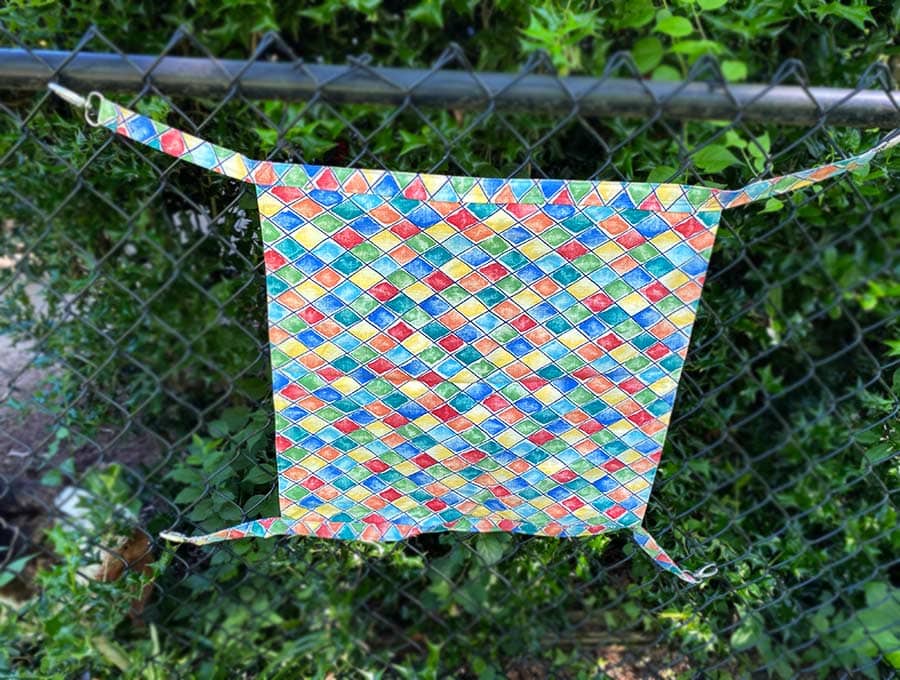
Image credit: Sharon B.
Below you will find my step by step written tutorial how to make cat hammocks with VIDEO instructions for all the visual learners.
We occasionally link to goods offered by vendors to help the reader find relevant products. Some of the links may be affiliate meaning we earn a small commission if an item is purchased.
Table of Contents
- 1 How to make a cat hammock
- 2 Cat hammock Supplies and tools
- 3 How to Sew a Cat Hammock
- 3.1 DIY CAT HAMMOCK VIDEO TUTORIAL
- 3.2 CAT OR FERRET HAMMOCK INSTRUCTIONS:
- 3.3 STEP 1: Cut the fabric
- 3.4 STEP 2: Stitch
- 3.5 STEP 3: Press and topstitch
- 3.6 STEP 4: Fold and press
- 3.7 STEP 5: Mark the mid-points
- 3.8 STEP 6: Attach arms to the base
- 3.9 STEP 7: Topstitch the arms
- 3.10 STEP 8: (OPTIONAL) Reinforce the high stress areas
- 3.11 STEP 9: Attach swivel hooks
How to make a cat hammock
Sew easy-to-make cat/ferret/rat hammocks for animal organizations in half an hour or less. Structurally, the cat hammock design (Sharon is a retired engineering librarian) is sturdier than most hammocks from on-line sources. The stress points are reinforced with stitching, and we use stronger metal swivel hooks to secure the ‘arms’ of the pet hammock to cage wires. The little kitty hammocks are machine washable, are a good way to use remnants or small yardages, the swivel hooks the costliest aspect of the project. You can buy those hooks on sale at Hobby Lobby and save money there. The cat hammock pattern is a no-brainer one, and would make a great 4-H project, too.
The animals simply love these!
Cat hammock Supplies and tools
- fabric – 1/2 yard cotton for the base (or 2 fat quarters if making it reversible)
- fabric – 1/4 yard cotton for the straps
- matching thread
- (4) 1 1/4-inch (3cm) wide Lobster clasp swivel hooks
- scissors (or rotary cutter and a cutting mat)
- ruler or measuring tape
- iron and ironing board
- sewing clips or pins
- sewing machine
DOWNLOAD: cat hammock pattern (Free PDF file)
Follow us for free patterns & tutorials! [easy-profiles]
How to Sew a Cat Hammock
Watch the diy cat hammock video first and then follow the written step by step instructions below.
Please enjoy and don’t forget to Like and SUBSCRIBE over on YouTube to be kept up to date with new videos as they come out.
DIY CAT HAMMOCK VIDEO TUTORIAL
CAT OR FERRET HAMMOCK INSTRUCTIONS:
STEP 1: Cut the fabric
- Cut (2) 18×18” (45 x 45cm) squares for the base of the cat hammock
- Cut (2) 40” x 3” (100 x 7.5cm) strips for arms to be attached to base
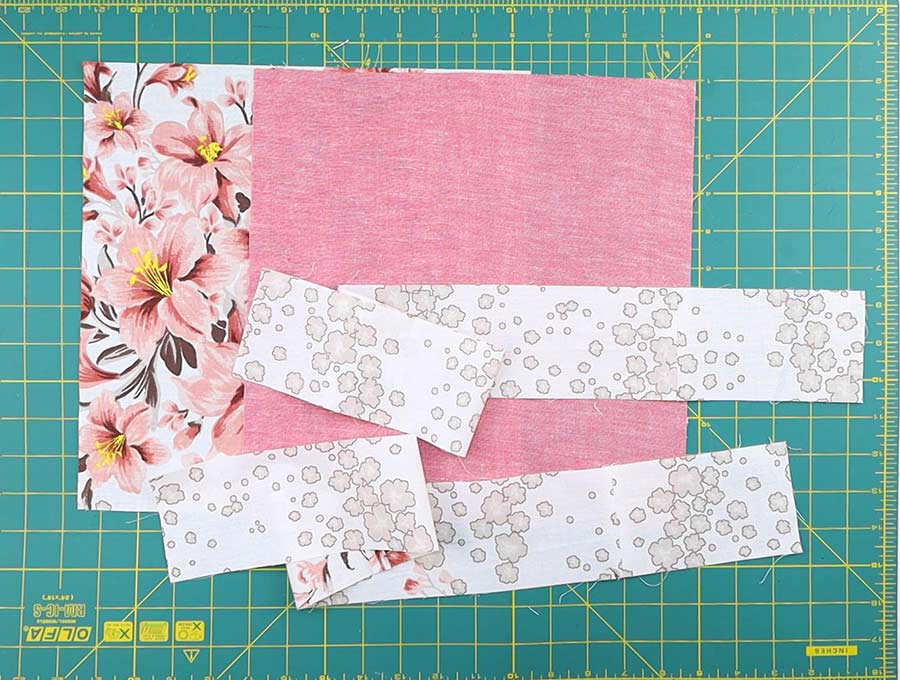
Modifications: Essentially, the big square or the base of the cat hammock, is approximately 18” x 18”, but can be approximately 18” X 12” (45 x 30cm) for ferrets. Do not agonize over dimensions as close approximations are fine. (Cats or ferrets will not be measuring these dimensions!!) The measurements can be adjusted; one can use two 18” X 18” pieces of sturdy cotton, poplin, duck. (Light-weight cotton may require interfacing for better integrity.) In lieu of two 18” square pieces, a 18” X 36” (45 x 90cm) piece of fabric folded over, works, saving a bit of sewing.
STEP 2: Stitch
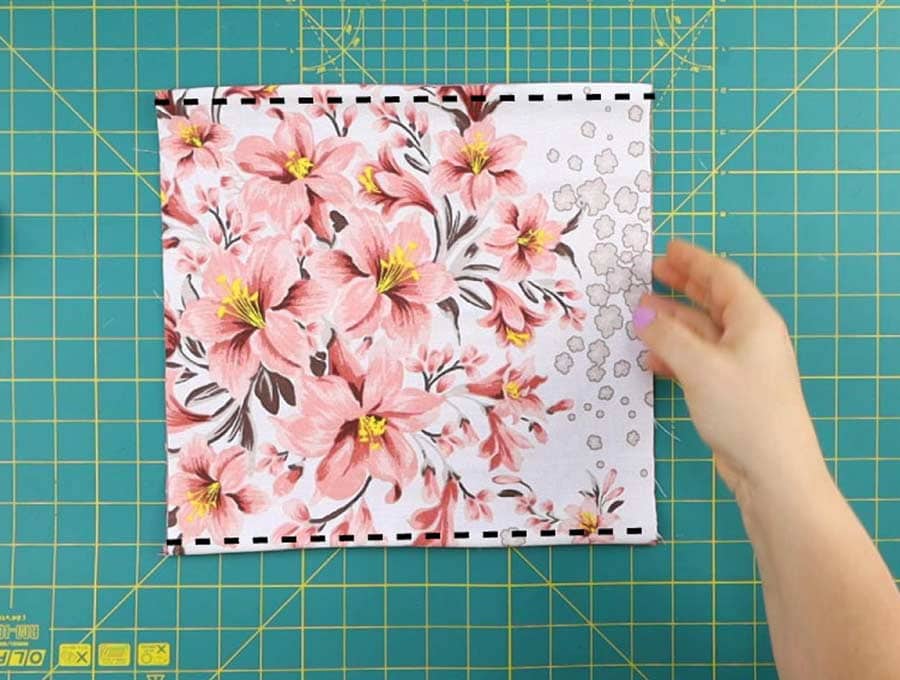
If using two 18” squares, place right sides together and sew down two opposite sides. The other two sides (top and bottom of base) are left open and are raw edges when the sewn 18” section is turned inside out.
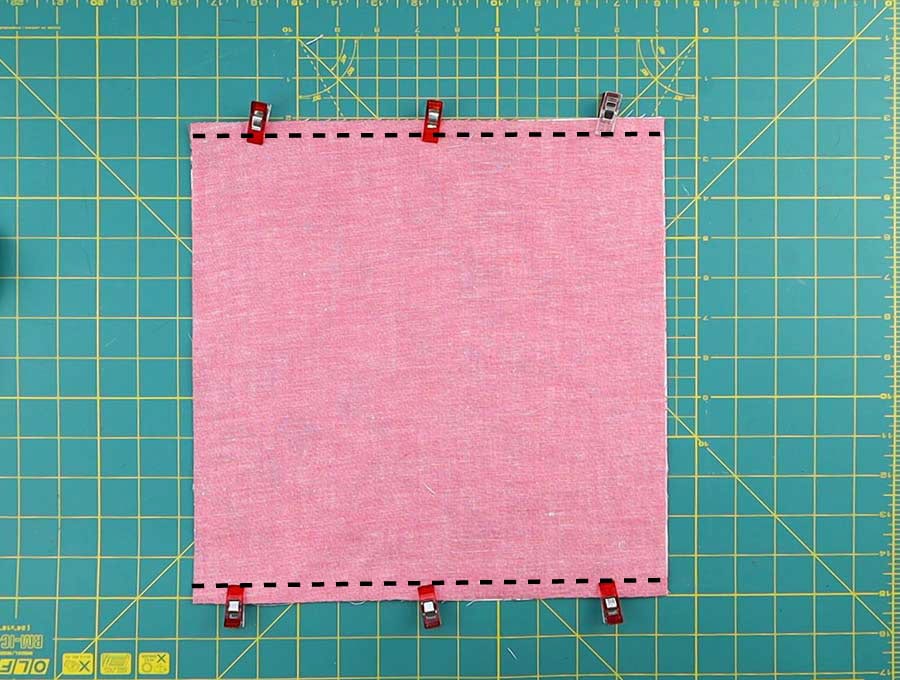
STEP 3: Press and topstitch
Turn around. Press the sewn edges and top stitch them. There will be two top stitched right sides and two raw edge right sides. The bottom of the cat hammock is done at this point. Set it aside.
STEP 4: Fold and press
Take the two strips* that you cut for the arms that will be attached to base. Press each strip down the middle lengthwise, then press each half again to make arm strip a la bias strip. It should be as wide as the loop of the swivel arm. I’m making these 1 ¼” wide to fit my hooks.

* The two arms should be approximately 40” X 3”, seam allowance included, if using Sewology (Hobby Lobby) metal swivel hook. Those have a 1 & 1-4” loop through which you will place end of arm. If using a different type of hook, adjust arm width accordingly. Above dimension includes adjustable seam allowance. The end of the arm strip when initial sewing is done in following step, should fit comfortably into the hook hole, and not be too bunchy when folded over prior to final finishing. Set hooks (4) aside once arm width has been determined.
STEP 5: Mark the mid-points
Fold each of the strips in half lengthwise and mark the middle. Fold the base square in half to meet the finished edges and mark the mid-point of each raw edge.
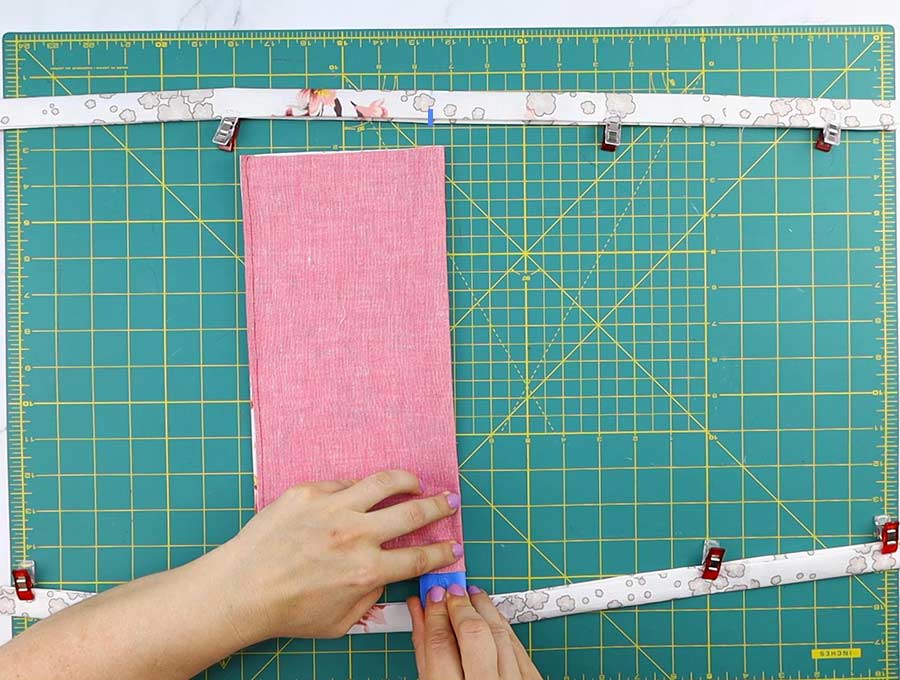
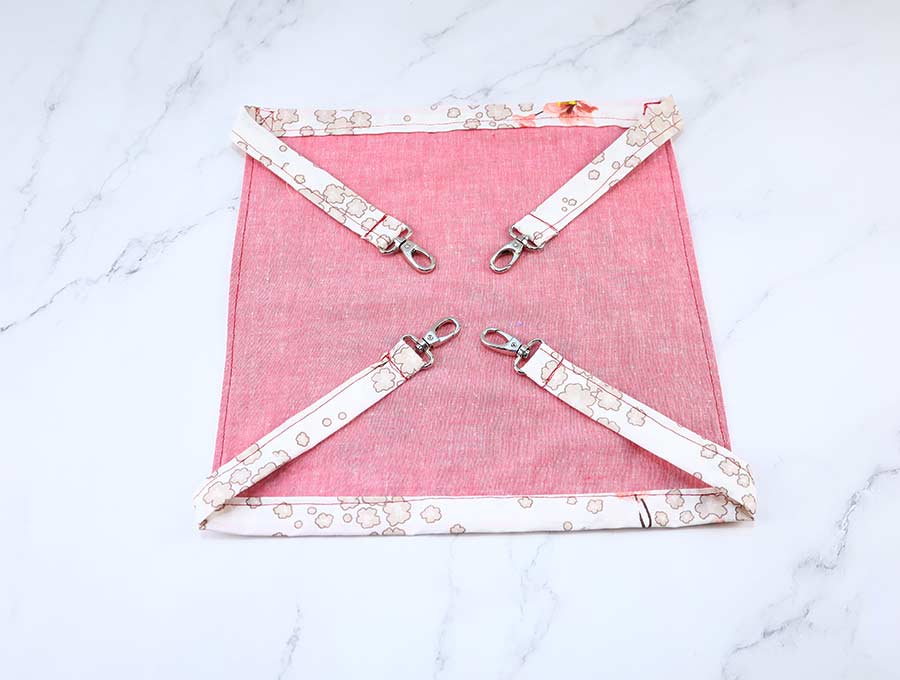
STEP 6: Attach arms to the base
Lay strip right side up flush onto raw edge of 18” square base, such that arm ‘bias’ strip encloses on both raw sides of base square.
Align mid-point of arm strip on to mid-point of one 18” raw edge of square base of hammock. Continue pinning or clipping arm until end of arm, where hook placement, the last step, will eventually be done.
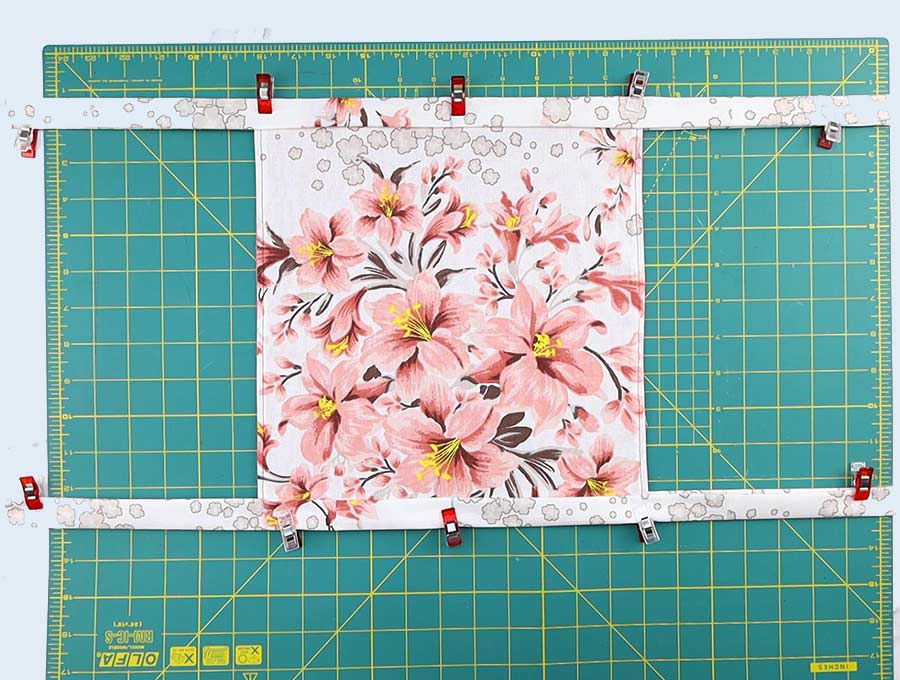
Before sewing arm onto base, insure each side-arm is equal length, 11”. (I usually have to do some re-pinning to cajole the components to come together…fabrics have a mind of their own!) Insure both sides of the arm abutting the base raw edge are uniform from one side to the other. If not, this step may have to be re-worked if stitching did not ‘catch’ the hidden side. Once the arm is properly positioned on the base, commence sewing inside edge (4 layers of fabric) from one arm at an end where a hook will go, and stitch, continuing across the base (6 layers of fabric for base/arm) segment; continue stitching through 4 layers to end of far arm. Check to make sure hidden side of hammock arm has been caught properly. A simple re-work can be done if necessary). Again, check arm lengths beyond base edge to see if of equal measure; they should be approximately 11”. If one a wee bit long, it can be shortened. I usually have to cut a wee bit off one arm end. The 40” length gives you a bit of wiggle room if needed. The basic components of the hammock have now been joined.
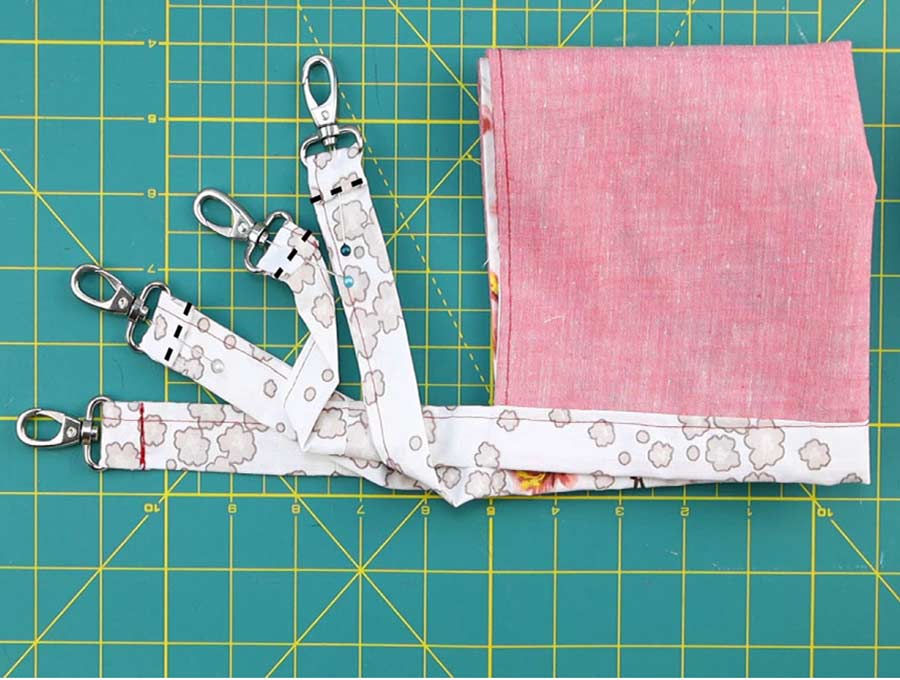
STEP 7: Topstitch the arms
Top stitch the far outer edge of newly attached arm. Hammock will start to look ‘tailored.’ Repeat above steps to attach second arm to remaining bottom raw edge of hammock base. Again, assure arms are equivalent, and side arms are equivalent.
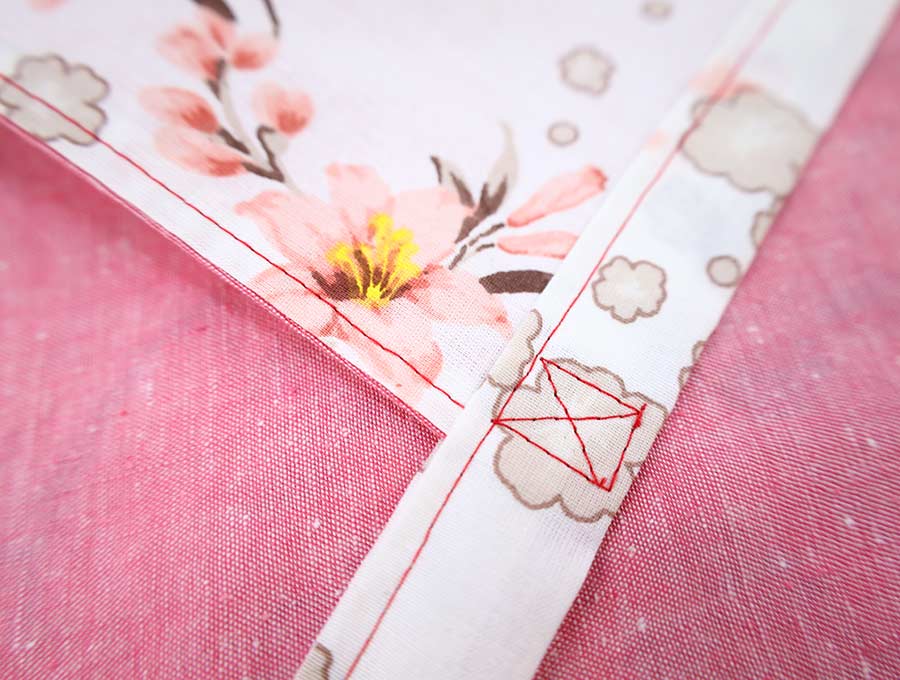
STEP 8: (OPTIONAL) Reinforce the high stress areas
Reinforcing high-stress junctures where the arms meet the base is easily done by stitching a small square of an inch or so through the 6 layers, then stitching an X inside that square. See diagram. Double stitch that square for better reinforcement. The stitching at bottom edge of the square should coincide fairly well with prior stitching earlier to attach arm onto base. Use thread colors that blend, such that the reinforcement areas are not very noticeable, yet speak of a beneficial tailoring step at a high-stress area on the hammock.
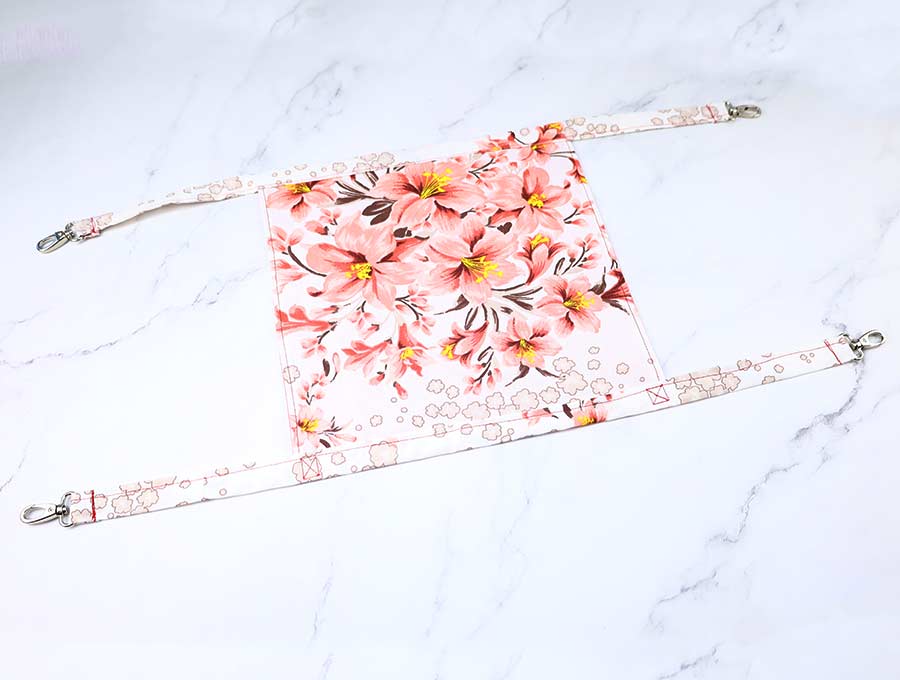
STEP 9: Attach swivel hooks
Last step is attaching swivel hook. Slide the fabric strip through the swivel hook about 1/2″ to 1″. Fold under the raw edge to hide it and stitch on top of it back and forth.
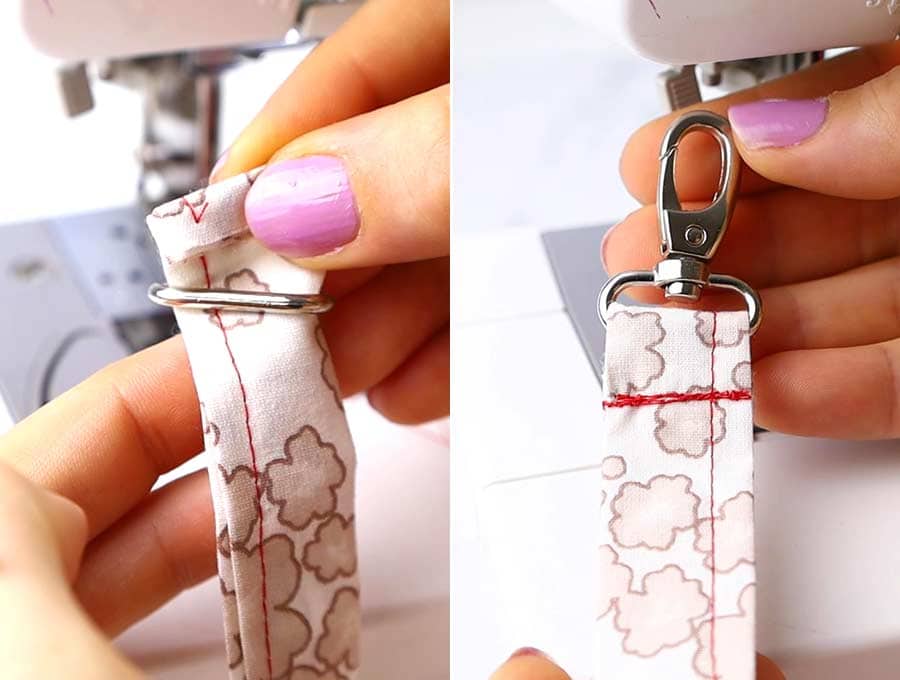
You’ll be sewing through thick fabric, so you can either use a walking foot to help you with the thickness or handstitch these.
Since sewing machines do not like to step up and down over thick seams, use a Hump Jumper (or a piece of fabric folded several times to the same thickness as the strap) to start off your stitching. It goes behind the presser foot supporting the back of the sewing machine foot.
I prefer to double hand-stitch these on as there are several layers of fabric to close off, maybe a bit of a raw edge to conceal, and my no-frills basic machine won’t handle such thickness. If yours does, this step will go more quickly. I use thread color to make this finishing off invisible. Ensure all hook placements are facing same way; e.g., so that when hammock is hooked onto animal cage, the hook stitching appears the same, either front side or back side. I usually pin the hooks on before I commence hand stitching so that that final step of the project can easily be done while watching the telly or riding in car.
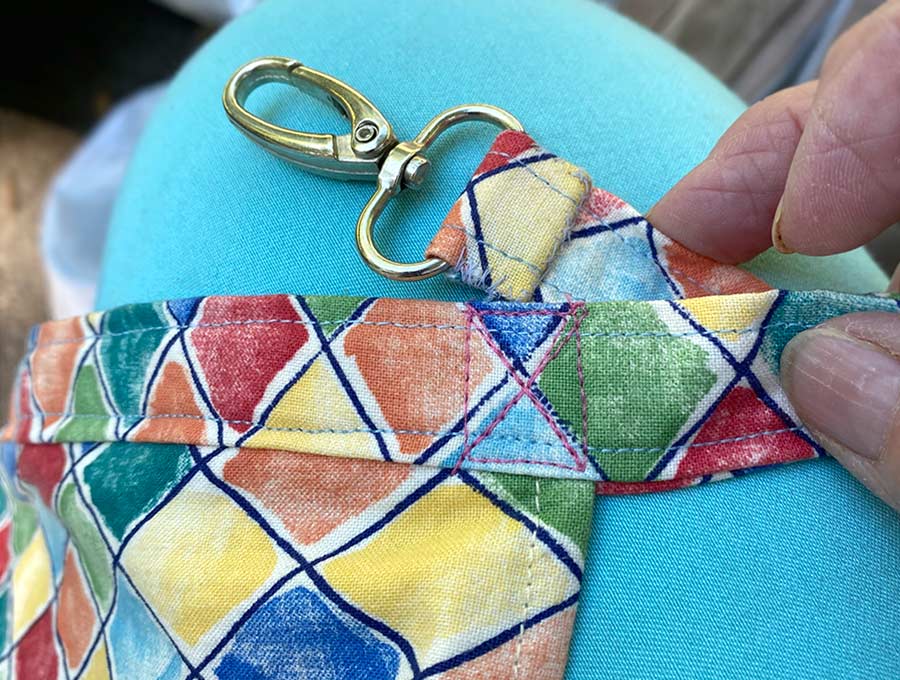
Image credit: Sharon B.
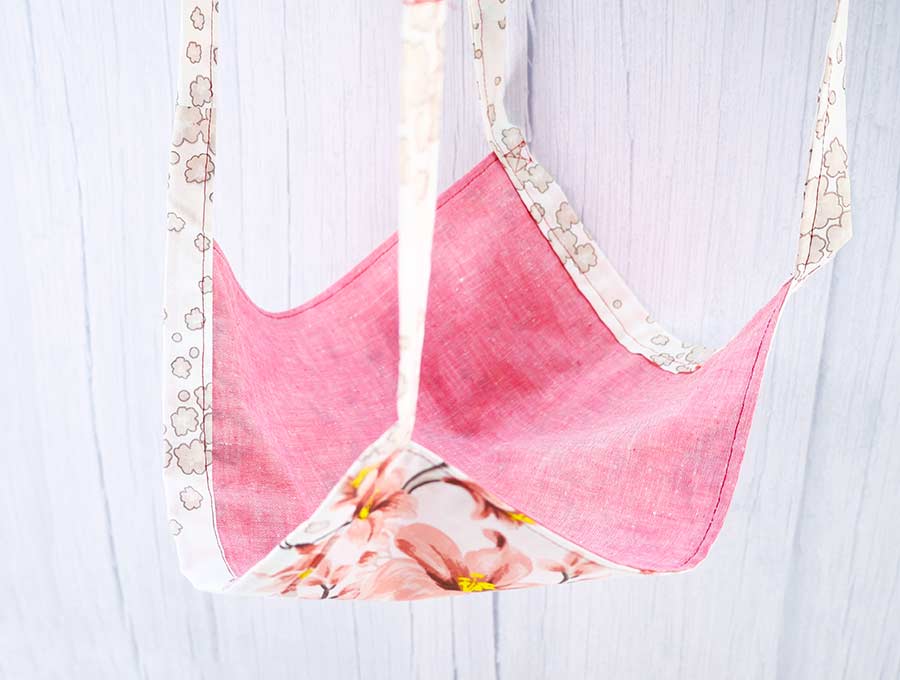
That’s it the DIY cat hammock is ready! You can invite your kitty to inspect it!
Do you like this? Pin for later:
[***pin img****]Wanna be friends? Click HERE and follow me on Pinterest
RELATED: