
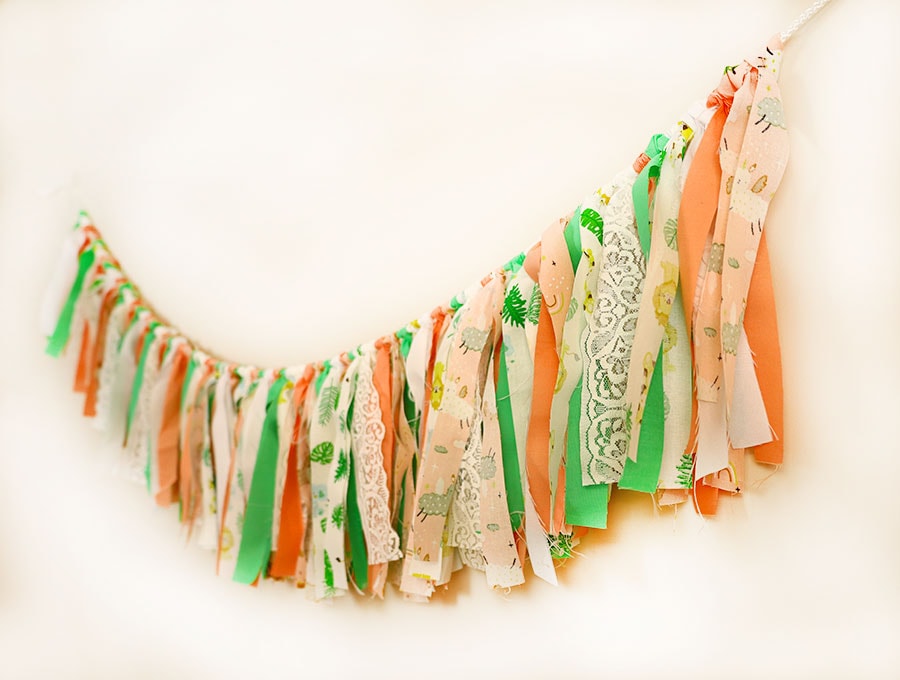
DIY Fabric Garland – Easy No-Sew DIY
A fabric garland is super easy to make and is a delightful holiday or weekend project to tackle with kids. They will learn so much about color, fabric texture, and have the pleasure of hanging their project in the baby room if you are welcoming a new addition to the family, or around the house or garden as seasonal or party décor. Our tutorial shows you the three step to making the garland, which can be completed in an hour or two depending on the length of the garland. The best part is there is no stitching involved!
First, you’ll need to decide on the color scheme. White and shades of wheat are great for a weddings, where the garland can be used across the front of the bridal table or suspended in the trees for a garden wedding. It is important to get a variety of textures into the garland, so use chiffons, lace, some plain-woven fabrics and a few small prints for the garland.
Currently, for baby showers or baby girl rooms, rose gold, pampas, and tints of pink are popular colors. Hawaiian type prints can brighten up the outdoors for a tropical party. You can go for red, fuschia, orange and shades of greens for a super bright Mexican look with matching colors in your floral arrangements on the table.
Having a girl’s birthday party when they are at stage of the ballerina, princess or unicorn themes? Try lots of chiffons in pinks with white, purple, or blue, and silver or gold metallic fabric accents Boys will enjoy bright primary colors to match their train sets or cars.
Below you will find my step by step written tutorial with VIDEO instructions for all the visual learners.
We occasionally link to goods offered by vendors to help the reader find relevant products. Some of the links may be affiliate meaning we earn a small commission if an item is purchased.
Table of Contents
- 1 How to make a fabric garland
- 2 Supplies and tools
- 3 How to Make a Ribbon garland
- 3.1 DIY fabric garland VIDEO TUTORIAL
- 3.2 How many fabric strips will I need?
- 3.3 INSTRUCTIONS:
- 3.4 STEP 1: Raid your stash
- 3.5 STEP 2: Iron and cut the strips
- 3.6 STEP 3: Arrange the strips
- 3.7 STEP 4: Prepare the string
- 3.8 STEP 5: Tie the first fabric strip
- 3.9 STEP 6: Repeat for all fabric strips
- 3.10 STEP 7: (optional)
How to make a fabric garland
Supplies and tools
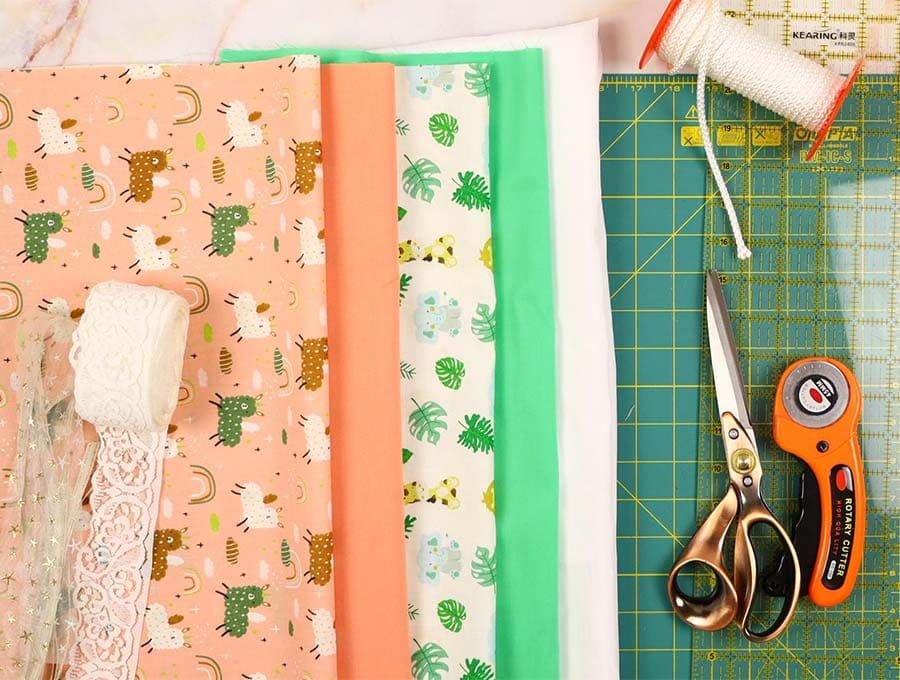
- fabric – Sufficient fabric strips around 1 inch (2.5 cm) wide and between 20 inches to 30 inches (50 cm – 75 cm) long to complete the length of fabric garland you have chosen to make.
- String or yarn onto which you will tie your strips.
- scissors (or rotary cutter and a cutting mat)
- ruler or measuring tape
Follow us for free patterns & tutorials! [easy-profiles]
How to Make a Ribbon garland
Watch the diy ribbon garland video first and then follow the written step by step instructions below.
Please enjoy and don’t forget to Like and SUBSCRIBE over on YouTube to be kept up to date with new videos as they come out.
DIY fabric garland VIDEO TUTORIAL
How many fabric strips will I need?
The number of strips will depend on the length of the garland – to make similar to my garland you will need about 20 strips per 12 inches, so for a 4 foot (120cm) fabric garland you will need 80 strips. I used 5 different fabrics, that makes 16 strips per fabric.
To get a super fluffy garland aim for around 40 strips per 12 inches (30 cm). For a four-foot fabric garland you would need 40 x 4 = 160 strips.
INSTRUCTIONS:
STEP 1: Raid your stash
Once you have decided on a color scheme sort through your fabric stash for suitable pieces of fabric. aim for a variety in fabric texture and design. You may choose to mix fabric weights or go for a garland made of all cotton, or only chiffon, or hessian interspersed with white lace. Make sure to use at least 4 different fabrics (I used 6 different fabrics for this garland, 2 whites – lace and synthetic strips, the rest of the strips were cut from cotton fat quarters)
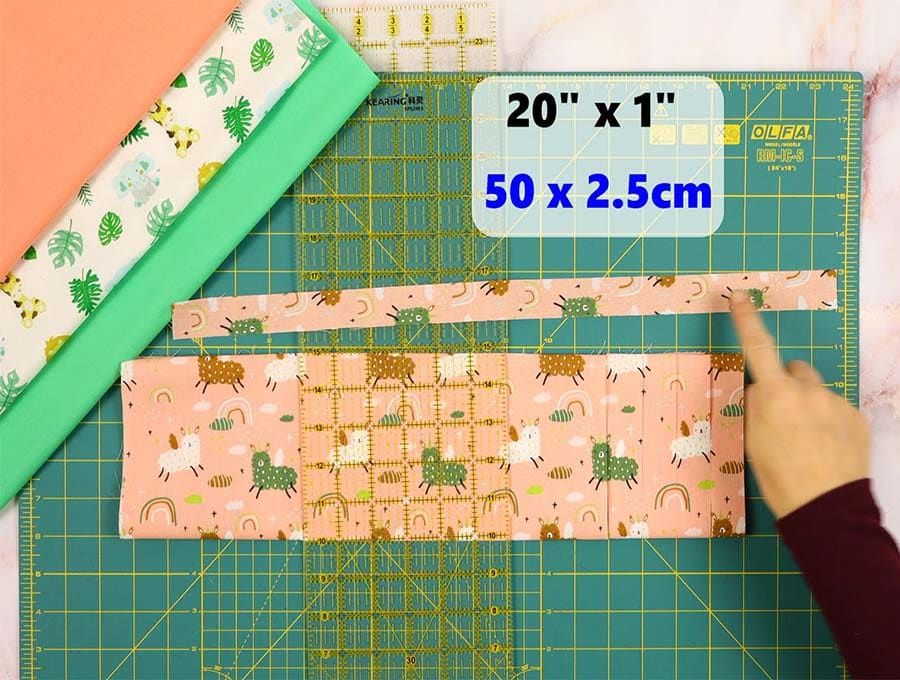
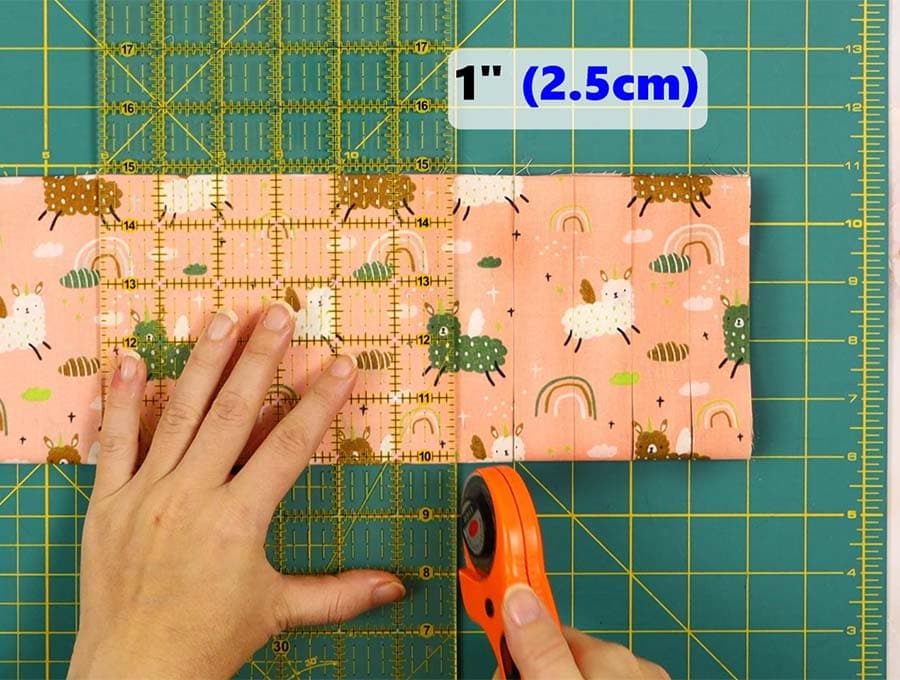
STEP 2: Iron and cut the strips
Once you have chosen your fabric, iron the pieces – it just makes cutting them so much easier than if they have become crumpled – then cut your strips.
Cut your pieces to size – it will depend on your fabric how many pieces you can get and what width they will be, but they should be between 2o to 30 inches (50 to 70cm) long.
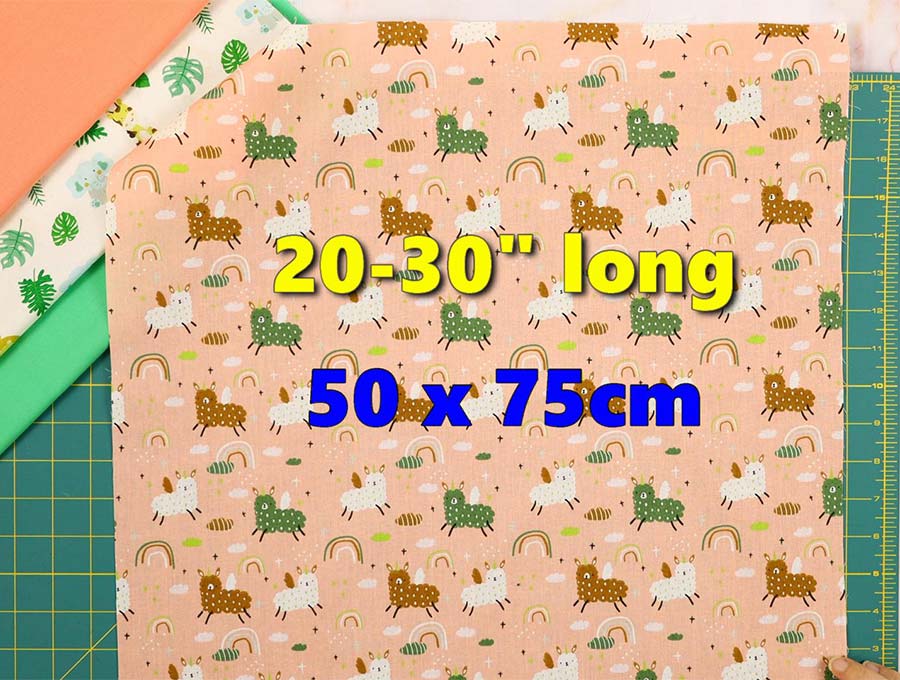
The width is usually 1 inch (2.5cm) but may vary from around ½ an inch (1.3 cm) to 1 ½ inches (3.8 cm) but don’t go wider than that otherwise the strips tend to twist and the back of the fabric will show. This doesn’t matter so much with lace or chiffons, but with quilting cottons it will detract from the color of the fabric garland.
STEP 3: Arrange the strips
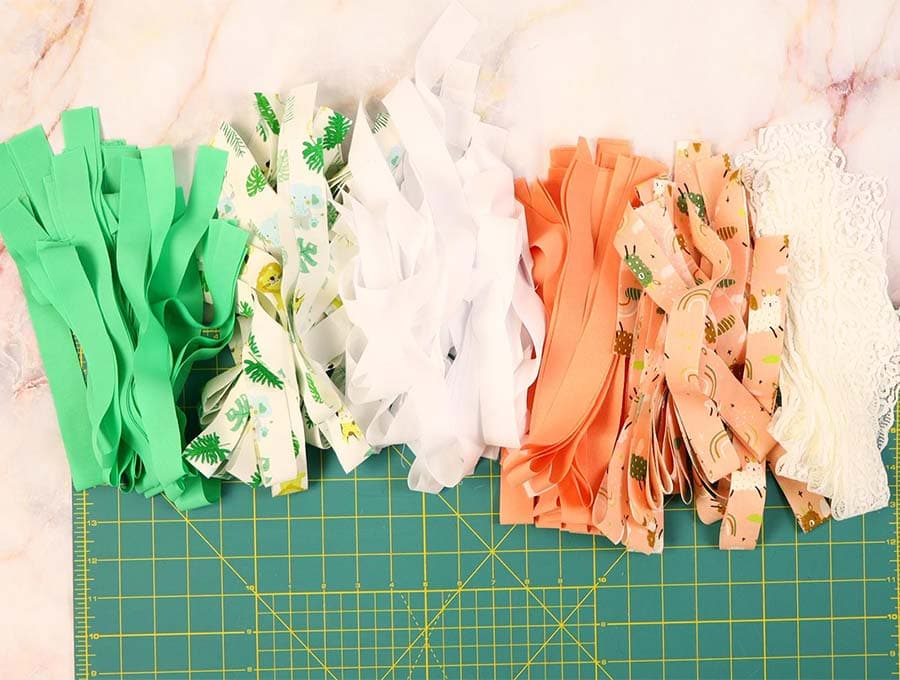
Assemble your color strips in the order in which they will be tied so they are distributed evenly. Let’s say you are doing a Mexican color scheme with red, fuchsia, orange, and green then ensure there is sufficient green to place between the brighter colors.
STEP 4: Prepare the string
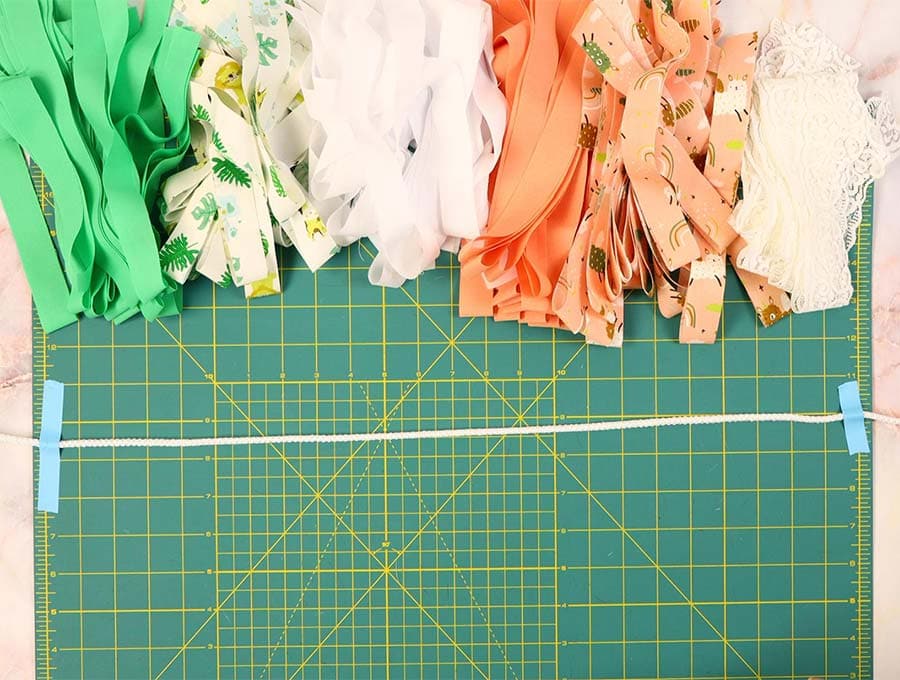
Lay a length of yarn or string across the worktop of the intended size of the garland – it could be 3, 4 or even 6 feet long, with extra to tie it up, and tape down the ends with masking tape to ensure they don’t move. Alternatively, you could use a heavy book to hold the ends in place and adjust the books as you progress along the length of the garland.
STEP 5: Tie the first fabric strip
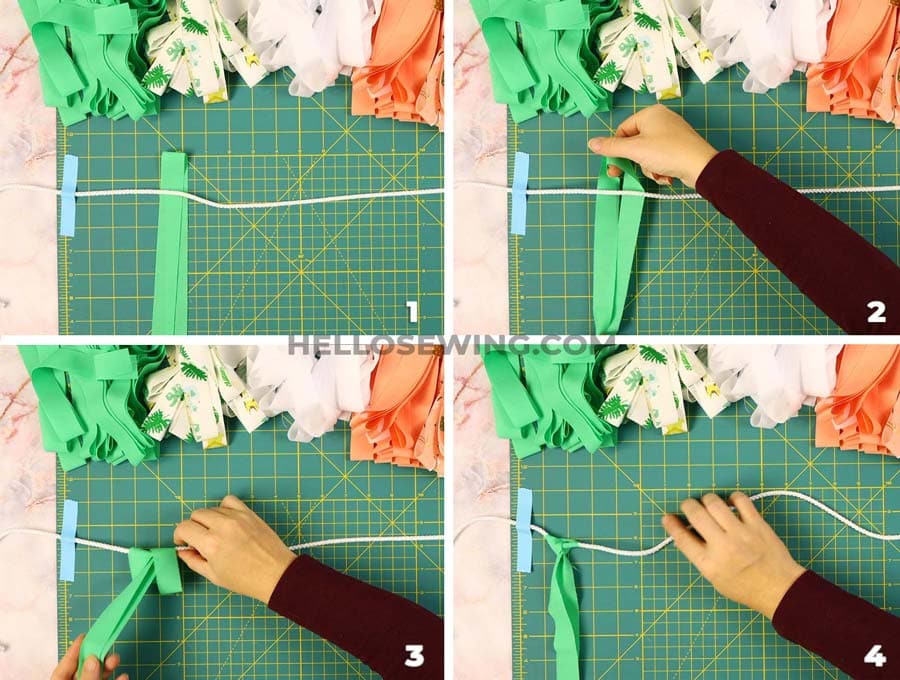
Take the first fabric strip and fold it in half along the length, with the right sides facing outwards. Slip the folded end under the string from the top downwards, then open the loop that’s been slipped under the string with two fingers. Using your other hand slip the ends of the fabric through the loop, position the fabric knot and pull up tight.
STEP 6: Repeat for all fabric strips
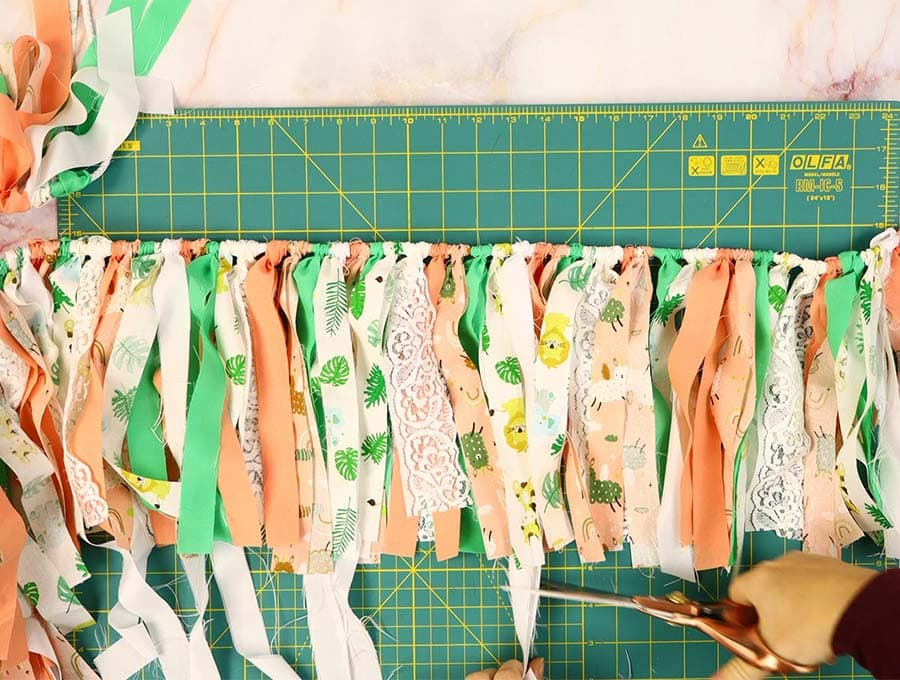
Continue in this manner until you have all the strips tied to the string, with at least 20 looped pieces of fabric per foot (30 cm). Then cut out any excess material. Ta-da! Your handmade scrap fabric garland is ready. No sewing involved!
STEP 7: (optional)
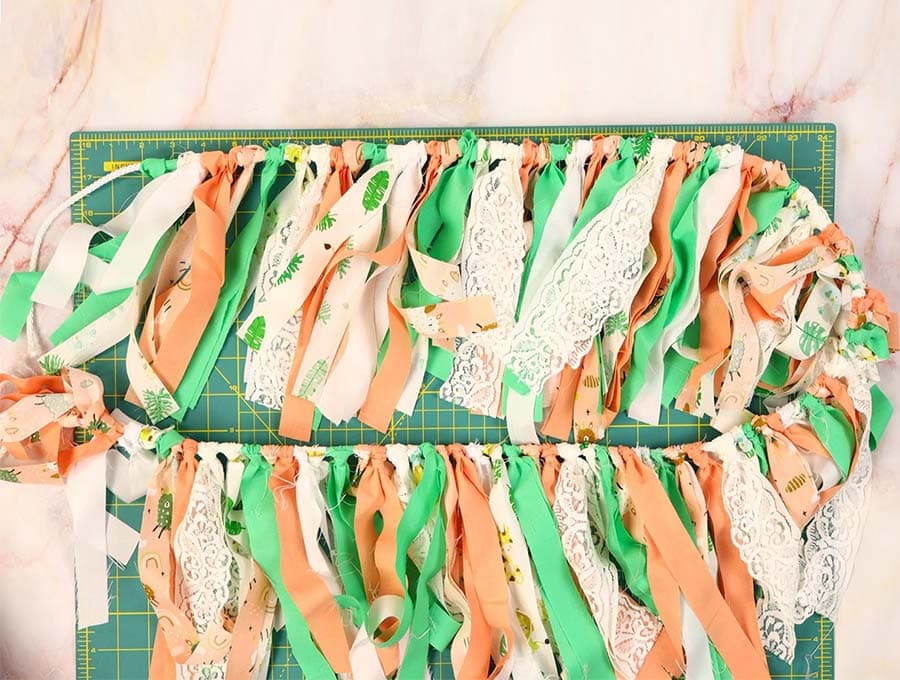
Once you have your garland finished, depending on the effect you want you can either leaved the strips hanging or spray on a little spray starch and crunch them up with your fingers for a fuller crinkled effect on the DIY fabric garland. This effect can look lovely, particularly on hessian interspersed with lace or chiffon strips, or if you are using bright satin strips.
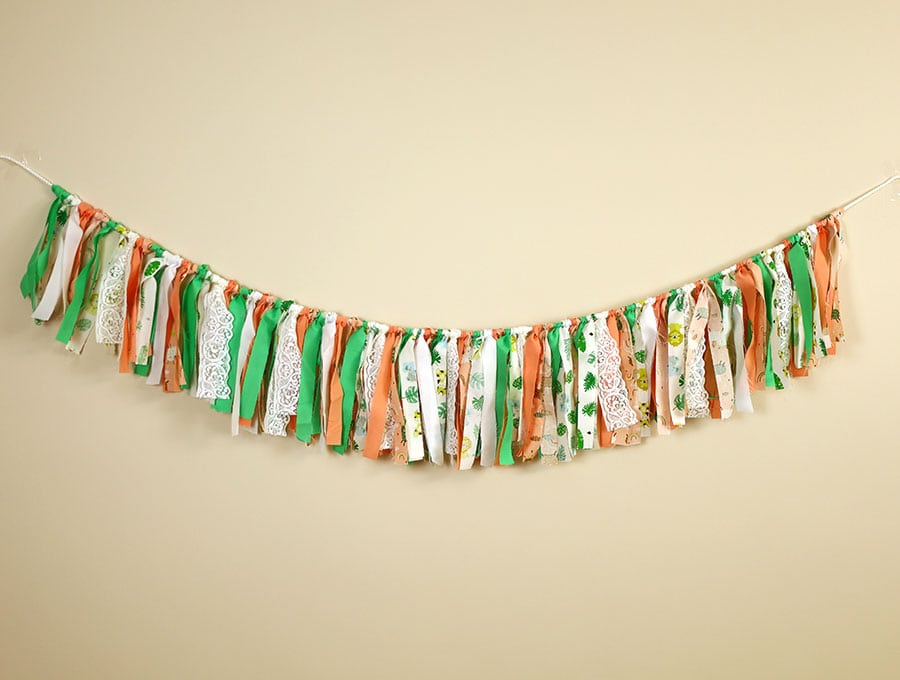
Ta da…. The fabric garland is ready to fasten to between trees, or onto small screws in the wall, or wherever you choose to use it. Have fun with the colors and enjoy using up all the skinny bits from your fabric stash that you never thought would come in useful but you just couldn’t throw away.
Make our festive DIY fabric garland that requires no sewing at all for a beautifully effective item of room décor or for a special occasion. Our step by step tutorial and our video make it so easy to learn the technique of knotting the fabric strips. It’s a chance to make something beautiful from all the extra fabric you have lying around in your stash that you can’t bear to part with but just don’t have projects that use 1 inch (2.5 cm) by 20 inch to 30 inch (50 – 75 cm) strips. Now you do, and you’ll see how pretty they can be. If you are doing a festive garland for Christmas do include some glittery ribbon to add some sparkle.
If you enjoyed this tutorial then please hit our like and subscribe buttons to have more easy and attractive projects delivered straight to your inbox.
Do you like this? Pin for later:
Wanna be friends? Click HERE and follow me on Pinterest
RELATED: