
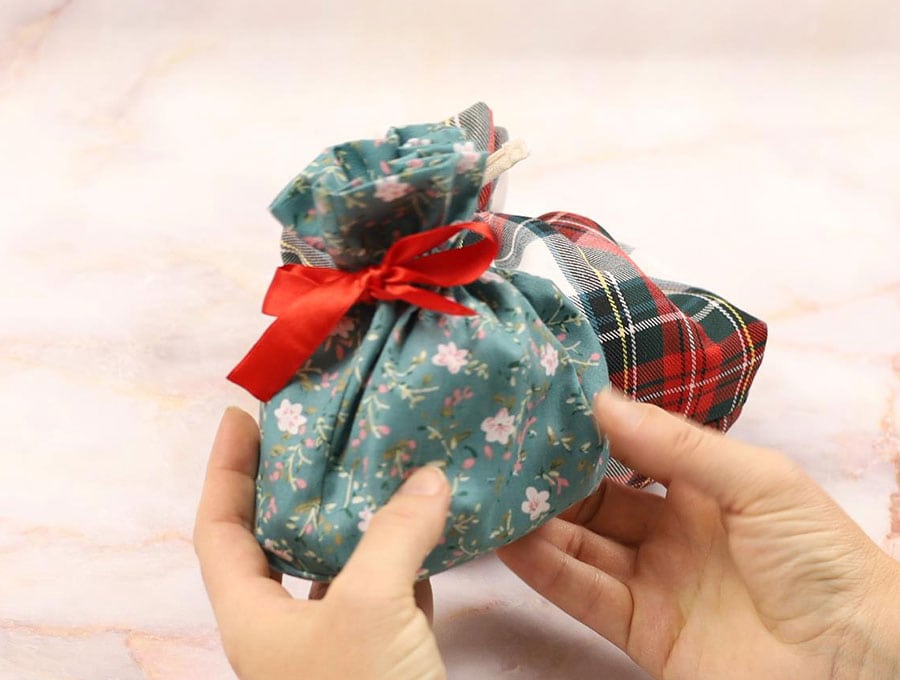
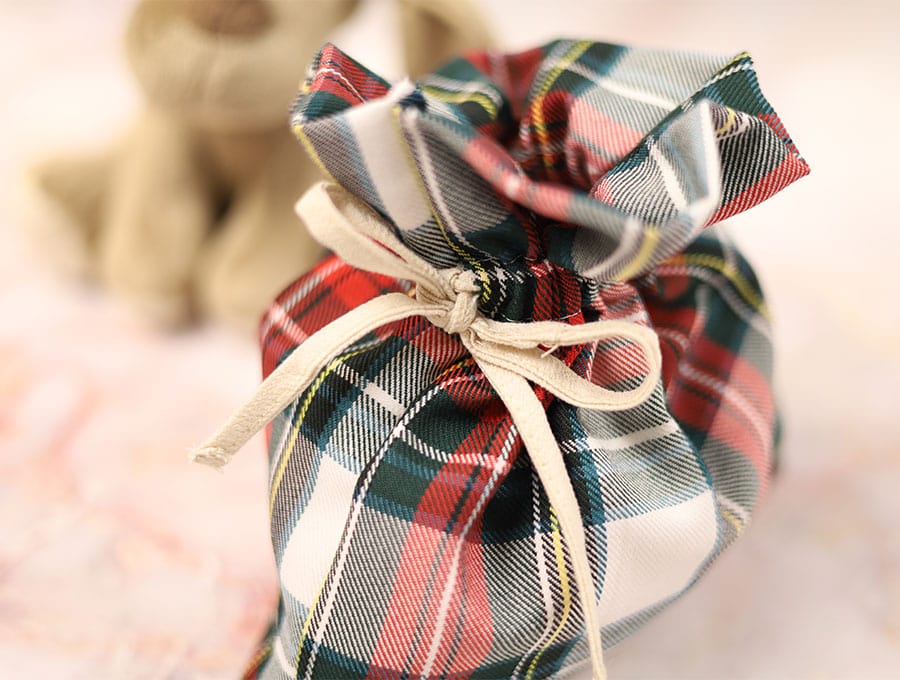
DIY Fabric Gift Bag / How to Make a Cloth Gift Bag
Making a gift bag from fabric is more sustainable than using paper that will simply end up in the trash. The gift bag can be used over and over again, either as a gift bag or for storing various items. The drawstring makes for a pretty and secure finish. If you like you can personalize gift bags with fabric glitter pens, but then this will cut down on their ability to be re-used so rather attach a pretty gift tag to the ribbon.
In a time when reducing and reusing has become the mantra of our society, making a reusable gift bag will keep spreading the joy year in and year out. These gift bags can be used for festive occasions and birthdays, special events like Easter and Halloween, or just for those ‘I care about you’ gifts when someone is feeling down or is not well. Have fun making them using the fabric in your stash with our easy to follow instructions and visuals. Keep the paper gift wrap out of the landfill and enjoy gifting with our reusable fabric gift bags.

Below you will find my step by step written tutorial how to make a fabric gift bag with VIDEO instructions for all the visual learners.
We occasionally link to goods offered by vendors to help the reader find relevant products. Some of the links may be affiliate meaning we earn a small commission if an item is purchased.
Table of Contents
- 1 How to make a fabric gift bag
- 2 DIY Fabric gift bag supplies and tools
- 3 How to Sew a gift bag
- 3.1 DIY cloth gift bag VIDEO TUTORIAL
- 3.2 INSTRUCTIONS:
- 3.3 STEP 1: Prepare the fabric
- 3.4 STEP 2: Measure from top
- 3.5 STEP 3: Turn over the fabric
- 3.6 Step 4: Fold over again
- 3.7 Step 5: Mark
- 3.8 Step 6: Sew
- 3.9 Step 7: Fold over and sew
- 3.10 Step 8: Clip the corners
- 3.11 Step 9 (OPTIONAL): Boxing the corners
- 3.12 Step 10 (OPTIONAL): Stitch the boxed corners
- 3.13 Step 11: Nick out the excess seam
- 3.14 Step 12: Apply fray check
- 3.15 Step 13: Turn the fabric gift bag around
- 3.16 Step 14: Insert the ribbon
How to make a fabric gift bag
DIY Fabric gift bag supplies and tools
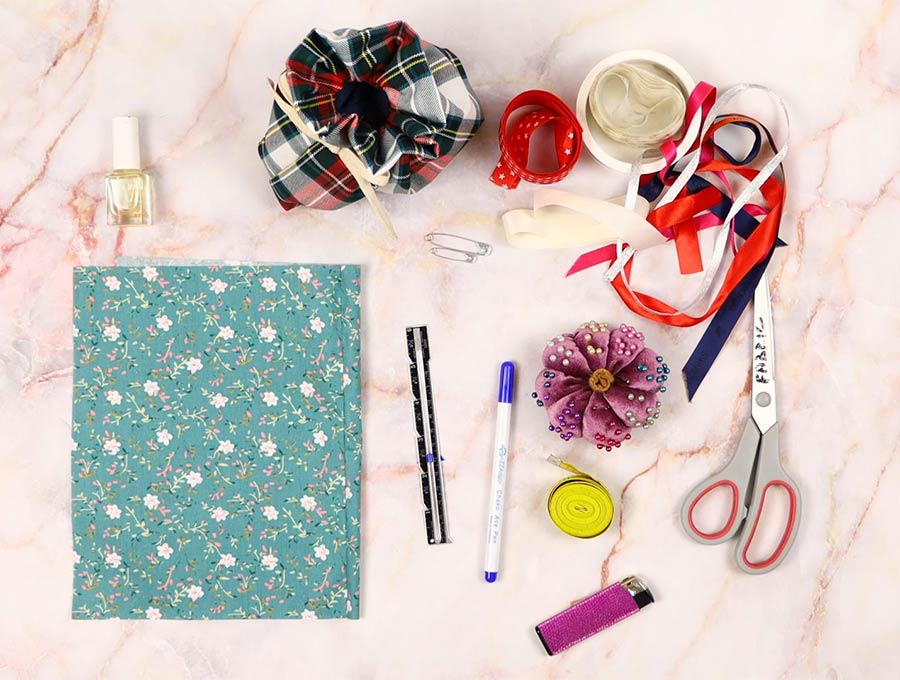
- fabric – cotton fabric for the bag
- grosgrain ribbon
- matching thread
- scissors (or rotary cutter and a cutting mat)
- ruler or measuring tape
- iron and ironing board
- sewing clips or pins
- safety pin or a bodkin
Follow us for free patterns & tutorials! [easy-profiles]
How to Sew a gift bag
Watch the diy gift bag video first and then follow the written step by step instructions below.
Please enjoy and don’t forget to Like and SUBSCRIBE over on YouTube to be kept up to date with new videos as they come out.
DIY cloth gift bag VIDEO TUTORIAL
INSTRUCTIONS:
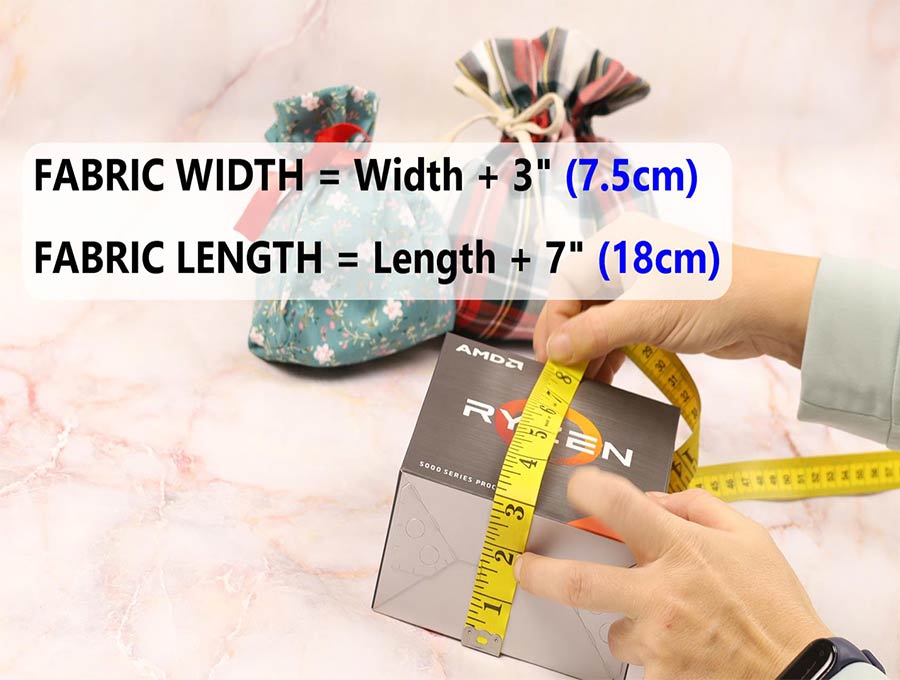
For this project we chose to make a small bag using a piece of fabric 13 x 11 inches to make a 6-inch finished bag. The bag sizes are given below if you would prefer to make a medium or large bag.
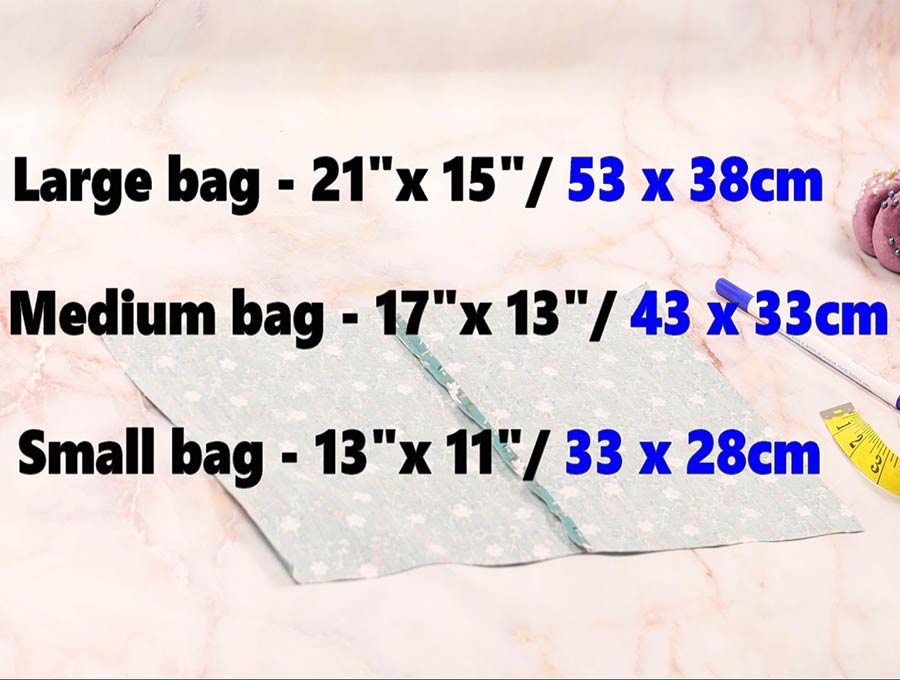
- Large fabric gift bag: 10 x 10 inches (25 x 25 cm )
Cut fabric 21 x 15 inches (53 x 38 cm)
Cut ribbon 26 inches (66 cm)
- Medium fabric gift bag: 8 x 8 inches (23 x 23 cm)
Cut fabric 17 x 13 inches (43 x 33 cm)
Cut ribbon 22 inches (58.9 cm)
- Small fabric gift bag: 6 x 6 inches (15 x 15 cm)
Cut fabric 13 x 11 inches (33 x 28 cm)
Cut ribbon 18 inches (45.7 cm)
- Made to measure gift bag
STEP 1: Prepare the fabric
Wash dry and iron your fabric before cutting your fabric to size. This is to avoid shrinkage if you decide to wash the bag before use. Imagine not being able to fit the present inside because it shrank!
STEP 2: Measure from top
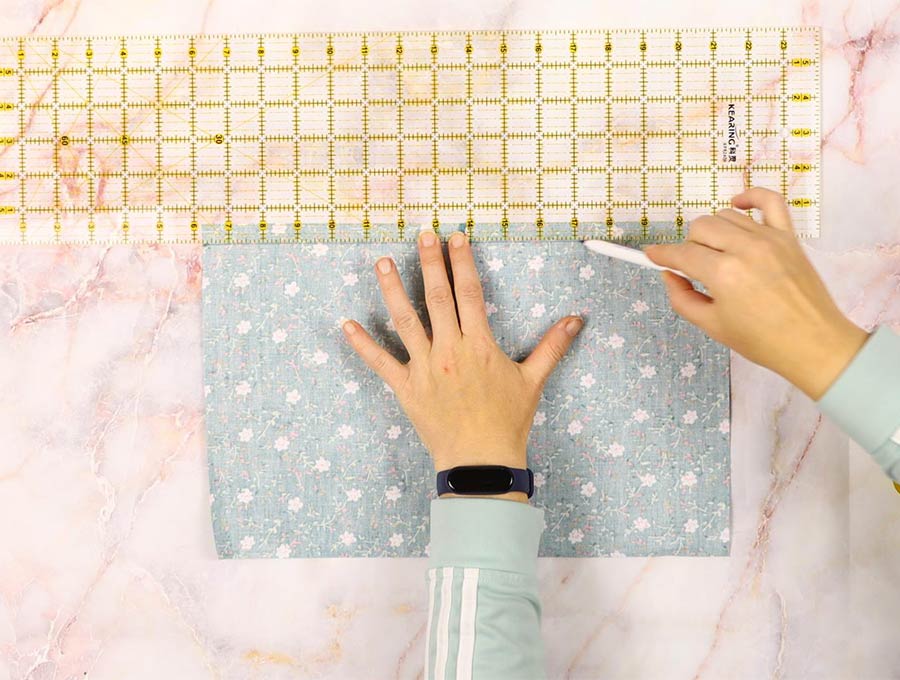
Lay the fabric with the right side down facing the worktop and using an erasable fabric pen mark ½ inch (1.3 cm) down from the top on one end of the shorter side – in our case we are doing the small bag, so it will be the 11-inch side. Once you have marked these use a ruler to join the points you marked.
STEP 3: Turn over the fabric
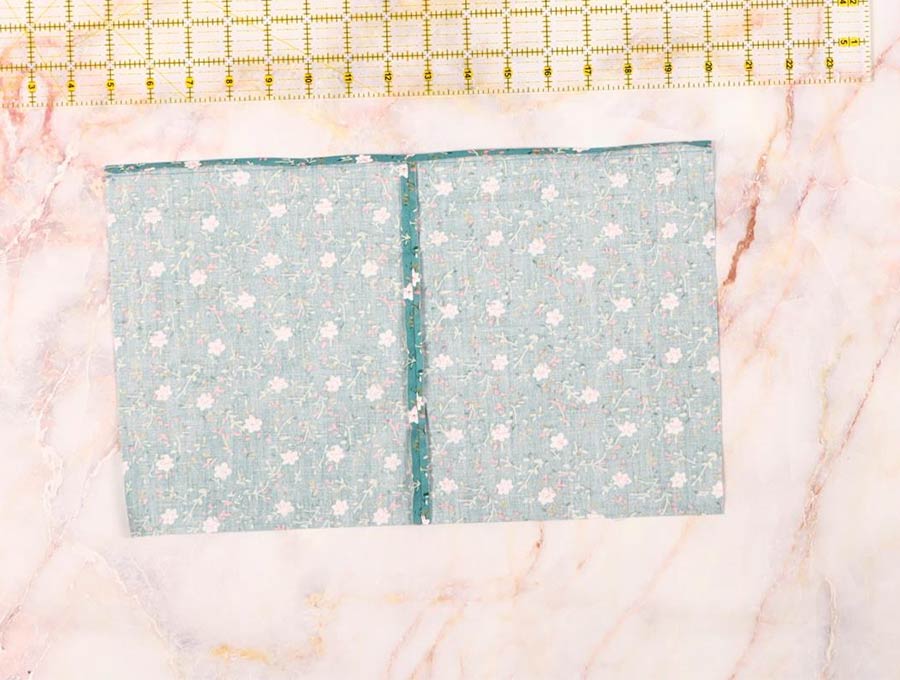
Turn over a ¼ inch (0.6 cm) to line up with the line you drew and press in place.
Step 4: Fold over again
Now, fold over again 2.5 inches (6.5 cm) and use a hem gauge or a ruler to ensure the width of the second fold is equal across the fabric. Press in place.
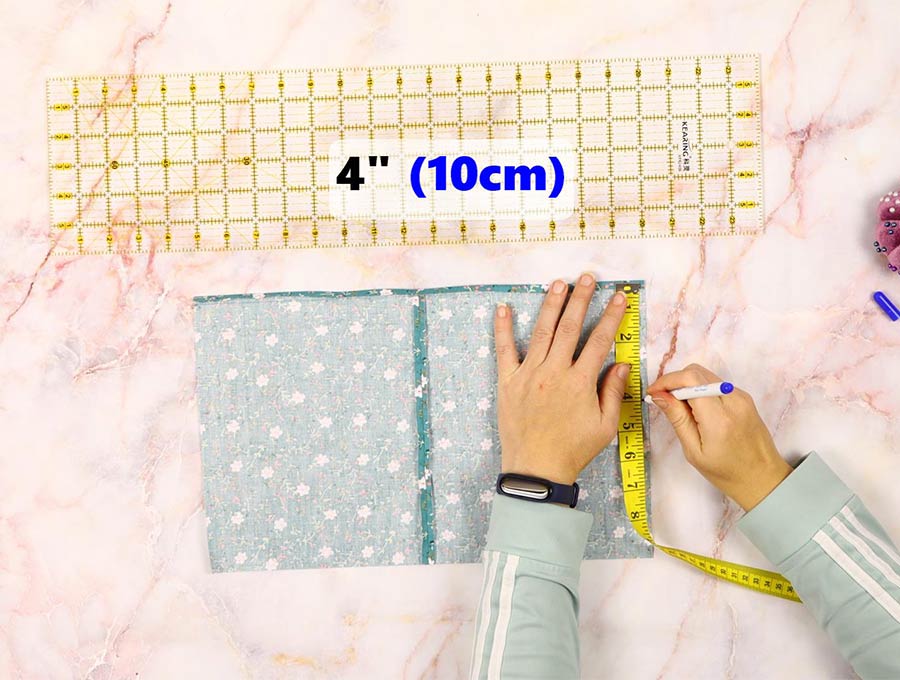
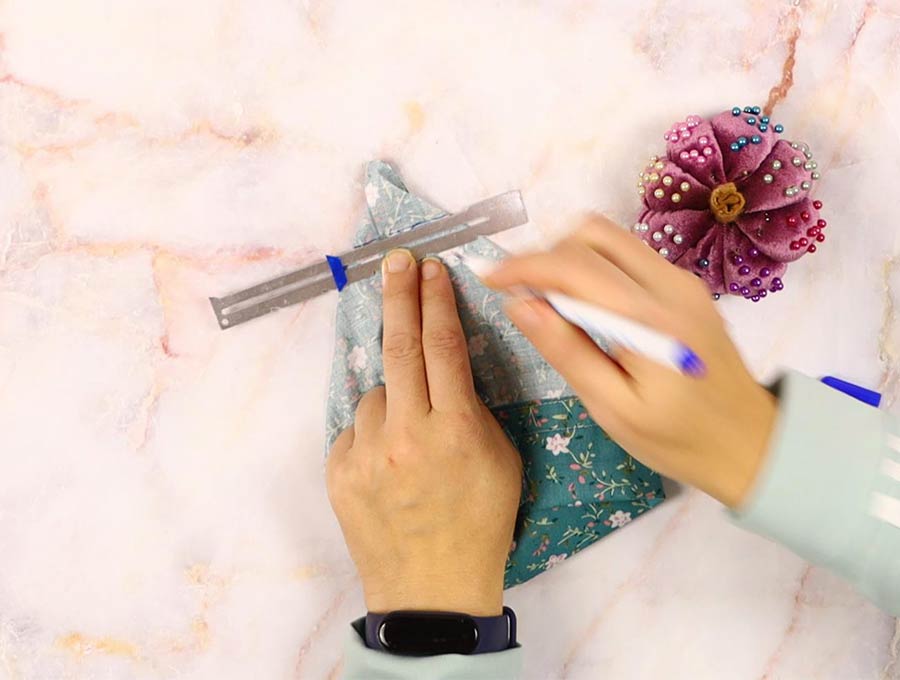
Step 5: Mark
Mark 3/8 inch (1cm) from the edge on either end of the seam and join the marks with a ruler using an erasable fabric pen.
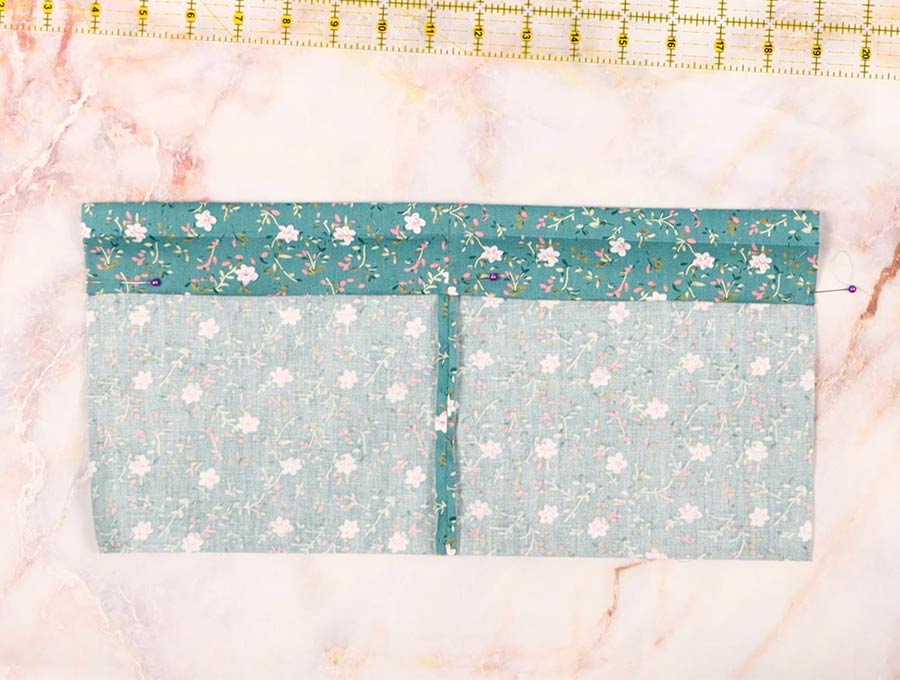
Step 6: Sew
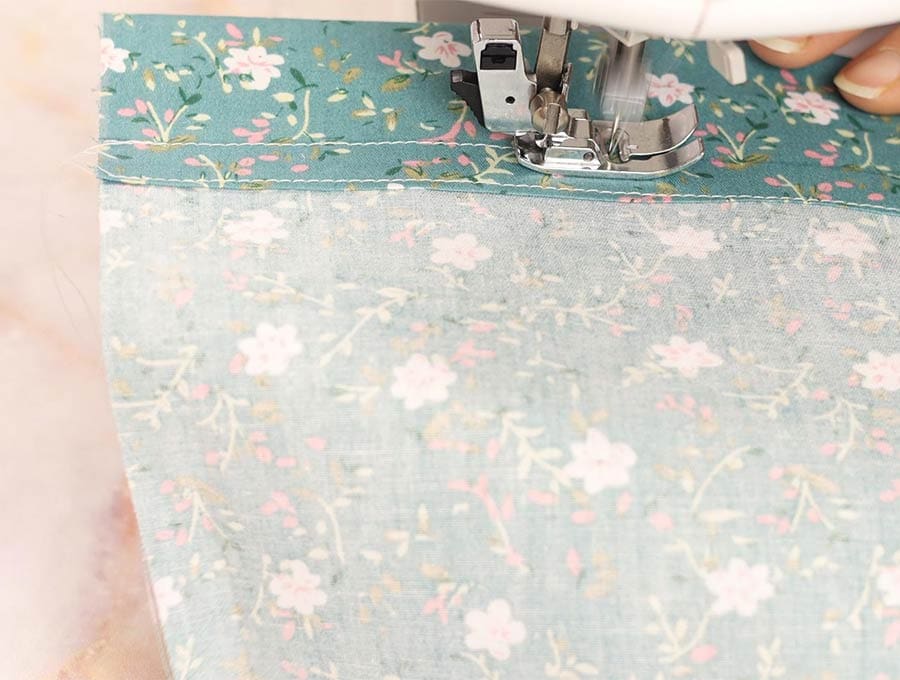
Stitch along the edge of the second fold on the wrong side of the main piece of fabric 1/8 inch (0.3 cm) from the edge and the line above it. Backtack at the start and finish. You have now created the casing through which the ribbon will later be threaded.
Step 7: Fold over and sew
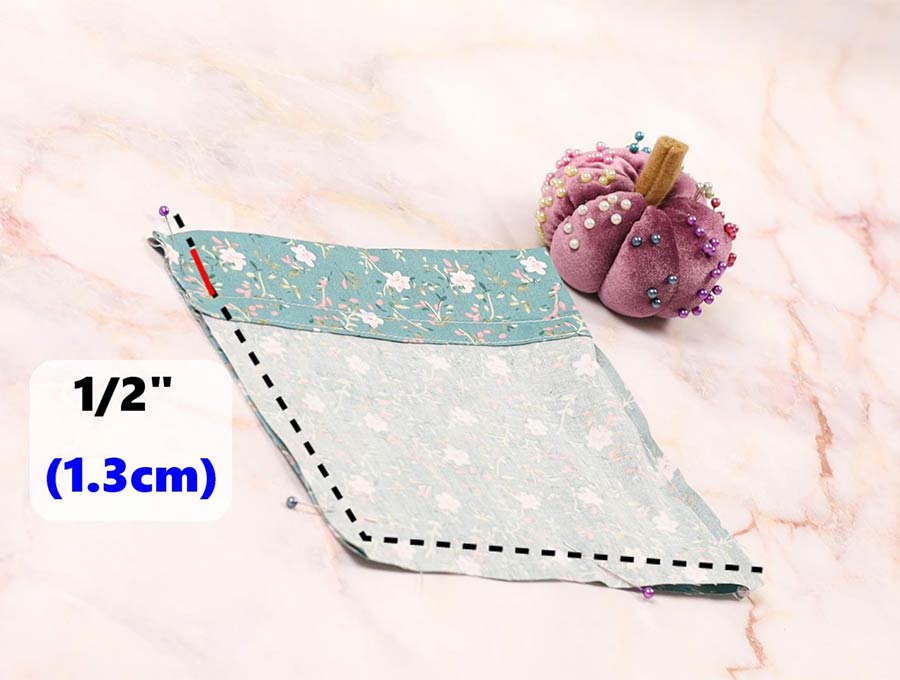
Fold over the 13-inch side so the bag has the stitched seam at the top and measures 6 ½ inches wide. Using a ½ inch seam allowance stitch down the edge starting from the folded seam at the top and stopping at the drawstring casing you created. Backtack at start and finish.
DO NOT STITCH ACROSS THE DRAWSTRING CASING.
Resume stitching below the casing, back tacking again at the start and finishing off at the end of the side.
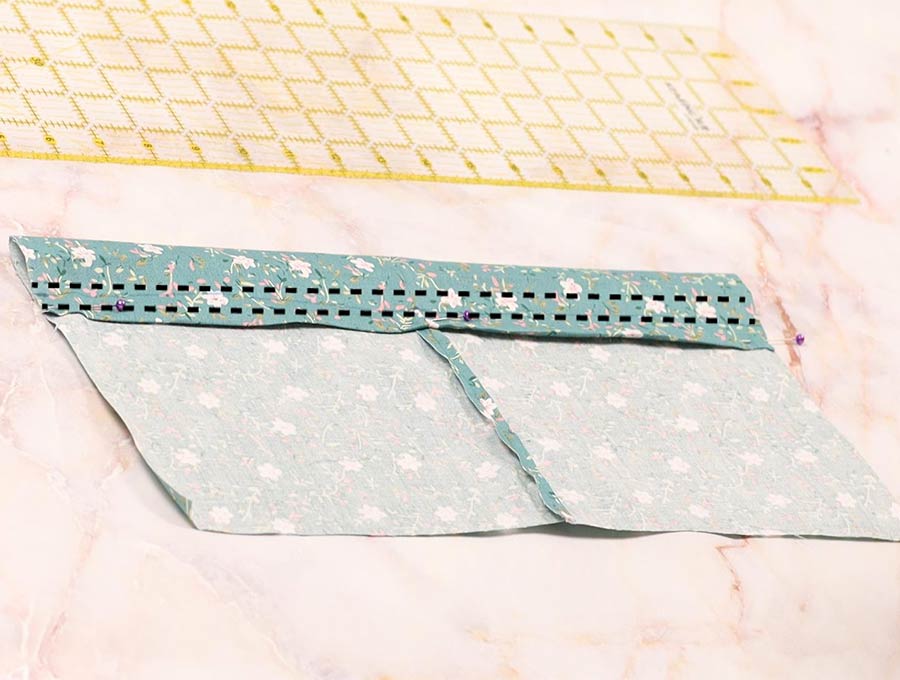
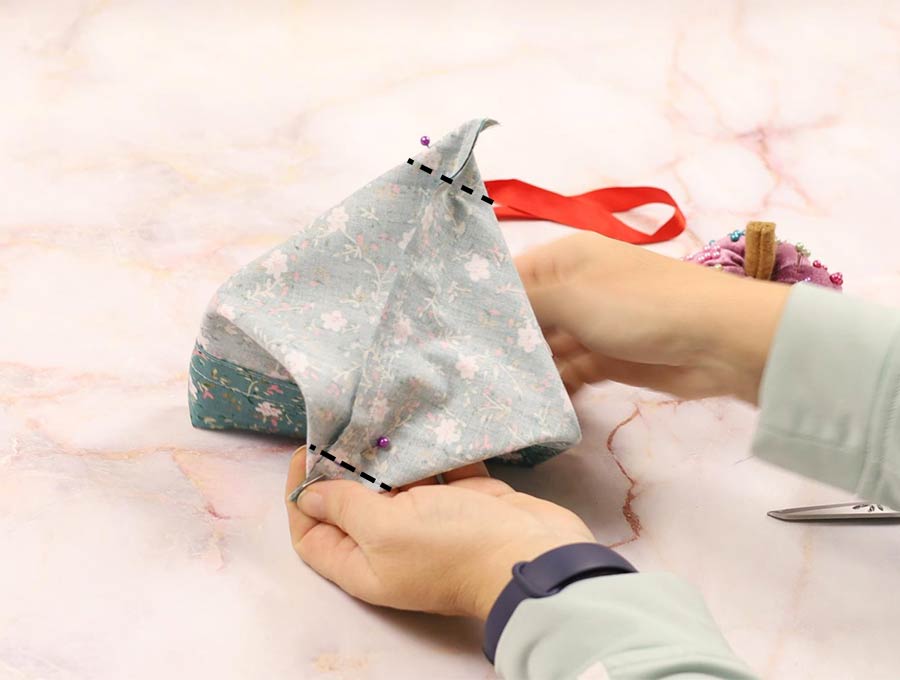
Step 8: Clip the corners
Clip across the corners at the bottom of the bag to reduce bulk when it is turned (if you are not making boxed corners, if you are, skip this step).
Step 9 (OPTIONAL): Boxing the corners
This step is purely optional if you want to create a more box shape to the bottom of the bag. If you do not want to do this then skip ahead to step 11.
Take the corners of the bottom of the back and in turn flatten them along the seam you sewed to create a triangle. Make a mark 1 inch (2.5 cm) from the point of the corner and draw a line vertically down, then stitch along the line. Do this for both corners.
Step 10 (OPTIONAL): Stitch the boxed corners
Stitch along these lines and then clip off the excess fabric.
You can use pinking shears to prevent fraying of the fabric. This now creates the box shape.
Step 11: Nick out the excess seam
If you didn’t want to create the box shape to the base of the gift bag pick up from here and nick out the excess seam fabric next to the casing – our video tutorial will make this clear – it is across the 3/8 inch (1 cm) casing.
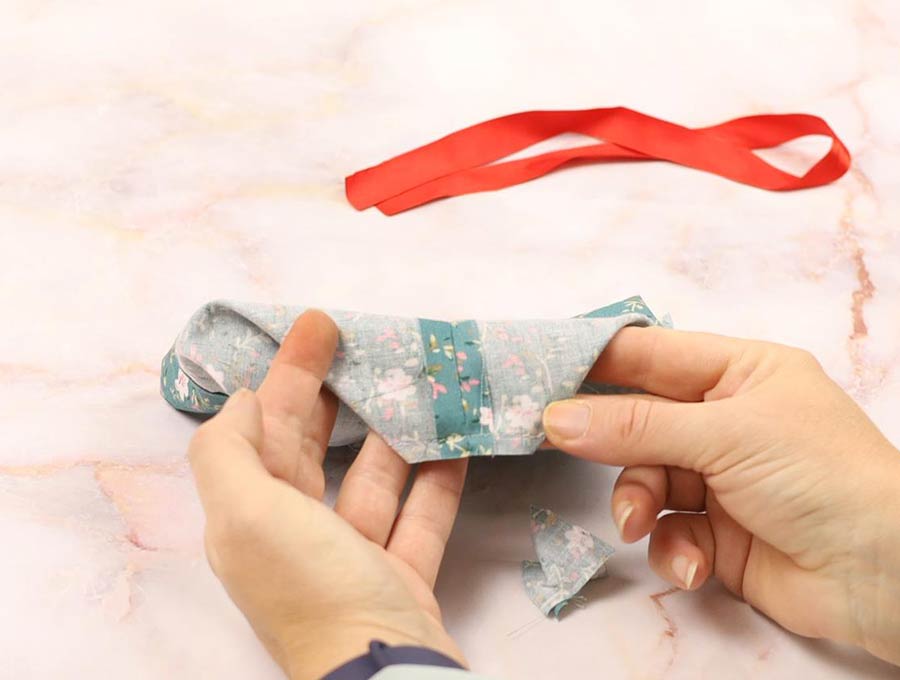
Step 12: Apply fray check

Once nicked out, paint some clear nail polish or fray check on the edge of the seams to prevent them fraying when the ribbon is drawn through, or you can use a commercial product you spray on to stop fraying. Just be sure to leave the seams propped open with a pin as they dry so they don’t stick together.
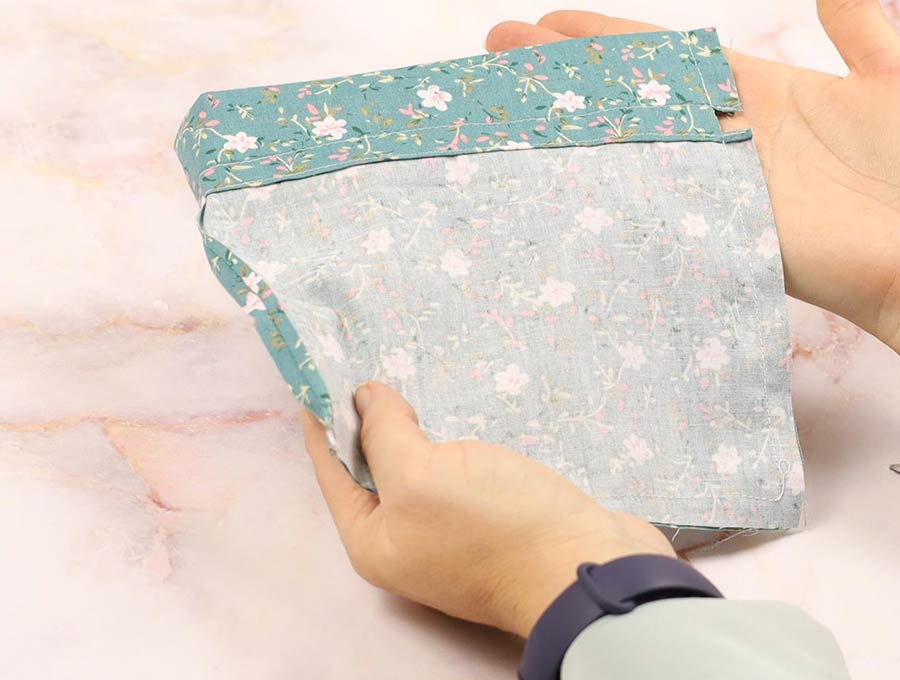
Step 13: Turn the fabric gift bag around
 Turn right side out
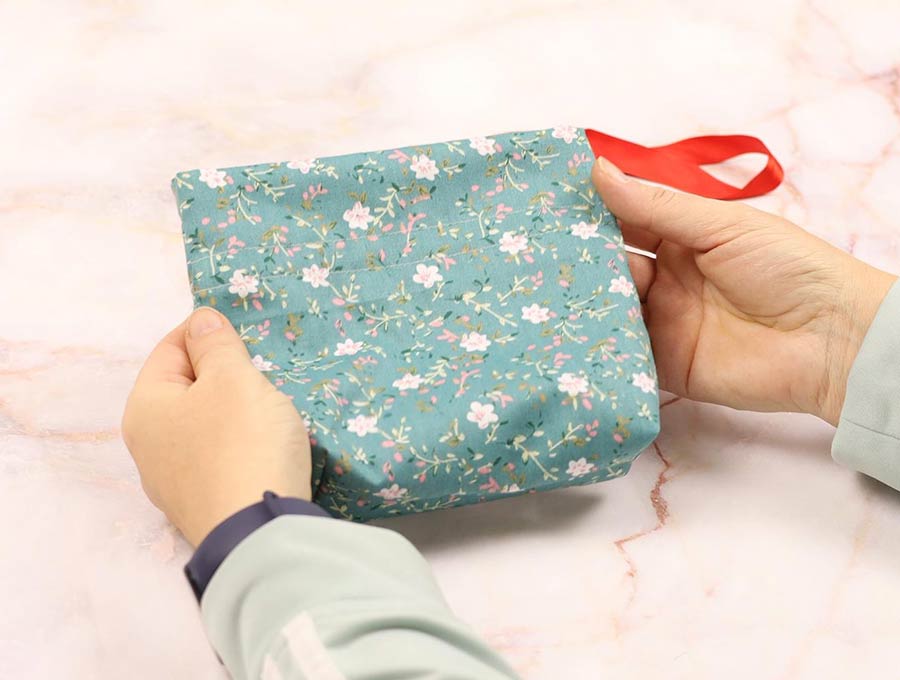
Step 14: Insert the ribbon
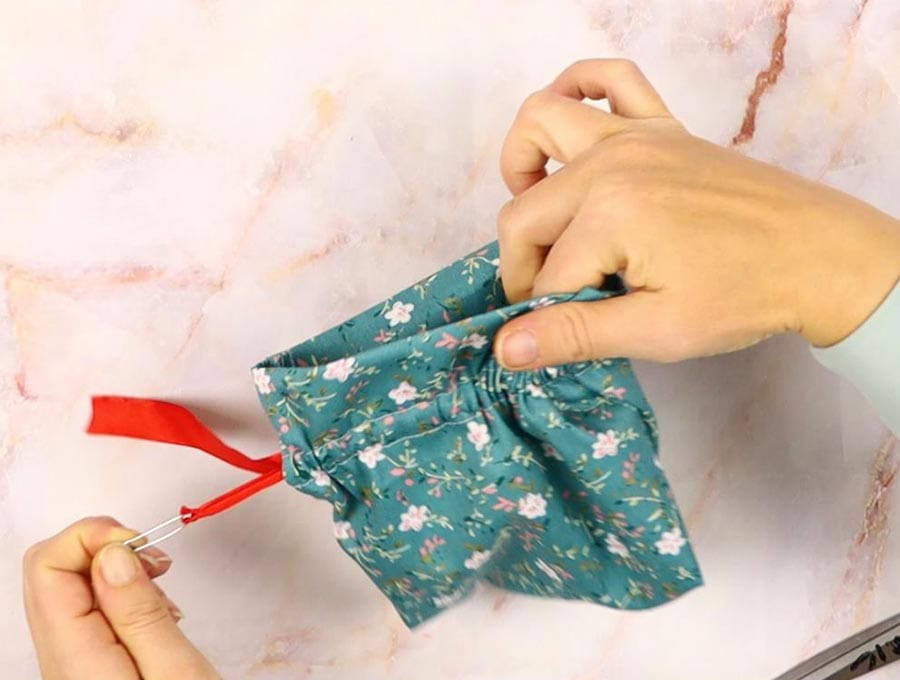
With a safety pin through one end of the ribbon thread it through the casing and even up the ends. You will want to snip off a small amount of ribbon where the pin penetrated through the ribbon, and use a lighter to seal the ends so the ribbon doesn’t fray.
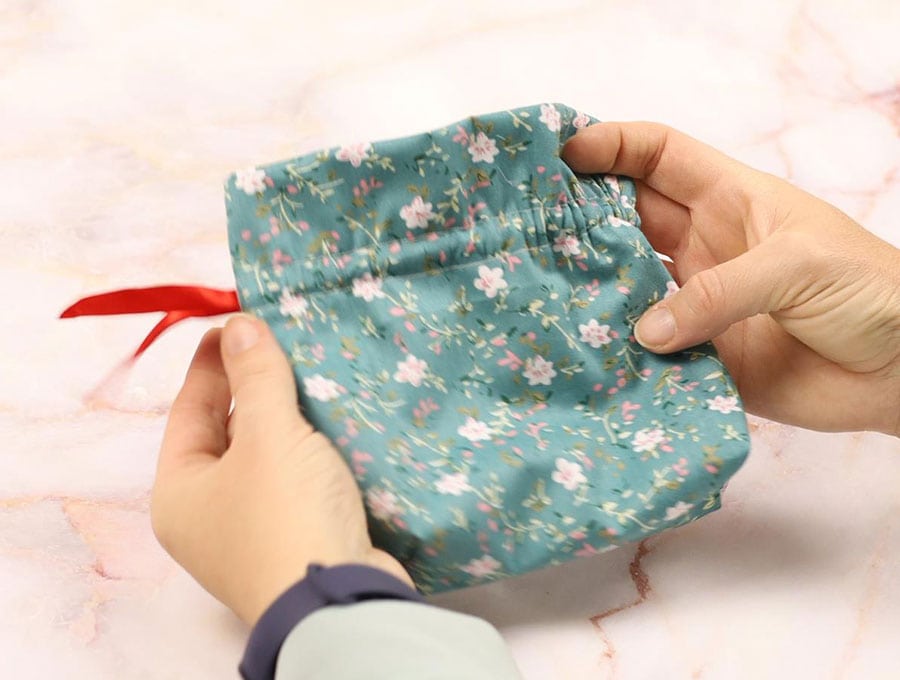
Lastly tie of the ribbon ends about an inch form the end so they don’t pull back into the casing.

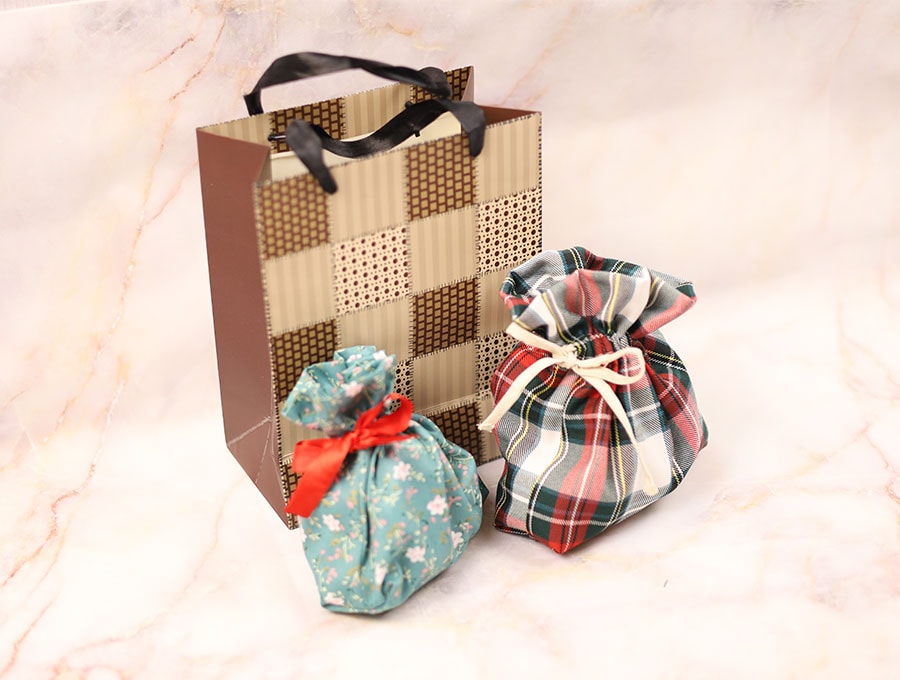
You gift bag is ready to use. Put your goodies inside, attach a beautiful gift tag and you’re ready for the gift to be delivered. As gift ideas, I love putting in homemade sweets or home-baked items like fudgy brownies or blondies in a cellophane wrapping. The gift bags are perfect for items of jewelry, an assortment of chocolates, or toy cars. The ideas are limitless. Men would enjoy receiving a bag full of jerky or the delicious South African biltong.
If you loved our easy to follow tutorial then please share and hit our subscribe button to have all the best of our projects delivered to your inbox. There is no need to miss out on the easy to sew projects that turn the fabric in your stash into beautiful items that can be enjoyed over and over again.
Do you like this? Pin for later:
Wanna be friends? Click HERE and follow me on Pinterest
RELATED: