
How to Make Fabric Origami Gift Bag in ANY size [VIDEO and Pattern]
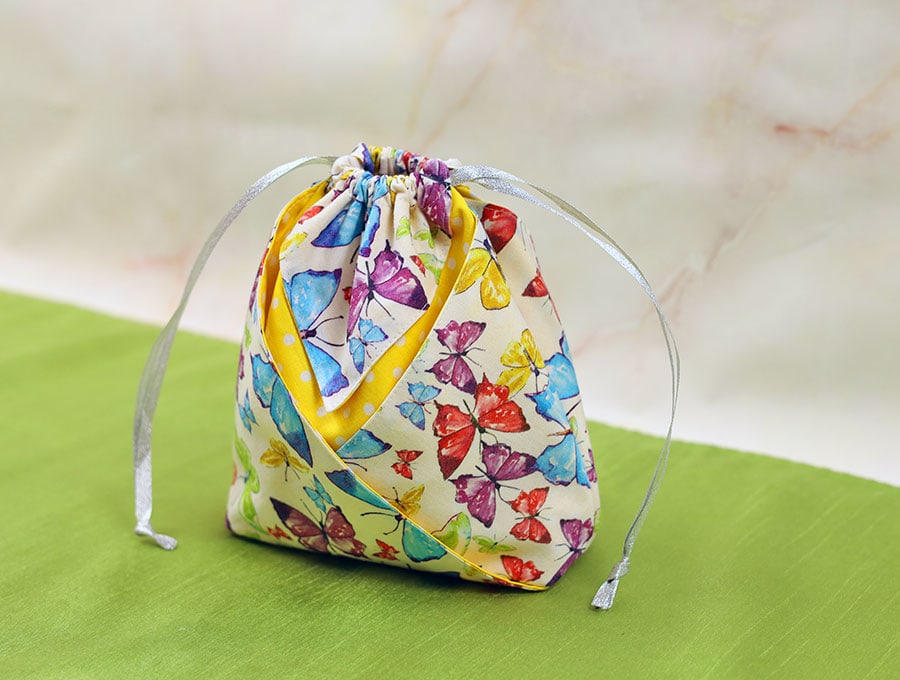
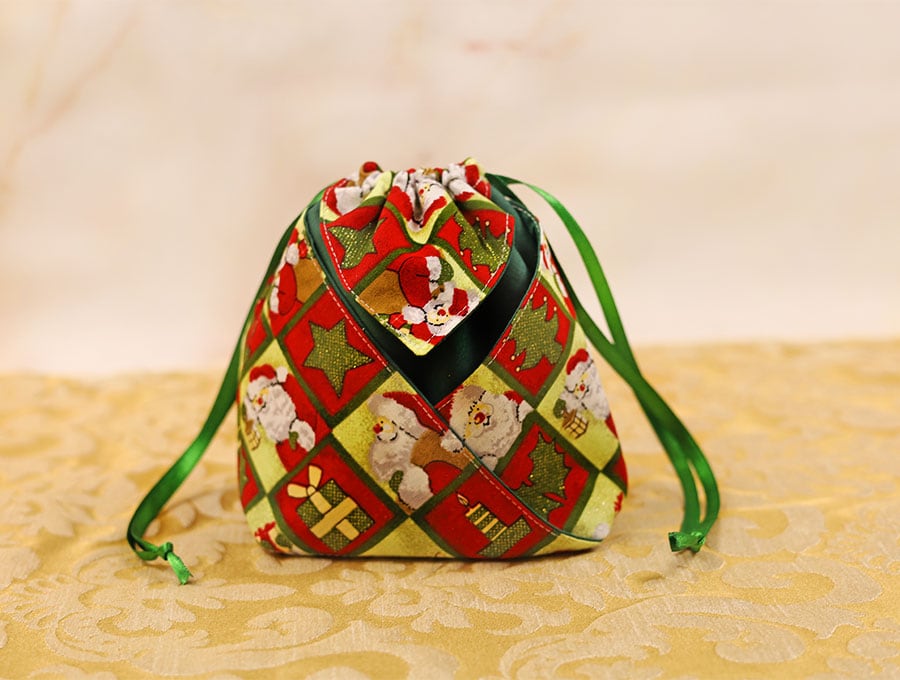
This origami gift bag is a breeze to make and will impress the recipient as it looks complicated. The secret is in the two easy folds. All it takes is two fat quarters (18 x 21 inches or 45 x 52 cm) or less, depending on the size of the bag, and some cord or ribbon for the drawstring top. The bags are perfect for those small gifts you want to look special; use up the small pieces in your stash, plus they’re washable and reusable. The recipient could use them for jewelry or phone chargers and USB sticks when they travel – depending on the size you make.
You need two contrasting fabrics, one for the outer and one for the inner. Cut your square with care because this will affect the neat points on the bag.
Below you will find my step by step written tutorial with VIDEO instructions for all the visual learners.
We occasionally link to goods offered by vendors to help the reader find relevant products. Some of the links may be affiliate meaning we earn a small commission if an item is purchased.
Table of Contents
How to make a Fabric origami gift bag
DIY Origami Pouch Supplies and tools
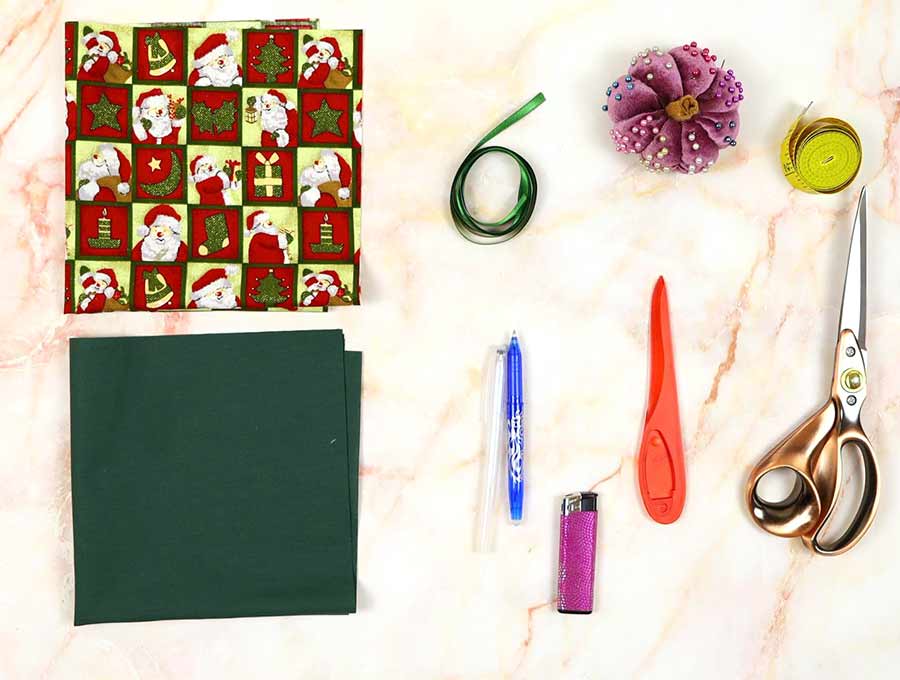
- fabric – 2 square pieces of cotton fabric (one main, one lining)
- 1/4″ (6mm) grosgrain ribbon
- (optional) fusible interfacing for the larger sizes
- matching thread
- scissors (or rotary cutter and a cutting mat)
- ruler or measuring tape
- iron and ironing board
- sewing clips or pins
Follow us for free patterns & tutorials! [easy-profiles]
How to Sew a Fabric Origami Gift Bag
Watch the diy origami gift bag video first and then follow the written step by step instructions below.
Please enjoy and don’t forget to Like and SUBSCRIBE over on YouTube to be kept up to date with new videos as they come out.
Fabric origami gift bag VIDEO TUTORIAL
INSTRUCTIONS:
STEP 1: Cut the fabrics
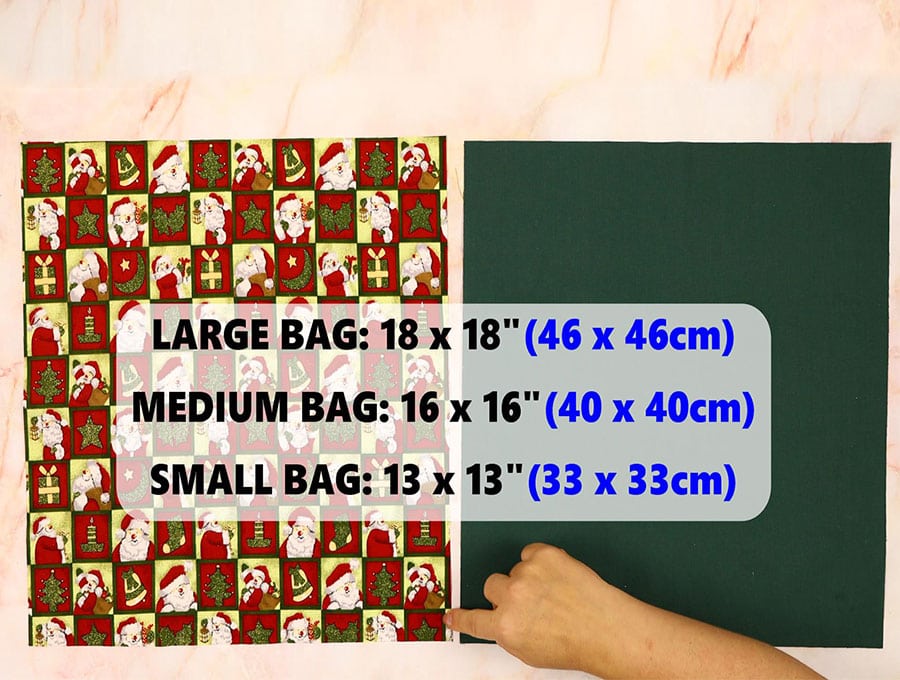
You need two squares of fabric in the size you choose. We decided to make the bag that was 14 inches (35.5cm) square, but you can go up to 18 inches (46cm) using a fat quarter, or even smaller – down to around 11 inches (28cm). For sizes larger than 15 inches (38cm), it would be good to use some iron-on interlining to give the bag some body so it sits upright on its base. The smaller ones are fine without interlining.
What you need:
Two squares 14 x 14 inches (35.5 x 35.5cm) in contrasting colors of cotton quilting or other suitable fabric
ORIGAMI BAG SIZES:
Cut 2 contrasting pieces of fabric in the following sizes
- MINI bag – (2) 11 x 11″ (28 x 28cm)
- SMALL bag – (2) 12.5 x 12.5″ (32 x 32cm)
- COMPACT bag – (2) 14 x 14 (35.5 x 35.5cm)
- MEDIUM bag – (2) 16 x 16″ (40 x 40cm)
- LARGE bag – (2) 18 x 18″ (46 x 46cm)
This origami gift bag looks its best when sewn using smaller prints on one side and plain contrasting fabric on the other side.
Do not use large one directions designs, as they might not look good on the bag.
STEP 2:
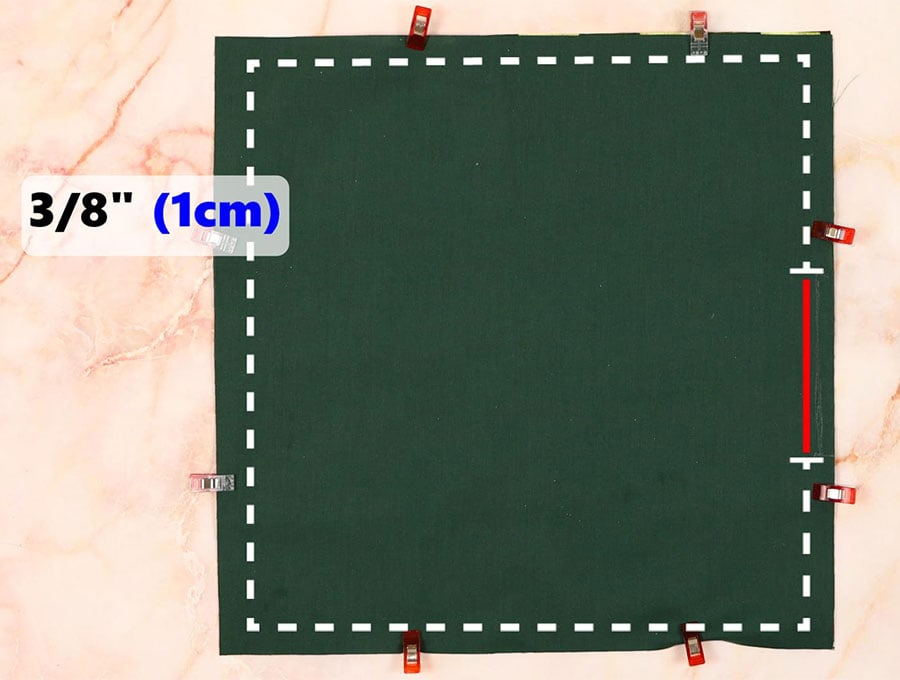
Check with your quilting ruler to make sure that the fabric is cut square and measures correctly, then place the right sides of the fabric facing each other and pin or clip together, leaving a gap of 2 inches (5 cm) in the middle of one of the sides. We leave the gap in the middle rather than near a corner, as it makes it easier to turn in.
STEP 3:
Stitch around the edge of the fabric 6mm (1/4″) from the edge. When you come to a corner, leave the needle down in the fabric and lift the pressure foot, swing the fabric 90 degrees, and depress the pressure foot before continuing to sew – this gives a nice neat corner. Remember not to stitch over the gap area!
STEP 4:
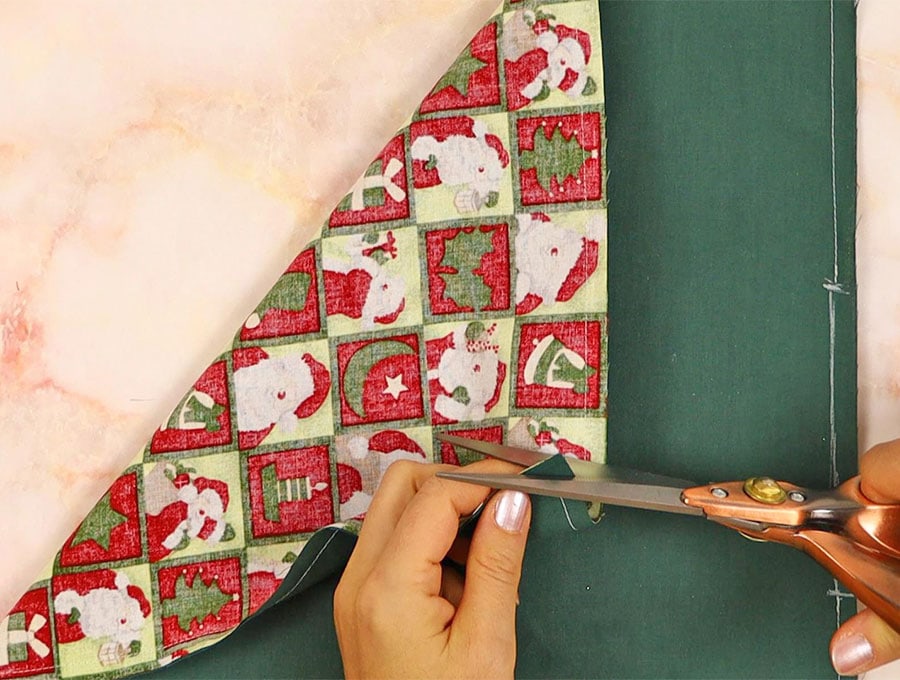
Cut diagonally across the extra fabric on the corners so they are not bulky but not too close to the stitch line, then turn the fabric the right way out by gently pulling it through the gap.
STEP 5:

Press the square after ensuring the corners are pushed out neatly, and tuck in the raw edges of the gap in line with the rest of the side of the square.
STEP 6:
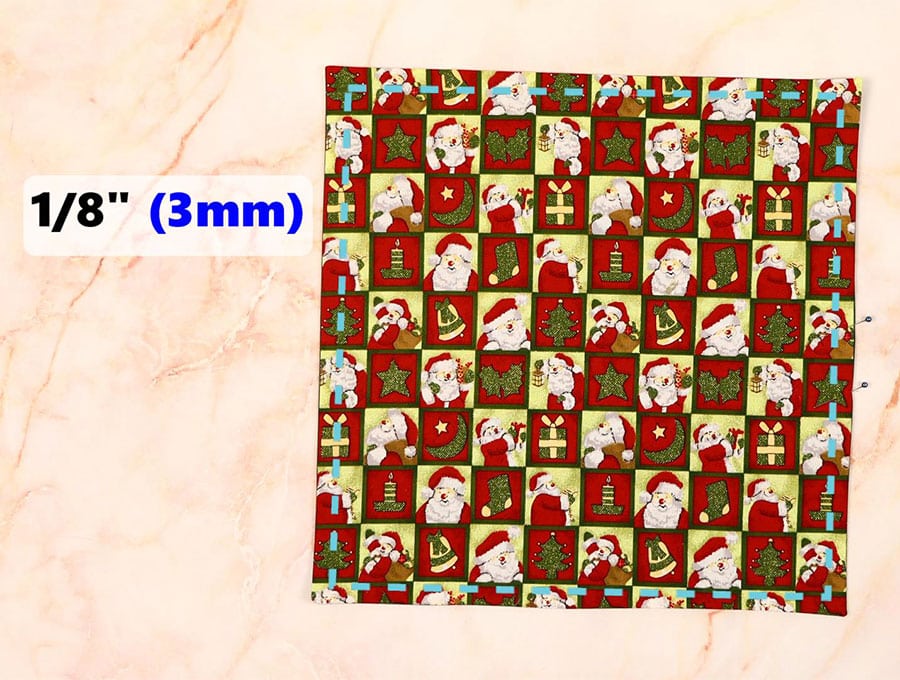
Top stitch all around the edge of the square 3mm (1/8″) from the edge, closing the gap with the topstitching.
STEP 7:
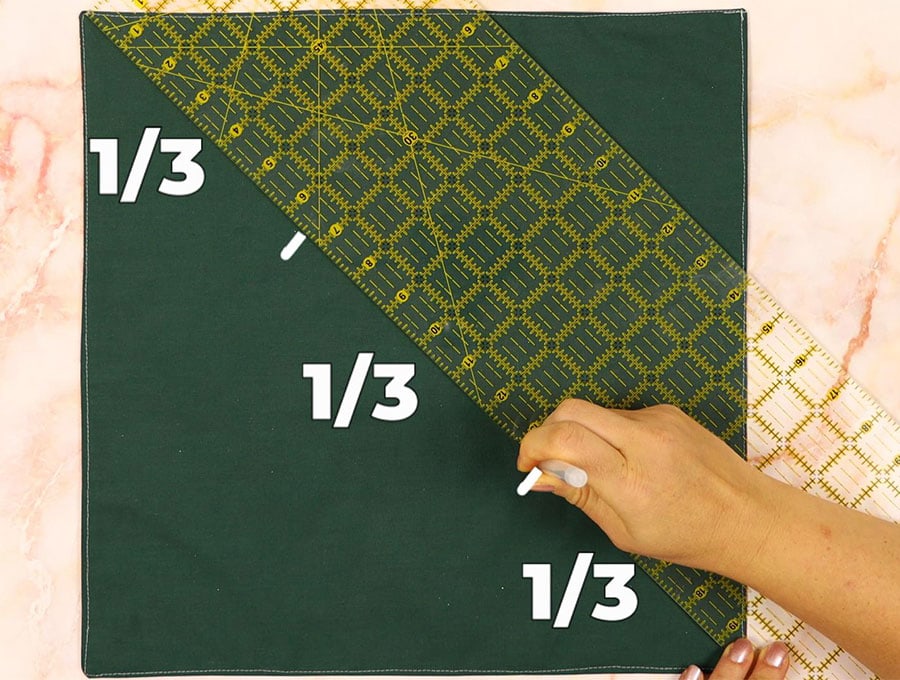
Place the square with the fabric you want on the outer side face down on the worktop like a diamond shape. Divide in thirds
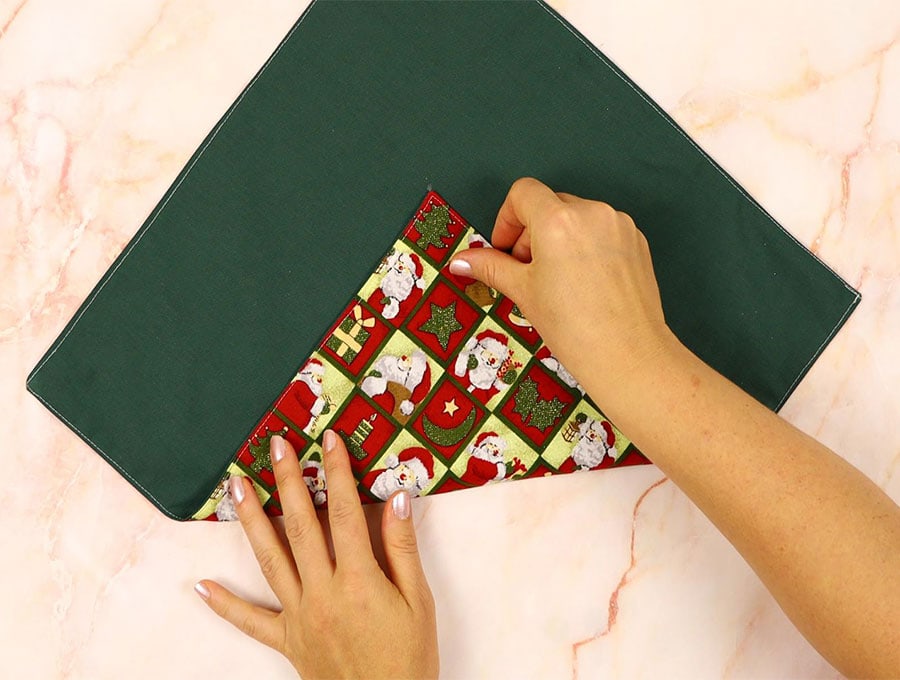
Fold the fabric up from the bottom and fold the top corner downwards, adjusting so they are equal and the points touch the fold.
Use your quilting square to check that the lining squares exposed are square – this is important for an excellent finish to the bag – adjust until you are sure, then use a pin to secure the downward folded point through all the layers of fabric.
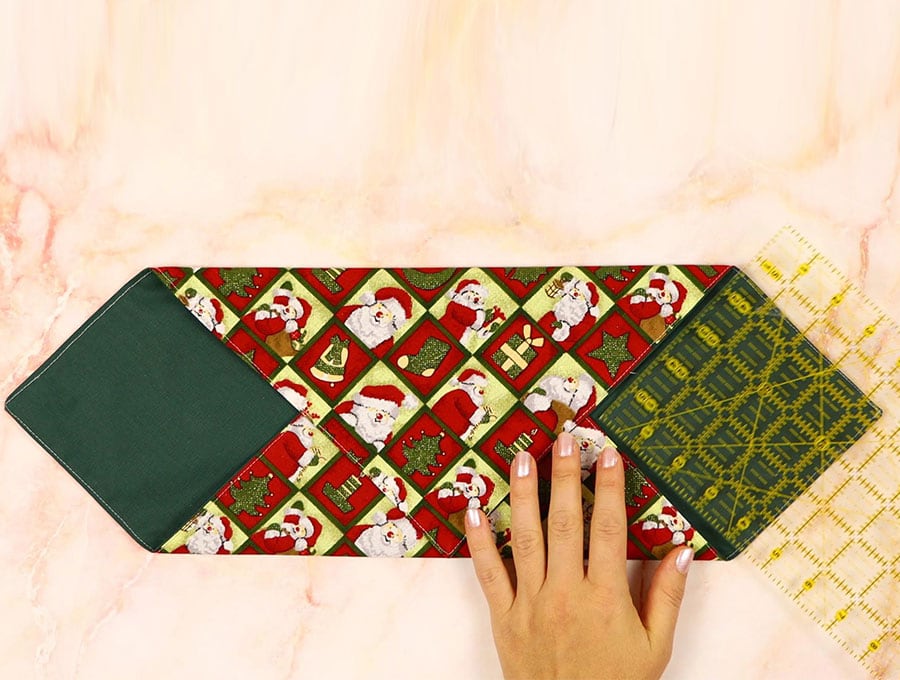
STEP 8:
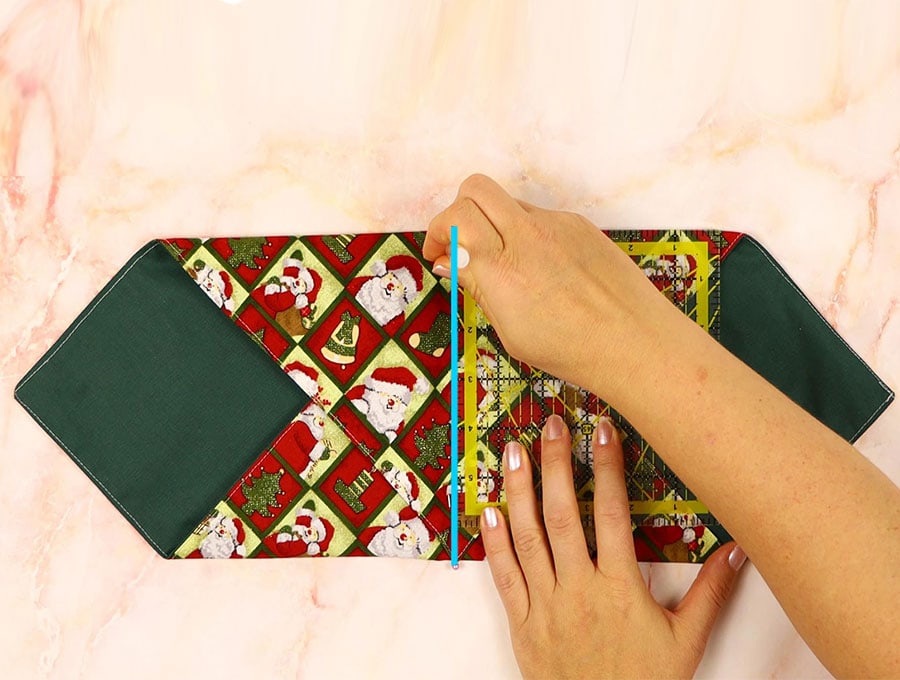
Take your fabric marker, and after folding the cloth in half from left to right, mark the center line, which will line up with the point of the folded fabric– then draw a line with a ruler.
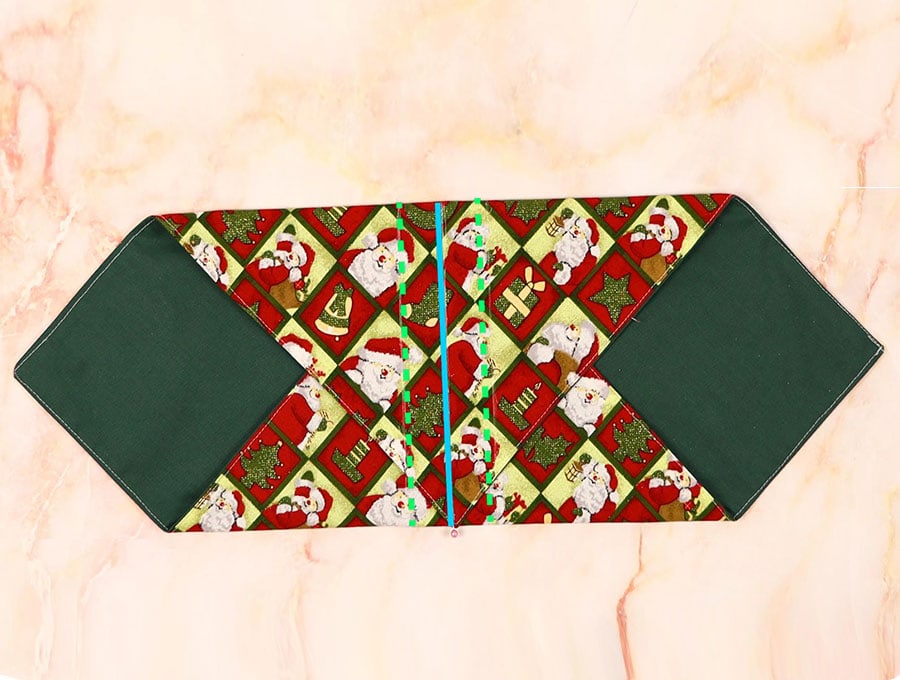
Next, measure out from the center line 2.5cm (1 inch) to the left and 2.5cm (1 inch) to the right of the center and mark these two lines to form the base.
STEP 9:
Stitch along the two marked lines to the left and right of the center (in green above), back tacking at the start and finish of each line of stitching.
STEP 10:
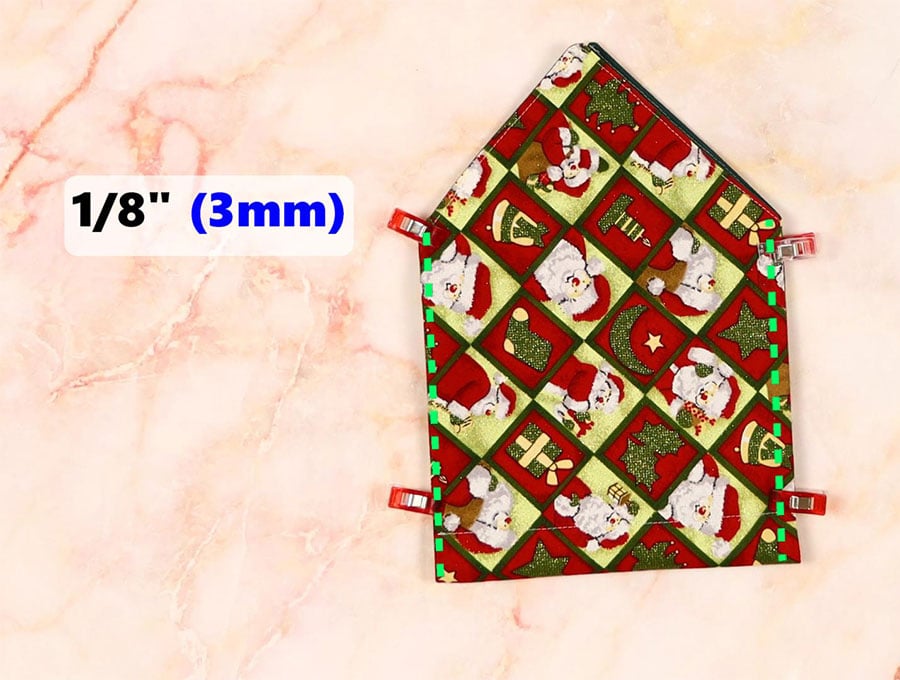
Fold the fabric in half, with point meeting point, with the outer fabric uppermost – this may sound counterintuitive as we usually sew on the lining side – but this is origami – the magic will happen. Then clip in place and stitch along the sides from the folded base to the top of the straight sides, 3mm (1/8″) from the edge.
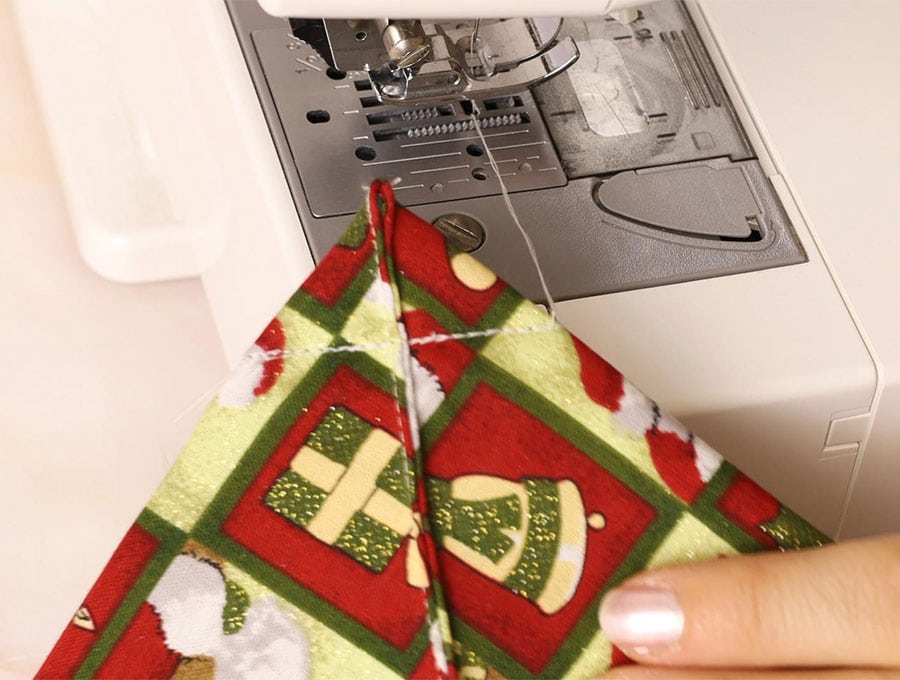
STEP 11:
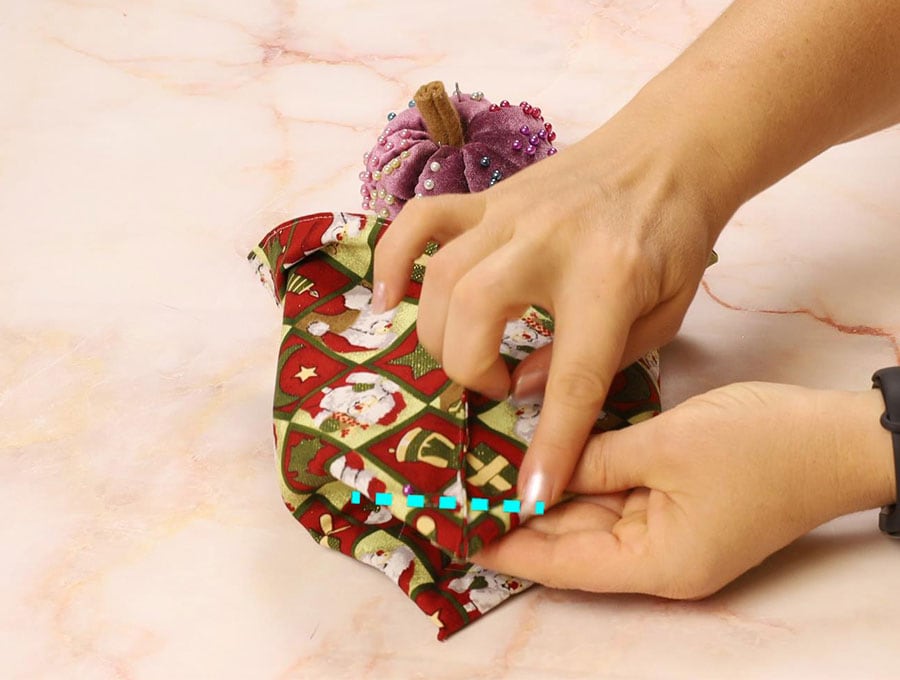
Take the corner of the bag at the base, push out, and flatten the corner so the seam you just stitched is lying in the middle of the triangular corner you have flattened. Put in a pin and stitch across the corner to create a triangle 2.5cm (1 inch) from the corner point.
Repeat with the other corner of the bag.
Please note that the bag is still wrong side out, so when you turn the bag around that the tabs of boxed corners will be inside.
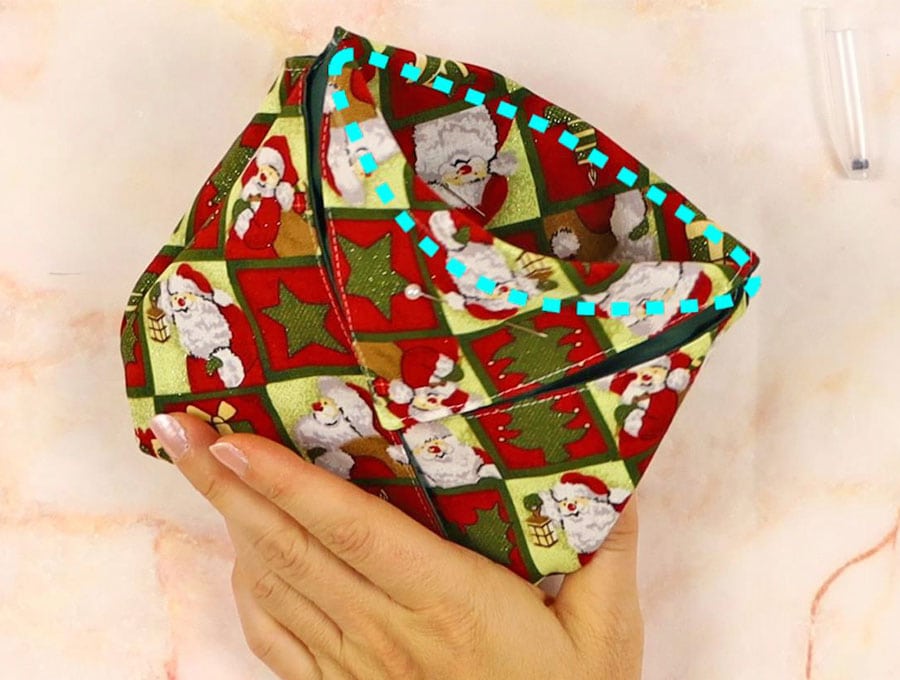
STEP 12:
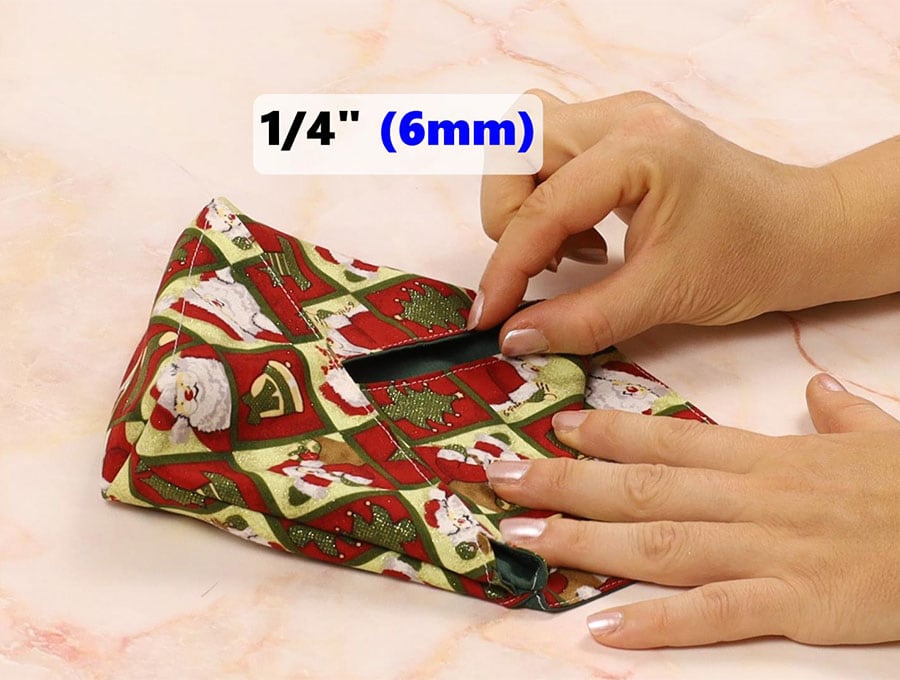
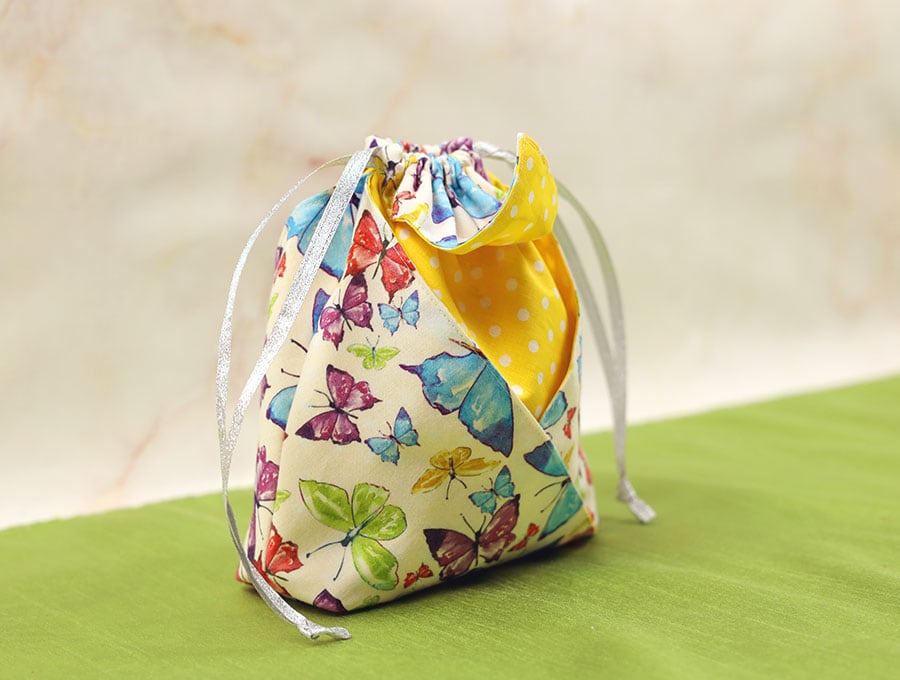
Put your fingers into the two corners you stitched and turn the bag inside out – and magically, the folds ensure the outer material still stays on the outside, and the inner will show like a portion of the inside of an envelope. Fold the flap of the envelope down on each side of the bag, but with enough of the lining showing to create a contrast and to ensure you have a 13mm (½ inch for the larger bags) and 6mm(1/4″ for the smaller bags) allowance to stitch across the top to make the casing for the drawstring and give it a good press.
STEP 13:
To create the drawstring, stitch across the fold 13mm (½ inch) from the edge on one side of the bag, then repeat on the other side.
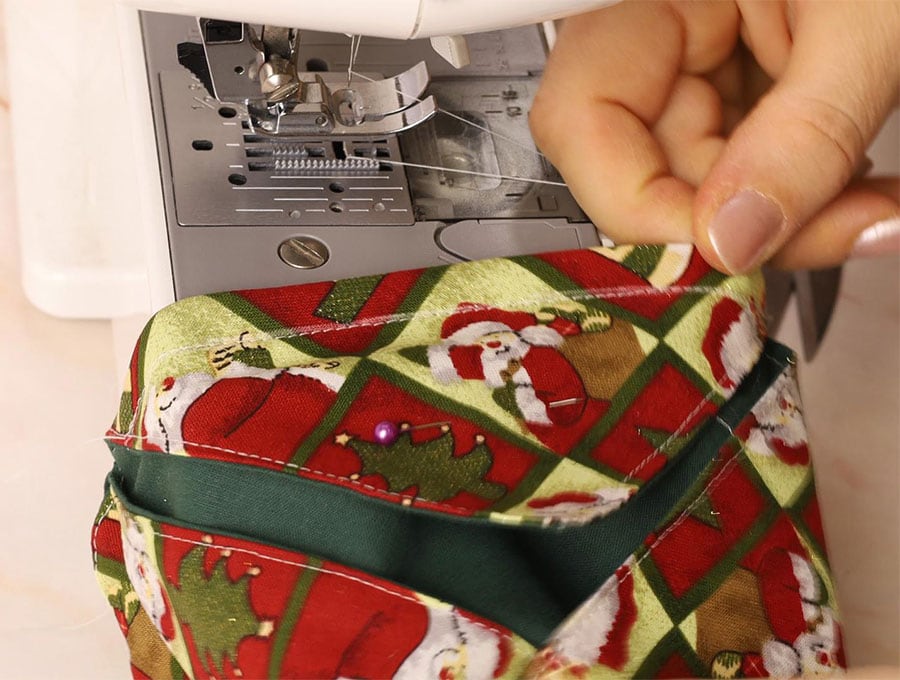
You have made the casing to pull the cord or ribbon through.
STEP 14:
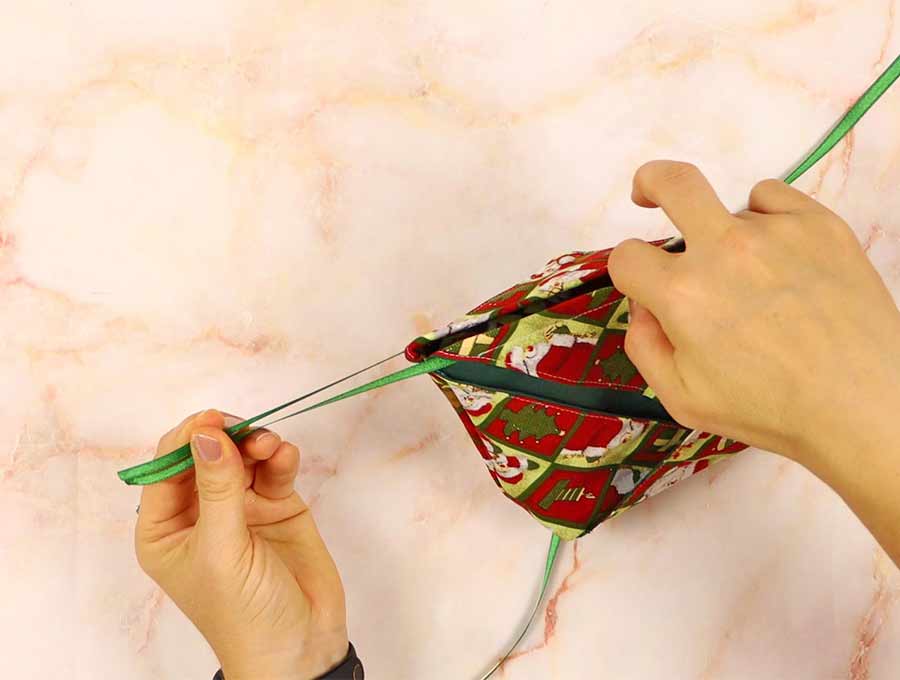
Take your 18-inch (46cm) ribbon or cord strip and pull it through both casings with a safety pin or a bodkin. Make sure the ends are equal and secure with a knot in the ribbon, then repeat the process with the next strip from the side where there is no knot – finishing off on the opposite side of the bag.
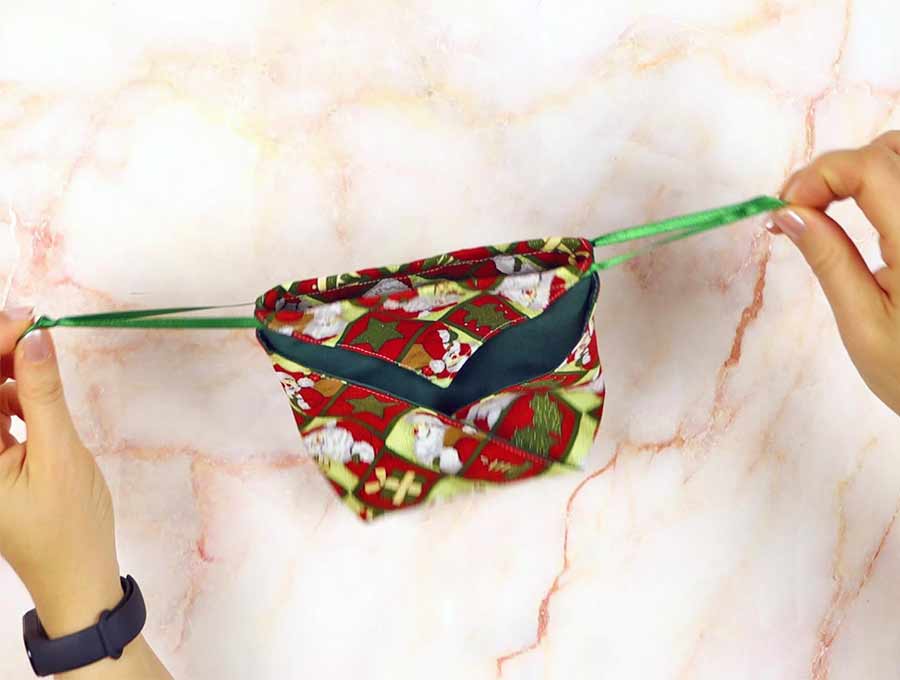
Now, you can pull the ribbon ends, and the drawstring bag closes. You can then tie a small bow with the ribbon to secure the present inside.
DIY Origami Gift Bag FAQs and tips:
Q: Can I end the ribbon with a bead?
A: It would look pretty if you chose a bead to attach neatly to the ends of the ribbon on each end of the drawstring.
Q: Can I secure the origami flap at the top?
A: You can ensure the origami-style flap stays in place by stitching a fancy button on either side of the bag. It will give a little extra finish to the fabric origami gift bag.
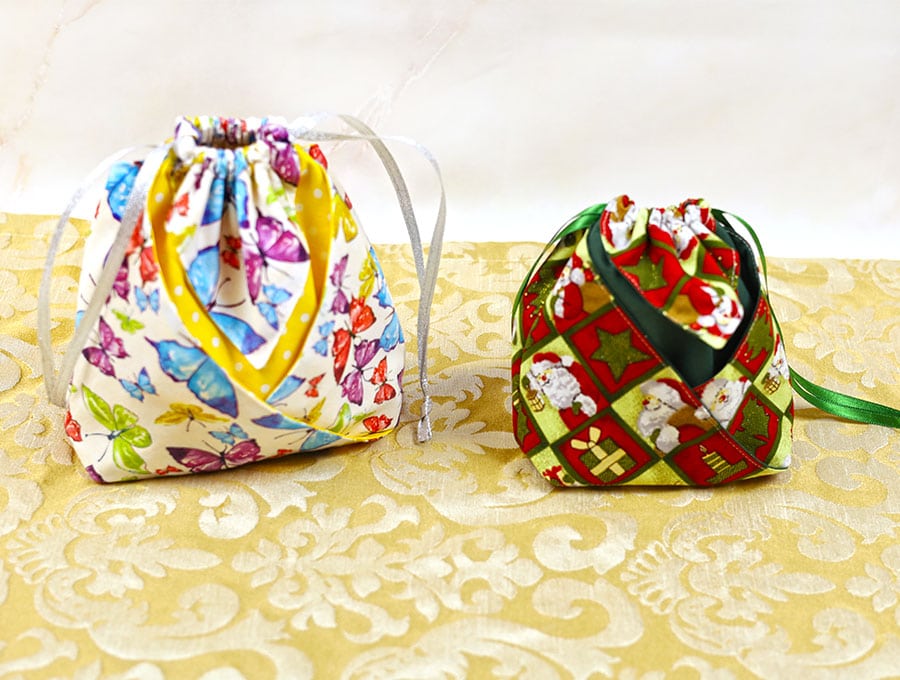
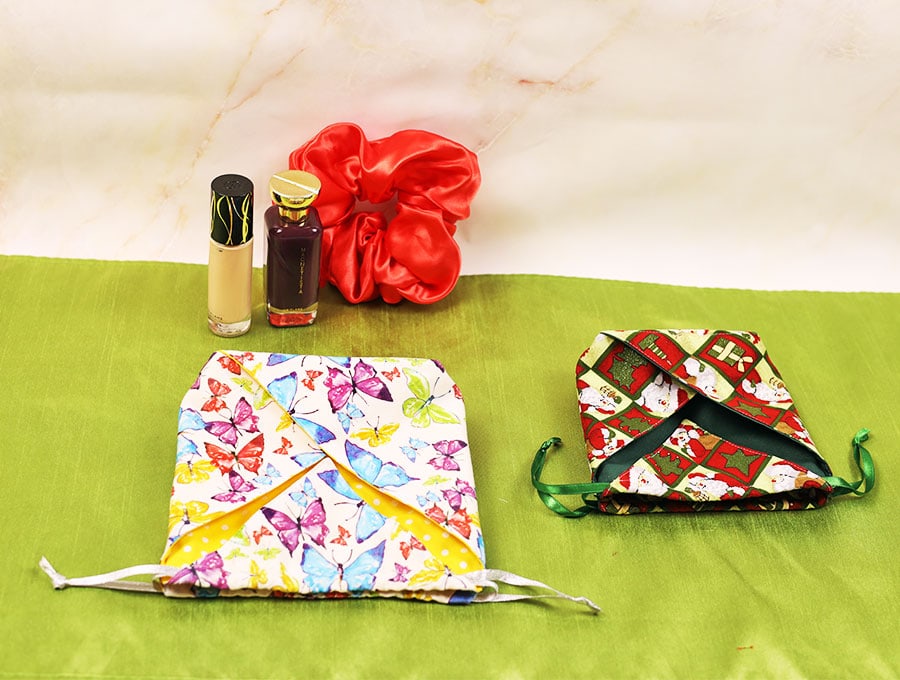
The fabric origami gift bag looks impressive but is easy and fast to sew. You can make the bag from a 10-inch square up to an 18-inch (25 to 45cm) square to suit the gift – from jewelry to chocolates, make-up, toiletries, and toys. Our visuals and step-by-step instructions guide you through making the bag. I can picture little girls’ delighted faces when they receive a unicorn print origami gift bag. It’s also an excellent way to use your Christmas print fabrics. Recipients will find many uses for these washable bags, from storing jewelry to make-up and phone chargers.
If you enjoyed this tutorial, share a photo of your fabric origami gift bag in the comments section. Please like and subscribe to have our latest tutorials sent straight to your inbox so you never miss out on a project again.
Do you like this? Pin for later:
Wanna be friends? Click HERE and follow me on Pinterest
RELATED: