
DIY felt leaf garland with FREE pattern
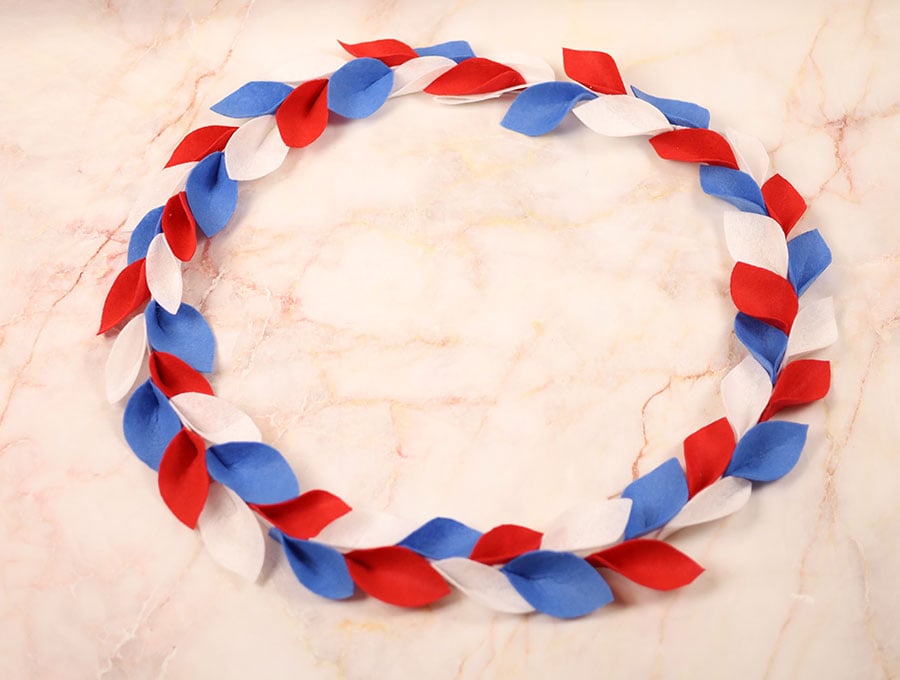
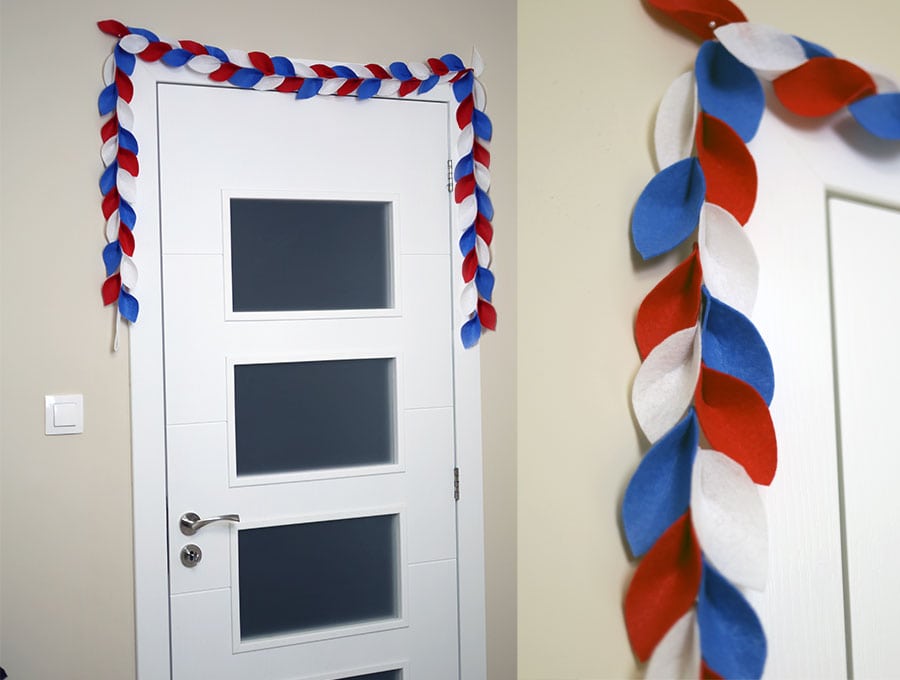
The DIY felt leaf garland is a fun and easy but luxurious-looking craft project. You don’t need a sewing machine for this one. Making the garland together is a great way to spend time with the kids as you cut and glue the leaves. We have chosen to make a patriotic one in red, white, and blue which can be used on the 4th of July or to welcome a serviceman home. You can create one in autumn colors, Christmas colors, or spring pastels. Adjust the length of the garland to suit the occasion – over the mantelpiece, over the entrance door frame, to give a table a festive mood, or even outdoors attached to a tree.
Below you will find my step by step written tutorial with VIDEO instructions for all the visual learners.
We occasionally link to goods offered by vendors to help the reader find relevant products. Some of the links may be affiliate meaning we earn a small commission if an item is purchased.
Table of Contents
- 1 DIY felt leaf garland
- 2 Supplies and tools
- 3 How to Make a Felt Leaf Garland
- 3.1 FElt Leaf Garland VIDEO TUTORIAL
- 3.2 INSTRUCTIONS:
- 3.3 STEP 1: Preparing the strip for the base
- 3.4 STEP 2: Prepare the leaf pattern
- 3.5 STEP 3: Cut out the leaves
- 3.6 STEP 4: Glue the base of the leaves
- 3.7 STEP 3: (optional) Prepare the strip
- 3.8 STEP 4: Attach the first leaves to the base
- 3.9 STEP 5: Finish the garland
DIY felt leaf garland
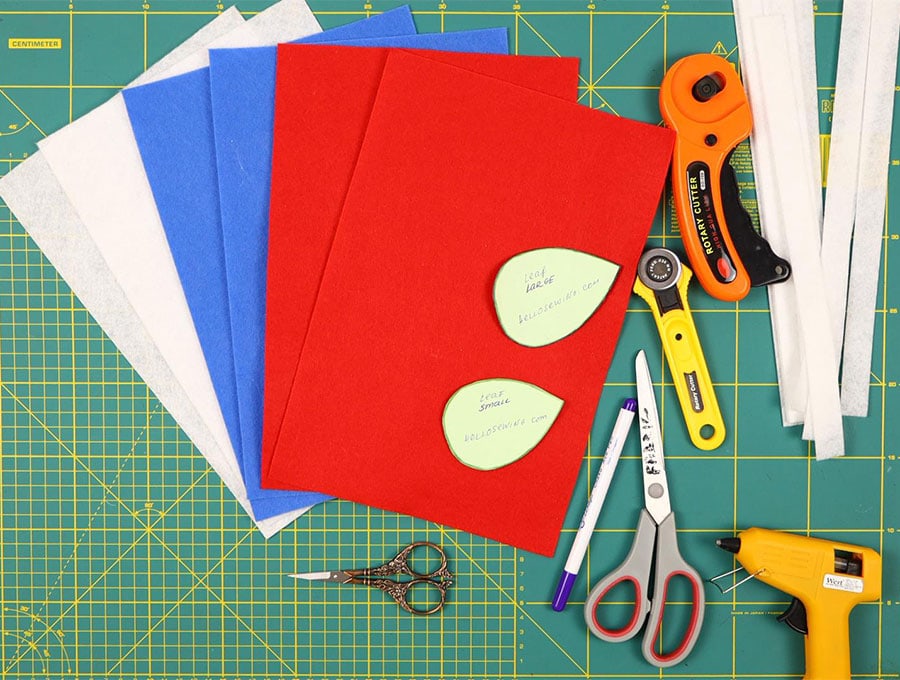
Supplies and tools
-
Paper leaf pattern (supplied free with this tutorial)
-
Glue gun
-
Fabric marking pen
-
Felt in three different colors – ½ yard (45 cm) each
-
Felt for base ½ yard (45 cm) – we used white as the base for our garland in patriotic colors
- scissors (or rotary cutter and a cutting mat) or if you have a Cricut machine, feel free to use it to cut the leaf shapes
- ruler or measuring tape
- sewing clips or pins
DOWNLOAD: leaf pattern [Free pdf file]
Follow us for free patterns & tutorials! [easy-profiles]
How to Make a Felt Leaf Garland
Watch the diy felt leaf garland video first and then follow the written step by step instructions below.
Please enjoy and don’t forget to Like and SUBSCRIBE over on YouTube to be kept up to date with new videos as they come out.
FElt Leaf Garland VIDEO TUTORIAL
INSTRUCTIONS:
STEP 1: Preparing the strip for the base
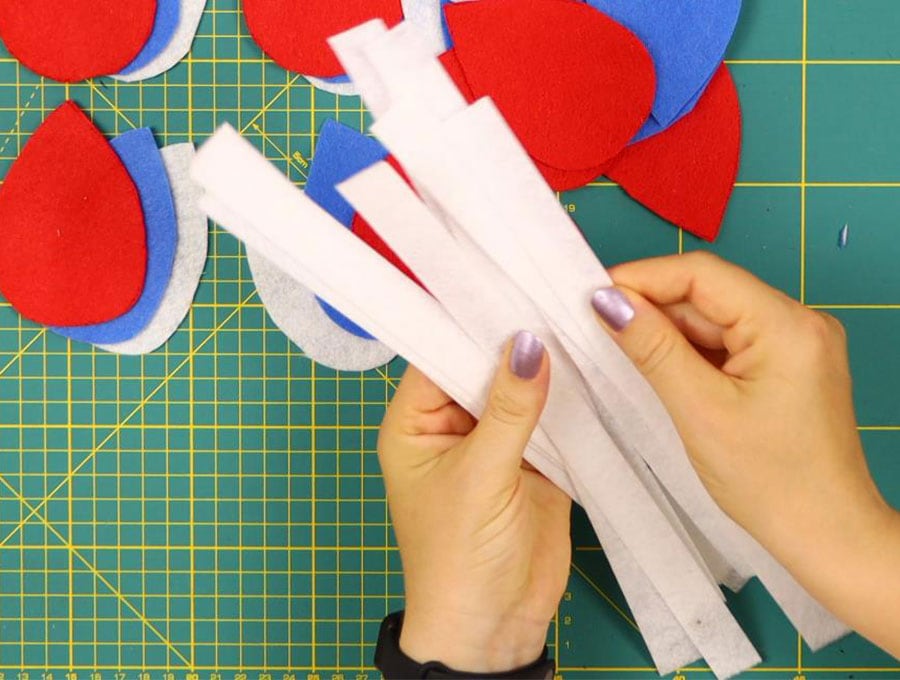
First, cut 3/4 inch (2 cm) strips for the base of the garland from your ½ yard of felt – you can join strips together to create any length you want within reason. Simply use the glue gun to join the strips together by overlapping them by an inch (2.5 cm), then lifting the overlap piece and applying glue on one side, then pressing them together firmly before adding the following part for the length of the base. When the backing strip is felt, it drapes well, so don’t be tempted to use another type of fabric.
STEP 2: Prepare the leaf pattern
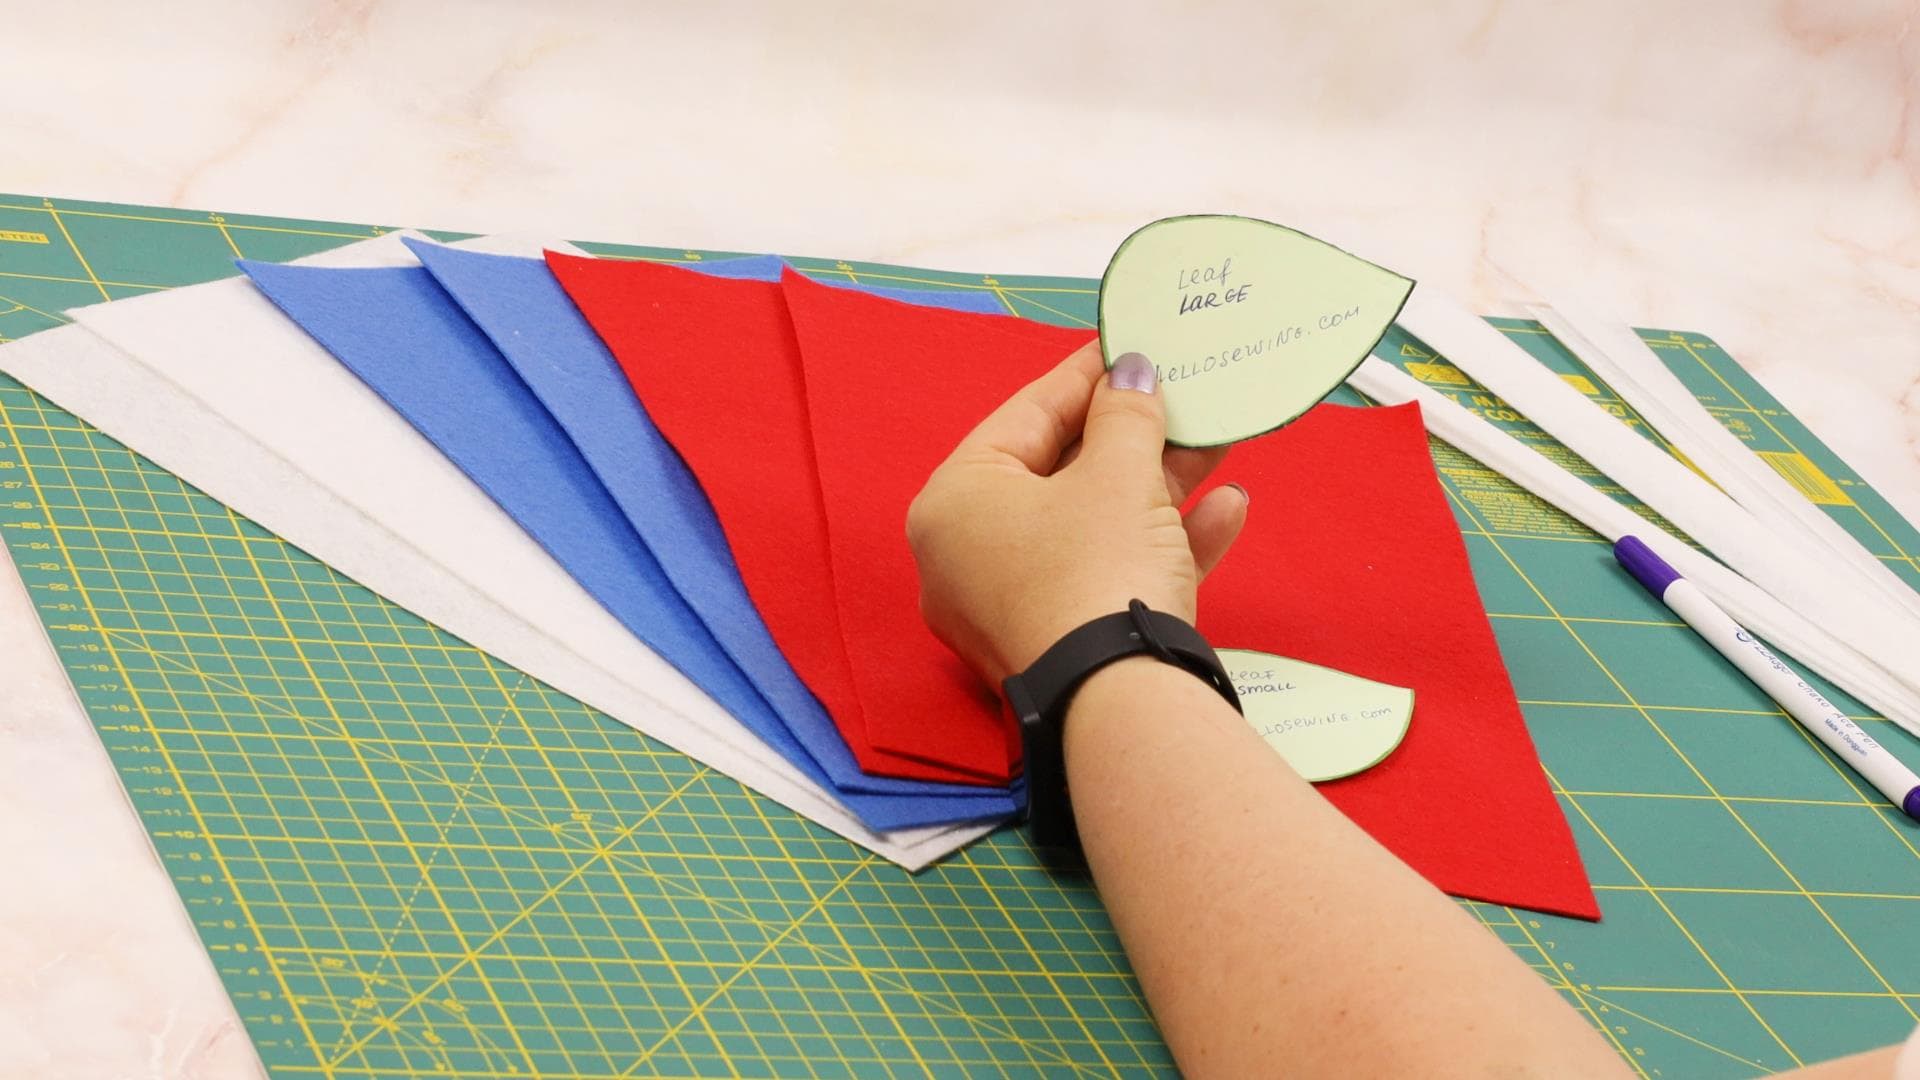
Print and then cut out your pattern piece for the leaf. If you prefer, you can freehand draw the leaf pattern. If cutting by hand with assistance from children, you may need a couple of leaf pattern pieces they can draw around using the fabric marking pen to make the project go faster.
STEP 3: Cut out the leaves
Next step is to cut out all the leaves. I’d like to draw all leaf pieces on one of the sheets and then stack all three colors to cut them all at once. You can either use a rotary cutter or just a pair of scissors. Just pin or clip the sheets together to keep them from moving.
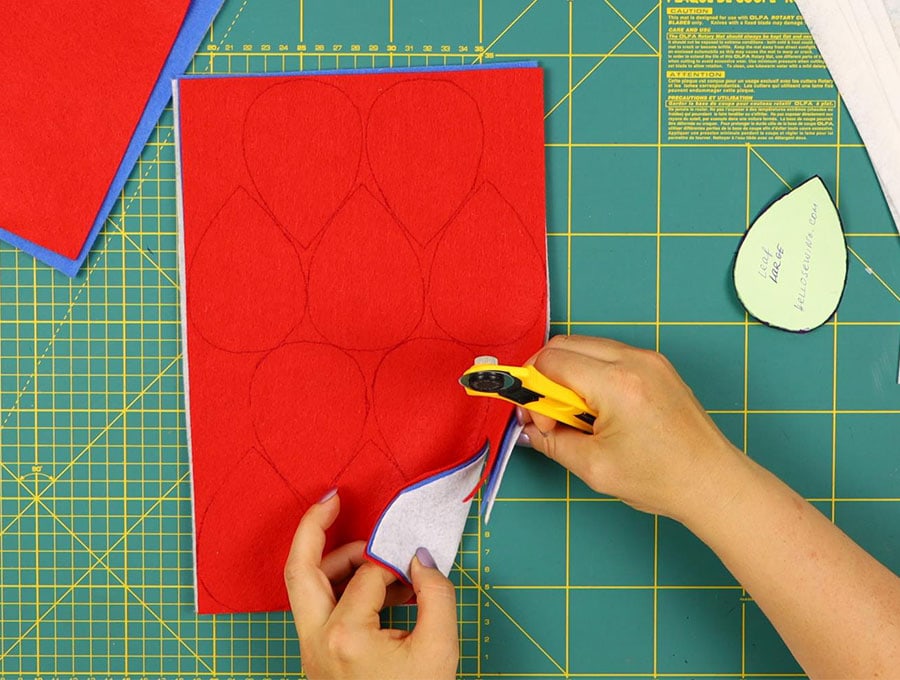
Cut out the leaf pattern pieces from the felt in equal numbers of red, white, and blue.
TIP: The Cricut machine can be used to cut all the leaves so they are perfectly even, but if you don’t have one of these machines, it’s no problem – use the free leaf pattern provided with this tutorial.
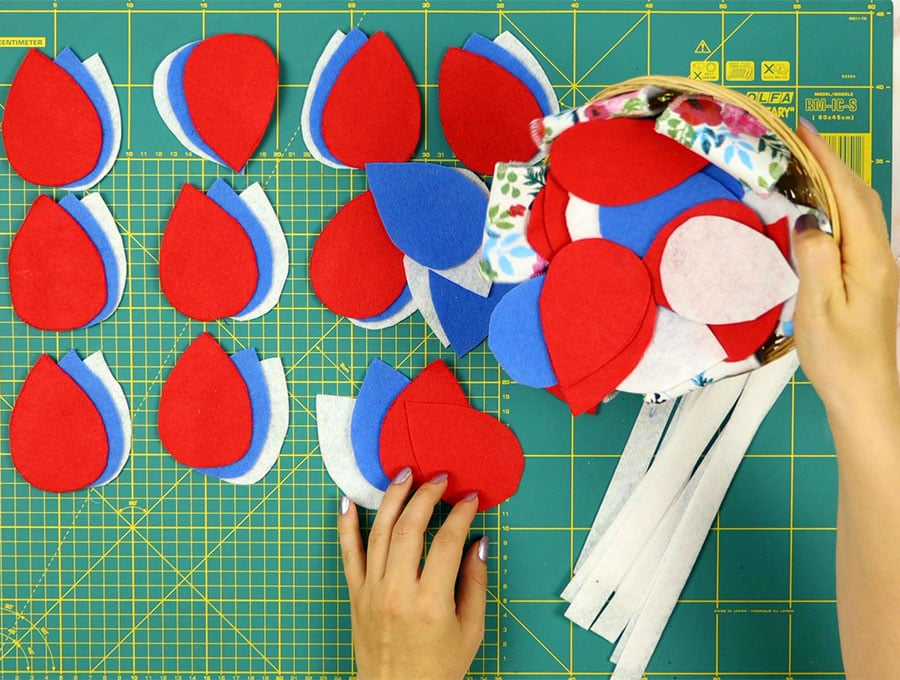
TIP: estimating how many leaves you will need:
The leaves will be glued 1 inch from the base of one leaf to the bottom of the next leaf on either side of the upper side of the felt strip, so you will need approximately 36 x 2 = 72 leaves to make a garland one yard long in total. That’s 24 each of red, white, and blue. If you want to make the garland 1 ½ yards, you will need 72 + 36 = 108 leaves.
STEP 4: Glue the base of the leaves
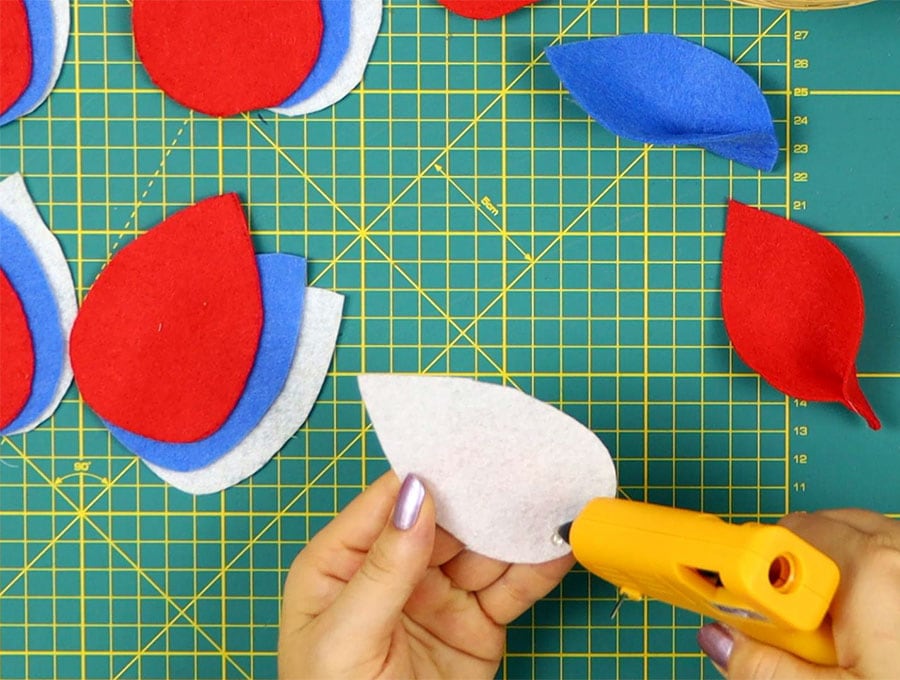
Once you have all your leaves cut out – an equal amount of each color, and your backing strip glued to the length you need for the garland, you can begin assembling the garland. To do this, get your hot glue gun ready, and start by placing a small arc of hot glue – like the mouth of a smiley face, across the rounded base of a leaf piece.
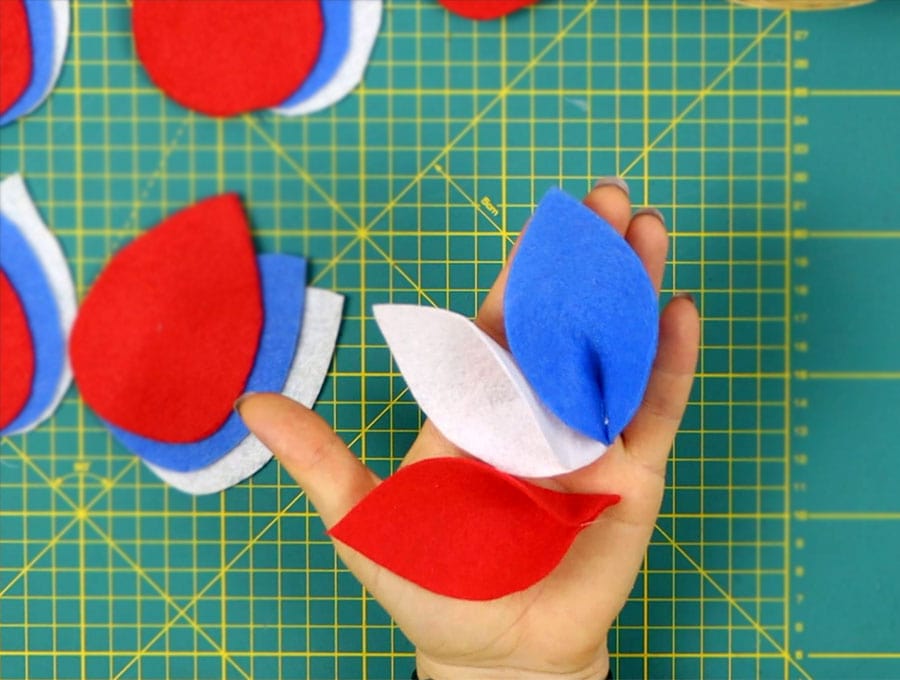
Immediately pinch together the middle of the arc so you form a neat left shape. If you feel the leaf shape is a bit flat because you didn’t extend the arc of the ‘smile’ far enough, feel free to add another dab of glue. Soon you’ll be in a rhythm of creating the perfect glue arcs to make the leaves.
Now it is up to you whether you want to create all the leaves together as one big production line or prefer to create each leaf before immediately gluing it to the backing.
STEP 3: (optional) Prepare the strip
The leaves bases are one inch (2.54 cm ) from each other – if you want, you can mark out the strip in advance one inch apart.
To make the hanging loops: make a 3 inch (7cm) loop on either side of the felt strip and add a dab of glue, then pinch it.
I’d like to just glue leaves as I go and add the end loop after I finish adding leaves
STEP 4: Attach the first leaves to the base
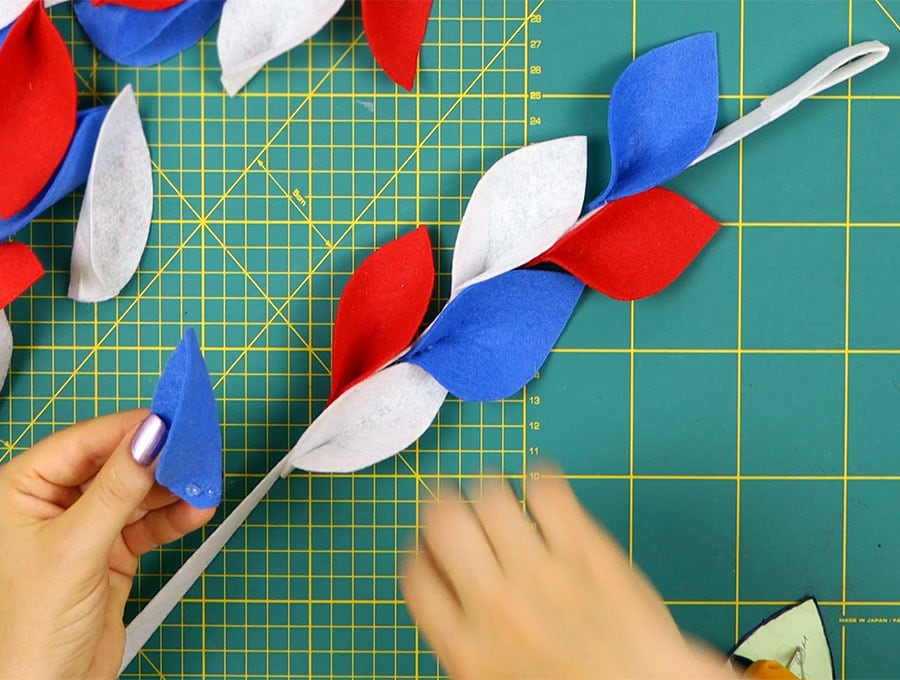
At the tip of the felt base, apply a strip of glue and a blue leaf. Applying the glue to the leaf rather than the leaf base is better. The strip stays in place, and you bring the leaf to it and press it firmly. Red, blue, and white are the color alternations, so, having started with a blue leaf, put a red leaf on the right-hand side and a white on the left-hand side of the felt base.
STEP 5: Finish the garland
You will see the leaves overlap each other hiding the bases where they have been glued. The following sequence will be red on the left-hand side, blue on the right, and white on the left, and so you progress. Each leaf base will be angled slightly outward from the base, just the way leaves naturally grow from a stem, but don’t angle them too far out, as you want each leaf to cover the base of the leaf above it.
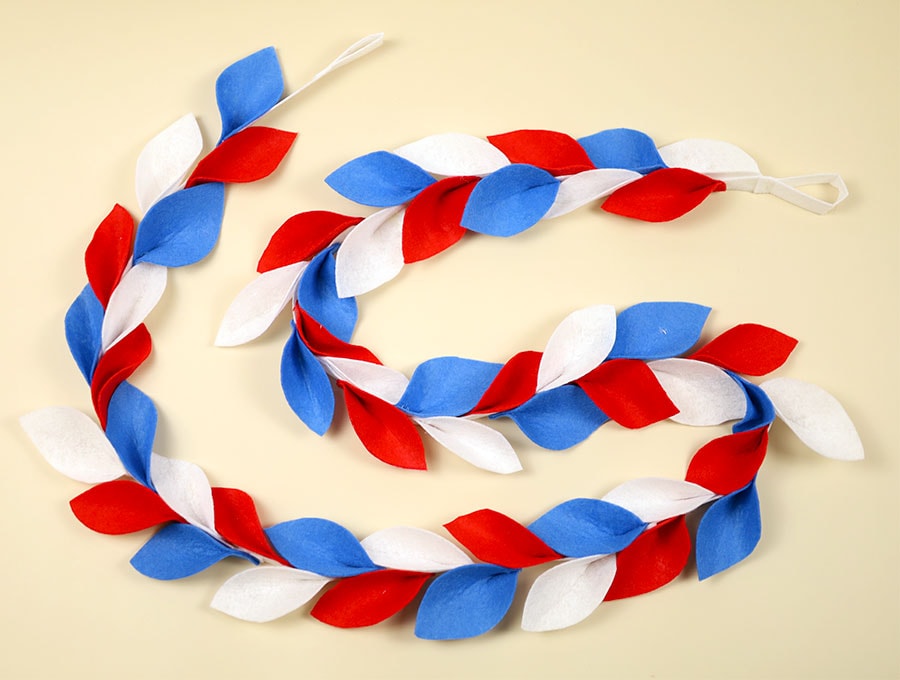
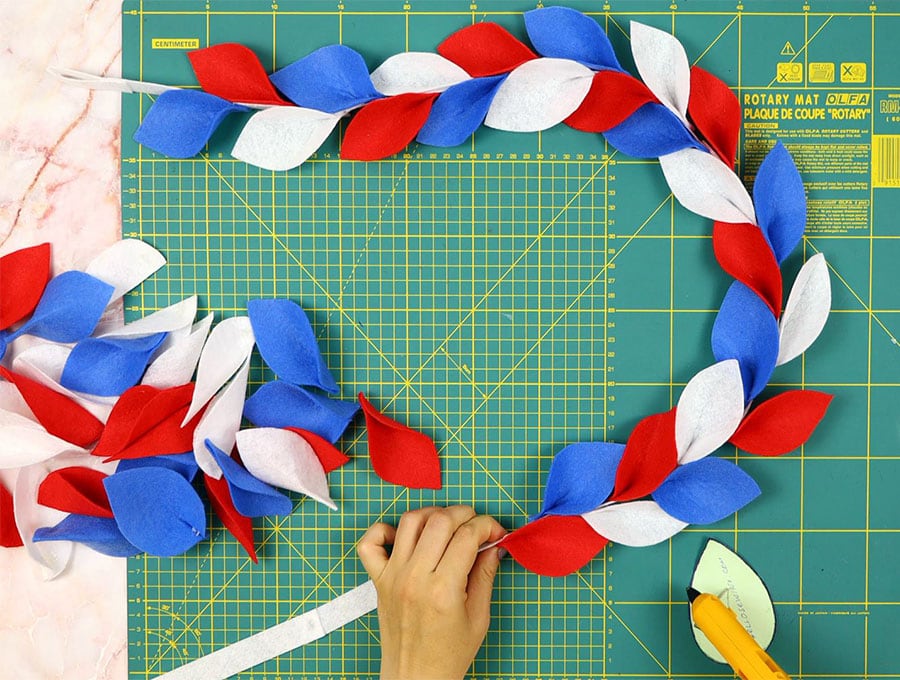
As soon as you have finished, apart from the last leaf on the end, you can drape the garland over the mantelpiece or wherever you intend to use it. If it looks short, you can always add a strip to the base and make it longer before adding more leaves. If you make a harvest color combination, a brown felt for the base would be ideal with orange, yellow, red, and a few green leaves.
If you liked this easy DIY Felt leaf garland, please follow us to get more of our fun craft and sewing tutorials delivered to your inbox so you have a variety of projects to try out. As a matter of interest, these garlands make a lovely present – especially the Christmas-themed ones s you can glue on a couple of holly pieces or glittery items to add to the festive feel. Once you are done, package the garland in a big square box finished with a decorative bow.
Make this fun DIY felt leaf garland for your 4th of July celebrations in patriotic colors, or make it in Christmas colors, fall shades, or even for a spring celebration in light pastels. You don’t need a sewing machine – just scissors and glue. Watch our visuals or follow the step-by-step instructions to get going on this project. It’s one the kids can join in making, and while you are engaged in cutting and gluing, you’ll create memories that will last forever. Somehow working together on a project loosens up family members, and everyone gets really chatty.
Do you like this? Pin for later:
Wanna be friends? Click HERE and follow me on Pinterest
RELATED: