
DIY Four Corners Apron with Free Pattern in 9 sizes! [Kids and Adults]
This is a super little apron to make – well, not quite so little – it covers your clothes pretty well in case of spills and is an ideal item for holiday baking with the kids.
Our free four corners apron pattern comes in a range of sizes from 3 years up to adults size 2XL and everything in between. The step-by-step sewing tutorial and visuals are easy to follow. You only need two squares of fabric and some contrasting bits for the trims. The pocket is optional, but it does add a good-looking finish. This apron can be used in the kitchen and for arts and crafts projects throughout the year.
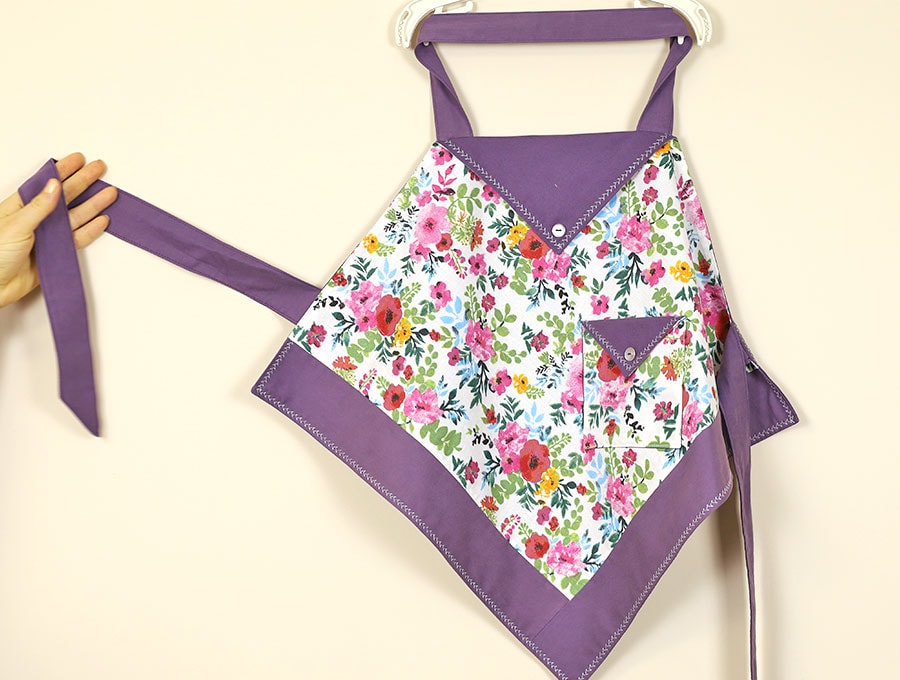
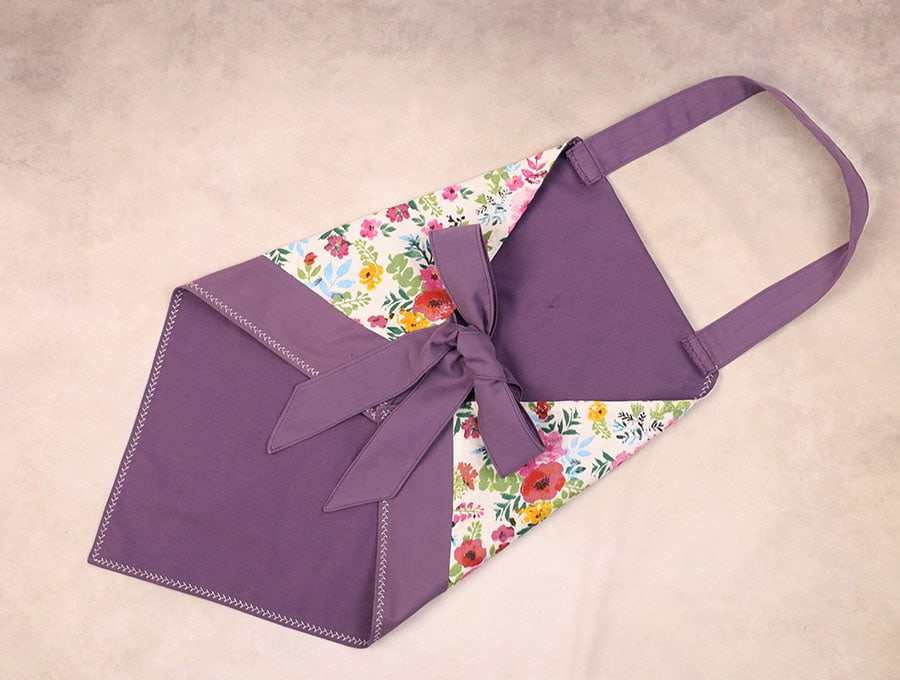
This is the type of apron kids will love for creating festive cookies – after all a chef in training needs to look the part! Additionally you can use these aprons for all sorts of arts and crafts as they cover clothing well, and even for gardening. Have fun selecting the appropriate prints and tying the gorgeous bow on the back.
Below you will find my step by step written tutorial how to sew a four corners apron with VIDEO instructions for all the visual learners.
We occasionally link to goods offered by vendors to help the reader find relevant products. Some of the links may be affiliate meaning we earn a small commission if an item is purchased.
Table of Contents
How to make a four corner apron
Supplies and tools
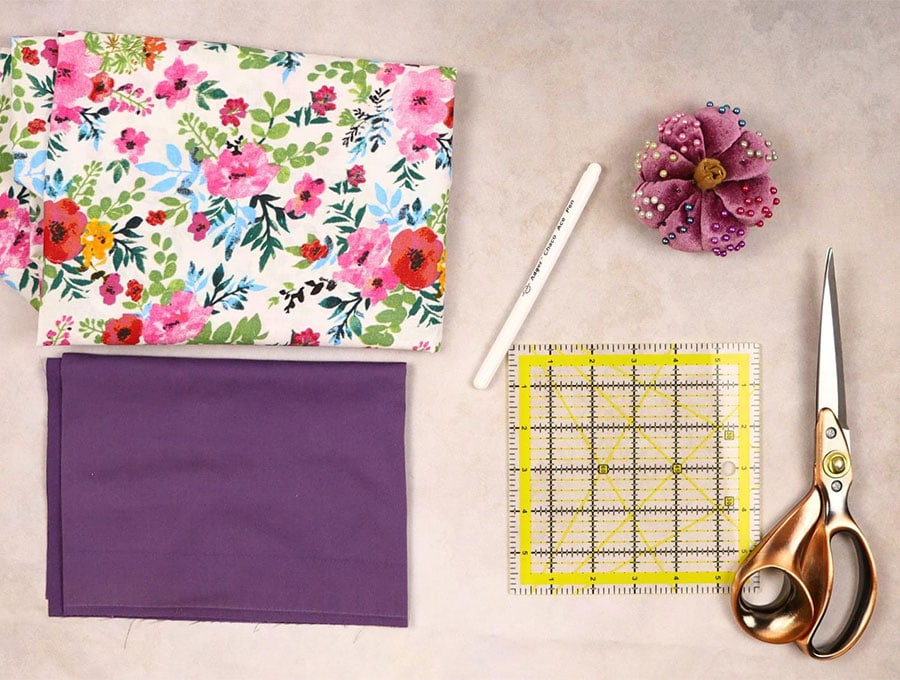
- fabric – 2 pieces of 100% tightly woven cotton (one main, one lining):
1 yard (91cm) printed fabric material for the apron
1 ¼ yards (114cm) backing fabric
-
2 decorative buttons
- matching thread
- scissors (or rotary cutter and a cutting mat)
- ruler or measuring tape
- iron and ironing board
- sewing clips or pins
- fabric pen
DOWNLOAD: four corner apron pattern coming soon[Free pdf file]
Follow us for free patterns & tutorials! [easy-profiles]
How to Sew a four corner apron
Watch the diy four corners apron video first and then follow the written step by step instructions below.
Please enjoy and don’t forget to Like and SUBSCRIBE over on YouTube to be kept up to date with new videos as they come out.
Four corners apron VIDEO TUTORIAL
Four corner apron measurements:
Below are the suggested front piece sizes for average-sized kids and adults. You could go up a size if your child is tall. The backing piece will always be 3 inches (7.5cm) larger for each size. You can keep the ties to the exact dimensions given in our step-by-step instructions, or if you wish to make them a bit narrower, feel free to do so. I suggest amending the pocket size on the first two kids’ sizes ( the 2 to 6-year sizes) to 5 x 5 inches finished size (13 x 13cm) and 6″ (15 x 15cm) square for the kids aged 7 to 12 to make the pocket proportional to the apron. For your convenience, we have supplied a smaller pocket pattern for kids’ aprons.
Front piece fabric measurements
Kids:
2 to 3 years 16 x 16 inch
4 to 6 years 18 x 18 inch
7 to 9 years 20 x 20 inch
10 to 12 years 22 x 22 inch
Adults:
S 24 x 24 inch
M 25 x 25 inch
L 26 x 26 inch
XL 27 x 27 inch
2XL 28 x 28 inch
backing piece for all sizes is 3″ larger than the front piece. E.g for size M front piece is a 25″square and the back piece is 25+3 =28″square
DIY Four corners apron INSTRUCTIONS:
We are doing a four corner apron to suit a medium-sized adult (M)
STEP 1:
Cut the following pieces of fabric:
- 1 of 25 x 25 inch (63.5 x 63.5 cm) piece of the printed fabric
- 1 of 28 x 28 inch (71cm) piece of the backing fabric
To form the edging on two sides:
- 1 strip of 3 x 25 inches (7.5 x 63.5cm) from the backing fabric
- 1 strip of 3 x 28 inches (7.6 x 71cm) from the backing fabric
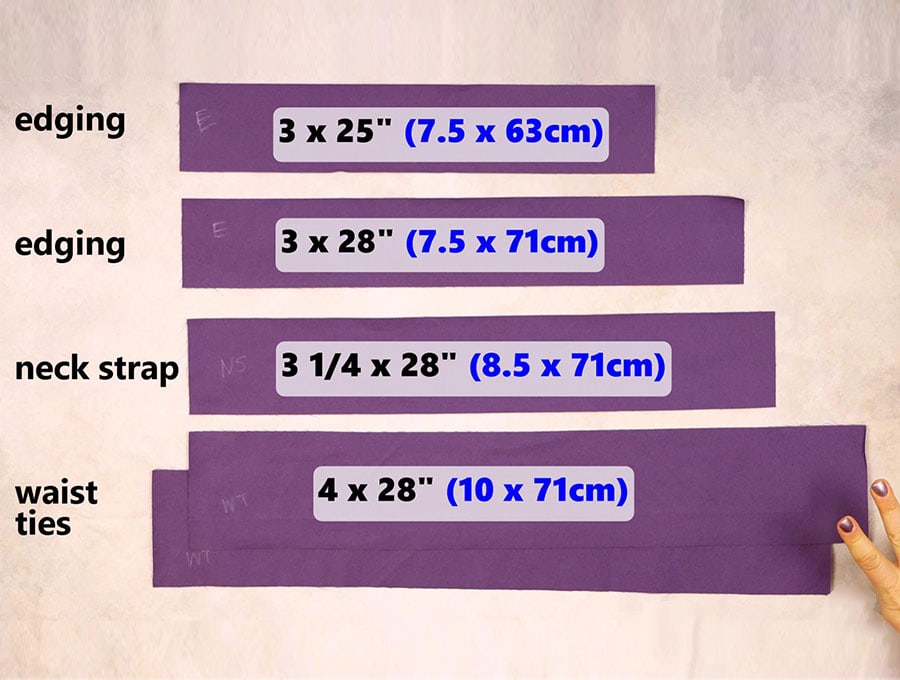
Waist ties and neckties:
- 1 strips of 3 ¼ x 28 inches (8.5 x 71cm) from the backing fabric for the neck straps
- 2 strips of 4 x 28 inches (10 x 71 cm) from the backing fabric for the waist ties
Pocket pieces:
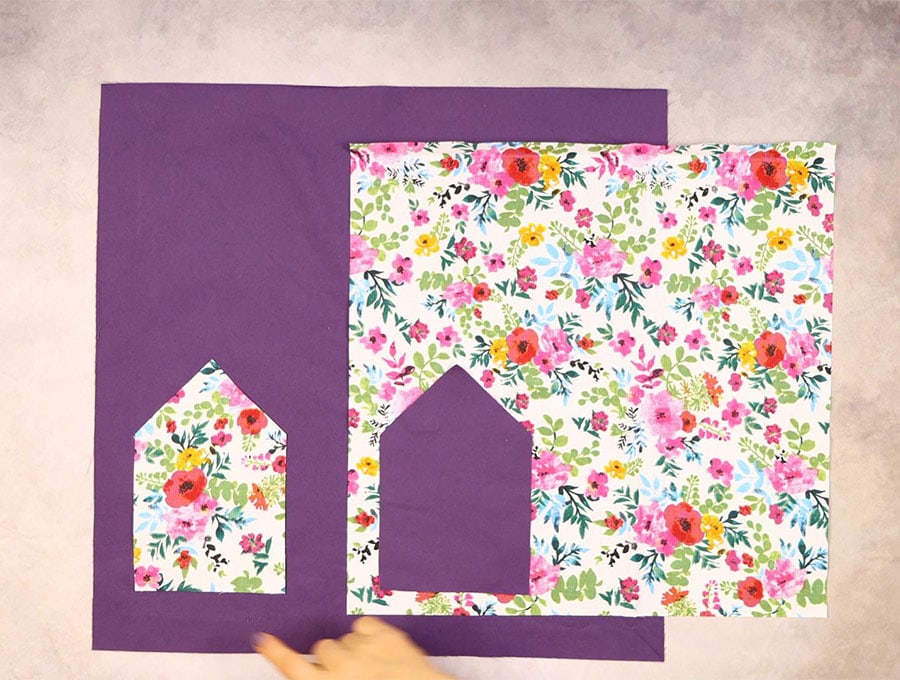
- 1 of 7 x 10.5 inches (18x 27cm) of the printed fabric cut to an angle at the top – see the free pattern piece.
- 1 of 7 x 10.5 inches (18 x 27cm) of the backing fabric cut to an angle at the top – see the free pattern piece. The finished pocket will be 7 x 7 inches (18 x 18cm) when the triangular piece at the top is folded down.
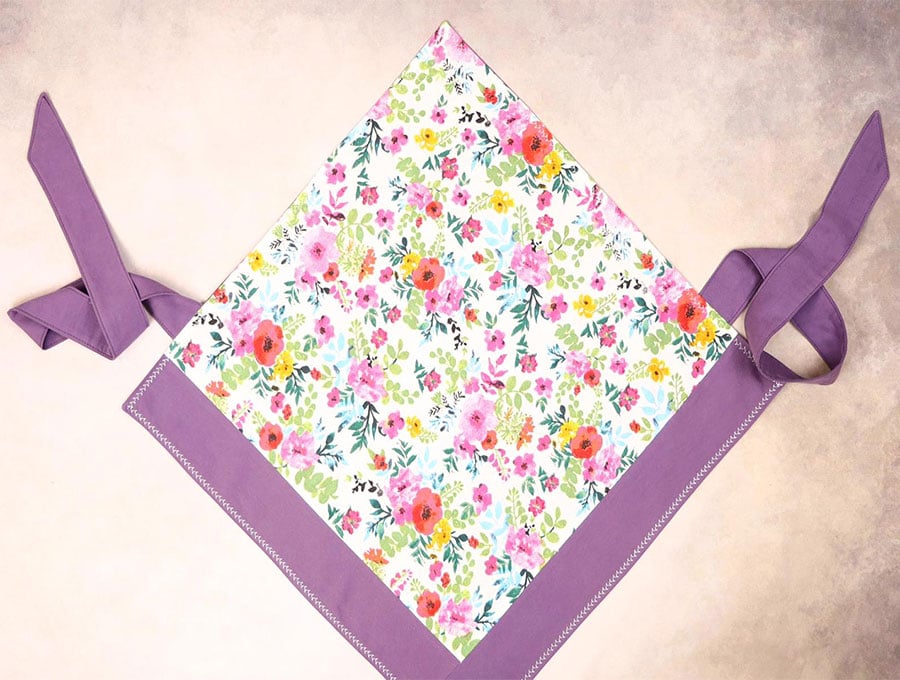
STEP 2:
Start with the 25 x 25 inch (63.5 x 63.5 cm) piece of printed fabric laid right side up on your worktop.
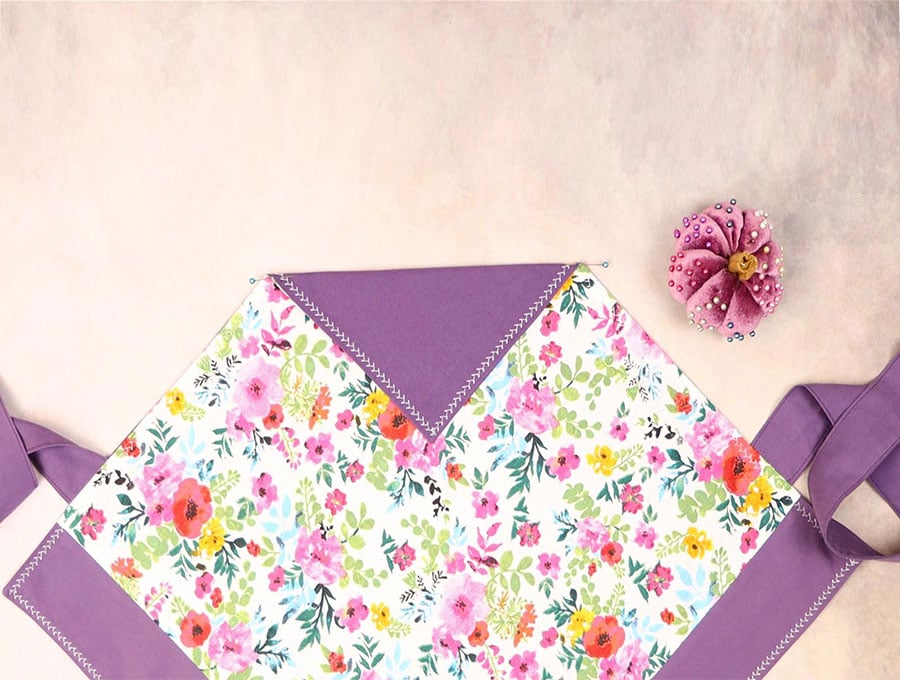
STEP 3:
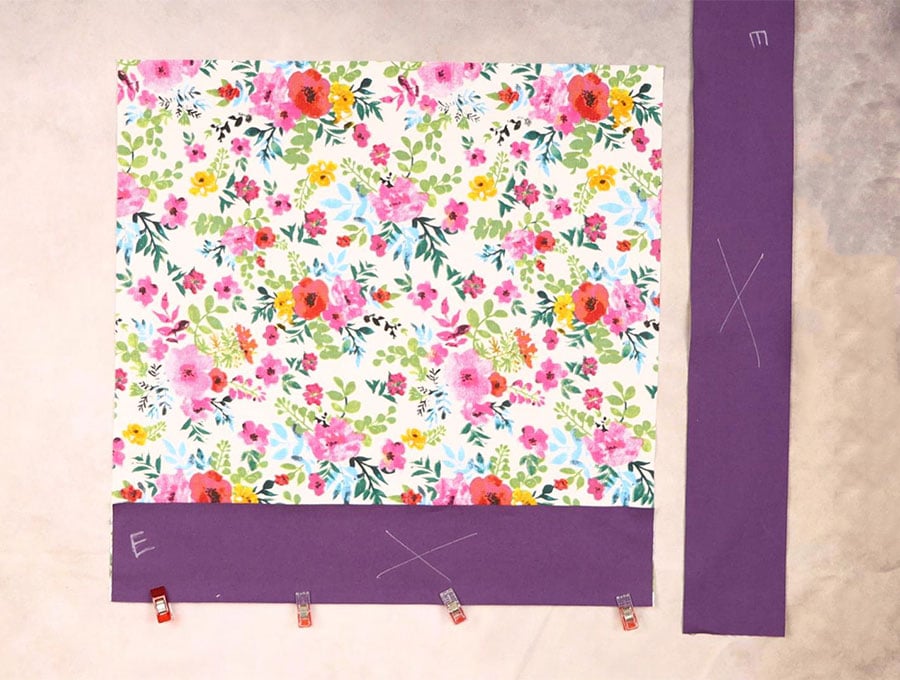
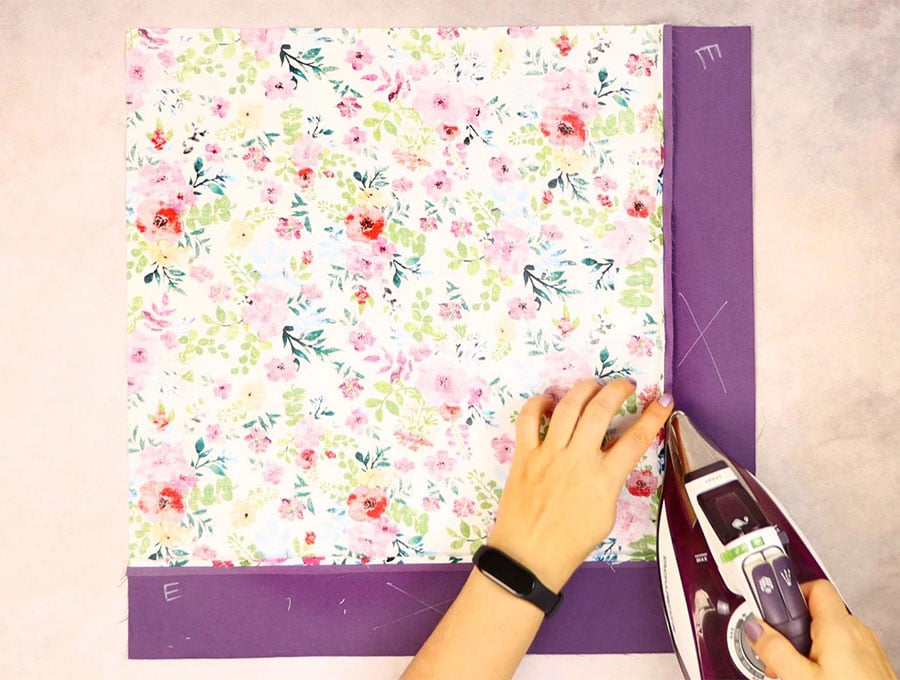
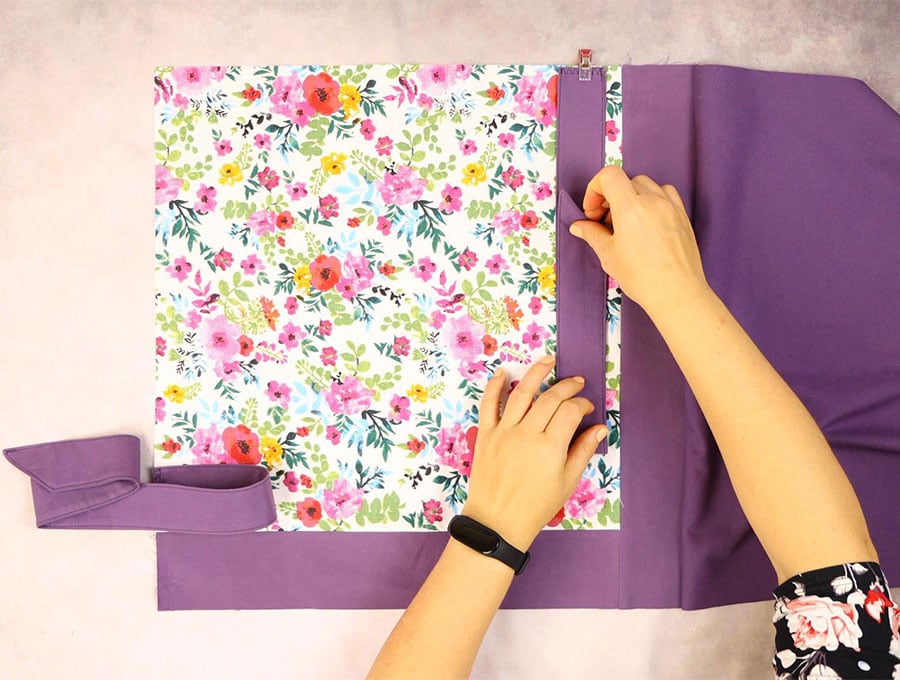
Pin the 3 x 25 inch (7.6 x 63.5cm) backing strip with the right sides facing at the edge of one side of the square. Sew using a ¼ inch (6mm) seam allowance. Open out and press.
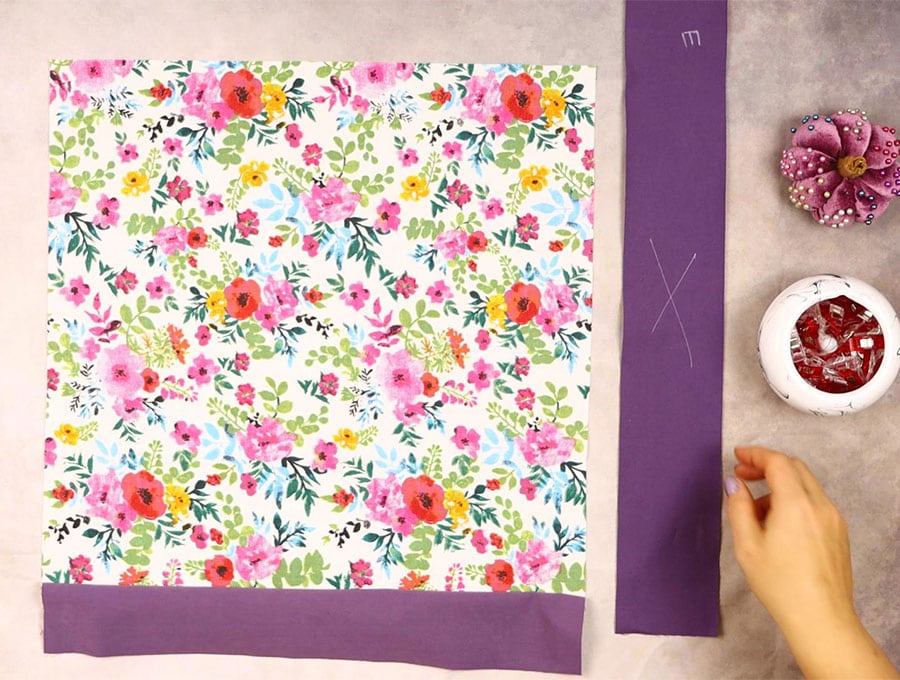
Take the end of the 3 x 28 inch (7.6 x 71.3cm) strip, line it up with the strip you just attached, and pin along the adjacent side of the square, creating a V of the backing strips.
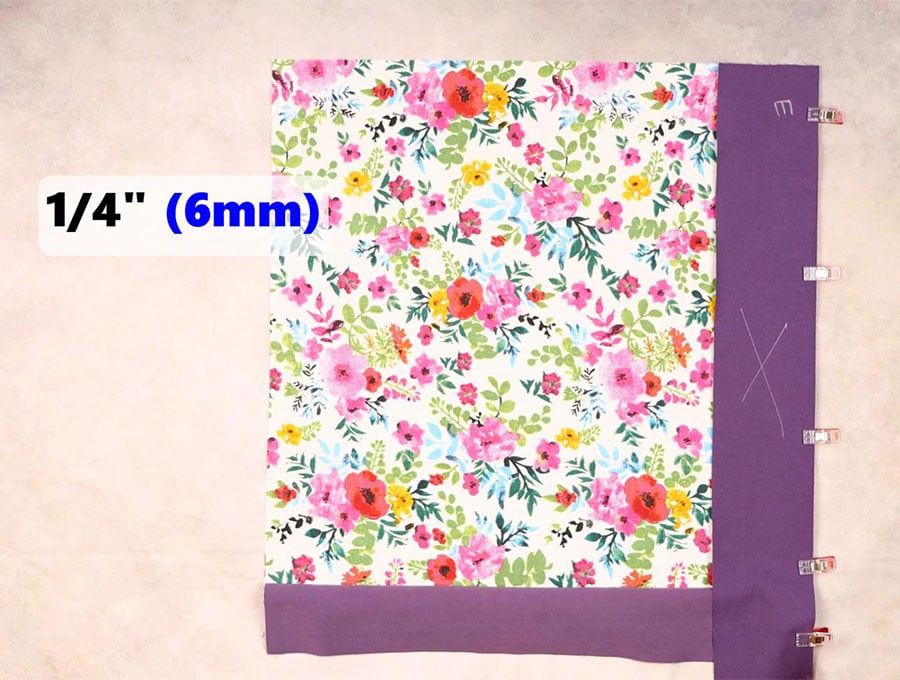
Stitch using an ¼ inch (6mm) seam allowance, open out, press flat, and set aside.
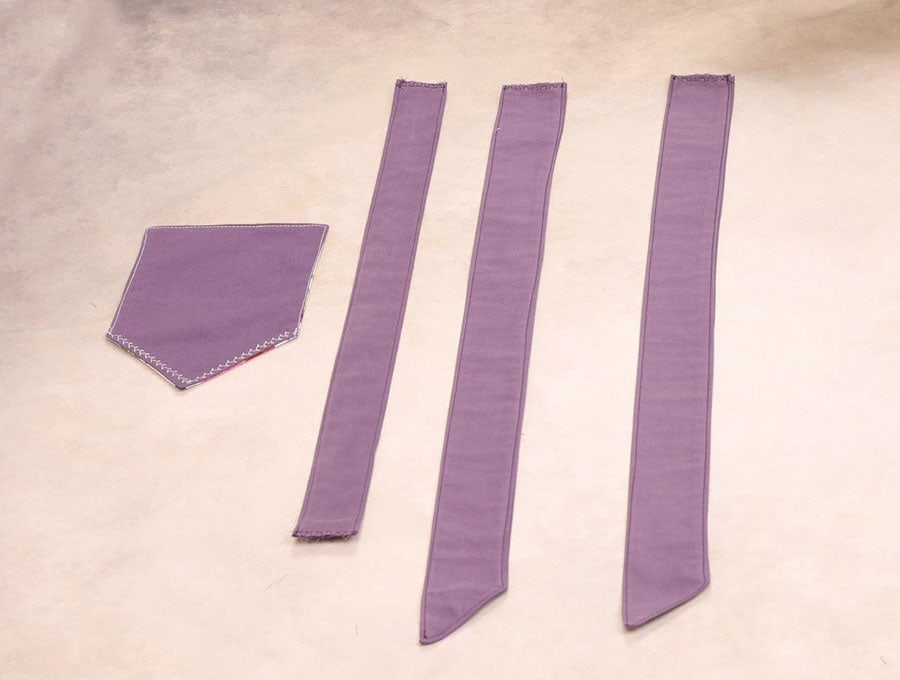
PRO TIP: If you watch the video first, you will notice I did everything in assembly line style in 3 simple steps:
- I pinned the neck strap, waist ties and the pocket

2. then sew them all in once and clipped the corners
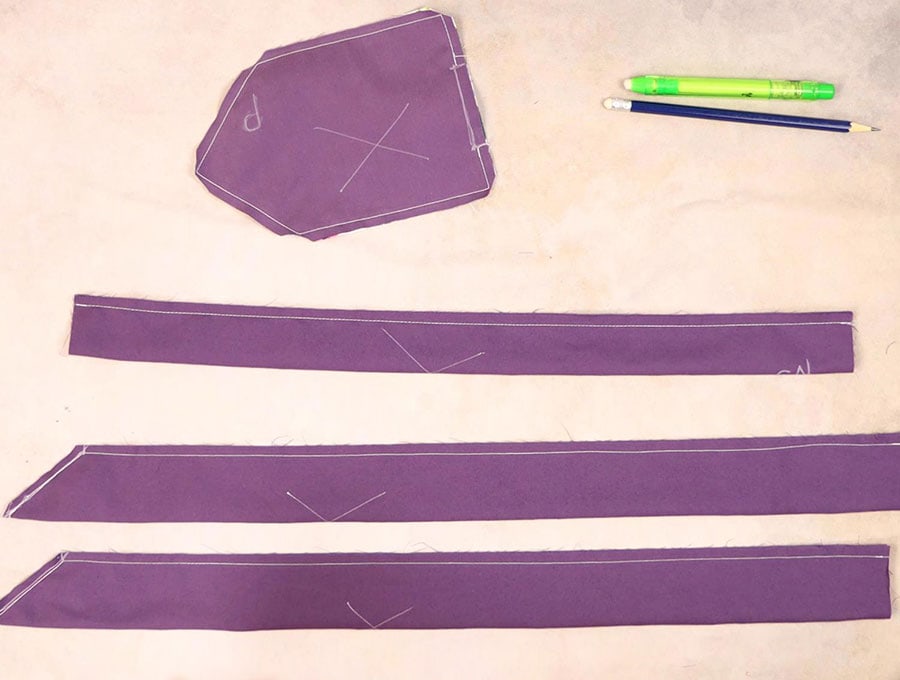
3. turned them around, pressed and topstitched.
I will describe everything separately below, step by step, as I believe it will be easier for the beginners to follow the logic of the assembly. This are the finished pieces:
Making the neck strap
Step 4:
Take the neck strap pieces and fold one in half along the long edge, right sides facing each other. Pin or clip in place.
Step 5:
Stitch ¼ inch (6mm) from the pinned edge, leaving both ends unstitched. Backtack at the start and finish.
Step 6:
Turn the neck strap the right way out either using a safety pin, a bodkin or a tube turner. Press neatly.
Step 7:
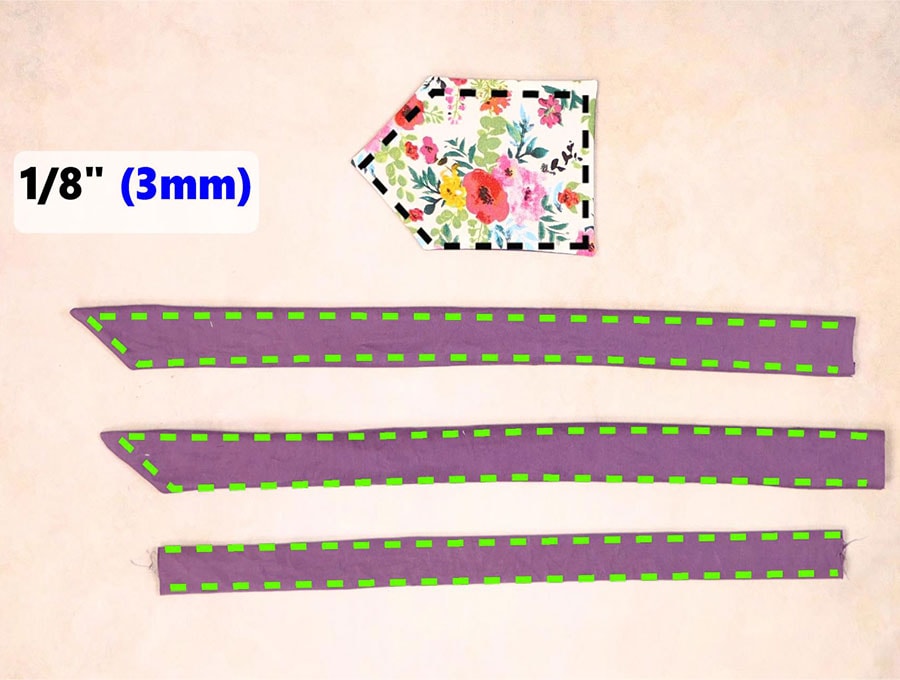
Run a line of top stitching 1/8 of an inch (3mm) from the edge all around the neck strap pieces, turning in the raw edges of the ends ¼ inch (6mm) and set aside.
Making the waist ties
Step 8:
To make the waist ties, fold one in half along the long edge, with the right sides facing each other. Pin or clip in place.
Step 9:
Stitch from the folded corner in a diagonal line to ¼ inch (6mm) from the pinned edge, then sew straight down the side to the end. Backtack at the start and finish.
Repeat with the other waist tie.
Step 10:
Clip the corners and the excess fabric.
Turn the waist tie the right way out by pushing through from the diagonally stitched end. Repeat with the other waist tie and press neatly without turning in the raw ends, as these will be tucked inside the apron.
Step 11:
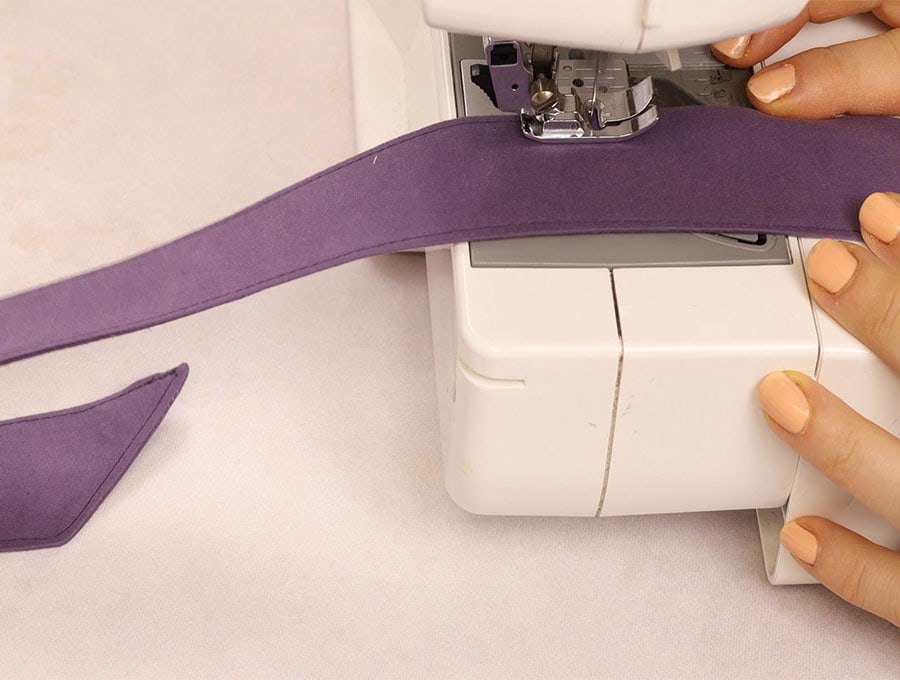
Run a line of top stitching 1/8 of an inch (3mm) from the edge all around the waist ties, and set aside.
Making the pocket
Step 12:
Place the two pocket pieces with right sides facing each other, line them up, and pin them in place.
Step 13:
Stitch all the way around, leaving a two-inch (5cm) gap in the middle of the base of the pocket seam – that’s the end opposite the pointed end. When you come to the corners, leave the needle down and lift the presser foot, swing the fabric around, depress the presser foot, and carry on sewing to create a neat corner.
Step 14:
Clip off the corners to reduce bulk, but not too close to the stitch line. Turn the pocket the right way out by carefully pulling the fabric through the gap, then give it a press, turning in the raw edges in line with the seam.
Step 15:
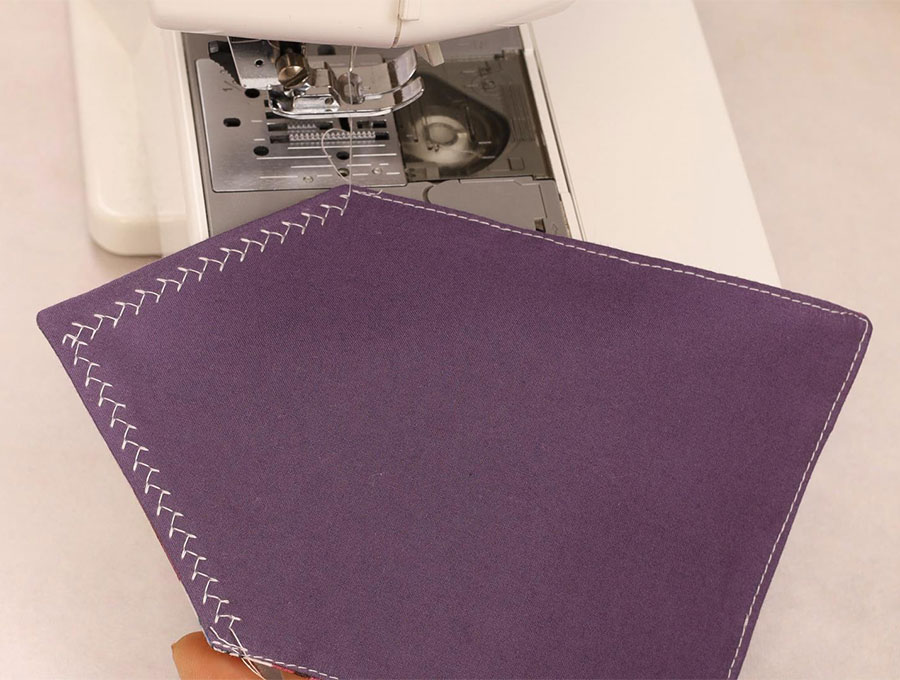
Topstitch around the pocket. Use decorative stitch along the two sides of the triangle that flip over and straight stitch for the rest of the pocket.
Step 16:
Flip over the pointed end of the pocket so you have a pocket with the contrasting backing piece over the printed side of the pocket.
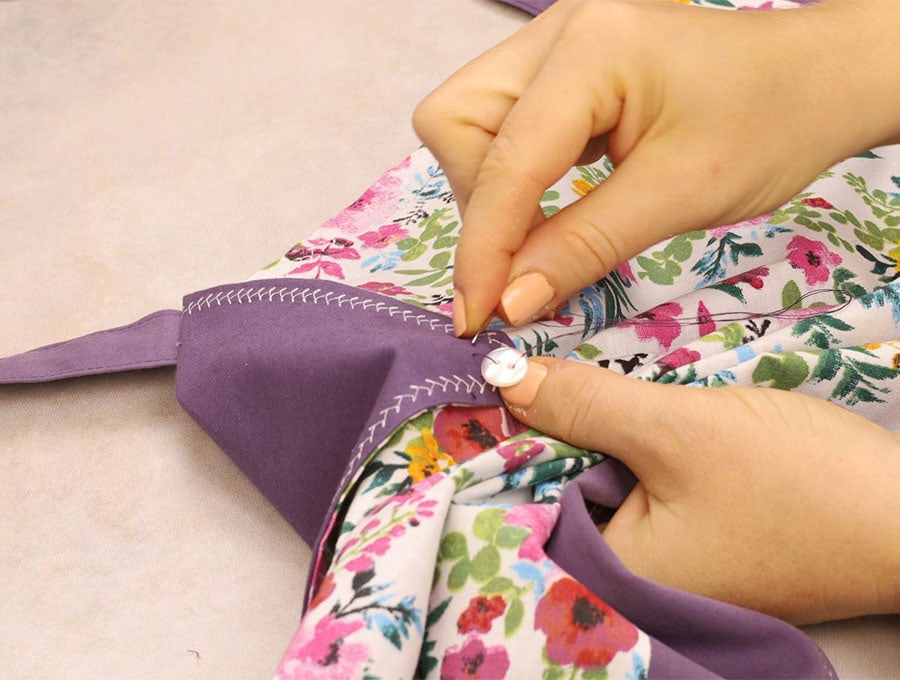
Step 17:
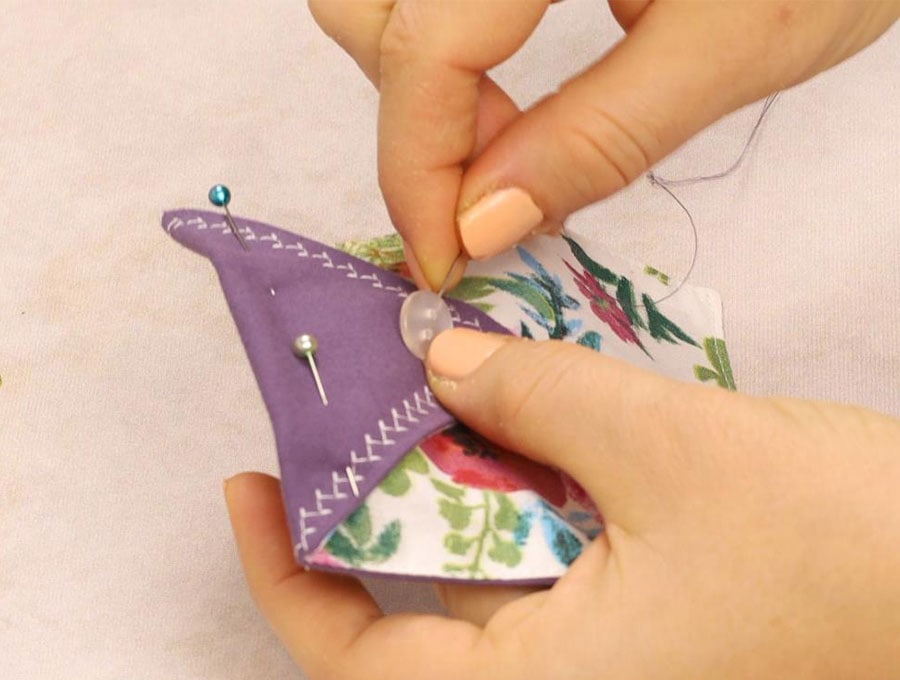
Hand sew on one of the decorative buttons to hold the end of the pointed flap in place.
Step 18:
It’s time to assemble the apron. Lay the front piece on the work top, right side up. Over it, place the waist ties 1/2″ (1.3cm) above the spot where the backing fabric bands on the front end and line up the edges before pinning both ties in place. Make sure to secure the ends to the apron with pins as well as to not catch them in stitching.
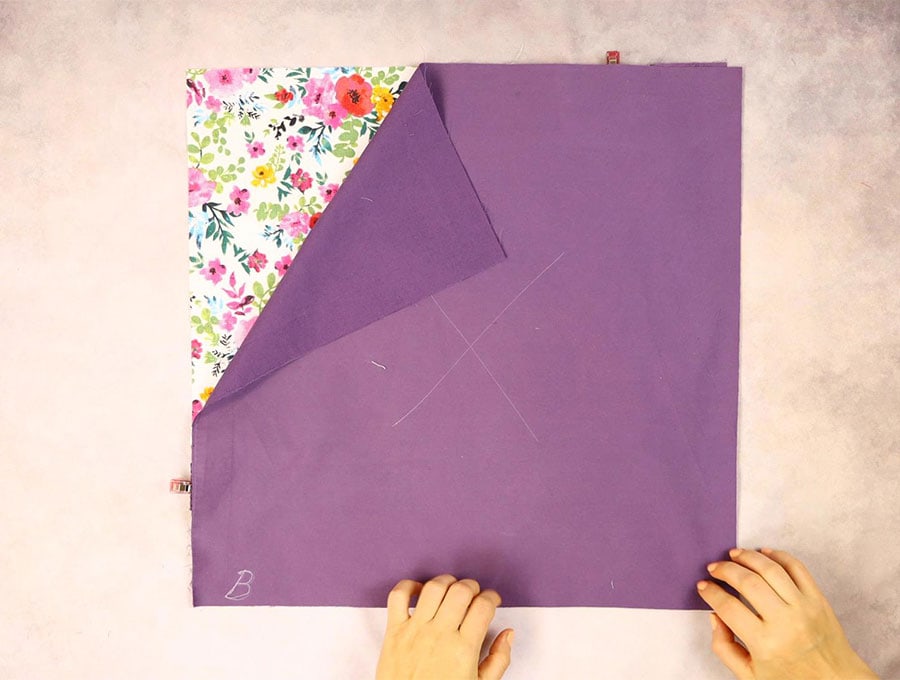
Place the backing piece of the apron on top and pin.
Step 19:
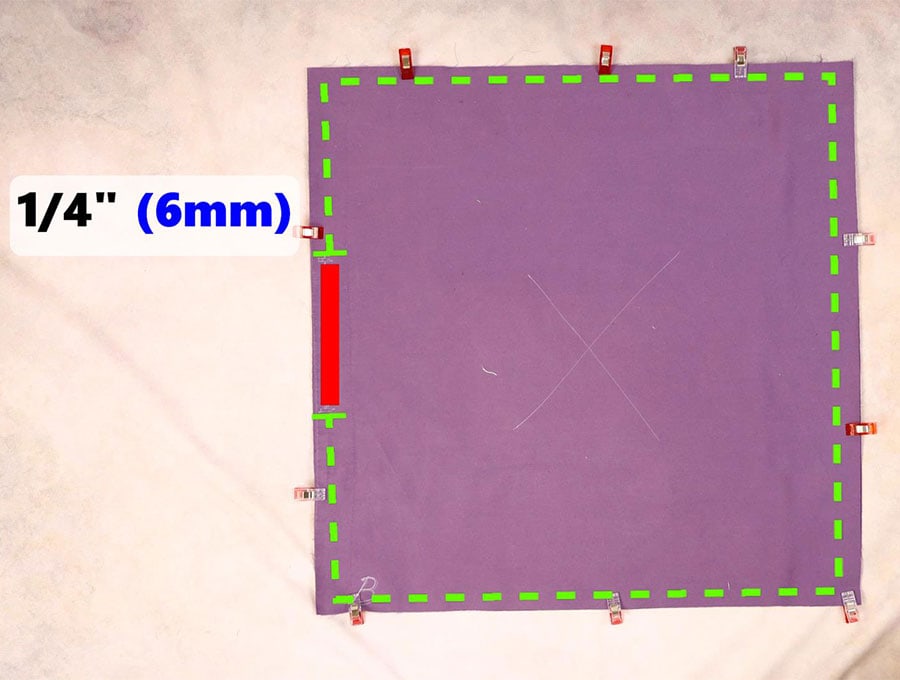
Stitch right around the edge using a 1/4″(6mm) seam allowance, leaving a five-inch (13cm) gap on any side – this is where you will pull through the fabric to turn the apron the right way out. I prefer to leave the gap just over the place where one of the waist ties is. Backtack at the start and end of the gap in the fabric.

Clip all corners to reduce the bulk
Step 20:
Turn the apron right way out by pulling the fabric through the gap.
Press the edges so they lie flat, turning in the edges of the gaps in line with the seam – ready for the topstitching.
Step 21:
Run a top stitch all around the edge of the fabric 1/8 of an inch (3mm) from the edge, securing the waist ties in place and closing the 5-inch pull-through gap. I wanted to use a decorative stitch, so I just run a line of edgestitching to close the gap and then used my decorative stitch all around the apron. When you go over where the waist ties are, backtack over the site where the ties attach to add strength.
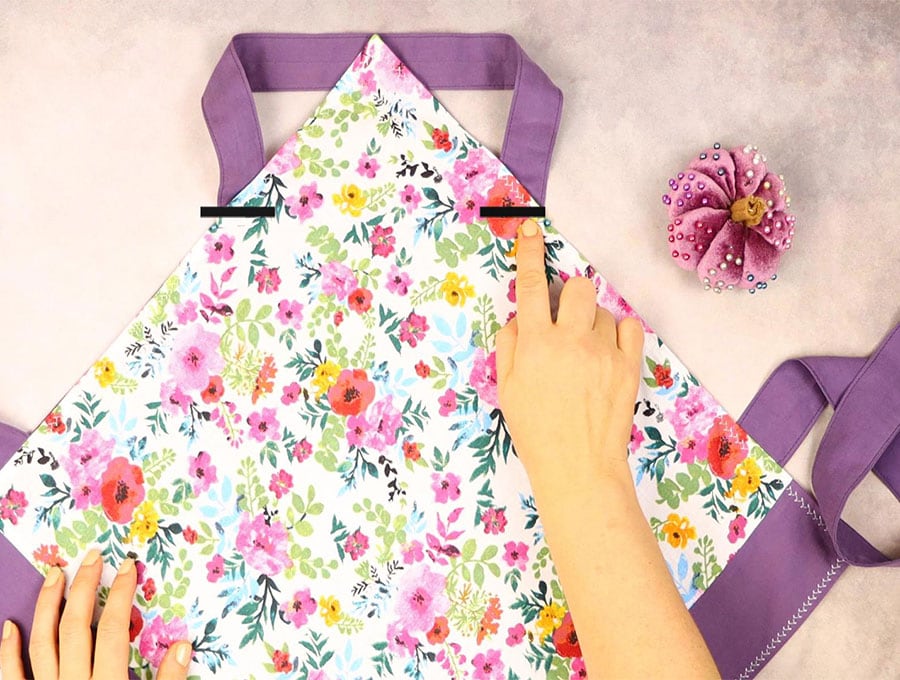
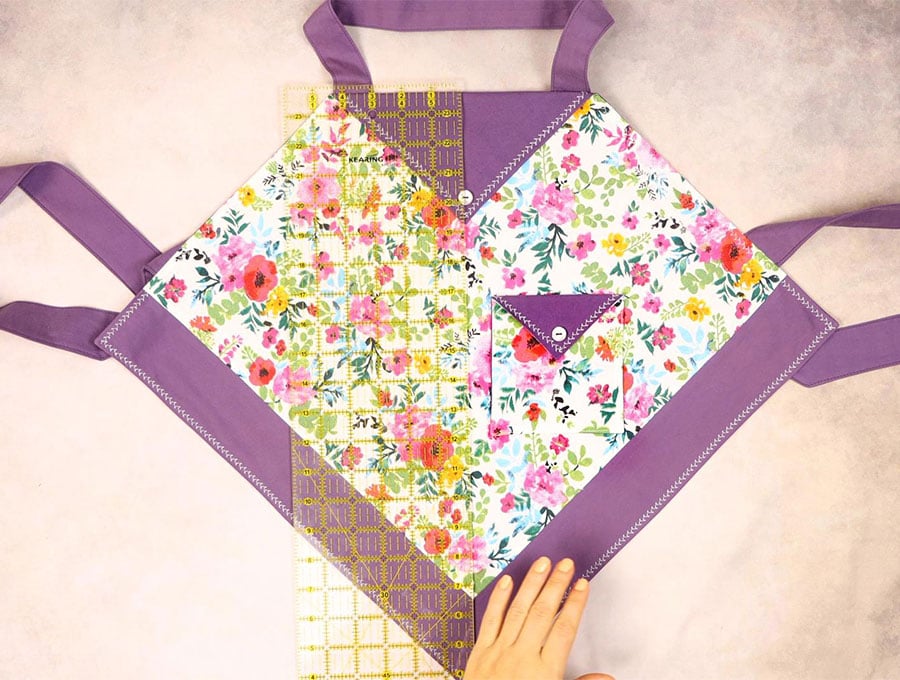
Step 22:
Flip over the pointed corner of the top of the apron to create a triangular flap – the folded edge should be:
- 10 inches (25 cm) across for adult sizes,
- 9″ for kids 7 to 12 years old
- 8″ for kids 3 to 6 years old
Press in place.
Step 23:
Now attach the square ends of the neckties onto the fabric just below where the fold is ironed – once the flap is flipped over, you will not see the stitch lines attaching the neckties.
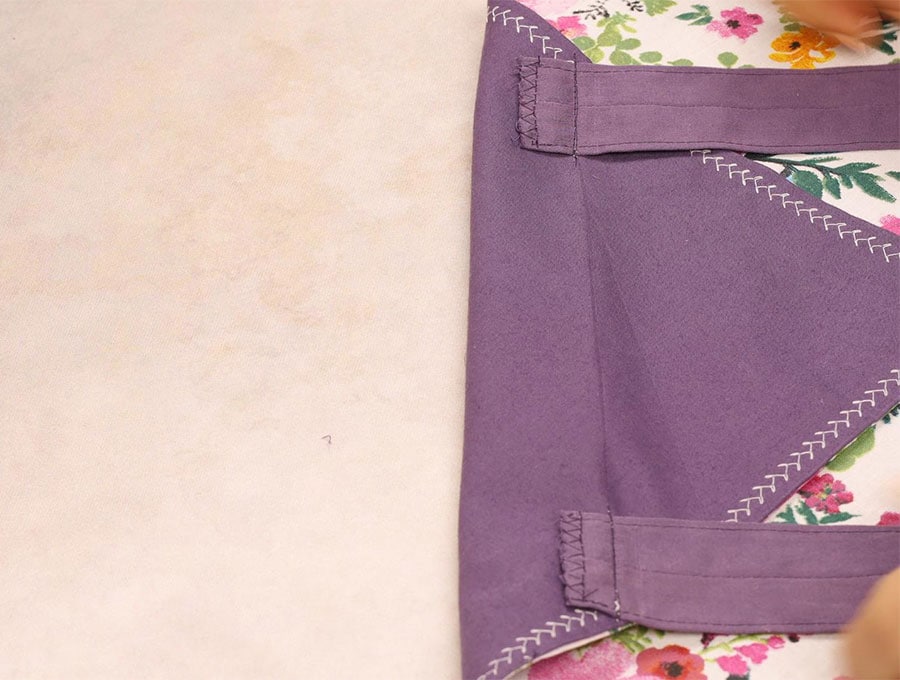
Make sure to backtack on these for added strength.
Step 24:
Secure the flap on the top of the apron by stitching the decorative button towards the pointed end of the flap.
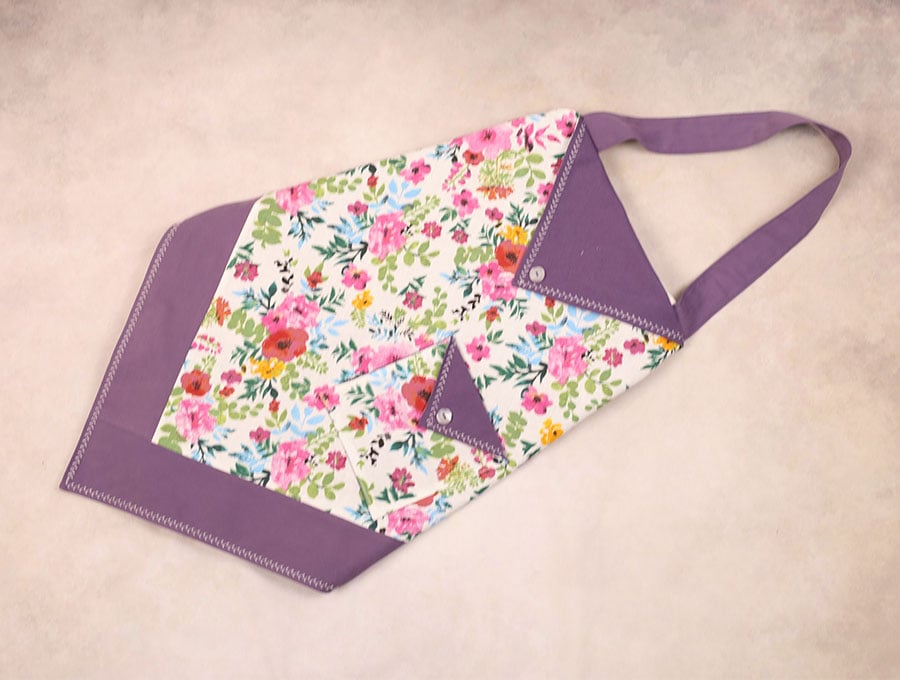
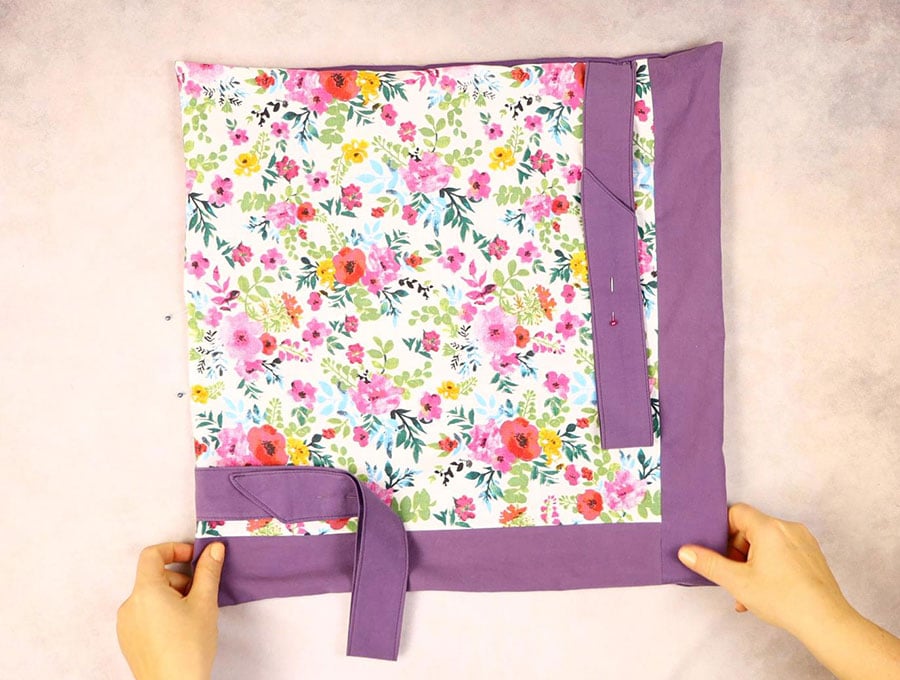
Step 25:
Place the pocket on the right side of the printed fabric where you feel it will be comfortable to reach into the pocket. Place the pocket on the left side for convenience if you are left-handed. Make sure the pocket is straight by measuring equal distances from the pointed base of the apron, folding up the fabric and hand creasing to create a straight line, then pin the pocket in place, lining up the base with the crease.
Step 26

Stitch the pocket in place, making sure to back tack at the start and finish of the top of each side of the pocket.
Your apron is now ready to wear. It takes a long time to explain, but if you watch the visuals, you will find pictures are worth a thousand words, and you can refer back to the step-by-step tutorial for the details if you are unclear on any step. Do like and subscribe to have more articles like this delivered straight to your in-box so you can save and file our tutorials for your future projects.
Do you like this? Pin for later:
Wanna be friends? Click HERE and follow me on Pinterest
RELATED: