")
DIY Laptop Sleeves in ANY size (FREE Pattern Measurements)
I’m so excited about sharing today’s tutorial on how to sew a laptop sleeve to suit ANY size laptop. It is super easy and the finished product looks really stylish. It will keep your laptop safe and unscratched when transporting it, and will look classy on your desk. The clever side sewing trick means there are no raw side seams or the need to sew through too many layers.
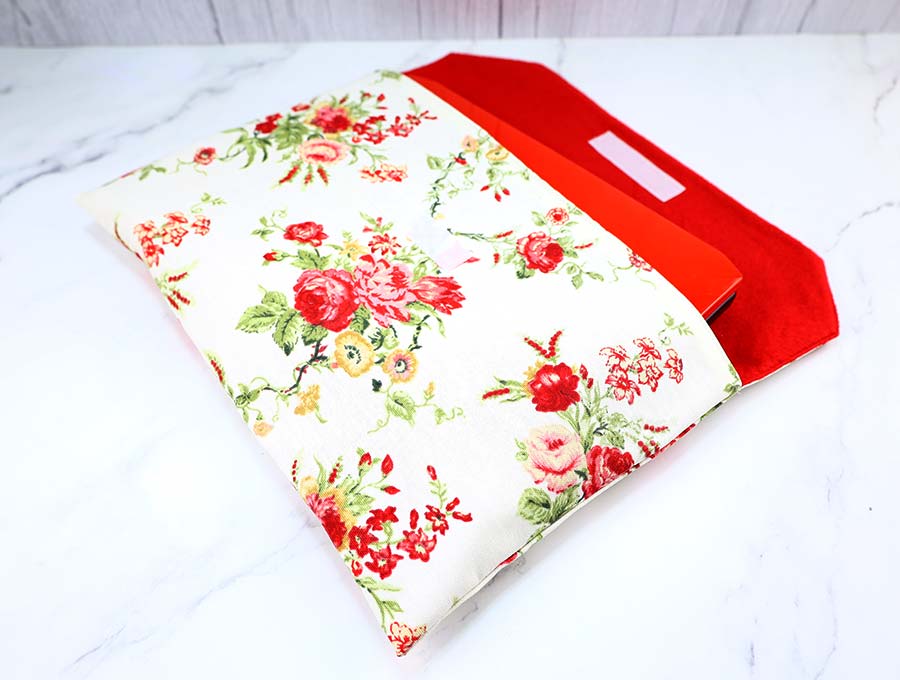
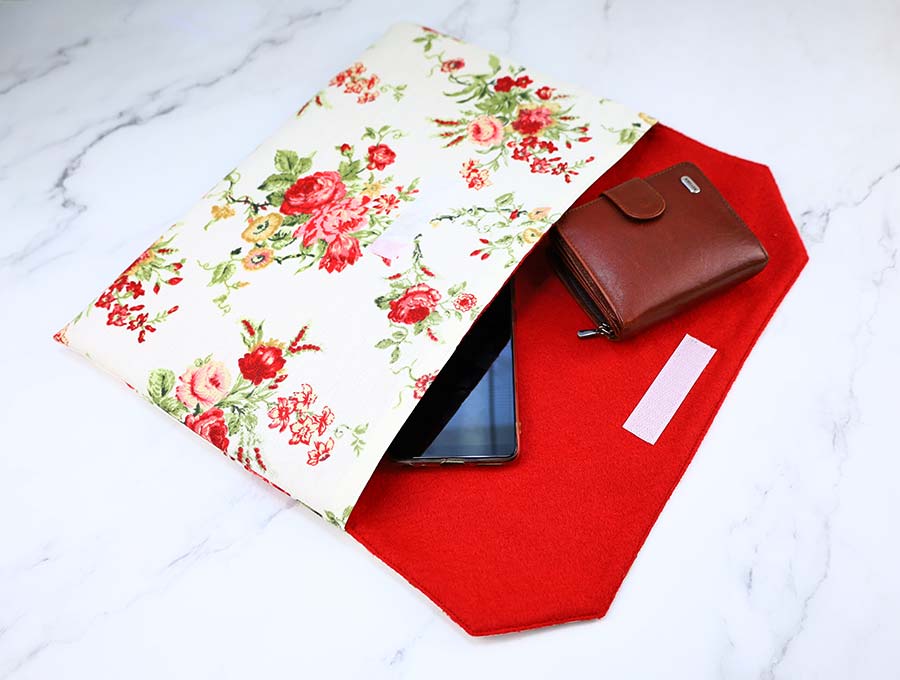
These lovely DIY laptop sleeves come with an easy Velcro fastening and a classy shaped envelope-style flap. The outer cover of the sleeve is made from home décor fabric, with a felt lining to cushion the laptop, and no need for interfacing. The best thing is that you can use the diy laptop bag as a clutch – 2in1 – a win-win!
Below you will find my step by step DIY laptop sleeve tutorial with VIDEO instructions for all the visual learners.
We occasionally link to goods offered by vendors to help the reader find relevant products. Some of the links may be affiliate meaning we earn a small commission if an item is purchased.
Table of Contents
- 1 How to make a laptop sleeve
- 2 Laptop Sleeve Supplies and tools
- 3 How to Sew a Laptop case
- 3.1 DIY LAPTOP SLEEVES VIDEO TUTORIAL
- 3.2 SOFT LAPTOP CASE INSTRUCTIONS:
- 3.3 STEP 1: Calculating the amount of fabric you need
- 3.4 STEP 2: Cut out the fabric
- 3.5 STEP 3: Make the top fold
- 3.6 STEP 4: Stitch the base of the laptop sleeve
- 3.7 STEP 5: Fold and pin
- 3.8 STEP 6: Add velcro
- 3.9 STEP 7: Make the double fold
- 3.10 STEP 8: Stitch the laptop sleeve
- 3.11 STEP 9: Trim corners, turn around
- 3.12 STEP 10: Press the diy laptop case
- 3.13 STEP 12: Stitch the gap
How to make a laptop sleeve
Laptop Sleeve Supplies and tools
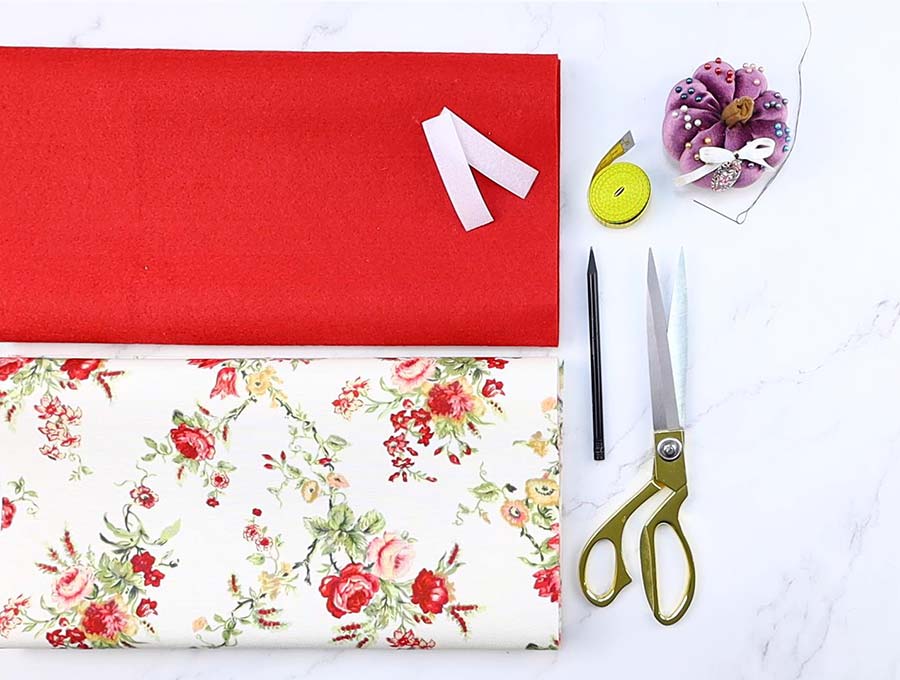
- outer fabric – 1/2 yard cotton or home decor fabric
- lining fabric – 1/2 yard felt
- velcro – 5″ (12cm)
- matching thread
- scissors (or rotary cutter and a cutting mat)
- ruler or measuring tape
- iron and ironing board
- sewing clips or pins
- sewing machine
Follow us for free patterns & tutorials! [easy-profiles]
How to Sew a Laptop case
Watch the diy laptop sleeves video first and then follow the written step by step instructions below.
Please enjoy and don’t forget to Like and SUBSCRIBE over on YouTube to be kept up to date with new videos as they come out.
DIY LAPTOP SLEEVES VIDEO TUTORIAL
SOFT LAPTOP CASE INSTRUCTIONS:
STEP 1: Calculating the amount of fabric you need
The first thing to do is to measure the laptop for which you want to create a diy laptop sleeve. To do this measure the length of the laptop as it sits on the desk facing you. You’ll need the width (A), depth (B) and height (C) as shown on the image below.
- WIDTH OF FABRIC = A + C + 2″
- LENGTH of FABRIC = 2.5 x (B + C) + 2″
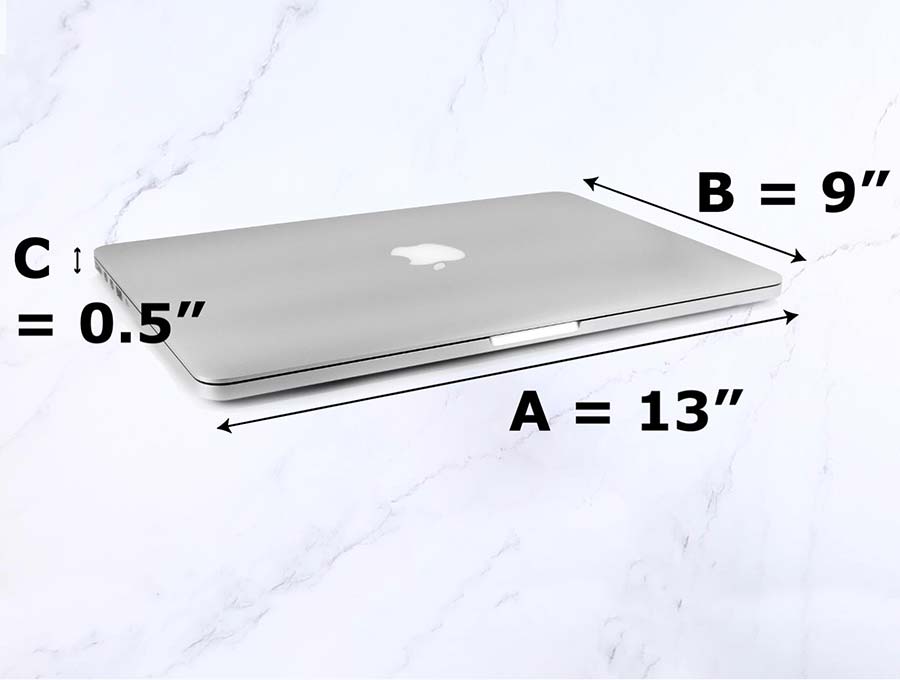
Let’s do the math. So, for example I’m making this for my mom’s Apple Mac Air that measures 13 inches (width) x 9 inches (depth) x 0.4 inches (high).
I need a piece of fabric that is 15.5 inches wide. I came to this figure by adding:
13” Width + 0.4” (height) + 2” (seam allowance).
Because it is difficult to measure 0.4 of an inch I’m going to round the height up to half an inch so 13 + 0.5” + 2” = 15.5”.
Now to calculate the length of the fabric I’ll take the depth of the laptop which is 9” + height 0.4” which adds up to 9.4 inches, but this needs to folded over and include the envelope style flap so I multiply by 2.5 and add the 2” seam allowance bringing the calculation to 9.4” x 2.5 = 23. 5” + 2” = 25. 5”.
So, my fabric should be 15.5 inches wide by 25. 5 inches long to accommodate my 13” MacBook Air laptop.
I need one piece of outer fabric of this size and one piece of felt type lining of the same size.
Seam allowance is 3/8″ and is already included in the calculations.
NOTE: Although I know this is quick math, I can see some of you might struggle with it. Do let me know whether you would like to to make a laptop sleeve pattern calculator, where you just fill in your laptop dimensions and it would calculate the appropriate fabric size for you. Let me know in the comments below
STEP 2: Cut out the fabric
Cut the fabric to the size of your laptop as described above. You will need one piece for the outer sleeve and one piece of felt for the lining. This laptop sleeve pattern does not use a fusible lining, making it even easier.
TIP: If you are using a cotton fabric without any structure, add fusible lining or batting on top of the cotton.
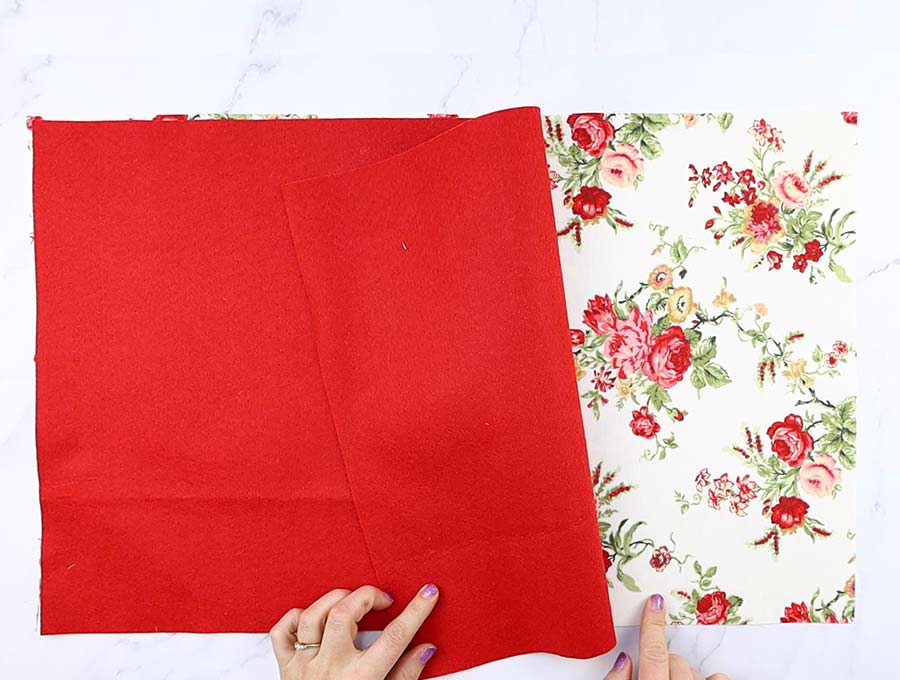
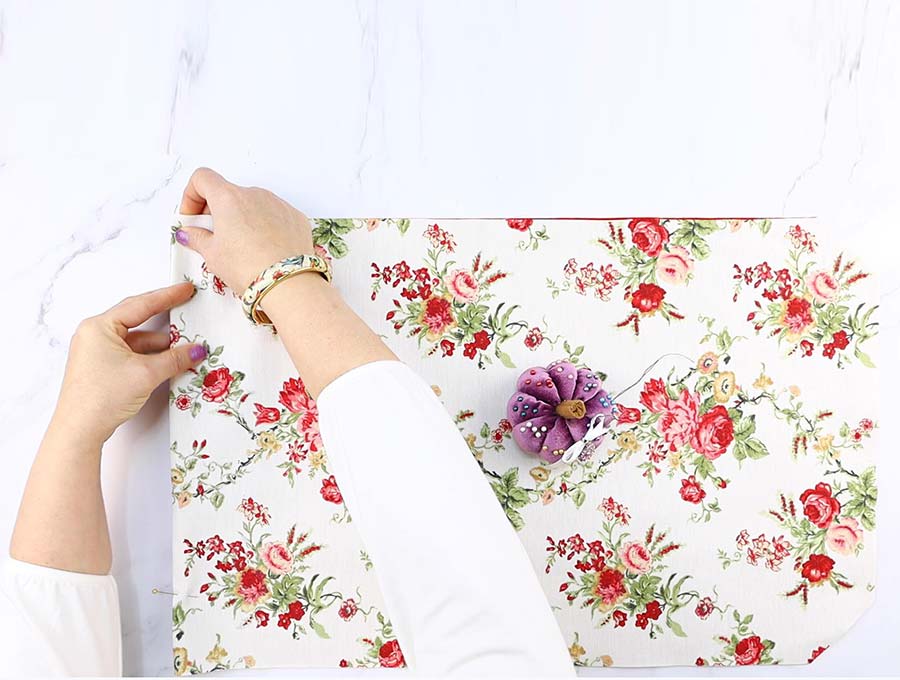
STEP 3: Make the top fold
Take the piece of the lining fabric as seen below and fold in half along the length, folding over the corner to meet the other corner of the flap. Take a ruler and measure 2″ (5cm) on either side of the corner, connect the dots with a diagonal line, and cut along the line.
Cut off the the triangular shape as shown below.
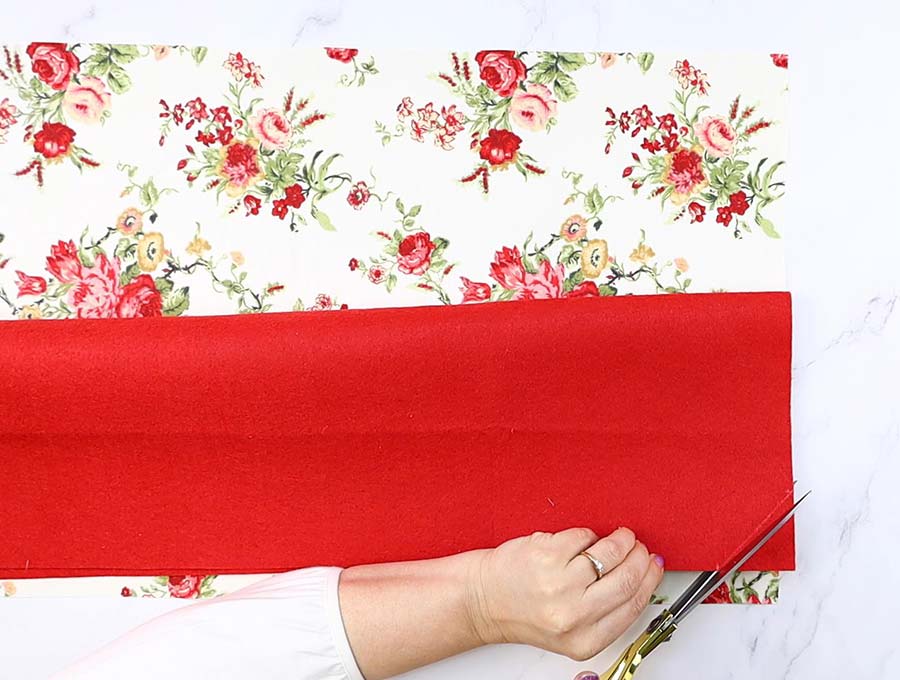
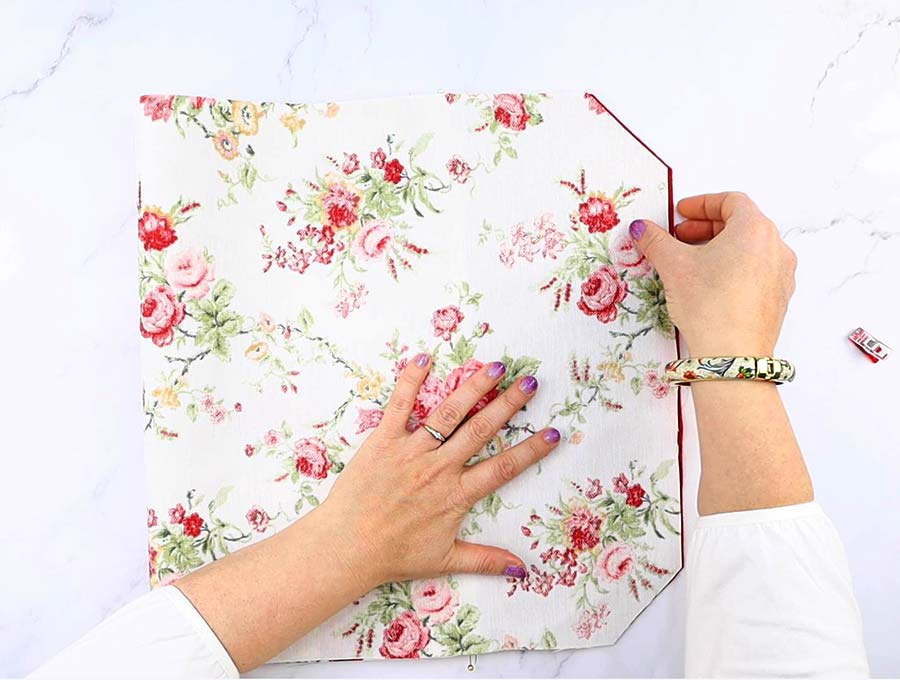
Take the shape you have cut for the outer sleeve and lay over the folded piece of outer fabric and cut the same angles. This will form the closing flap of the laptop case.
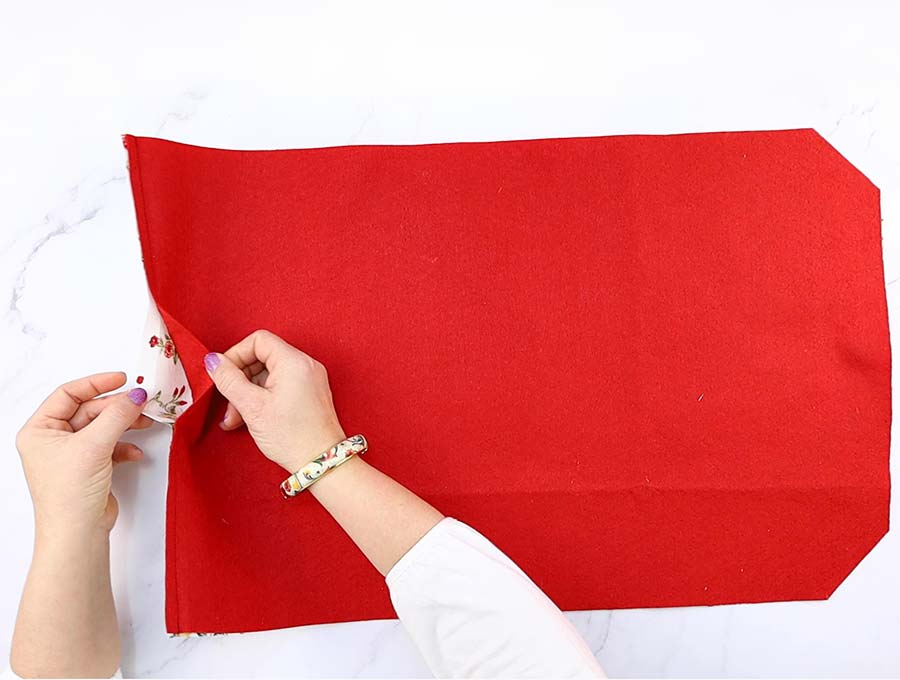
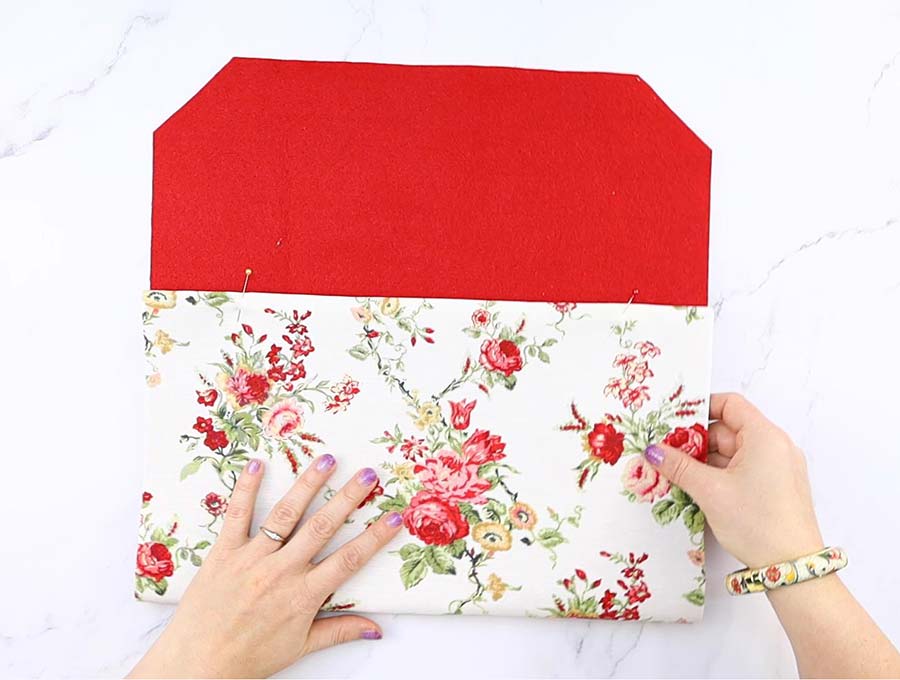
STEP 4: Stitch the base of the laptop sleeve
With right side to right side of lining and outer, pin together and stitch across the base only leaving an opening in the middle of around 3 inches (10cm).
STEP 5: Fold and pin
Unfold and press the seam with your fingers or an iron.
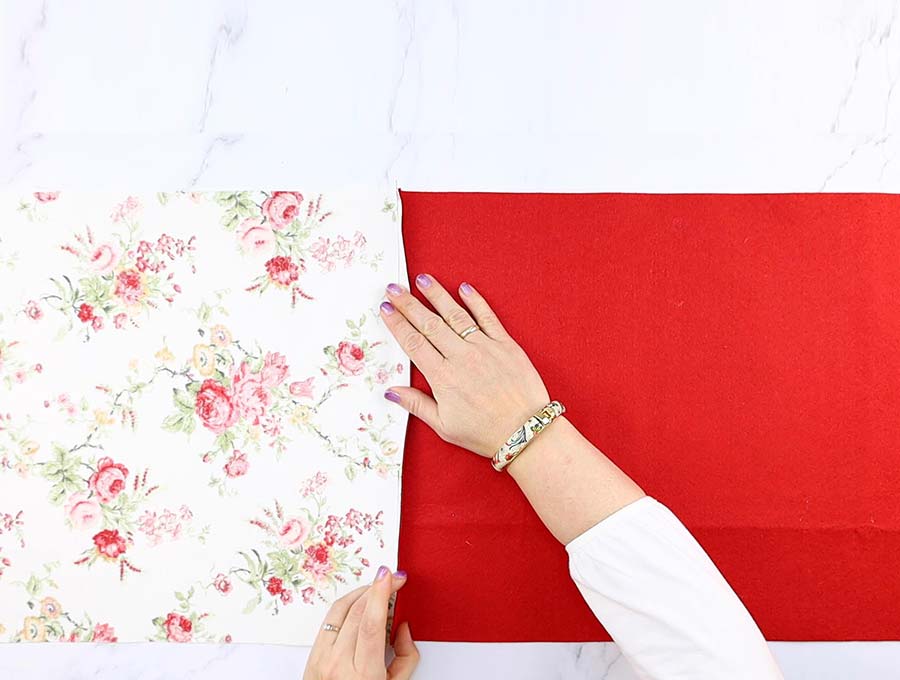
Fold so the right sides face out and pin the base turning in the raw edges of the gap you have left, so it is smooth, then press with an iron on the base only.
This is the perfect time to check for fit. Fold the base up, and mark the bottom end of the flap.
If you have the laptop, slip it inside the sleeve to check the fit. If you are making a gift, leave a flap that is half the height (B) of the laptop + 1.5″.
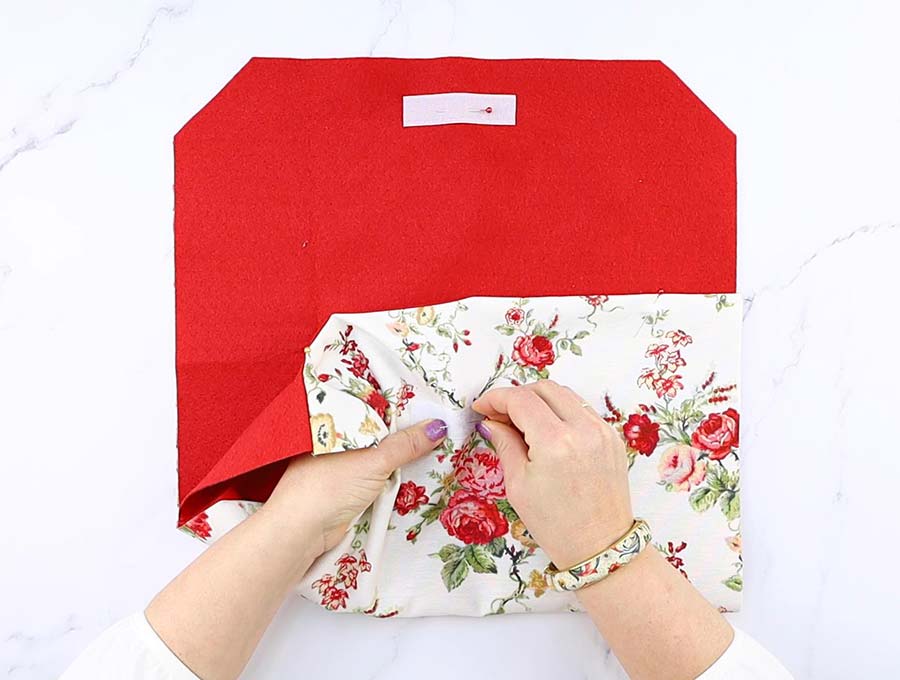
STEP 6: Add velcro
On the lining of the flap mark the center spot for the Velcro to be added 1 inch from the lower edge of the flap piece, making sure it is positioned centrally on the fabric then pin the Velcro in position to the lining only.
Now bend over the flap and see where the Velcro you stitched on the flap meets up with the front of the bag. Mark the spot where the Velcro from the flap touches the front.Pin it to the outer fabric only.
Now unfold the fabrics and machine stitch each Velcro piece in the spot marked to the SINGLE layer of fabric.
STEP 7: Make the double fold
This is the trickiest part of sewing this laptop case but ensures a professional finish, so make sure to follow it to the T (watch the video to see this in action)
Fold the fabrics along the base seam, so that the right sides face out. Fold up the base to meet with the two marks you have made on the lining.
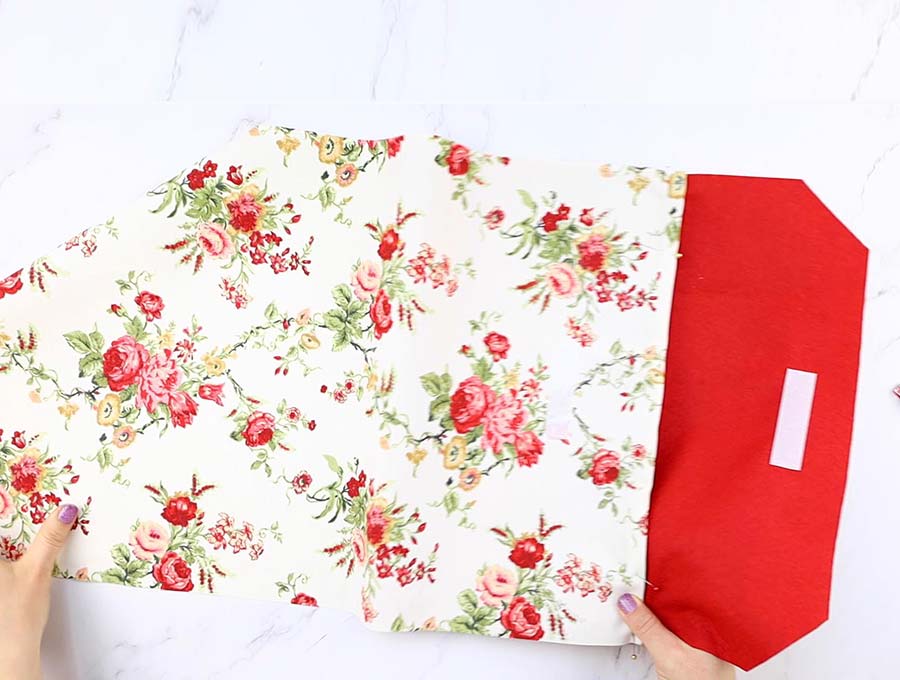
Remember the base is the only part stitched to the lining, and it still has a gap in it – this is to pull the fabric through when you are nearly finished. You will now have an envelope shape.
Fold down the outer fabric and up on the other side to line it up with the lining piece. There will be a double folded section in the laptop sleeve now.
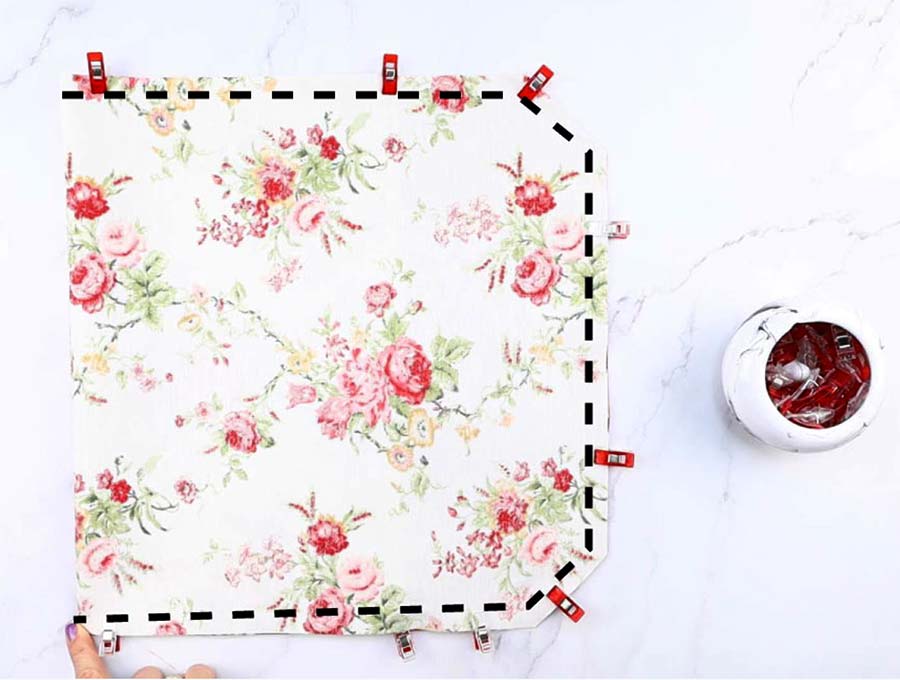
STEP 8: Stitch the laptop sleeve
Stitch around the sides and envelope flap, but not across the base.
STEP 9: Trim corners, turn around
Trim the corners at a 45-degree angle at the base of the sides, so there is no excess fabric when it is turned, and across the corners of the flap.
Reach in between the double fold at the base of the laptop bag and start pulling the fabric through so the right sides are showing.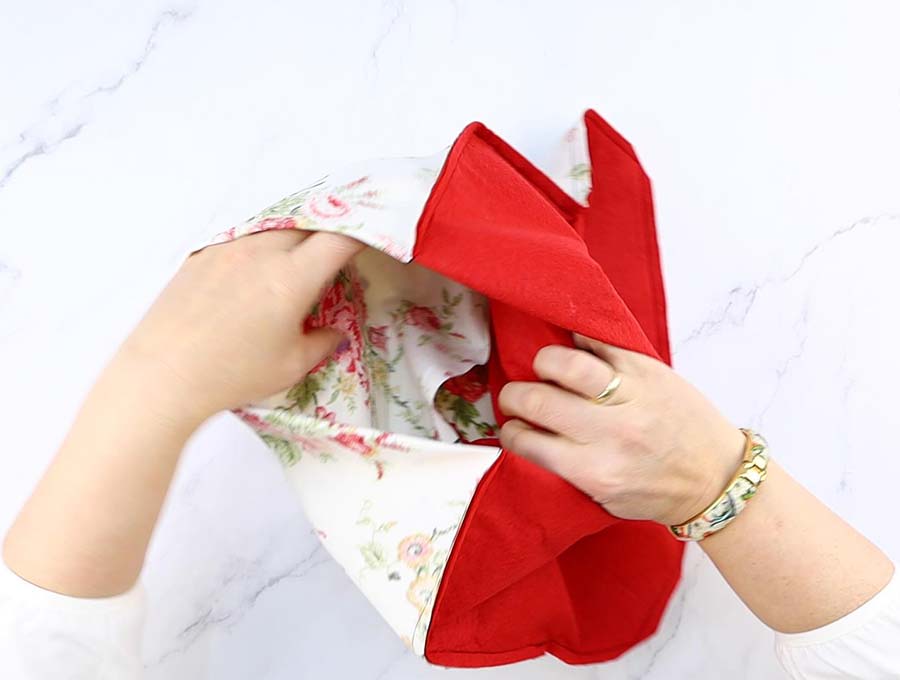
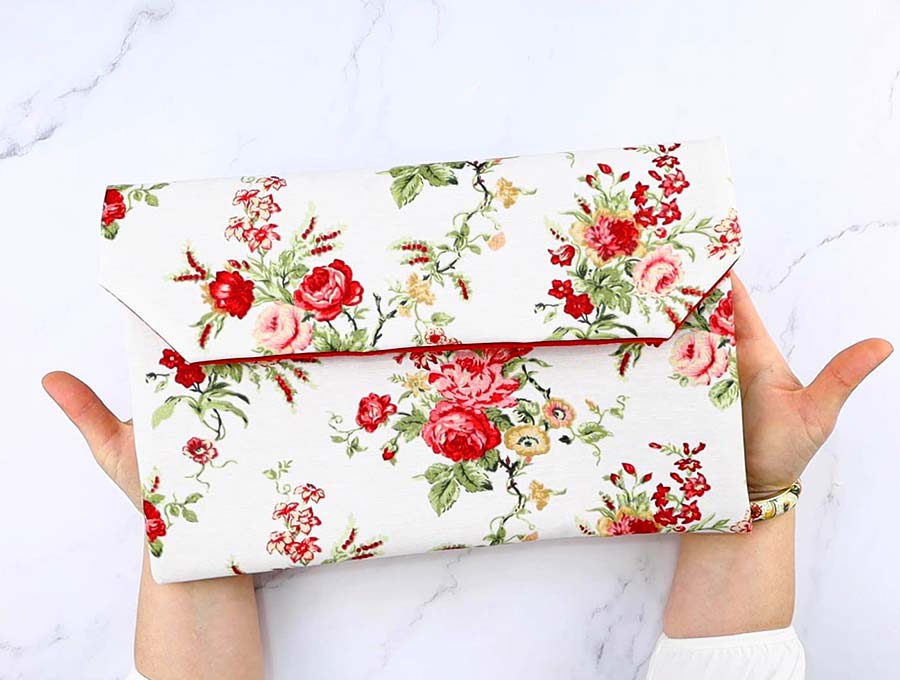
STEP 10: Press the diy laptop case
The diy laptop bag now is the right way out and you just have to ensure all the sides are lying flat, and press the finished sleeve.
STEP 12: Stitch the gap
All that remains to do is close the gap, through which you turned the diy laptop sleeve, with invisible ladder stitch or the quicker slip stitch.
The choice of whether to glue a piece of leather or a finishing metal decorative piece on the front of the flap is entirely up to you.
Once you have the knack of making these you’ll be able to complete them quite quickly and without any laptop sleeve pattern. I can see myself making some more as gifts – I’ll just have to sneakily measure the laptops of people I want to gift with sleeves! A laptop sleeve is a practical gift for teens, who are notoriously difficult to shop for as their style changes often and is not always something that adults ‘get’. If you give a laptop sleeve in denim (preferably distressed) you are unlikely to go wrong. For men dark grey, mid grey, charcoal or black are good colors for a customized diy laptop bag. For women go with what is currently in style – it could be stripes, botanical or dark paisley prints, or the colors for 2021 which are sage green, grey, vivacious pastels like lime and peach, or the neutrals of sand, stone, and light terracotta.
So ladies, let me know, do you want me to make you life easier and make you a laptop sleeve pattern calculator to do the math for you? Let me know in the comments below
Do you like how to make a laptop sleeve tutorial? Pin for later:
[***pin img****]Wanna be friends? Click HERE and follow me on Pinterest
RELATED: