
How to Make a No-Sew Scandinavian Star Ornament
The reason I love the No-Sew Scandinavian Star Ornament is not just because it’s beautiful but because making decorations is about spending quality time with children as you prepare for the festivities. Working together teaches them so much and gives them a chance to talk about all sorts of issues often bypassed in our busy lives. So, if you have children or grandchildren get them involved in this easy project that Scandinavians have been making for centuries.
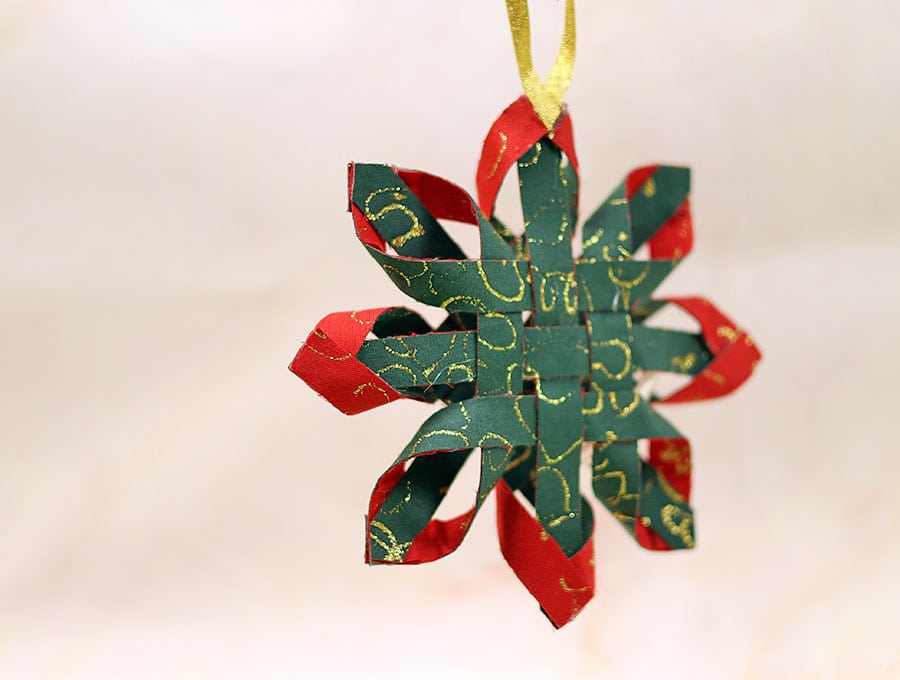
To get the best effect from the stars you need two contrasting pieces of fabric – the most traditional would be a red Christmas print and a green one, but you can do blue and white, red and white, green and white – or whatever suits your décor choice for the season, like rose gold and silver.
The theme can be used for winter décor too as the stars do tend to look like snowflakes – they would be lovely in various shades of blue hanging at varying lengths in a window to contrast with the snow outside.
I would suggest using a quilting cotton as you need a fabric that is fairly firm – and the cottons come in the most beautiful Christmas prints. A small all-over print rather than a larger one works better as the strips are cut fairly small. The woven star is double sided for two different looks.
Below you will find my step by step written tutorial How to make a Scandinavian Star Ornament with VIDEO instructions for all the visual learners.
We occasionally link to goods offered by vendors to help the reader find relevant products. Some of the links may be affiliate meaning we earn a small commission if an item is purchased.
Table of Contents
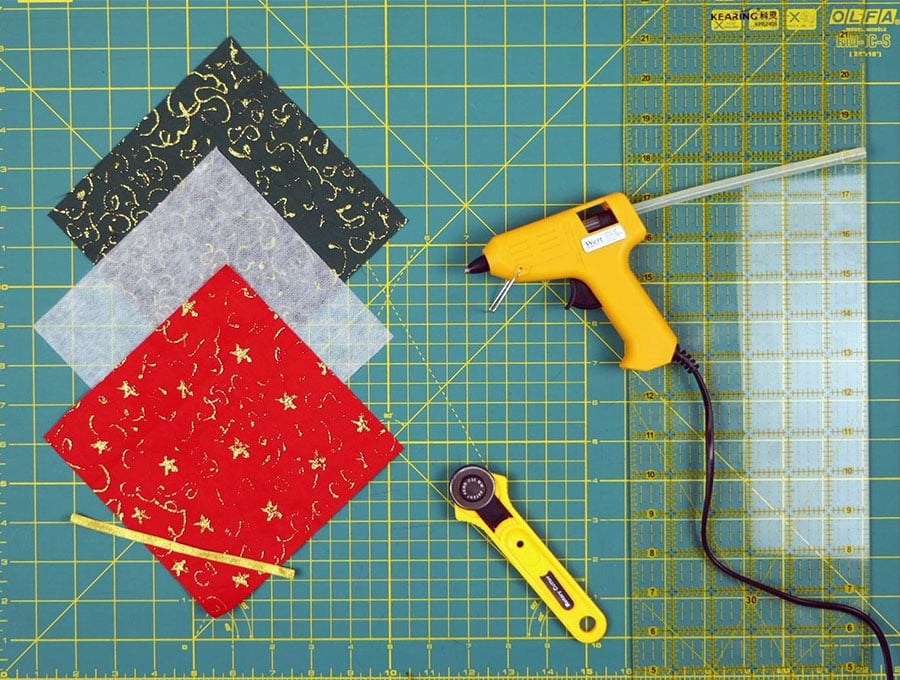
- fabric – 2 pieces of contrasting Christmas fabric 6 ½ inches x 6 ½ inches (16.5 x 16.5cm), quilting cotton works best
- double-sided iron-on fusible interfacing
- Piece of ribbon 10 inches (25 cm) long to hang the star
- matching thread
- scissors (or rotary cutter and a cutting mat)
- ruler or measuring tape
- iron and ironing board
- hot glue gun
Follow us for free patterns & tutorials! [easy-profiles]
Watch the diy Scandinavian Star Ornament video first and then follow the written step by step instructions below.
Please enjoy and don’t forget to Like and SUBSCRIBE over on YouTube to be kept up to date with new videos as they come out.
INSTRUCTIONS:
STEP 1:
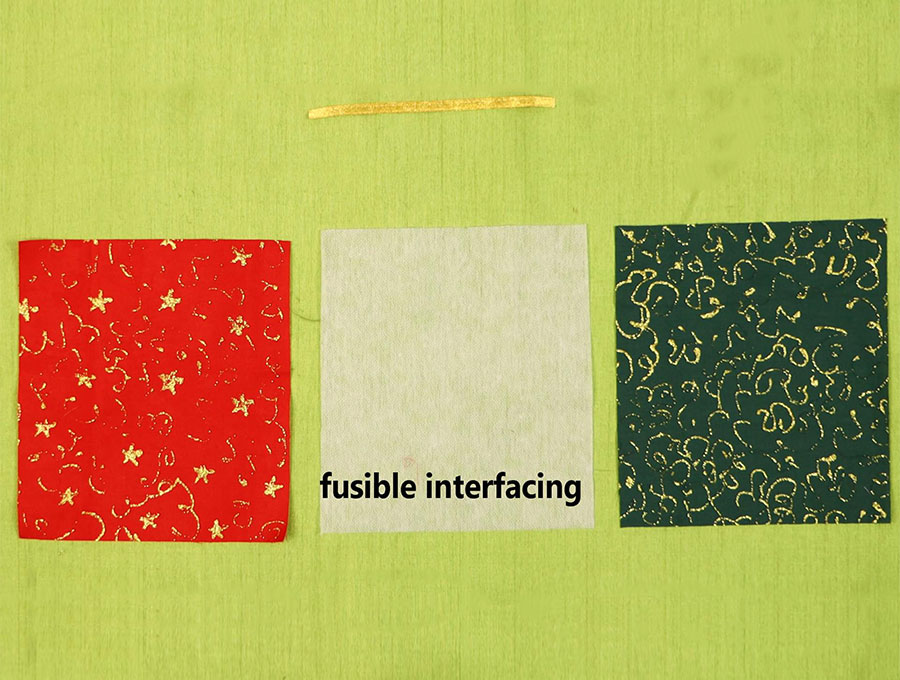
Insert the iron-on fusible interfacing between the wrong sides of the contrasting squares.
Line up the edges of the two squares, right sides of fabric facing outwards.
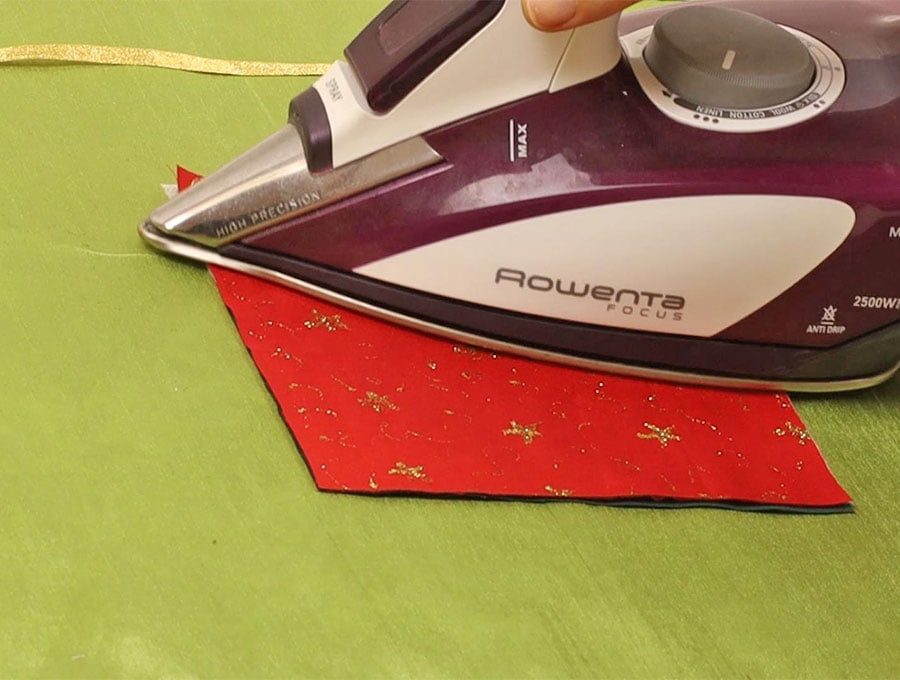
Iron the squares to bond them together.
STEP 2:

Using the rotary cutter and self-healing cutting mat trim down your square to exactly 6 x 6 inches (15 x 15cm) or use your scissors, a fabric marker and a ruler to mark first. We do this to ensure that the fabric has fused right to the edges – we don’t want bits of the star peeling away later.
STEP 3:
Cut the square in 12 x ½ inch (1.25cm) strips using the rotary cutter and self-healing mat or marking out the ½ inch (1.25cm) strips along the fabric with a ruler then cutting with scissors. Accuracy is very important here to get a good-looking star, and it’s a wonderful way to teach kids some math!
STEP 4:
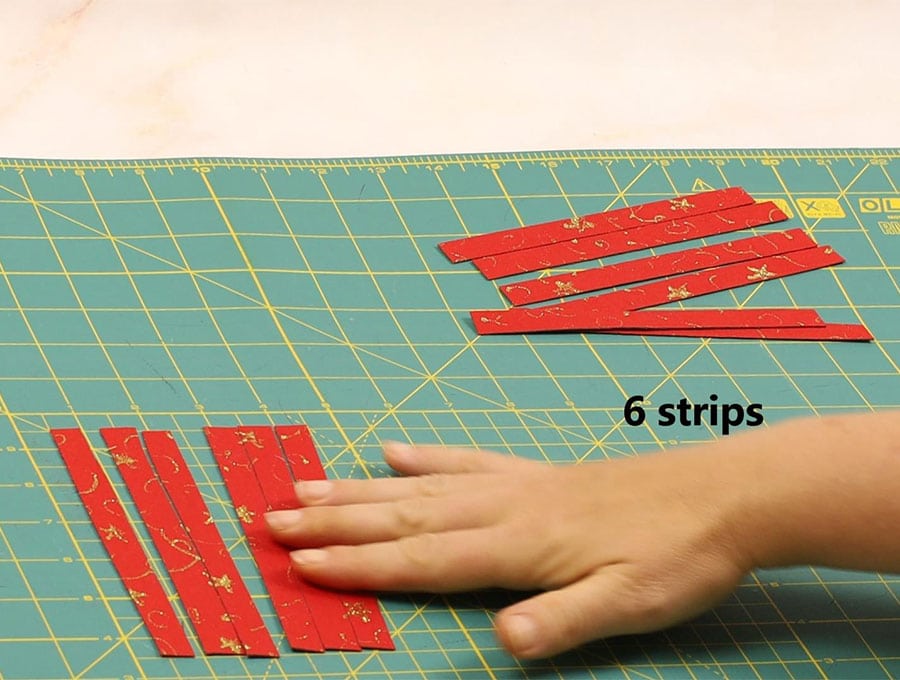
The ornament is two sided so you use 6 strips for one side and 6 for the other.
Select 6 strips and set the others aside – what you do with the first side will be done exactly the same with the other side. Select two strips and fold them so you have a 3 inch (7.5cm) strip and finger press them to create a fold.
STEP 5: Create the RED half-star
We will call this the red side – just to contrast with the second half of the star which we will call the green side. All strips on this side will have the red side facing upwards.
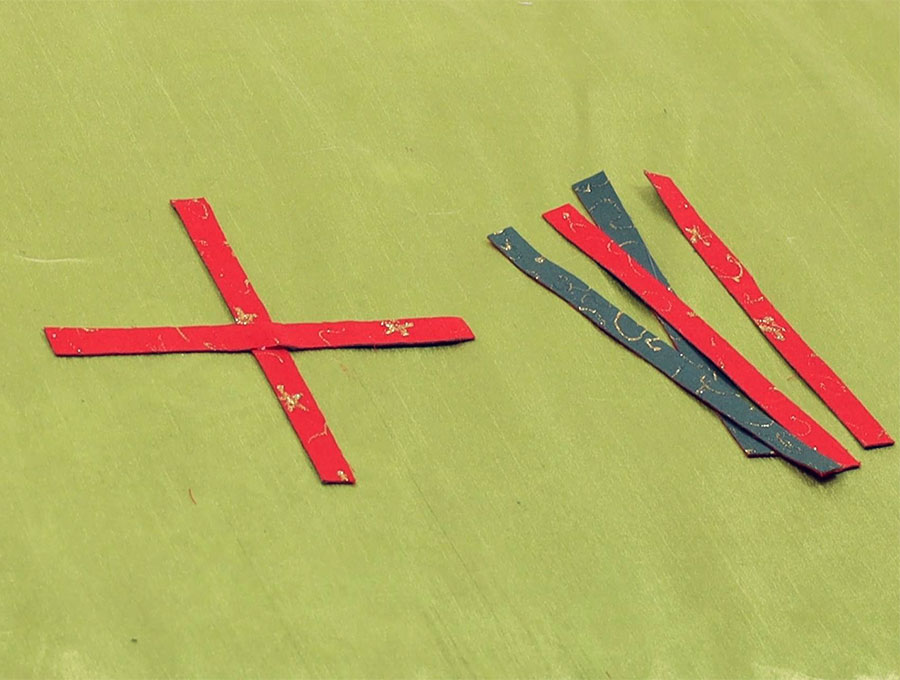
Open out the two strips you finger pressed and put a little glue from the hot glue gun across the center fold and up to ¼ inch (6mm) on either side of the fold, lay it vertically on your work top, then place the other strip you finger pressed with its fold directly over the glued area, horizontally, creating a cross. Check the angles are perfect right angles using the grid on the self-healing cutting mat or a protractor – an opportunity to teach kids about angles in action!
STEP 6:
With the cross laid out in front of you on your worktop line up two more strips; one on each side of the center vertical strip. They will go over the horizontal strip and be spaced around 1/8 inch (3mm) from each other. Make sure the ends are all in a straight line and then just fold back one vertical strip and dab a little glue on the horizontal strip before pressing it back down, repeat with the strip on the other side of the center strip.
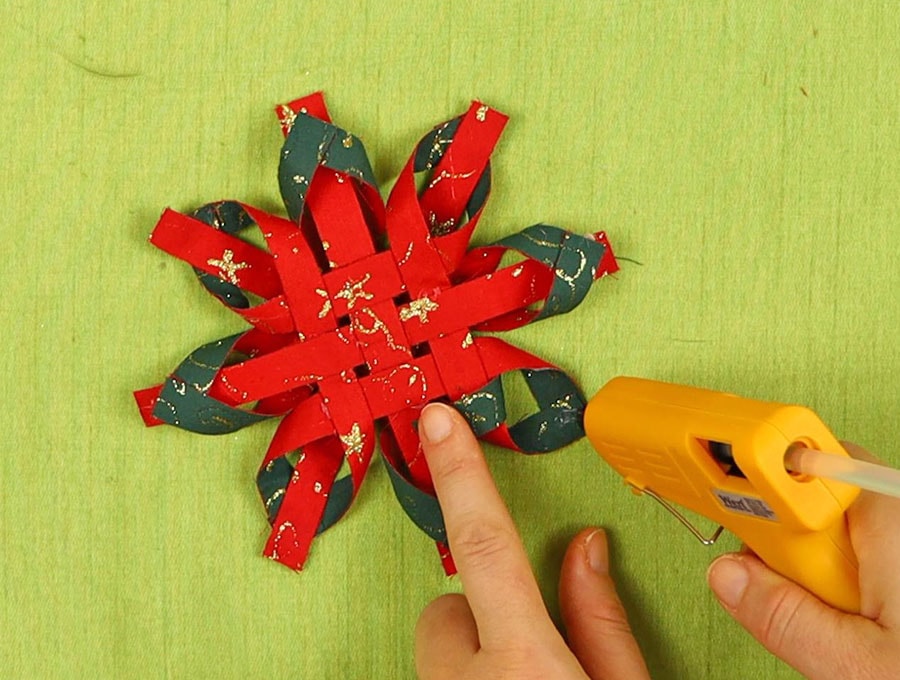
STEP 7:
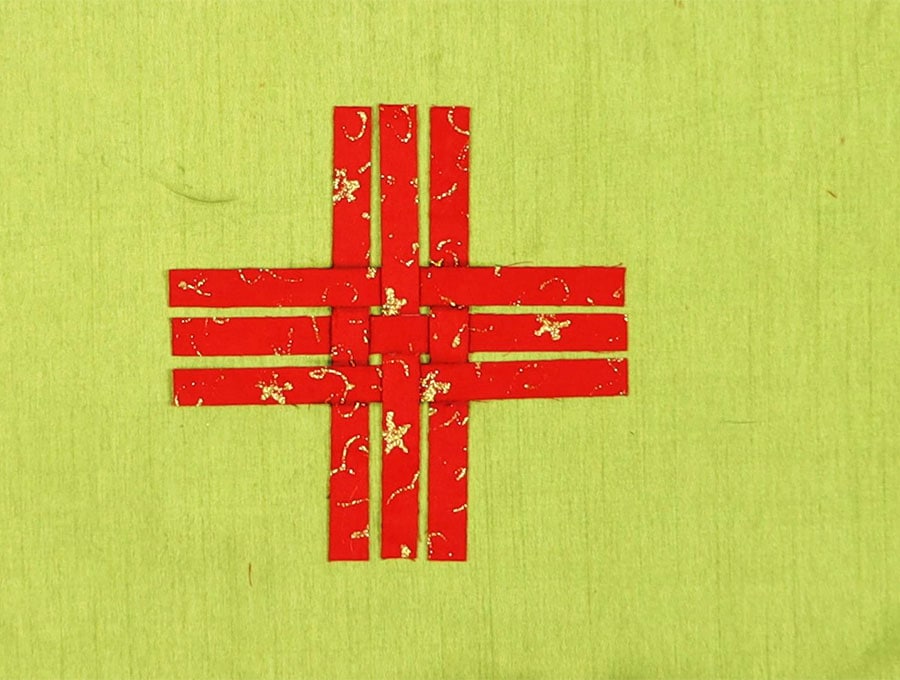
Take the next two strips and place them on either side of the horizontal strip, doing the classic under and over to create a weave, then lift the flaps and place some glue on the points where they cross with the vertical strips to secure the weave in place.
STEP 8:
Put a dab of glue on each spot where of the central vertical strip intersects with the two horizontal strips that are on either side of the central horizontal strip.
STEP 9:
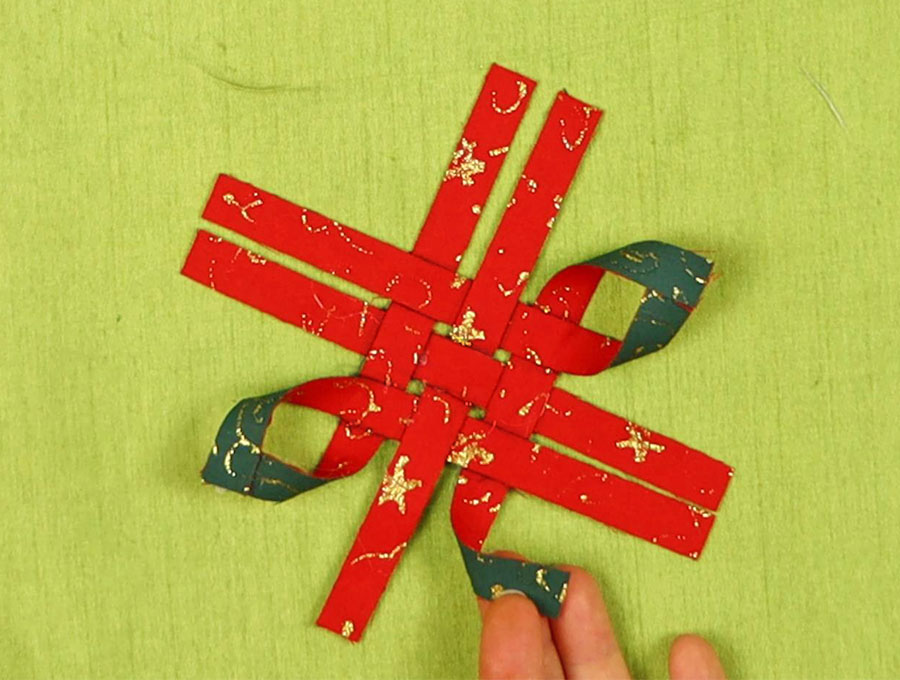
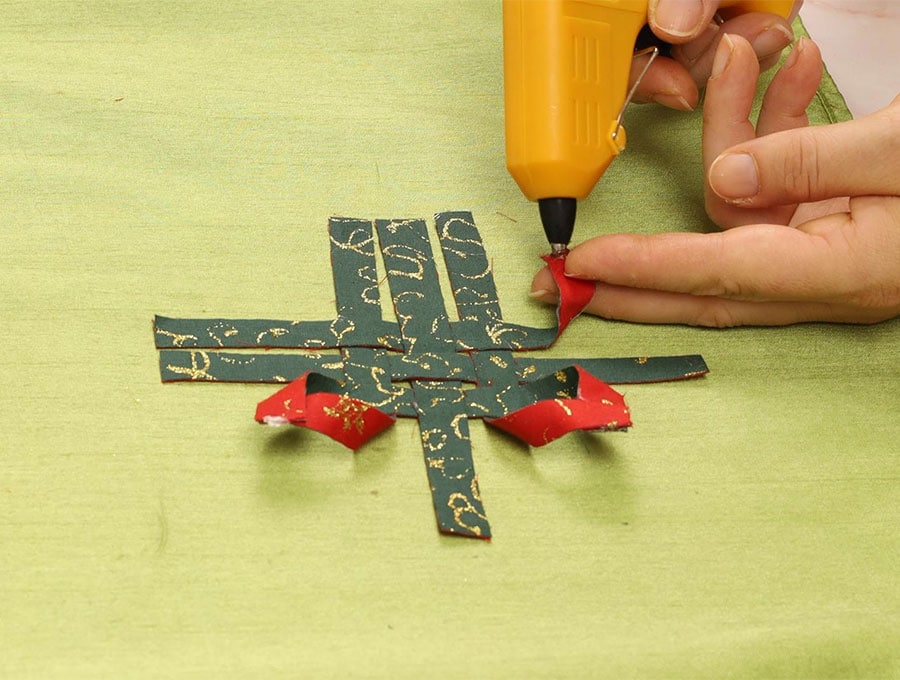
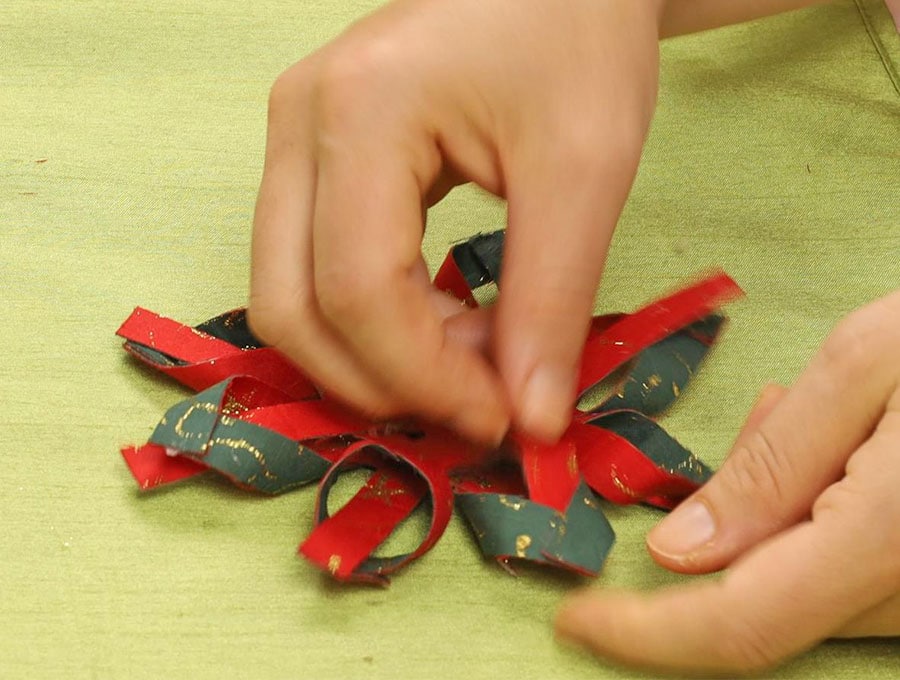
Take one strip on the outside (not the central two strips) and turn the strip end so the contrasting fabric shows, put a dab of glue on the end then pick up the piece at the right angle closest to it and twist to show the contrast fabric then place its end over the glued end. You have what looks like a flower petal standing above the rest of the cross. Repeat with the other three sides so you have four ‘petals’ and the two central strips lying flat and unused at this point.
STEP 10: Create the GREEN half-star
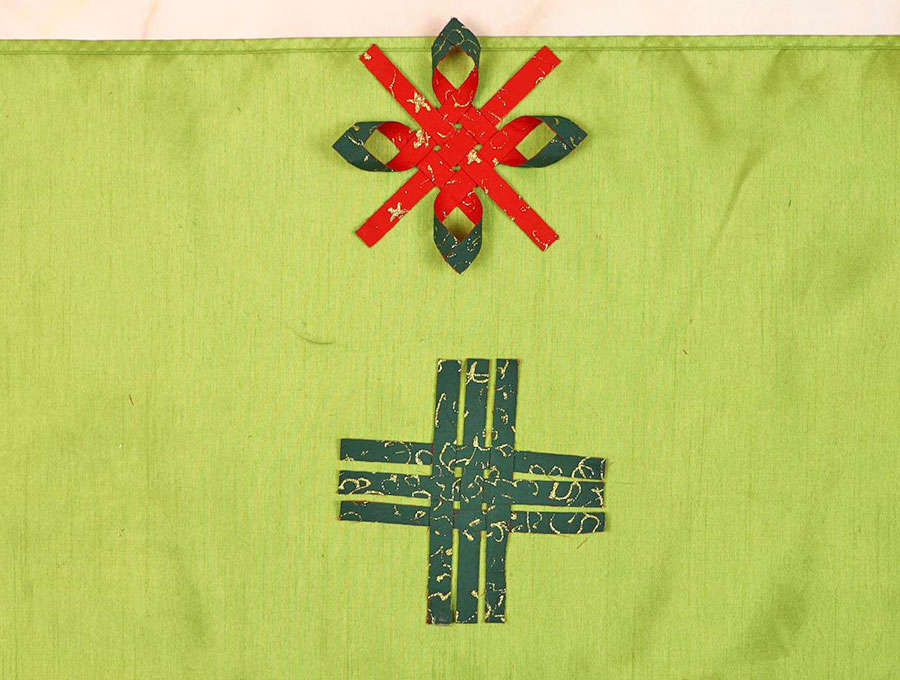
Set the half-finished star half aside and repeat steps 5 to 9 with the other six strips with the green side uppermost.
STEP 11:
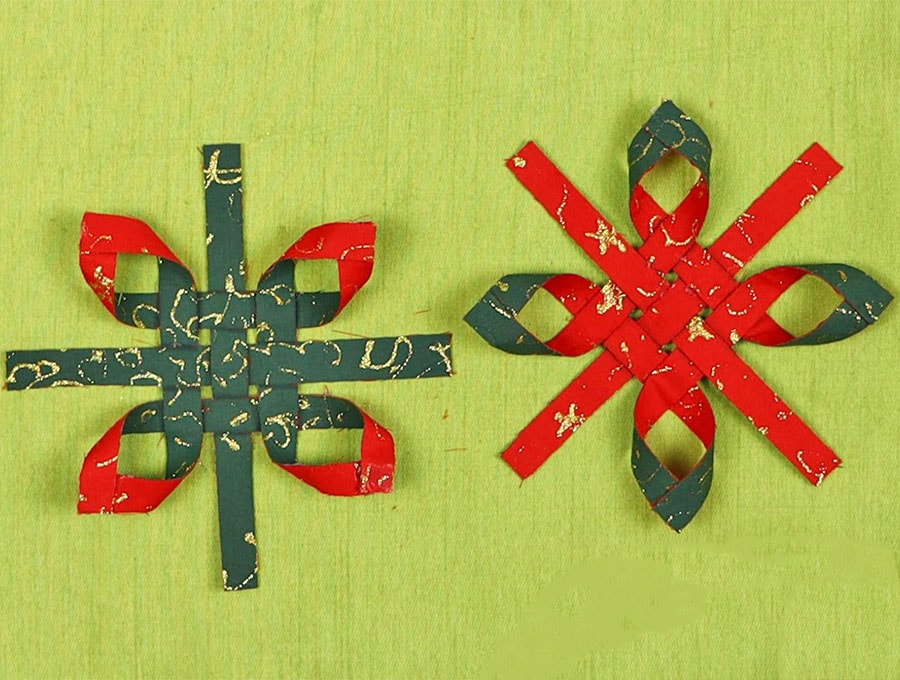
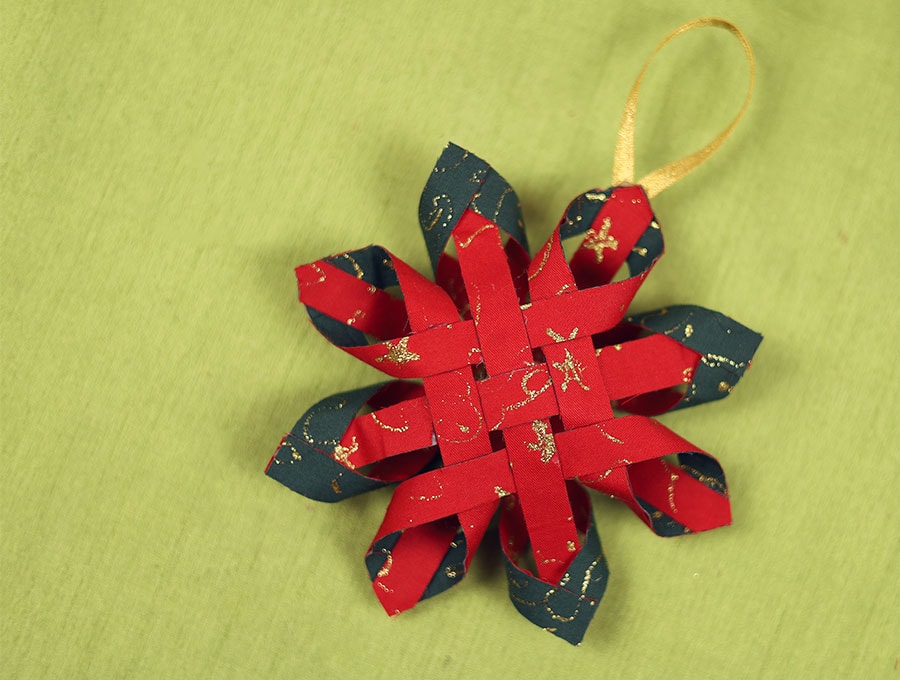
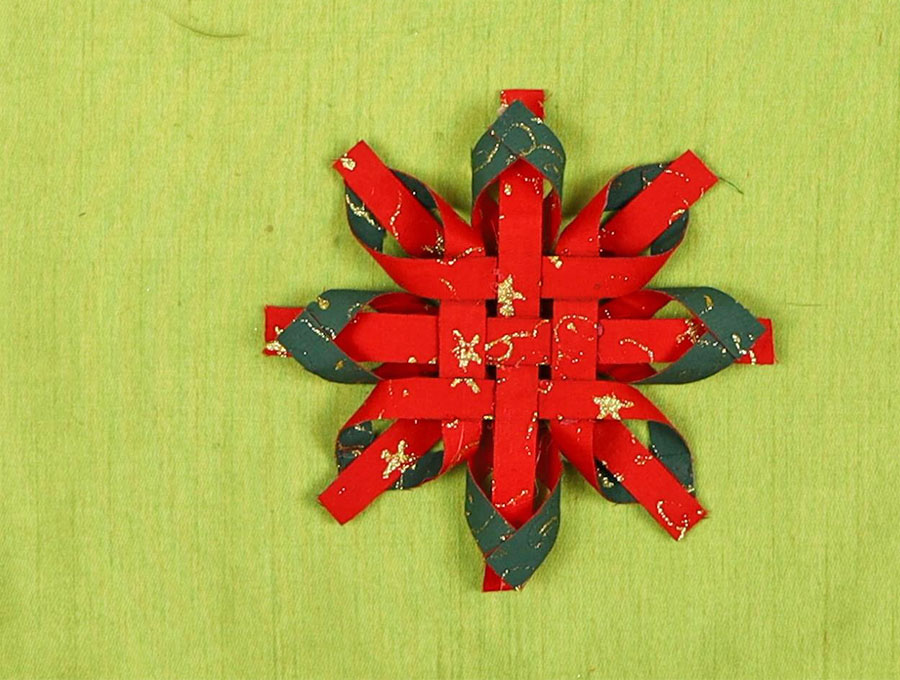
With both half stars finished place the red half with the ‘petals’ or raised star points facing upward on your worktop. Now place the green half star with the star points facing upwards diagonally across the base half so the star points are equally distant from each other.
 Take the four flat strips not joined into star points and tuck each one under a star point on the one side, making sure the strip is flat.
STEP 12:
Flip over the star and lift the ends of the pieces tucked into the star points and add a dab of hot glue, then press them together. Don’t worry about the bit on the edge that sticks out from the star point as they will be trimmed later.
STEP 13:
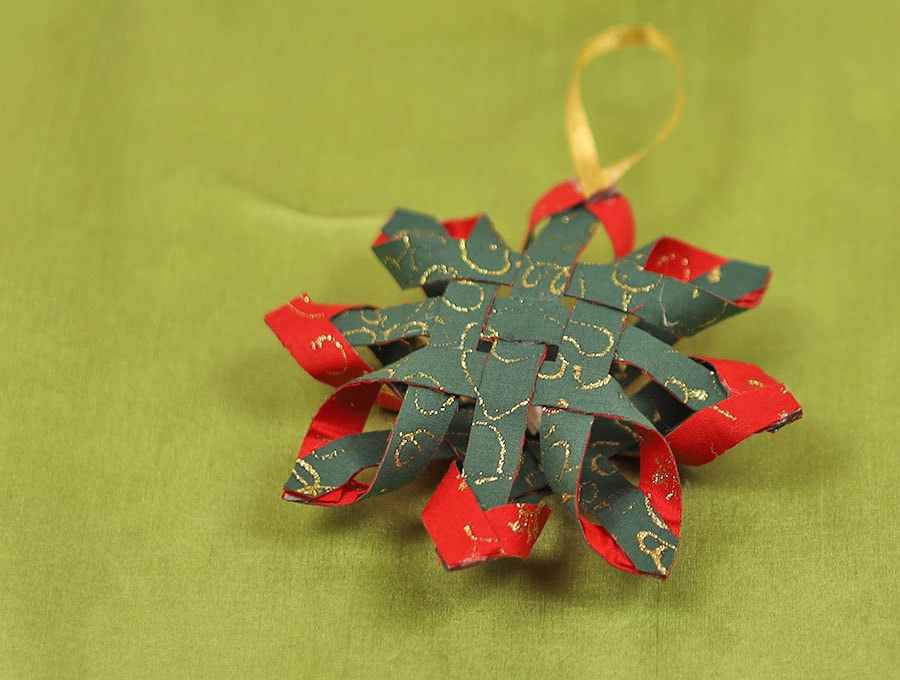
Now take the extra 4 central pieces not tucked under a star point and tuck them in then flip the star and glue them in place.
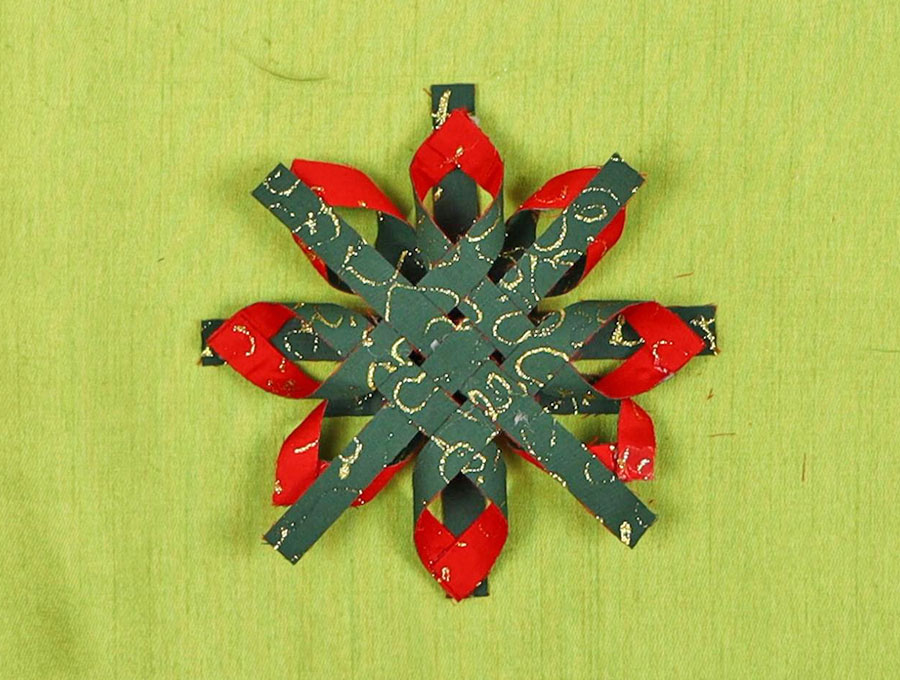
Here’s how the star looks at this point
STEP 14:
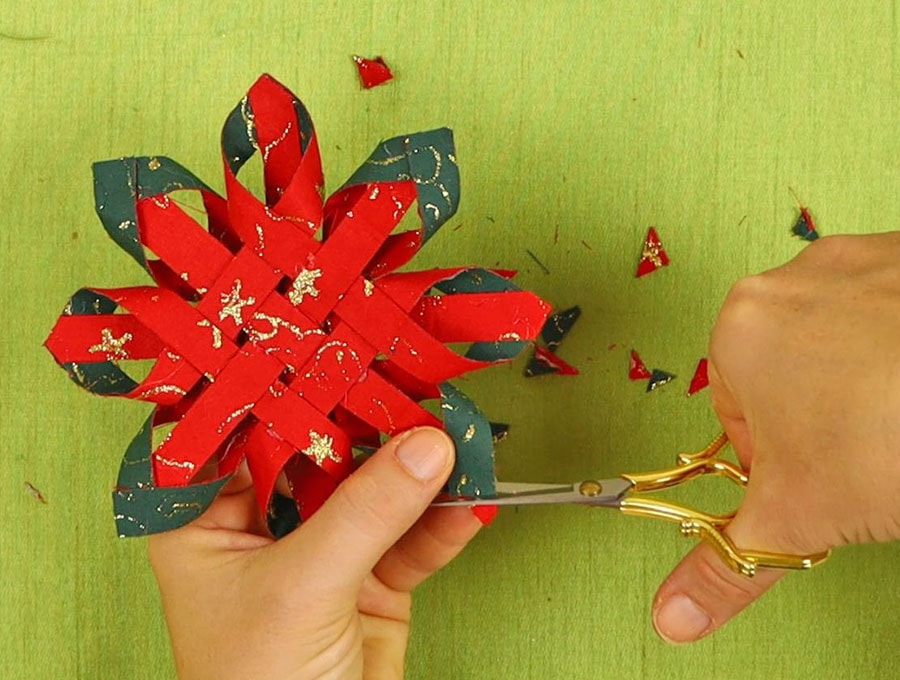
Trim off those tiny bits of at the end of each star point neatly.
STEP 15:
Thread the piece of ribbon through one star point to create a loop, knot the ribbon and trim. Or you can glue the ribbon to one of the points as I do in the video. You ornament is ready to hang on a tree, on the mantelpiece or in a window. If you want to use the Scandinavian star as a tree topper omit the ribbon and place the star over the tip of the tree. Since it is two sided it will remain firmly in place.
If you are into creating beautifully handcrafted decorations and don’t want to miss out on projects, then hit our LIKE button and subscribe to have our gorgeous festive projects delivered straight to your inbox. When you have made the No-Sew Scandinavian Star Ornament please share a photo into our comments section as we would be thrilled to see how yours turned out.
Making the Scandinavian star ornament is a tradition in Nordic countries handed down from generation to generation. Not only is the no-sew Scandinavian Star ornament an attractive addition to your décor, but creating it is a great way to spend quality time with children. They will learn quite a bit about maths in a fun way with this project. Our visuals are easy to follow and if you are unsure our step-by-step instructions help make the whole process really clear. Create these no-sew Scandinavian star ornaments that can hang on the tree or in a window, or even serve as a tree topper.
Do you like this? Pin for later:
Wanna be friends? Click HERE and follow me on Pinterest
RELATED: