
DIY Fabric Remote Control Holder – How to sew an Armchair caddy with 4 pockets
If you regularly spend time digging down the side of the lounge cushions in search of the TV and other remotes then you definitely need this remote holder. Remotes end up in the most weird and wonderful places – in amongst the kids’ toys, under the blanket of the dog bed, somewhere in the kitchen or even under the furniture. Enough with the crazy searching. The DIY remote control holder can be made in a fabric to complement or blend with your lounge décor, keeps remotes neat and tidy, and more importantly keeps them where you can find them – in the armchair caddy for remotes.
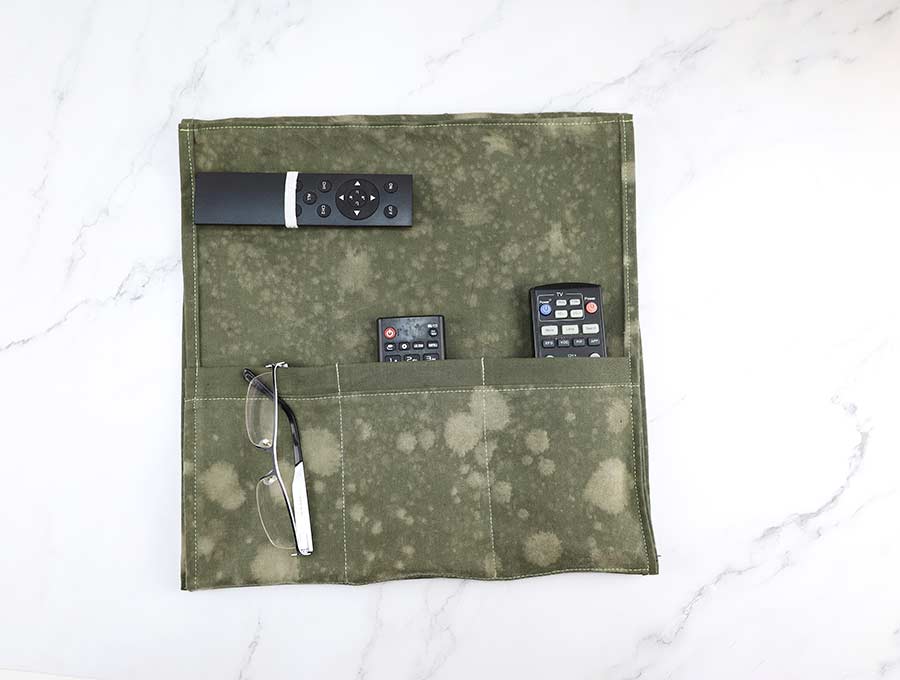
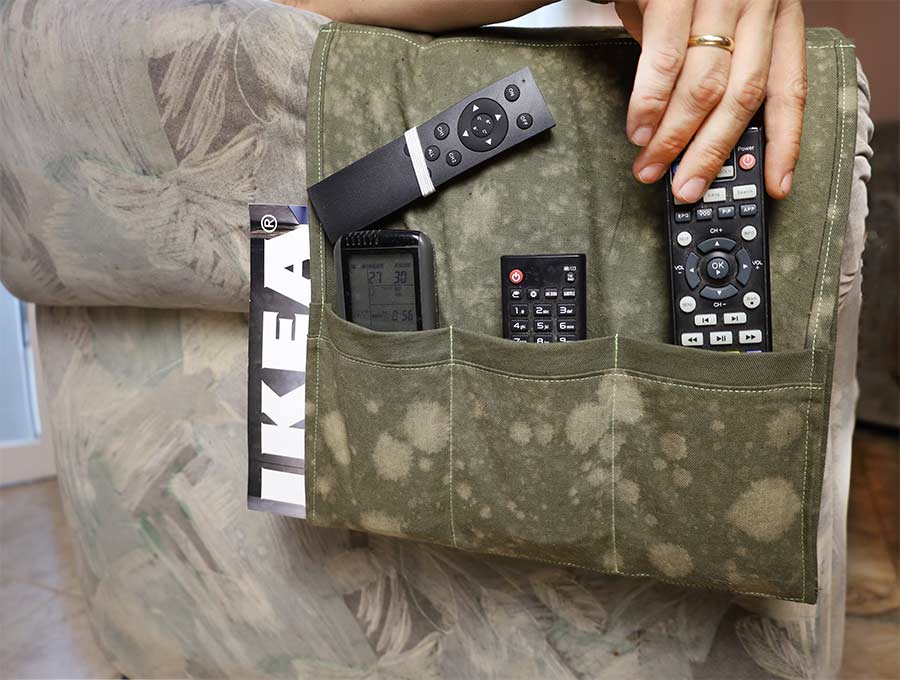
Below you will find my step by step diy remote caddy written tutorial with VIDEO instructions for all the visual learners. It’s an easy sew, and makes the perfect present for anyone. Just place it over the armrest of your sofa, courch or under your matress, tuck it under and place your remotes inside this clever fabric remote control organizer.
We occasionally link to goods offered by vendors to help the reader find relevant products. Some of the links may be affiliate meaning we earn a small commission if an item is purchased.
Table of Contents
- 1 How to make a Remote Control Holder
- 2 Remote Holder Supplies and tools
- 3 How to Sew a Remote Caddy
- 3.1 DIY Remote Caddy VIDEO TUTORIAL
- 3.2 DIY Remote Control Holder INSTRUCTIONS:
- 3.3 STEP 1: Cut the fabrics, and fold the binding
- 3.4 STEP 2: Align edges
- 3.5 STEP 3: Sew
- 3.6 STEP 4: Press and topstitch
- 3.7 STEP 5: Hem the edges
- 3.8 STEP 6: Attach the pocket
- 3.9 STEP 7: Stitch the pocket
- 3.10 STEP 8: Fold once more
- 3.11 STEP 9: Sew
- 3.12 STEP 10: Mark
- 3.13 STEP 11: Stitch down
- 3.14 STEP 12: Create a magazine loop
- 3.15 STEP 13: Final stitching
- 4 Remote control Caddy FAQ:
How to make a Remote Control Holder
Remote Holder Supplies and tools
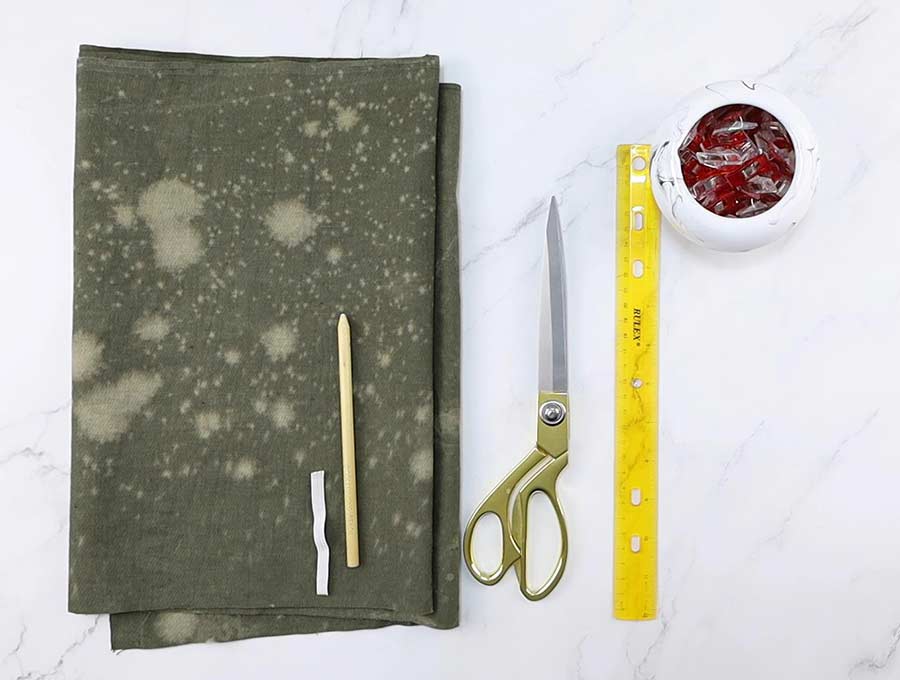
- fabric – 1 yd of mid-weight home décor fabric without a clear wrong side
- 1/2″ flat elastic – 4″ long (optional)
- matching thread
- scissors (or rotary cutter and a cutting mat)
- ruler or measuring tape
- iron and ironing board
- sewing clips or pins
- sewing machine
Follow us for free patterns & tutorials! [easy-profiles]
How to Sew a Remote Caddy
Watch the diy remote caddy video first and then follow the written step by step instructions below.
Please enjoy and don’t forget to Like and SUBSCRIBE over on YouTube to be kept up to date with new videos as they come out.
DIY Remote Caddy VIDEO TUTORIAL
DIY Remote Control Holder INSTRUCTIONS:
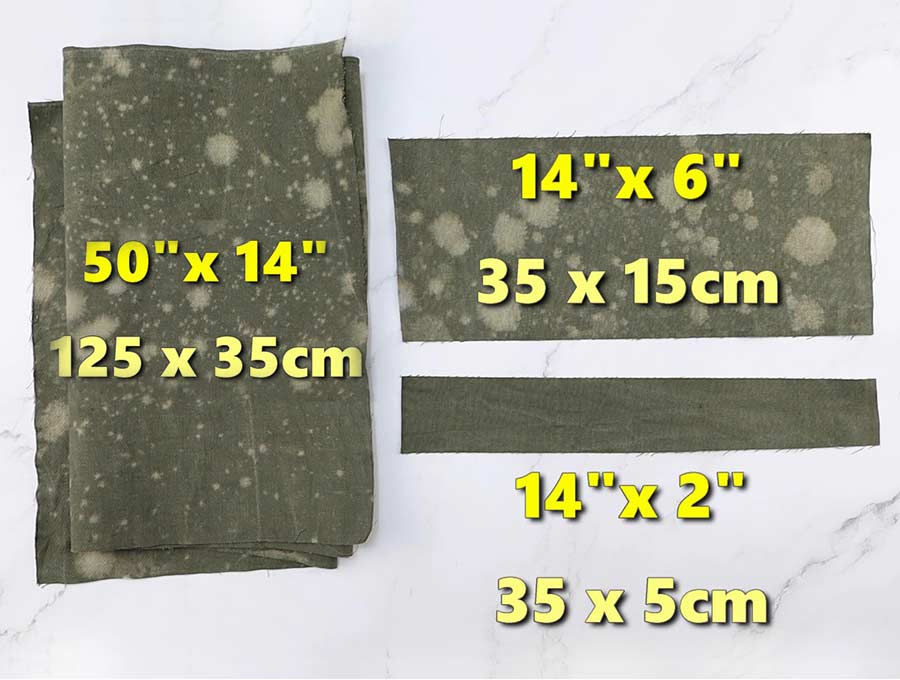
To make the remote holder I am using a 14-inch-wide piece of fabric that is 40 inches long, which has a piece for the pocket that is 14 inches by 5 ½ inches. You will need an extra piece that is 14 inches by 4 inches to create an edging for the pocket. I suggest a décor fabric that is firm but not too heavy.
I’m not using bias binding for the edges, but am folding the edges twice ¼” and stitching on top of both sides so it is more in keeping with the décor for the lounge.
STEP 1: Cut the fabrics, and fold the binding
Once you have cut your main piece of fabric, your pocket piece and pocket edging, take the pocket edging and fold in half lengthways, right side outwards, so you have a piece that is 14 inches by two inches. Line up the corners and press the piece flat.
STEP 2: Align edges
With the right side of the pocket fabric laid on your worktop, place the folded edging’s raw edges to the raw edge of the top of the pocket, with the edging on top of the right side of the pocket piece and pin or clip into place.
STEP 3: Sew
Sew a straight line leaving a ¼ inch seam allowance to join the edging to the pocket. You can overlock the edges, use a zig-zag stitch, or simply trim the raw edges with pinking shears.
STEP 4: Press and topstitch
Press the seam down towards the main pocket, then finish with a top stitch along the edge where the seam for the edging joins the main pocket piece. Put aside.
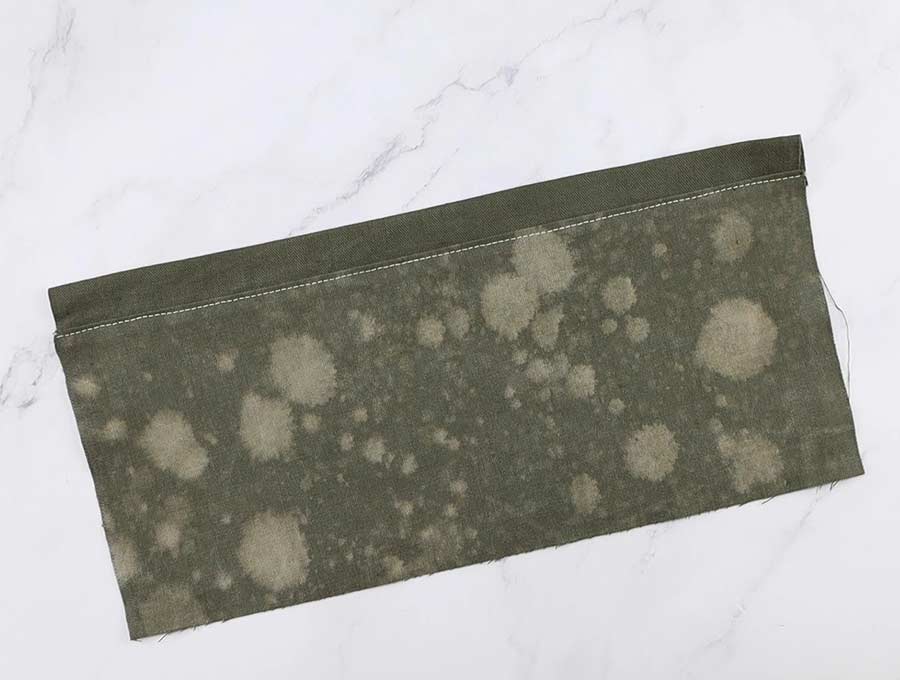
STEP 5: Hem the edges
Time to hem the edge of the base. You will hem 3 of the sides – top, bottom and left. Fold over ¼ inch all the way round the rectangle, toward the wrong side and press. Then fold over again ¼ inch all the way around so the raw edges are hidden and pin into place. Stitch all the way around on the right side ¼ inch from the edge.
Then zig zag the short right side.
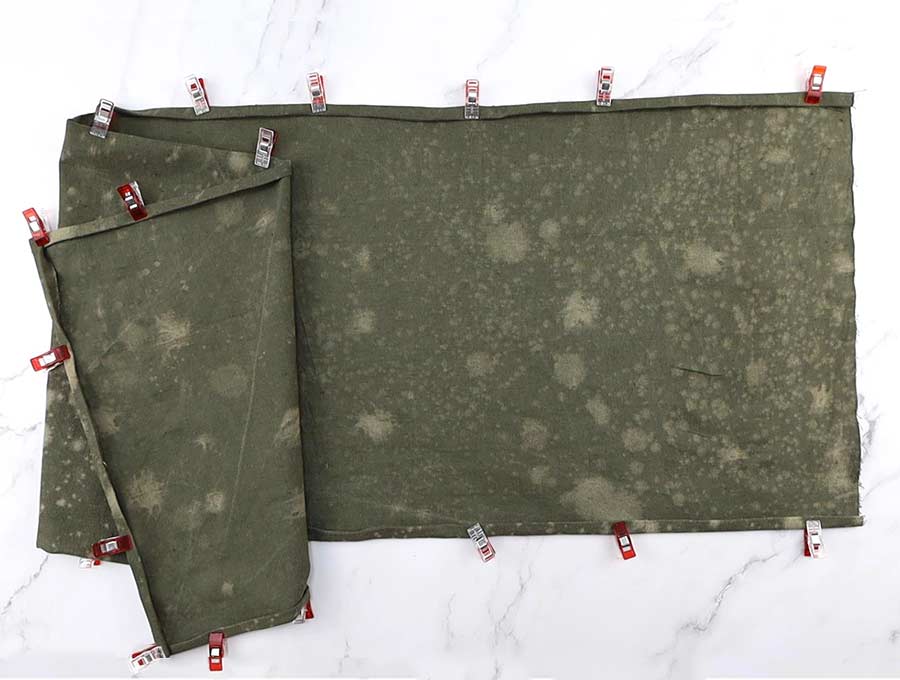
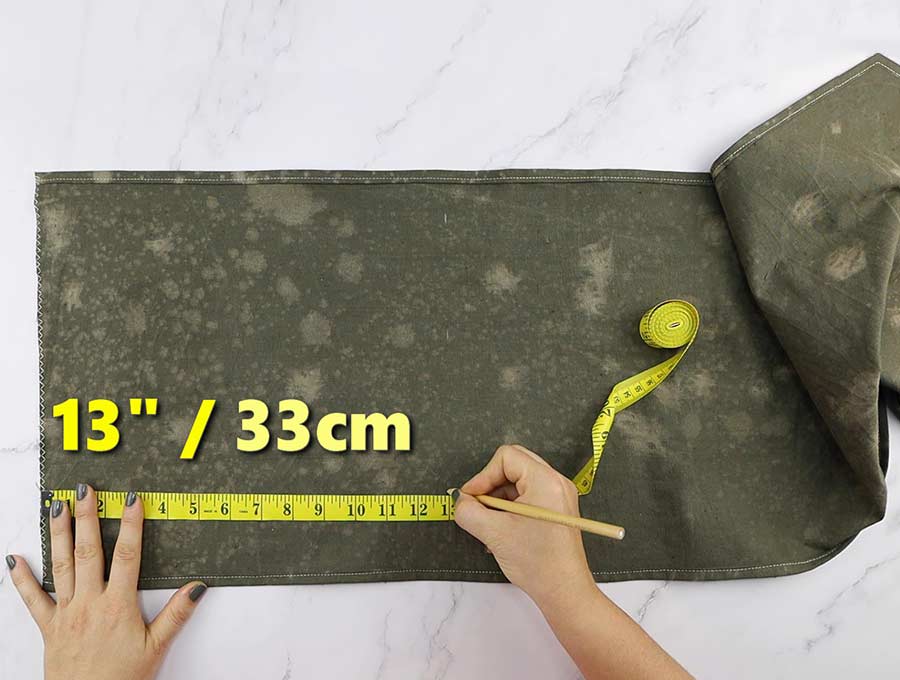
STEP 6: Attach the pocket
To attach the pocket to the main piece, place the main piece of fabric on your worktop with wrong side up, the long side running along the length of the worktop and the zig zagged edge on the left. Now measure 13 inches (33cm) from the short left side edge and mark in 3 spots using an erasable fabric pen to ensure you have a straight line.
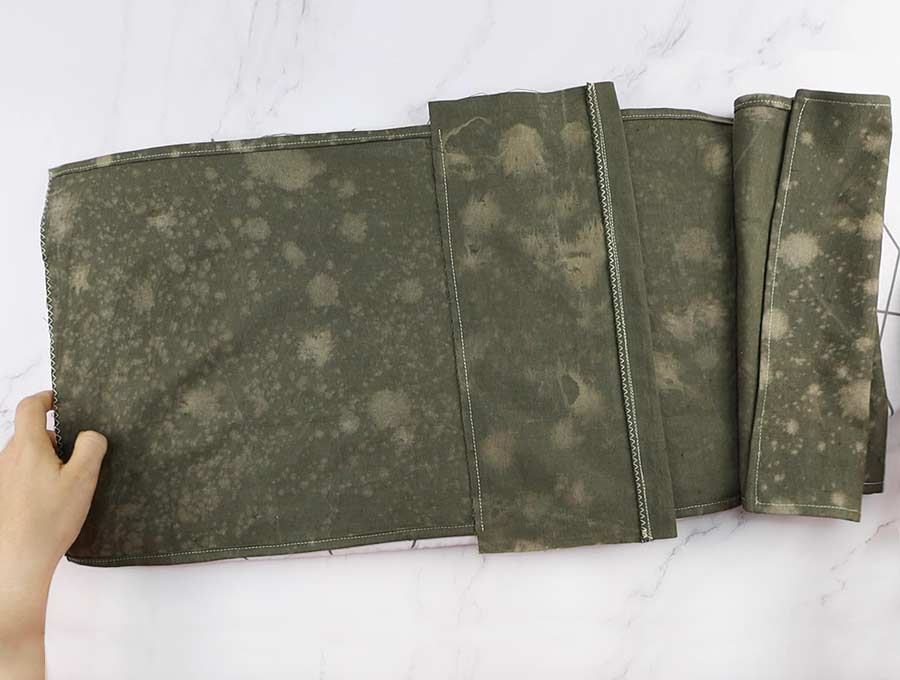
STEP 7: Stitch the pocket
Take the pocket piece with the wrong side up and align the raw edge with the marks and pin along the line you have marked on the main piece. Stitch using ¼” seam allowance.
STEP 8: Fold once more
Fold in the short raw edges of the pocket and press. Flip the pocket to its right side and pin the top corners of the pocket piece so they line up with the sides of the fabric.
STEP 9: Sew
Top stitch right at the edge of the pocket sides and base.
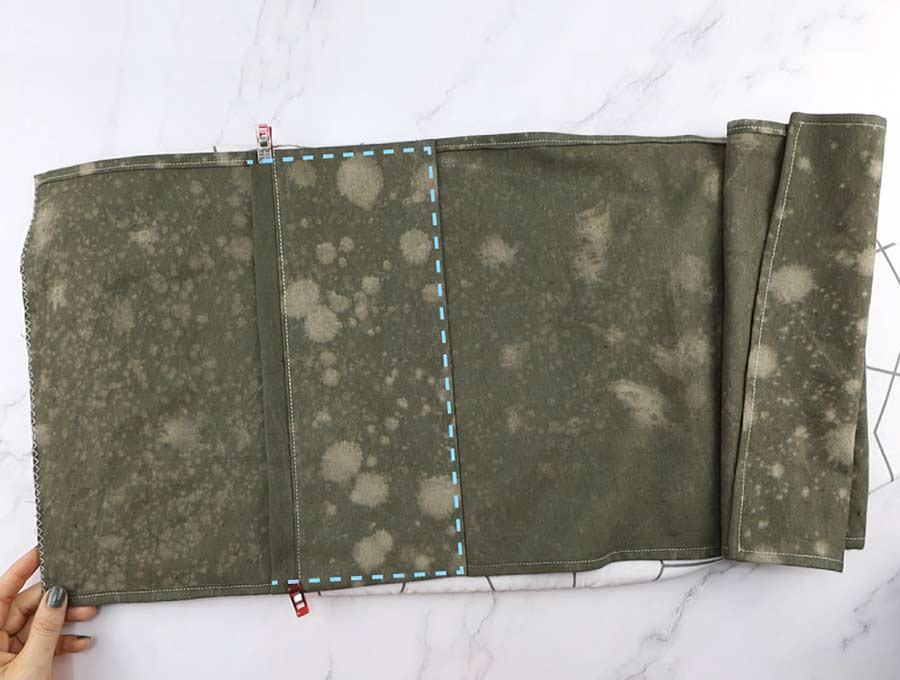
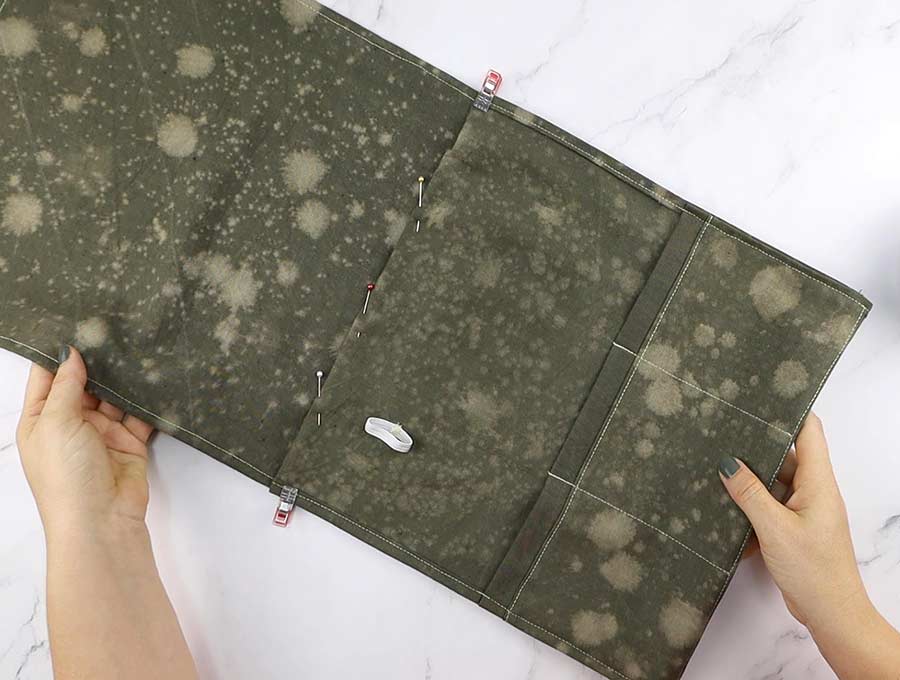
STEP 10: Mark
Then lay out your remotes on top of the pocket so you can judge where to divide the pocket into separate areas for the remotes. Some may be wider and some narrower. Mark your desired stitch lines and make sure to leave around 1 inch on either side so they don’t fit too snugly to pull them out easily.

(optional) Cut a piece of elastic for the mini remote and pin it above the other remotes
STEP 11: Stitch down
Once you have marked the lines where you are going to stitch with an erasable fabric pen, to create the mini-pockets for the remotes, then stitch down the lines back stitching at top and bottom. Also stitch down the elastic for the mini remote (optional)
STEP 12: Create a magazine loop
The final step is to create a loop with the extra fabric below the pocket. This will be used for sliding in a brochure, or magazine. Fold up the fabric towards the right side, so it is in line with the base of the pocket.
Fold the top zig zagged edge of the base ¼ under and pin in place.
STEP 13: Final stitching
Now run a line of stitching parallel to the topstitching on the pocket, this should ensure that the raw edges of the turnover for the pocket base are contained within the two rows of top-stitching, so there will be no loose threads inside the pocket, and that the loop for the magazine is secured. Backstitch at start and finish for strength.
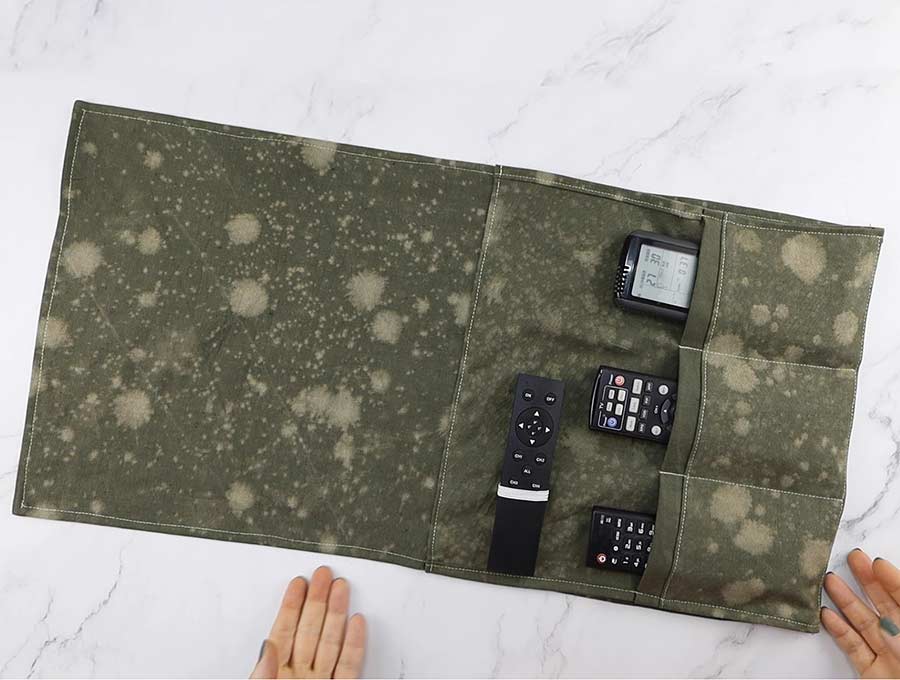
Your DIY armchair caddy for remotes is now ready to use. Tuck the one end under the armchair cushion to secure, then hang over the armchair edge, tuck in your remotes and you are ready to relax.
Remote control Caddy FAQ:
Q: Can I use bias binding to finish the edges of the DIY remote caddy rather than folding over the edges?
A: Absolutely. Just attach the bias binding the usual way instead of following Step 5.
Q: What about small remotes?
A: If remotes are really small then you can attach an elastic loop above the pocket of the DIY remote holder to accommodate them.
- Simply measure around the remote with the elastic, making sure the fit is snug and leaving ½ inch seam allowance at the end.
- Stitch the elastic together then turn so the raw edges of the elastic seam face the right side fabric of the DIY remote holder, flatten the seam out and stitch to the marked spot on the fabric.
- Stitch on either side of the stitch line that joined the ends, pulling the loop of elastic aside as you stitch.
- Flatten out the loop and stitch at both ends to ensure it lies flat.

The DIY remote holder is an ideal present for anyone but will be specially appreciated by older folk. Make the armchair caddy for remotes, not only for your own family, but for your parents, grandparents, aunts and uncles. It helps them keep everything handy, including their reading glasses. When you give this as a gift slip in a little pack of special biscuits or small box of chocolates into the magazine loop! If you enjoyed this step-by-step tutorial then hit the subscribe button below to have projects like this sent straight to your inbox. There is no excuse to sit with stashes of fabric you are not quite sure how to use – we have hundreds of ideas.
Do you like this DIY remote holder? Pin for later:
Wanna be friends? Click HERE and follow me on Pinterest
RELATED: