
How to Make a Reusable Bread Bag – DIY Bread Bag Tutorial
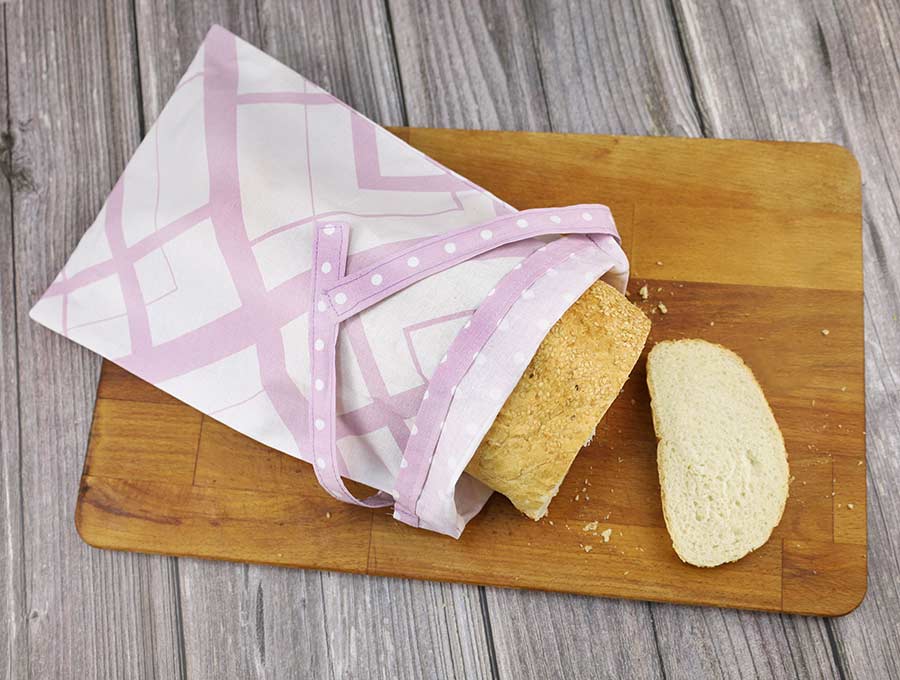
Today’s tutorial is all about making a re-usable bread bag. Say no to plastic and take your bread bags with you when you go to your local baker, or use them for storing your own home-made bread. They make a lovely gift with a freshly baked loaf of bread and some home-made pesto or jam, and will keep your own bread fresh in the bread-bin, in the fridge and even in the freezer. Make this today using fabric scraps and our really easy step-by-step instructions. It will take you around 10 to 15 minutes and you’ll wonder why you never made a reusable bread bag before.
It is suggested you make your reusable bread bag from cotton or linen offcuts. If your fabric offcuts aren’t large enough there isn’t a problem – you can join two pieces together to create a sufficiently large piece to accommodate your bread. What I love is that you can make your bread bags various sizes to store the more unusual shapes – like the round bread or super long crusty French loaves. Storing French loaves always gave me a headache as I wanted to keep them intact to display on a grazing platter with olives and other goodies for guests. Chopping them in half to fit into a plastic container just wasn’t an option!
Below you will find my step by step written tutorial with VIDEO instructions for all the visual learners.
We occasionally link to goods offered by vendors to help the reader find relevant products. Some of the links may be affiliate meaning we earn a small commission if an item is purchased.
Table of Contents
- 1 How to make a bread bag
- 2 Bread Bag Supplies and tools
- 3 How to Sew a Bread Bag
- 3.1 DIY Bread Bag VIDEO TUTORIAL
- 3.2 INSTRUCTIONS:
- 3.3 STEP 1: Cut the fabrics
- 3.4 STEP 2:
- 3.5 STEP 3: Stitch the short sides
- 3.6 STEP 4: Make a french seam
- 3.7 STEP 5: Sew and trim
- 3.8 STEP 6: Turn the bread bag around
- 3.9 STEP 7: Stitch a second time
- 3.10 STEP 8: Turn around
- 3.11 STEP 9: Make the fabric tie
- 3.12 STEP 10: Attach the tie to the bread bag
- 3.13 STEP 11: Final stiching
- 4 FAQs, Tips and Troubleshooting:
How to make a bread bag
Bread Bag Supplies and tools
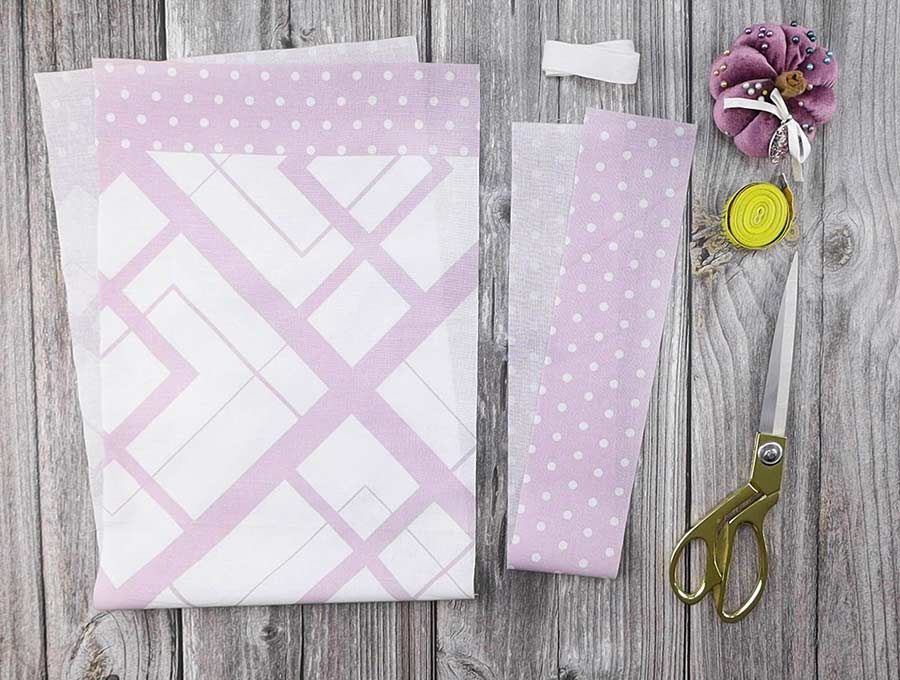
- fabric – cotton or linen
- grosgrain ribbon (or make a fabric tie)
- matching thread
- scissors (or rotary cutter and a cutting mat)
- ruler or measuring tape
- iron and ironing board
- sewing clips or pins
- sewing machine
Follow us for free patterns & tutorials! [easy-profiles]
How to Sew a Bread Bag
Watch the diy bread bag video first and then follow the written step by step instructions below.
Please enjoy and don’t forget to Like and SUBSCRIBE over on YouTube to be kept up to date with new videos as they come out.
DIY Bread Bag VIDEO TUTORIAL
INSTRUCTIONS:
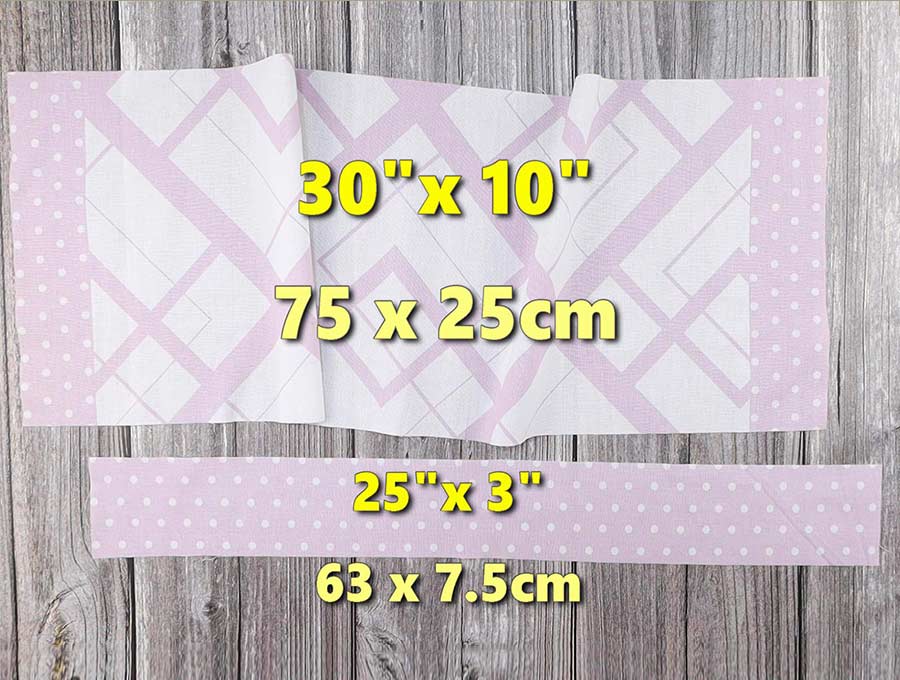
The bread bag we are creating needs to be roomy enough to easily slide a loaf in and out and will have a tie string top, not a casing with a thread, because the tie-string top is more air-proof. To keep the bread from drying out it needs to be protected from the air. Some people prefer ribbon, but I like to use a piece of fabric that is the same as that used for the bread bag, or maybe a piece that contrasts or complements the pattern. If you are using ribbon, you will need a 25-inch (63cm) piece that is between ½ to 1 inch (1.3 to 2.5) wide.
If creating your tie from fabric you will need a 25-inch piece that in 3 inches wide (63 x 7cm) .
Remember to wash your fabric before making the bread bag to get rid of the chemicals used in the finishing, and to check their color fastness and make sure they are pre-shrunk. No one wants dye rubbing off on the bread, or to have spent time making a bag to find it is too small after the first wash.
STEP 1: Cut the fabrics
Cut your piece of fabric 30 inches by 10 inches (75 x 25cm). This should accommodate a standard loaf of bread. If you are in doubt wrap a piece of fabric around the loaf you intend using the bag for and see that it fits comfortably and is long enough. You can always adjust the width and length to suit the loaf.
STEP 2:
Lay the fabric on your ironing board, wrong side up, with the 10-inch side perpendicular to your body, and fold over ¼ inch (6mm), pressing as you go until the short side has a seam pressed into it. Now fold over again ½ inch (1.3cm) and press. Turn the fabric around, making sure the wrong side is uppermost, and repeat the process on the other short end.
STEP 3: Stitch the short sides
Head over to your machine and stitch down close to the edge of the fold on the 10-inch side and the repeat for the other 10-inch side.
STEP 4: Make a french seam
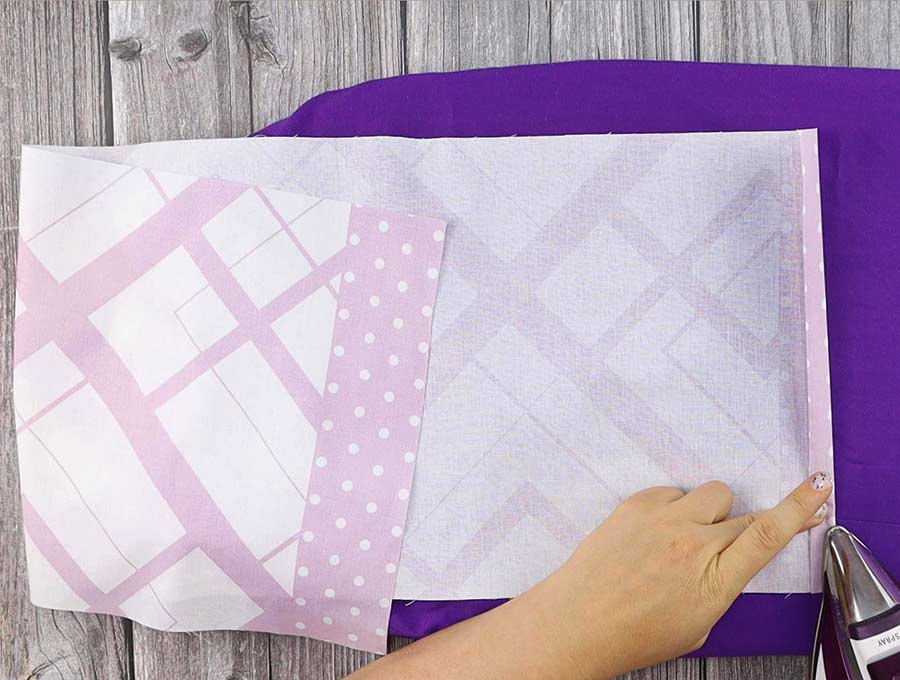
Fold so the right sides are outermost and the two edges you have stitched line up. We are going to create a French seam so that there are no raw edges that could fray and get onto your bread. No one likes spitting out bits of fabric when they have a slice of fresh bread, butter and honey, or whatever delicious topping you are having.

STEP 5: Sew and trim
Once you have pinned or clipped the top corners and lined up the edges, stitch down both sides of the fabric ¼ inch from the edge on the right side. Trim any frayed bits off before the next step.
STEP 6: Turn the bread bag around
Now turn the bag wrong side out, using a chopstick or knitting needle to ease out the corners, and press the side seams flat.
STEP 7: Stitch a second time
Run a stitch line along each side ½ inch (1.3cm) from the edge, back-tacking at the start and finish.
STEP 8: Turn around
Turn the bag right side out. You now have all raw edges safely enclosed in the French seam so no chance of fabric threads ending up in your bread. Make sure to trim the sewing thread. If you are using a piece of ribbon then skip steps 9 to 12 which explain how to make a tie from fabric and head directly to Step 13.
STEP 9: Make the fabric tie
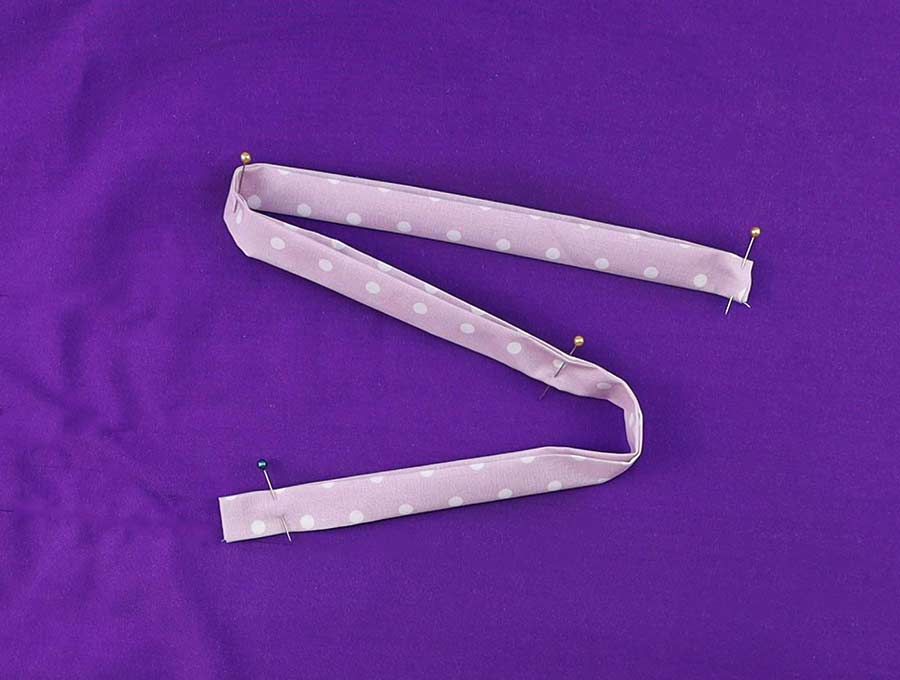
The last step is to create the fabric tie. Take the short 3-inch (7cm) end turn over ¼ inch (6mm) and press into place. Repeat on the other short end.
Press a seam along the 25-inch (64cm) length that is ½ inch (1.3cm) wide, then repeat on the other side, making sure that the folds you pressed on the short sides remain in place and tuck in neatly.
Fold the fabric in half along its length pinning or clipping in place and run a seam 1/8 inch (3mm) from the edge around all four sides. When you come to the corners, leave the needle in the fabric, lift the machine foot, and turn the fabric, put the foot down and continue stitching.
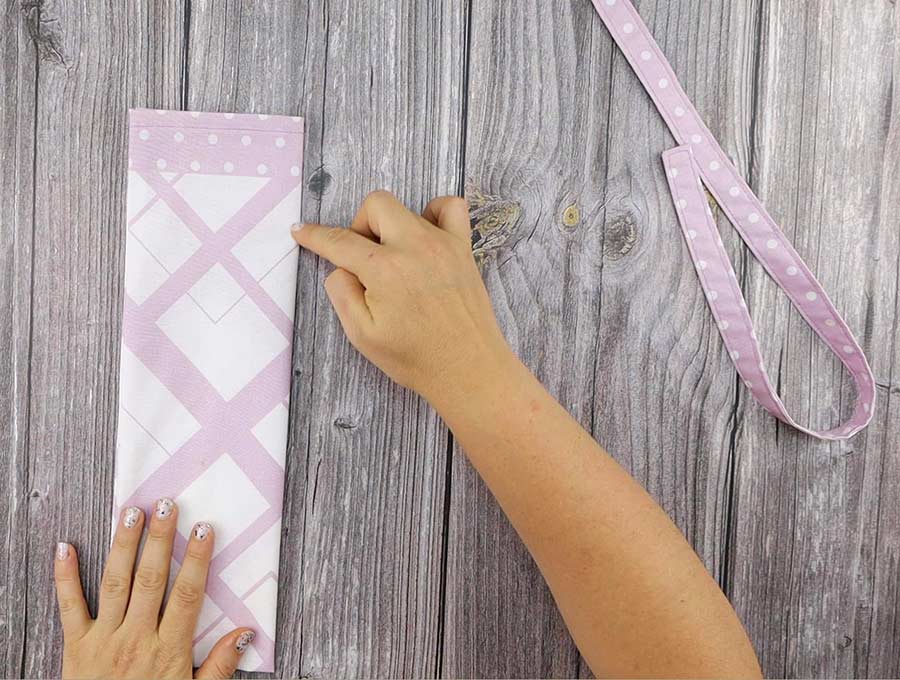
STEP 10: Attach the tie to the bread bag
Time to attach the tie to the re-usable bread bag. Line the two short ends up over each other, folding the long piece in half and mark the center with a pin. Next fold the bread bag in half along its length, and mark the outer fold with a pin about 1 ½ inches (4cm) from the top. Just check first that you have enough space for the loaf to fit, otherwise you may need to put the tie just 1-inch down, but you need a decent amount of fabric gathered at the top to make the bread bag look good when tied.
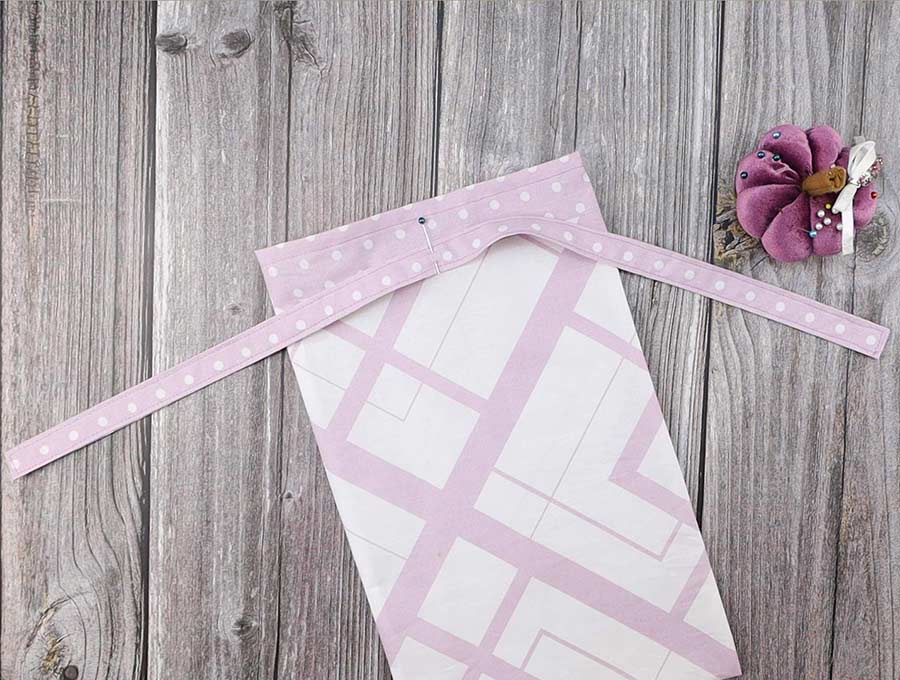
STEP 11: Final stiching
Line up the pin in the center of the tie with the pin in the center of one side of the bread bag. Pin the tie onto the bag and on your machine stitch a small square, then an X within the square to make sure it is securely attached. Remember these will be laundered often and the tie needs to be secure.
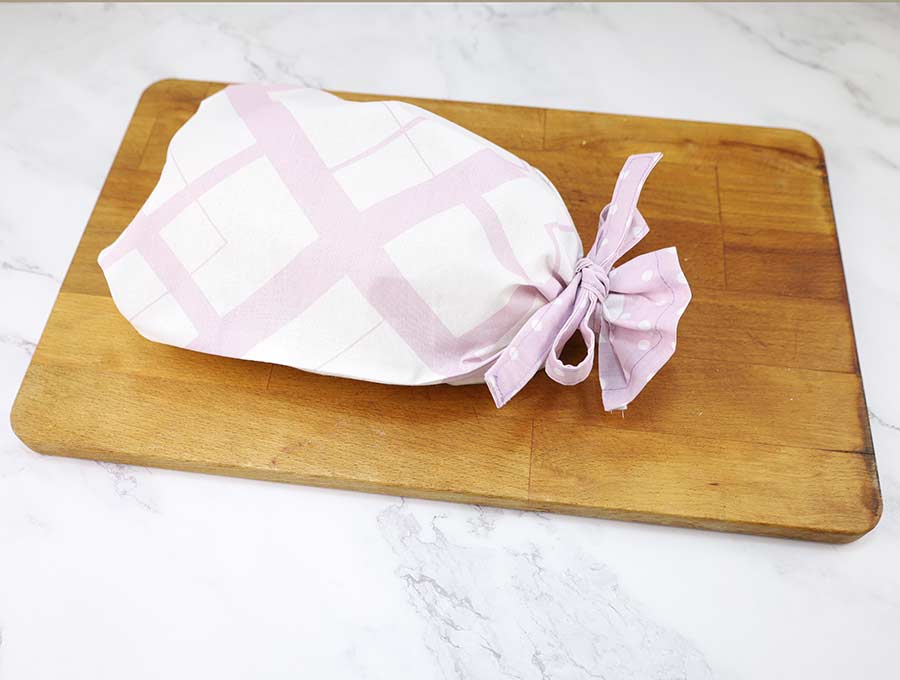
That’s it your bread bag it ready! All that remain to be done is insert you loaf of bread and tie a neat bow.

FAQs, Tips and Troubleshooting:
Q: How do I join two pieces of fabric to make the bread bag?
A: If you don’t have a large enough piece of fabric you can always join two pieces together to create a piece that is large enough. Use the instructions in Step 5 to 7 to join the two pieces together using a French seam, so no little bits fray inside your re-usable bread bag.
Q: How do I stop the ribbon from fraying?
A: Heat seal the ends by holding a lighter or match near the ends to melt the fabric – just make sure you don’t let it burn or catch on fire.
Q: What colors should I use for bread bags?
A: My personal preference is for natural earthy colors such as mocha, tan, or biscuit. I also like the idea of blue and white prints. You can use colors to coordinate with the seasons – Christmas prints, warm oranges and reds for autumn, bright floral prints for spring, and green and white or blue and white stripes for summer. A lemon yellow is always reminiscent of sunshine and would be perfect for the reusable loaf bags.
When you head off to your baker with your pretty re-usable loaf bags be prepared for comments – you’ll probably find people asking you to make them some too. They make great packaging for a homemade loaf that you may take to a friend. Leave the bag behind so the recipient can use it too. You’ll be helping cut the use of plastic while spreading joy.
If you liked this idea then please subscribe to have more tutorials for practical items delivered straight to your inbox. We are brimming with ideas for useful projects to make use of those fabric leftovers.
Do you like this? Pin for later:
Wanna be friends? Click HERE and follow me on Pinterest
RELATED: