
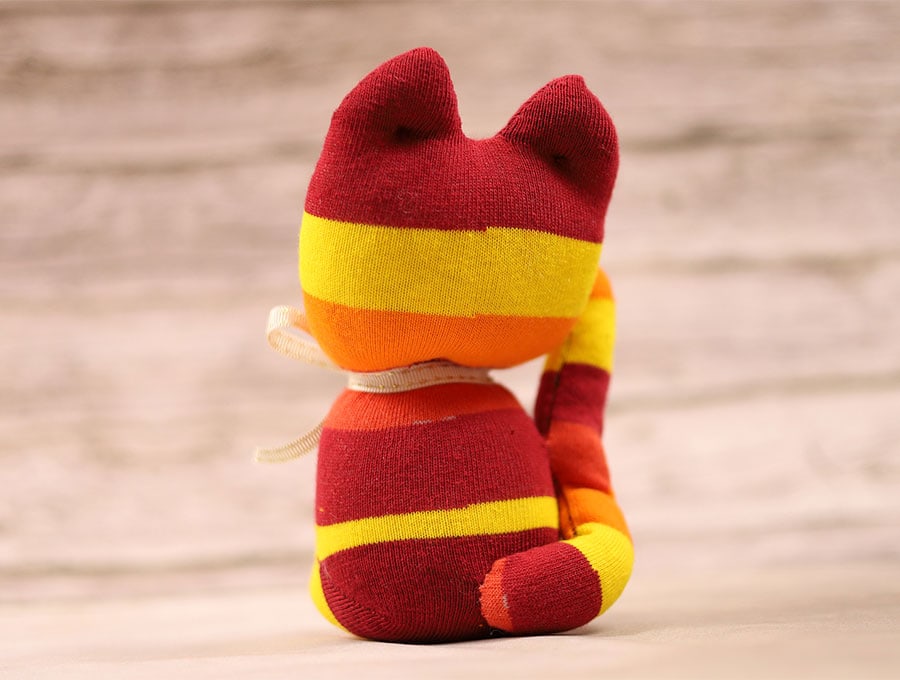
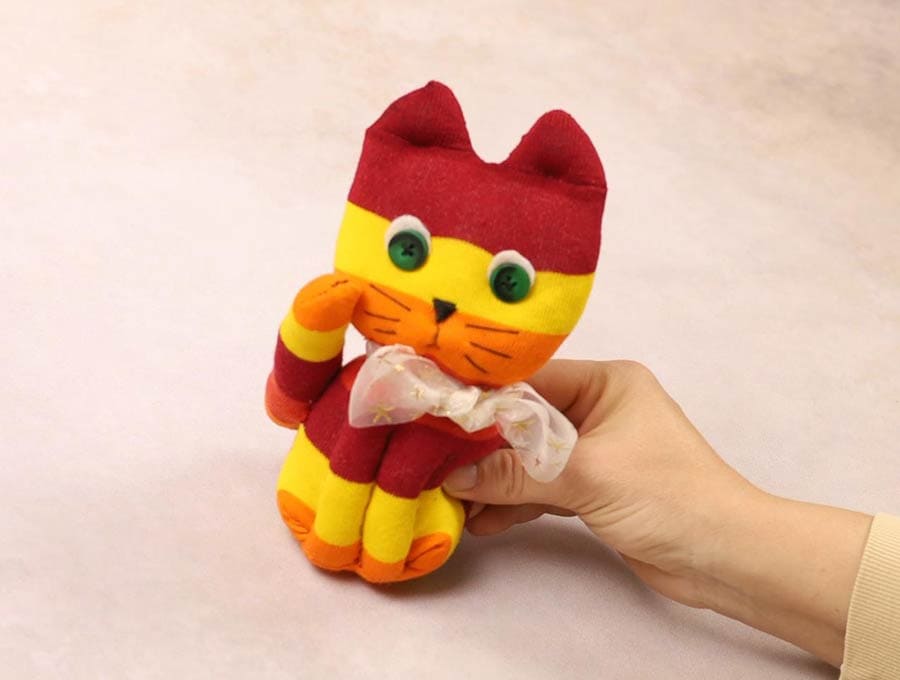
How to make a cat plush – DIY Sock kittens
It’s kind of sad to throw away a perfectly good sock, so make a family of sock kittens from those lonely socks. Or if you prefer, you can use a new pair to make a great gift for a kid. Little fingers will enjoy holding them as they drift off to sleep. Encourage kids to play imaginative games with the cat plush family during the day. Follow our very easy step by step instructions to make the cat plush toys. All you need as a sock, a small quantity of Fiberfil stuffing, a couple of buttons and a needle and thread.
Watch the visuals to see how to easily create the cutest DIY sock kittens. Your kids will love watching the sock metamorphose into a sweet little cat plush with an appealing expression. We also have step-by-step instructions to explain the visuals. No sewing machine is needed – this is a quick hand sewn project that will have kids begging for more kittens to add to the family of DIY sock kittens. It’s a fun way to use up those socks they have seldom worn or the lone socks that seem to accumulate at the bottom of the wash-basket
Below you will find my step by step written tutorial how to make sock kittens with VIDEO instructions for all the visual learners.
We occasionally link to goods offered by vendors to help the reader find relevant products. Some of the links may be affiliate meaning we earn a small commission if an item is purchased.
Table of Contents
How to make a sock kitten
Sock kittens supplies and tools
- 2 standard socks or 1 long sock
- polyester stuffing
- 2 butons for the eyes
- white felt for the eyes
- matching thread
- hand sewing needle
- scissors (or rotary cutter and a cutting mat)
- ruler or measuring tape
- iron and ironing board
- sewing clips or pins
Follow us for free patterns & tutorials! [easy-profiles]
How to Sew a sock kitten
Watch the diy sock kitten video first and then follow the written step by step instructions below.
Please enjoy and don’t forget to Like and SUBSCRIBE over on YouTube to be kept up to date with new videos as they come out.
Sock kitten VIDEO TUTORIAL
INSTRUCTIONS:
STEP 1:
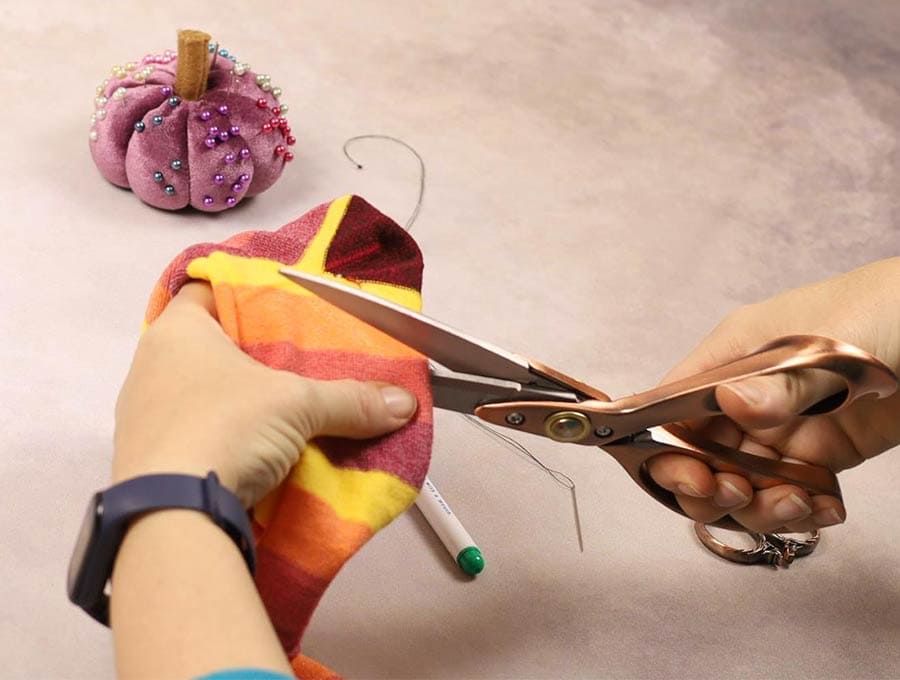
Turn the sock inside out. Flatten across the toe part then the toe part in half and mark the center point with a pencil or fabric pen about an inch down from the toe. Open the fold and lay the sock flat on the worktop.
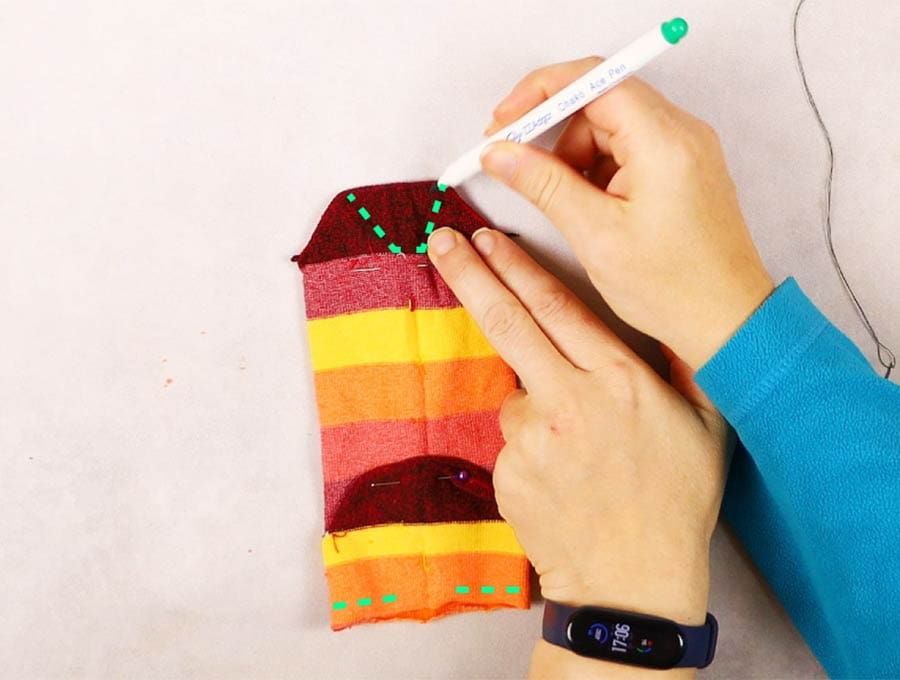
Use a pencil or fabric pen to draw a fairly flat u shape, making sure the mark you made is at the center of the base of the U shape and it reaches up to the edge of the toe. This will form the kitten’s ears and forehead.
If you have a long sock, cut out the excess an 1.5 inches away from the heel of the sock. Do not throw away the rest, it can be use to make a scarf or a tail for the kitten.
STEP 2:
Hand stitch along the U-shape, back tacking at start and finish, using small running stitches.
STEP 3:
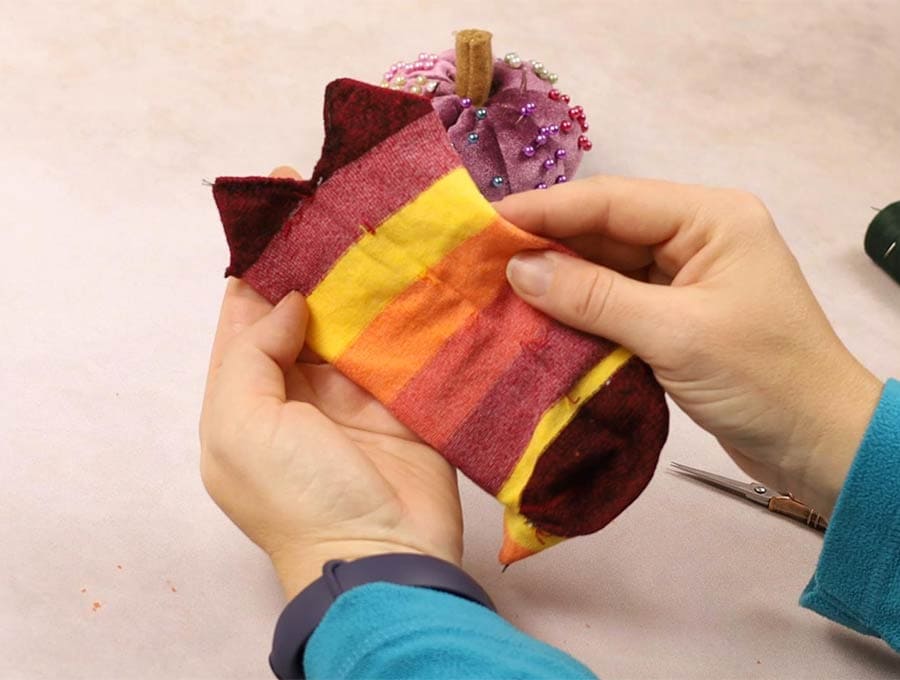
Now cut out the center of the U shape with scissors, making sure not to get too close to the stitched line.
STEP 4:
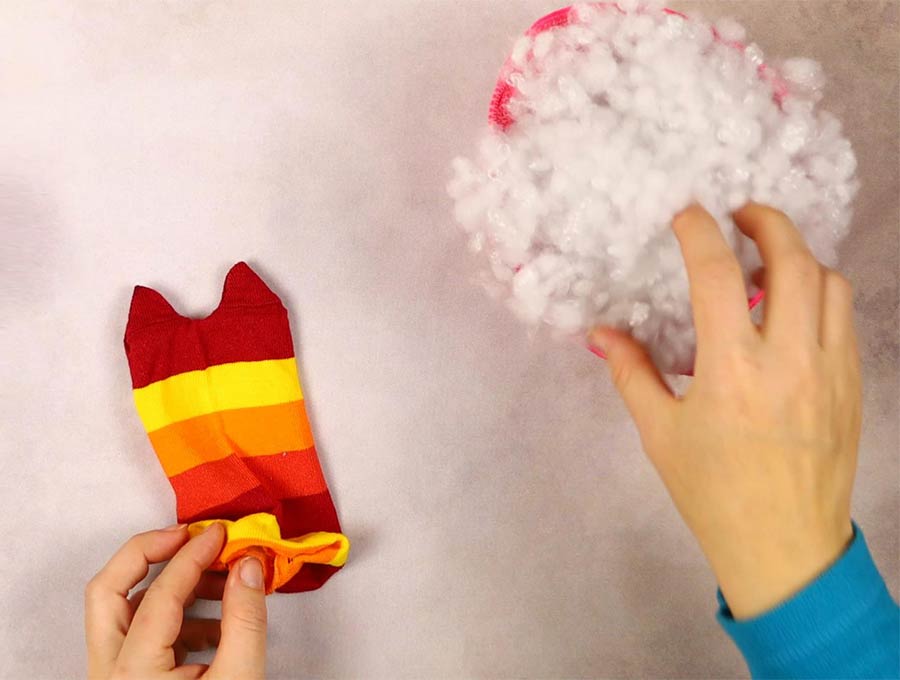
Turn the sock the right way out and use small quantities of Fiberfil to stuff the body and ears until they stand up straight.
STEP 5:
Insert a pin at the base of each ear so as you stuff the head of the kitten no more Fiberfil can enter the ears. Stuff the head section to about halfway down the sock.
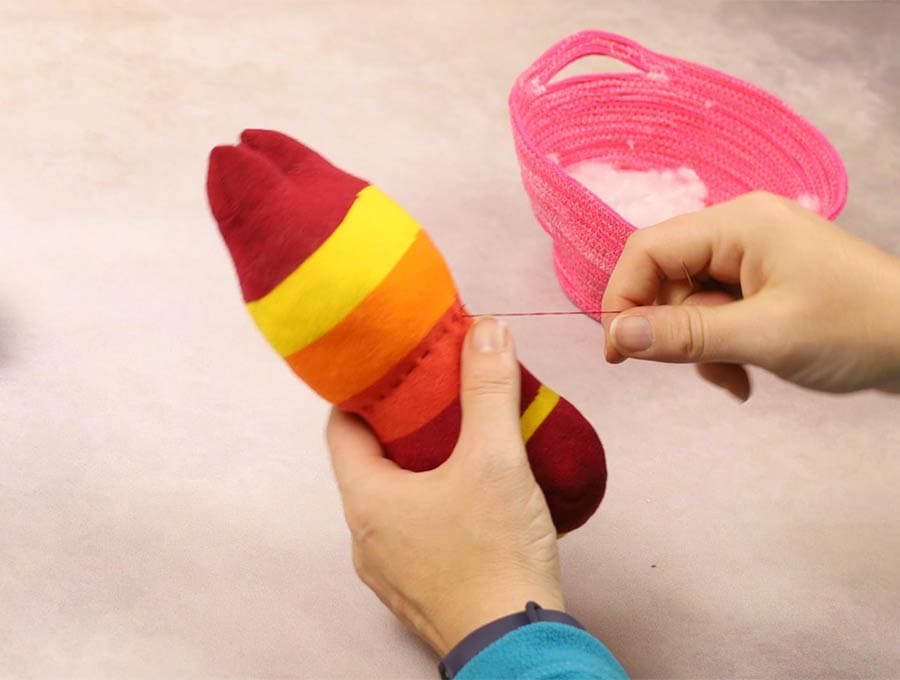
STEP 6:
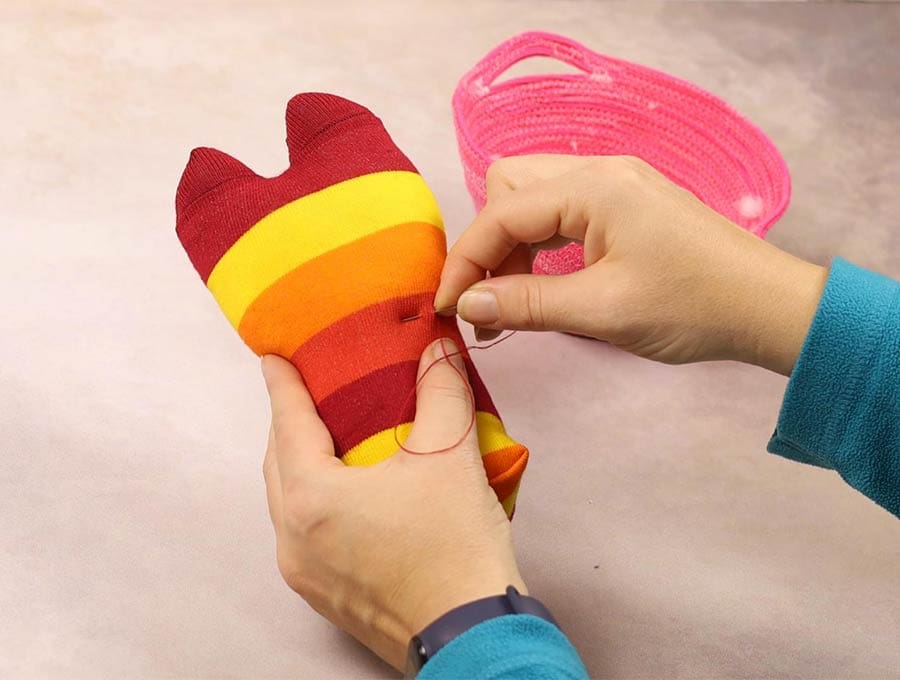
Take a needle and matching thread to the sock color and work a row of running stitches around the base of the head section – it will be halfway down the sock, then pull the thread tight so it draws in to form the neck. End the cotton off firmly by knotting so it does not pull loose.
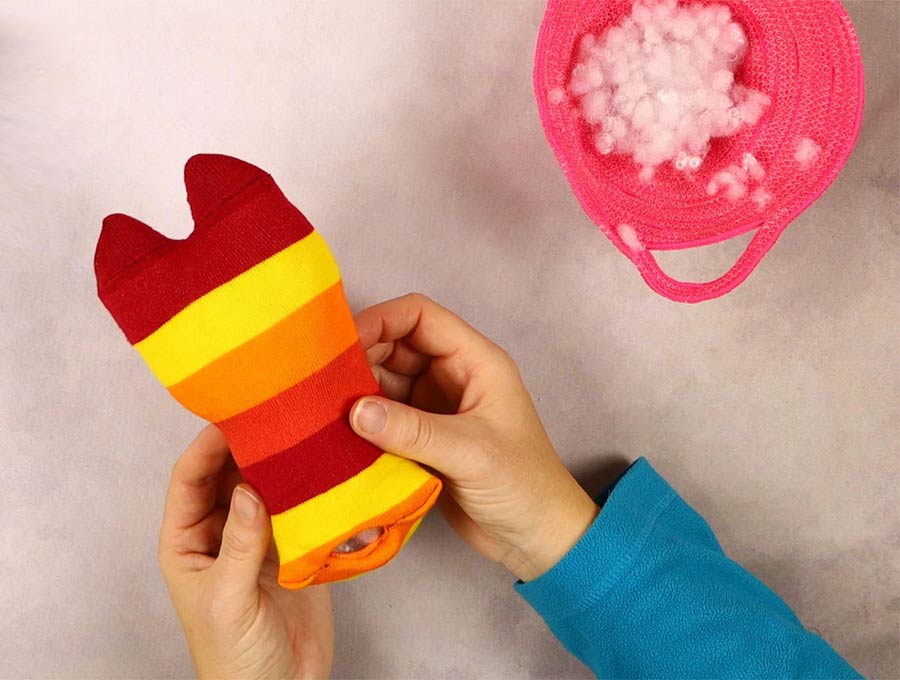
STEP 7:

Stuff the rest of the sock, then with a slip stitch close the opening. Sit the kitten on the worktop pushing a little to get the filling to puff out and the base flattish so the kitten sock sits up straight.
STEP 8:
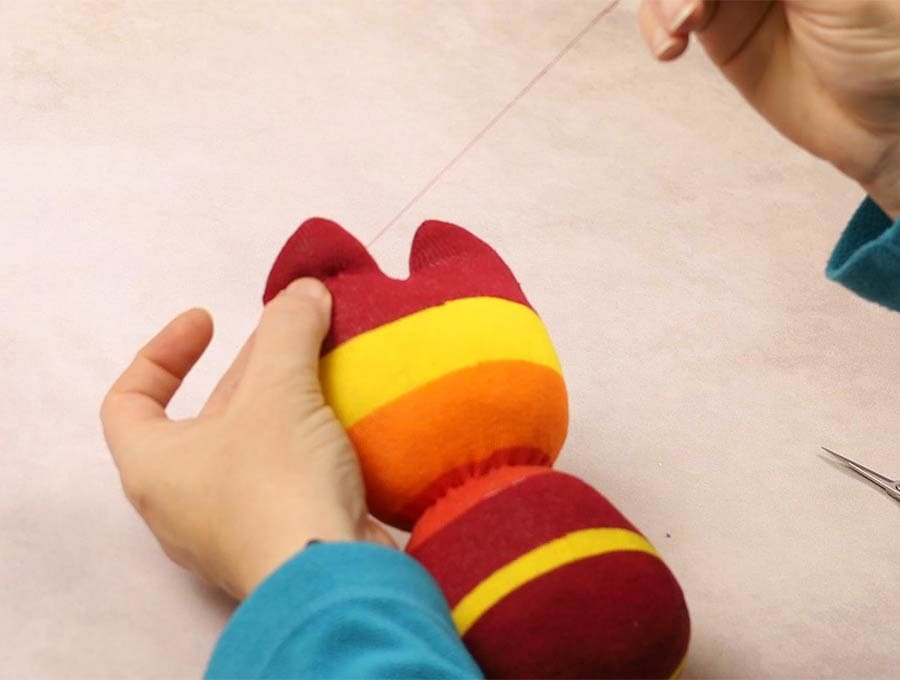
Where you put in the pins at the base of the ears, use a matching thread to the sock color to stitch from the front to the back of the ear to create an indentation. Repeat on the other ear. This will make the kitten ears look more lifelike.
STEP 9:
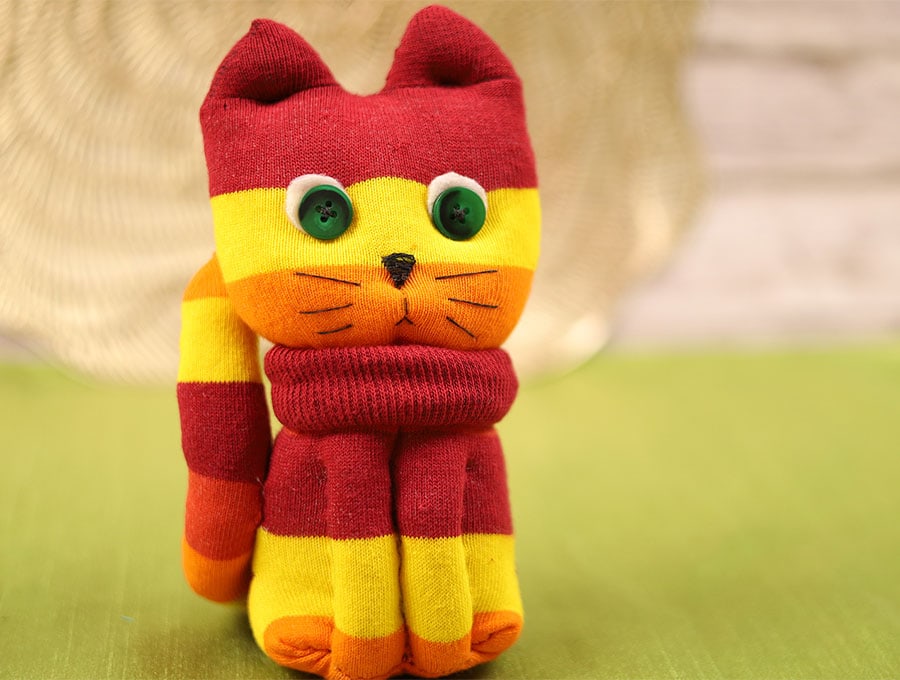
To create the eyes and the nose use two small black buttons and pink or red thread. Mark the position of the nose and the eyes with three pins poked into the kitten head. Adjust until you feel happy with the positioning.
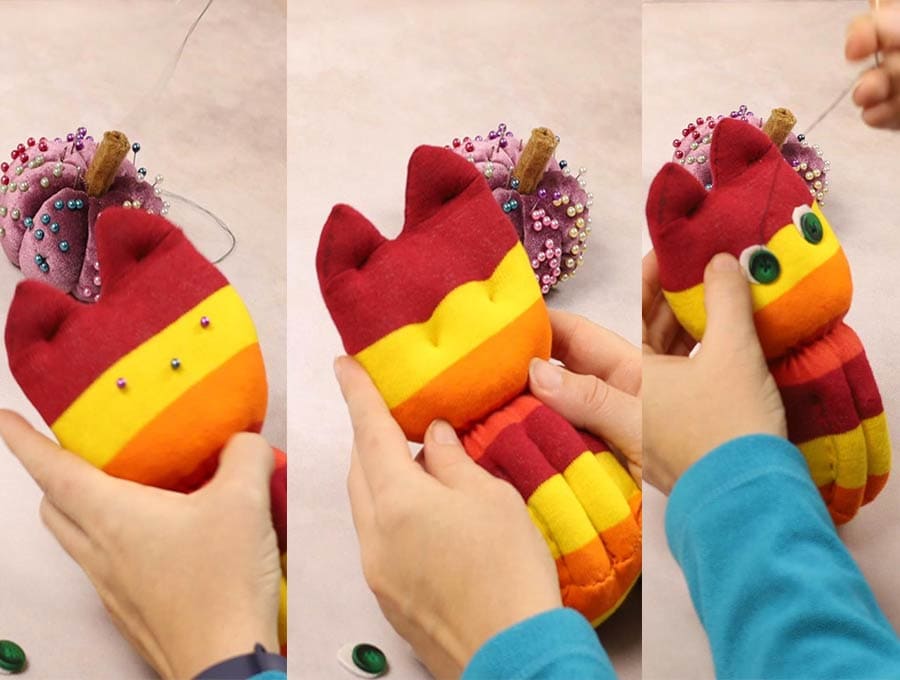
STEP 10:
Stitch the two eye buttons onto a piece of white felt using black thread, then cut around the button leaving just a little white, to create the kitten’s eyes. Set them aside. Now, using doubled black thread, poke through from the back where the head joins the body to the position of the nose. Once the needle comes up near the pin, remove the pin and stitch on the black button for the nose, taking the thread through the filling and out to the back of the neck, pulling in quite tight to create an indentation. Then find the eye position, remove the pin and attach the eye firmly. Repeat with the other eye, pulling the thread tight because you want the eyes to sit in the indentation on the face rather than being stitched onto the surface. All the stitches go to the same place at the back of the neck so there is only one little spot of black.
STEP 11:
To create the front legs, place three pins equidistant from each other at the front of the kitten about an inch below the neck. Use a fabric pen to mark the lines down from the position below the neck to the bottom of the sock.
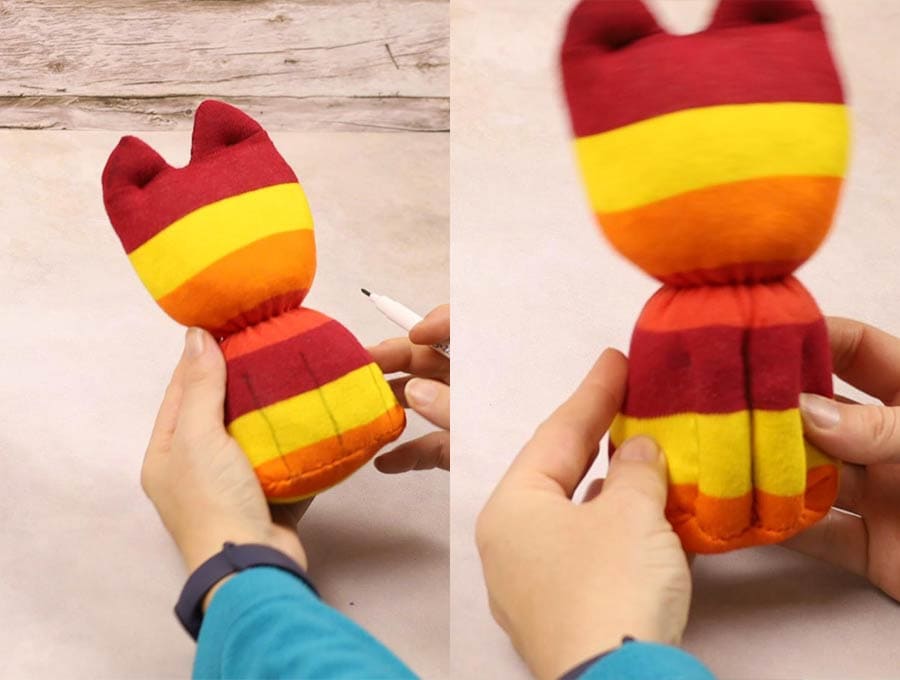
STEP 12:
Take a needle and thread in a matching color to the sock and insert the needle at the top of the line to the right, then take it through the stuffing to pop up at the middle line. Insert the needle to make a very small stitch and take the needle through the stuffing to the last line. Pull the thread up so it creates the beginning of the legs. Now take the needle back with a small stitch from the last line through to the middle line, make a small stitch and go back to the first line. Continue in this way going back and forth, pulling up the thread so you have created two legs. When you reach the bottom of the kitten sock, finish off the thread by taking a stitch downward to the edge on either side of the legs and slip the needle through a loop of thread to create a knot twice, then cut the thread.
STEP 13:
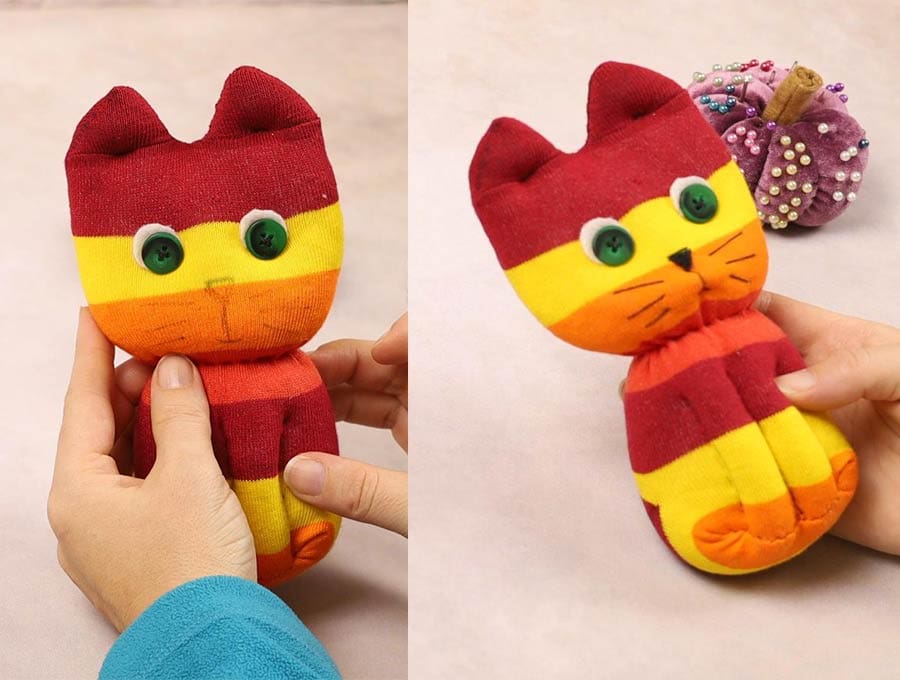
Finish off the kitten socks with a couple of stitches in black thread to create whiskers on the sides of the face just below the nose. If you like you can add a small contrasting ribbon bow around the neck of the sock kitten, but stitch it firmly in place.
STEP 14: (OPTIONAL) TAIL
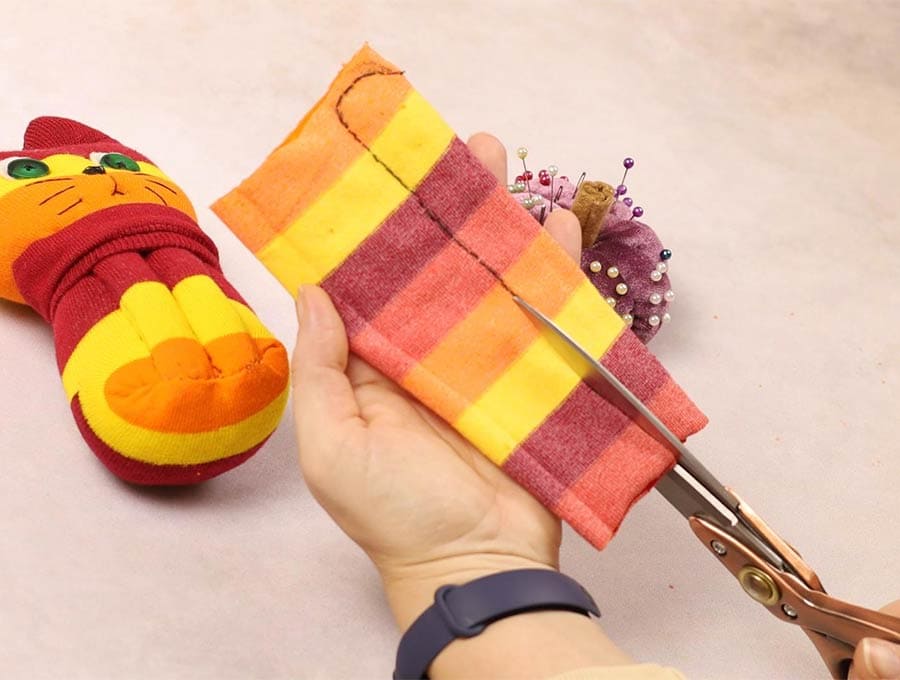
If you have two socks or you are using a long sock, you can use part of the second sock to create a tail by sewing a backstitch across the fold of the sock, ¾ of an inch from the fold. After stitching cut the excess part of the sock away, then turn the tail right way out and stuff with Fiberfil. Turn in the end, so no raw edges show, and attach firmly at the base of the central back of the kitten.
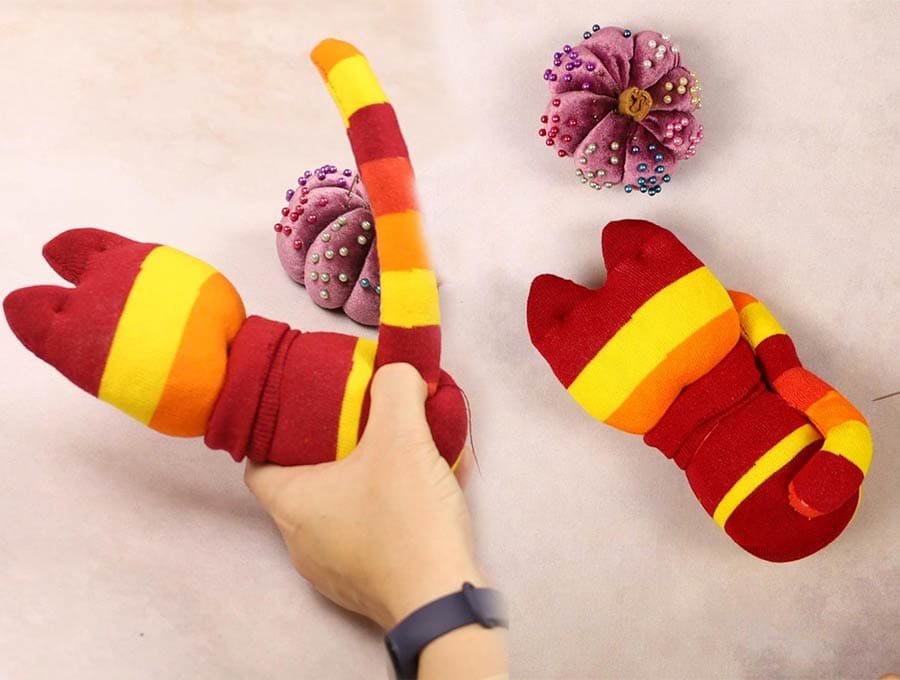
Bring the tail around to the front and secure just to the left of the legs.
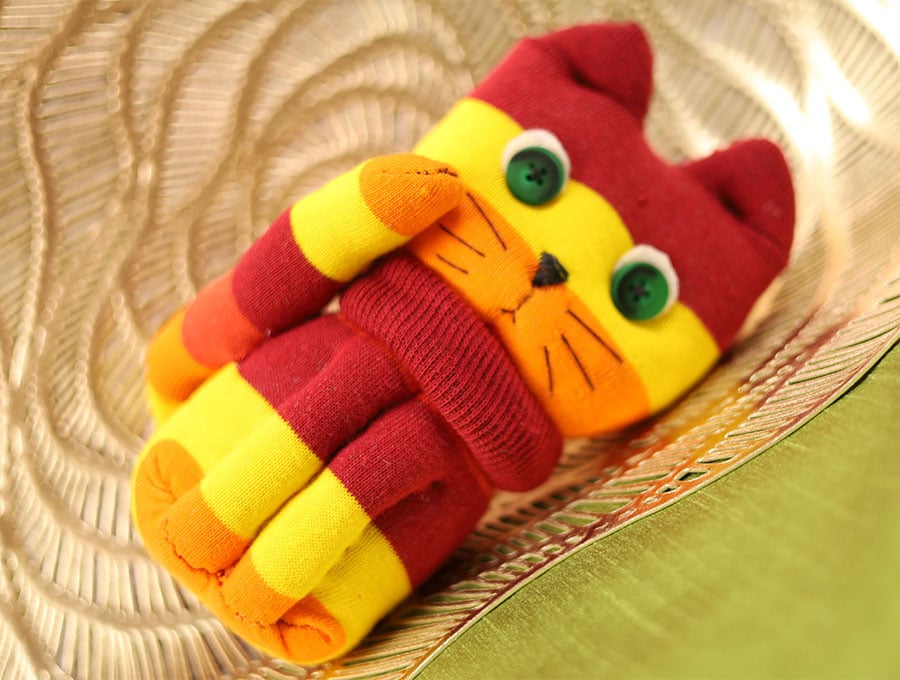
Ta-DA- the diy sock kitten is finished!
Sock Kitten FAQ
Q: Can is use commercially bought eyes and a nose?
A: These are more expensive than a couple of black buttons but you can use them – just attach as per the manufacturer’s instructions.
Q: I’m worried about babies chewing off the buttons or commercially made eyes, what else can I use?
A: You can embroider the eyes and nose with black embroidery thread – the nose will be a triangle shape with the sharp tip pointed downwards, and the eyes circular. The other alternative is to draw them on with permanent marker but this may not look as good due to the texture of the sock fabric.
If you enjoyed making this cat plush toy then click on the button at the top to subscribe and have more fun and easy projects delivered to your inbox.
Do you like this? Pin for later:
Wanna be friends? Click HERE and follow me on Pinterest
RELATED: