
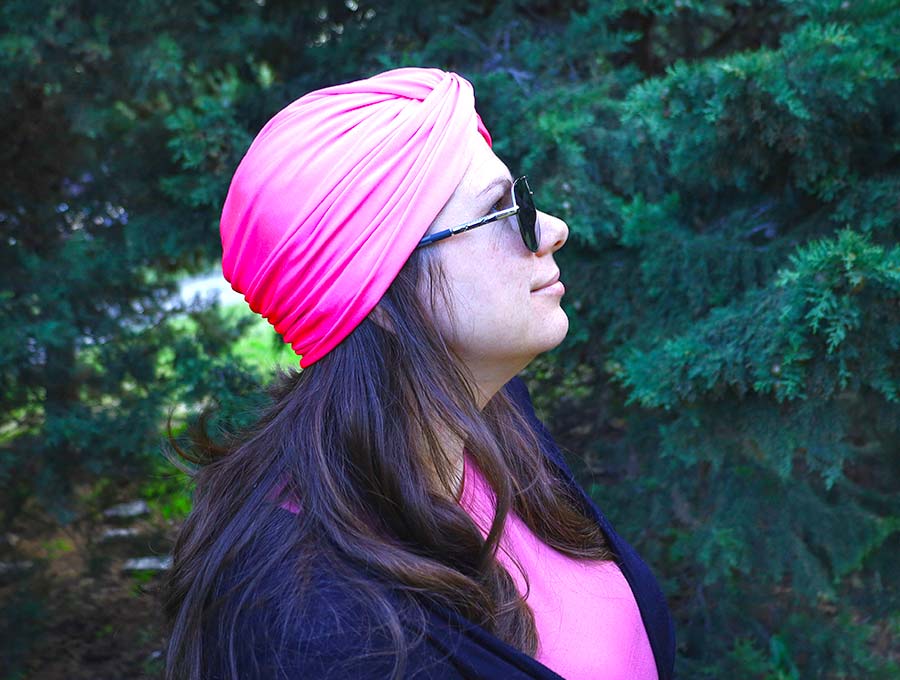
DIY Twisted Turban Hat out of Stretch or Non-Stretch Fabrics
The twisted turban hat is one of those hats that looks good on everyone – from babies to adults. It can be made in a stretchy or a piece of not so stretchy fabric. I would advise using a material with a bit of give to fit the head snugly. There are two measurements in the chart below, one for the stretchy fabric and one for the non-stretch fabric. This is a perfect project for using up those longish strips of fabric that seem to be leftover. A cuddly fleece or any stretch fabric with a bit of body will do perfectly.

Below you will find my step by step written tutorial how to make a twisted turban hat for a baby or an adult with VIDEO instructions for all the visual learners.

We occasionally link to goods offered by vendors to help the reader find relevant products. Some of the links may be affiliate meaning we earn a small commission if an item is purchased.
Table of Contents
- 1 How to make a Twisted Turban Hat
- 2 Supplies and tools
- 3 How to Sew a Twisted Turban Hat
- 3.1 Twisted Turban Hat VIDEO TUTORIAL
- 3.2 INSTRUCTIONS:
- 3.3 STEP 1: Cut the fabric
- 3.4 STEP 2: Fold and pin
- 3.5 Step 3: Stitch or serge
- 3.6 Step 4: Turn right side out
- 3.7 Step 5: Cut the tube
- 3.8 Step 6: Mark the middle
- 3.9 Step 7: Make a temporary stitch
- 3.10 Step 8: Twist the turban hat
- 3.11 Step 9: Pin three of the pieces
- 3.12 Step 10: Stitch the pinned pieces
- 3.13 Step 11: Stitch or serge the backside
- 3.14 Step 12: Handstitch to gather the backside
How to make a Twisted Turban Hat
Supplies and tools
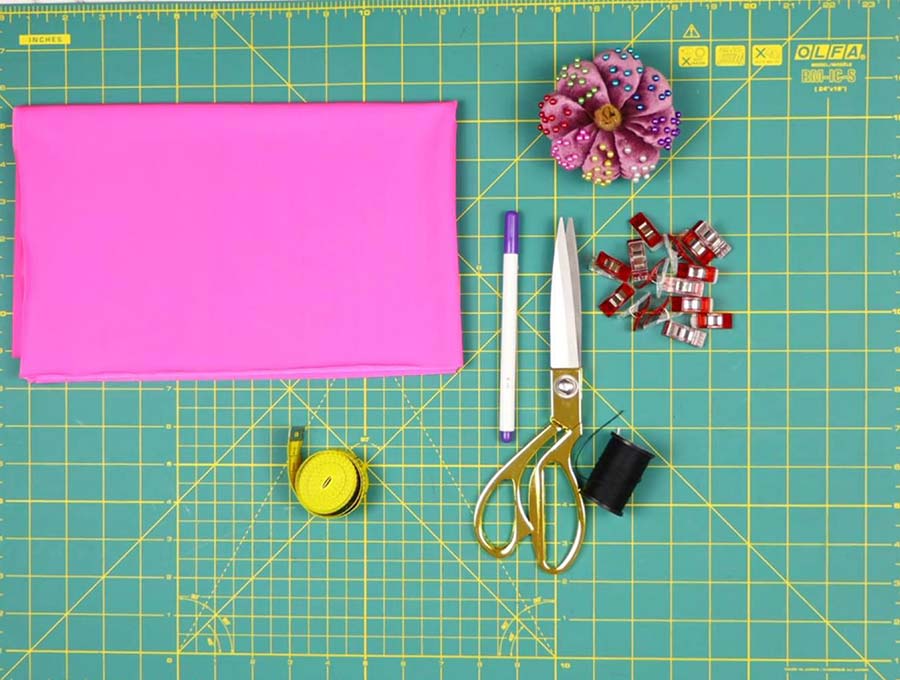
- fabric – stretch fabrics, cuddly fleece or non-stretch fabric
- scissorsB00AQ7CVPO
- matching thread
- scissors (or rotary cutter and a cutting mat)
- ruler or measuring tape
- iron and ironing board
- sewing clips or pins
Follow us for free patterns & tutorials! [easy-profiles]
How to Sew a Twisted Turban Hat
Watch the diy twisted turban cap video first and then follow the written step by step instructions below.
Please enjoy and don’t forget to Like and SUBSCRIBE over on YouTube to be kept up to date with new videos as they come out.
Twisted Turban Hat VIDEO TUTORIAL
INSTRUCTIONS:
STEP 1: Cut the fabric
Cut the fabric according to the size of the twisted turban hat you are making, making sure the stretch is along the length of the material.
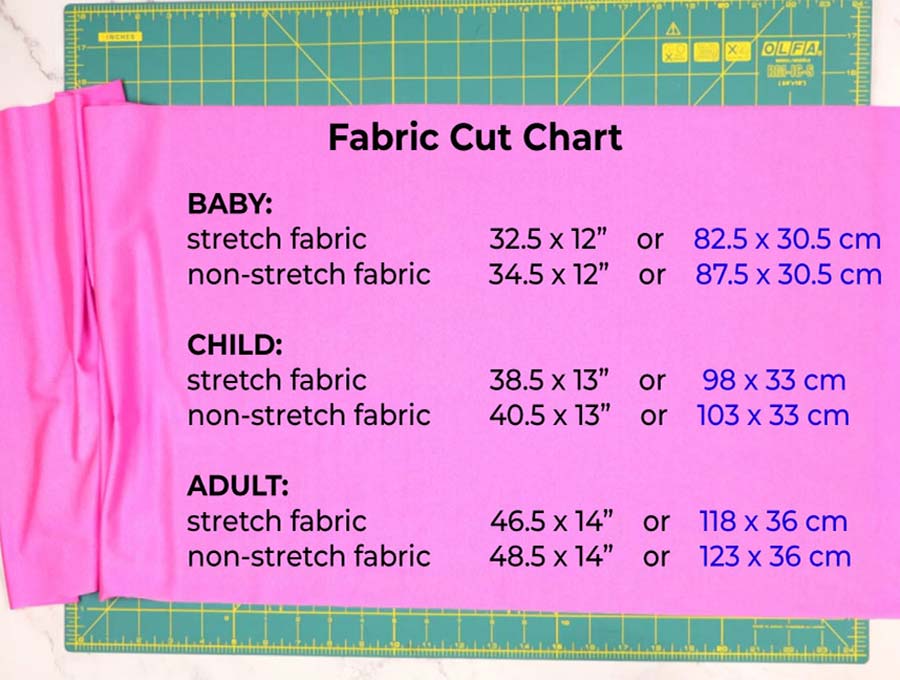
Infant
- Stretch fabric: 32.5 inches x 12 inches (82.5 cm x 30.5 cm)
- Non-stretch fabric: 34.5 x 12 inches (87.5 cm x 30,5 cm)
Child
- Stretch fabric: 38.5 inches x 13 inches (98 cm x 33 cm)
- Non-stretch fabric: 40.5 x 13 inches (103 cm x 33 cm)
Adult
- Stretch fabric: 46.5 inches x 14 inches (118 cm x 36 cm)
- Non-stretch fabric: 48.5 x 14 inches (123 cm x 36 cm)
The sizes mentioned in the chart give you the basic idea. Still, it will be best to measure the head of the person you are making the turban for before starting. Some babies have larger heads than others of the same age, and children’s heads vary according to their age. In in doubt cut the material a little bigger, and you can adjust the twisted turban hat size right at the end, rather than risk making it too small.
STEP 2: Fold and pin
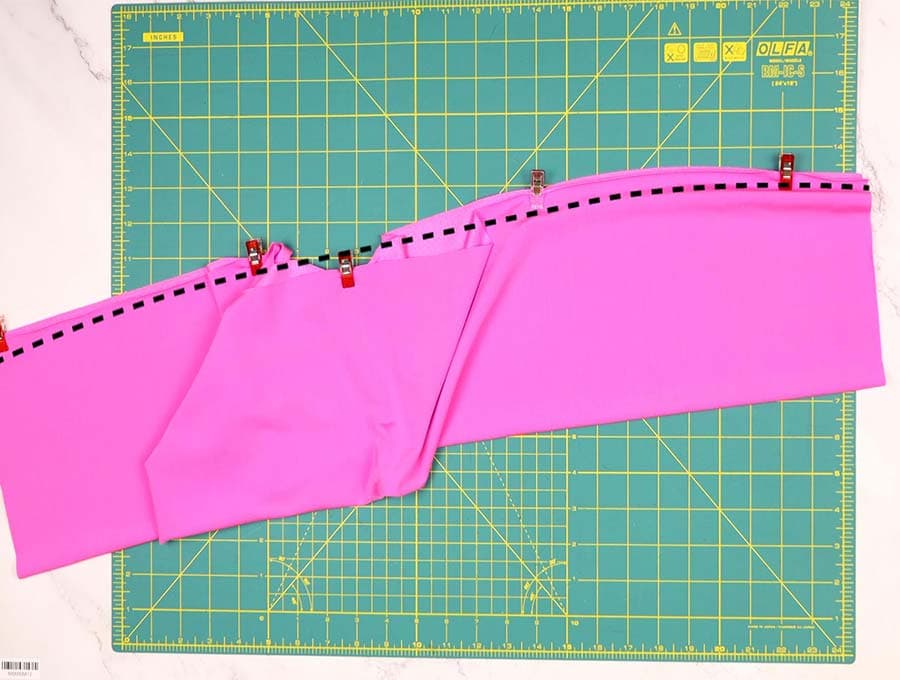
Fold the fabric over along the length, with the right side facing each other and clip it into place so you have a long skinny piece of fabric.
Step 3: Stitch or serge
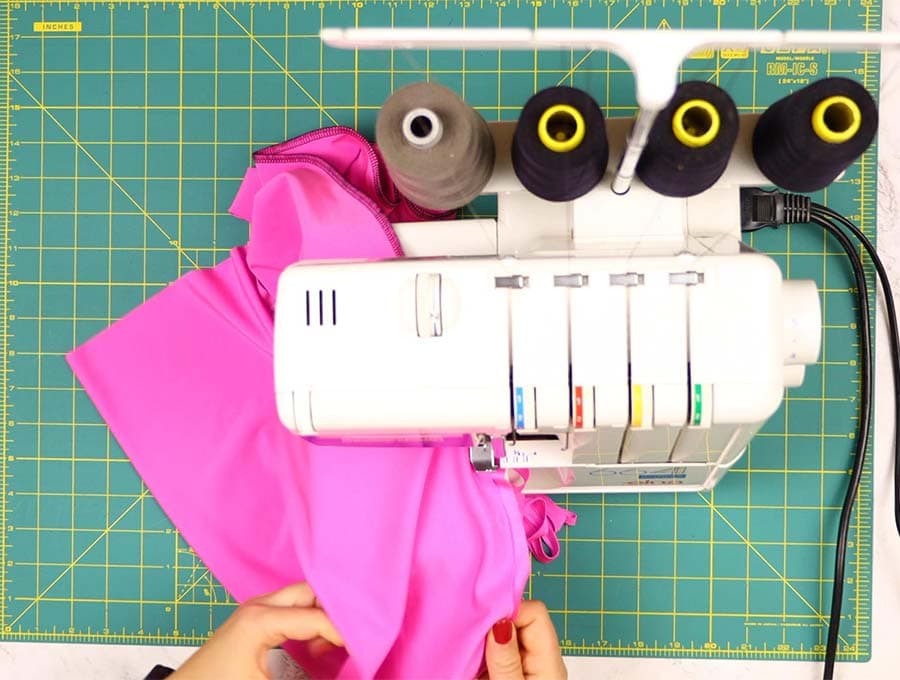
If you’re using stretch fabric, use a zigzag stitch with some give in it. The cotton can easily break if you use a straight stitch and stretch the fabric. For the non-stretch fabric, you can use a straight stitch. Stich along the whole length of fabric ½ inch (1.3 cm) from the edge. You can use a serger (overlocker) to finish the edges.
Step 4: Turn right side out
Turn the tube you have stitched the right way out, and place the seam in the middle, making sure it is not twisted along the length. No seam will be visible on either side of the tube.
Step 5: Cut the tube
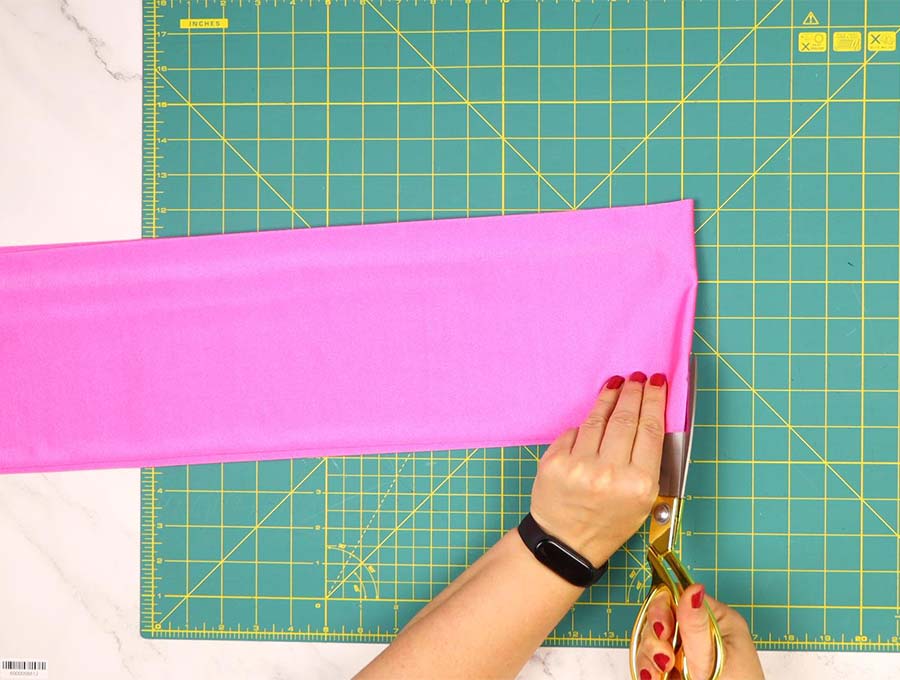
Fold the tube, so the short side meets the opposite short side and cut it in half.
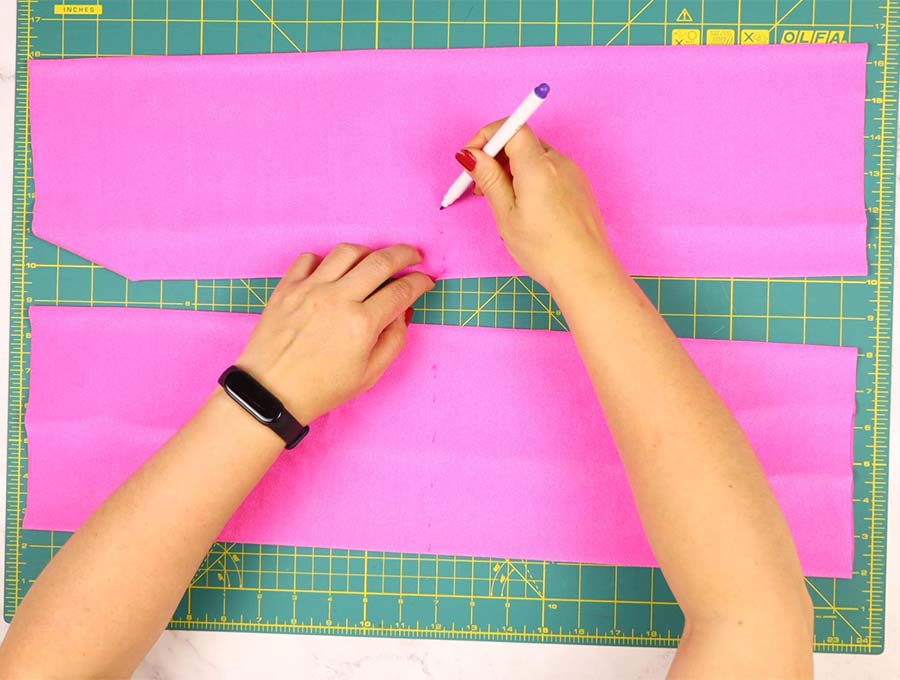
Step 6: Mark the middle
Take both tube pieces, fold each in half again and mark the halfway point with an erasable fabric pen.
Step 7: Make a temporary stitch
Pick up one half and hand stitch wide, gathering stitches along the width, going through both layers of fabric. It should form about four pleats in the fabric. Do not break the sewing cotton but take the other half and repeat the gathering stitches, then end off, so both pieces are attached just by the thread. They should be lying next to each other, facing vertically on your worktop.
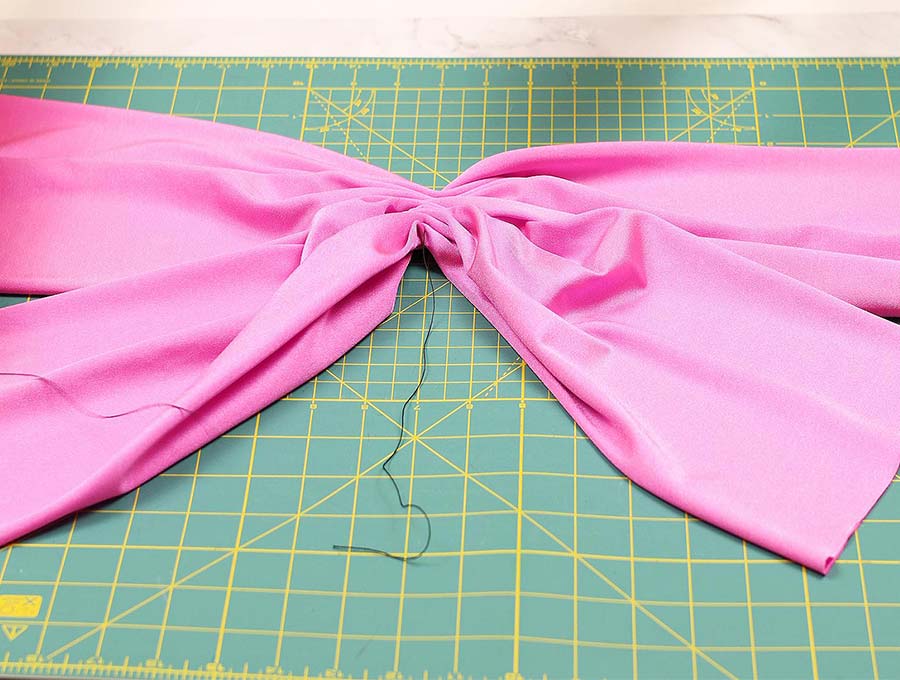
Step 8: Twist the turban hat
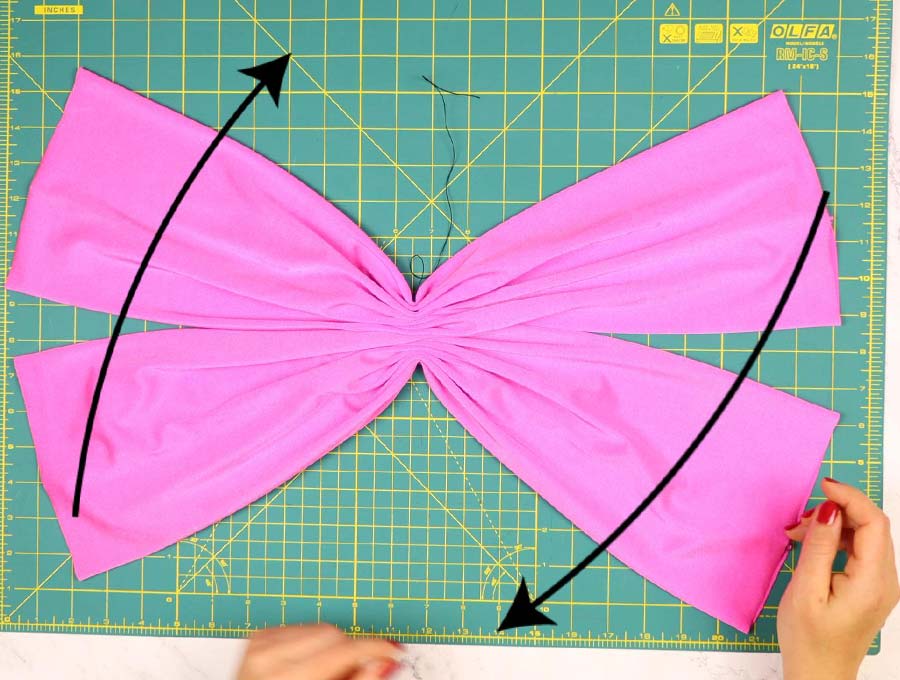
Time to do the twist. Take the top left corner and swing it over to the right, then the bottom right of the other piece and swing it left. Pull the pieces so that the top right of one and the bottom right of the same piece face in the same direction, then do the same with the other piece. This creates the twist.
The side without the seam will be uppermost beyond the central twist.
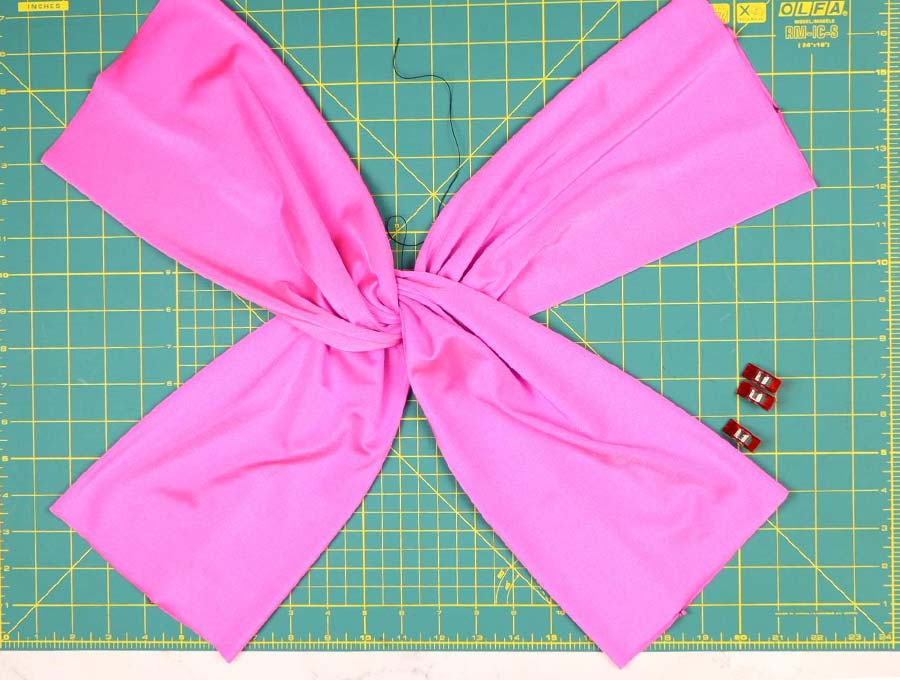
Step 9: Pin three of the pieces
Take the bottom piece on the left, flip it up to line up with the top left portion, and clip it in place on the lower side closest to the edge of the worktop. Flip up the bottom right to the top right and clip along the lower edge on the right-hand side. Both central seams should be showing on the fabric, with the smooth sides without the seam facing each other.
Open out the clipped fabric and fold over left to right, and clip in place at the top.
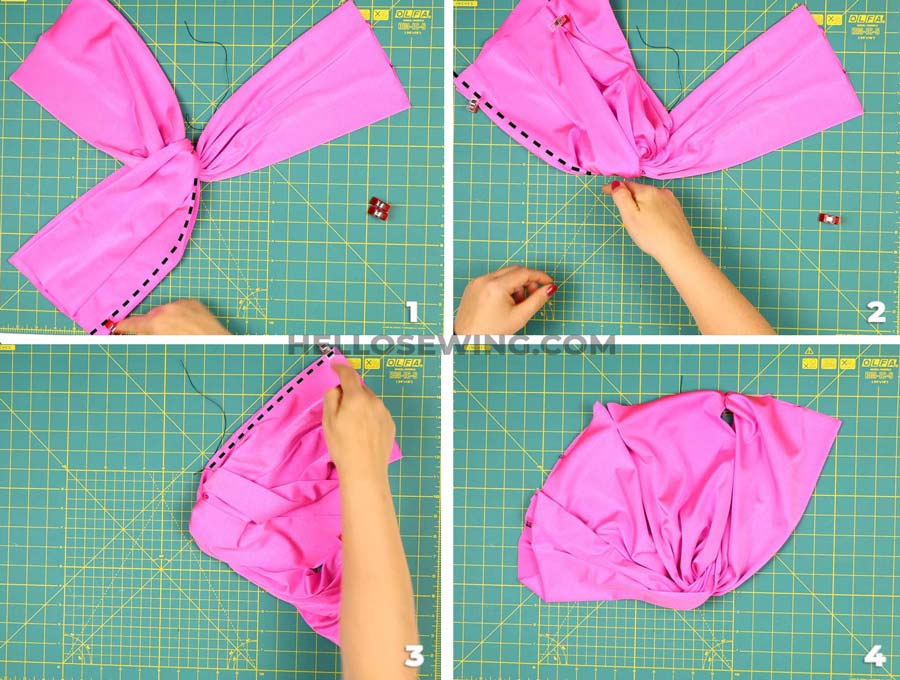
Step 10: Stitch the pinned pieces
Take the first bit you clipped together and stitch along the edge to join the two pieces, stopping short of the twist.
Stitch along the next piece you clipped, stopping short of the twist, and finally along the third edge, stopping short of the twist and backtracking at the start and finish of all three seams. When you open it out, you will have something of a fan shape with the twist at the base of the fan.
Take a big eyed needle and use it to hide all tail ends.

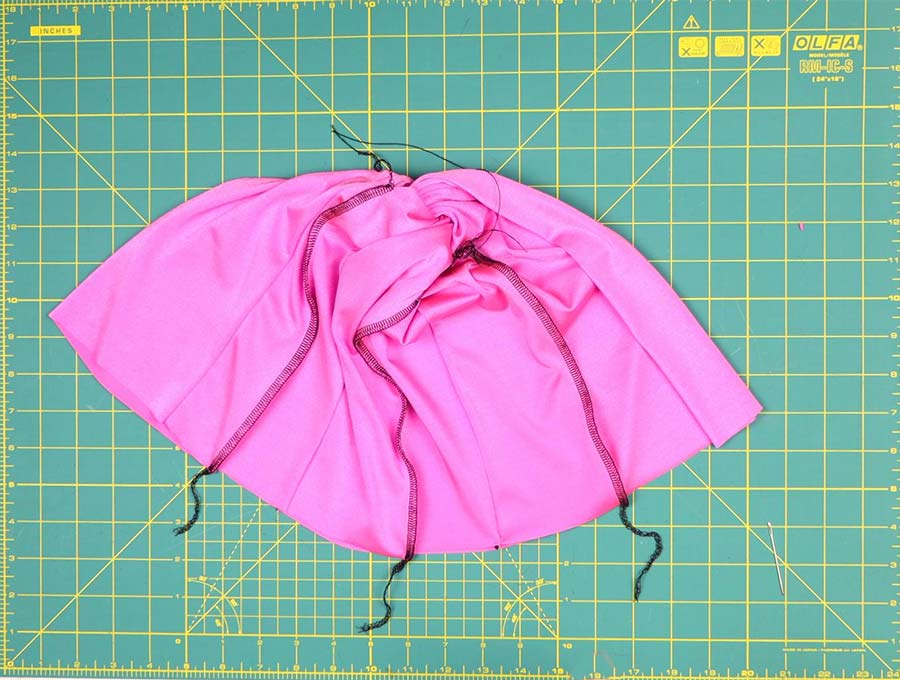
Step 11: Stitch or serge the backside
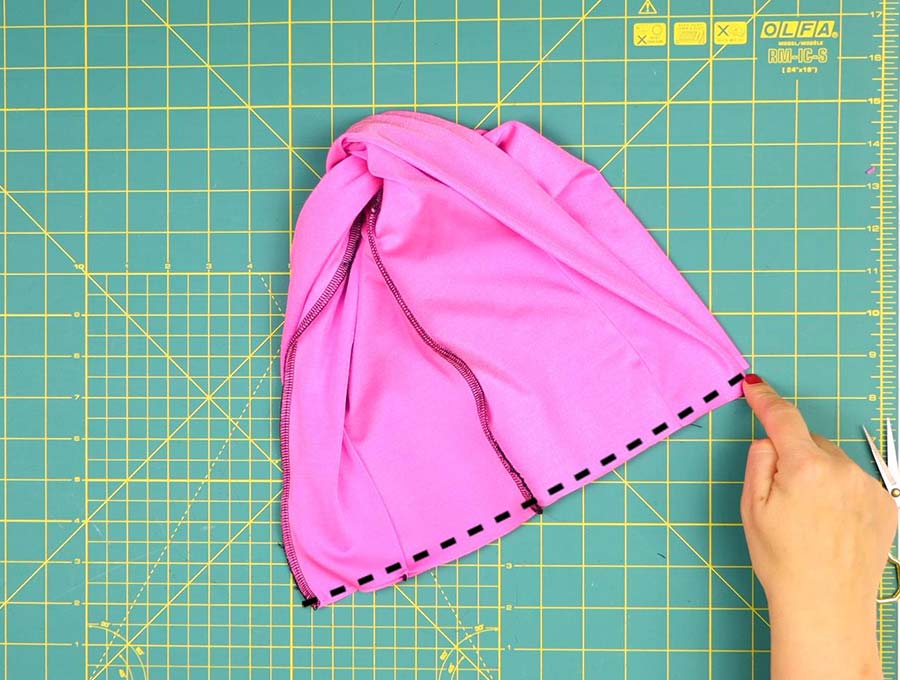
Now with the seams uppermost, so the right sides face each other, fold the fan shape in half and stitch a 1 inch (3 cm) in from the edge. One edge of the turban will be open as you did not sew all four seams, and this will be the edge of the turban closest to the face. All the seams should be finished with a serger (overlocker) for a neat finish.
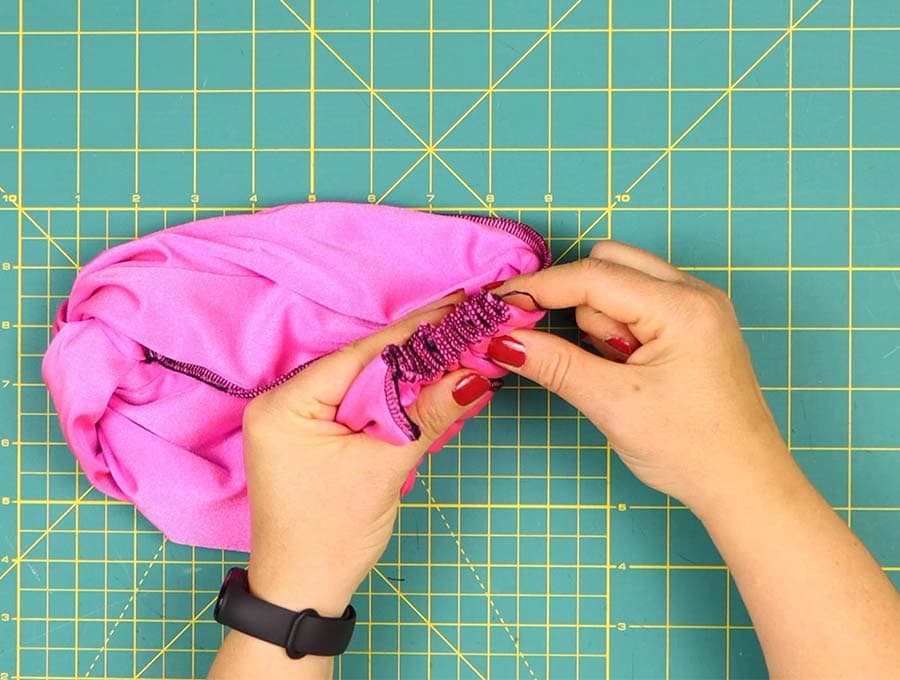
Step 12: Handstitch to gather the backside
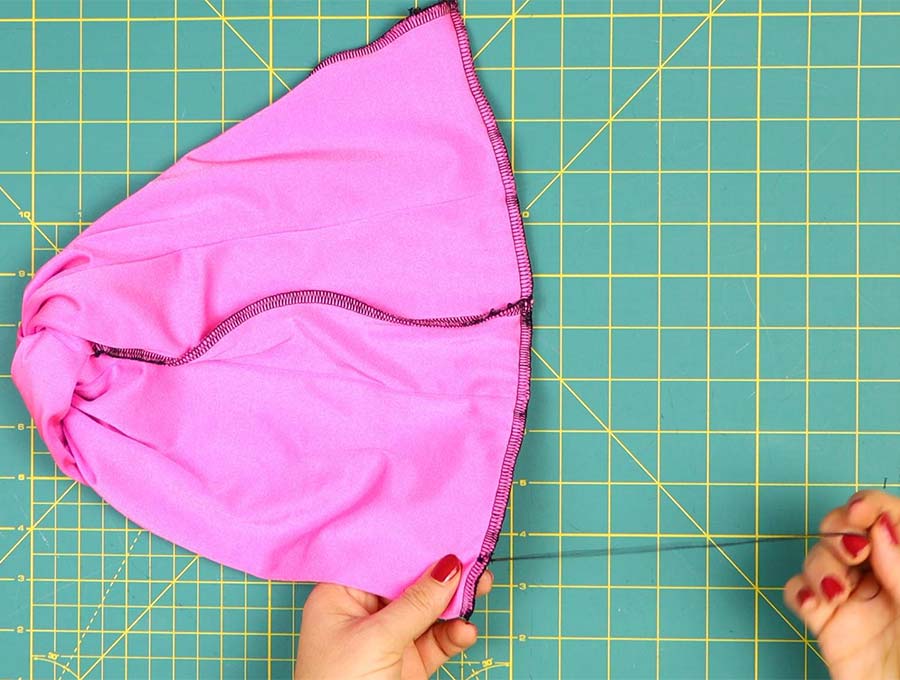
Hand stitch a wide gather stitch using a double thread, across the back of the hat, between the seam and the serged (overlocked edge), pulling up the sewing thread to create a gathered effect along the back seam of the hat. Make sure to begin and end the thread securely, so it does not pull out.
And you’re done. You are now all set to enjoy wearing the hat or gift it to an adorable baby or child.
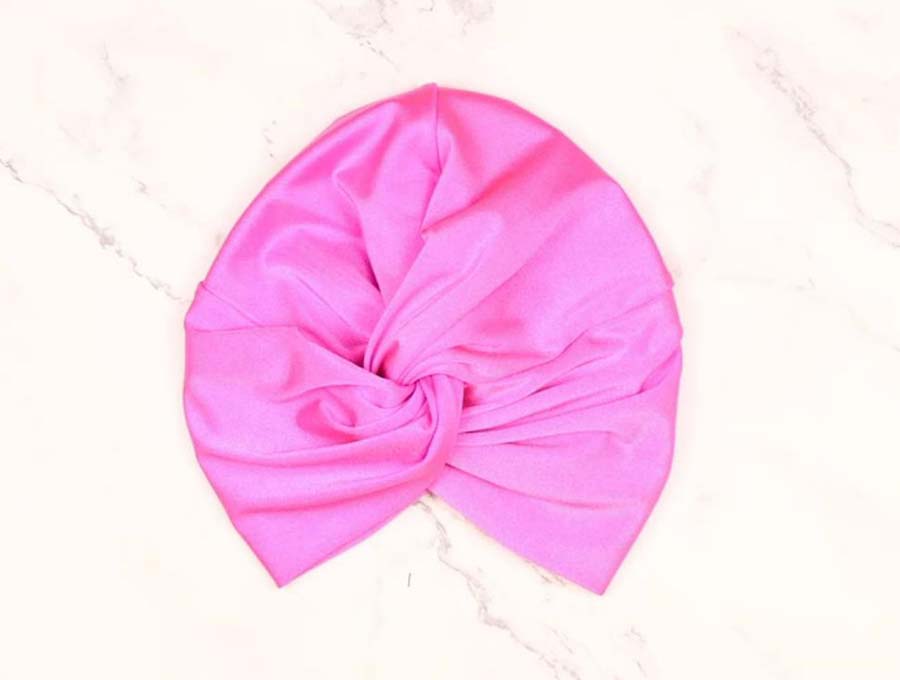
Made in soft fleece fabric, these are lovely and warm and comfortable. Winter white is always a good choice for any age. Pastels for babies and bright colors for kids are good options. For adults, a sophisticated camel color, tan or black, is a good choice if you’re not into pastels or bright colors.
The DIY twisted turban cap is easy to make if you follow our step-by-step instructions that show you exactly what to do. These hats are perfect for cooler weather and suit everyone from infants to adults. Soft fleece fabric is ideal, but you can make these in virtually any stretch fabric. You will need to cut the twisted turban hat pattern slightly for the non-stretch fabric options. Our handy chart gives all the measurements for baby, child, and adult sizes. These will be in demand in winter so maybe get sewing early, so you have a stock of them to give as gifts.
If you enjoyed making this twisted turban hat, please like and click on the subscribe button. We have loads of fun sewing projects to deliver straight to your inbox, week by week, as we continually develop fun patterns.
Do you like this? Pin for later:
Wanna be friends? Click HERE and follow me on Pinterest
RELATED: